Helping millions of people navigate the world of technology.

How to Make Someone Server Admin or Owner on Discord

How to Make Someone Server Admin on Discord

You can grant someone admin privileges on Discord via the PC or mobile app. This will allow them to manage the Discord server and perform moderation tasks. Note that you can only do this if you are a server admin or owner.

On Desktop

Step 1: Open the Discord app on your PC. Use the left sidebar to navigate to the server on which you want to make someone an admin.

Step 2: Click the server’s name at the top and select Server Settings from the resulting menu.

Open Discord Server Settings

Step 3: Use the left sidebar to switch to the Roles tab and click the Create Role button on your right.

Create Discord Role

Step 4: On the Edit Role page, enter a name for the role—Admin or Administrator.

Discord Role Name

Step 5: Switch to the Permissions tab and scroll down to the Advanced Permissions section. Enable the toggle for Administrator and click Save Changes.

Discord Role Permissions

Step 6: Press the Esc key to return to the server page, and then click on the Show Member List icon at the top.

Show Member List Discord Server

Step 7: Locate the user you want to make an admin. Right-click on his name, go to Roles, and select the new role you created.

Make Someone Admin on Discord Server

On Android or iPhone

Step 1: Launch the Discord app on your Android or iPhone and navigate to your server.

Step 2: Tap the three-dot menu icon at the top right corner and select Settings.

Step 3: Scroll down to the User Management section, tap on Roles, and tap the Create Role button.

Step 4: Enter a name for the role in the Role Name field and tap Create.

Step 5: Tap your newly created role, go to the Permissions tab, and enable the toggle for Administrator.

Step 6: Switch to the Members tab and tap Add members.

Step 7: Select the user you wish to make the admin and tap Add to save changes.

Once you complete the above steps, the user will have admin access to your server. You can also add more members to this list to give them admin access.

How to Make Someone Server Owner on Discord

If you no longer wish to run the server you created, you can transfer the server ownership to one of your friends on Discord. After that, you can leave the server or remain a member of it.

On Desktop

Step 1: Open the Discord app on your PC and use the left sidebar to navigate to your Discord server.

Step 2: Click on the server name and select Server Settings from the menu.

Step 3: Under User Management, click on Members.

Step 4: Scroll down or use the search bar to locate the member you wish to make the owner.

Step 5: Click the three-dot menu icon next to the user’s name and select Transfer Ownership.

Step 6: Enable the acknowledgment toggle and hit the Transfer Ownership button.

On Android or iPhone

Step 1: Open the Discord app on your phone and navigate to your server.

Step 2: Tap the three-dot menu icon at the upper right corner and tap Settings.

Step 3: Scroll down to tap on Members and select the user you want to make the owner.

Step 4: Tap on Transfer Ownership, check the acknowledgment box, and hit Transfer.

Was this helpful?

Thanks for your feedback!

4 Ways to Fix Unable to Load Video or Photo Error on iPhone

Basic Fixes

  • Turn off Low Power Mode: Unless your iPhone is running really low on battery, it’s best to turn off Low Power Mode since it limits background activities like rendering to save battery power.
  • Update Your iPhone to the Latest Version of iOS: The iOS version on your iPhone may be outdated, leading to photos and videos not loading properly. Hence, update your iPhone to the latest version of iOS to fix any potential bugs and issues.
  • Enable Network Access to the Photos App: If you sync your media to iCloud, you will need to ensure that you grant network access to the Photos app. To do so, go to Settings > Mobile Data/Cellular, and toggle the switch next to Photos.

Method 1: Add the Video to Favorites and Then Remove It

This trick has worked for several users facing this issue. If you see the aforesaid error message while loading a high-quality photo or video on your iPhone, try adding the video or image to your favorites before opening it. Here’s how it works.

Step 1: Open the Photos app on your iPhone and navigate to the photo or video your iPhone cannot load.

Step 2: Tap and hold onto it and select Favorite. After a few seconds, Unfavorite it.

Open the video or photo now and see if your iPhone can play it.

Method 2: Check if Your iPhone Has Sufficient Free Storage

Some apps or functions on your iPhone may not run properly if there isn’t sufficient free storage. This may also lead to your iPhone storage not loading properly.

Removing unnecessary data should ensure that your iPhone has enough free storage. Then, try opening the photo or video once again.

Method 3: Free up RAM by Clearing Background Apps

After freeing up storage on your iPhone, it’s also essential to ensure there’s utilizable free RAM to run processes efficiently, even in the background.

The best way to ensure there’s enough free RAM on your iPhone is to kill the apps running in the background. These apps consume resources, so ending them would free up some RAM for the Photos app to work correctly.

Method 4: Switch From iOS Beta to Stable Version

The beta version of iOS might give you access to several new features, but given that it’s in the beta stages, it may also bring some bugs and issues. The most common issue with running the beta version of iOS is that some apps may not work as intended.

So, roll back to the stable version of iOS on your iPhone and then use the Photos app to view your videos and photos without any issues.

Was this helpful?

Thanks for your feedback!

5 Best Free Calorie Counter Apps for iPhone

1. Apple Health – Default App to Log In Calories

Apple Health lets you manually log in calories as the app doesn’t have an in-built calorie tracker, or connect a calorie counting app to do it. You can see the logged-in calories in detail on the nutrition page on Apple Health. Besides, you can favorite some nutrients, which will be displayed on the dashboard.

While you log in calories, the information you can add is just the quantity of the nutrient. For the nerds, you get some trivia on the nutrient too. Once done, it will show up in a neat little graph displaying how much of it you ate daily, monthly, or yearly.

Pros

  • Great user interface.
  • Works well for minimalists – with just the basic features.
  • No advertisements.
  • Option to connect to other apps.
  • A good companion to the Apple Watch

Cons

  • No catalog of food, hence you must add values manually.
  • Does not provide much inference on the logged-in nutrients.
  • Not a fan of the long list of logged-in nutrients; a pie chart would’ve been better.

Price: Free

Also Read: Best smart scales with Apple Health support

2. HealthifyMe – Great Catalog of Food

HealthifyMe immediately impressed me with the number of different food items it has in its database. I could track something as obscure as an Oreo Cheesecake I had for our evening snack. You can add breakfast, lunch, morning snacks, dinner, and all possible meals you eat during the day.

It provides a great breakdown of micronutrients as well. You can also set up a meal plan, and the app will guide you as to what you need to increase or decrease, but this is limited to the pro version. The macronutrient break-up is also a neat little way to understand your primary nutrient intake and know how your food habits are over a period.

Pros

  • Great catalog of food items
  • Impressive micro and macro nutrients breakdown
  • In-built diet planner.
  • Non-intrusive advertisements.
  • Added health features apart from food tracking.

Cons

  • Slightly sluggish.
  • Multiple listed food items under the same name.
  • Constant ads about their pro plans.
  • Can’t sync data to Apple health.

Price: Free; HealthifyMe Smart Plan: $15

3. MyFitnessPal – Connect Your Nutrition Data to Apple Health

MyFitnessPal is currently one of the most popular calorie counters. It contains a comprehensive nutrition database with over 11 million foods. It has a free version, but features like meal prep and recipes, macronutrient counters, and guided workouts are only available in the premium version.

The app monitors your weight and estimates your daily calorie intake. It also includes a food diary and an exercise record. MyFitnessPal tracks your progress toward your goals and provides chat forums with other users. Conversations, recipes, tips, and personal success stories can all be found in the forums, so you are part of a larger community taking a stride toward a healthier life.

Pros

  • Good catalog of foods.
  • Ability to connect to Apple Health.
  • Good app to record other fitness data as well.
  • Barcode scanner to instantly grab nutrition data from products.

Cons

  • Too many intrusive ads.
  • Sluggish user interface.
  • The free version misses out on micronutrient analysis.
  • Calorie recording and presentation are easier in other apps on this list.

Price: Free; Pro Version: $19.99 per month or $79.99 per year

4. Lifesum – Great for Recipes and Meal Plans

Lifesum offers a food and meal rating system that describes whether a dish is nutritious and whether your meal is healthy or imbalanced. The app is more empathetic and does not stress terms like ‘unhealthy’, ‘junk food’, and other similar phrases that might make you feel guilty about your eating habits.

If you want a low-carb, high-protein diet that involves intermittent fasting, this app has you covered. You also get a great set of healthy recipes for all your meals. More features, such as a more complete nutrient analysis, recipes, insights, and educational resources to learn how to make healthier food choices are available in the pro version.

Pros

  • Brilliant user interface and great design language.
  • A good number of diet plans.
  • The recipes tab has a helpful menu to aid your diet plan.
  • Easy to view a breakdown of nutrients.

Cons

  • Misses out on connecting to Apple Health.
  • Recipes are not free through the app, but you can visit the website to access them.
  • The catalog does not seem as extensive as MyFitnessPal or HealthifyMe.

Price: Free, $4.17 per month for Premium.

5. Lose It! – Comprehensive Meal Plans

Have you ever been to a gym or a nutritionist, where they asked you many questions about your health preferences so that they can understand you better? The Lose It app does exactly that. We took around a full ten minutes to set up the app while we answered questions about our dietary and other health preferences.

Moreover, the Lose It! food database contains all popular restaurants, grocery stores, and brand-name items, all of which have been confirmed by the app’s professional team. You also have an active chat community and can take part in multiple challenges. With the pro version, you get additional features like advanced tracking, awards, and celebrations as you complete goals, and you get more detailed exercise and diet planning.

Pros

  • Best app for meal plans.
  • Impressive user interface and performance.
  • Verified information in the food catalog.
  • Active chat community and meal plans.

Cons

  • Does not track micronutrients.
  • Difficult to add custom meals.
  • The number of questions asked might be a lot for users while setting up a meal plan – a few users in reviews complain of impractical meal plans.

Price: Free, Premium: $39.99 per year

Also Read: How accurate is Apple Watch calorie tracking

Was this helpful?

Thanks for your feedback!

4 Ways to Disable Fast Startup on Windows 11

Method 1: Disable Fast Startup Using Control Panel

Using the Control Panel is an old-school way of making changes to your Windows computer. Here’s how to use it to disable fast startup on Windows.

Step 1: Click the search icon on the taskbar, type control panel, and select the first result that appears.

open control panel on Windows

Step 2: Use the drop-down menu at the top right corner to change the view type to large icons. Then, go to Power Options.

Power Options on Windows

Step 3: Click the Choose what the power buttons do option in the left pane.

Choose what power buttons do

Step 4: Click on Change settings that are currently unavailable.

Change system settings

Step 5: Uncheck the Turn on fast startup (recommended) option and click Save changes.

Disable fast startup via Control Panel

Method 2: Disable Fast Startup via Command Prompt

Command Prompt is a powerful tool that allows you to run scripts, repair system files, and perform advanced administrative tasks. You can also use it to change your PC’s power plan or disable the fast startup feature. Here’s how.

Step 1: Right-click on the Start icon > select Terminal (Admin) from the list.

Open Terminal on Windows

Step 2: In the console, run the following command and press Enter:

Powercfg -h off
Disable fast startup using CMD

Once you run the above command, the fast startup feature will be disabled.

Method 3: Turn Off Fast Startup From the Group Policy Editor

You can also change the Group Policy settings to disable the fast startup feature on Windows 11. However, you can only use this method using the Windows Professional, Education, or Enterprise editions.

Step 1: Press the Windows key + R to launch the Run dialog box. Type gpedit.msc in the Open field and press Enter.

Step 2: In the Local Group Policy Editor window, use the left pane to navigate to Computer Configuration > Administrative Templates > System > Shutdown.

Group Policy Editor on Windows

Step 3: Double-click the Require use of fast startup policy on your right.

Fast startup policy in GPO

Step 4: Select Disabled > hit Apply, followed by OK.

disable fast startup using GPO

Method 4: Disable Fast Startup From the Registry Editor

Another way to disable fast startup on Windows is via the Registry Editor. Since this method is risky, you should only use it if none of the other methods work.

Step 1: Press the Windows key + S to open the search menu. Type registry editor in the box and select Run as administrator.

Step 2: In the Registry Editor window, use the address bar at the top to navigate to the following key:

HKEY_LOCAL_MACHINE\SYSTEM\CurrentControlSet\Control\Session Manager\Power
Registry Editor

Step 3: Within the Power key, locate the HiberbootEnabled entry. Double-click on it and change its value to 0 (zero). Then, click on OK.

Disable fast startup via Registry Editor

Exit the Registry Editor and restart your PC to apply the changes. If you wish to re-enable fast startup at any point, follow the same steps above and change the Value data for HiberbootEnabled DWORD to 1.

FAQs

1. Is fast startup bad for SSDs?

Enabling fast startup does not inherently damage SSDs, and leaving it enabled does not negatively impact their lifespan or performance.

2. Does fast startup damage a laptop?

No, fast startup is not dangerous for any computer.

Was this helpful?

Thanks for your feedback!

How to Use Stars to Organize Your Emails in Gmail

Add Star to an Email on Web

Step 1: Open Gmail and locate the essential email or the one you want to visit again.

Step 2: Select the star icon beside the email.

Star an email message

Step 3: From the Gmail sidebar, click on the Starred label to view your marked emails in one place.

Go to Starred section

Use Gmail Mobile Apps to Star Emails

Step 1: Open Gmail on iPhone or Android.

Step 2: Tap the star icon beside an email.

Step 3: To check your favorite emails, tap the hamburger menu at the top-left corner and tap Starred.

Use Different Star Styles

Step 1: Find the email address to which you want to add a star on the phone or web.

Step 2: Successfully click on the star icon and move between star types in use.

Add different types of style

Step 3: When you visit Starred inbox from the sidebar, you can check different star types in action. It’s easy to separate them from the standard starred email.

Unfortunately, there is no way to use different star types on Gmail mobile apps.

Customize Star Styles on Gmail

Step 1: Open Gmail in your preferred web browser and select the Settings gear at the top-right corner.

Open Gmail Settings panel

Step 2: Click on See all settings from the flyout to open the General section. Scroll to the Stars section.

See all settings in Gmail

Step 3: You’ll find the stars under In use and Not in use in this section.

Add more Star styles

Step 4: Drag the stars between the lists. The stars will rotate in the order shown below when you click successively. Hover your mouse over the image to learn the name of a star for search.

Step 5: You can also choose stars from default Presets. Scroll down and press the Save Changes button.

Save changes for Gmail star

Automatically Add a Star to a Gmail Inbox

Step 1: Open Gmail and click on Show search, i.e., the menu control at the end of the search bar.

Open Search menu ion Gmail search

Step 2: Enter the email address, subject, words, etc., to filter existing or upcoming emails and click on Create filter.

Create Gmail Filter

Step 3: Check the box for Star it and click on Create filter.

Add Star it option Gmail.

After creating this filter, whenever you receive an email that meets all the conditions, Gmail will automatically add a star and send it to the Starred inbox. However, the service won’t allow you to assign other star styles like blue-star, purple-question, green-star, and more.

Was this helpful?

Thanks for your feedback!

How to Mirror Android to Your Windows 11 PC

Installing and Enabling the Wireless Display Feature

Step 1: Use the Windows + I shortcut to open the Settings app.

Step 2: Inside the Settings app, click on the Apps and click on Optional features.

click on Optional features.

Step 3: Click on the View features next to Add an optional feature section.

Click on the View features

Step 4: Check the box next to Wireless Display and click the Next button.

Check the box next to Wireless Display

Step 5: On the following screen, click the Install button.

click the Install button

After that, Windows 11 will automatically download and install the necessary files to enable the Wireless Display feature on your computer.

After installing and enabling Wireless Display on your Windows 11, you may set up screen mirroring from your Android phone.

Also Read: Fixes when Wireless Display feature is not working on Windows 11

Mirroring Android Devices to Windows 11

To mirror an Android smartphone to your PC, you must ensure that both devices are appropriately configured and connected to the same Wi-Fi network.

Configuring Your Windows 11 PC

Step 1: Open the Windows Settings app. Then, scroll down and click on Projecting to this PC.

click on Projecting to this PC

Step 2: Now, click on one drop-down at a time and ensure that you select all the options that are selected in the screenshot below:

click on one drop-down

Step 3: Click on the Launch the Wireless Display app to project to this PC option.

Note: If you’re trying to use the Wireless Display feature on a laptop, you must turn off the This PC can be discovered for projection only when it’s plugged into a power source toggle.

Click on the Launch the Wireless Display app to project to this PC

After that, you’ll see a blue Wireless Display window on your screen with the message, Your PC’s Name is ready for you to connect wirelessly.

Your PC's Name is ready

After you’ve configured and confirmed that Wireless Display works on your Windows 11 PC, let’s move to the Android phone to get things ready.

Configuring Your Android Device

Almost all Android phones have a Cast feature built inside, regardless of the phone maker. So, it is pretty easy to configure your Android device for screen mirroring.

Step 1: Open the Settings app on your Android device. Then, tap on Bluetooth & Device Connection.

Note: The Settings app may look different on your Android phone depending on its make and Android version.

Step 3: Under Bluetooth & Device Connection, tap the Cast option.

Step 4: Under Cast, tap on the Enable wireless display toggle to turn it on.

Step 5: Now, tap on your PC’s name. This will open an Invitation to connect dialog, and you’ll need to enter the 8-digit PIN that you can find on your Windows 11 PC.

Your Windows 11 PC will display an 8-digit security PIN, which you’ll need for the next step.

Windows 11 PC will display an 8-digit security PIN

Step 6: Enter the 8-digit PIN from your PC’s screen, then tap Accept.

tap Accept

When you tap Accept, your Android phone’s interface should appear on your PC’s screen.

your Android phone's interface

This way, you can mirror an Android smartphone onto your Windows 11 PC. However, if you can’t, ensure all devices are connected to the same wireless network.

Was this helpful?

Thanks for your feedback!

6 Ways to Remove Residual Files After Uninstalling Software on Windows 

Method 1: Delete Registry Keys

Registry keys are a database that includes an app’s configuration and installation data, such as the product key, custom install settings, etc. Deleting the registry keys for an uninstalled app removes its leftover traces.

Note: Be careful as you proceed to remove the registry keys. Ensure you know the name of the program whose keys you need to remove, especially when multiple versions of the same app are present. To prevent any mishaps, backup a copy of the registry keys.

Open the Registry Editor app from the Start menu. Right-click on the folder of the uninstalled app and click on Delete. Confirm the action when prompted again.

Right click and Delete

Method 2: Delete Temporary Folder

You can delete temporary files on Windows to remove the leftovers of the uninstalled application.

Step 1: Open Run from the start menu. Type %temp% and hit OK.

Type the code for temp files

Step 2: This will open the temporary folder. Use Ctrl + A to select all the files. Now, right-click and select the delete option.

Step 3: Open the Recycle Bin later to delete the files permanently.

Delete Temp Files

Method 3: Use the Disk Clean-up Tool

The Disk Clean-up tool is an easy one-click tool for deleting unwanted files from your system. Here’s a step-by-step procedure.

Step 1: Open the Disk Clean-up app from the Start menu. Select the drive and click on OK.

Click OK for C drive

Step 2: In the Disk Clean-up window, check the box for Temporary files. Then, click OK.

Alternatively, you can also opt to Clean up system files to remove more such unwanted files.

Method 4: Check Program Files

Open the Windows Explorer, go to This PC, and open Windows (C:). Then, open the folder Program Files and Program Files (x86).

Check for any folders of the uninstalled app and proceed to delete them. However, check the contents of the folder before deleting it and if it contains any important files you wish to retain.

Program Files

Method 5: Remove App Data

Removing the app data folder removes any leftover files and cache data from the uninstalled app.

Open the Run app from the Start menu and type %app data%. Look for the folder containing the name of the program you uninstalled and delete it.

Run App

Method 6: Use the Third Party App

Revo Uninstaller helps you uninstall programs on Windows along with all their traces and residual files. While the service is paid, you will get a free trial version for thirty days.

Step 1: Visit the Revo Uninstaller download page and click on TRY NOW. Install the app using the downloaded setup files.

Step 2: Open Revo Uninstaller, click on the app you want to uninstall, and select Uninstall in the left pane.

Select App Click Uninstall

Step 3: Check the box for Automatically delete all found leftovers and click on Continue.

Click Continue

Step 4: Once the program is uninstalled, click on Scan. This will search for any leftover files.

Click on Scan Revo Uninstaller

Once the scan is complete, the program will also delete any leftover files and display the amount of deleted files along with their size.

Was this helpful?

Thanks for your feedback!

How to Delete Telegram Contacts on iPhone, Android, or PC

How to Delete Telegram Contacts on Android

1. Deleting a Single Telegram Contact

Step 1: Open the Telegram app on your Android.

Step 2: Tap on the hamburger menu at the top left and select Contacts.

Step 3: Now, search and tap on the account you want to delete. Then, click on the contact’s profile.

Step 4: Now, tap on the three dots at the top right corner and select Delete Contact.

We recommend deleting the chat before deleting the contact. 

Step 5: Select Delete on the prompt shown.

That’s it! The contact will be removed from the Telegram contact list. Want to remove all synced contacts at once? Read the next section.

How to Delete All Telegram Contacts

Step 1: Open the Telegram app and tap on the hamburger menu in the upper left corner.

Step 2: Go to Settings and tap Privacy and Security.

Step 3: Under Contacts, tap Delete Synced Contacts and select Delete in the prompt. 

There you go. All the synced Telegram contacts will be removed using your Android device. However, these contacts will still be in your Android contact list, meaning they can sync back if you haven’t turned off syncing with your phone’s contact list. So, here’s how to do that.

Disable Contact Syncing on Telegram

Step 1: Open the Telegram app and tap the hamburger menu.

Step 2: Go to Settings and tap Privacy and Security.

Step 3: Under Contacts, toggle off Sync Contact.

The above steps should help you out. Well, if you’re simply annoyed by the Telegram contact joined notifications, check our guide on how to turn off contact joined notifications on Telegram rather than deleting the contact.

How to Delete Telegram Contacts on iOS

Deleting a Single Contact From Telegram

Step 1: Open the Telegram app and go to the Contacts tab.

Step 2: Tap the search bar to find the contact you want to delete.

Step 3: Go to their details page and tap on their user avatar in the upper right corner.

Step 4: Now, go to Edit, select Delete Contact, and tap on Done.

Step 5: Finally, select Delete Contact to confirm.

That’s all. The contact you delete will be removed from Telegram’s contact book. To remove all contacts simultaneously, check the next section.

Deleting Multiple Telegram Contacts at Once

Step 1: Open the Telegram app and go to the Settings tab.

Step 2: Tap Privacy and Security and go to Data Settings.

Step 3: Tap Delete Synced Contacts.

There you are. All your Telegram contacts will be deleted at once. If you want to log out of specific devices, check out our guide on how to log out of devices from your Telegram account.

Further, you can directly disable contact syncing on Telegram using an iPhone to avoid contact sync or the notification altogether.

Note: When you delete synced contacts, you will lose access to synced Telegram contacts only and not your phone contacts.

Step 1: Open the Telegram app and go to the Settings tab.

Step 2: Tap Privacy and Security and go to Data Settings.

Step 3: Under Contacts, toggle off Sync Contacts.

How to Delete Contacts From Telegram on a PC and Mac

Deleting a Single Telegram Contact on a PC

Step 1: Open the Telegram Desktop app and click on the hamburger menu in the upper left corner.

Step 2: Go to Contacts.

Telegram Contacts on Windows

Step 3: Now find the contact you want to remove from Telegram and tap on the profile.

find the contact you want to remove from Telegram and tap on the profile

Step 4: Go to Contact’s Profile and click Delete Contact.

Go to Contact's Profile and click Delete Contact

Step 5: Select Delete in the prompt to confirm.

Select Delete on the prompt shown

That’s all there is to it. You can use Telegram desktop and Telegram web to do this. Mind you, once you delete a contact from the app, the contact’s phone number and other details will not be removed from your phone’s contact list. 

To remove a contact from the phone’s contact list, you must follow the traditional way of deleting contacts from the phone.

Deleting Multiple Contacts via PC or Mac

You can’t delete multiple contacts on the Telegram desktop. So, we will be using Telegram Web to execute this. Let’s proceed. 

Step 1: Open Telegram Web using the below link.

Step 2: Sign in to your account and click on the hamburger menu in the upper left corner.

Step 3: Now, click on Switch to the older version.

Switch to the older version from Version K

Step 4: Then click on Contacts.

Telegram Older Version Contacts

Step 5: Choose Edit and select the contacts you want to remove from Telegram.

choose Edit and select the contacts you want to remove from Telegram

Step 8: Now, click Delete and confirm it. 

click Delete and confirm it.

There you go. You have removed unwanted contacts using Telegram Web.

There are many ways to delete your Telegram contacts, one at a time or all at once. Besides, it is better to disable the option to sync Telegram contacts to your phone to avoid deleting the same contact repeatedly.

Was this helpful?

Thanks for your feedback!

5 Ways to Fix Unable to Print From Microsoft Excel on Windows 11

Fix 1: Save Your Excel File in XPS Format and Try Again

If Excel can’t respond to print requests, save your file in the XPS format and try again. Several users on Microsoft Community post reported fixing the issue with this simple workaround. So, if you’re in a rush, try this method.

Step 1: Open the Excel file you wish to print and click the File menu at the top left corner.

Excel File Menu

Step 2: Navigate to the Print tab and use the drop-down menu under Printer to select Microsoft XPS Document Writer. Then, click the Print button.

Excel Print Tab

Step 3: When the Save Print Output As dialog appears, save your Excel file in the XPS format. It should print without issues.

Save File in XPS Format

Fix 2: Open Excel in Safe Mode

You can try printing an Excel file in safe mode to see if one of the third-party add-ins is causing the problem. For that, press the Windows key + R to open the Run dialog. Type excel -safe in the box and press Enter.

Check to see if Excel prints your file in safe mode. If it does, one of the third-party add-ins is to blame. You can disable all add-ins and re-enable them individually to isolate the culprit.

Step 1: Open Microsoft Excel and go to File > Options.

Excel Options Menu

Step 2: In the Excel Options window, switch to the Add-ins tab from the left column. Select COM Add-ins in the Manage drop-down menu and click the Go button.

Excel Options

Step 3: Uncheck all the Add-ins and click OK.

Disable Excel Add-ins

After this, restart Excel and enable your add-ins one at a time. Print a test page after enabling each add-in to identify the one causing the issue.

Fix 3: Update Printer Driver

Issues with your printer driver can affect Excel’s ability to print spreadsheets and lead to problems. To avoid this, you should ensure that your printer driver is up to date and functioning properly.

Step 1: Right-click on the Start icon and select Device Manager from the menu that appears.

Open Device Manager on Windows

Step 2: Double-click on Print queues to expand it. Right-click on your printer and select Update driver.

Update Printer Driver on Windows

Follow the on-screen prompts to finish updating the printer drivers. After that, try printing your file again.

Fix 4: Remove and Reinstall Your Printer

If Microsoft Excel still can’t print, try removing your printer and re-adding it on Windows. Here’s how to do it.

Step 1: Press the Windows key + I to open the Settings app.

Step 2: Select Bluetooth & devices from the left sidebar and go to Printers & scanners.

Printers and Scanners on Windows 11

Step 3: Select your printer from the list.

Printer List on Windows

Step 4: Click the Remove button at the top to delete your printer.

Remove Printer from Windows 11

Step 5: After that, return to the Printers & scanners menu and click on Add device. Then, follow the on-screen prompts to add your printer again.

Add Printer on Windows

Fix 5: Repair Microsoft Office

Microsoft Office offers a handy repair tool for any issues with Office apps. If nothing else works, consider repairing Microsoft Office by following the steps below.

Step 1: Right-click on the Start icon and select Installed apps from the list.

Step 2: Scroll down to locate the Microsoft Office product on the list. Click the three-dot menu icon next to it and select Modify.

Modify Microsoft Office on Windows 11

Step 3: Select Online Repair and hit Repair.

Repair Office Apps

Was this helpful?

Thanks for your feedback!

WhatsApp Verification Code Not Received? Try These Workarounds

Basic Fixes

  • Double-check your region code and number – WhatsApp automatically detects your region and shows a dialing code and a menu to enter your mobile number. Ensure that you type the correct mobile number to get a security code.
  • Check WhatsApp servers – The issue could be on WhatsApp’s end. Head to Downdetector and search for WhatsApp. If the platform has server issues, wait for it to fix them.
  • Switch between Wi-Fi and mobile data—A patchy network connection can be the cause. Try switching between Wi-Fi and mobile data. You can also temporarily enable and disable Airplane mode on your phone to reset the network connection.
  • Reinstall WhatsApp and try again – Reinstalling the app can kill multiple birds at once by clearing any issues related to bugs, cache, or connection.

Fix 1. Check Spam for WhatsApp Security Code

The default iOS and Android Messages app can be aggressive and send important messages to the spam folder. It’s wiser to check if that is the root cause of the issue.

On iPhone

Step 1: Open Messages → Filters from the top left.

Step 2: Select Junk inbox and check.

On Android

Step 1: Launch Messages → tap the three-dot menu from the top right.

Step 2: Open the Spam & blocked inbox.

Fix 2. Verify With a Missed Call or Email ID

If you still haven’t received a WhatsApp security code, you can confirm your identity with a missed call or email ID. WhatsApp will send a missed call and check call logs to verify your identity.

Note: WhatsApp may ask for permission to access call logs.

Step 1: Open WhatsApp and enter your mobile number. Hit the Next button.

Step 2: Hit Continue to verify your number.

Verification through email ID is only available if you previously added an email address when setting up WhatsApp or two-factor verification. Simply select the option to receive the code in your email.

Fix 3. Change Language and Try Again

The idea is simple, resolve any connection or settings-related issue. There are two ways to do so. One is to reinstall WhatsApp (or go back if allowed) and choose a preferred language from the options.

Note: Select a language you can read and understand because you’ll need it to change WhatsApp’s language.

Another option is to uninstall WhatsApp and change the device’s default language.

  • iPhone users can go to Settings → General → Language & Region → Add Language.
  • Android users go to Settings → General management → Language → Add language.

Once done, restart the device and reinstall WhatsApp. Hopefully, this will fix WhatsApp’s issue of not sending the security code.

Fix 4. Get the Code on WhatsApp Business

While this method might sound a bit iffy, it has worked for some users in the past. So, no harm in trying, right? Plus, you’re not actually moving to WhatsApp Business, we’re using the app to fix whatever issue.

So, once you get the code, do not enter it. Instead, move back to the normal WhatsApp and try getting the code.

Fix 5. Try Getting the Verification Code on a Different Device

Both the idea and execution of this fix are similar to the above fix. Download and install WhatsApp on your additional device or add the account to an existing app. During the verification process generate the code, but don’t use it.

Come back to your original device and try the verification process again. You should receive the security code without a hiccup (fingers crossed).

If you still can’t get the WhatsApp security code, there’s only one way left – Contact WhatsApp and ask for their assistance.

Was this helpful?

Thanks for your feedback!

4 Fixes if Chrome Remote Desktop Is Not Working on Windows 11

Fix 1: Disable PIN-Less Authentication

Chrome Remote Desktop lets you pair your trusted devices with your computer. This eliminates the need to enter the security PIN whenever you access your computer. However, this feature may also cause problems at times. Try disabling the PIN-less authentication feature on your computer to see if that works.

Step 1: Press the Windows key + R to open the Run dialog > type regedit in the box > press Enter.

Step 2: Paste the following path in the address bar at the top and press Enter to navigate to the Policies key.

HKEY_LOCAL_MACHINE\SOFTWARE\Policies
Registry Editor

Step 3: Right-click the Policies key > go to New > select Key > name it Google.

Create New Key

Step 4: Within the Google key, create another key and name it Chrome.

Create New Key in Registry

Step 5: Right-click on the Chrome key > go to New > select DWORD (32-bit) Value > name it RemoteAccessHostAllowClientPairing.

Create DWORD in Registry

Step 6: Double-click the newly created DWORD > change the value data to 1 > click OK.

Edit Registry DWORD

Now, restart your PC and use the Chrome Remote Desktop again.

Fix 2: Delete the Paired Client and Connect Again

Another thing to fix Chrome Remote Desktop is to remove all the paired clients and start over. This will help clear out any temporary glitches and re-establish the remote connection.

Step 1: Open the Chrome Remote Desktop app on your PC or navigate to the Chrome Remote Desktop page in your browser.

Step 2: On the Remote Access tab, click on View/Edit.

Chrome Remote Desktop App

Step 3: In the Paired clients window, click the trash icon next to the device you want to unpair.

Delete Paired Clients From Chrome Remote Desktop

After completing the above steps, set up the remote computer again.

Fix 3: Repair or Reinstall Chrome Remote Desktop

Problems with the Chrome Remote Desktop app on your PC can also prevent it from working. Fortunately, Windows lets you repair your apps in several ways.

Step 1: Press the Windows key + I to open the Settings app > go to Apps > Installed apps.

Installed Apps on Windows 11

Step 2: Scroll down or use the search bar at the top to locate the Chrome Remote Desktop Host on the list. Click the three-dot menu icon next to it and select Repair.

Repair Chrome Remote Desktop Tool

Wait for Windows to repair the app. If the problem persists, uninstall the Chrome Remote Desktop app and install it again.

Fix 4: Reinstall Google Chrome

If you still have trouble connecting while using the Chrome Remote Desktop extension, try reinstalling the browser on your PC. This will resolve issues caused by corrupt data and update the browser to its latest version.

Step 1: Press the Windows key + R to open the Run dialog > type appwiz.cpl in the Open field > press Enter.

Step 2: Locate and select Google Chrome > click on Uninstall at the top.

Uninstall Chrome

Follow the on-screen prompts to finish removing the browser. Once done, reinstall Google Chrome on your PC, and the Chrome Remote Desktop extension should work as before.

Was this helpful?

Thanks for your feedback!

How to Use Voice Memos on iPhone: A Complete Guide

How to Record an Audio on iPhone

Step 1: Click on the red button at the bottom to record the audio.

Step 2: To pause the recording, touch the black line at the bottom and drag it up. Then, hit the pause button to stop the recording temporarily.

Step 3: To resume recording, tap on Resume. Once you’re done recording, click on the stop button.

How to Play or Rename a Voice Memo

Under All Recordings, tap on any recording and press the play button. To skip forward or back, tap on the circular icon on either side of the play/pause option.

To rename the audio, tap and hold on the existing audio’s name. This will make the name editable. Now, rename the recording.

How to Trim or Delete Parts of the Recorded Audio

Trimming the audio is a great way to remove unwanted parts from a recording.

Step 1: Tap the three dots icon next to the audio you want to edit and select edit recording.

Step 2: Now, tap on the crop icon and use the yellow-colored slider to select the part you want to edit.

Step 3: If you want the selected audio part to be saved, tap on Trim. Alternatively, tap on Delete to remove the selected part.

How to Replace Parts of the Recorded Audio

Here’s how to replace a portion of an audio. Practice the same with a test audio clip, as the changes are irreversible.

Step 1: Tap the three dots icon next to the audio you want to edit, and select edit recording.

Step 2: Play the audio until the part that needs to be replaced begins, and tap on Replace.

Step 3: You can now record the audio for the replacement and hit the pause button once it is added.

How to Edit the Audio Quality on iPhone

Next, you have the tools to edit the audio quality. These can help you compress or improve the sound quality.

Step 1: Go to the Settings app and tap on Voice Memos. Tap on Audio Quality.

Step 2: You have two options – Lossless and Compressed.

  • Select Compressed to ensure your audio recording stays minimal in size.
  • On the other hand, you can select Lossless for top-notch recording quality. However, this would increase the file size.

Use Enhanced Playback Options on iPhone

The enhanced playback options will help you improve the quality of the audio recording. Tap the three dots icon next to the audio you want to edit and select edit recording.

You will find multiple options in this section.

  • Skip Silence: Toggle on this option to skip or remove all the silent parts in your audio recording. This means that your audio will remain continuous and without any breaks, if any, while recording.
  • Increase Speed: To change the playback speed, drag the slider to increase or decrease it.
  • Enhance Recording: To improve the audio quality and remove the background noise, toggle on Enhance Recording. We were impressed by how this option significantly improved the quality of the audio recording.

Also Read: How to fix Voice Memos not recording audio on iPhone

How to Save the Voice Recording on iPhone

Once you stop the audio recording, the file will be automatically saved in the Voice Memos app. But if you want to save the audio to Files, here’s how.

Step 1: Tap on the audio recording you wish to save and hit the three dots icon.

Step 2: Click on Save to Files. Select your destination in the Files app.

Also Read: How to transcribe Voice Memos on iPhone

Create Folders in the Voice Memos App

You can create new folders to segregate the audio recordings into different folders within the app.

Step 1: Open the Voice Memos app and click on the back icon. This will take you to the main screen of the app. Now, click on the add folder icon at the bottom right corner.

Step 2: Name the folder and click on Save. We have created a folder called Favourite Audios.

Step 3: To move recorded audio to this new folder, tap on the three-dot icon next to the audio. Select Move to Folder and select the folder you created to move the audio there.

How to Send a Voice Memo on iPhone

Here’s how to share your audio recordings with your friends and family using an app of your choice.

Tap on the three-dot icon next to the audio recording you want to share. You have the option to share the audio in different apps. As you slide across, you can choose the app you want to send the audio file to.

How to Delete a Voice Memo

You can easily use the delete option to remove recordings from the Voice Memos app.

To delete an audio recording, tap on the trash bin icon in the recording menu.

If you accidentally deleted the audio recording, fret not. Tap on the back icon and go to the main screen of the Voice Memos app. There is a Recently Deleted folder. Using this folder, you can easily restore the deleted audio file.

Also Read: How to play local MP3 files on iPhone

Was this helpful?

Thanks for your feedback!

5 Fixes When Wireless Display Feature is Not Working on Windows 11

Basic Fixes:

  • Ensure your devices support Miracast and Wi-Fi Direct protocol: One essential prerequisite for using the wireless display feature on Windows 11 is that all your devices, including your PC and the transmitting device, should support the Miracast and Wi-Fi Direct protocol.
  • Ensure both devices are on the same Wi-Fi network: This is because the Wireless Display feature on Windows 11 works via Miracast. This feature depends on the Wi-Fi Direct protocol to share media files and mirror content between devices on the same network.

Fix 1: Reinstall Wireless Display Through Optional Features

If the problem is caused by corrupt files or settings linked to the wireless display functionality, reinstalling through optional features will fix the problem. Follow these steps:

Step 1: Press Windows + I to open the Settings app.

Step 2: Click the System menu on the left, then on the right, click Optional Features.

Windows optional features

Step 3: Click View features.

View optional features

Step 4: Type Wireless display in the search box, click the Wireless Display checkbox, and click the Install button.

Install wireless display

Step 5: Finally, restart the computer.

Fix 2: Allow Wireless Display Feature Through The Windows Defender Firewall

The Windows Defender Firewall may often prevent the wireless display feature from connecting to the Internet. Therefore, you must allow it through the Windows Defender Firewall. Follow the steps below.

Step 1: Click the Start button on the taskbar, type Windows Defender Firewall, and click Open next to the Windows Defender Firewall search result.

Open windows defender firewall

Step 2: From the left column, click on the Allow an app or feature through the Windows Defender Firewall option.

Allow an app or feature through the Windows Defender Firewall

Step 3: Click the Change Settings button at the window’s top-right corner. If a User Account Control prompt appears, select Yes.

Change Settings button

Step 4: Lastly, look for an entry called Wireless Display. Once located, check all the checkboxes, including those on the left side of the entry and those under the Private and Public columns.

Enabling Wireless Display

Fix 3: Temporarily Disable Firewall for Public Networks

This fix will resolve the problem if your firewall blocks some communication channels Wireless Display uses when establishing the connection. Follow the steps below.

Step 1: Press the Windows key, type Security, and click Windows Security.

Open Windows Security 5

Step 2: On the right pane, click Firewall & Network Protection.

Firewall network protection

Step 3: Click Public Network.

Step 4: Finally, toggle off Microsoft Defender Firewall.

Disable microsoft defender

Fix 4: Check If the Wi-Fi Direct Driver Is Enabled

The wireless display feature on Windows 11 works using Wi-Fi Direct. However, the Wi-Fi Direct driver responsible for running this feature may be disabled. Here’s how to check if the Wi-Fi Direct driver is disabled on your PC and how to enable it if it’s turned off:

Step 1: Right-click the Start button and select Device Manager from the list.

Open device manager

Step 2: Under Network adapters, right-click Microsoft Wi-Fi Direct Virtual Adapter and select Enable Device.

enable wifi driver

Try using the Wireless display feature again. If this doesn’t work, move on to the next solution.

Fix 5: Reinstall the Wi-Fi Driver

Your Wi-Fi Direct driver may be corrupt. Reinstalling drivers using the device manager can easily fix driver-related issues.

Step 1: Right-click the Start button and select Device Manager from the list.

Open device manager

Step 2: Look for the Network adapters entry in the Device Manager window and double-click to expand it.

Open Network adapters

Step 3: Right-click on Microsoft Wi-Fi Direct Virtual Adapter and select Uninstall device.

Uninstall Microsoft Wi-Fi Direct Virtual Adapter

Step 4: In the confirmation dialog that appears, click on Uninstall.

Confir choice

Step 5: Lastly, restart your PC.

After you restart your PC, Windows 11 will automatically search for and install the relevant Wi-Fi Direct driver. You may also reinstall or update other network drivers on your computer because some Wi-Fi adapters may support the Wi-Fi Direct feature without installing additional drivers.

Was this helpful?

Thanks for your feedback!

4 Ways to Transfer Files From Apple iPad to PC

Method 1. Use iTunes

Although Apple has retired iTunes on Mac, it remains the go-to software for managing your iPhone or iPad on Windows. Follow the steps below to transfer files from iPad to PC using iTunes.

Step 1: Download and install iTunes from the Microsoft Store on Windows.

Step 2: Open iTunes and grab a data cable to connect your iPad to a PC.

Step 3: Grant permission to let the Windows device recognize your iPad.

iTunes app for Windows

Step 4: The device icon will appear in iTunes in the top left corner. The software will ask you to allow the computer to access iPad data. Press the Continue button.

Allow iTunes to access iPad

Step 5: Press the Windows + E keys shortcut to open File Explorer. Click on ‘This PC‘ in the left column, and your Apple iPad will appear on the list.

Access iPad via File Explorer

Step 6: Select your iPad to check device storage. Open relevant folders and move your files to the PC.

DCIM folder holds all photos

Using iTunes on Windows is a below-average experience. The software looks dated, and you might face issues with the data cable connection. Read along to find the top ways to transfer files from iPad to PC without iTunes.

Method 2. Using iCloud

iCloud is the default cloud storage solution on iPad. You can upload your photos, videos, and relevant files to iCloud and access them using the iCloud native app or iCloud web on Windows. First, you must enable iCloud to upload on the iPad. 

Step 1: Open the Settings app on your iPad.

Step 2: Select your account and open iCloud from the following menu. Select Photos.

Photos app settings on iPad

Step 3: Next, enable the Sync this iPad toggle.

Enable Sync this iPad

If you have PDFs and other documents, you can use the Files app on your iPad and move them to a relevant folder in iCloud Drive. Let’s access and move your uploaded files to the PC.

Step 1: Open the iCloud website in a browser on your Windows computer.

Step 2: Sign in with your Apple account details and complete the authentication process.

Photos App on iCloud

Step 3: Open Photos and select media files. Press the download button at the top and save them on your PC.

Download from iCloud

Step 4: Select iCloud Drive from the homepage and download PDFs and documents.

Open iCloud Drive Windows

If you don’t want to visit iCloud web every time, set up iCloud on Windows and access your iCloud photos and folders from the File Explorer menu. Read our dedicated guide to adding iCloud to File Explorer on Windows. With a native iCloud app, you can also access the iCloud password on your PC.

Method 3. Using OneDrive

Not everyone prefers iCloud to store sensitive data online. Microsoft’s OneDrive is an excellent alternative to iCloud and comes by default on Windows. Besides, if you are an existing Microsoft 365 subscriber, you get 1TB of OneDrive storage.

Step 1: Install OneDrive on iPad.

Step 2: Sign in with your Microsoft account details.

Step 3: Select photos or files on your iPad and use the iPadOS share menu to upload them on OneDrive.

Share to OneDrive

Step 4: Successfully upload files to OneDrive.

Upload to OneDrive

Step 5: Press the Windows + E keys to open the File Explorer on your Windows computer. Select OneDrive from the left column to check the files you uploaded to the iPad.

OneDrive in File Explorer

Method 4. Establish an FTP Server

FTP (File Transfer Protocol) is yet another effective method to transfer files from iPad to PC. We will use the FE File Explorer app to establish an FTP connection on the PC.

Step 1: Download the FE File Explorer app from the App Store.

Step 2: Open the app and permit it to access photos and device content.

Step 3: Select the photos you want to transfer and move them to any folder in the My Files tab.

FE File Explorer

Step 4: Tap on the Settings gear.

Fe File Explorer Settings

Step 5:  Select Built-in Servers.

Enable Built-in servers

Step 6: Note down the FTP Server URL.

Server Details

Step 7: Open File Explorer on Windows (use Windows + E keys) and type the FTP server name in the address bar.

File IP address

Step 8: The My Files folders in the file manager.

Copy File from FTP Server

Step 9: Select the files you want to move to the PC.

Step 10: Right-click on them and select Copy to Folder from the context menu. Select a relevant folder on your PC to move the iPad files.

Copy to Folder

Was this helpful?

Thanks for your feedback!

Why Can’t I Follow Someone on Instagram

Preliminary Fixes

  • You Have Exceeded Limit: Instagram has limits in place to prevent spam and misuse of its platform. One such limit involves the number of people you can follow within a certain period. If you’ve followed too many accounts in a short time, Instagram may temporarily restrict you from following more.
  • Instagram Has Action Blocked Your Account: If Instagram suspects that your account is engaging in behavior that violates its community guidelines, it may issue an action block, preventing you from following other users. Action blocks can last from a few hours to several days, depending on the severity of the violation.
  • Check Network Connection: A poor or unstable internet connection can prevent you from following someone on Instagram. If you’re on Wi-Fi, restarting your router can sometimes resolve connectivity issues.
  • Check Instagram Servers: If Instagram’s servers are down, you may experience issues like being unable to follow someone. Use a service like DownDetector or check Instagram’s official Twitter account for any reports of server outages or issues.

Fix 1: Authenticate Your Account Again

Due to an account authentication error on Instagram, you might face issues following someone on Instagram. It’s time to log out from the app and log in again using the same account credentials.

Step 1: Open Instagram on Android or iPhone (both apps use an identical UI).

Step 2: Go to your account and tap on the hamburger menu in the top right corner.

Step 3: Open Instagram Settings.

Step 4: Scroll down to log out from your account and confirm your decision.

Step 5: Sign back in using Instagram account details and follow accounts without an issue.

Fix 2: The User Has Blocked You

Did someone block you on Instagram? Unfortunately, you can’t follow such accounts. When things go south with your friend or family member, the person might block you on Instagram. Also, Instagram doesn’t notify you when someone blocks you. You’ll need to sort out issues on a call or other social media apps and ask the person to unblock you on Instagram.

Fix 3: You Have Used Bots or Third-Party Apps

Using bots or third-party apps to automate actions like following can result in Instagram restricting your account. Avoid using bots or tools that promise to increase followers or engagement, as they often violate Instagram’s terms of service.

Before you head to the Instagram help center to register a complaint, try the tricks above and troubleshoot the issue for your account.

Was this helpful?

Thanks for your feedback!

9 Ways to Open Task Manager on Windows 10 and Windows 11

Task Manager is one of the most commonly used programs on Windows, regardless of its version. It is a tool that displays currently running programs and resource utilization such as CPU, RAM, graphics card, hard disk, and processes on a Windows OS. Task Manager can be used to end unresponsive programs and processes, start new tasks, monitor your system’s performance, and view detailed information.

Open Task Manager on Windows

However, before you can use the Task Manager to get the work done, you must know how to open it. Whether a beginner or a technology geek, we have compiled this detailed guide to help you understand the different ways and shortcuts to open Task Manager in Windows. Let’s start with the easiest way.

1. Open Task Manager with Windows Search

It is the easiest way to open the Windows Task Manager without complexities. Below are the steps on how to go about it.

Step 1: Go to the Windows Start menu or hit ‘Windows + S.’

Step 2: Now, type Task Manager and press Enter.

Click on Windows Search to Open Task Manager

That’s it! It is the easiest way to open the task manager on Windows.

Windows Task Manager

However, if you find that you’re Task Manager doesn’t load or work, check out our guide on the top ways to fix the Task Manager not working issue.

2. Use Keyboard Shortcuts to Open Task Manager on Windows

Some apps might go off the block, leading your Windows software to stop responding. In this scenario, you can’t access Windows Search to see the running app and stop it. To overcome this, we have Windows hotkeys. There are three different key combinations with which you can open Task Manager. Let’s see them.

Open Task Manager Using Win + X Shortcut

Simply press Win + X or right-click on the Start (Windows) button in the taskbar. Now, from the menu, click on Task Manager to open it.

Windows Quick Action menu to open Task Manager

There you go. Simple, right? Moving on. If you are unable to access Windows hotkeys, then our guide on fixing keyboard shortcuts not working on Windows will help you out.

Open Task Manager Using Win + X and T Shortcut

This method is an extension of the above one. Using this approach, you can directly open the Windows Task Manager without the involvement of a mouse.

Firstly, Press Win + X to open the Windows Quick Access Menu. Now, Press T. This will open the Windows Task Manager.

Windows Quick Action menu to open Task Manager

This method is easier and more efficient than the one listed above.

Open Task Manager Using Ctrl+Alt+Del Windows Hotkey

Yet another way to open the Task Manager is by using Windows Hotkeys.

Press Ctrl + Shift + Del together. It will instantly open the Windows Task Manager. However, some apps might prevent users from accessing Task Manager with the above method.

In that case, Press Ctrl + Shift + Del together and select Task Manager in the Graphical Identification and Authentication (GINA) screen. The added advantage is that this hotkey helps open Task Manager while using a remote desktop or working on a virtual machine.

Press ctrl-alt-del to open Task Manager

3. Open Task Manager using Run Command on Windows

It is no surprise that, through the Run command, one can access essential components of Windows. Here’s how to access Task Manager.

Step 1: Go to Windows Search and type Run. Alternatively, you can directly press the ‘Win + R’ hotkey.

Press Win+R to open run command

Step 2: Now, type taskmgr or taskmgr.exe and hit Enter.

Type Taskmgr on Run command to open Task Manager

That’s it! You will directly land on the Task Manager.

4. Bring Up Task Manager on Windows From File Explorer

Yes, you can access Task Manager from File Explorer with a quick two-step process. Here’s how to do it.

Step 1: Launch File Explorer on your PC or Press ‘Win + E.’

Open Task Manager From File Explorer

Step 2: At the address bar, type taskmgr.exe and press Enter.

Type Taskmgr.exe on the file explorer's address bar

Here you go; you have got into Task Manger from File Explorer; not very conventional, but it works. However, if your file explorer is not working, our guide on how to fix File Explorer search not working on Windows will surely help.

5. Access Task Manager on Windows via Control Panel

The Control Panel hosts many options, and it also has an option to open Windows Task Manager. Follow the below steps to bring it up.

Step 1: Go to the Control Panel pinned on the taskbar.

If you don’t have it pinned, use Windows Search to open Control Panel.

Open Control Panel using Windows Search

Step 2: In the Control Panel’s address bar, type taskmgr.exe and press Enter.

Type taskmgr.exe on the address bar

6. Use the Settings App to Bring up Task Manager

Step 1: Press the ‘Win + I’ hotkey to open Windows Settings.

Open Settings app for opening Windows Task Manager

Step 2: Type Task Manager in the settings bar and click on the ‘View system resource usage in the Task Manager’ option to open the Task Manager.

Type task manager on the settings search

All the steps above were pretty straightforward. Now, let’s move on to complicated-looking but simple-to-execute ways.

7. Open Windows Task Manager Using Command Prompt or PowerShell

Windows is incomplete without the Command Prompt, Terminal, or PowerShell. Here’s how to open Task Manager using it.

Step 1: Open PowerShell or Command Prompt.

If you don’t already know, we have described various methods extensively in our guide on how to open Command Prompt on Windows.

Search Command prompt on Windows Search

Step 2: Now, type taskmgr.exe and press Enter.

Type taskmgr.exe on the command prompt to open Task Manager

There you go. You are in the Windows Task Manager.

8. Open Task Manager on Windows 11 Using Windows Tool

We will use the Windows Tools option to access Task Manager for this method. Windows Tools contains tools for system administrators and advanced users. Follow the below steps.

Step 1: Press the Windows key and go to All apps.

Go to All apps from Windows search

Step 2: Now, scroll down to find Windows Tool and open it.

Open Windows Tools using Windows Search

Step 3: Scroll down and double-click on the Task Manager.

Click on Task Manager to open it

A not-so-conventional way to open Task Manager, but sometimes, this way of opening Task Manager can be easy considering your position on Windows.

9. Bring up Task Manager Using Shortcut Function

If you use Task Manager often, it is better to create a shortcut and place it on the desktop for easy usage. Here’s how to do it.

Step 1: Right-click anywhere on the desktop, go to New, and choose Shortcut.

Right click to open Shortcut menu

Step 2: Now, type taskmgr.exe in the location field and click on Next.

Type taskmgr.exe on the file location of the item

Step 3: Enter Task Manager as the shortcut’s name and press Enter.

Type the file name and press finish

A Task Manager Shortcut will be created on the desktop. So, next time, you don’t have to do the tedious work of following multiple steps or remembering hotkeys. Simply double-click on the Shortcut and open the Task Manager.

Open Task Manager With Ease

There are multiple ways to open Task Manager on Windows, but the above-mentioned steps are a few of the efficient ways to do it. We hope this guide helped you in opening Windows Task Manager effectively and efficiently. Which method do you use to open Task Manager? Share your answer in the comment section below.

Was this helpful?


Thanks for your feedback!

3 Best Ways to Fix iPhone Calls Not Ringing on Mac

Basic Fixes

  • Connect devices with the same Wi-Fi: Such features work only when your Apple devices are connected to the same Wi-Fi network.
  • Update software version: Install the latest software version on your devices to get rid of bugs that might be causing the issue.

Fix 1: Allow Calls On Other Devices on iPhone

Sending and receiving iPhone calls on your Mac requires enabling a feature from the Settings menu of your iPhone. This feature lets you make and receive calls on devices signed in to your iCloud account. Here’s how to enable the same.

Step 1: Open Settings > Phone.

Step 2: Tap on Calls on Other Devices from the list of options and then enable Allow Calls on Other Devices.

Step 3: Once your iMac or MacBook model name appears on the screen, tap the toggle next to its model name to allow calls.

Fix 2: Disable Focus Mode on Mac

Focus Mode on Mac lets you limit app notifications while working or spending time with family after work. If iPhone calls are not ringing on Mac, you should check your Focus Mode settings for calls and then enable them for your currently active Focus Mode. Here’s how to check it.

Step 1: Click the Control Centre icon at the top-right corner of your Mac Home Screen.

Step 2: Click on the name of your active Focus Mode.

Step 3: Click on your active Focus Mode from the list of options to disable it.

Fix 3: Enable FacTime Notifications on Mac

Along with video calls, FaceTime on Mac also helps in receiving iPhone cellular calls. You might have turned off FaceTime notifications on Mac and forgotten to enable it again. Here’s how you can check the same.

Step 1: Open Settings > Notifications.

Step 2: Click on FaceTime from the left menu.

Step 3: Enable FaceTime notifications.

Tip: You can read our posts suggesting solutions for when iMessage not syncing with iPhone and Mac if you have ever faced such issues.

Was this helpful?

Thanks for your feedback!

6 Fixes for “Wi-Fi Doesn’t Have a Valid IP Configuration” Error on Windows 11

Fix 1: Set IP Address Settings to Automatic

Such errors can occur if you have recently modified your PC’s wireless network adapter with a custom IP address. To resolve this issue, configure Windows to acquire an IP address automatically by following the steps below.

Step 1: Press the Windows key + R to open the Run dialog box. Type control in the box and press Enter.

Step 2: Use the drop-down menu at the top right corner to change the view type to large icons and go to Network and Sharing Center.

Network and Sharing Center on Windows

Step 3: Click on Change adapter settings in the left column.

Change Adapter Settings

Step 4: Right-click on your Wi-Fi network adapter > select Properties.

Open Network Adapter Properties

Step 5: Double-click on Internet Protocol Version 4 (TCP/IPv4).

Open IPv4 Properties

Step 6: Select Obtain an IP address automatically and click OK.

Step 7: Similarly, select Obtain an IPv6 address automatically for Internet Protocol Version 6 (TCP/IPv6).

IPv6 Properties

Fix 2: Restart WLAN AutoConfig Service

Windows uses the WLAN AutoConfig service to facilitate the connection with your Wi-Fi network. If this service encounters a problem, Windows may display the “Wi-Fi doesn’t have a valid IP configuration” error. Here’s how to fix it.

Step 1: Click the search icon on the taskbar, type services, and select the first result.

Open Services

Step 2: Scroll down to locate the WLAN AutoConfig service. Right-click on it and select Restart.

Restart WLAN AutoConfig Service

Fix 3: Renew Your IP Address and Flush DNS Cache

Another way to fix the invalid IP configuration error is to assign a new IP to your computer. You can force Windows to acquire a new IP address from the router and flush the DNS cache with a few commands in Windows PowerShell.

Step 1: Click the search icon on the taskbar > type Windows PowerShell > select Run as administrator.

Open Windows PowerShell

Step 2: Run the following commands one by one.

ipconfig /release
ipconfig /flushdns
ipconfig /renew
Renew IP Address

Fix 4: Reset TCP/IP

Windows uses the Transmission Control Protocol and Internet Protocol (TCP/IP) to communicate with other machines on the network and the Internet to transmit and receive digital data. Resetting the TCP/IP stack can resolve any glitches that cause invalid IP configuration issues on Windows.

Step 1: Right-click on the Start icon and select Terminal (Admin) from the list.

Open Terminal (Admin) on Windows

Step 2: Run the following commands in the console and press Enter after each one:

netsh winsock reset
netsh int ip reset
Reset TCP & IP

Restart your PC and check if the “Wi-Fi doesn’t have a valid IP configuration” error occurs again.

Fix 5: Update Network Drivers

Drivers typically don’t cause many issues after installation. However, if they become outdated or are affected by other software, errors can occur. To address this, update the network drivers on your Windows 11 PC.

Step 1: Right-click on the Start icon > select Device Manager from the list.

Open Device Manager on Windows

Step 2: Double-click on Network adapters to expand it. Right-click your network adapter > select Update driver.

Update Network Adapter Driver

From there, follow the on-screen instructions to finish updating the network driver.

Fix 6: Reset Network Settings

If all else fails, reset your PC’s network settings as a last resort. Here’s how to do it.

Step 1: Press the Windows key + I to launch the Settings app > navigate to Network & internet > Advanced network settings.

Advanced Network Settings in Windows

Step 2: Under More settings, click on Network reset.

Network Reset on Windows 11

Step 3: Click the Reset now button next to Network reset.

Network Reset on Windows 11

Your PC will restart and revert to the default network settings. After that, you must manually enter the IP address details or let it capture the IP address details from your network automatically.

Was this helpful?

Thanks for your feedback!

5 Best Ways to Transfer Files Between iPhone and Windows PC

We always speak about how convenient the Apple ecosystem is. But, it’s also important to realize that most people use a wide range of devices. Someone using an iPhone doesn’t necessarily mean that they also use a Mac. You may be using an iPhone with a Windows PC. While that’s totally fine, you lose out on features like AirDrop for file transfer. It’s no surprise that transferring files between iPhone and Windows is a hassle.

transfer files between iPhone and Windows

Sometimes, the iPhone’s files don’t show up on the PC, or worse, the computer doesn’t recognize your iPhone. If you’re tired of trying multiple different methods to connect your iPhone to a PC, don’t give up just yet. Here are the tried and tested ways to transfer files from iPhone to Windows PC and vice-versa. They will not fail you.

Note: We are including a mix of both wired and wireless methods, so pick the one that’s most convenient for you.

1. Use a USB Cable to Transfer Files From iPhone to PC

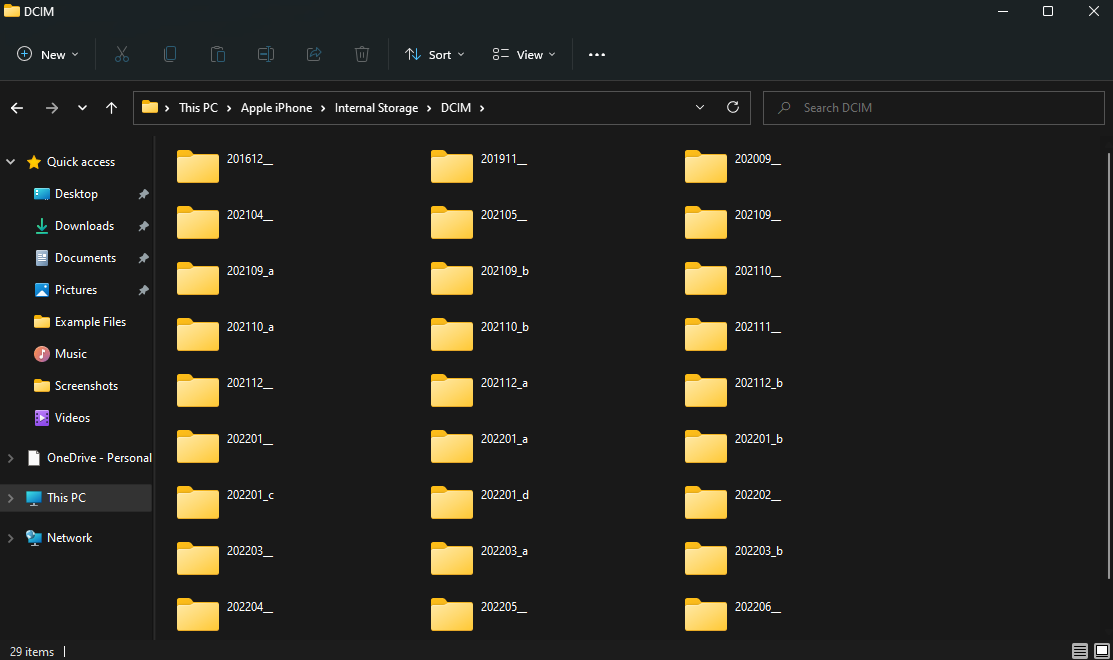
This is the most basic way to transfer files between your iPhone and a Windows PC. Just use a good lightning cable that supports data transfer to connect your iPhone to the PC. Then, open File Explorer on Windows to navigate to the iPhone’s directory.

iPhone connected to Windows

You can then transfer the files you want from your iPhone’s storage onto your Windows PC. Just copy whatever file you want and paste it onto your PC’s local storage. If you’re facing connectivity issues, look at our guide on how to connect an iPhone to a Windows PC for detailed instructions.

Trasnfer iPhone files to Windows

Use this method mainly if you want to transfer photos or small videos.

2. Transfer Files From PC to iPhone With iTunes

iTunes is a piece of software developed by Apple that helps your iPhone communicate with your PC. You can use iTunes to sync your iPhone’s data like photos, videos, music, etc., to your PC. Here’s how to use iTunes to transfer files between iPhone and Windows PC.

Step 1: Install iTunes on your Windows PC using the link below.

Step 2: Open iTunes and connect your iPhone to your computer using a USB cable.

Open iTunes

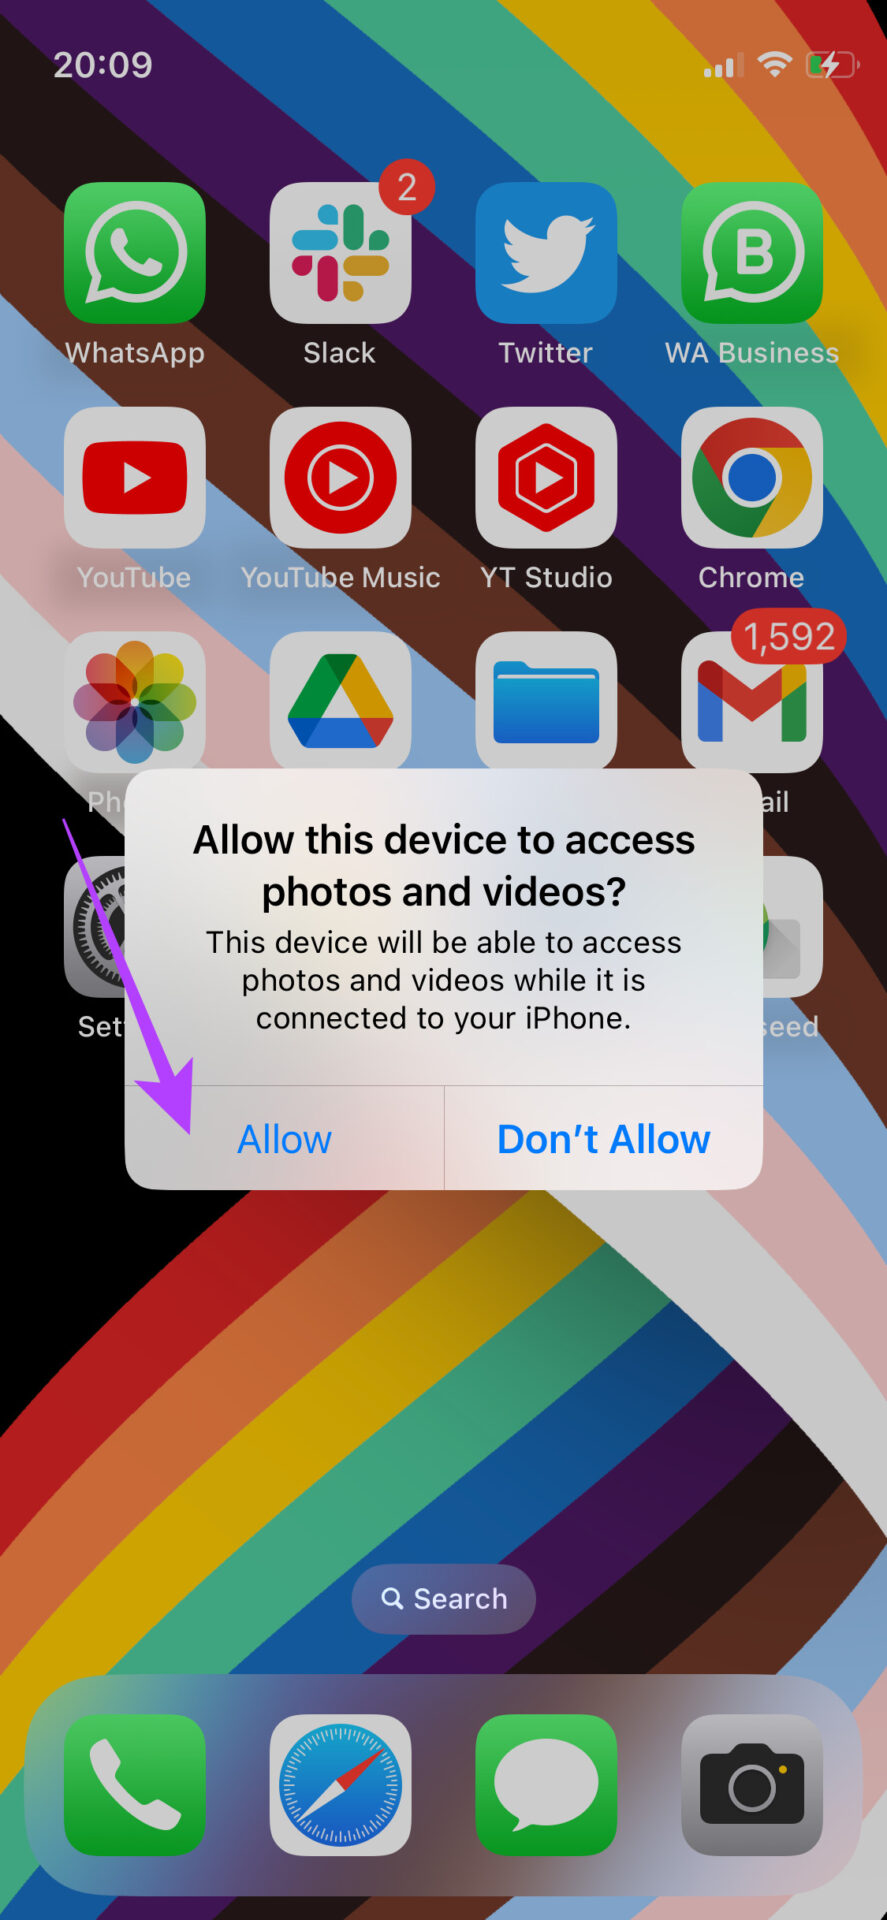
Step 3: Select Allow in the prompt on your iPhone to allow the device to access your data.

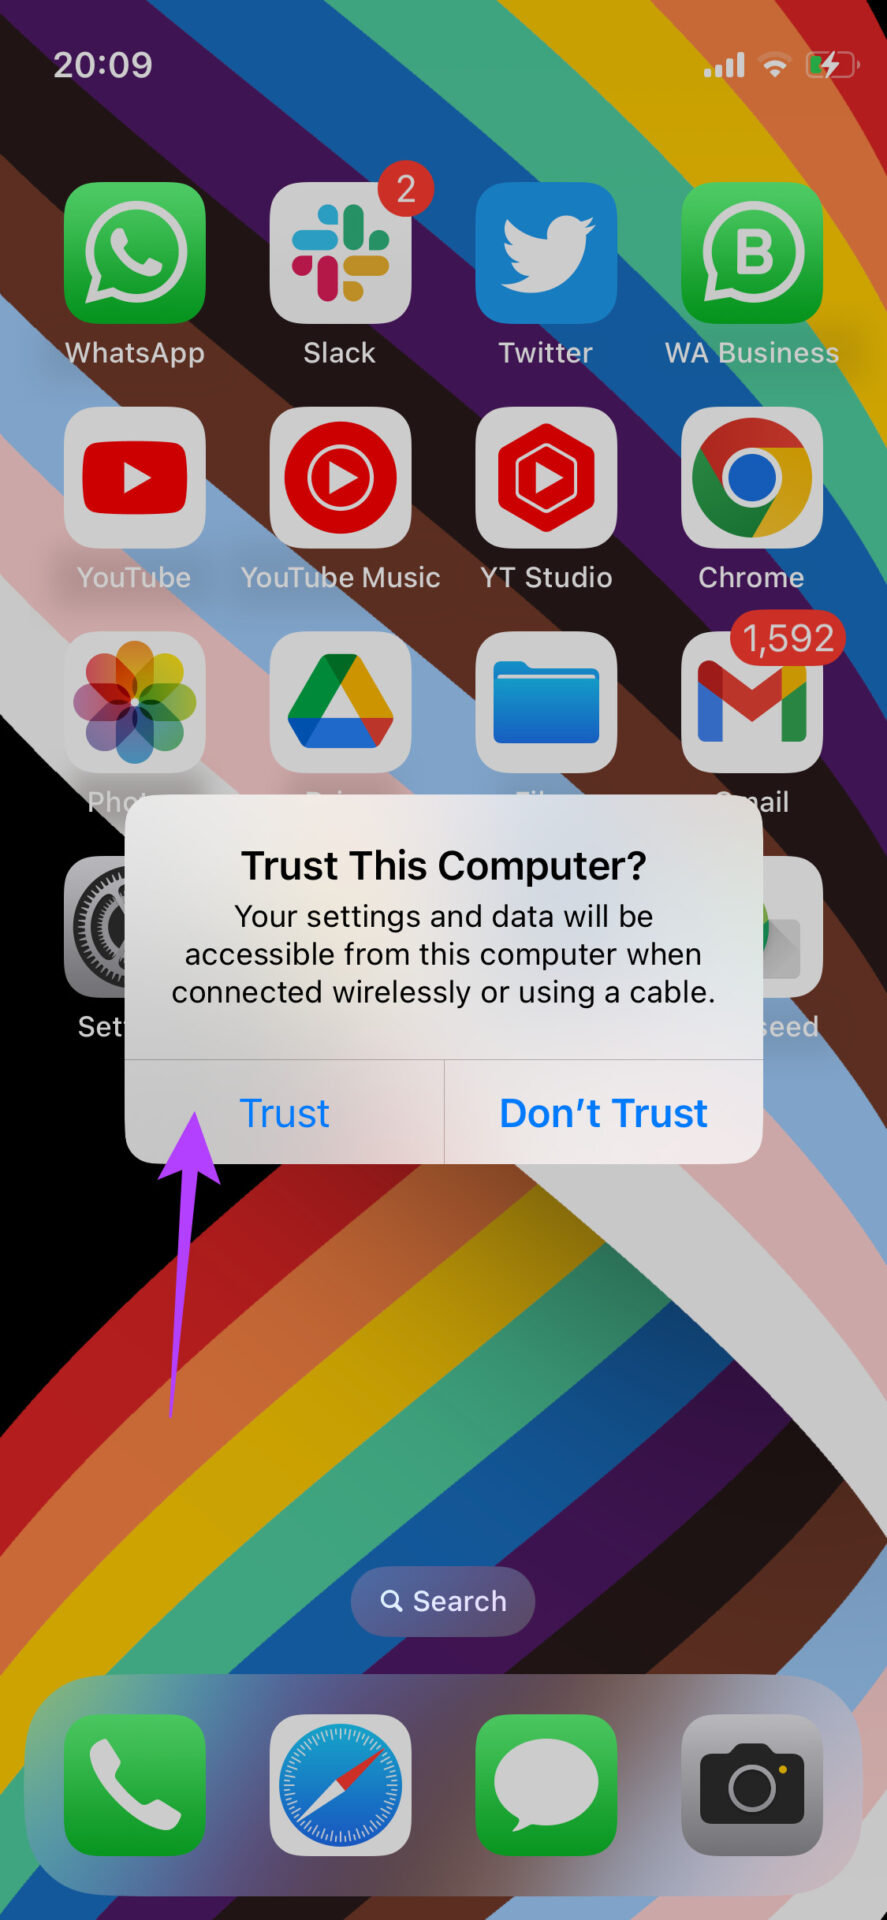
Step 4: Tap on Trust to trust the computer. Then, enter your passcode.

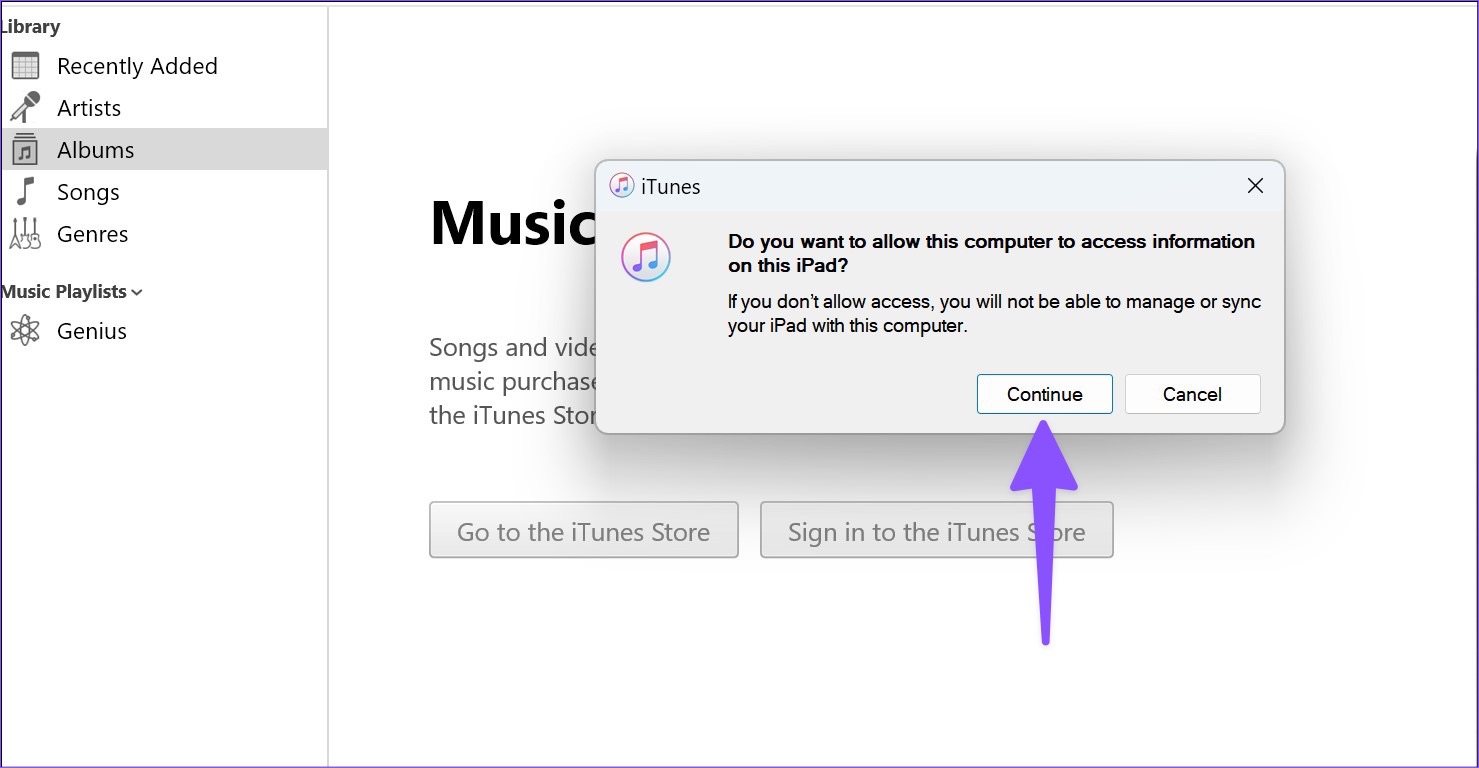
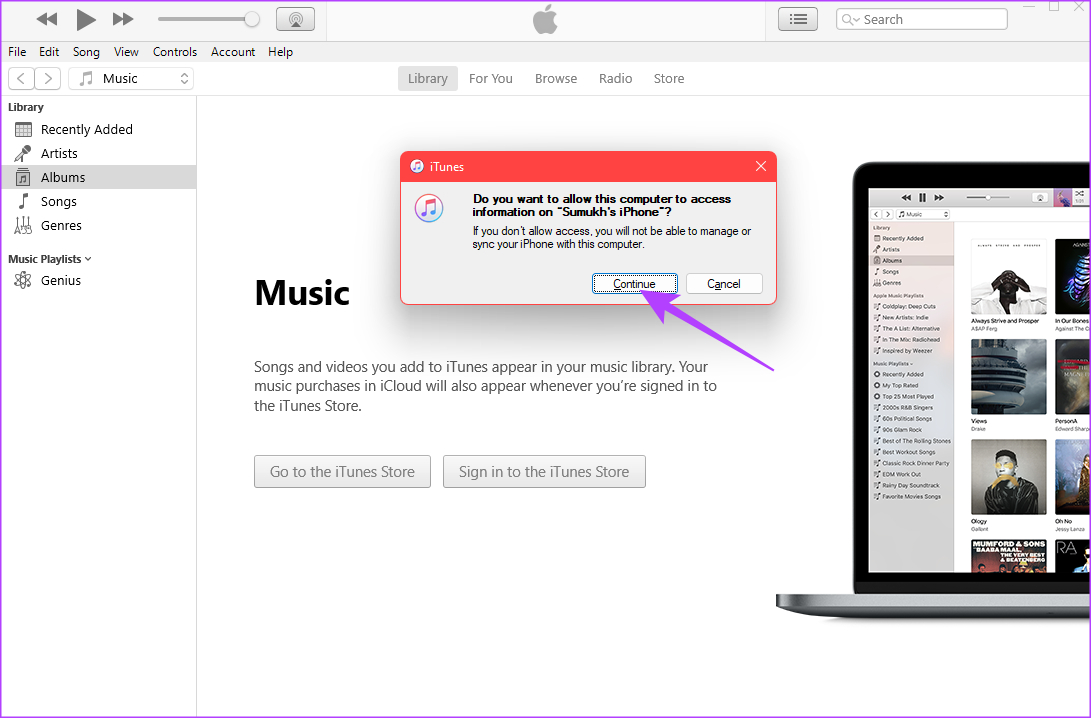
Step 5: Now, click on Continue to allow your computer to access information on your iPhone.

Continue button

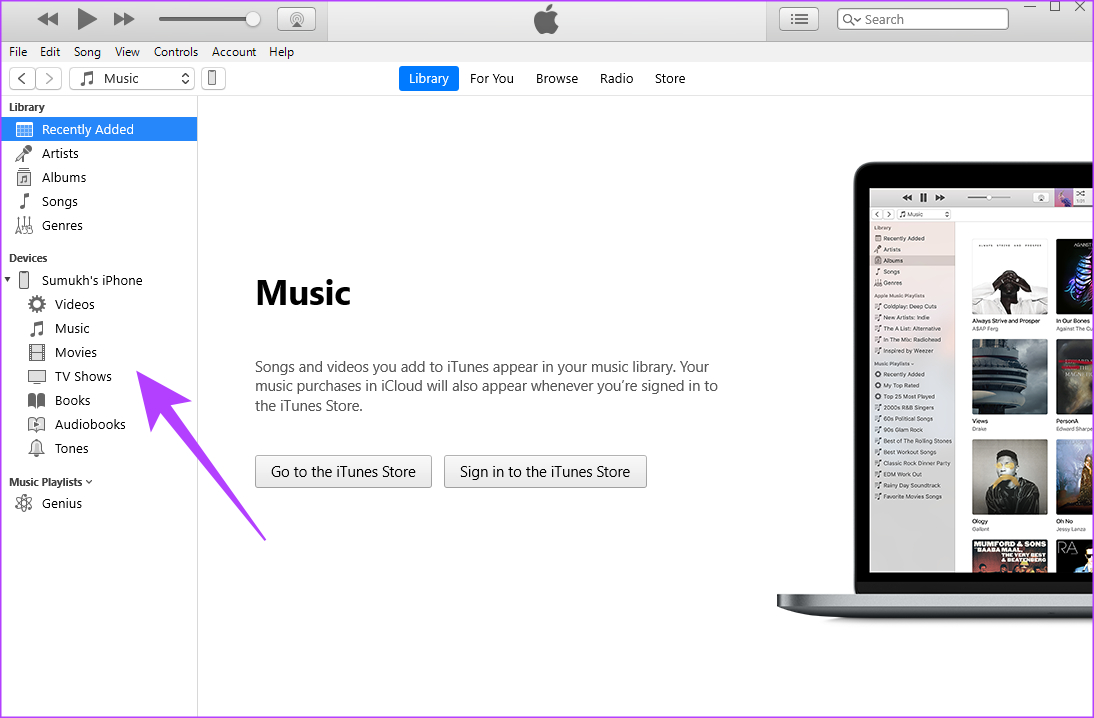
Step 6: Your iPhone’s contents will now show up in iTunes. Use the pane on the left to navigate to the category you want and access your files.

Access files

These are the two recommended methods for wired transfer of files. Let’s cut the cord now and move to wireless methods!

3. Add a Server in the Files App to Transfer Files Between iPhone and PC Wirelessly

A lot of iPhone users may not be aware that the Files app on the iPhone lets you connect to a server. Using this trick, you can create a local server on your Windows PC to transfer files to and from your iPhone. It might sound complex but is rather simple. Here’s how to do it.

Setting up Folder Sharing on Windows

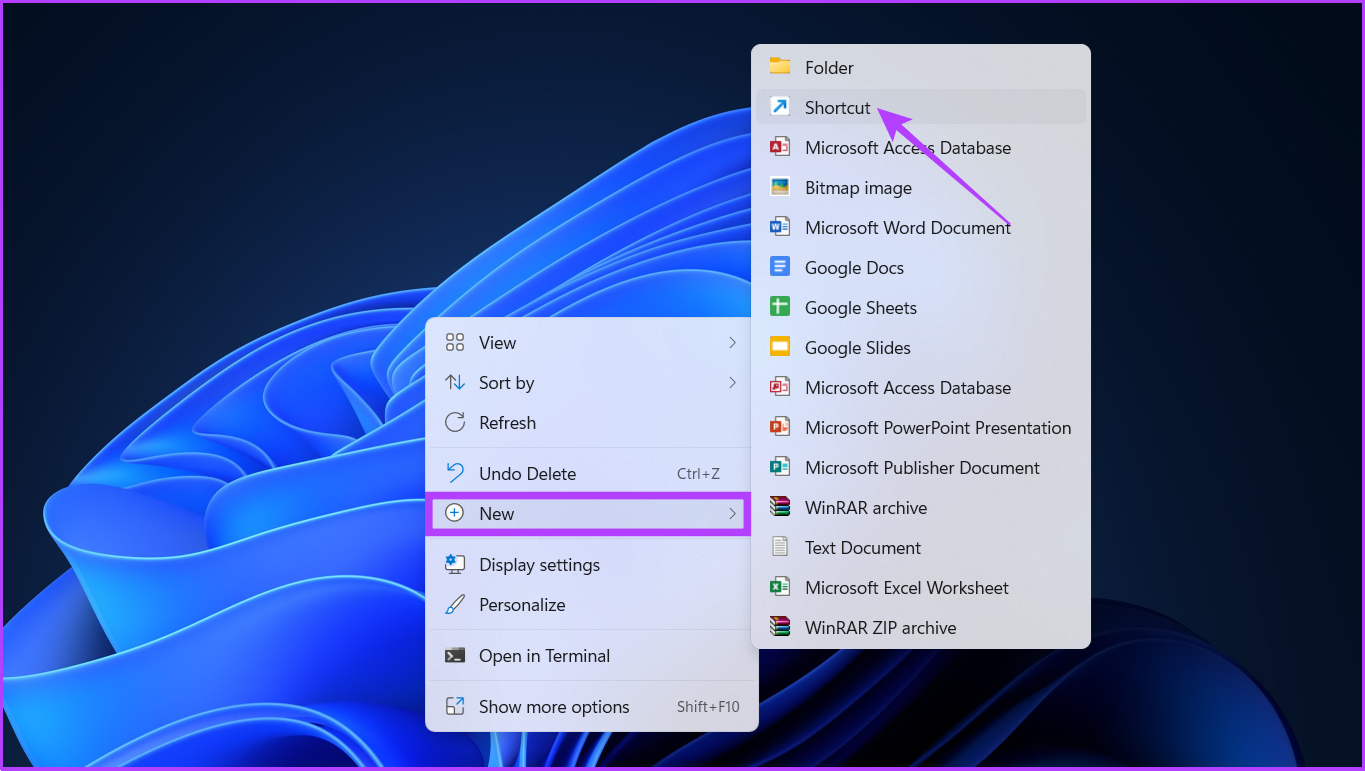
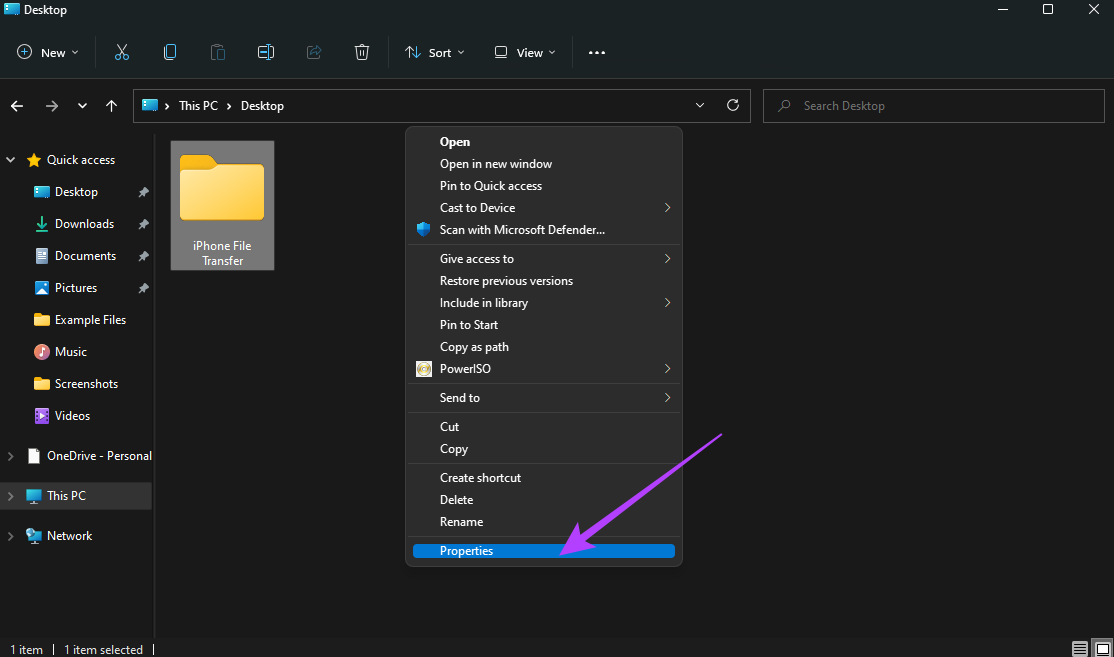
Step 1: Open File Explorer on your Windows PC and create a folder to which you want to transfer your iPhones files.

file transfer folder

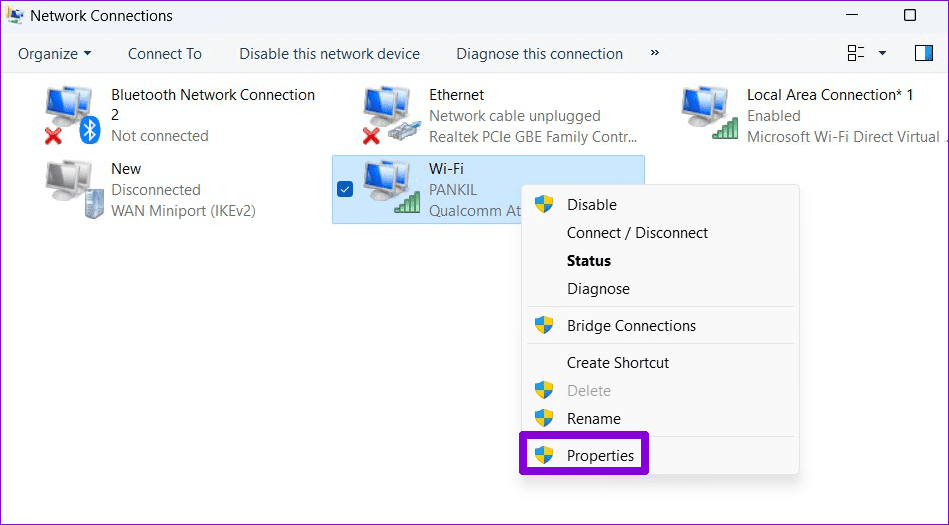
Step 2: Now, right-click on that folder and select ‘Show more options.

show more options

Step 3: Click on Properties.

properties

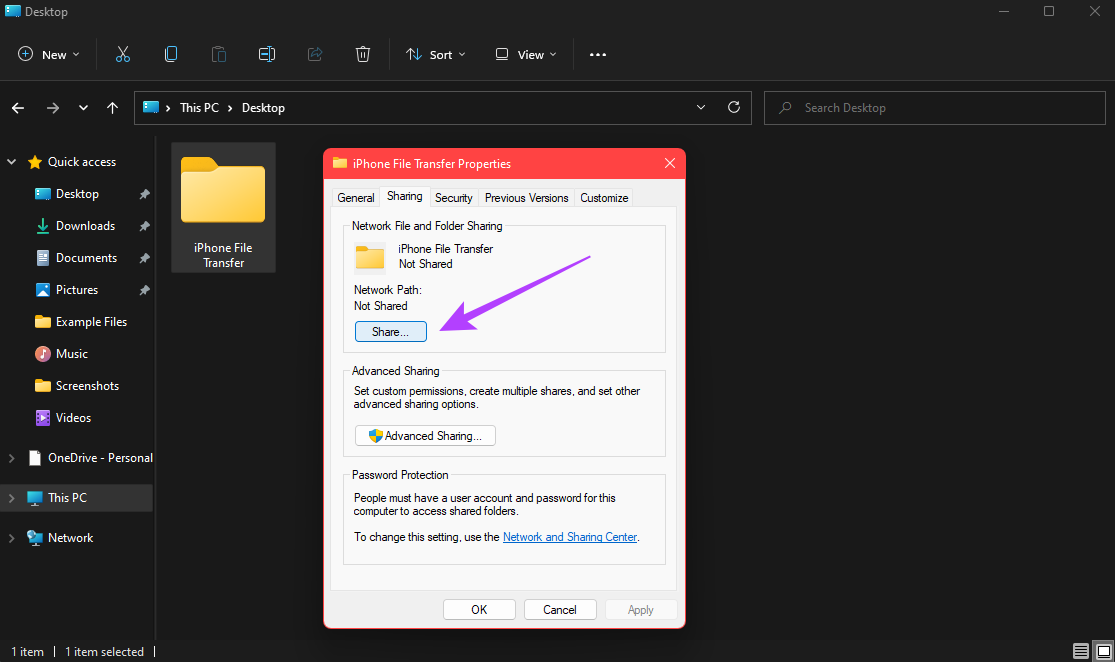
Step 4: Navigate to the Sharing tab.

sharing tab

Step 5: Select the Share option under ‘Network File and Folder Sharing.’

select share files option

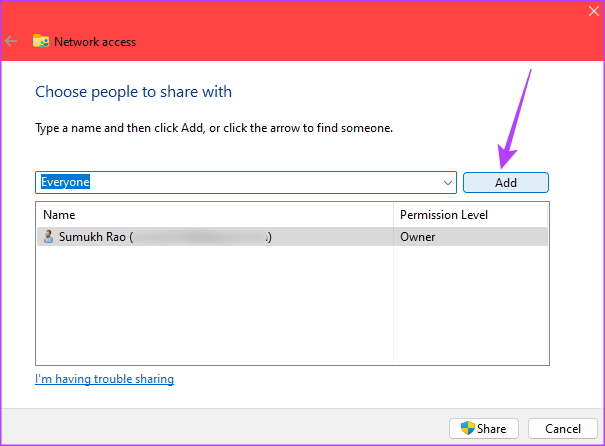
Step 6: Click on the drop-down menu and choose Everyone.

select everyone

Step 7: Select Add to enable folder sharing with everyone on the network.

Add button

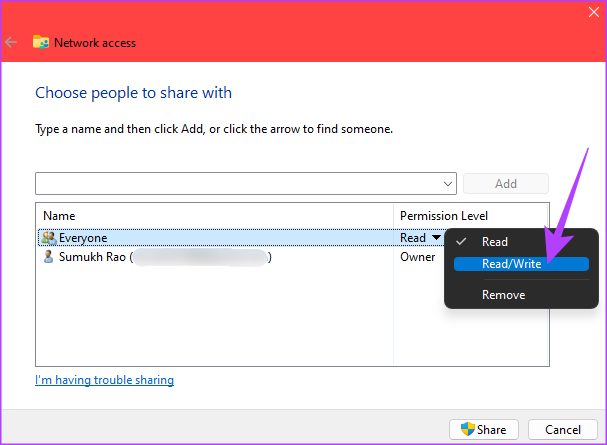
Step 8: Once added, click on the drop-down arrow next to Read under Permission Level and select Read/Write.

permission

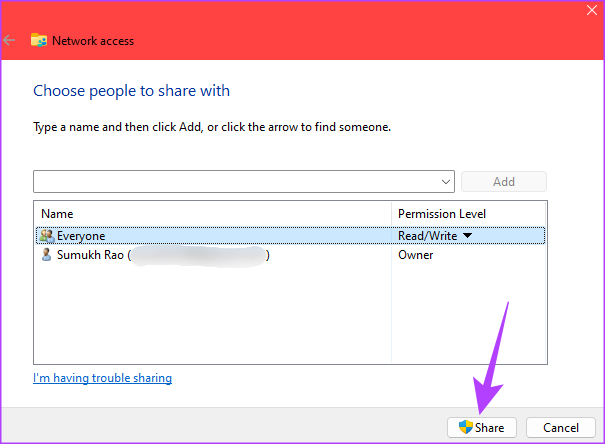
Step 9: Finally, click on the Share button.

Share files from iPhone to windows

Step 10: Select the first option when prompted.

select first option

Step 12: Once the folder is shared, click on Done to close the window.

Done button

Turning Off Password-Protected Sharing

Once you’ve enabled folder sharing, it’s time to disable the password to access the shared folders. Here’s how to do it.

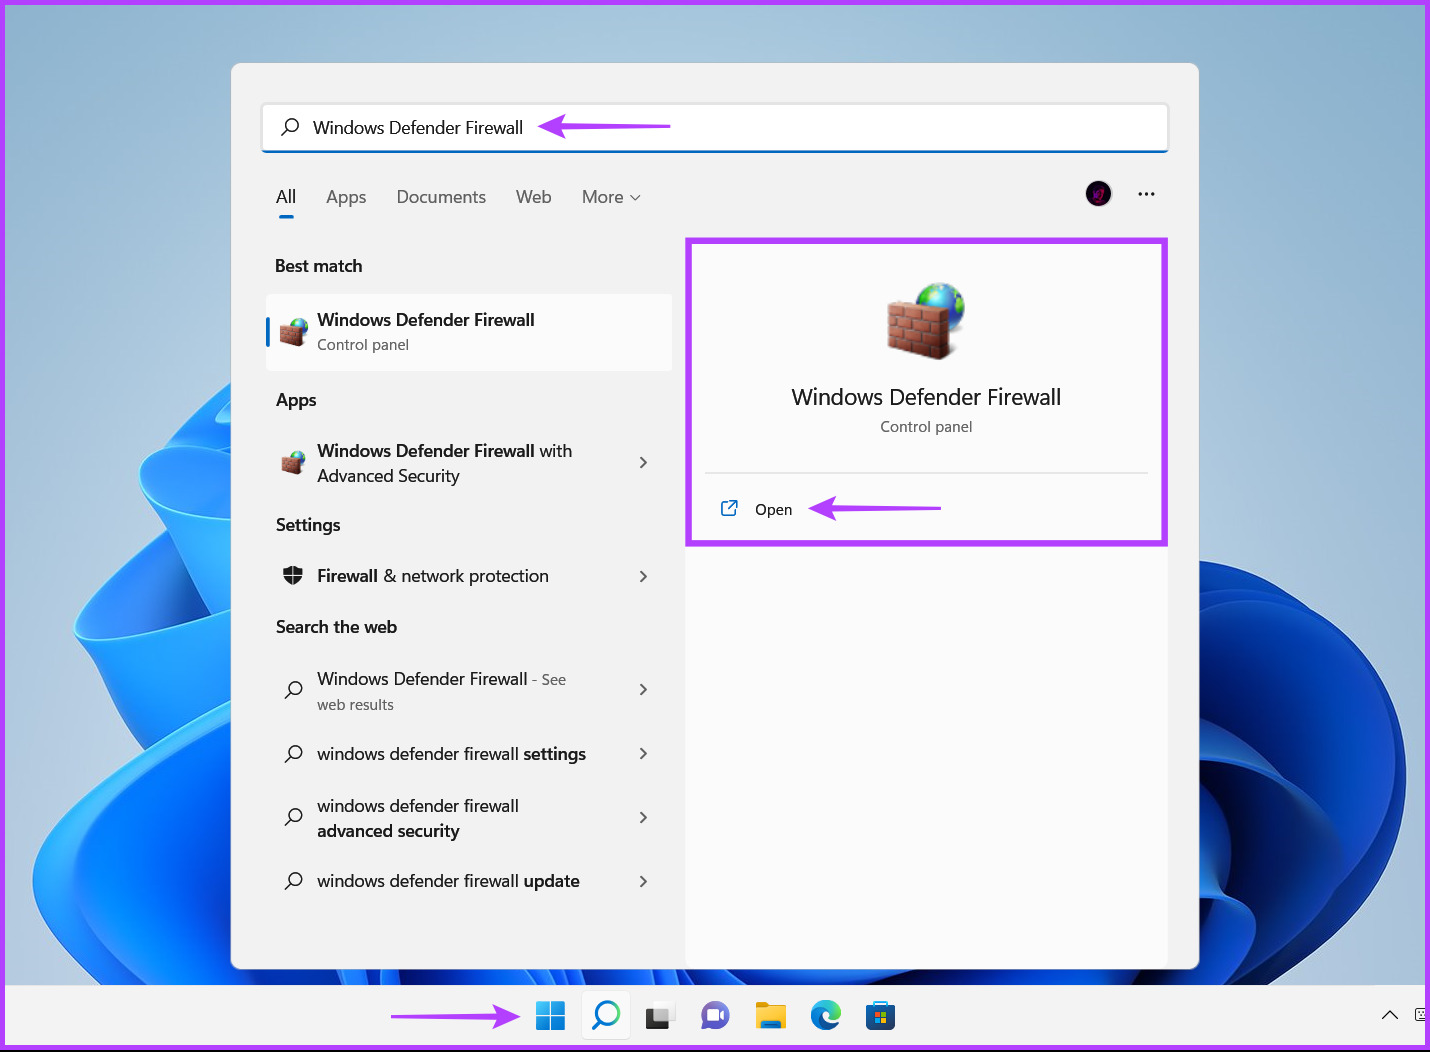
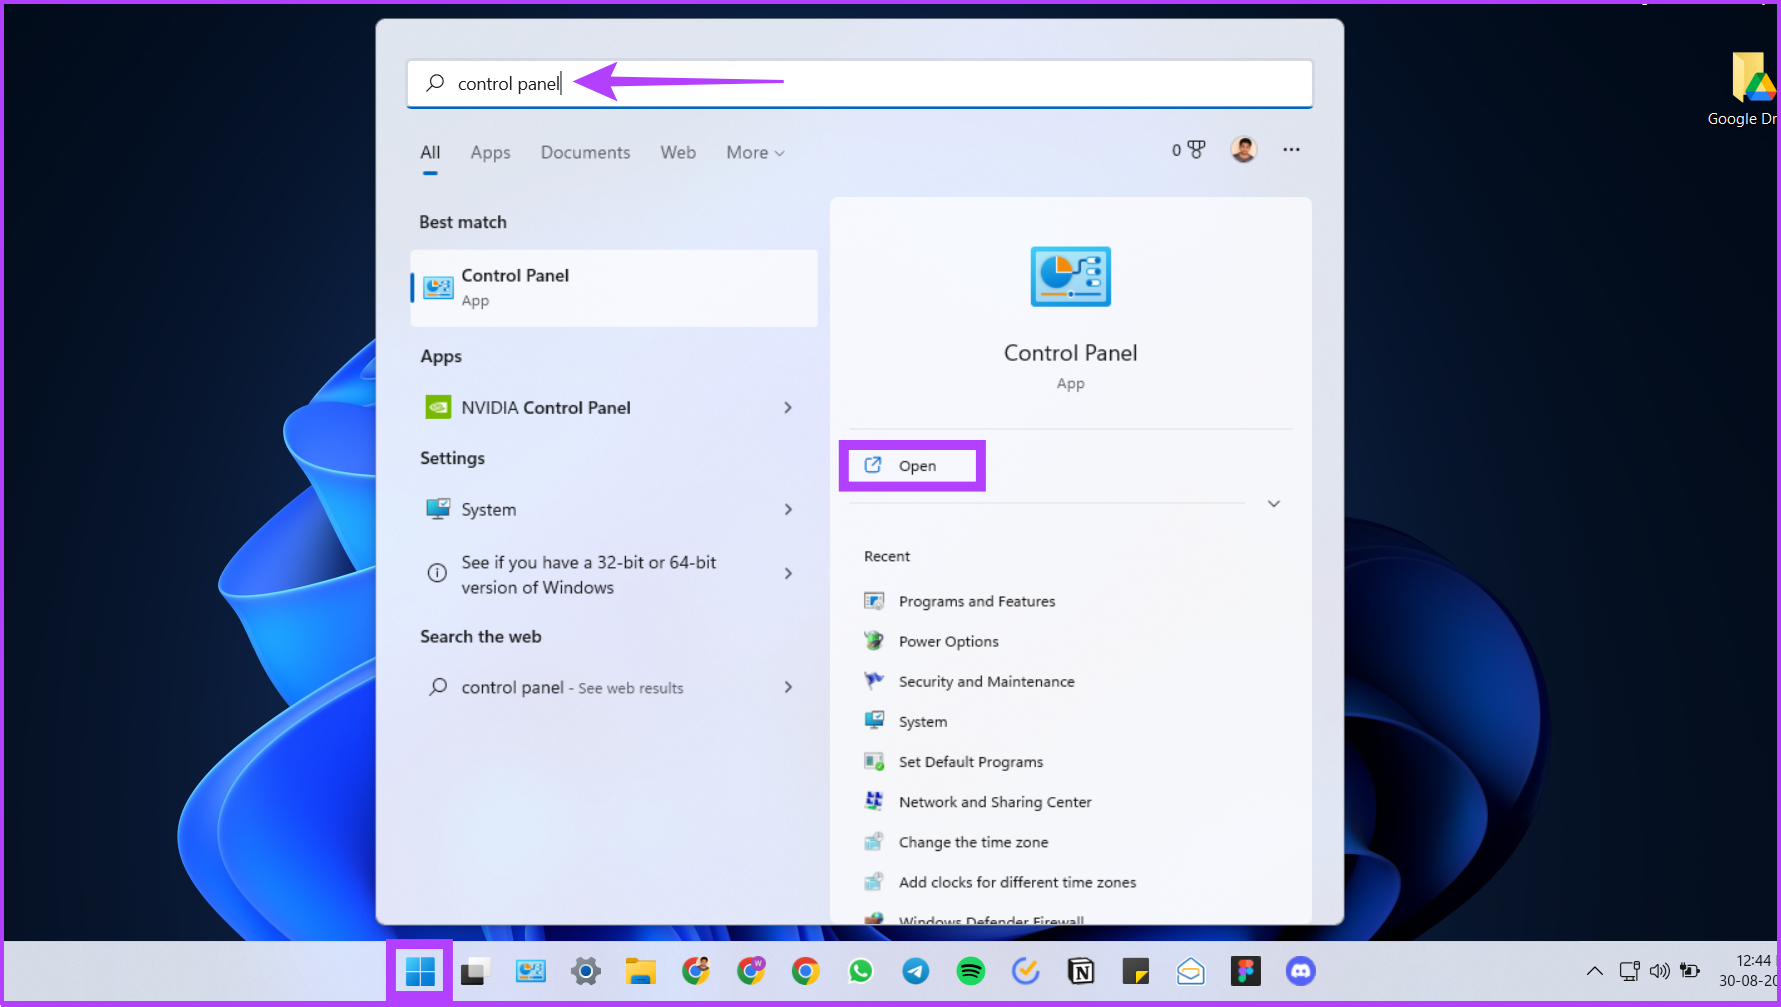
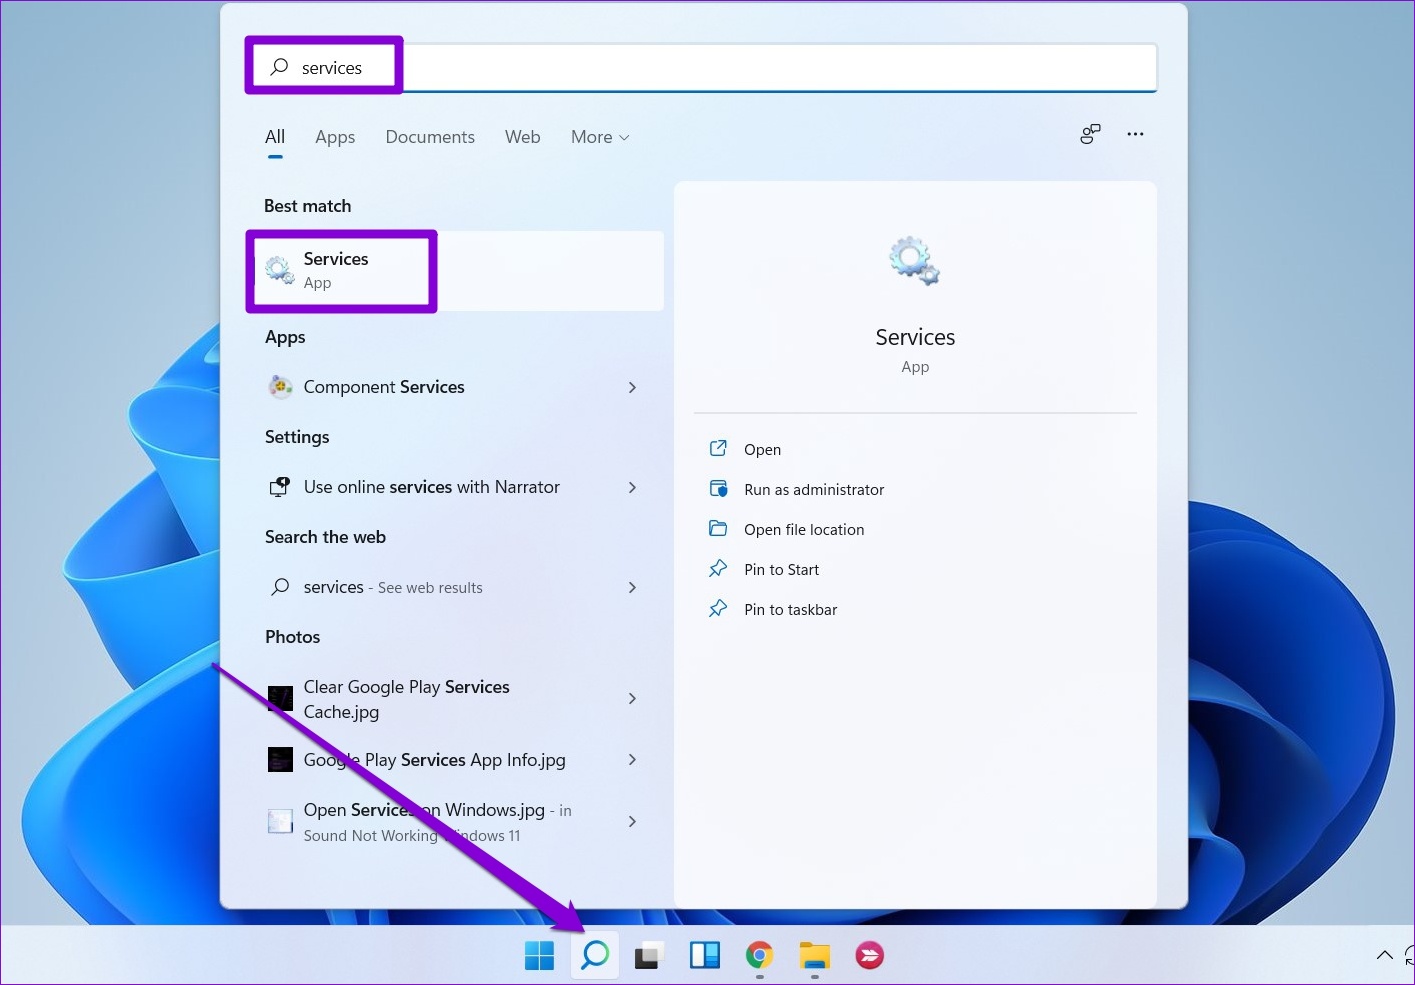
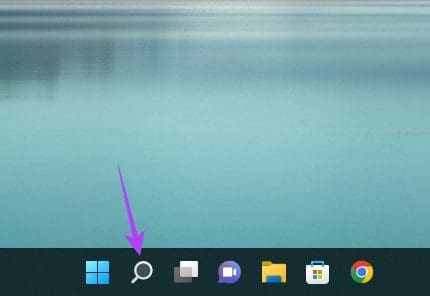
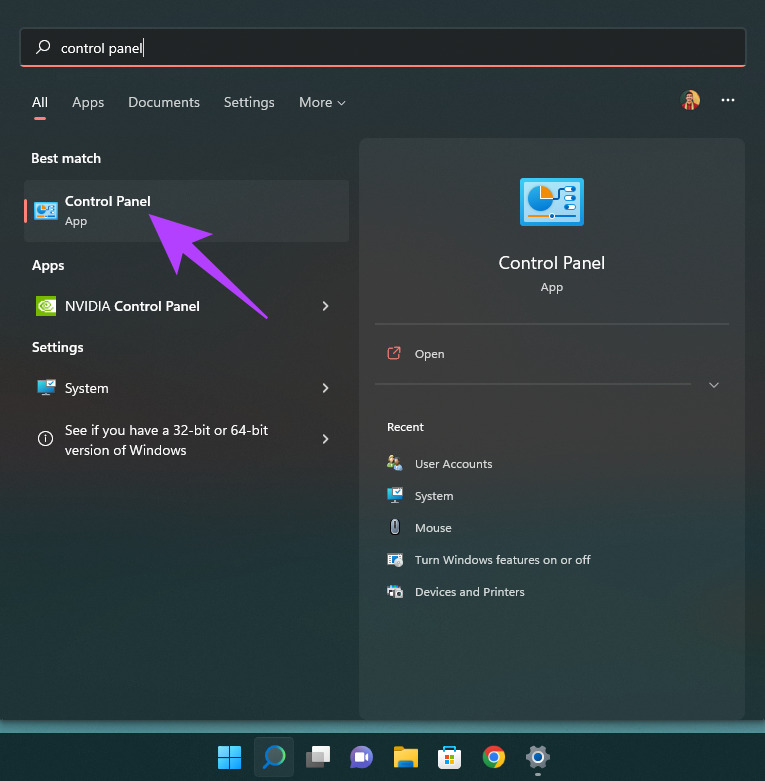
Step 1: Click on the Search icon in the taskbar.

search button

Step 2: Search for Control Panel and click on the first result that shows up.

control panel

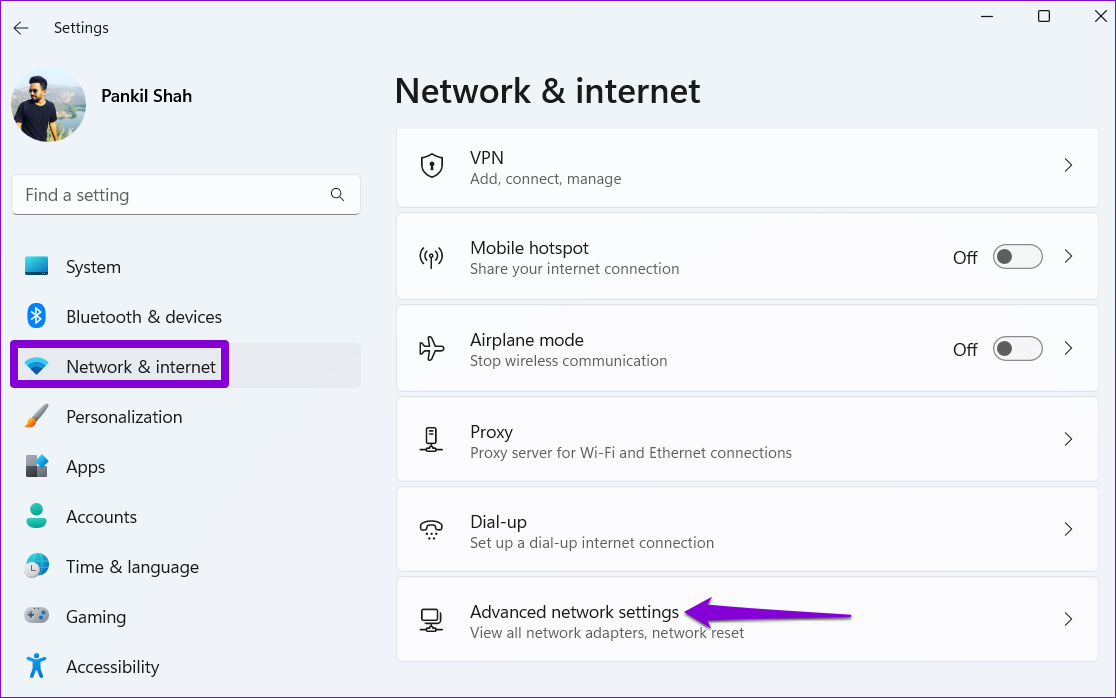
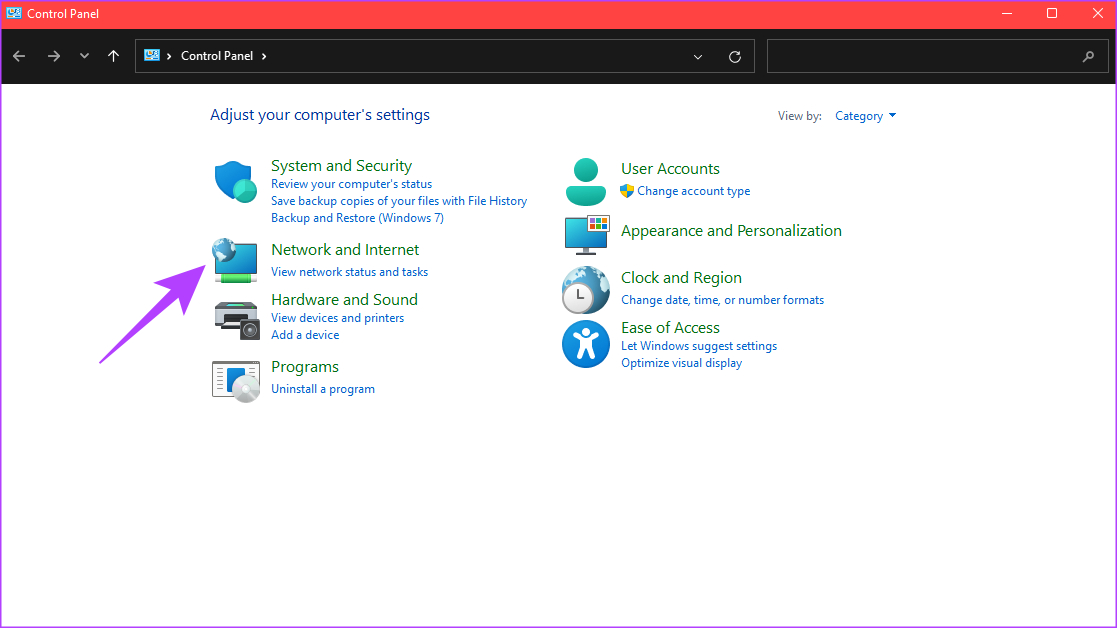
Step 3: Select ‘Network and Internet.’

network and internet

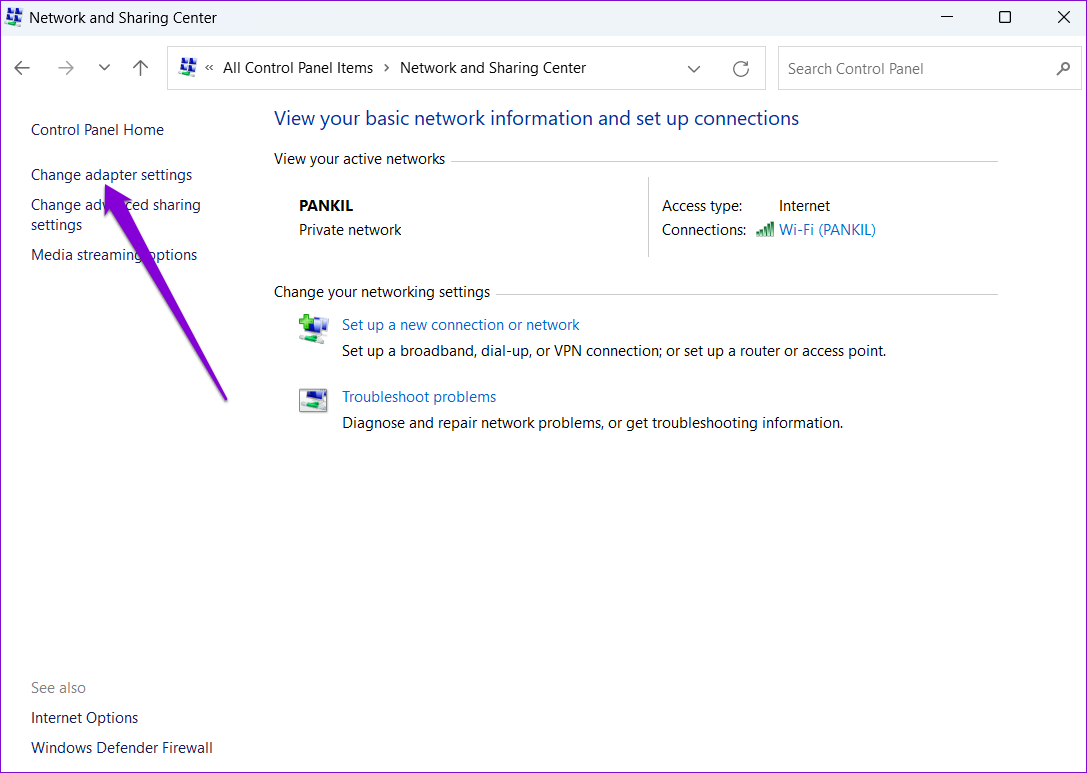
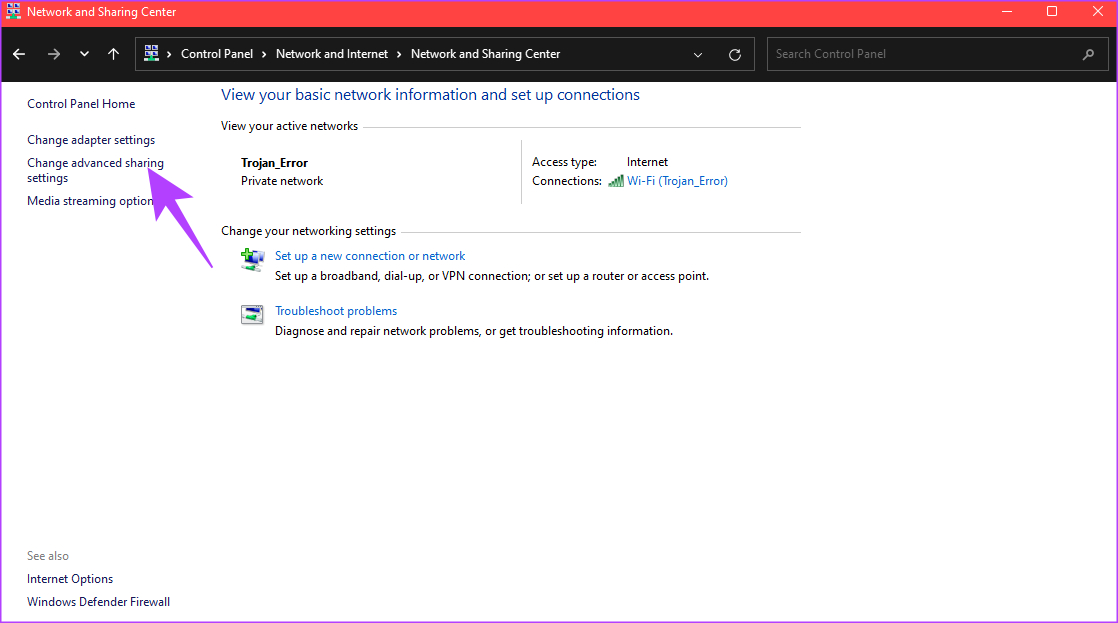
Step 4: Next, choose the ‘Network and Sharing Center’ option at the top.

network sharing

Step 5: In the left pane, click on ‘Change advanced sharing settings.’

advanced sharing settings

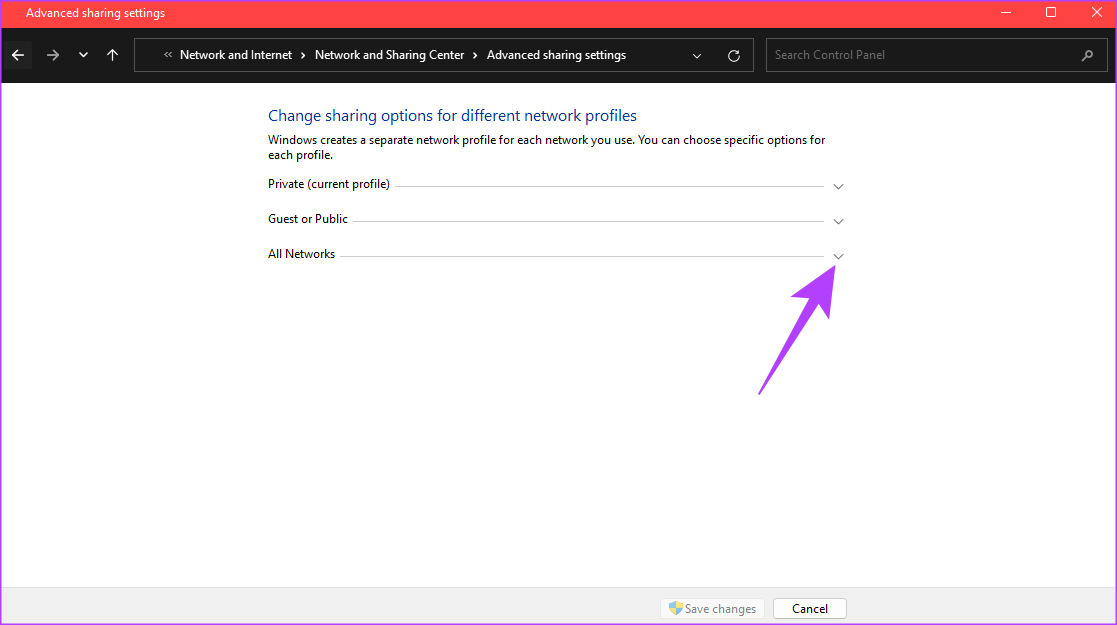
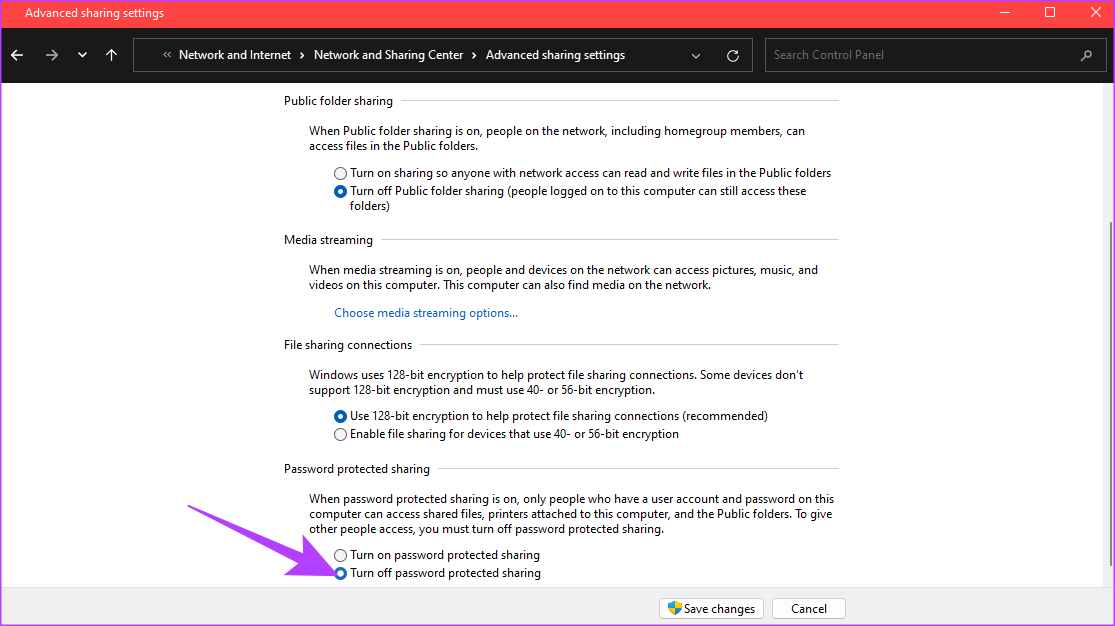
Step 6: Click on the arrow next to All Networks to expand it.

all network settings

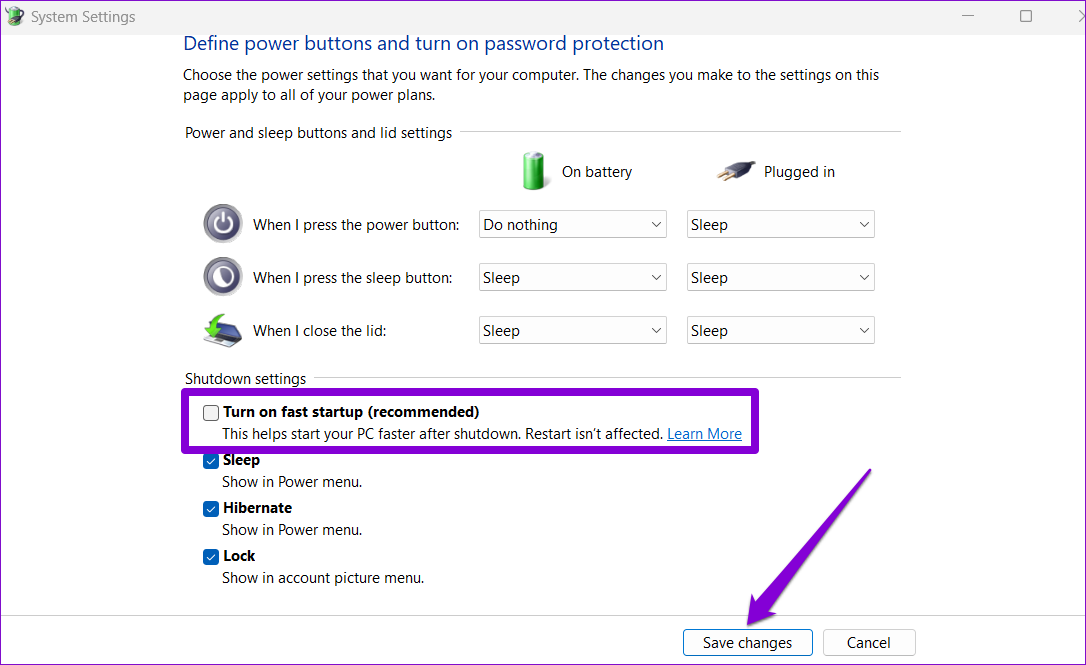
Step 7: Under ‘Password protected sharing’, select ‘Turn off password protected sharing’.

turn off password

Step 8: Finally, click on Save changes.

save changes

Finding Your Local IP Address

Now, it’s time to find your PC’s local IP address to enter it in the Files app on the iPhone.

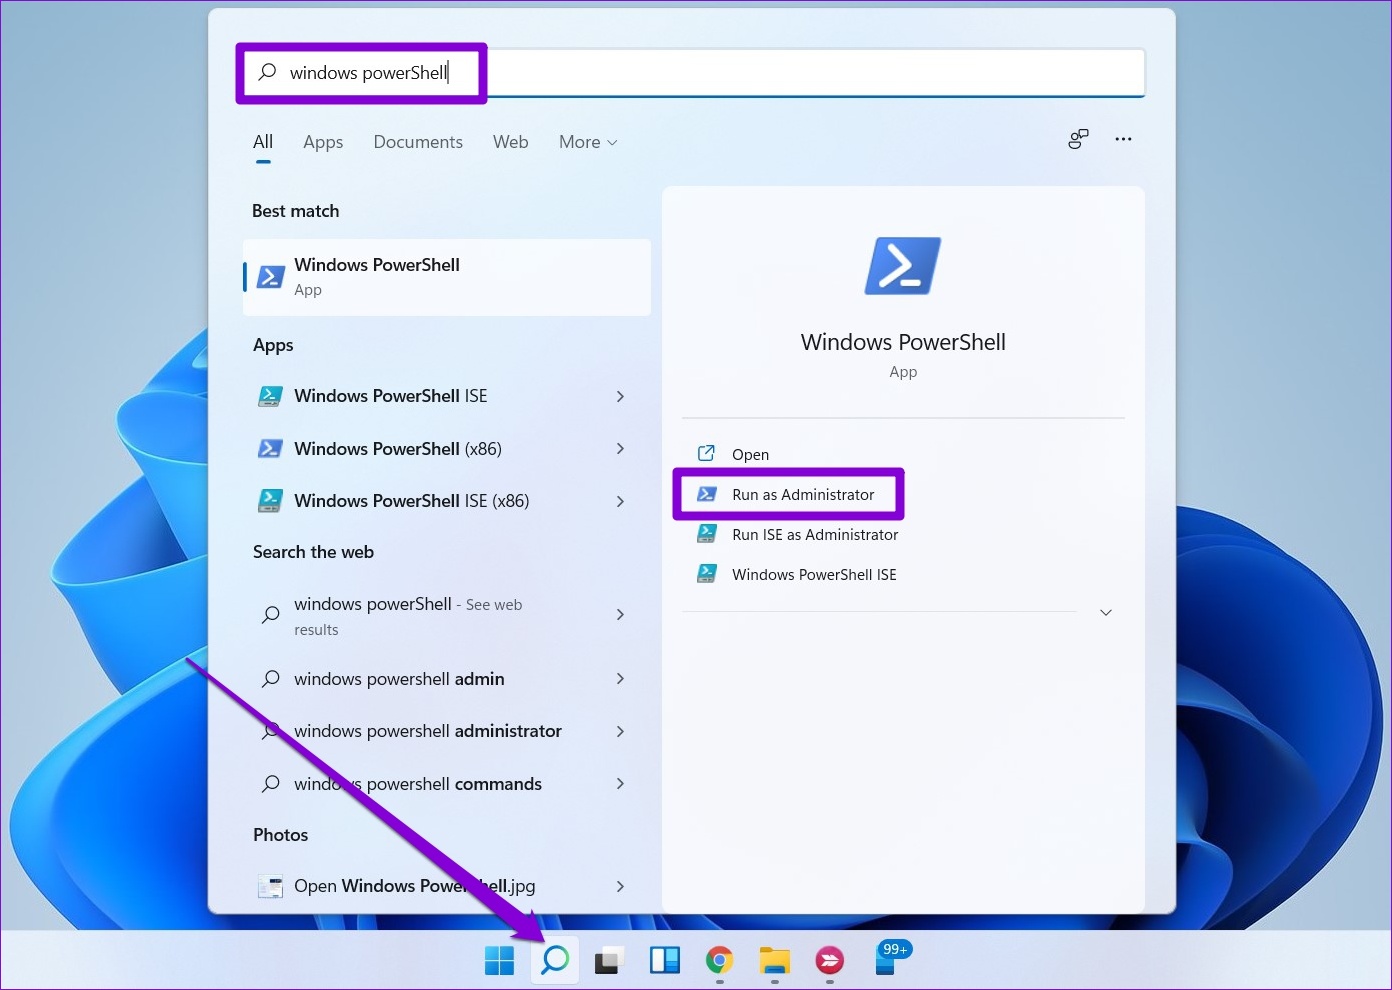
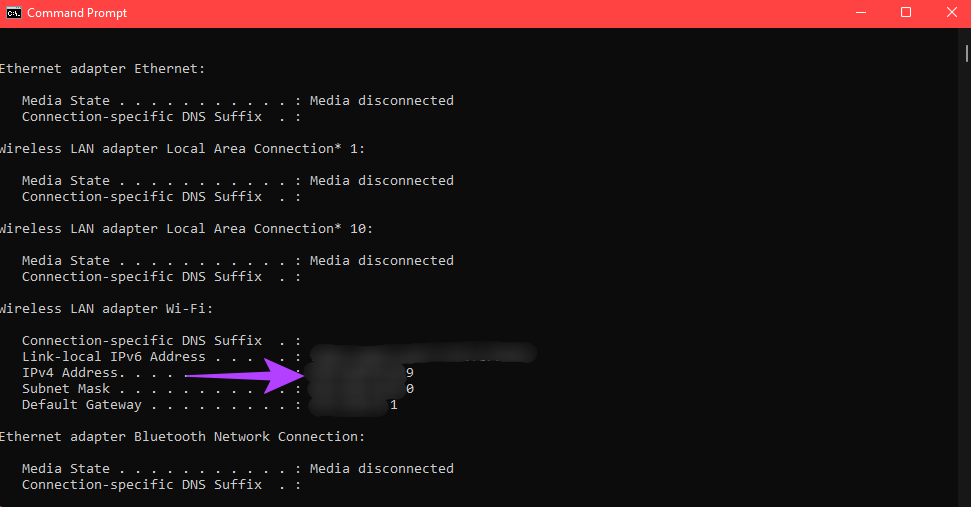
Step 1: Click on the Search icon in the taskbar and search for CMD. Click on Command Prompt to open it.

cmd in search bar

Step 2: Type in ipconfig and hit Enter.

ipconfig

Step 3: Scroll down and you will see your PC’s local IP address listed as the IPv4 Address. Make a note of this.

IP address

Accessing the Shared Folder via the Files App on the iPhone

Before starting this process, ensure your iPhone is connected to the same network as your PC. This is a basic requirement to access the shared folder.

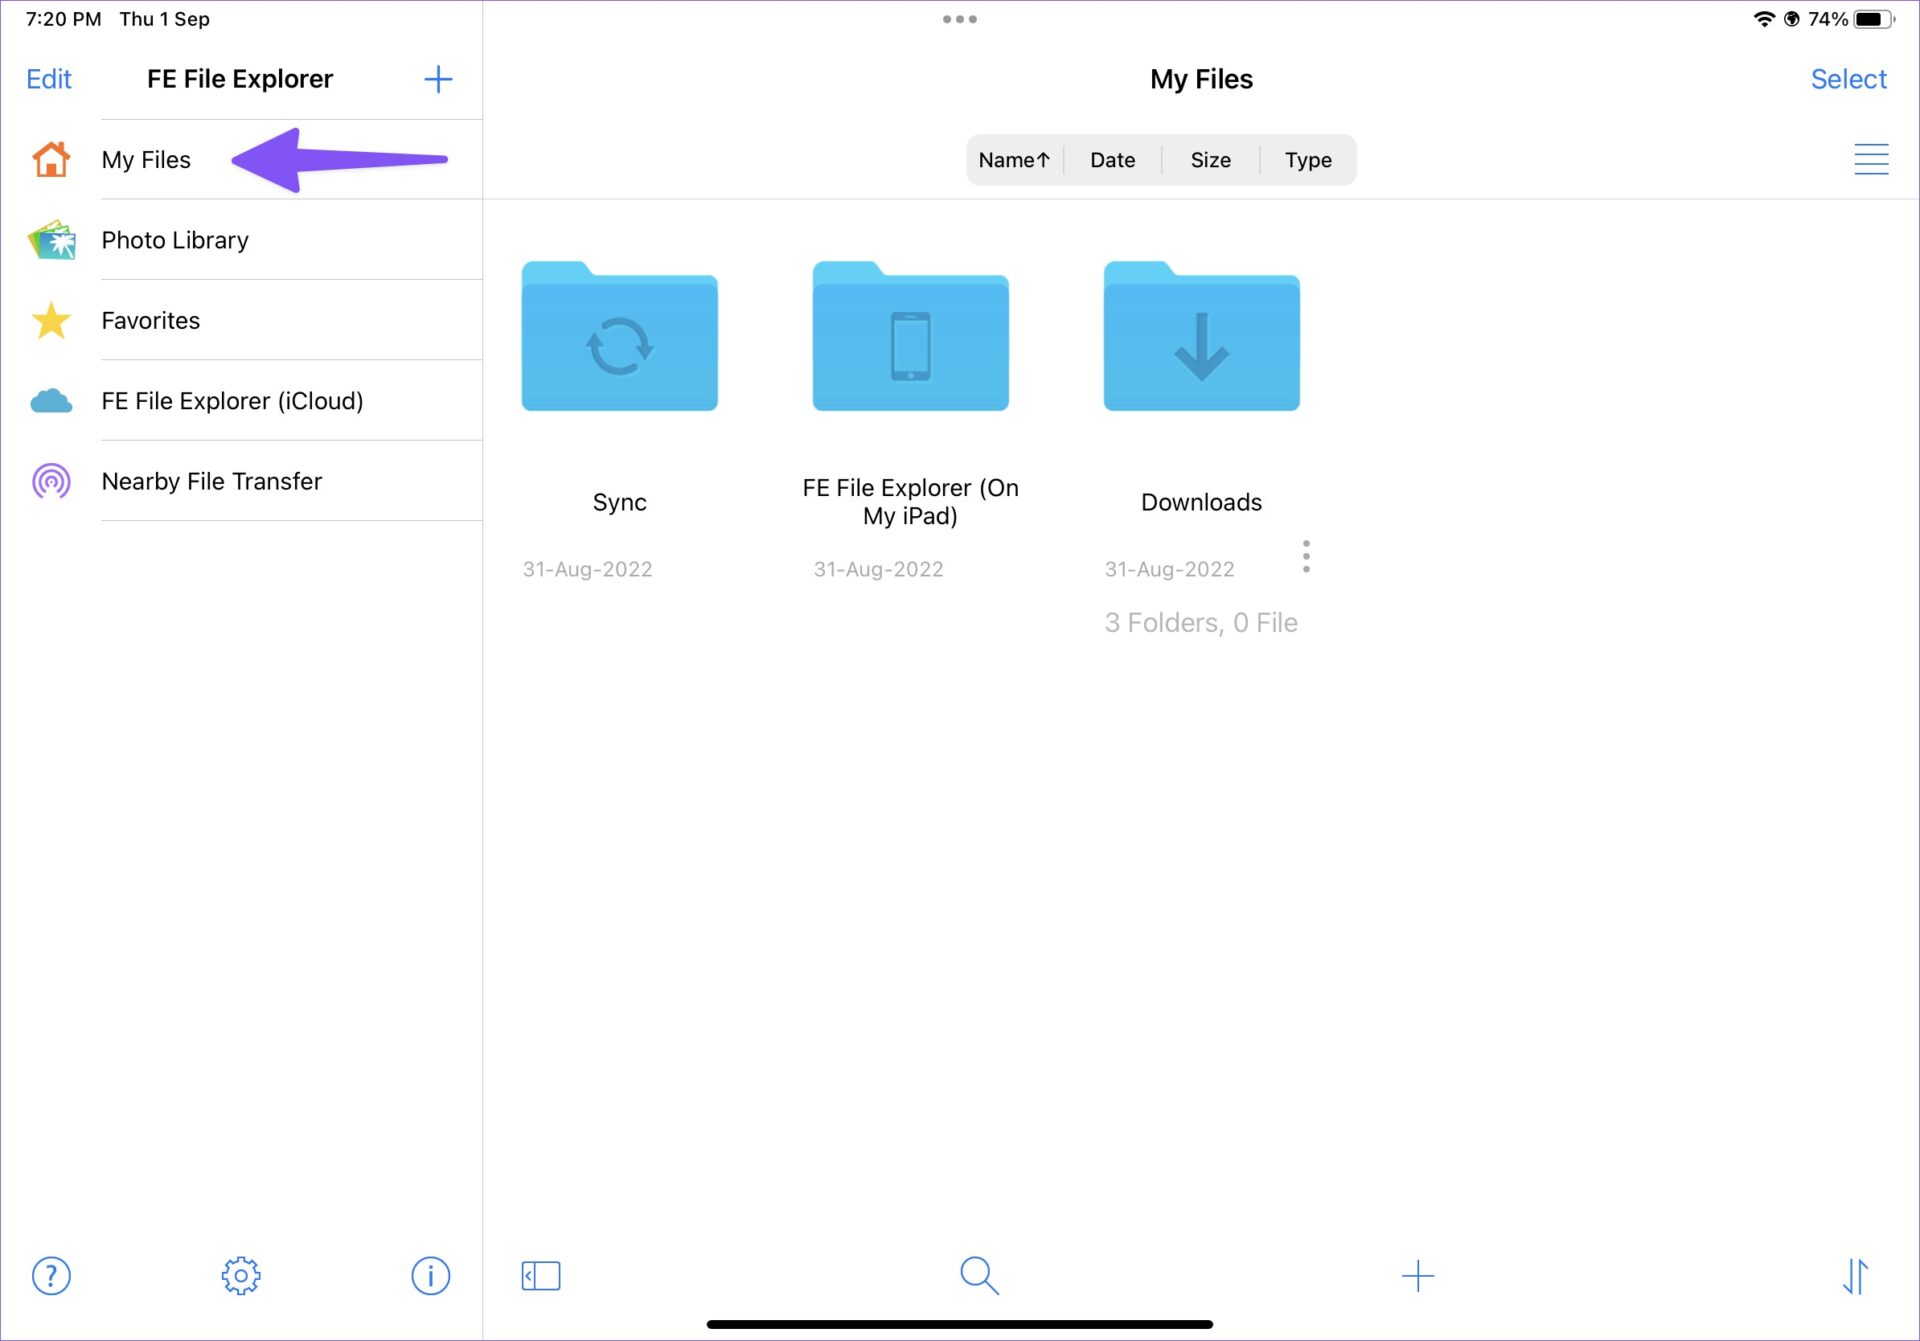
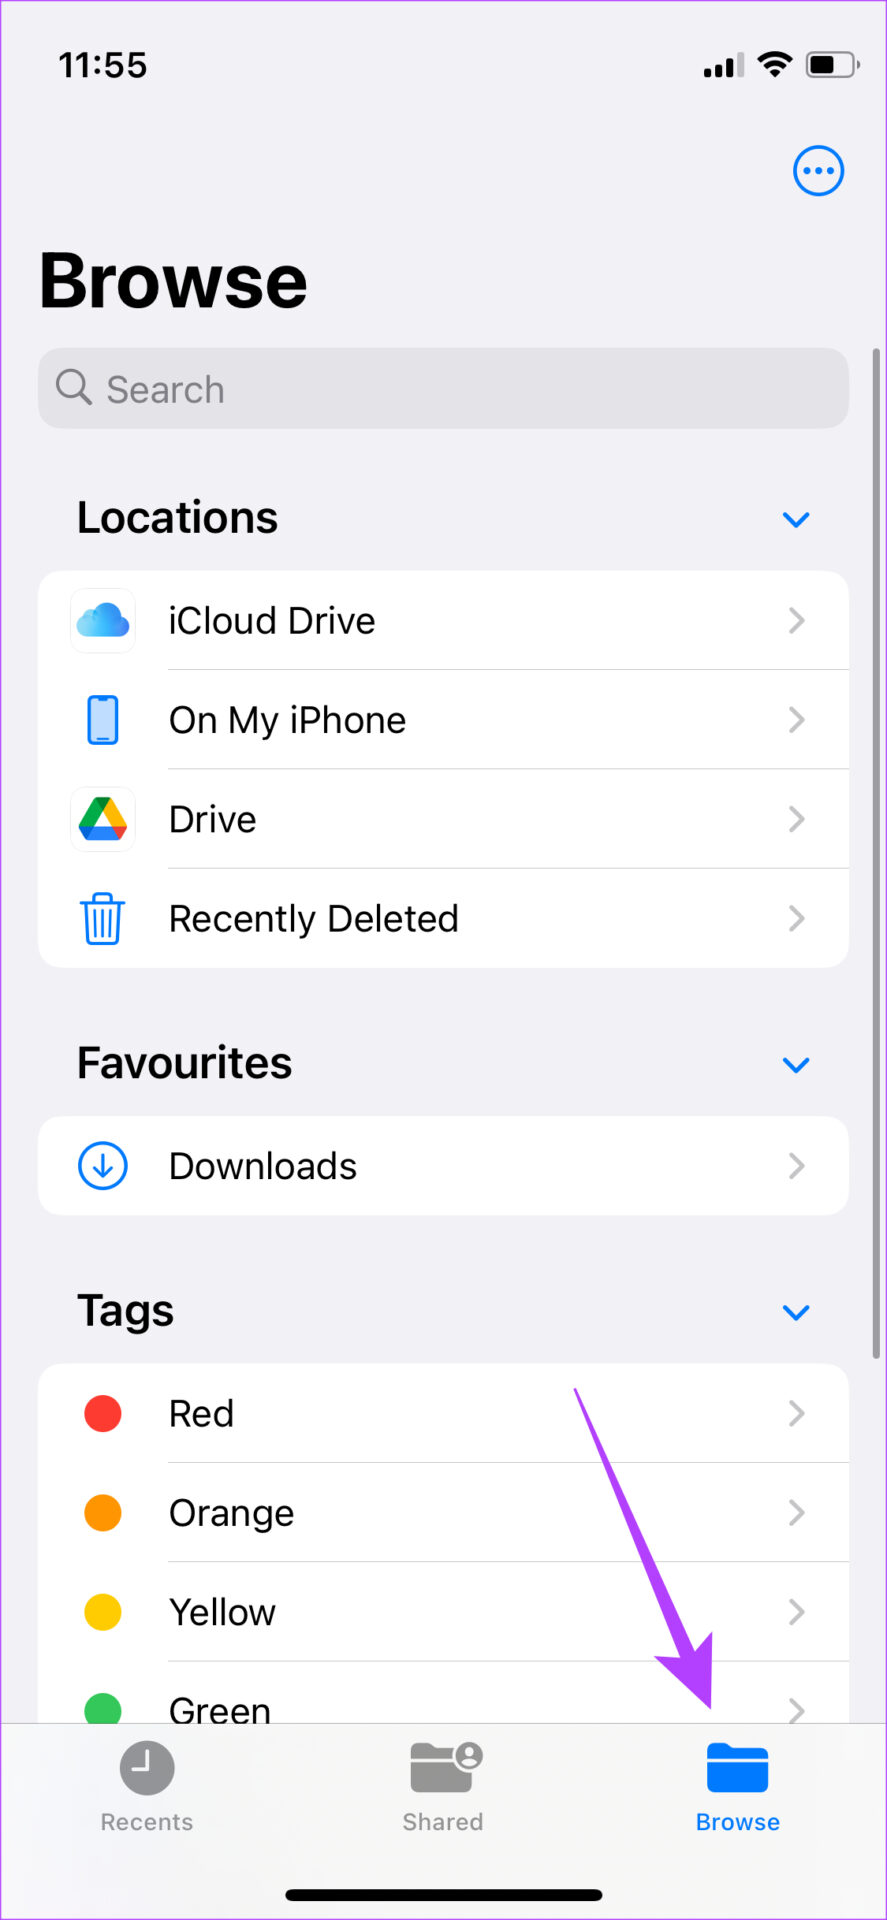
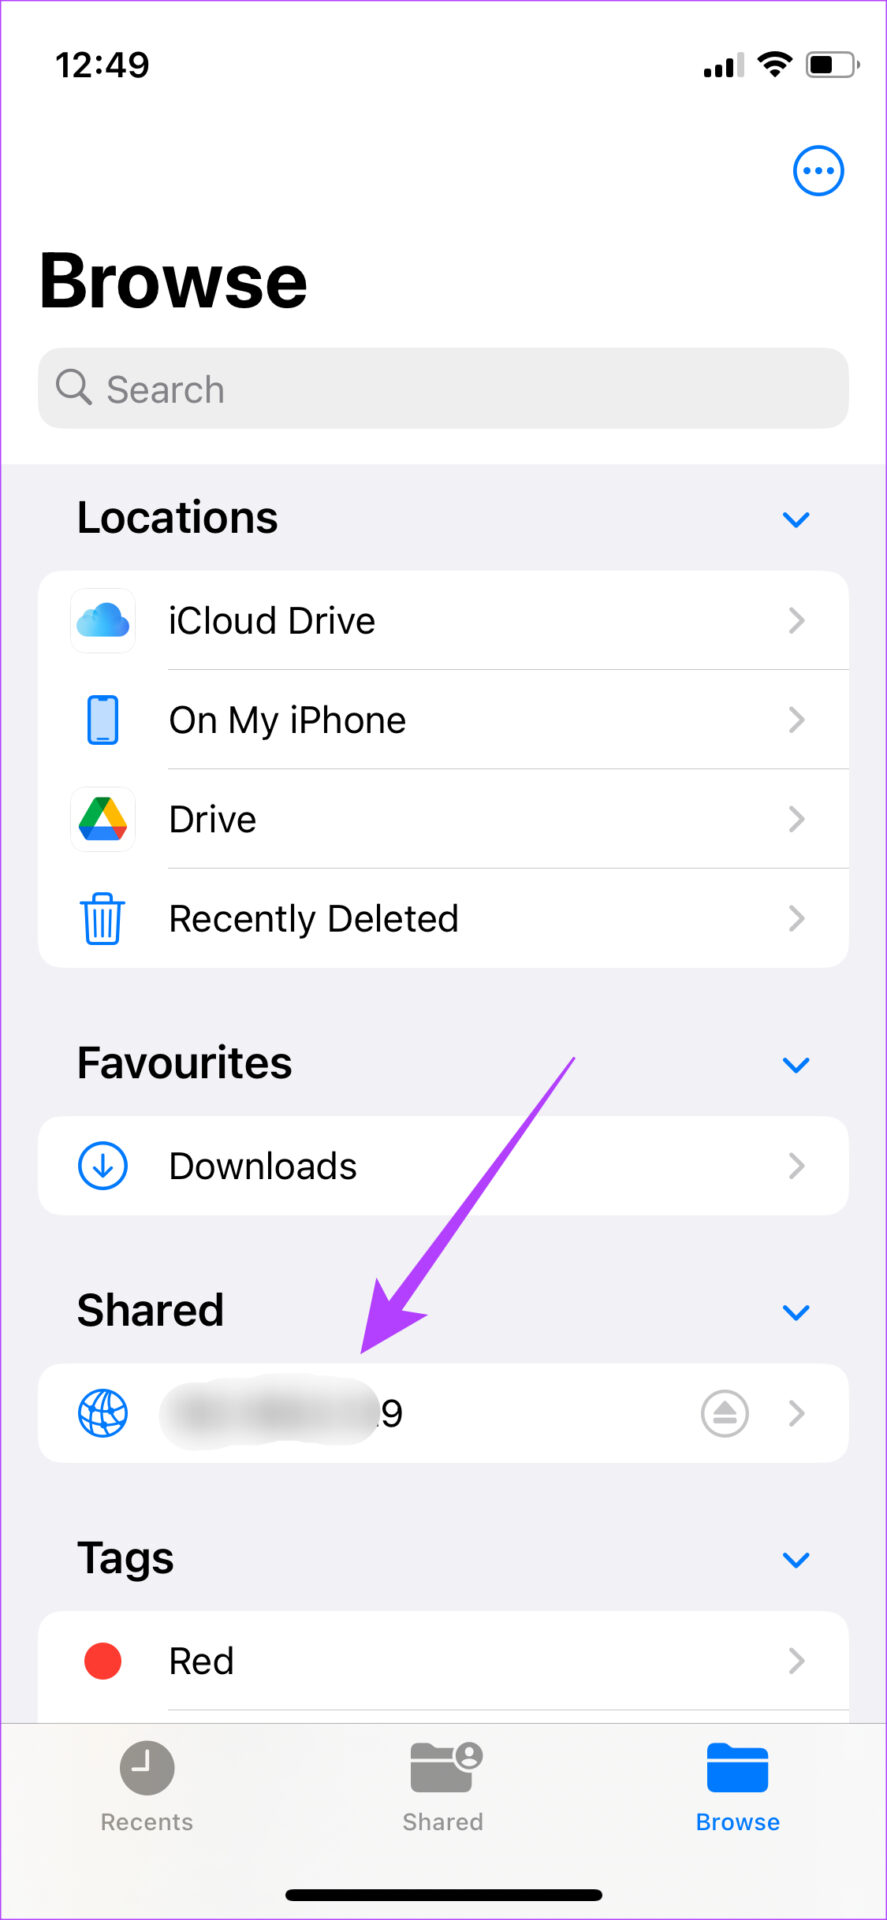
Step 1: Open the Files app on your iPhone.

Step 2: Select the Browse tab at the bottom and

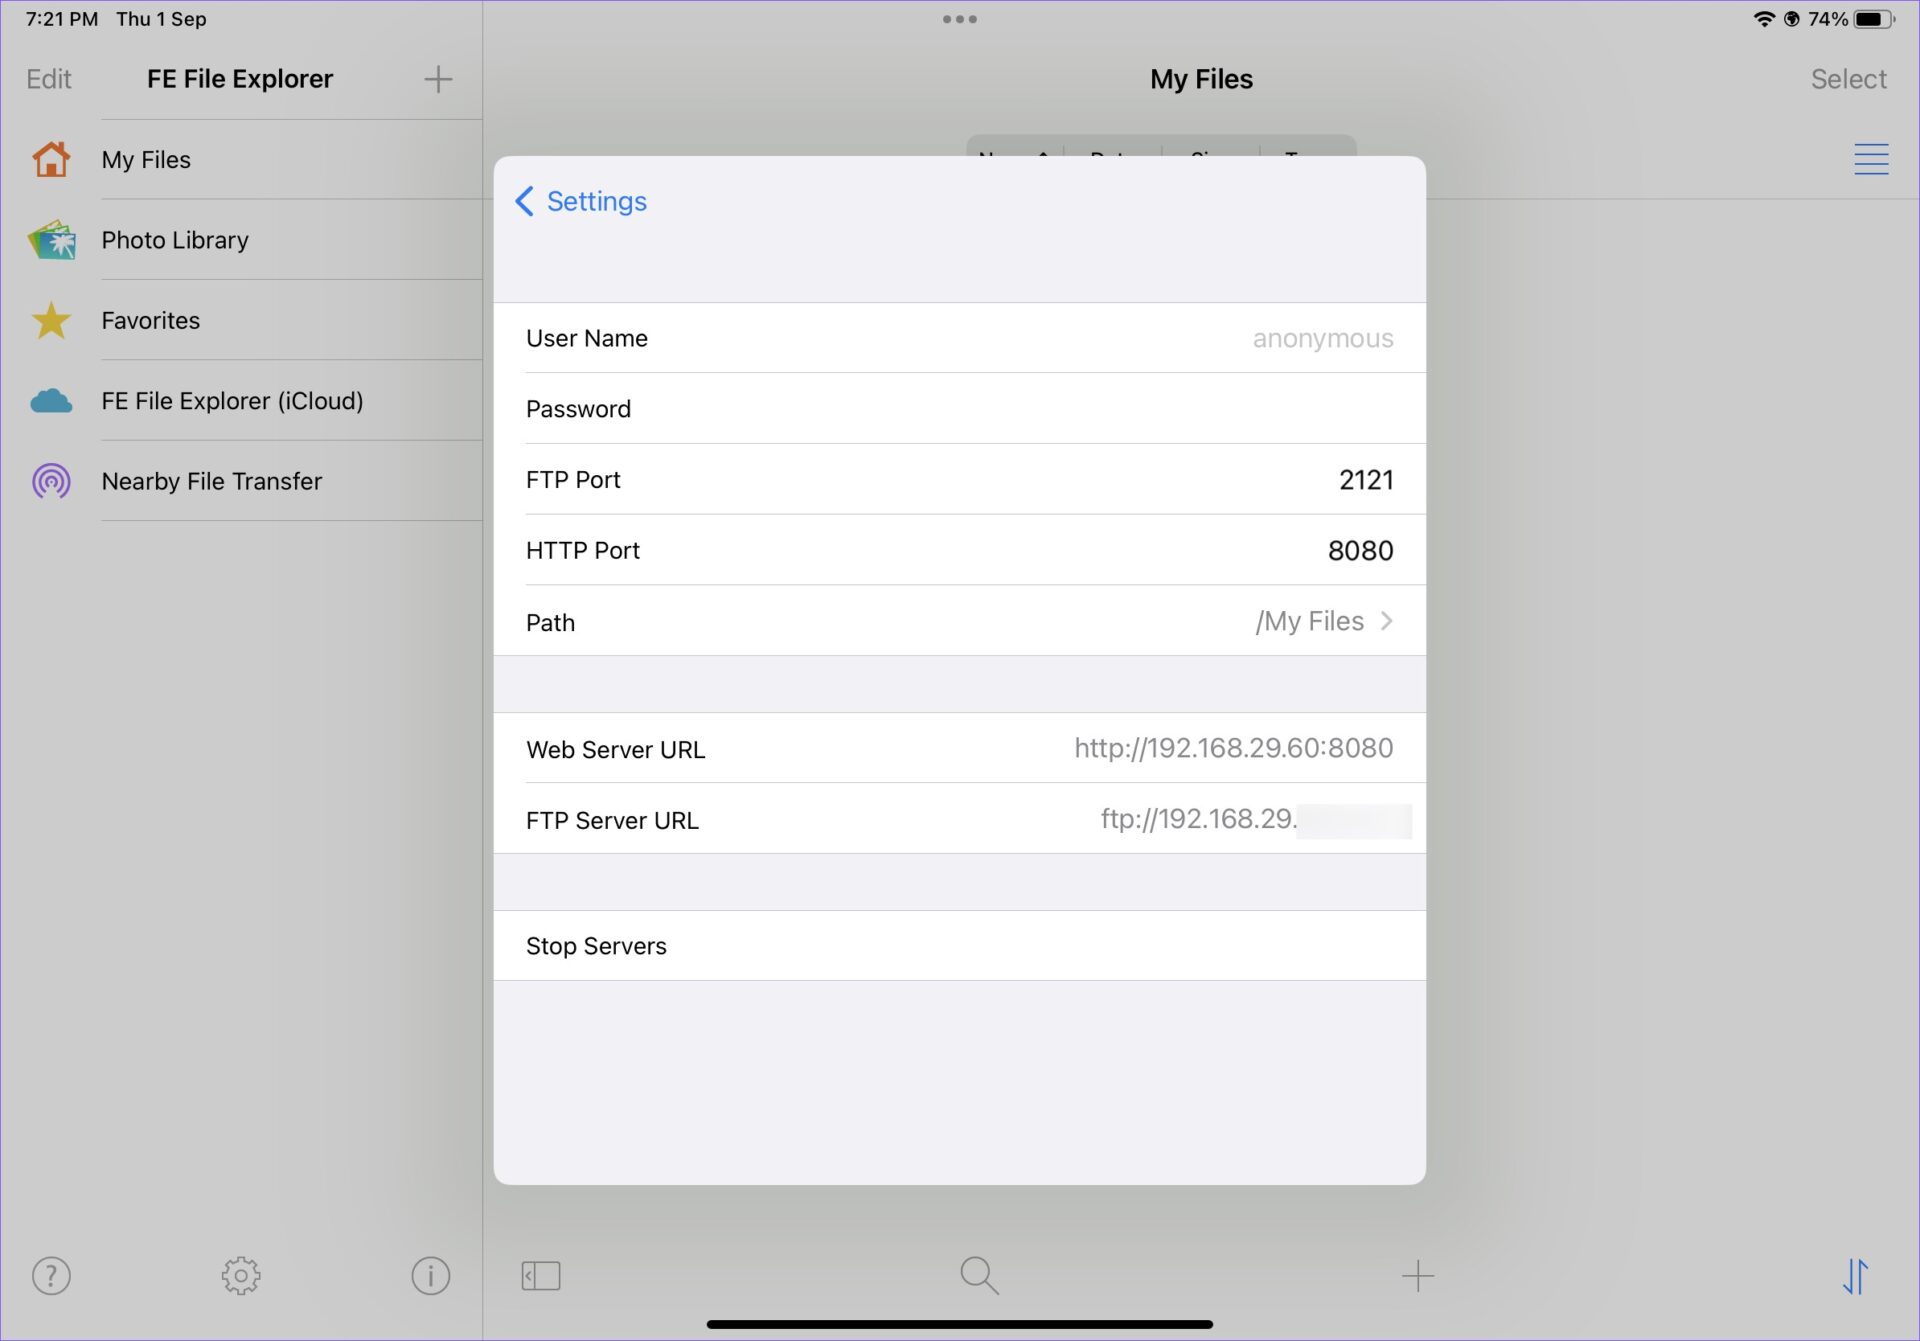
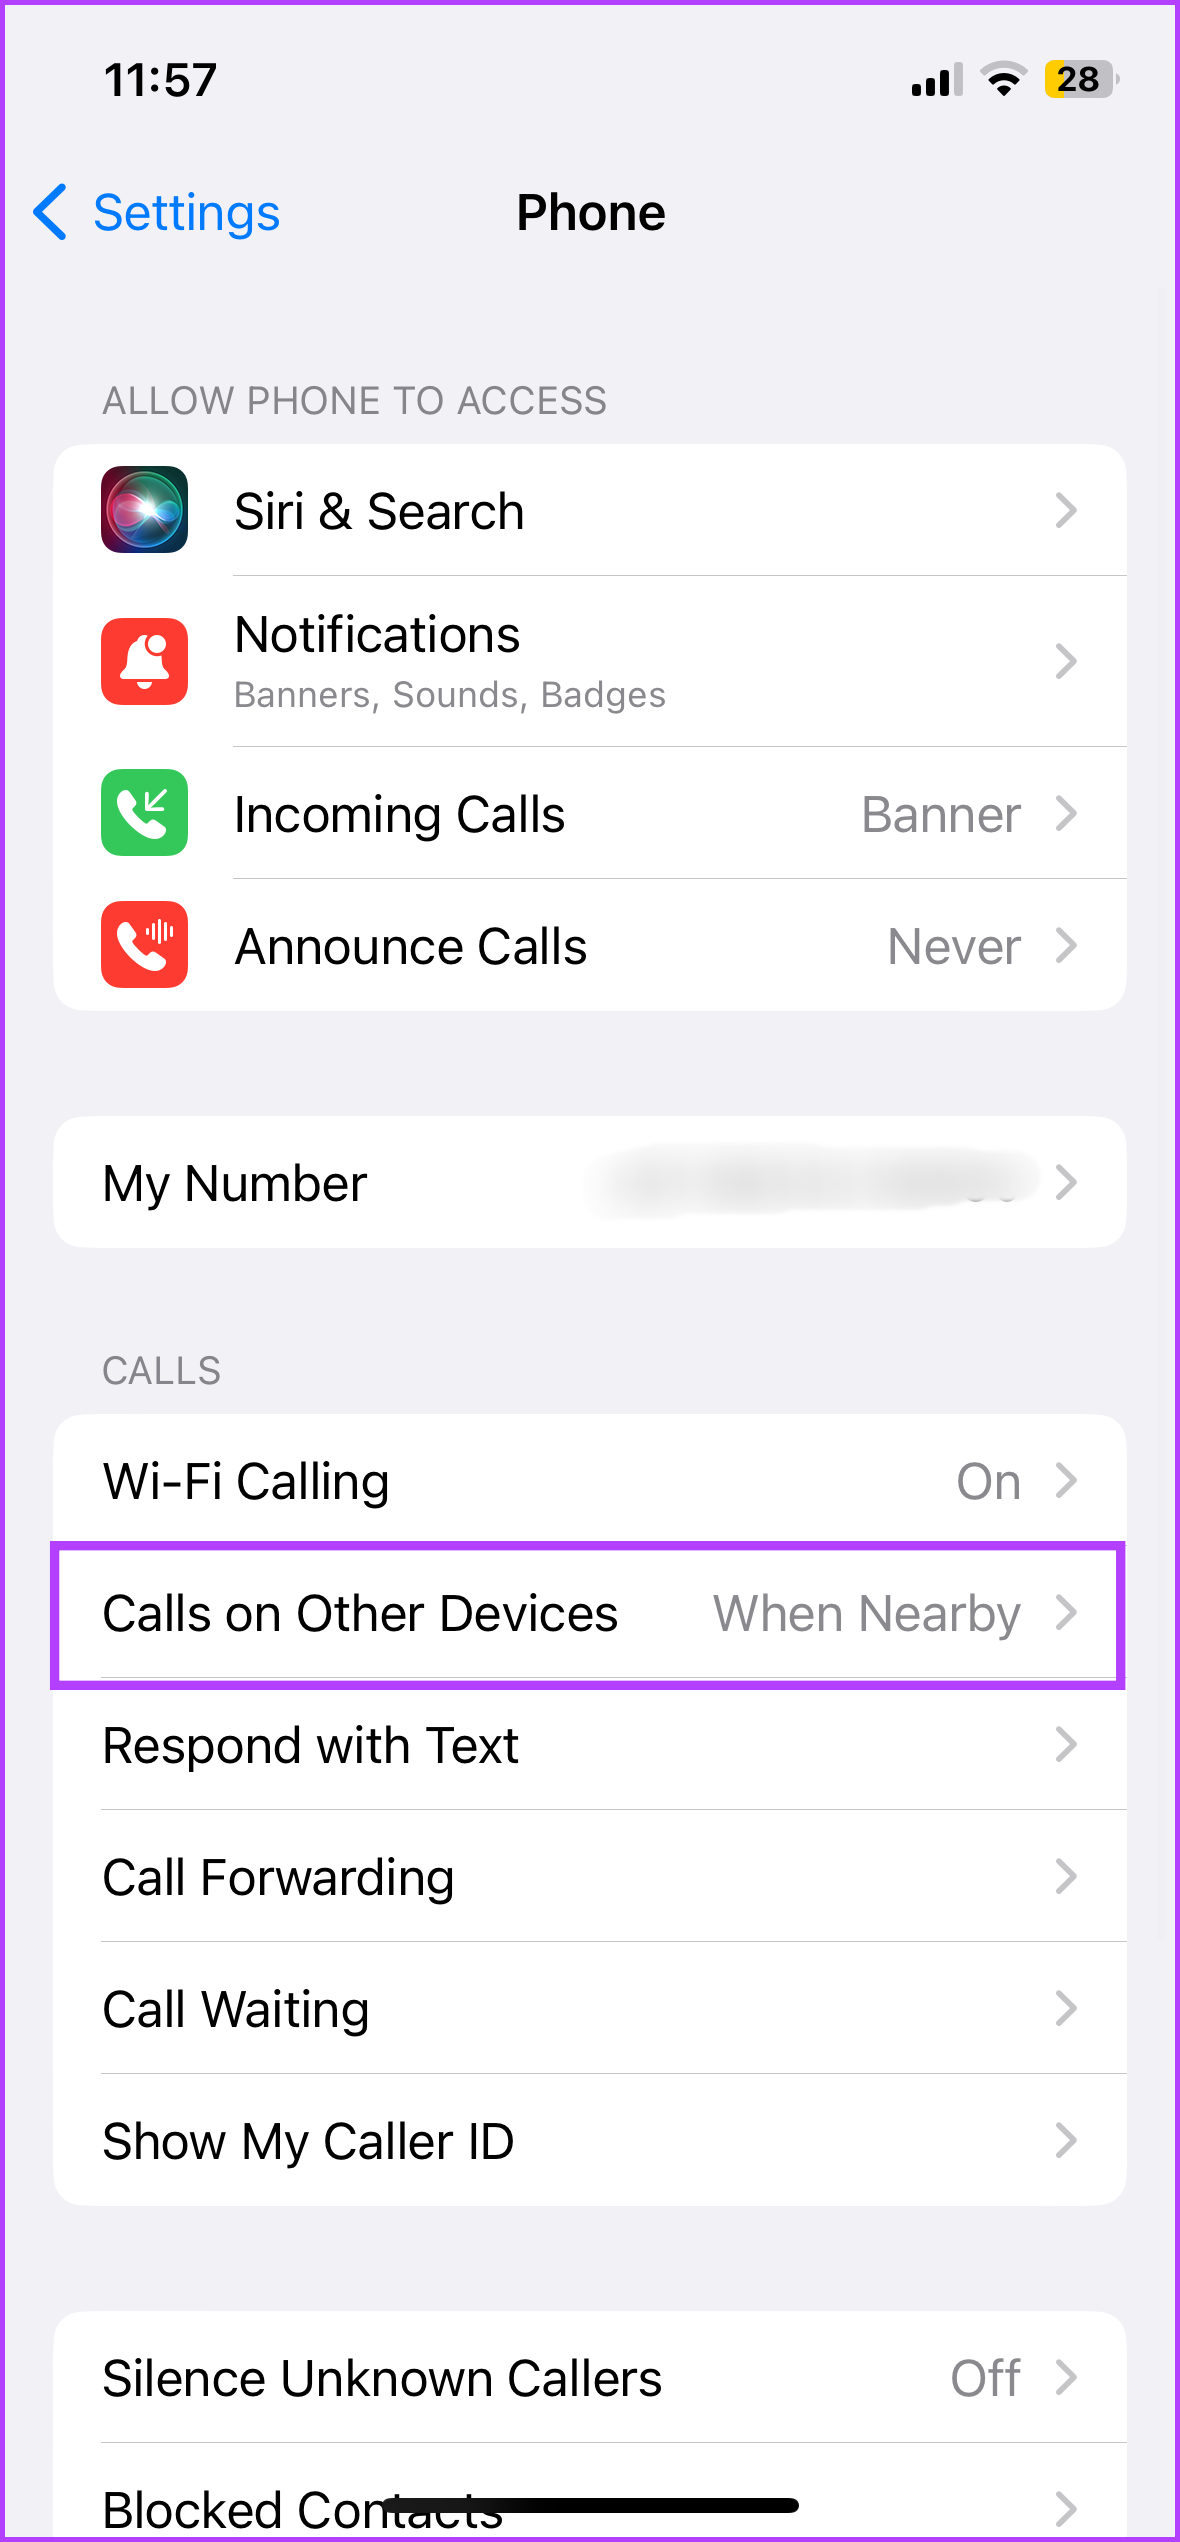
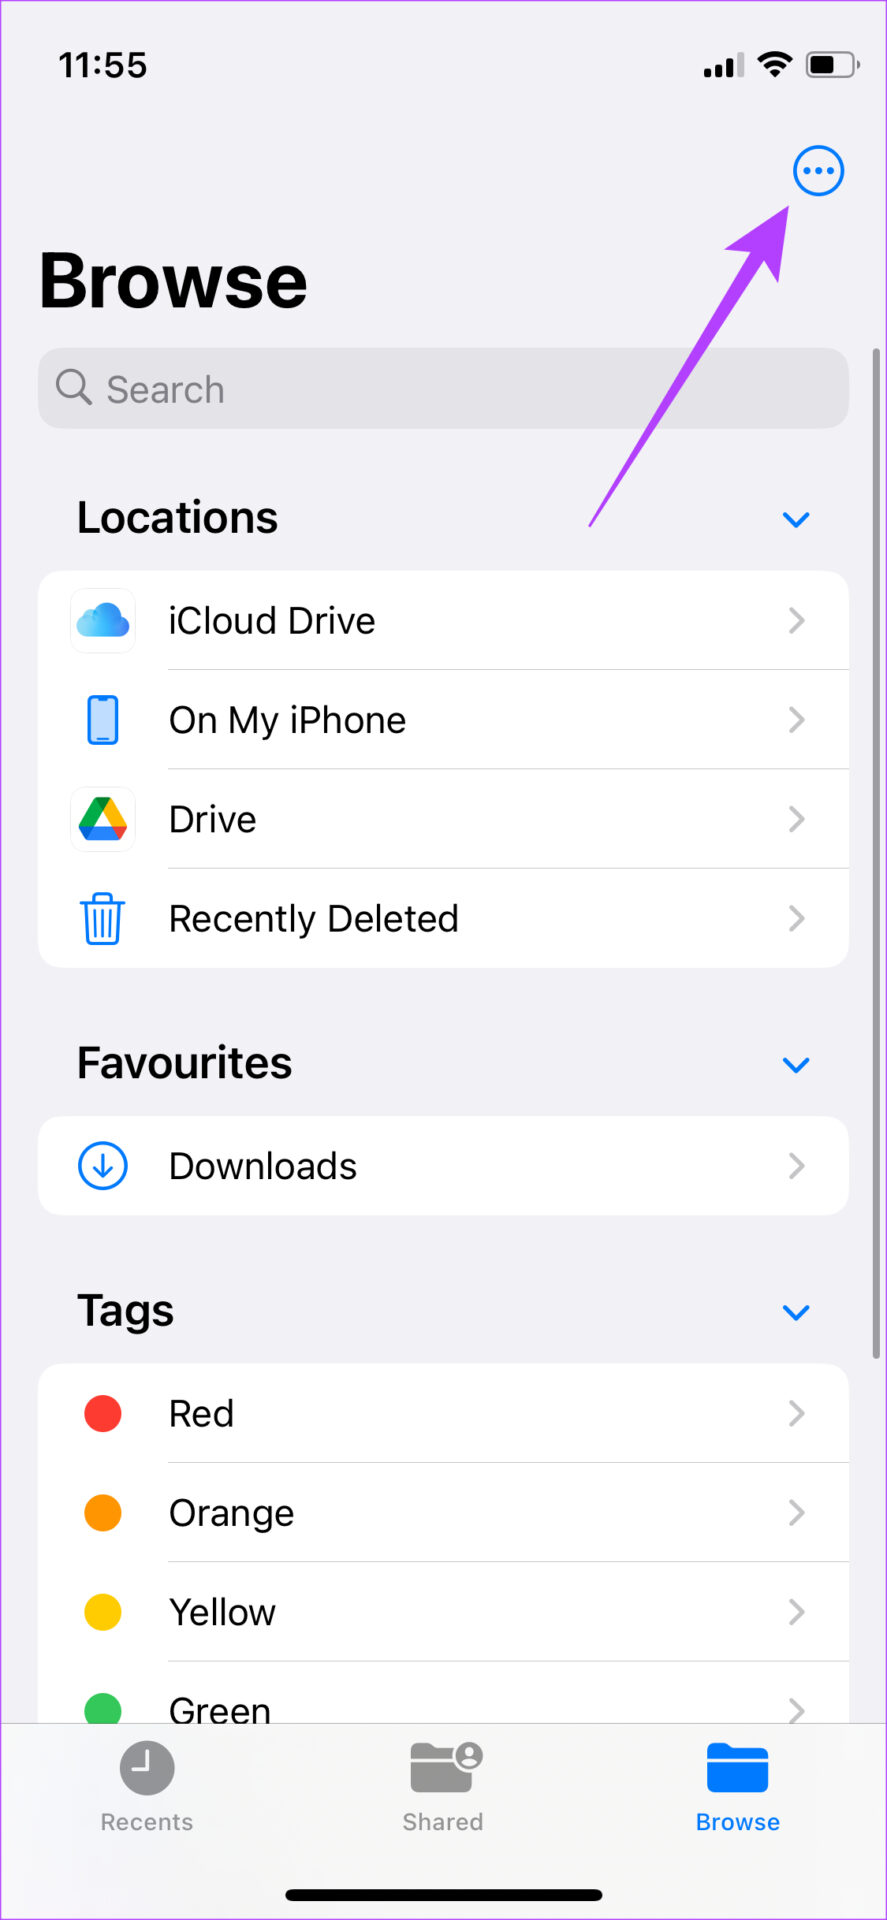
Step 3: Tap on the three-dot menu in the top-right corner and select ‘Connect to Server.’

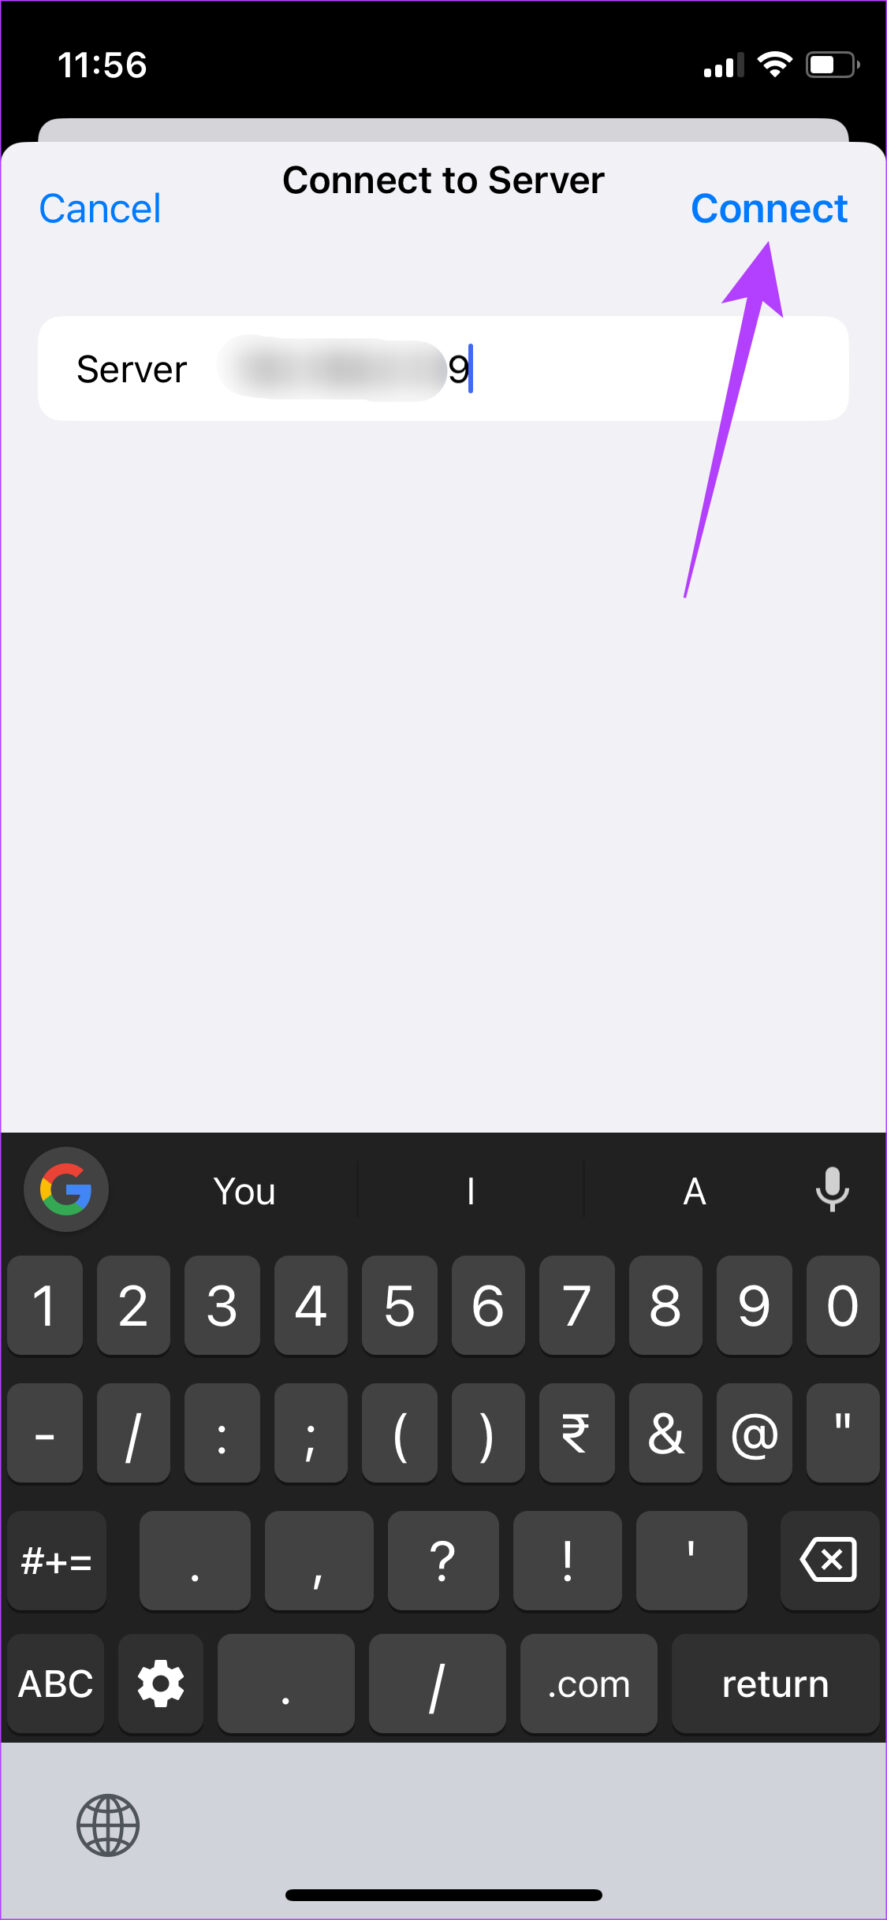
Step 4: Enter the IPv4 address you noted down earlier and tap on Connect.

Step 5: Select Guest under Connect As and then tap on Next.

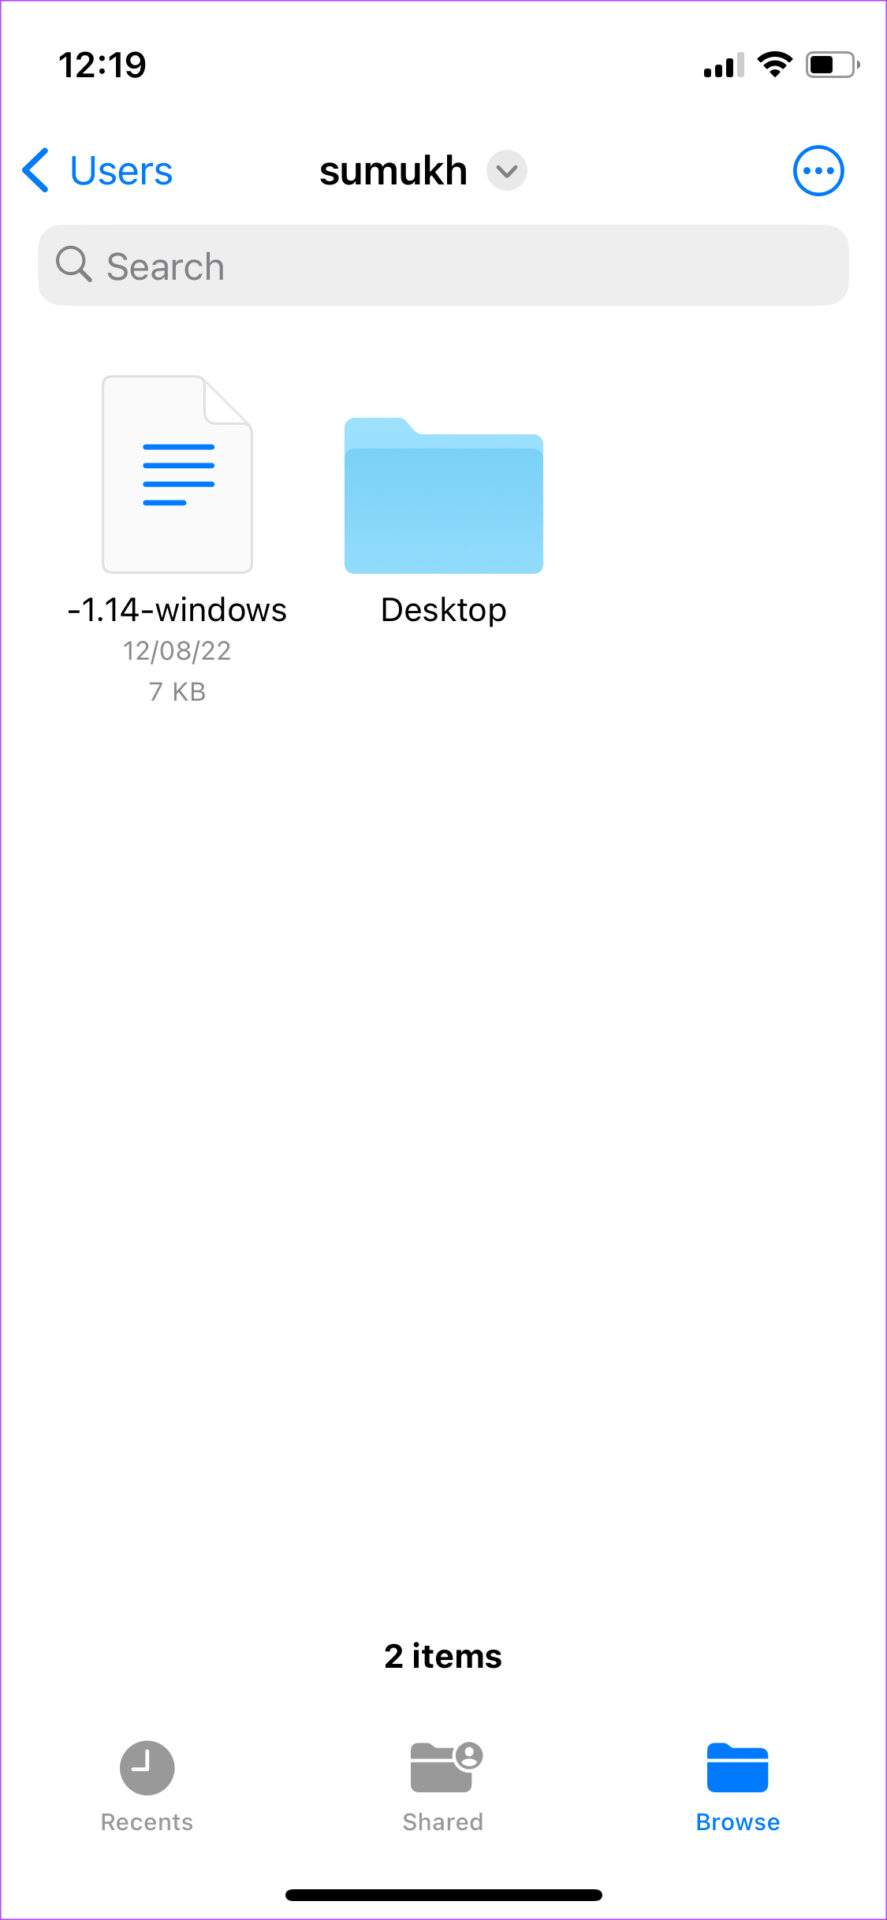
You can now access the shared folder on your Windows PC.

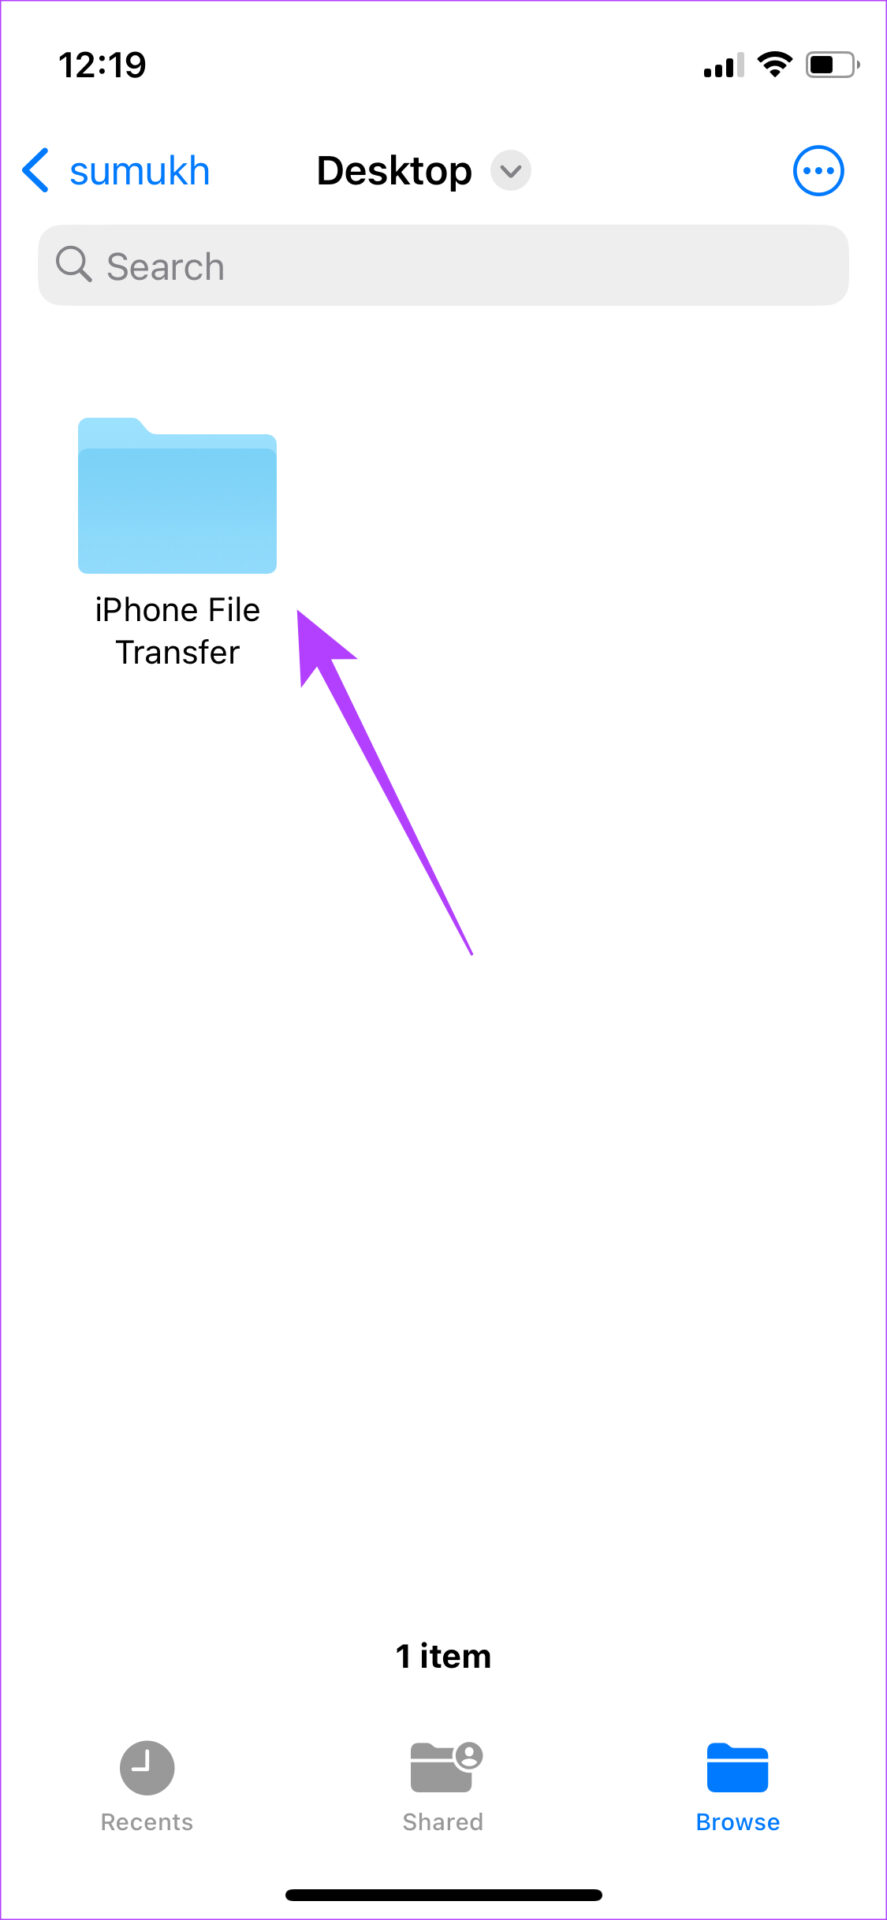
We created the shared folder on the Desktop of our Windows PC. So, if you browse through the folders and access the Desktop folder, you can spot the iPhone File Transfer folder we created.

Transferring Files to the Shared Folder

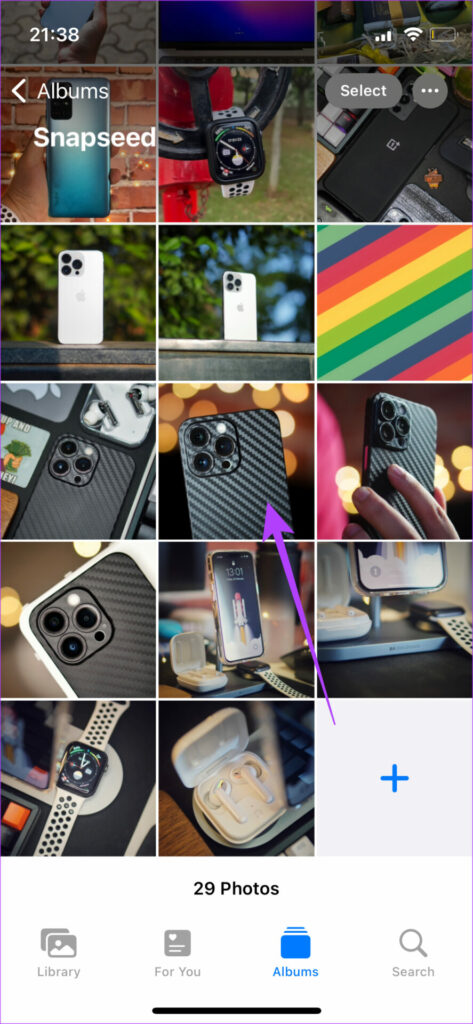
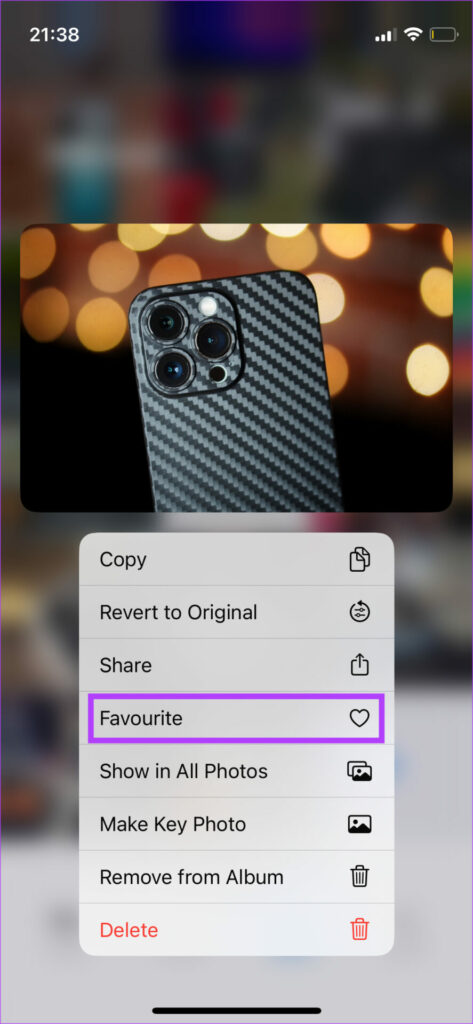
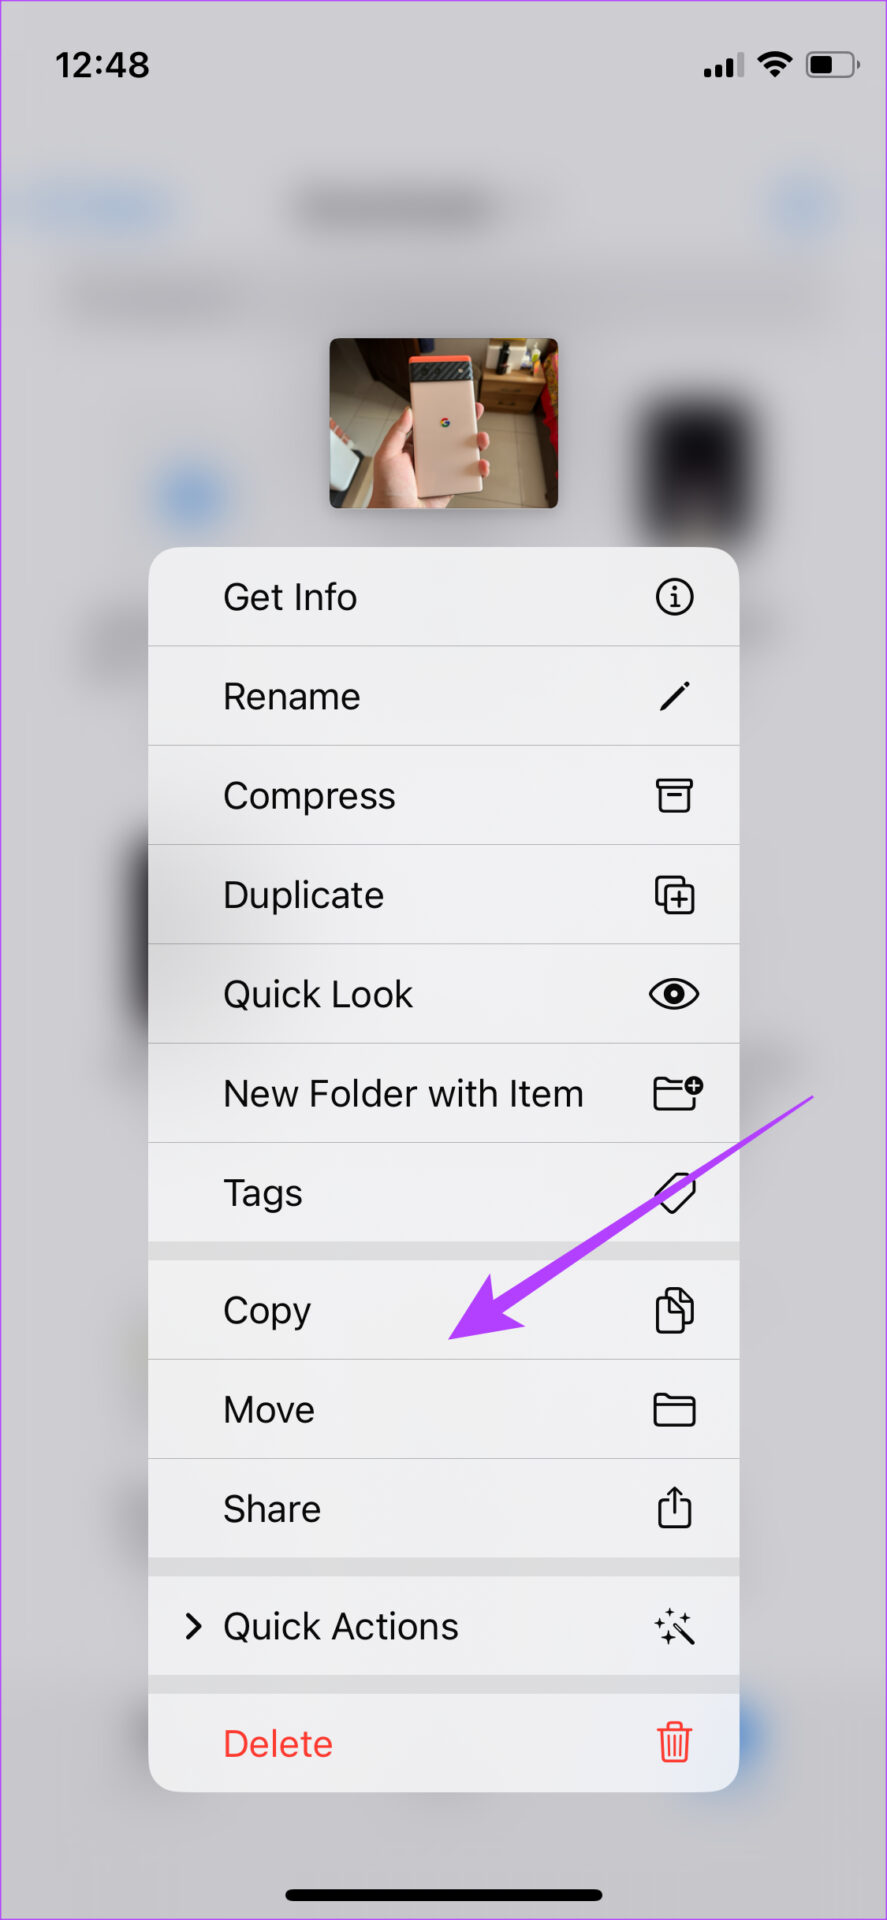
Step 1: Locate the file you want to transfer to your PC.

Step 2: Once you’ve found it, tap and hold on to the file and select Copy.

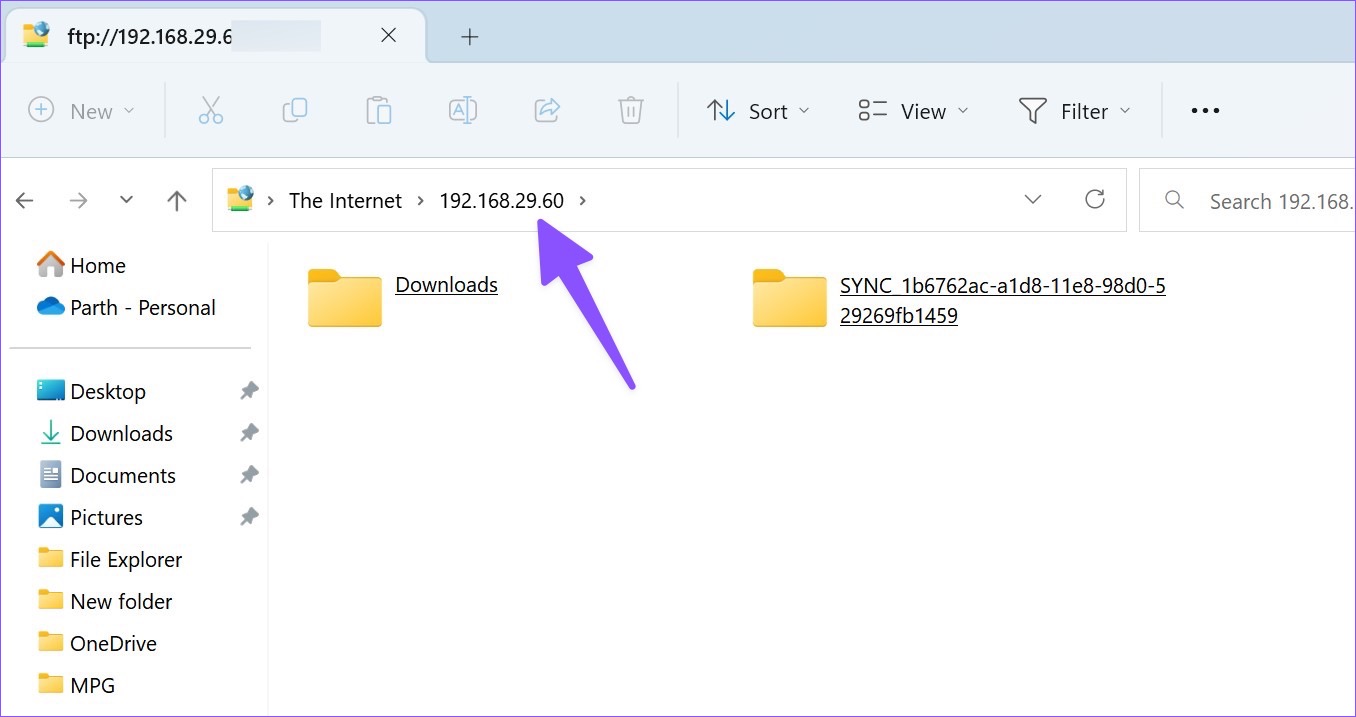
Step 3: Now, navigate to the shared folder by tapping on your IP address under the Shared tab within the Files app.

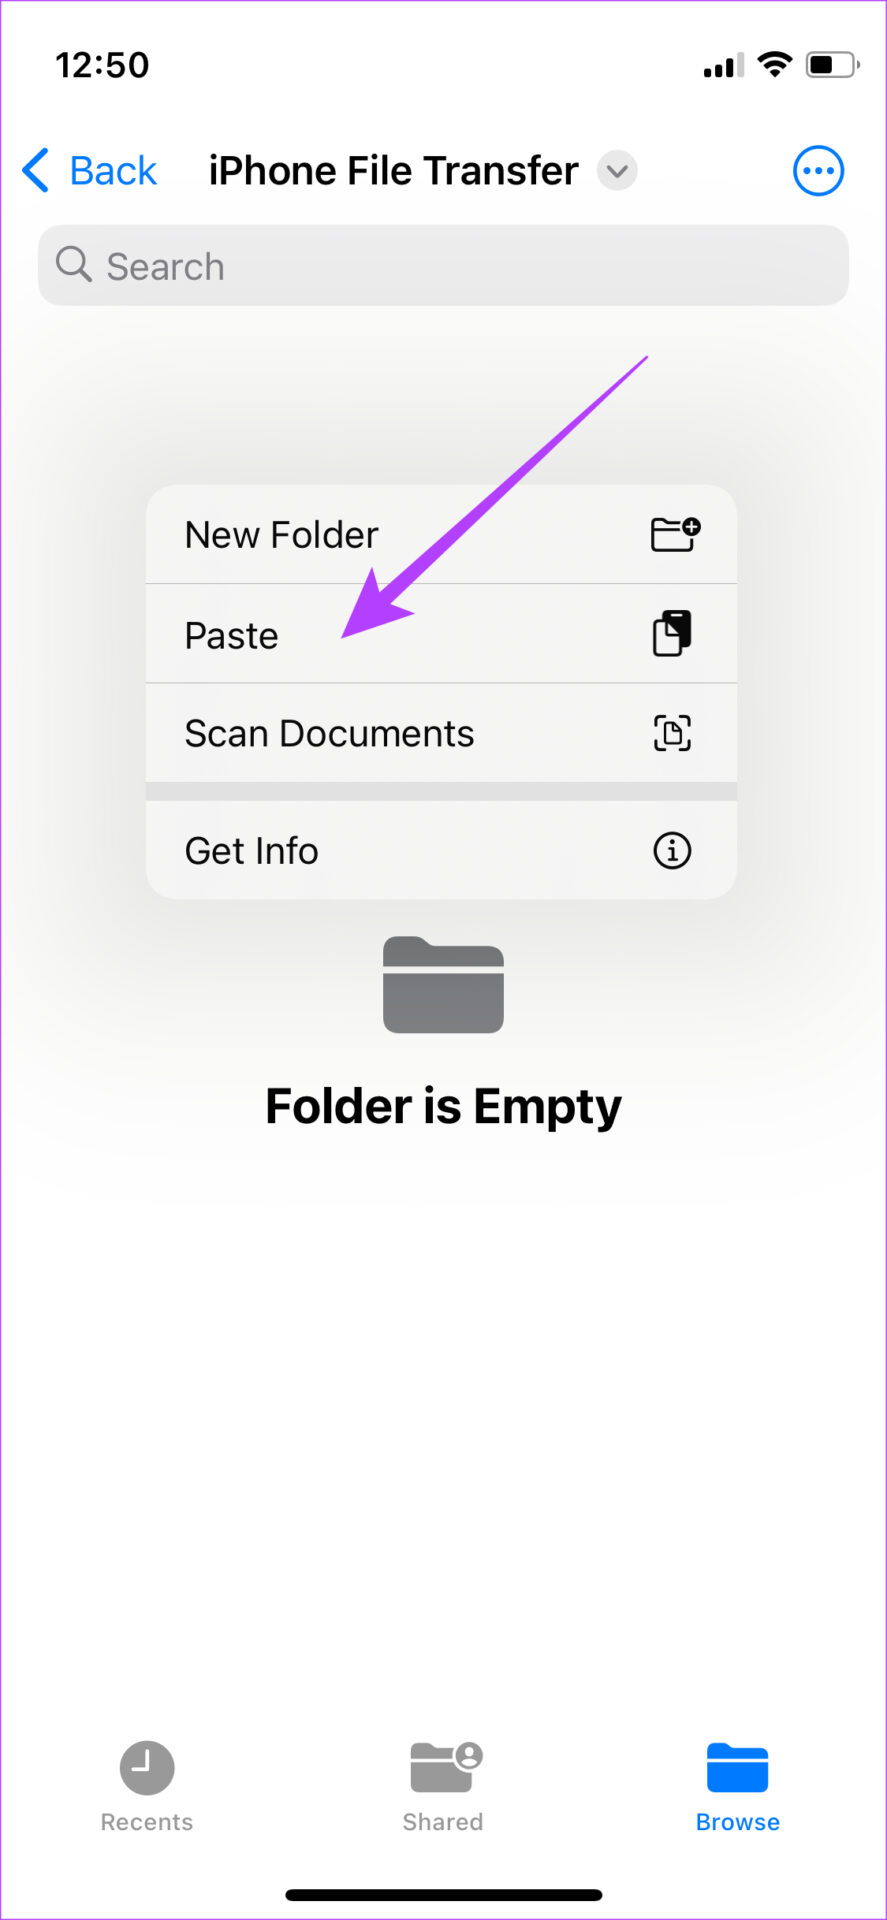
Step 4: When you’re in the folder, tap and hold on to an empty space and select Paste.

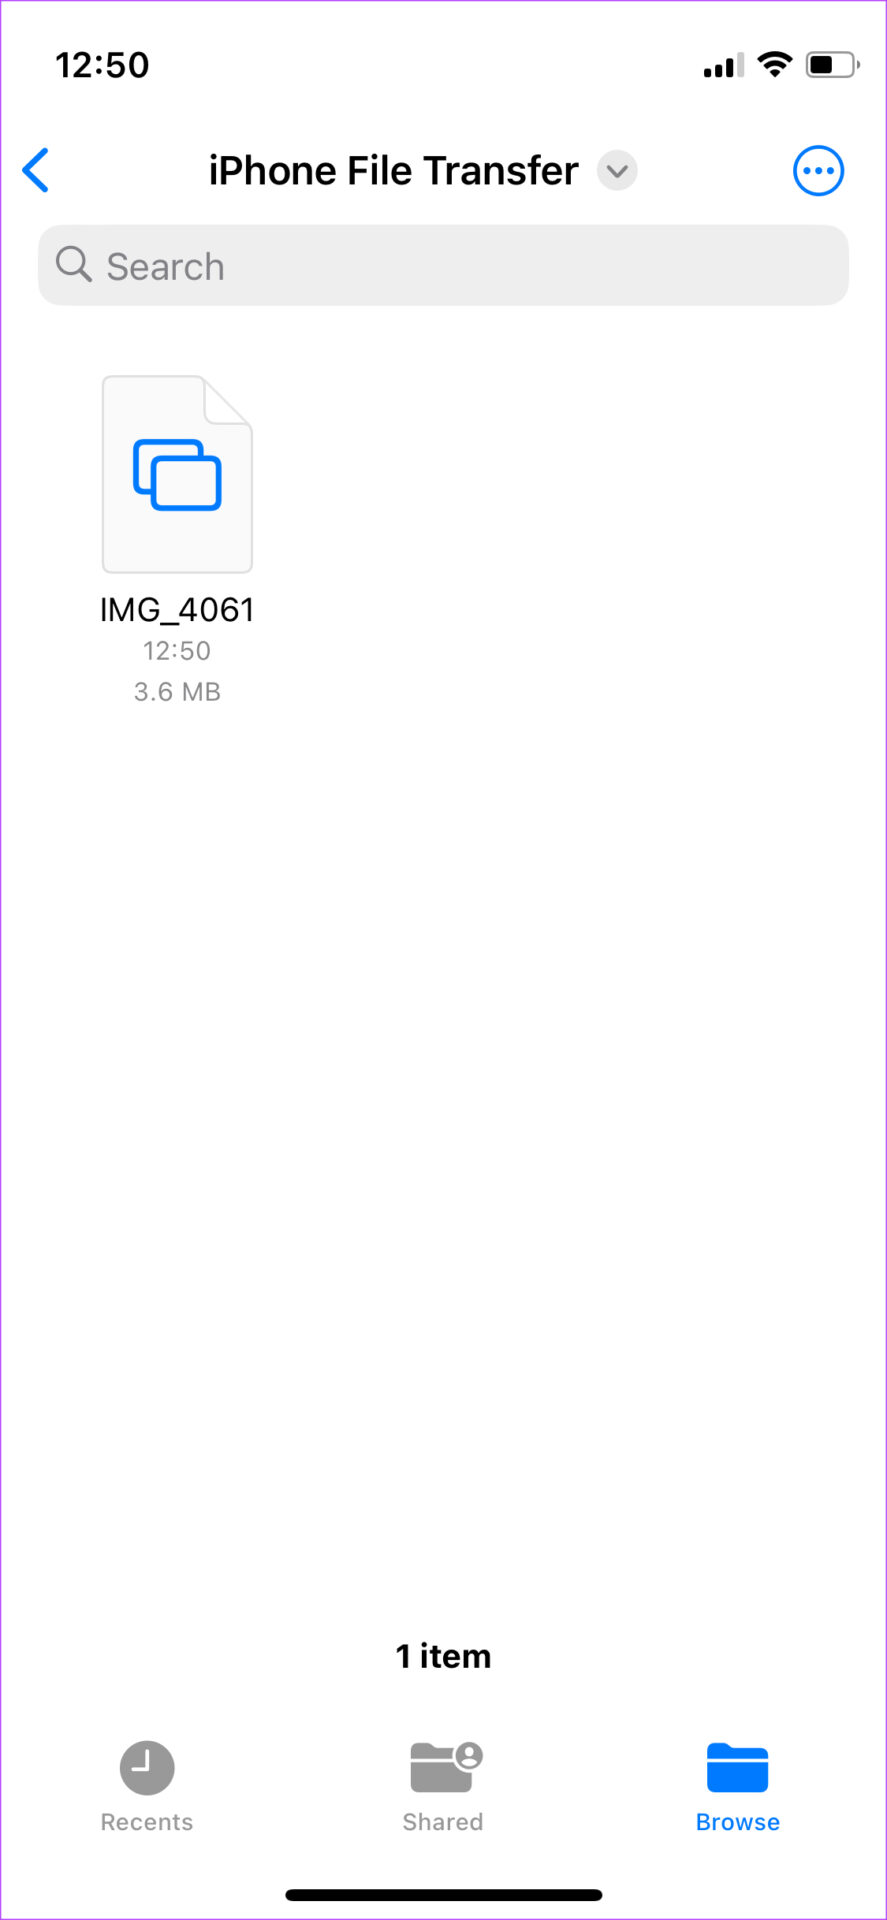
The selected file will be copied.

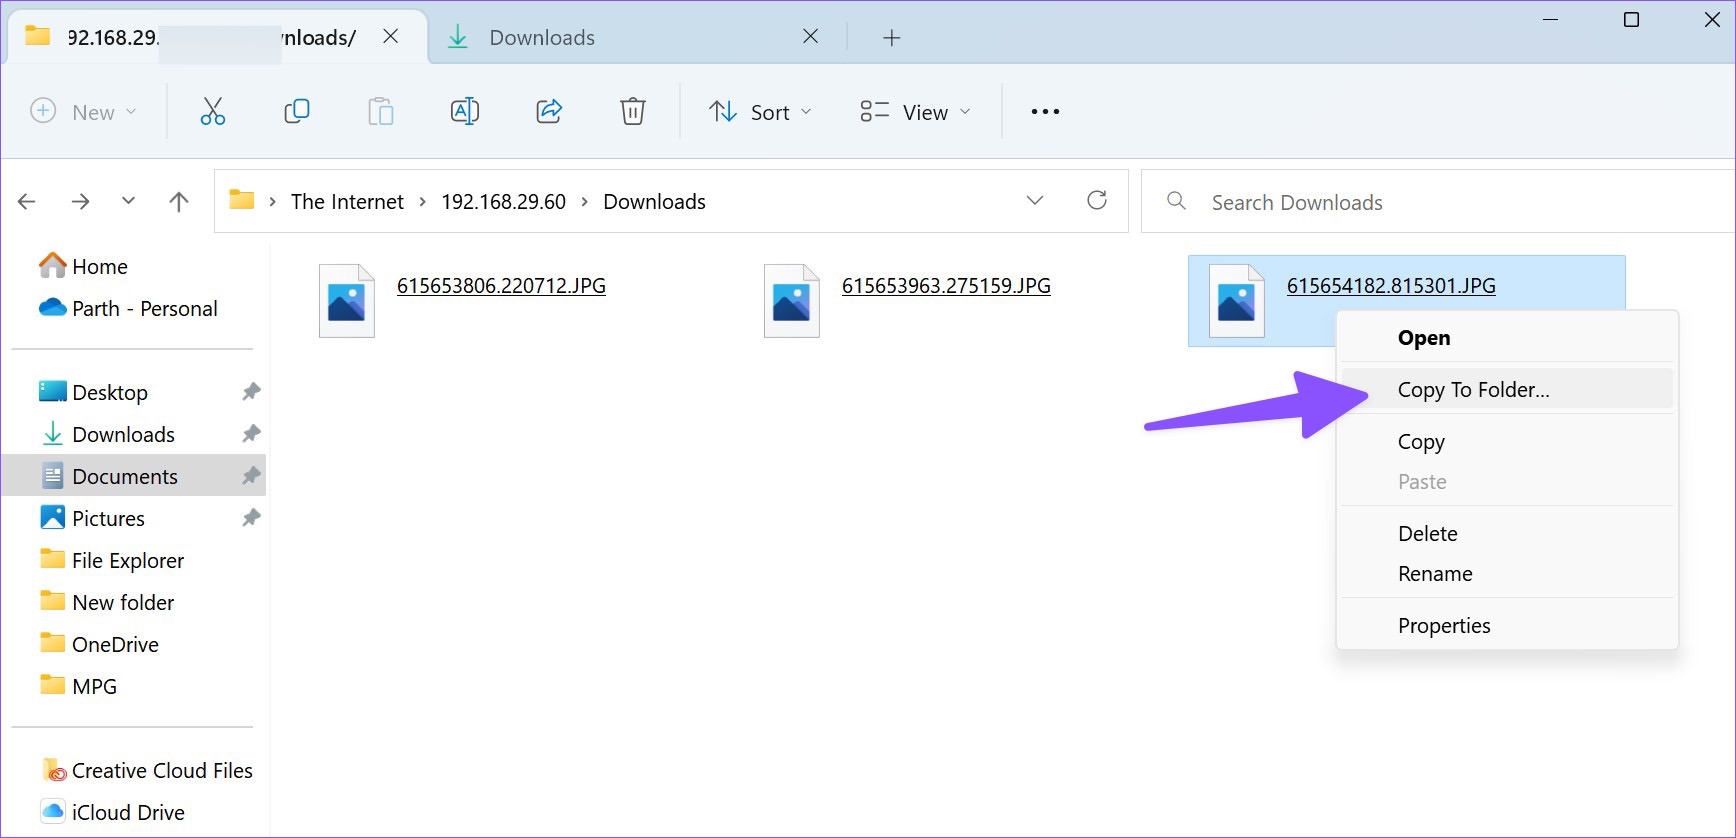
Step 5: Open the shared folder on your Windows PC. You’ll see that the file has been copied. You can access the file on your computer as well.

copied file

Step 6: Alternatively, you can also copy files from your PC into the shared folder. You will be able to access it on your iPhone.

This is the easiest and the best way to transfer files between iPhone and Windows PC wirelessly. You can use it to transfer large files like videos as well without any issues. You just have to go through the setup process once and you’re done.

One thing to note, though, is that your local IPv4 address may change whenever you reboot your computer or connect to a different network. So, if you’re unable to access the shared folder the next time, enter the new IP address in the Files app if it has changed.

4. Transfer Files From iPhone to Windows PC Wirelessly Using Cloud Storage

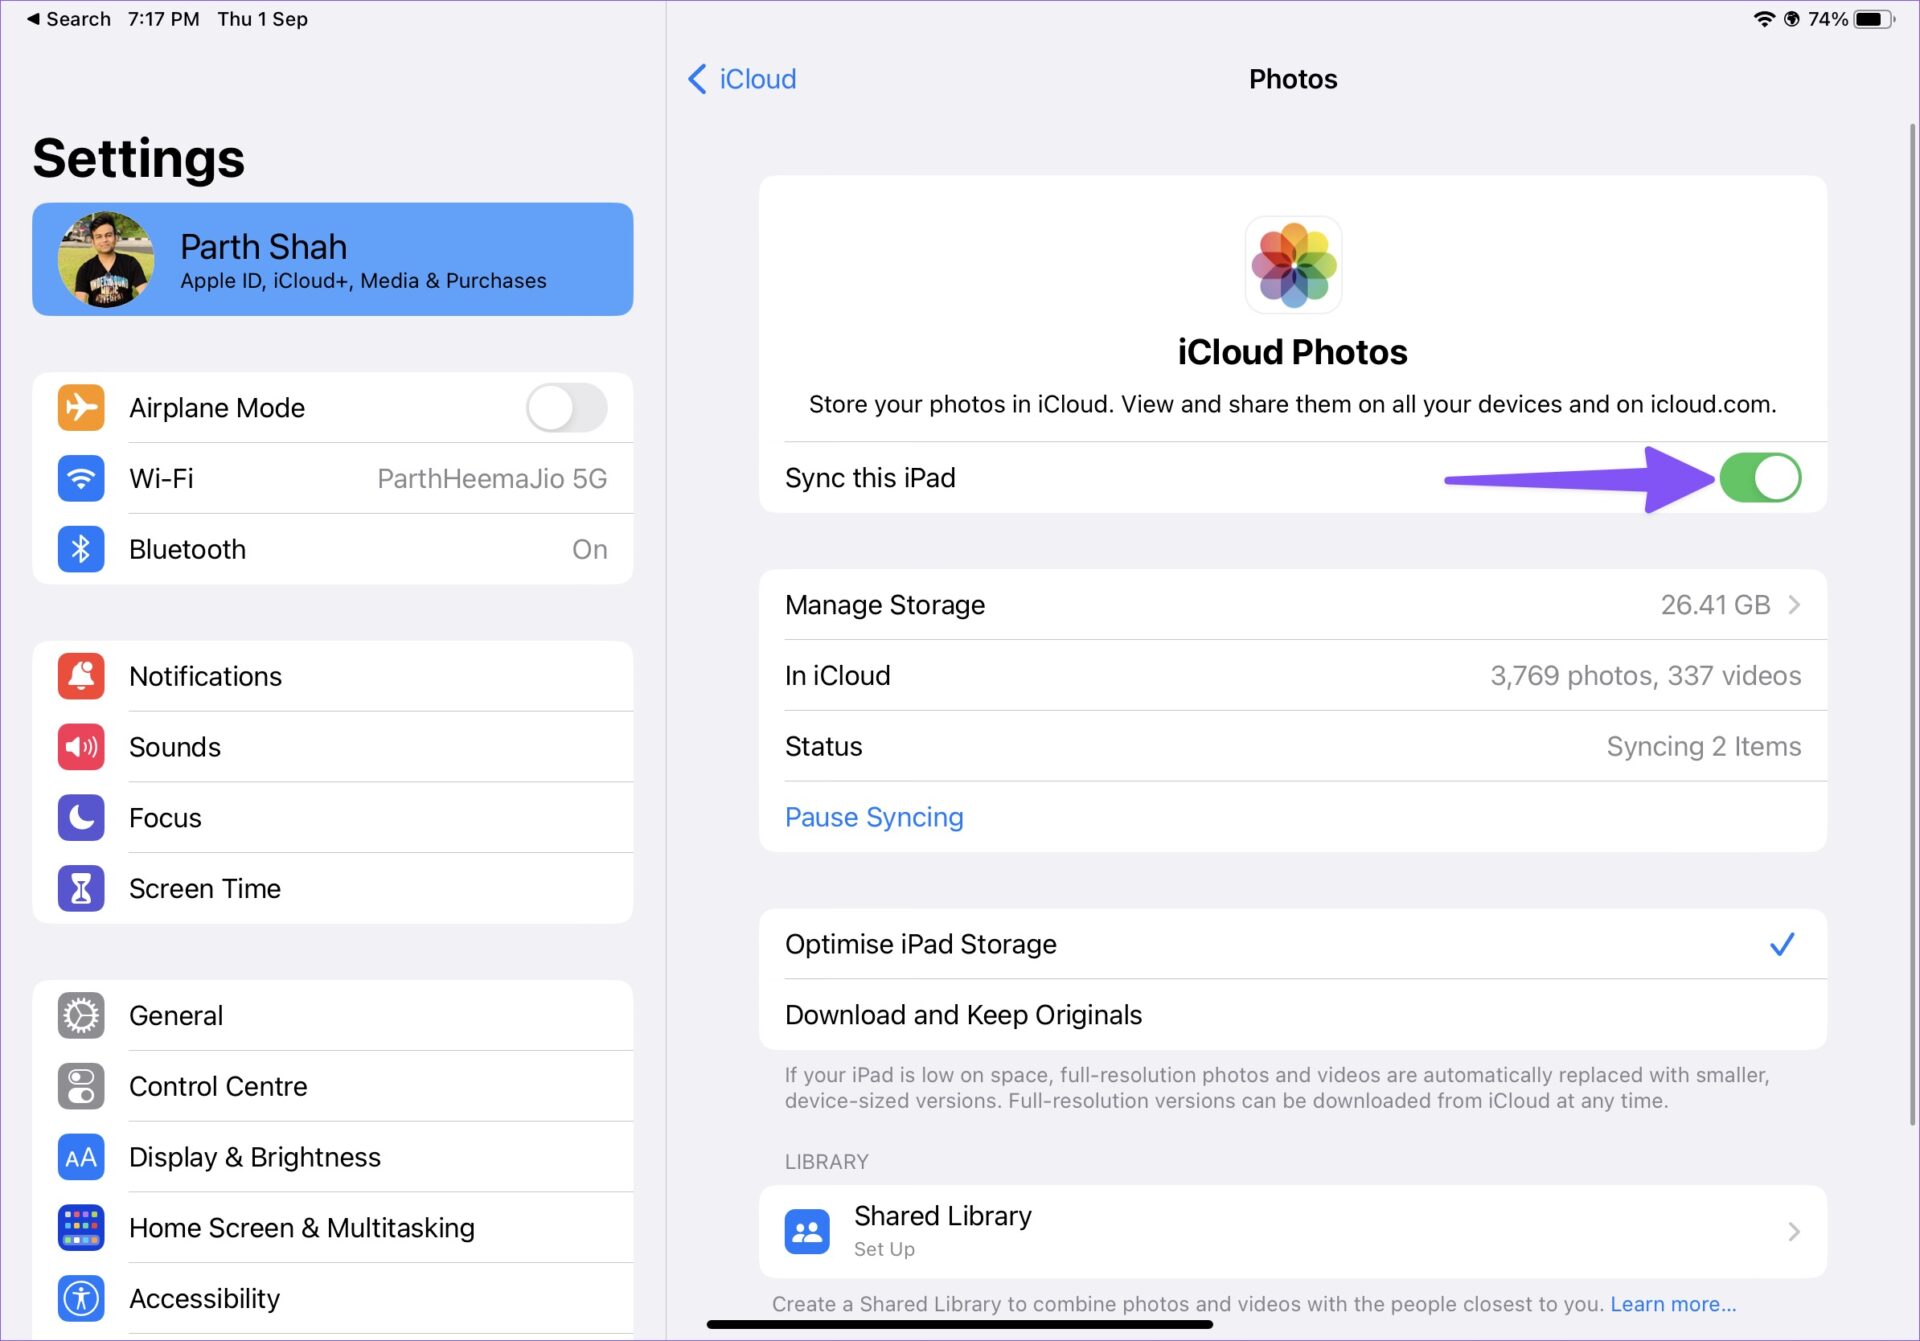
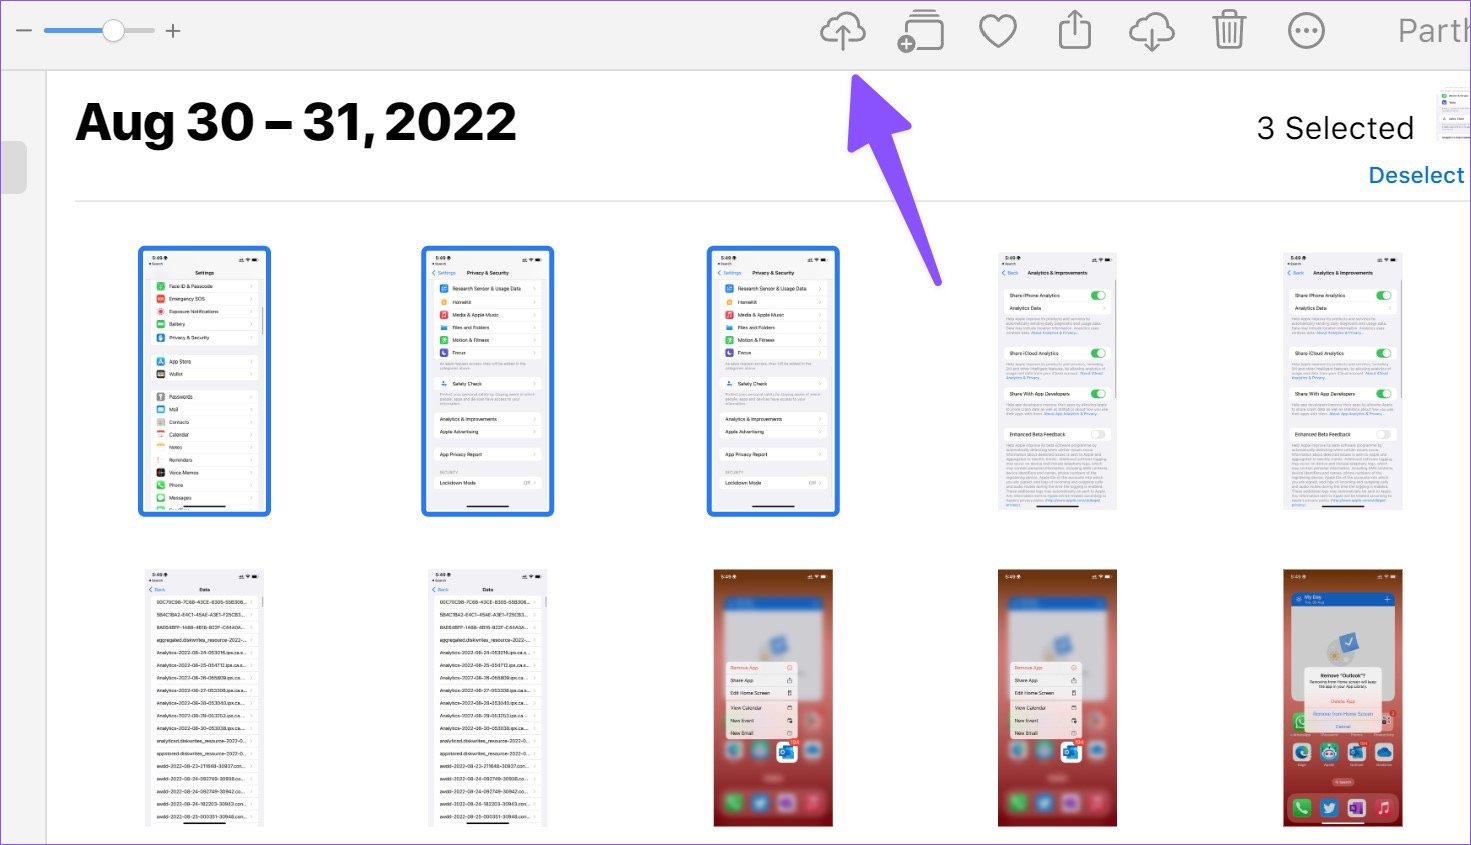
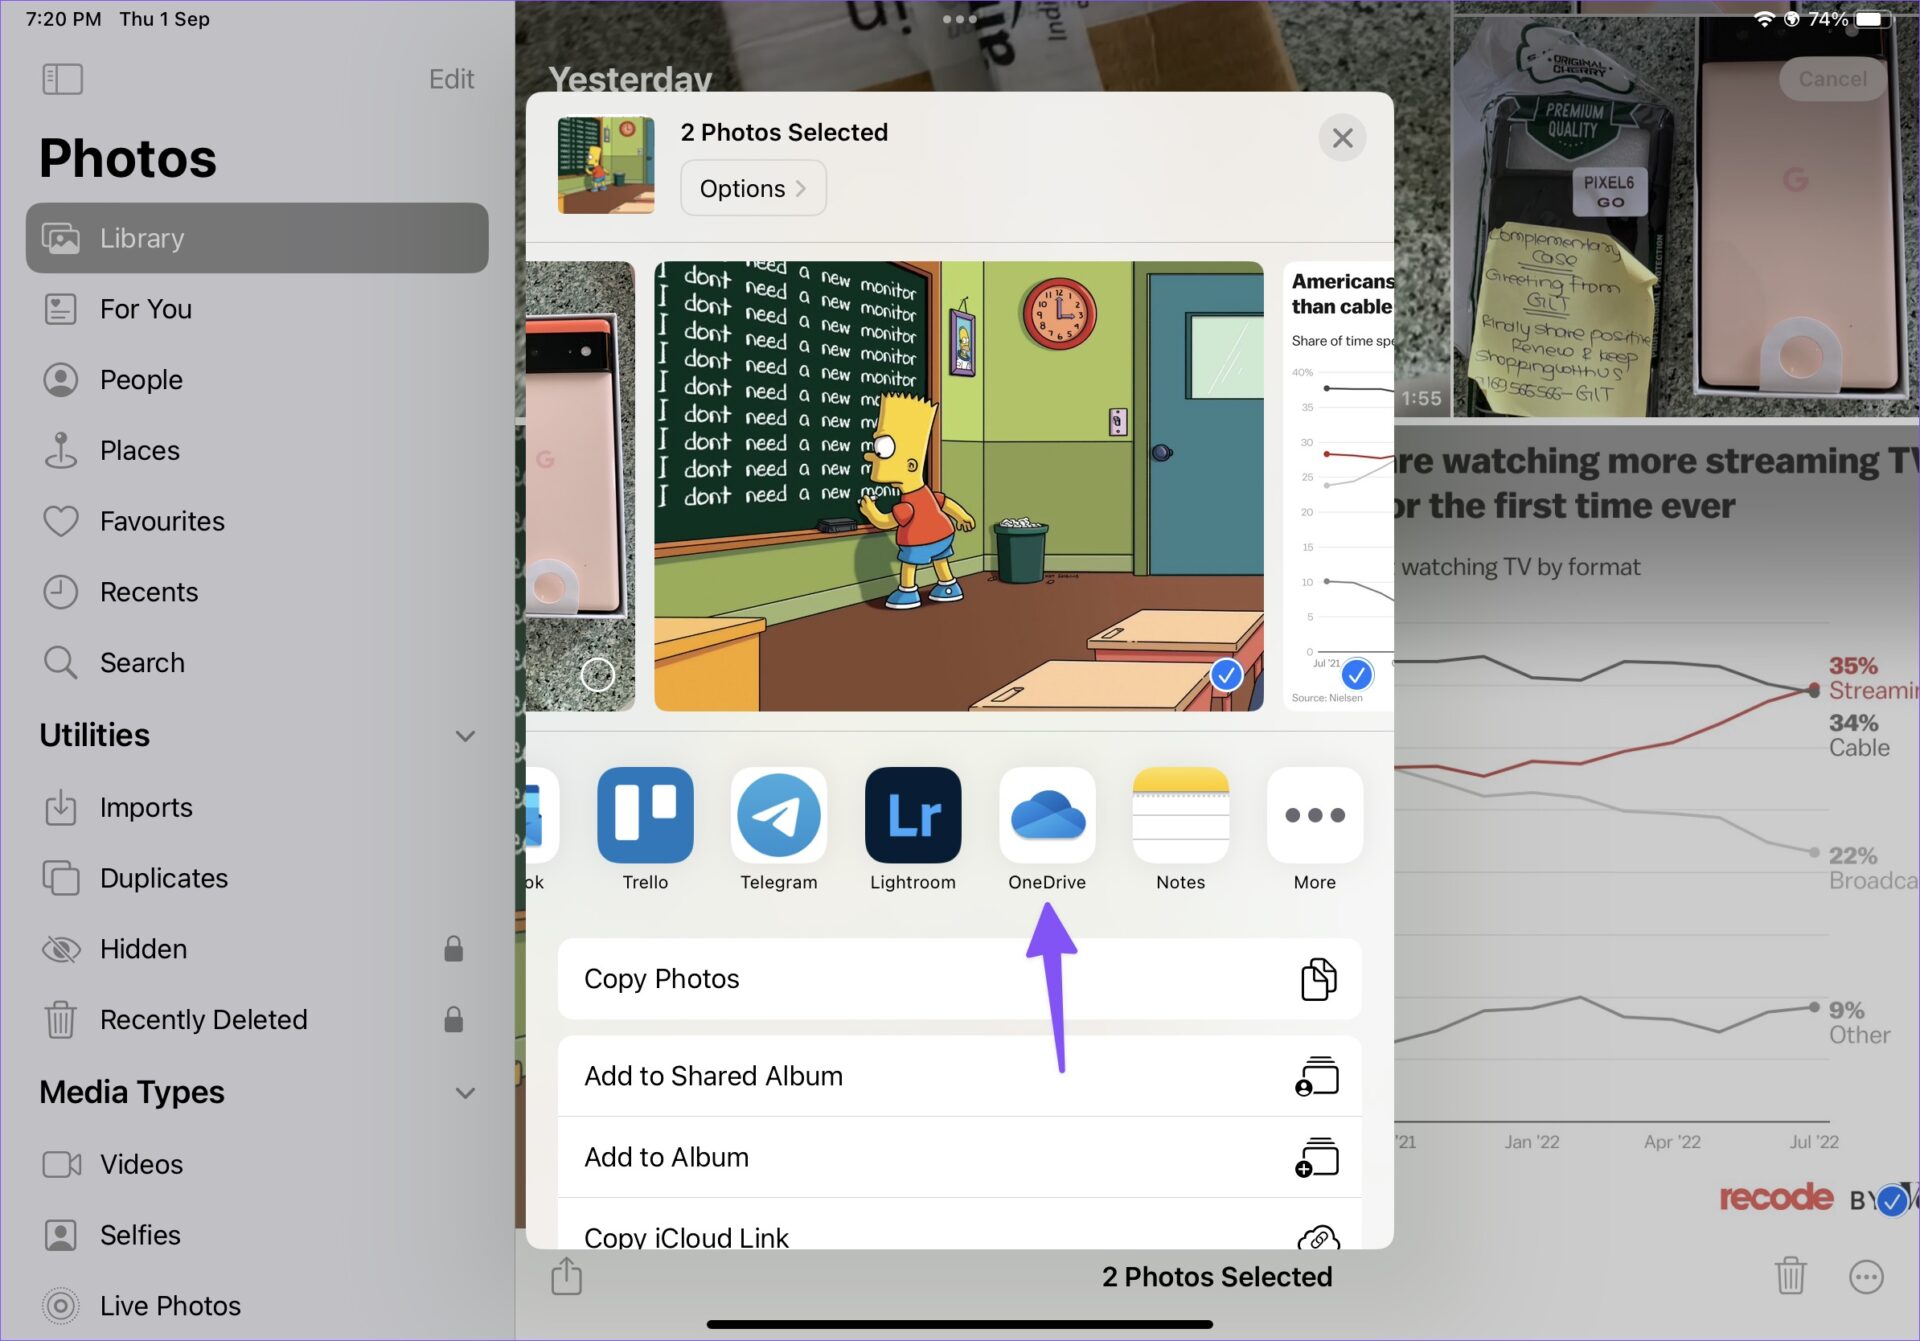
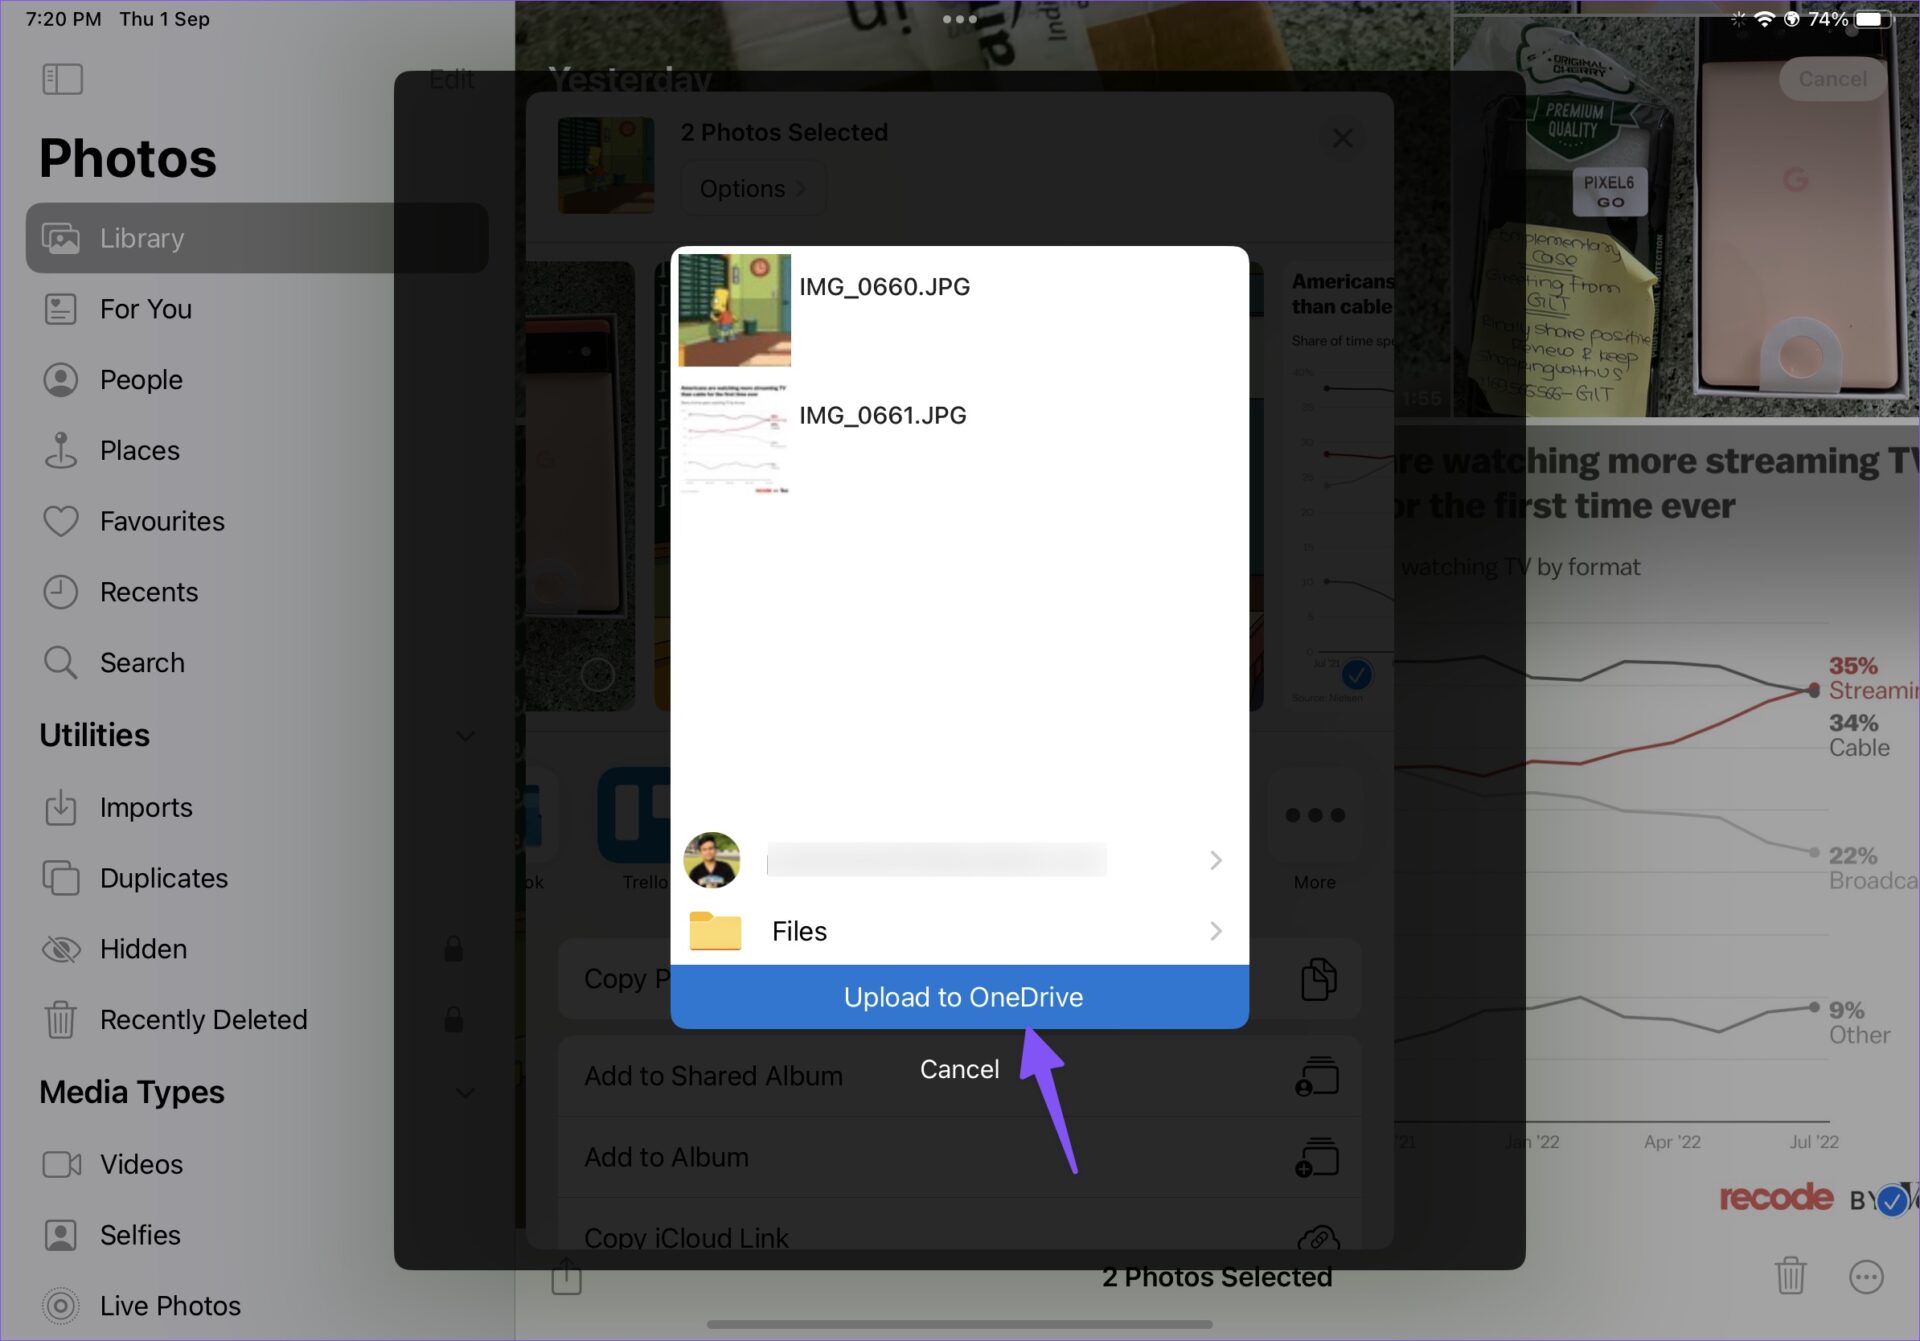
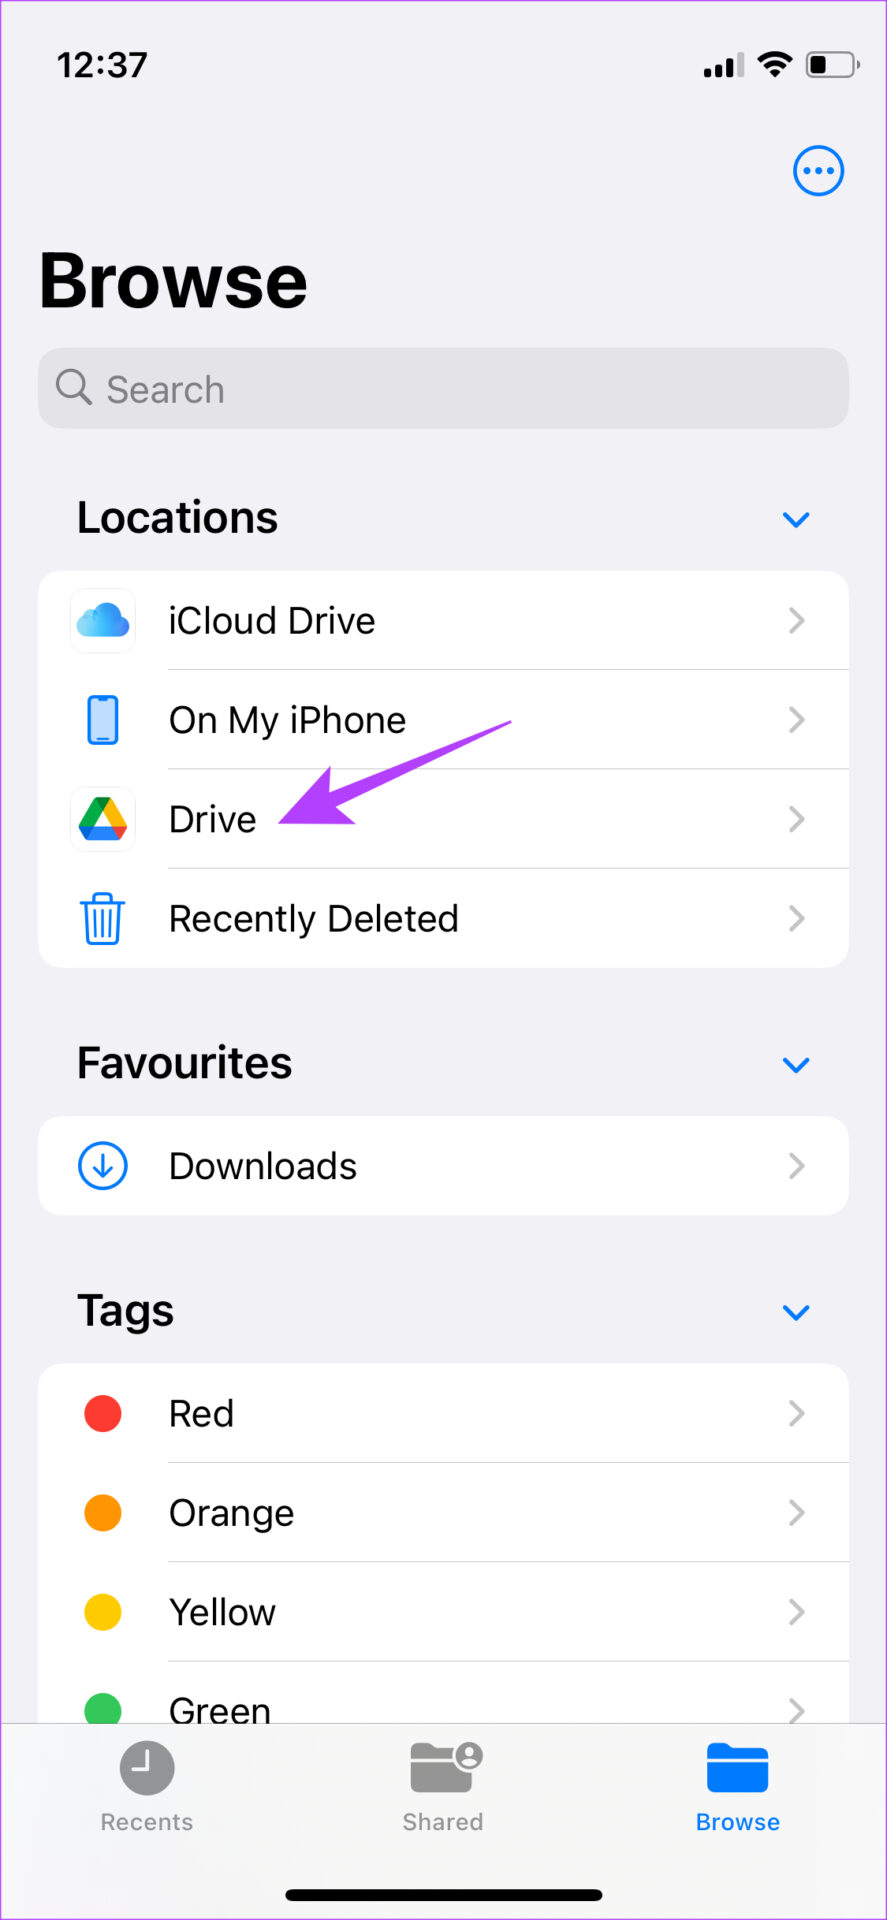
Although this method involves some extra steps, it’s a fairly simple way to transfer photos and videos from your iPhone to a PC. Sign up for a cloud storage solution like Google Drive or One Drive. Then, upload the files you want to transfer from your iPhone using the corresponding app.

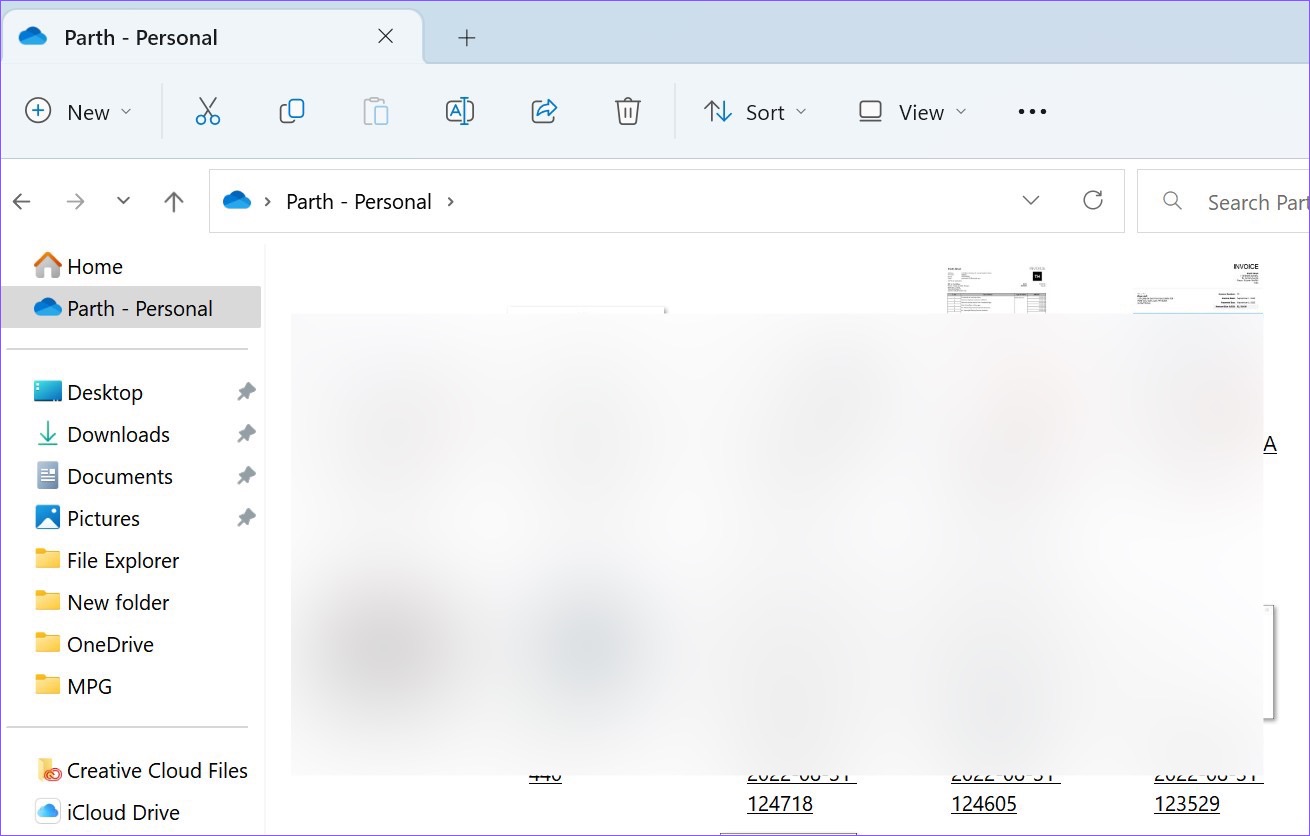
Access the cloud storage website on your Windows PC and download the files you want. Alternatively, you can sync your Apple Photos library to Google Photos and download the files you want directly from your PC.

5. Use an AirDrop Alternative to Transfer Files Between iPhone and PC

AirDrop is restricted to Apple devices. So, if you won’t be able to use it to connect your iPhone to Windows. However, there are alternatives to AirDrop that work cross-platform. Snapdrop and Sharedrop are some examples of websites that allow you to transfer files from iPhone to Windows PC wirelessly. Here’s how you can use them.

Step 1: Connect both your iPhone and PC to the same network.

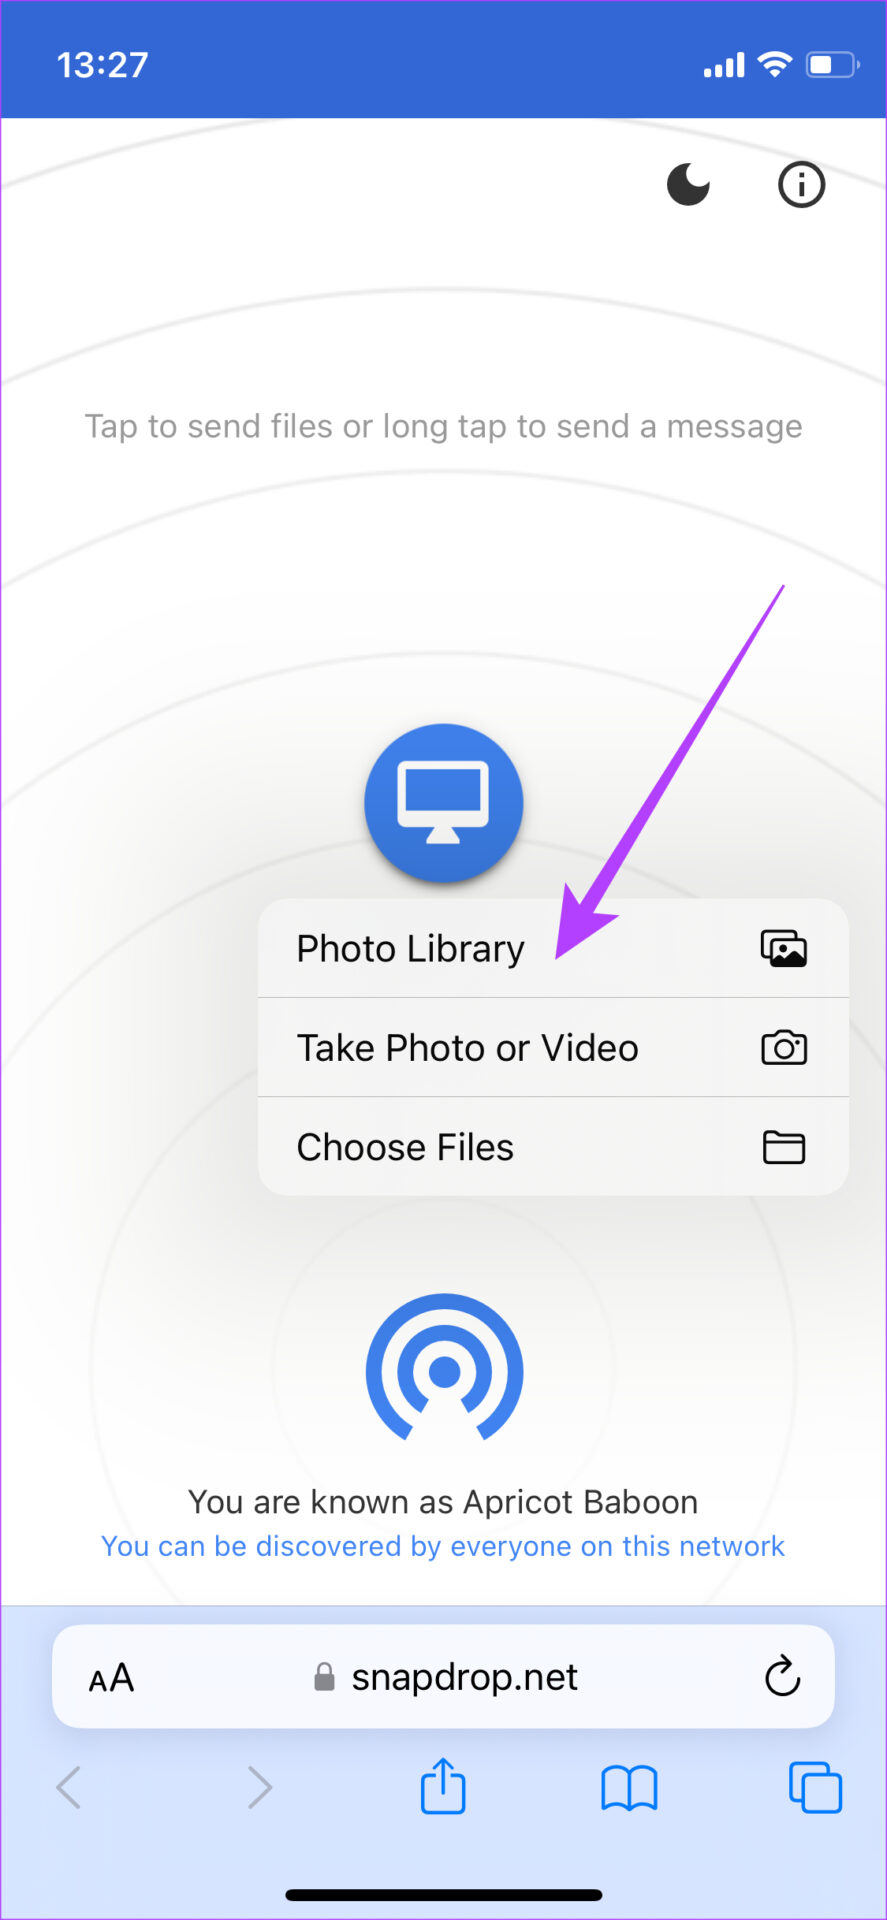
Step 2: Open Snapdrop using the browser on your Windows PC as well as iPhone.

Step 3: You will now see your PC pop-up on your iPhone. Confirm if the name shown to you is the same as that on your PC.

Step 4: If the names match, tap on the PC icon to select the files you want to transfer.

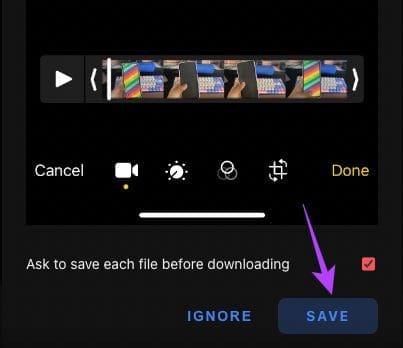
Step 5: You will now see a prompt on your PC asking if you wish to receive the file being sent. Select Save.

save file

The selected files will now be transferred to your PC. You can also perform this process in reverse to select a file on your PC and transfer it to your iPhone.

Such services are great for transferring smaller files and photos as large files such as videos take a long time to transfer.

Share Your Files With Ease

You no longer have to frown when your friends ask you to transfer the photos you clicked of them to a Windows PC. Or, if you’re a content creator who shoots a lot of videos, you no longer have to go through excruciating pain to transfer large 4K video clips to your PC. Just use one of these methods and you will be good to go. Personally, we suggest using the Shared Folder method via the Files app to transfer files between iPhone and Windows as it’s the fastest and most seamless way.

Was this helpful?


Thanks for your feedback!