Method 1. Use iTunes
Although Apple has retired iTunes on Mac, it remains the go-to software for managing your iPhone or iPad on Windows. Follow the steps below to transfer files from iPad to PC using iTunes.
Step 1: Download and install iTunes from the Microsoft Store on Windows.
Step 2: Open iTunes and grab a data cable to connect your iPad to a PC.
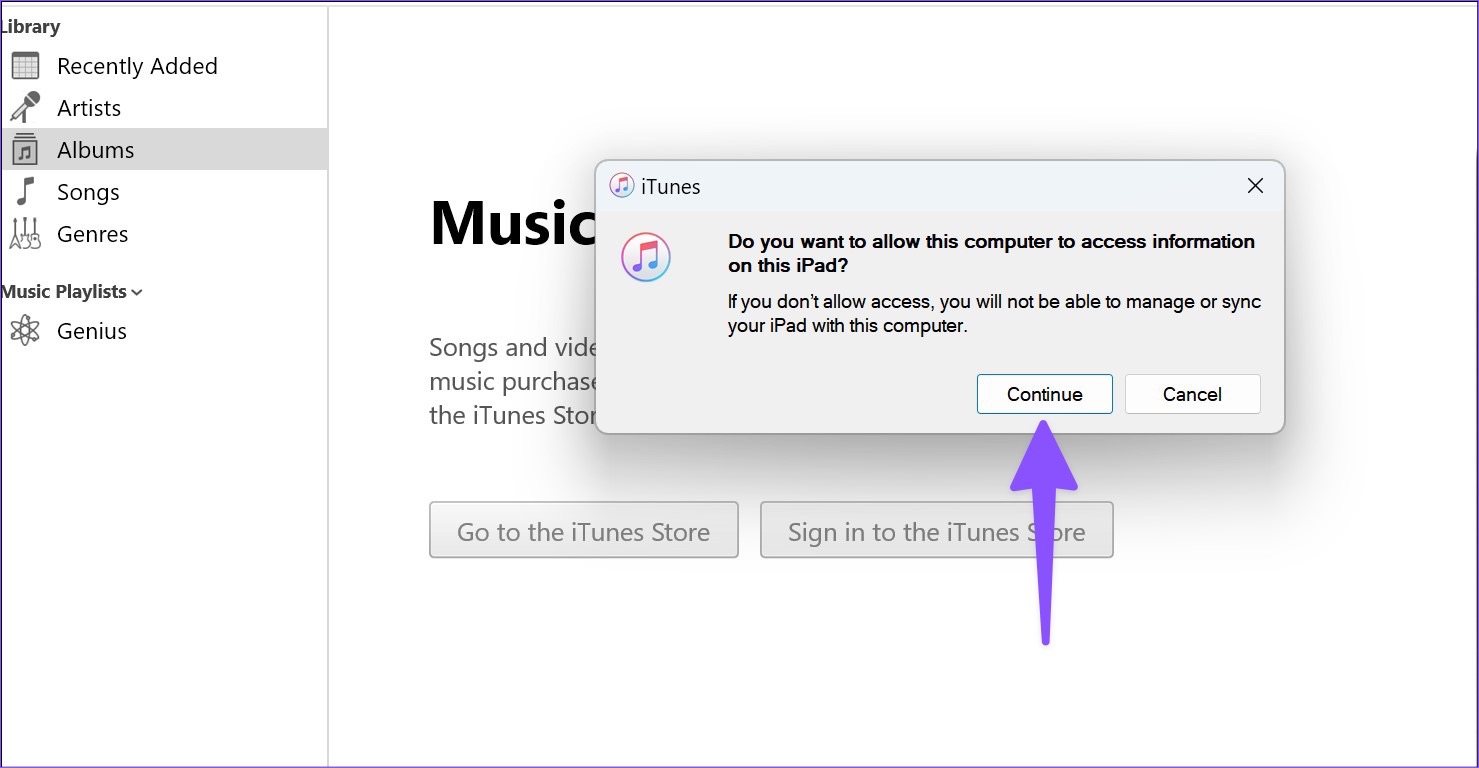
Step 3: Grant permission to let the Windows device recognize your iPad.

Step 4: The device icon will appear in iTunes in the top left corner. The software will ask you to allow the computer to access iPad data. Press the Continue button.
Step 5: Press the Windows + E keys shortcut to open File Explorer. Click on ‘This PC‘ in the left column, and your Apple iPad will appear on the list.

Step 6: Select your iPad to check device storage. Open relevant folders and move your files to the PC.

Using iTunes on Windows is a below-average experience. The software looks dated, and you might face issues with the data cable connection. Read along to find the top ways to transfer files from iPad to PC without iTunes.
Method 2. Using iCloud
iCloud is the default cloud storage solution on iPad. You can upload your photos, videos, and relevant files to iCloud and access them using the iCloud native app or iCloud web on Windows. First, you must enable iCloud to upload on the iPad.
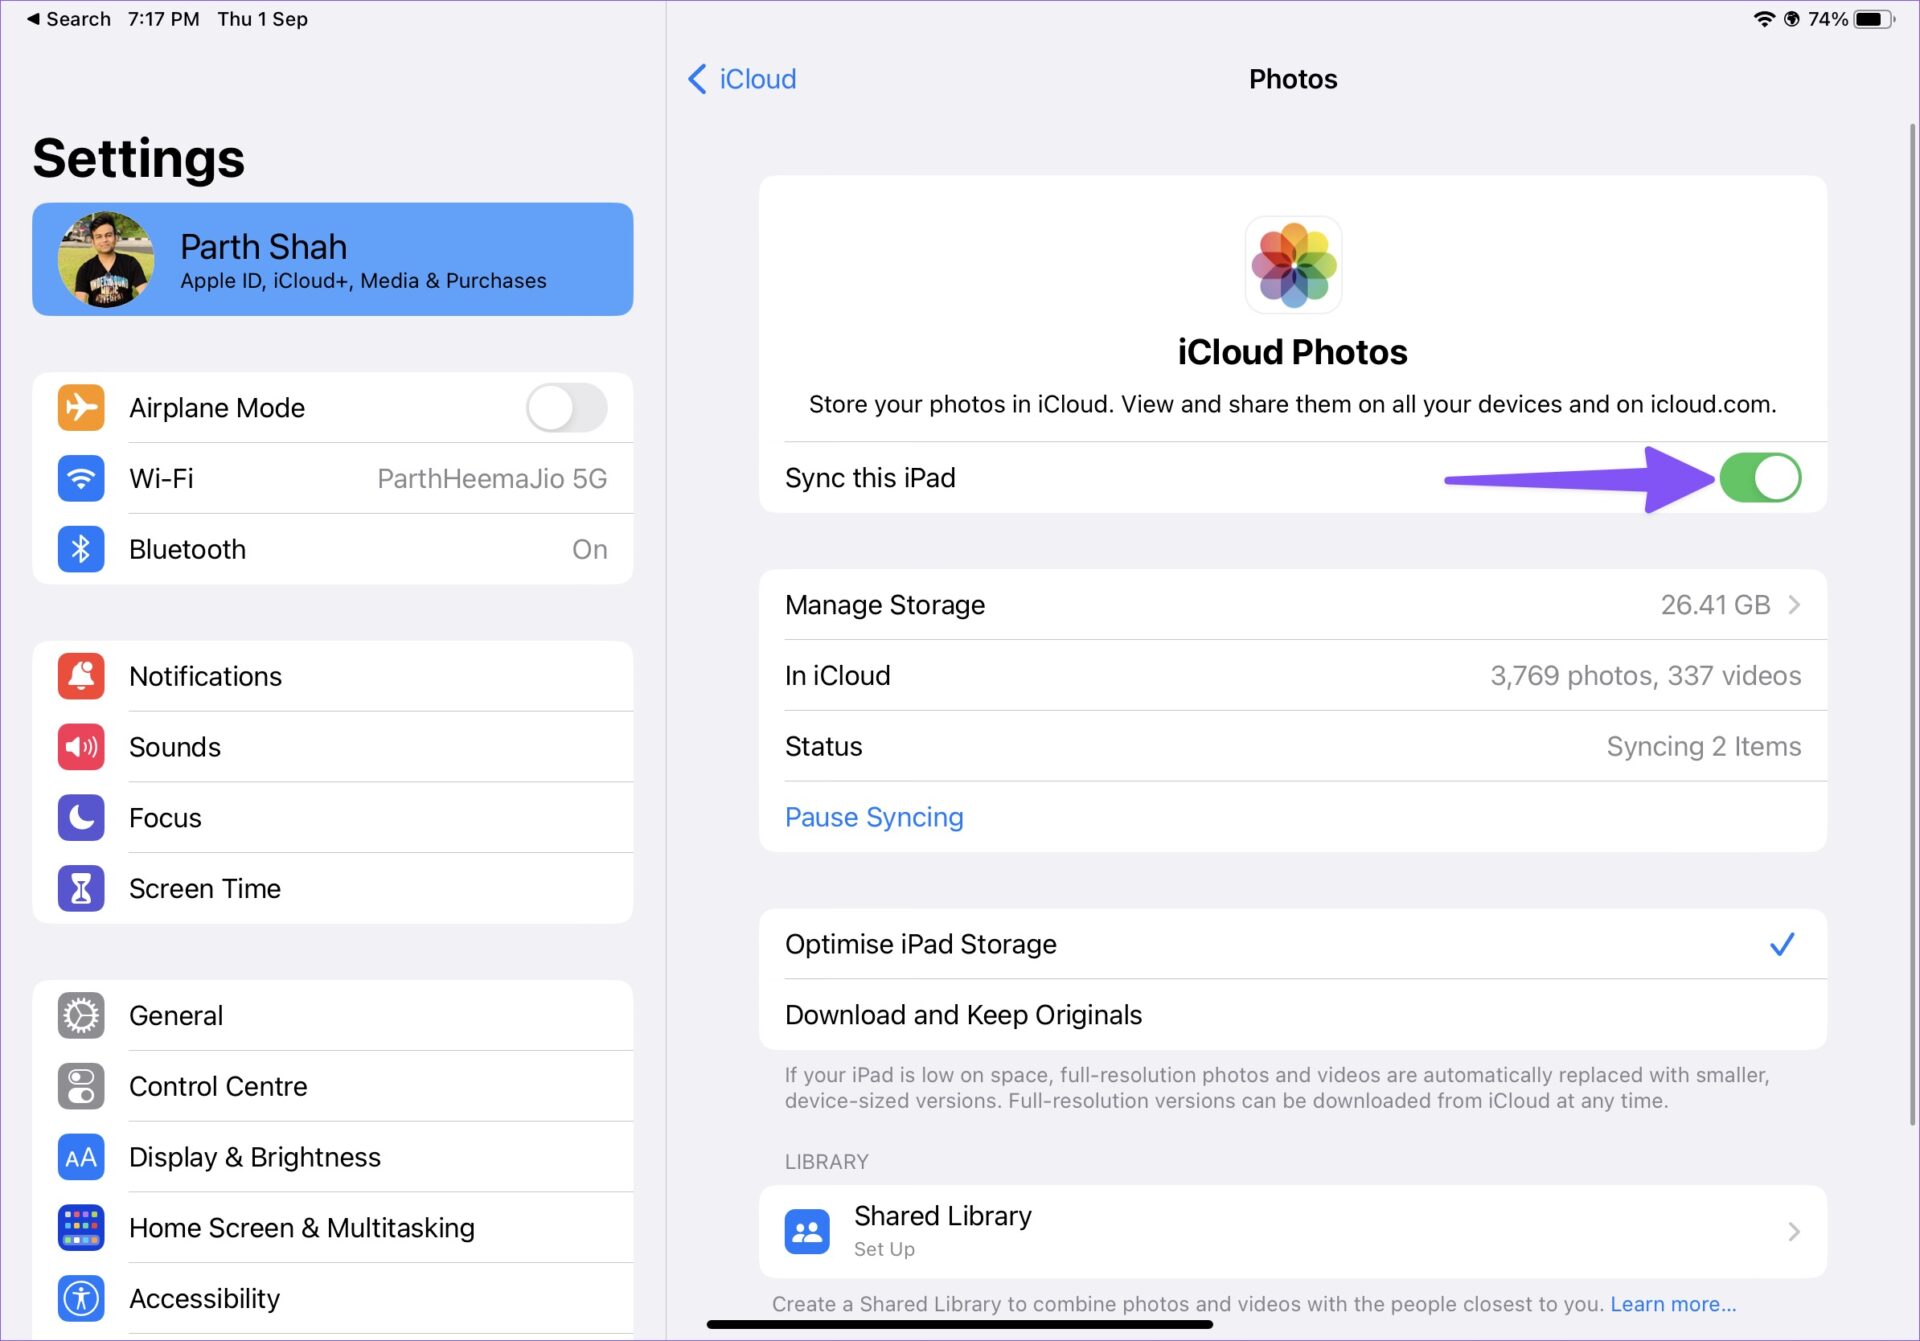
Step 1: Open the Settings app on your iPad.
Step 2: Select your account and open iCloud from the following menu. Select Photos.

Step 3: Next, enable the Sync this iPad toggle.
If you have PDFs and other documents, you can use the Files app on your iPad and move them to a relevant folder in iCloud Drive. Let’s access and move your uploaded files to the PC.
Step 1: Open the iCloud website in a browser on your Windows computer.
Step 2: Sign in with your Apple account details and complete the authentication process.

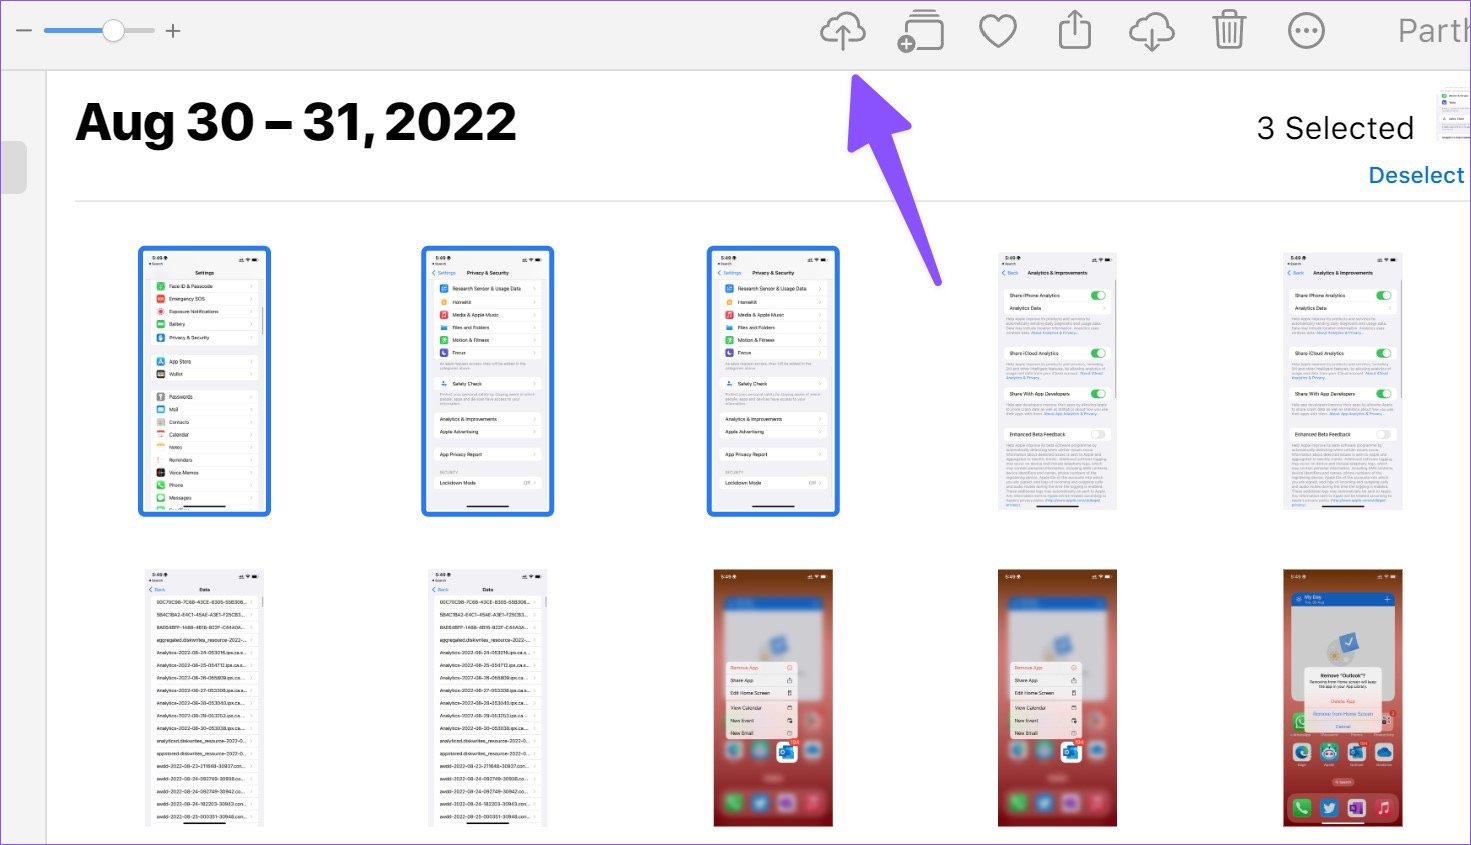
Step 3: Open Photos and select media files. Press the download button at the top and save them on your PC.
Step 4: Select iCloud Drive from the homepage and download PDFs and documents.

If you don’t want to visit iCloud web every time, set up iCloud on Windows and access your iCloud photos and folders from the File Explorer menu. Read our dedicated guide to adding iCloud to File Explorer on Windows. With a native iCloud app, you can also access the iCloud password on your PC.
Method 3. Using OneDrive
Not everyone prefers iCloud to store sensitive data online. Microsoft’s OneDrive is an excellent alternative to iCloud and comes by default on Windows. Besides, if you are an existing Microsoft 365 subscriber, you get 1TB of OneDrive storage.
Step 1: Install OneDrive on iPad.
Step 2: Sign in with your Microsoft account details.
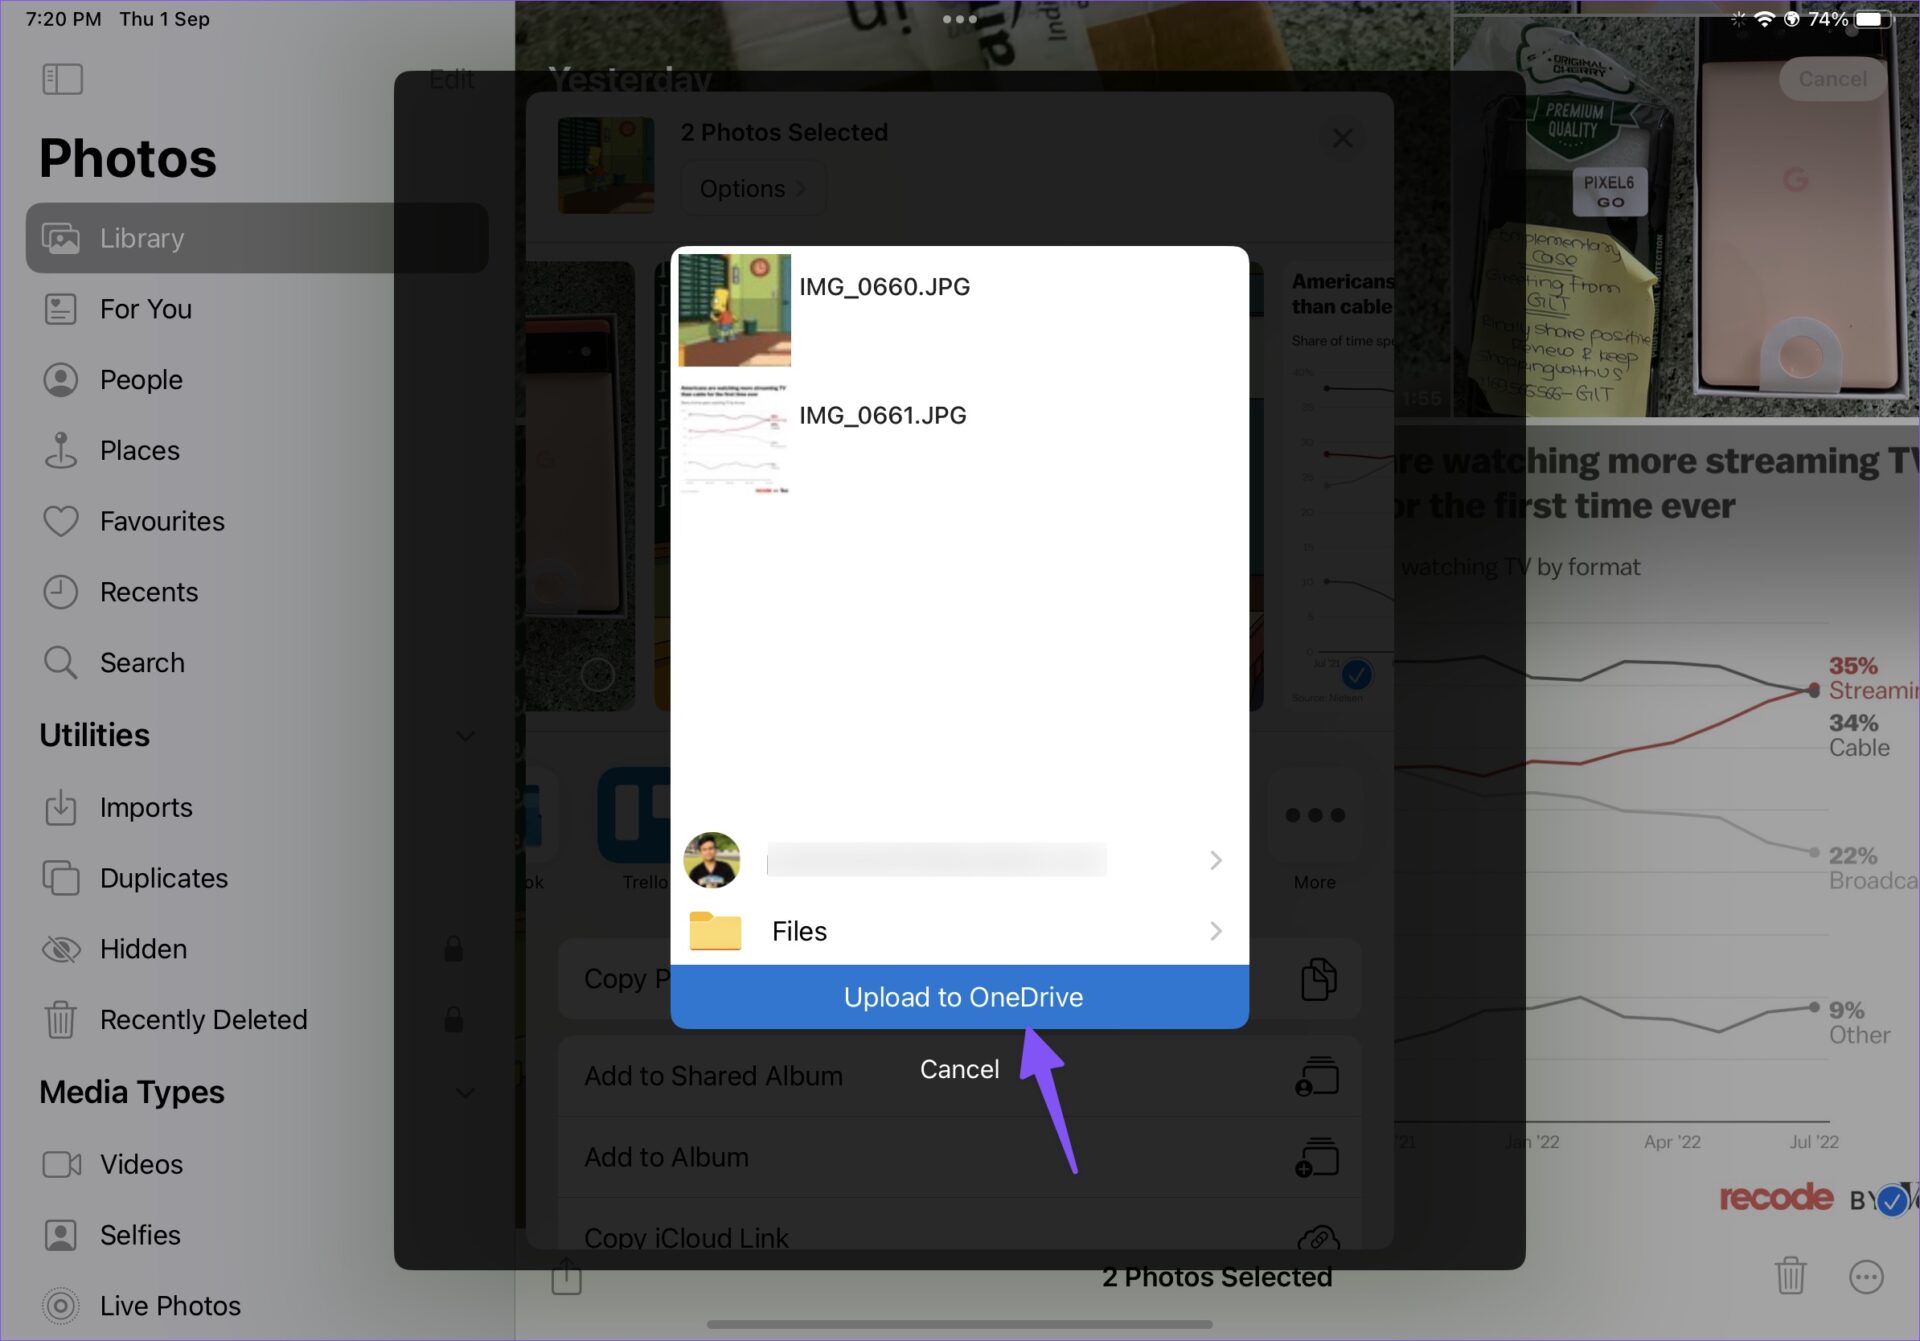
Step 3: Select photos or files on your iPad and use the iPadOS share menu to upload them on OneDrive.
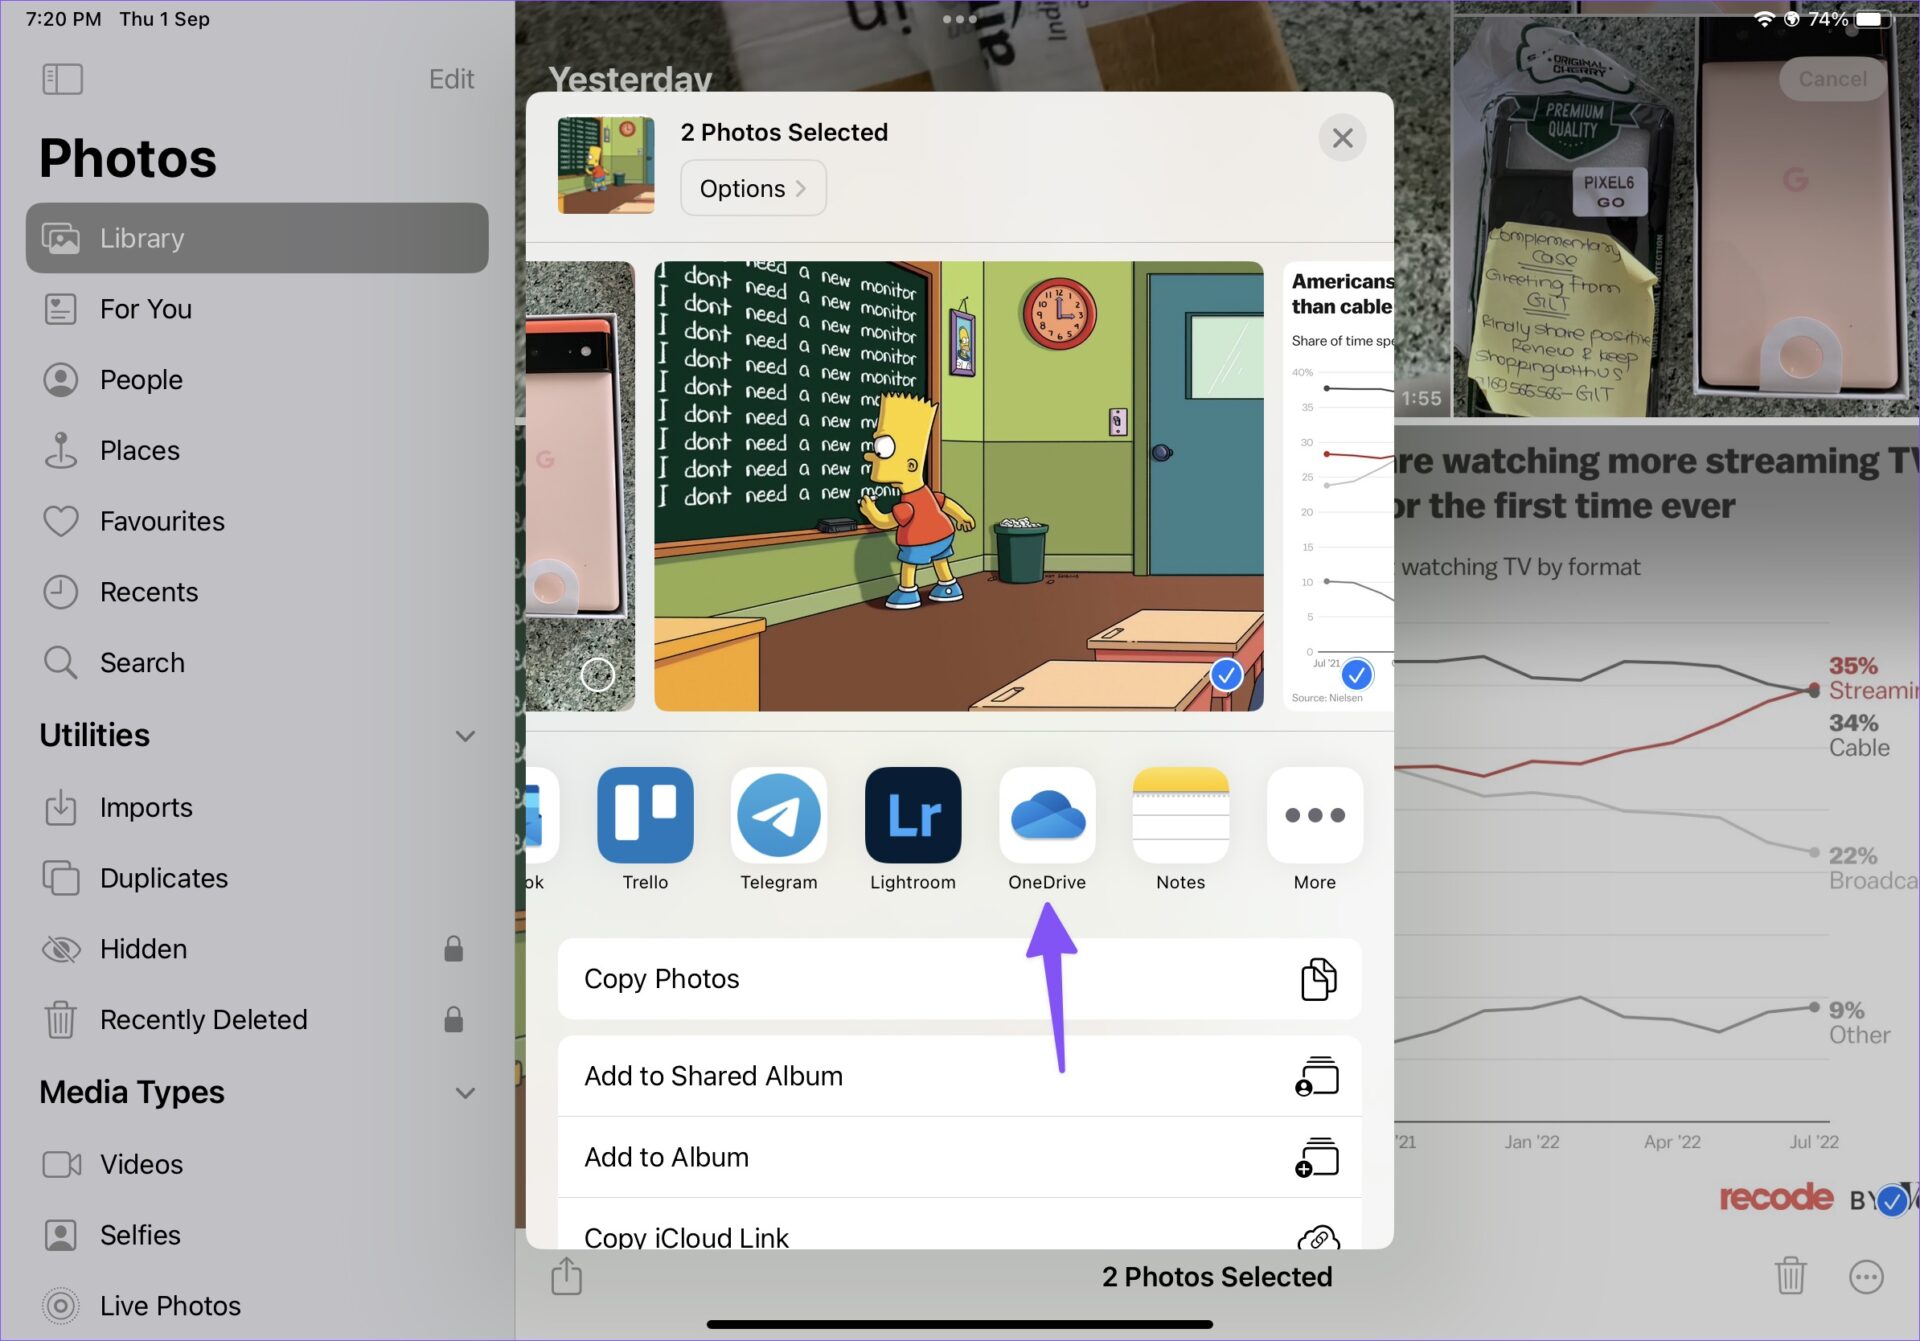
Step 4: Successfully upload files to OneDrive.
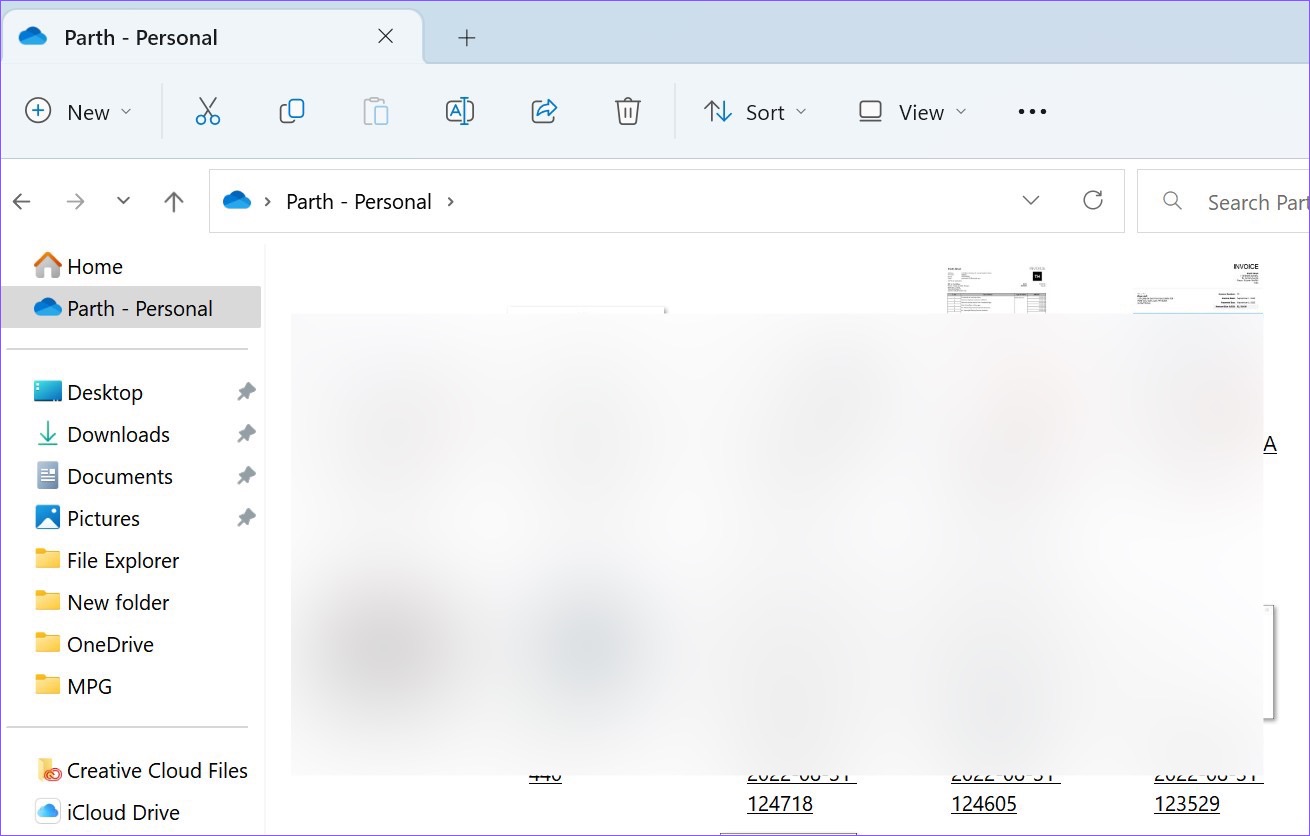
Step 5: Press the Windows + E keys to open the File Explorer on your Windows computer. Select OneDrive from the left column to check the files you uploaded to the iPad.
Method 4. Establish an FTP Server
FTP (File Transfer Protocol) is yet another effective method to transfer files from iPad to PC. We will use the FE File Explorer app to establish an FTP connection on the PC.
Step 1: Download the FE File Explorer app from the App Store.
Step 2: Open the app and permit it to access photos and device content.
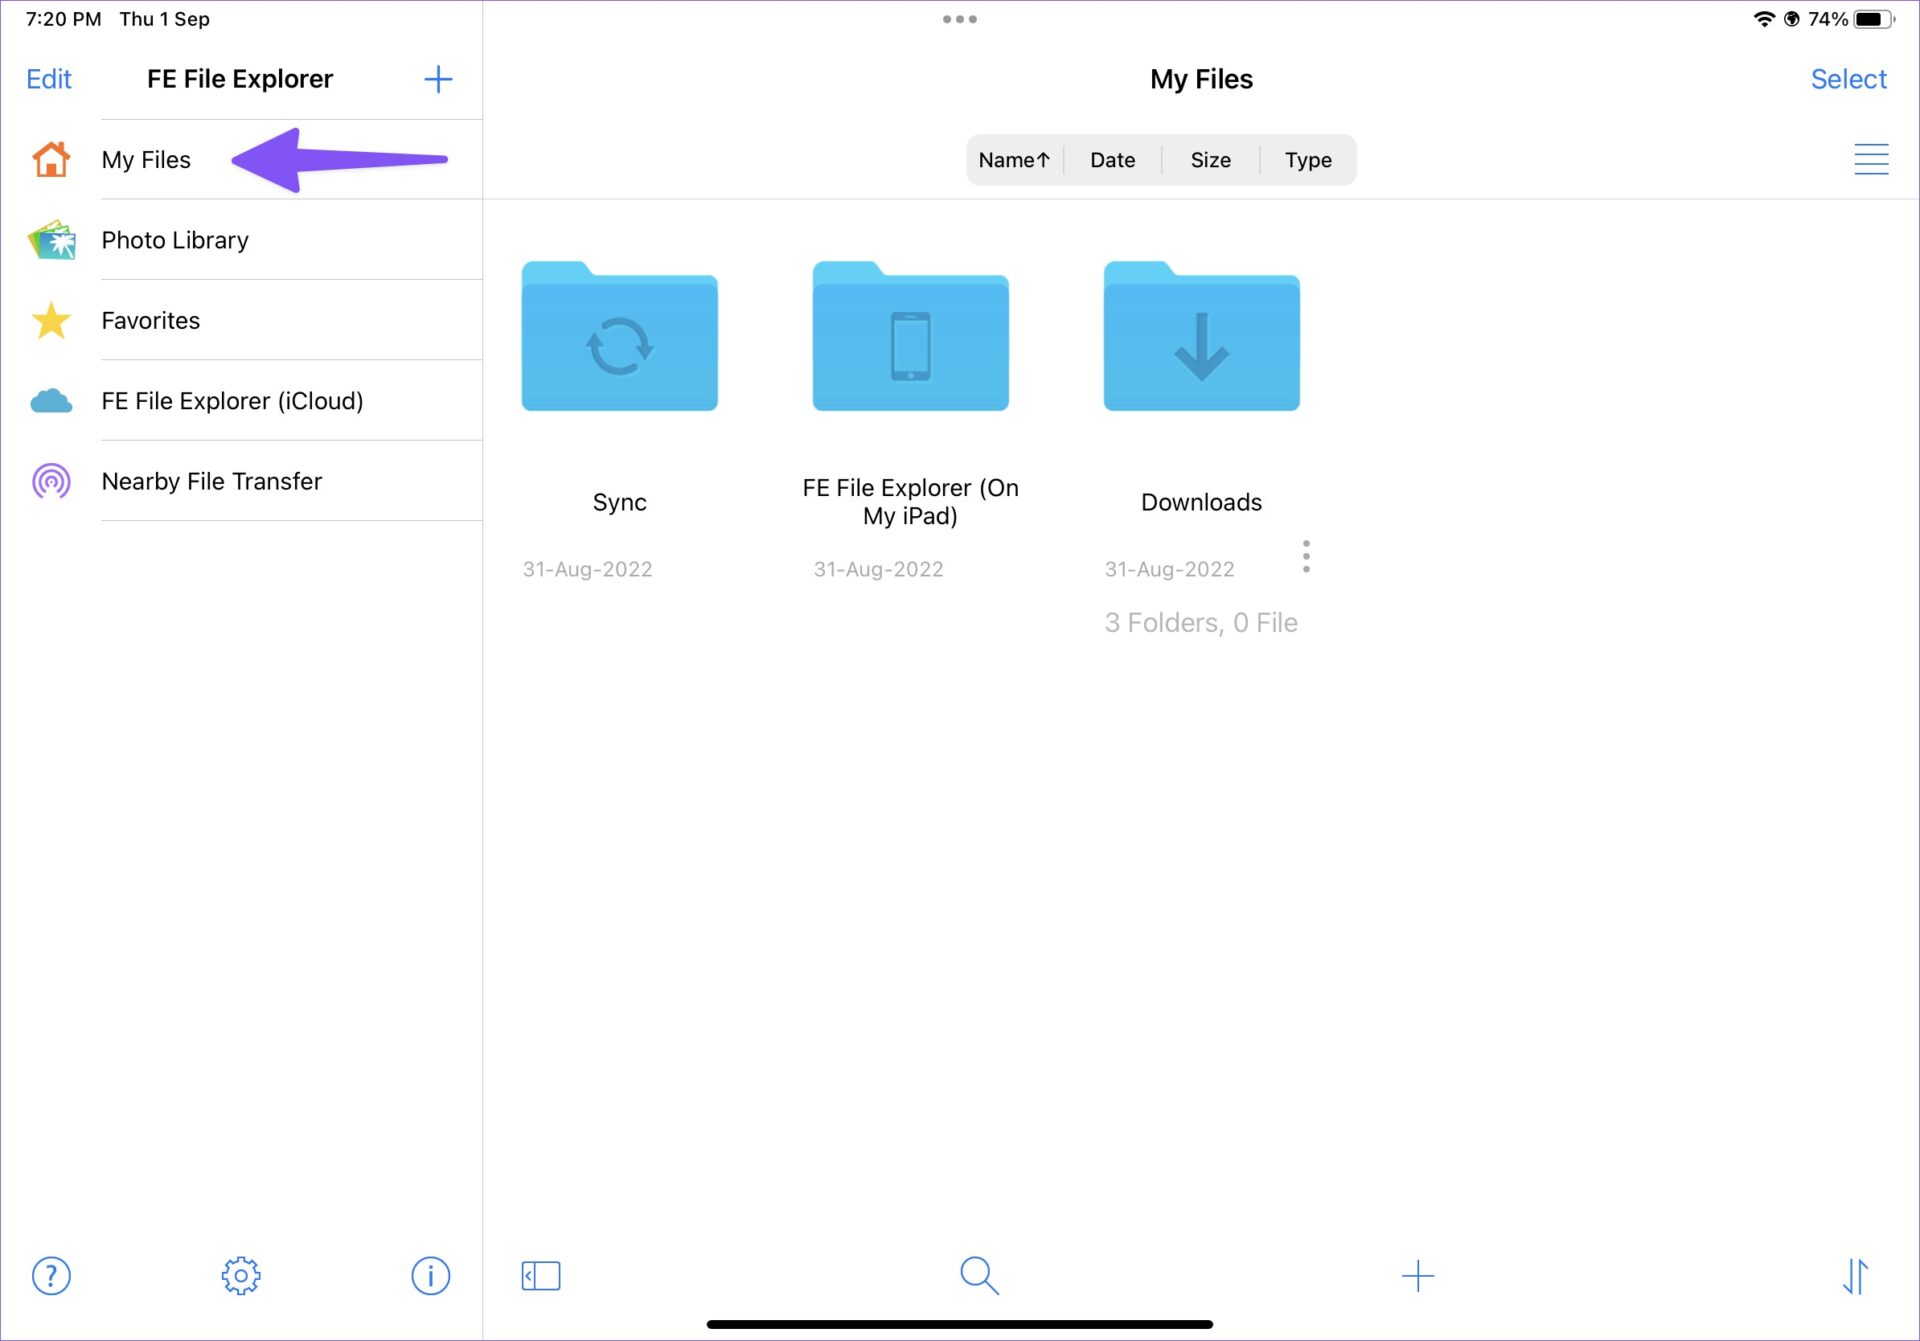
Step 3: Select the photos you want to transfer and move them to any folder in the My Files tab.
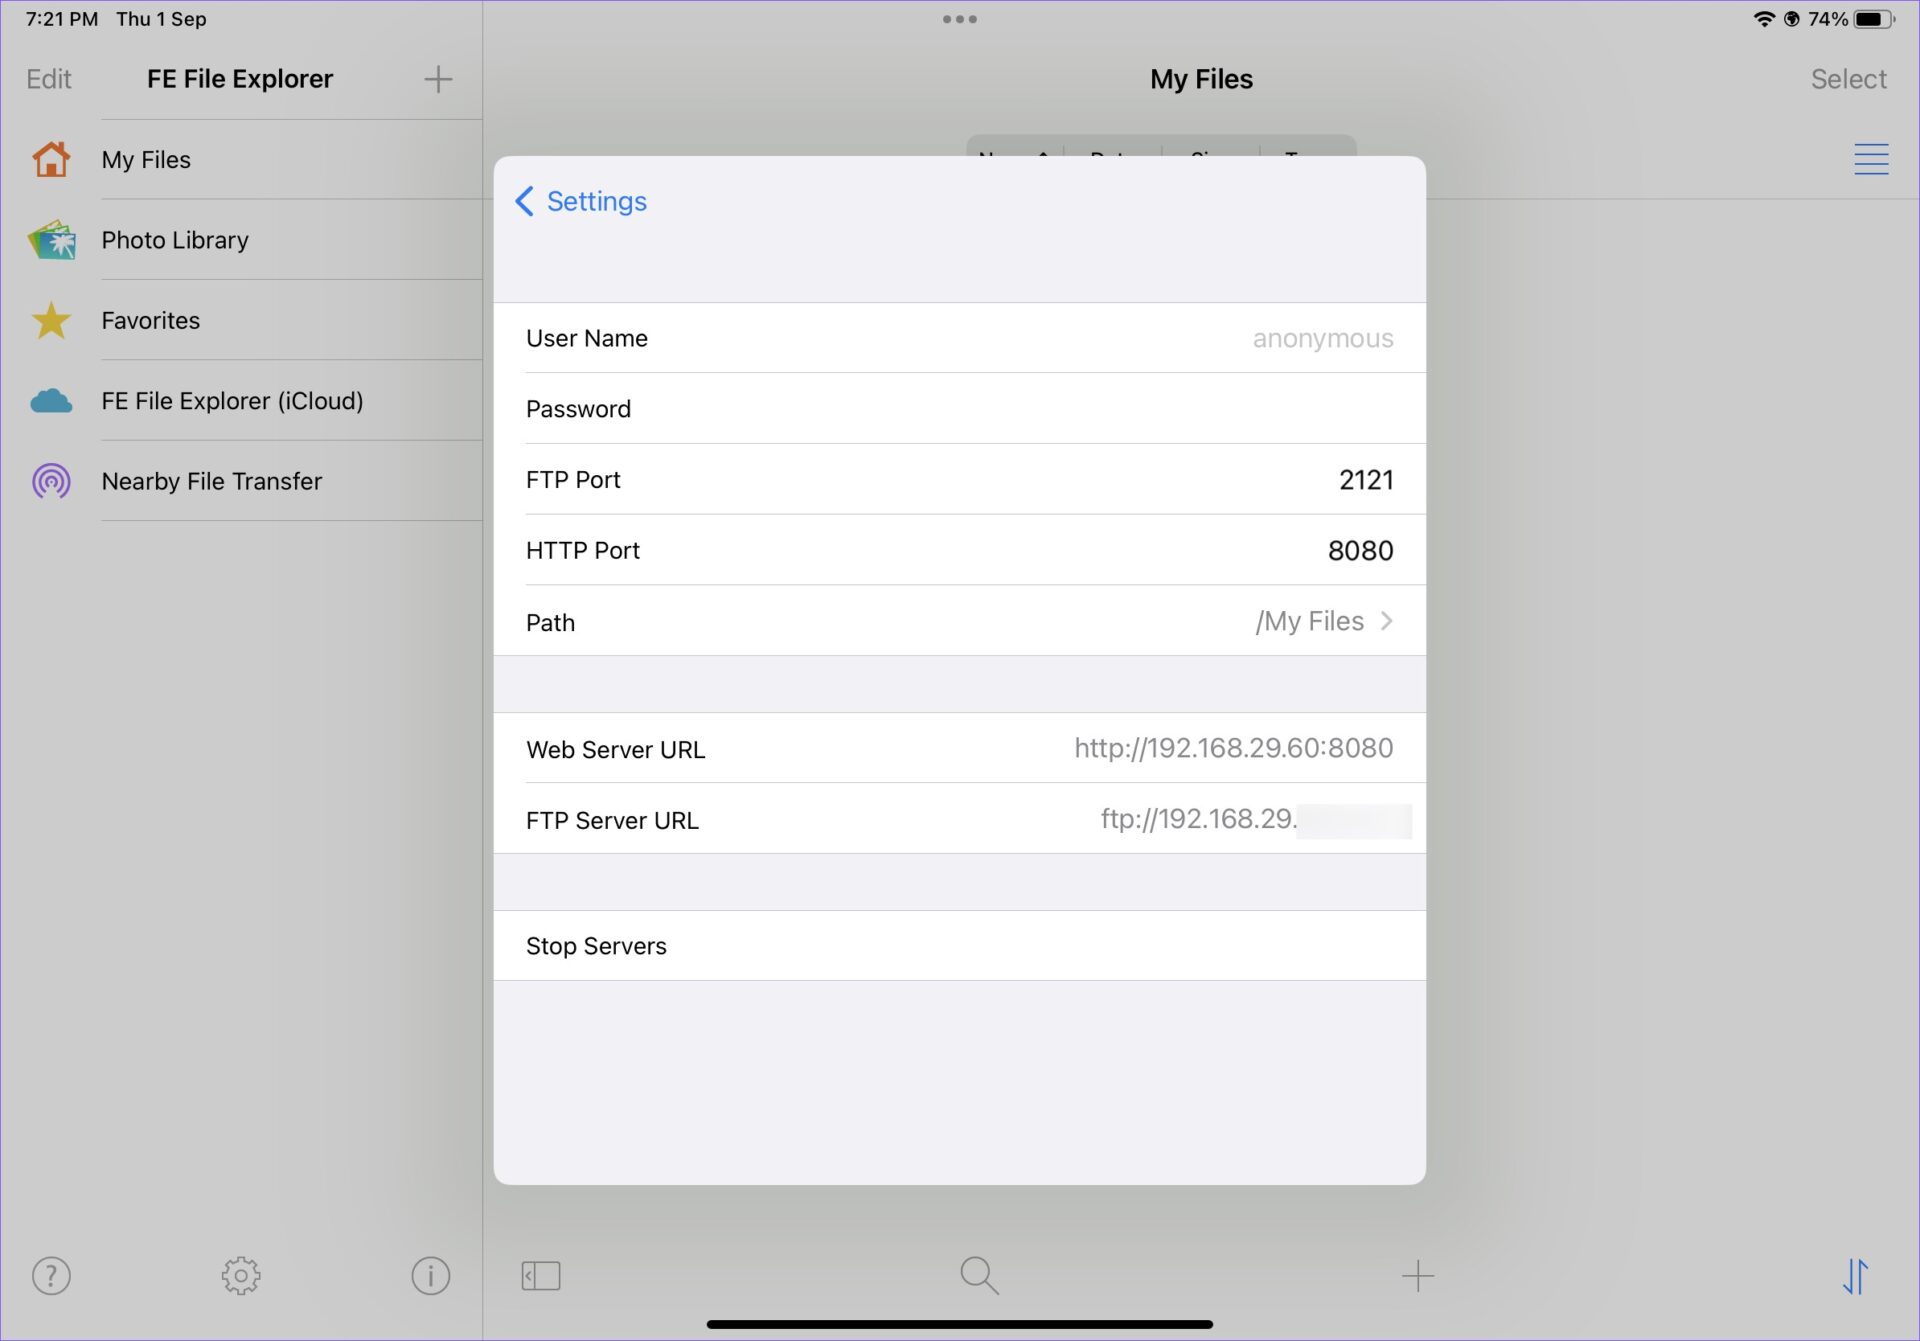
Step 4: Tap on the Settings gear.

Step 5: Select Built-in Servers.

Step 6: Note down the FTP Server URL.
Step 7: Open File Explorer on Windows (use Windows + E keys) and type the FTP server name in the address bar.
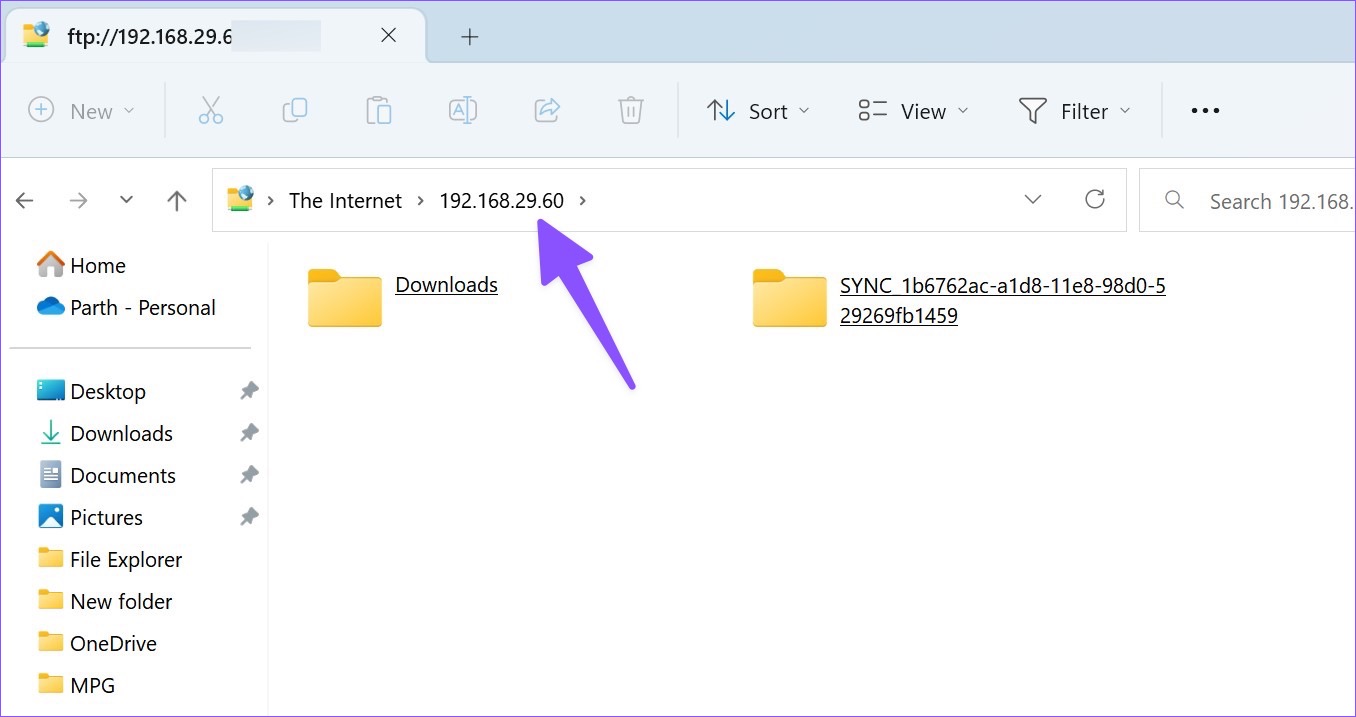
Step 8: The My Files folders in the file manager.

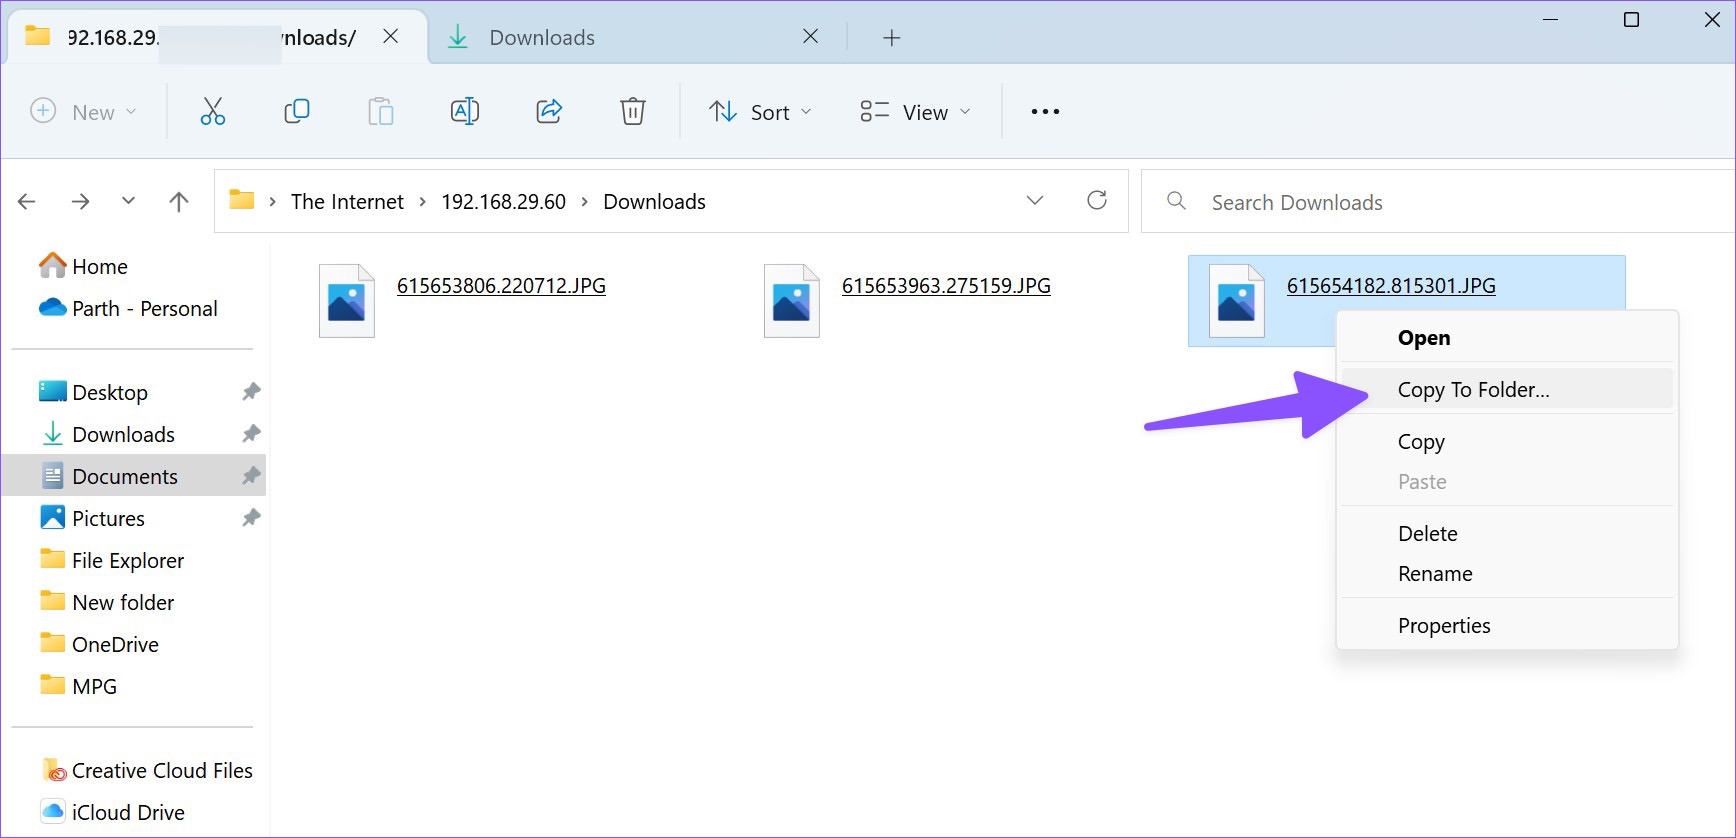
Step 9: Select the files you want to move to the PC.
Step 10: Right-click on them and select Copy to Folder from the context menu. Select a relevant folder on your PC to move the iPad files.
Was this helpful?
Last updated on 27 August, 2024
Read Next
 4 Ways to Transfer Files from a Windows PC to an iPad
Method 1: Use iTunes to Transfer Files From a PC to an iPad While Apple has retired iTunes on Mac, the company offers the same on Windows to manage your
4 Ways to Transfer Files from a Windows PC to an iPad
Method 1: Use iTunes to Transfer Files From a PC to an iPad While Apple has retired iTunes on Mac, the company offers the same on Windows to manage your
 5 Best Ways to Transfer Files Between iPhone and Windows PC
We always speak about how convenient the Apple ecosystem is.
5 Best Ways to Transfer Files Between iPhone and Windows PC
We always speak about how convenient the Apple ecosystem is.
 4 Ways to Transfer Files Between Mac and Android Wirelessly
1.
4 Ways to Transfer Files Between Mac and Android Wirelessly
1.
 5 Easiest Ways to Transfer Files From iPhone to Mac
AirDrop is the most popular way to transfer files from an iPhone to a Mac.
5 Easiest Ways to Transfer Files From iPhone to Mac
AirDrop is the most popular way to transfer files from an iPhone to a Mac.
 How to Use Xiaomi ShareMe App to Transfer Files and Data on Android
How do you transfer files between two phones?
How to Use Xiaomi ShareMe App to Transfer Files and Data on Android
How do you transfer files between two phones?
 3 Ways to Transfer Playlists From YouTube Music to Apple Music
There are three services you can use to perform the transfer based on your preferences.
3 Ways to Transfer Playlists From YouTube Music to Apple Music
There are three services you can use to perform the transfer based on your preferences.
 Samsung My Files vs Google Files: Which File Manager Is Better on Galaxy Phones
Samsung apps are bundled to replace the official Google Apps in the One UI.
Samsung My Files vs Google Files: Which File Manager Is Better on Galaxy Phones
Samsung apps are bundled to replace the official Google Apps in the One UI.
The article above may contain affiliate links which help support Guiding Tech. The content remains unbiased and authentic and will never affect our editorial integrity.