Does your Windows PC throw an error while creating a new folder? While you may want to organize your files, the inability to create a new folder might throw you off. Thankfully, there are several troubleshooting tricks for fixing the problem when you can’t create a new folder on Windows 11. Let’s check them out.

Whether it’s lack of permissions for your user profile, or the storage is running out of space – the reason could be anything. We will start with the basics and move to advanced methods like using a Registry Editor to fix can’t create a new folder on Windows 11. Without further ado, let’s get started.
1. Restart File Explorer
The newly redesigned File Explorer app with a tabbed interface can be fun to use. However, it may misbehave at times, especially if you are on one of the Windows 11 Insider Builds. You can force close the app and try creating new folders again.
Step 1: Right-click on the Windows key and select Task Manager.

Step 2: Select ‘File Explorer’ from the list and select ‘Restart task.’
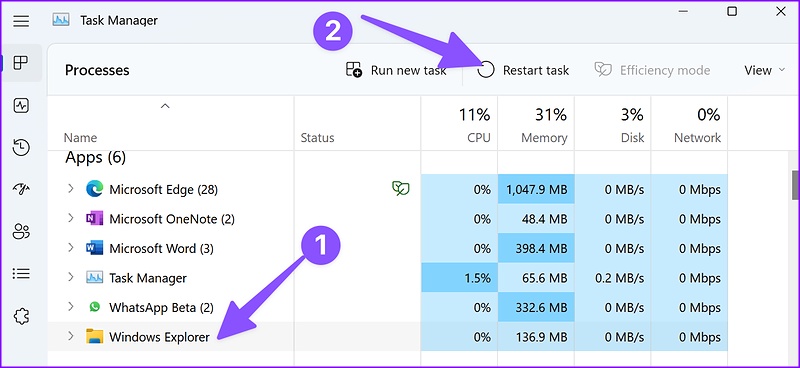
Step 3: Open File Explorer and create a new folder.
2. Use Keyboard Shortcut Keys
Another quick workaround is using keyboard shortcuts to create new folders in File Explorer. Press Ctrl + Shift + N keys and check your new folder in action.
3. Use Command Prompt to Create New Folders
If you still face issues with File Explorer, use Command Prompt to create new folders on your PC.
Step 1: Press the Windows key and type Command Prompt.
Step 2: From the results, select Run as administrator.

Step 3: When the Command Prompt window opens, type cd / to access the root directory – the one where you’ve installed Windows.
Step 4: Type mkdir followed by your folder name and hit Enter.
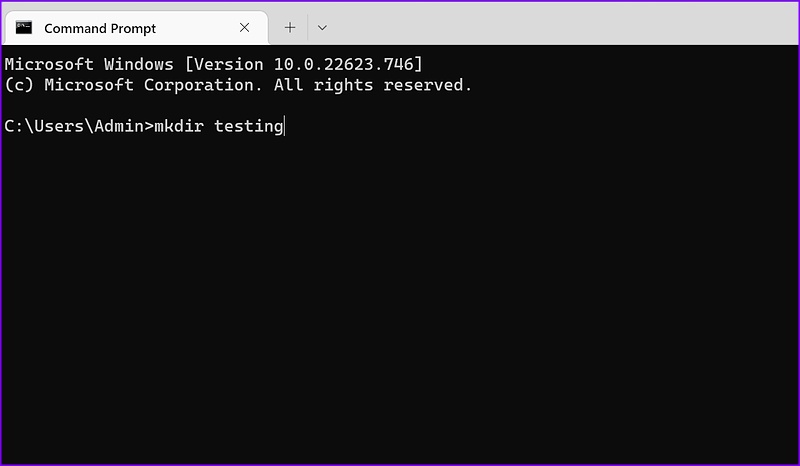
Open File Explorer, head to (C:) drive, and find your new folder.
4. Tweak Windows Registry
It’s time to edit Windows Registry to fix the can’t create new folders in Windows 11 problem. Be careful when you use Windows Registry to make tweaks on your computer. A single misstep can lead to software issues on your Windows PC. We recommend you take a backup of the Registry before you proceed.
Step 1: Press the Windows key and search for Windows Registry. Hit Enter.

Step 2: Head to the following path.
Computer\HKEY_CLASSES_ROOT\Directory\Background\shellex\ContextMenuHandlers
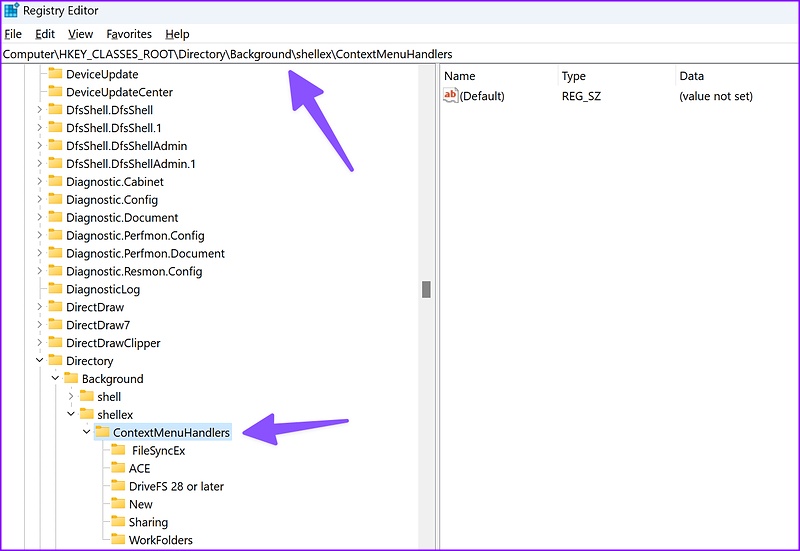
Step 3: Right-click on empty space, select New and choose Key.
Step 4: Type New as the key title.

Step 5: Double-click on it to open the Edit String menu.
Step 6: Copy and paste the following in the Value data and click OK:
{D969A300-E7FF-11d0-A93B-00A0C90F2719}
Step 7: Close the Registry Editor and reboot File Explorer (refer to the steps above) and create new folders.
5. Run Windows Security Scan
Malicious and corrupt files might prevent you from creating new folders on your PC. You can scan your PC using Windows Security to let it diagnose and fix the problem.
Step 1: Click the Windows key and search for Windows Security.

Step 2: Hit Enter to open the app. Select Virus & threat protection from the sidebar.

Step 3: Select ‘Scan options.’
Step 4: Select the radio button beside ‘Full scan’ and click ‘Scan now.’

After the Windows Security scan completes, open the File Explorer app and start creating new folders.
6. Tweak Windows Security Settings
Enabling controlled folder access protects files, folders, and memory areas on your device from unauthorized changes by random applications. If you have enabled the option, use the steps below to disable it.
Step 1: Press Windows + I keys to open the Settings app. Head to Privacy & security section from the left column and select Windows Security on the right pane. Then, choose ‘Virus & threat protection’ (check the steps above).
Step 2: Click ‘Manage ransomware protection’ option.
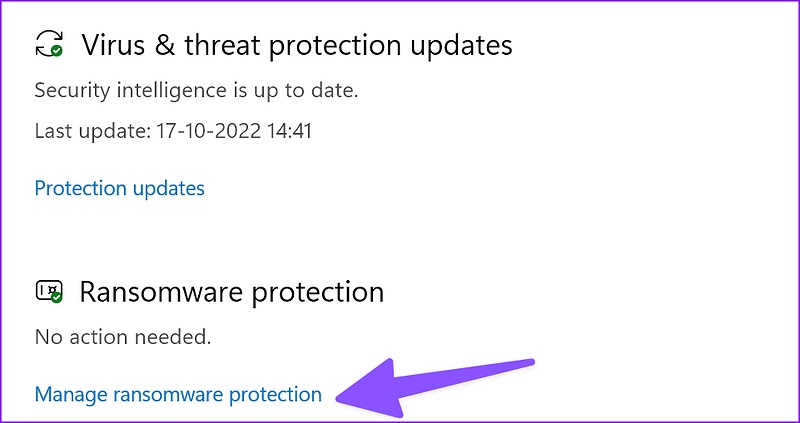
Step 3: Disable the ‘Controlled folder access’ toggle from the following menu.

7. Restore File Explorer to Default Settings
A wrong setting tweak might prevent you from creating folders on your computer. You can restore File Explorer to the default settings and try again.
Step 1: Press Windows + E keys to open File Explorer.
Step 2: Select the three-dot menu at the top.
Step 3: Click Options.

Step 4: Select Restore Defaults.

Step 5: Hit Apply and click OK.
8. Update Windows 11
Microsoft recently redesigned the default File Explorer with a new interface and features like tabs. However, the app isn’t free of issues. At times, we face problems like thumbnails not showing, File Explorer not working, or can’t create folders.
The software giant is fairly quick to resolve glaring issues. The File Explorer app is tied with the OS build, and you must download the latest Windows update to fix the problem.
Step 1: Press Windows + I keys to open the Windows Settings menu.
Step 2: Select ‘Windows Update’ from the sidebar.

Step 3: Download and install the pending Windows updates on your PC.

Create New Folders at Breeze
You might face issues with creating new folders due to low internal storage on your PC. You must remove unnecessary apps or use Storage Spaces and create new folders without issue.
Was this helpful?
Last updated on 20 October, 2022
The article above may contain affiliate links which help support Guiding Tech. The content remains unbiased and authentic and will never affect our editorial integrity.


