Method 1: Change the Power Plan Using the Settings App
By default, your PC is set to Balanced power mode, but you can change it to “Best performance” or “Best power efficiency” to prioritize performance or battery life, respectively. Here’s how:
Step 1: Press the Windows key + I to open the Settings app and head to System > Power & battery.

Step 2: Use the drop-down menu next to Power mode to switch between three modes: Balanced, Best power efficiency, and Best performance.

Method 2: Change the Power Plan via the Control Panel
Using the Control Panel is an old-school way of making changes to your PC. Here’s how to use it to change the power plan in Windows 11.
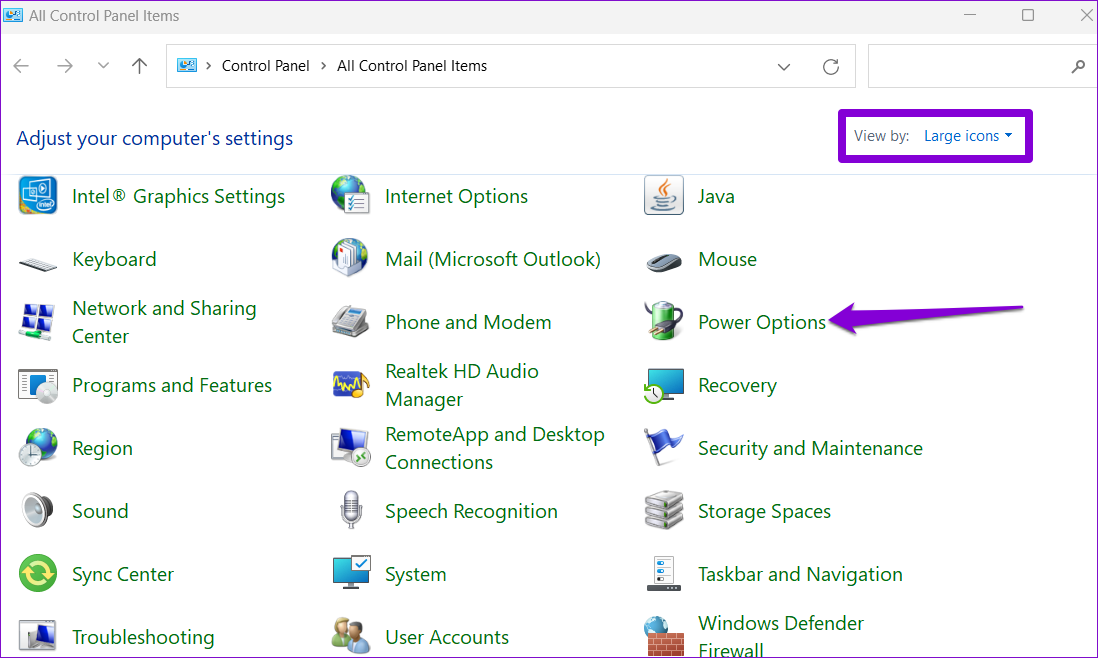
Step 1: Click the search icon on the taskbar. Type control panel and press Enter.

Step 2: Use the drop-down menu at the top right corner to change the view type to Large icons and go to Power options.
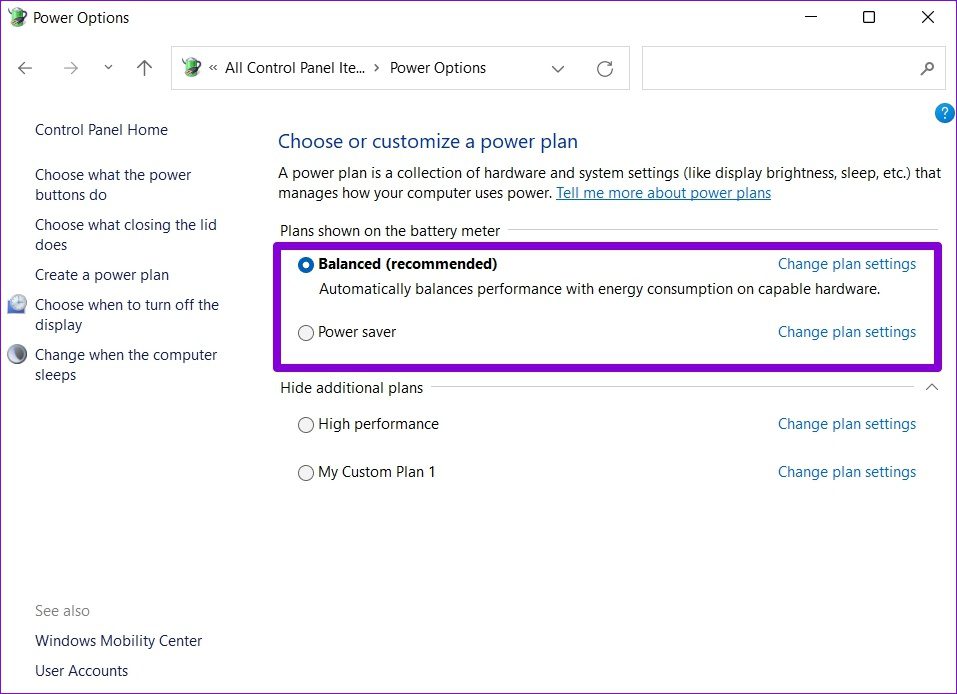
Step 3: Select the radio button on the left of the power mode to activate it.
Method 3: Change the Power Plan With Command Prompt
You can also use the command prompt on Windows 11 to communicate with your PC and change its power plan settings. Read on to learn how.
Step 1: Press the Windows key + S to open the search menu, type cmd, and press Enter.

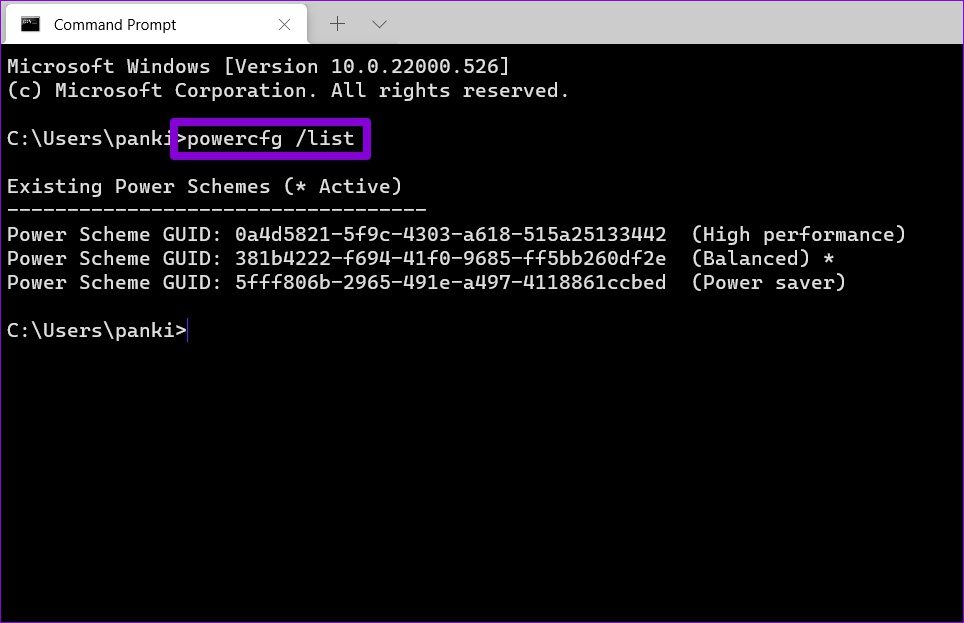
Step 2: In the console, type the below command and press Enter to view a list of available power plans.
powercfg /list
Note: The GUID number next to the plan is its unique identifier code that you can use to switch between various modes. Note the GUID number of the plan you wish to use.
Step 3: To change power mode, run the following command.
powercfg /setactive GUID
Replace GUID in the above command with the actual unique identifier code noted earlier.

It’s important to note that once you’ve changed the power mode via the Control Panel or Command Prompt, you can’t change modes via the Settings app. To fix this, use the Control Panel or Command Prompt and switch to the Balanced mode first.

Bonus: Create a Custom Power Plan on Windows 11
While Windows 11 already offers you three different power plans, you can also create a custom power plan that best suits your needs. Here’s how.
Step 1: Press the Windows key + R to open the Run dialog, type control, and press Enter.
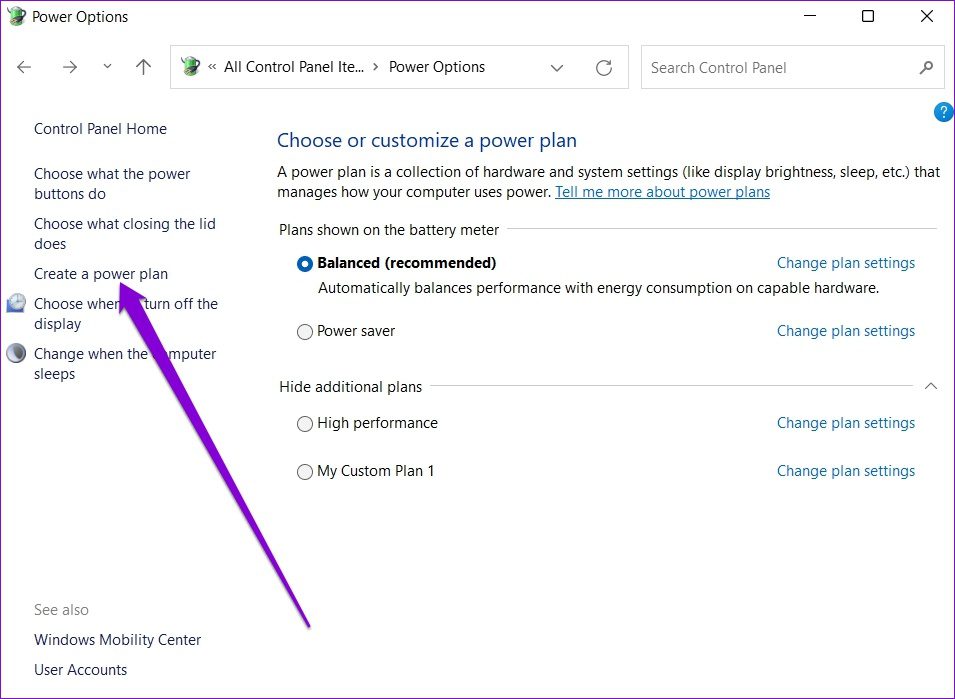
Step 2: Click Power options. From the left column, click on Create a power plan.
Step 3: Select one of the three basic plans to start with. Then, enter a suitable plan name and hit Next.

Step 4: Choose the preferred sleep and display settings for the plan and hit Create.

Was this helpful?
Last updated on 08 May, 2024
Read Next
 5 Quick Ways to Fix Can’t Change Power Plan in Windows 11
Are you unable to change the power plan on your Windows PC?
5 Quick Ways to Fix Can’t Change Power Plan in Windows 11
Are you unable to change the power plan on your Windows PC?
 How to Change or Cancel Netflix Plan on Any Device
How to Change Your Plan on Netflix If you've made your decision and wish to change your Netflix plan, here's how to do it.
How to Change or Cancel Netflix Plan on Any Device
How to Change Your Plan on Netflix If you've made your decision and wish to change your Netflix plan, here's how to do it.
 6 Best Power Banks With USB Type-C Power Delivery
A power bank is a must-have for many of us who are often on the road.
6 Best Power Banks With USB Type-C Power Delivery
A power bank is a must-have for many of us who are often on the road.
 6 Best Free Websites for Floor Plan Design
It’s 2019, and today, the internet acts as the gateway to a myriad of different tools and websites.
6 Best Free Websites for Floor Plan Design
It’s 2019, and today, the internet acts as the gateway to a myriad of different tools and websites.
 Netflix Standard vs. Premium: Which Netflix Plan Is Best for You
Netflix Subscription Plans At a Glance While Netflix provides three plans in total, the Standard and Premium plans take the cake.
Netflix Standard vs. Premium: Which Netflix Plan Is Best for You
Netflix Subscription Plans At a Glance While Netflix provides three plans in total, the Standard and Premium plans take the cake.
 How to Fix ‘There Are Currently No Power Options Available’ Error in Windows
Preliminary Fixes Check for Windows Update: Sometimes, the error can occur due to bugs or issues introduced in a previous Windows update.
How to Fix ‘There Are Currently No Power Options Available’ Error in Windows
Preliminary Fixes Check for Windows Update: Sometimes, the error can occur due to bugs or issues introduced in a previous Windows update.
 5 Fixes for Driver Power State Failure in Windows 11
What Causes Driver Power State Failure?
5 Fixes for Driver Power State Failure in Windows 11
What Causes Driver Power State Failure?
 3 Ways to Change Priority Levels for Programs on Windows 10 and Windows 11
When Should You Change the Priority Level of a Program By default, Windows 11 assigns different priority levels to each process based on its importance.
3 Ways to Change Priority Levels for Programs on Windows 10 and Windows 11
When Should You Change the Priority Level of a Program By default, Windows 11 assigns different priority levels to each process based on its importance.
The article above may contain affiliate links which help support Guiding Tech. The content remains unbiased and authentic and will never affect our editorial integrity.

