Fix 1: Run the Printer Troubleshooter
Start by running Windows’ built-in printer troubleshooter to see if it can detect and resolve any pending printing errors.
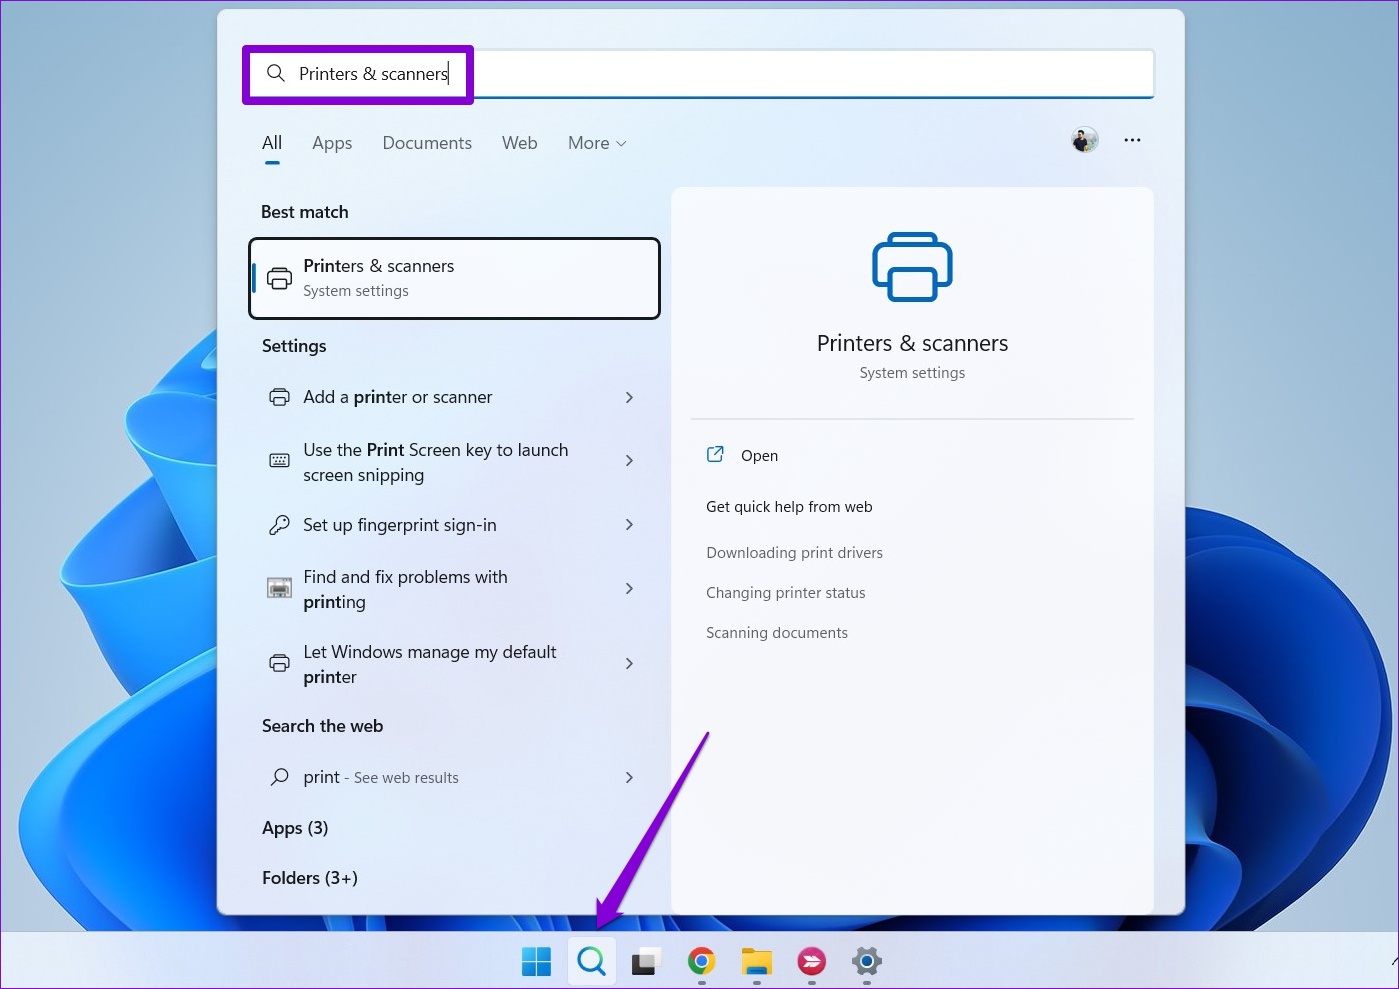
Step 1: Click the search icon on the taskbar, type printers & scanners, and press Enter.
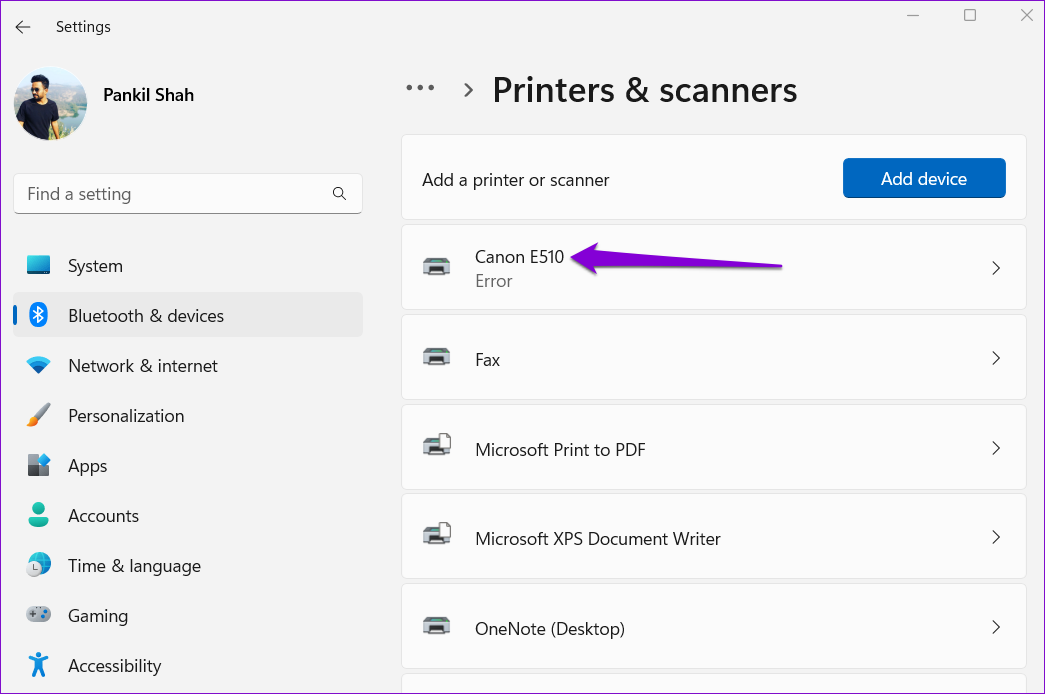
Step 2: Select your printer.
Step 3: Click on Run the troubleshooter.

Windows should automatically detect any issues with the printer and fix them. Following that, you should be able to get rid of the printer.
Fix 2: Remove the Printer From the Print Server Properties
There are several ways to remove a printer in Windows 11. So, if you can’t remove the printer from the Settings app or Control Panel, remove it from the Print Server Properties in Windows.
Step 1: Press the Windows key + S to open the search menu. Type printers & scanners and press Enter.
Step 2: Under Related settings, click on Print server properties.

Step 3: Go to the Drivers tab, select your printer, and click Remove.

Step 4: Select Remove driver and driver package and hit OK to confirm.

Fix 3: Stop Print Spooler Service
Print Spooler is a critical service that handles printer interactions on Windows. If that service interferes with the removal process, disable it temporarily to see if it helps.
Step 1: Press the Windows key + R to open the Run dialog. Type services.msc in the box next to the Open field and press Enter.
Step 2: In the Services window, scroll down to locate Print Spooler. Right-click on it and select Stop.

After stopping the Print Spooler service, remove the printer again.
Fix 4: Uninstall Printer Driver
Device Manager is a useful tool that lets you manage and troubleshoot all your hardware devices from one place. You can also use it to delete an old printer from your PC. Here’s how.
Step 1: Right-click on the Start icon and select Device Manager from the menu.

Step 2: Open the View menu at the top and select Show hidden devices.

Step 3: Double-click on Print queues to expand it. Right-click on your printer and select Uninstall device.

Fix 5: Remove Printer Software
If you’ve installed a dedicated app or software for your printer, it could also obstruct the removal process. To avoid this, first uninstall that app or software before trying again.
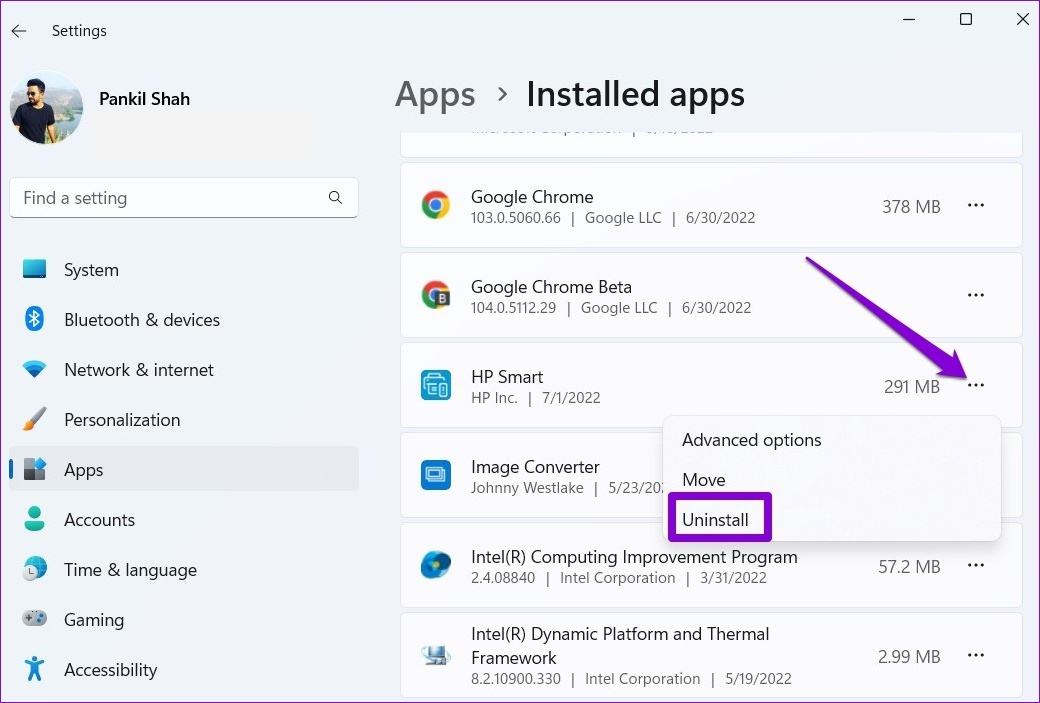
Step 1: Right-click on the Start icon and select Installed apps from the list.

Step 2: Locate the printer app on the list. Click the three-dot menu next to it and select Uninstall.
After removing the app, you can remove the printer from the Settings app or Device Manager.
Fix 6: Use the Registry Editor
Windows may not remove the printer due to corrupt registry keys associated with it. To fix it, remove those corrupted registry keys by following the steps below.
Step 1: Press the Windows key + R to launch the Run dialog. Type regedit and press Enter.
Step 2: Paste the following path in the address bar at the top and press Enter.
HKEY_LOCAL_MACHINE\SYSTEM\CurrentControlSet\Control\Print\Printers
Step 3: Locate the printer you wish to remove and click on Delete. Then, select Yes to confirm.

Restart your PC after this, and you should be able to remove your printer without a problem.
Was this helpful?
Last updated on 09 April, 2024
Read Next
 5 Ways to Fix Unable to Remove Bluetooth Device on Windows 11
Fix 1: Try Removing Device in Airplane Mode To start, enable Airplane mode and remove the Bluetooth device again.
5 Ways to Fix Unable to Remove Bluetooth Device on Windows 11
Fix 1: Try Removing Device in Airplane Mode To start, enable Airplane mode and remove the Bluetooth device again.
 5 Ways to Fix Printer Driver Is Unavailable Error on Windows 11
Fix 1: Run the Printer Troubleshooter Windows 11 includes several troubleshooters that can help you fix common system-level issues.
5 Ways to Fix Printer Driver Is Unavailable Error on Windows 11
Fix 1: Run the Printer Troubleshooter Windows 11 includes several troubleshooters that can help you fix common system-level issues.
 4 Ways to Fix HP Printer Not Working on Windows 11
Basic Fixes Check the printer cable: Ensure the connected cable isn't loose.
4 Ways to Fix HP Printer Not Working on Windows 11
Basic Fixes Check the printer cable: Ensure the connected cable isn't loose.
 How to Fix Printer Not Activated (Error Code 30) on Windows 11
Basic Fixes Reconnect printer: If you're using a wired printer, its loose USB connection to your PC may result in 'Printer not activated (Error Code 30)'.
How to Fix Printer Not Activated (Error Code 30) on Windows 11
Basic Fixes Reconnect printer: If you're using a wired printer, its loose USB connection to your PC may result in 'Printer not activated (Error Code 30)'.
 4 Ways to Fix Unable to Contact Your DHCP Server Error on Windows 11
Fix 1: Restart Your DHCP Client service The DHCP Client service registers and updates the PC's IP address and DNS record.
4 Ways to Fix Unable to Contact Your DHCP Server Error on Windows 11
Fix 1: Restart Your DHCP Client service The DHCP Client service registers and updates the PC's IP address and DNS record.
 6 Ways to Fix NVIDIA’s ‘Unable to Change Display Mode’ Error on Windows 11
Method 1: Terminate and Restart the NVIDIA Control Panel It is common for apps and their associated processes to encounter glitches and stop working properly.
6 Ways to Fix NVIDIA’s ‘Unable to Change Display Mode’ Error on Windows 11
Method 1: Terminate and Restart the NVIDIA Control Panel It is common for apps and their associated processes to encounter glitches and stop working properly.
 5 Ways to Fix Unable to Connect to EA Servers on Windows
Fix 1: Rule Out Issues With Your Account To start, you need to check if your EA Play membership has expired by signing into your EA account online.
5 Ways to Fix Unable to Connect to EA Servers on Windows
Fix 1: Rule Out Issues With Your Account To start, you need to check if your EA Play membership has expired by signing into your EA account online.
 6 Ways to Fix Unable to Run EXE Files on Windows 11
Fix 1: Scan for Malware Malware infections can often disrupt Windows operations and prevent EXE files from running on your PC.
6 Ways to Fix Unable to Run EXE Files on Windows 11
Fix 1: Scan for Malware Malware infections can often disrupt Windows operations and prevent EXE files from running on your PC.
The article above may contain affiliate links which help support Guiding Tech. The content remains unbiased and authentic and will never affect our editorial integrity.