Use the updated Wi-Fi password: If the password is incorrect, your Android may fail to connect to a Wi-Fi network automatically. This can happen if someone has changed the Wi-Fi password and you haven’t updated it on your phone. To fix this, disconnect from the network and reconnect to it.
Disable battery saver mode: When you enable battery saver mode, Android restricts some of the background activities. This can prevent your phone from scanning for and connecting to saved Wi-Fi networks. To prevent this, avoid using the battery-saver mode when not required.
Fix 1: Configure Auto Reconnect Settings
Step 1: Open the Settings app > navigate to Connections > Wi-Fi.
Step 2: Tap the gear icon next to your network > enable the toggle for Auto reconnect.
If your Android is not connected to the network, use the three-dot menu icon at the top-right corner and go to Advanced settings > Manage networks. Then, select the network you want to configure. Note that you’ll need to repeat the above steps for each Wi-Fi network separately.
Fix 2: Configure Android to Turn On Wi-Fi Automatically
Your Android phone can automatically turn on Wi-Fi when you’re close to your frequently-used networks. If you’ve previously disabled this option, turn on the Wi-Fi manually each time you want. Here’s how to change that.
Step 1: Open the Settings app > tap on Connections > select Wi-Fi from the following page.
Step 2: Tap the three-dot menu icon at the top-right corner > select Intelligent Wi-Fi.
Step 3: Turn on the toggle for Turn Wi-Fi on/off automatically > disable the toggle for Switch to mobile data.
Fix 3: Reset Network Settings
As a last resort, reset the network settings on your Android. This will reset all the network settings to default and fix any issues caused by misconfigured settings. Since this process removes your saved Wi-Fi networks, you must connect to each of your networks again.
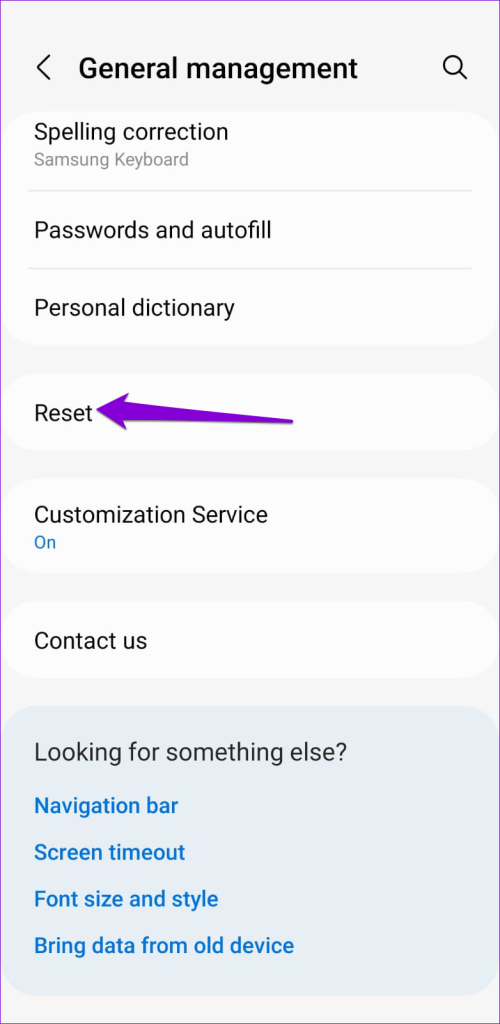
Step 1: Open the Settings app > tap on General management.
Step 2: Tap Reset > select Reset network settings.
Step 3: Tap the Reset settings button to confirm.
After your phone reboots, reconnect to the Wi-Fi network you want to use. Your phone will automatically connect to that network whenever it is in range.
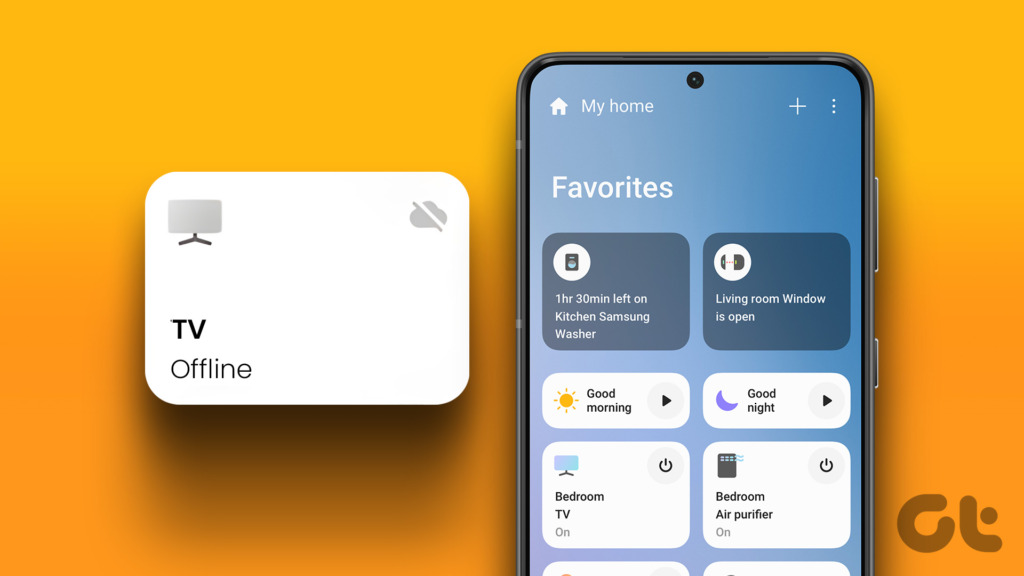
Have you been wondering why won’t SmartThings connect to my TV? Well, there could be several reasons for that. For instance, your TV and phone are far away from each other, they aren’t connected to the same Wi-Fi network, etc. Whatever the reason, we have covered all of them here. This post will help you fix Samsung TV not showing in or connecting to the SmartThings app.
For the unaware, the SmartThings app lets you control your Samsung TV without using its remote. You can turn the TV on/off, control the TV using the remote in the app, turn on screen mirroring, and do much more. Let’s dive straight into different ways to fix Samsung TV not connecting to the SmartThings app.
1. Restart Devices
Begin the troubleshooting process by restarting your TV, phone, and Wi-Fi router. To restart the TV and Wi-Fi, simply turn them off for 10-15 seconds and then turn them on again. Or, long press the Power button on the TV remote until the Samsung logo appears on the screen. After restarting the devices, try connecting Samsung TV to SmartThings.
The phone that you are using to connect to Samsung Smart TV must be within a proper range (30 feet) of the TV. If both devices are far away from each other, Samsung TV won’t connect to the SmartThings app. Therefore, try to bring the devices closer to fix the Samsung smart TV not showing in the SmartThings app issue.
3. Connect to the Same Wi-Fi Network
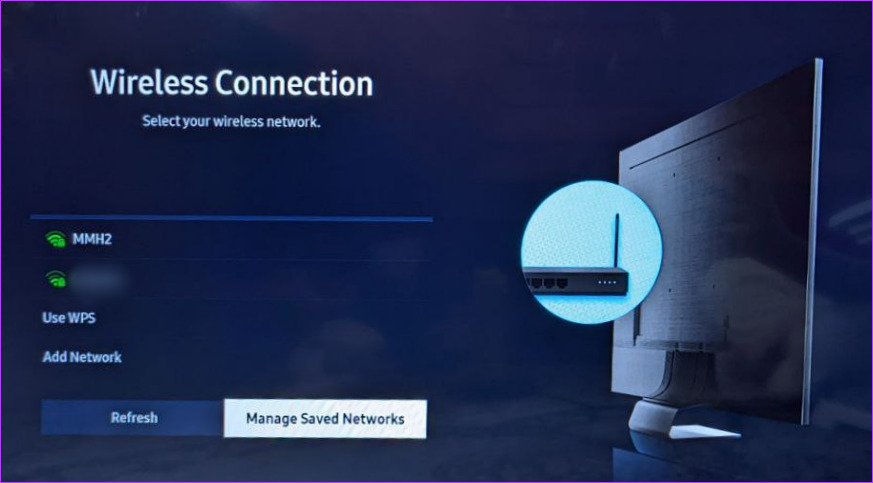
For Samsung smart TV to be discoverable in the SmartThings app on your phone, both devices must be connected to the same Wi-Fi network.
To check and change the Wi-Fi network on your TV, go to TV Settings > General > Network > Open network settings > Wireless. Select the Wi-Fi that you want to connect to.
Next, make sure to connect to the same Wi-Fi network on your phone as well. To be on the safe side, you should turn off mobile data while adding the TV to the SmartThings app.
Note: Some Samsung TVs do not support 5Ghz Wi-Fi networks.
4. Use the Same Samsung Account
Another thing that you must take care of is that both the SmartThings app and the TV must be logged in to the same Samsung account.
To check the Samsung account in the SmartThings app, open the app. Then, tap on the three-bar icon at the bottom followed by the Settings icon at the top. You will see the registered Samsung account.
Similarly, to check the account on your TV, go to TV Settings > General > System Manager > Samsung account.
5. Clear Cache of the SmartThings App (Android)
If the SmartThings app is unable to detect the Samsung smart TV, you should try clearing the cache of the app. Doing so will not remove the TV or any other setting from the app. It will only delete temporary files that could be making Samsung TV not discoverable in the SmartThings app.
To clear the cache of the SmartThings app, go to Settings on your Android phone. Tap on Apps and look for the SmartThings app. Tap on it followed by Storage. Hit the Clear cache button. Then, restart your phone.
6. Re-Add TV to the SmartThings App
If you have already added the Samsung TV to the SmartThings app but it doesn’t show up or appears offline, you should re-add the TV to the SmartThings app. To do so, you must first remove the TV from the app and then add it back as shown below.
Step 1: Open the SmartThings app on your phone.
Step 2: Long-press on your Samsung TV in the Devices tab and select Edit from the menu.
Step 3: Tap on Remove device.
Step 4: After removing the TV from the app, restart your phone and TV.
Step 5: Open the SmartThings app again. Go to the Devices tab and tap on the (+) Add icon to add a device.
Step 6: Scroll down to the list of devices section. Tap on TV followed by Samsung.
Step 7: Follow the on-screen instructions to connect the TV to the SmartThings app.
Step 8: While setting up the TV, you might have to enter the PIN shown on the TV on your phone or select the Ok/Allow option on the TV. Don’t skip that.
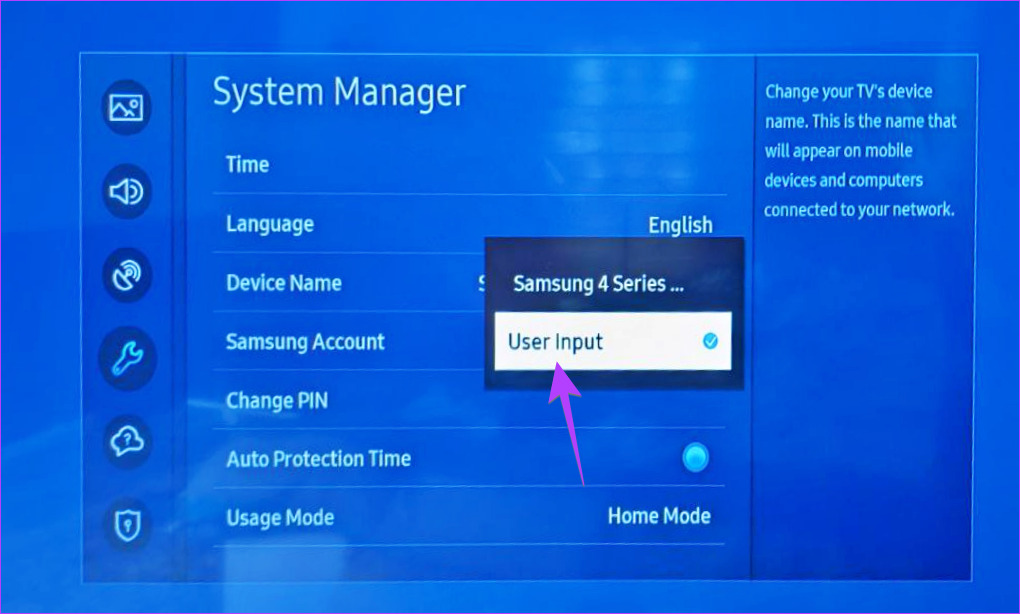
7. Rename Your TV
If you don’t see the Samsung TV or you are getting the 07-005 error while adding it to the SmartThings app, try renaming your TV. To do so, go to TV Settings > General > System Manager > Device Name. Choose User Input and enter a new name for the TV. Then, try adding it to the app.
8. Update TV Software
If Samsung TV isn’t showing up in the SmartThings app, there are chances that your TV is running old firmware which is clashing with the version of the SmartThings app. To fix it, you should try updating the software on your Samsung smart TV.
To do so, go to TV Settings > Support > Software Update > Update now.
Similarly, there is a possibility that the issue could be caused by an outdated or buggy version of the SmartThings app. Therefore, you must update the SmartThings app on your phone as well.
To update the SmartThings app, open the Play Store (Android) or App Store (iPhone). Search for the SmartThings app and hit the Update button, if available.
If nothing seems to fix the issue of Samsung TV not connecting to the SmartThings app, you should try reinstalling the SmartThings app on your Android or iPhone.
To reinstall the app, you must first uninstall it. And then install it back from Play Store (Android) or App Store (iPhone). After reinstalling the app, the Samsung TV should be discoverable in the SmartThings app.
11. Factory Reset the TV
If you can’t connect your Samsung TV to the SmartThings hub, the last resort is to factory reset your smart TV. Doing so will restore your TV to the original factory settings. Thus, all the apps that you have installed on the TV will be removed.
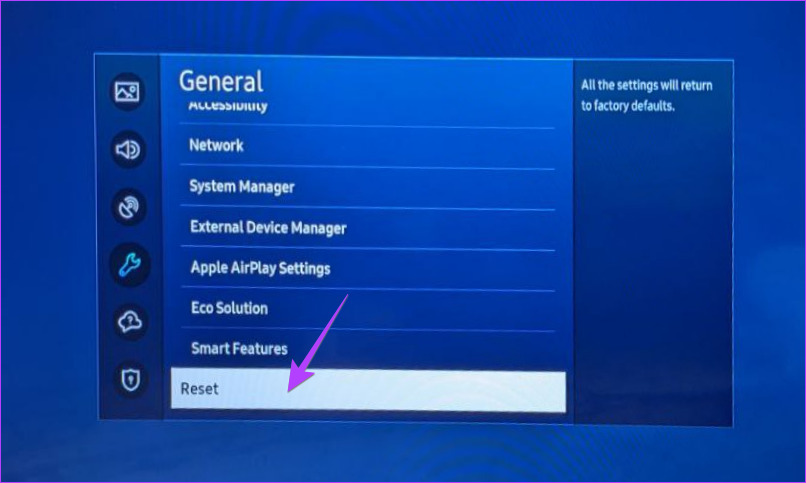
To reset Samsung TV, go to Settings > General > Reset.
Before we go into full-blown troubleshooting mode, it is wiser to check whether your region, carrier, and phone support 5G or not. So which iPhone and Android phone support 5G?
DeviceCompatibility –
iPhone – Apple incorporated 5G support from iPhone 12. And except for iPhone SE 2 (2020), every iPhone model since is 5G compatible.
Android phones – It’s not as straightforward. You’ll have to do a quick spec check (online or offline) to check for 5G compatibility.
5G availability – While the 5G rollouts might be in full swing in the country, your area still might be deprived. You can figure this out with a quick Google search or check out Ookla’s helpful 5G tracking map.
Carrier support – Ensure that your carrier offers support for it. Most importantly, double-check that your SIM and data plan are 5G compatible. The easiest way to do so is to call the carrier support center and get clarity on these things.
Basic Fixes
Update OS – As and when a region is blessed with 5G, an update is scheduled to enable 5G support from the developer’s end. So, before we move on, it’s wiser to update the OS to unlock 5G compatibility.
Check your data usage – If your 5G has suddenly stopped working, the culprit might be the data limit of your cellular plan. You can tally the data usage and then remedy it accordingly.
Disable low-power mode – Some devices including iPhone 12 series, disable 5G when in Low Power/Power Saving mode. So, if your 5G is not working, try turning off the battery-saving settings to fix the issue.
Turn Airplane Mode on and off – When dealing with network-related issues such as a phone won’t connect to 5G, AirPlane Mode can help. It restarts the network connections, hopefully eliminating the bugs or settings behind the error.
Restart your phone – If restarting your network setting didn’t work, restarting the phone might do the trick. The idea is the same, to reset and resolve any discrepancies.
Re-insert the physical SIM – The idea is to clear the SIM cache and eradicate any bug or setting that might be stopping you from accessing 5G. Simply, take out the SIM from your device, restart your phone, and insert the device back again.
Note: Don’t try this step for an eSIM, unless directed by the carrier. If you delete an eSIM, you’ll need to contact the carrier and set up a new one.
Fix 1. Switch from LTE to 5G or 5G auto
Well if you’re in the 5G range and still LTE or 4G shows up in the status, there might be a chance that 5G is disabled on your device. So, here’s how to check and turn on 5G.
On iPhone
Launch the Settings app and go to Cellular → Celluar Data Options → Voice & Data. Here, ensure that either 5G On or 5G Auto is selected.
For battery-saving purposes, it is suggested to use 5G Auto at all times or to switch off 5G when you’re not in range. You can also read this guide to manage 5G settings and data-saving modes for further clarity.
On Android Phones
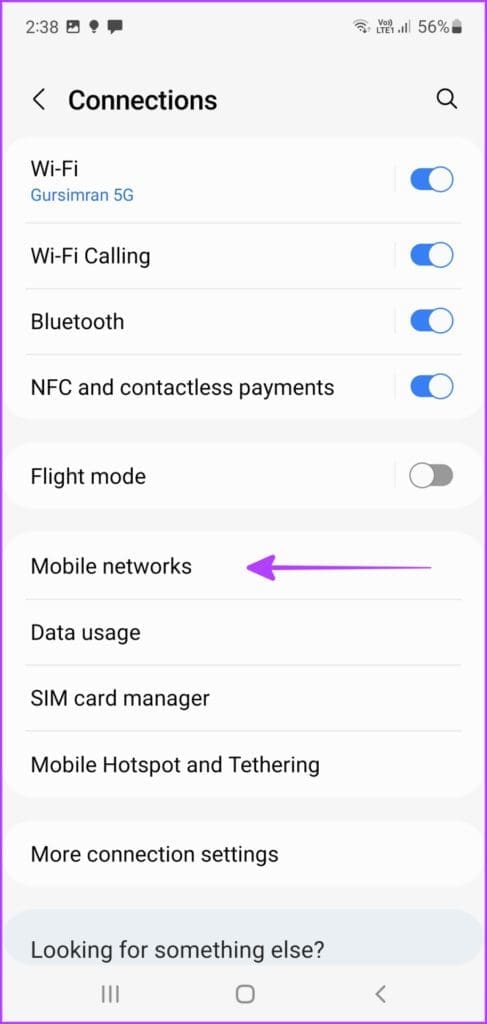
Step 1: Go to Settings → Connections or Network & internet. Tap Mobile networks or SIMs.
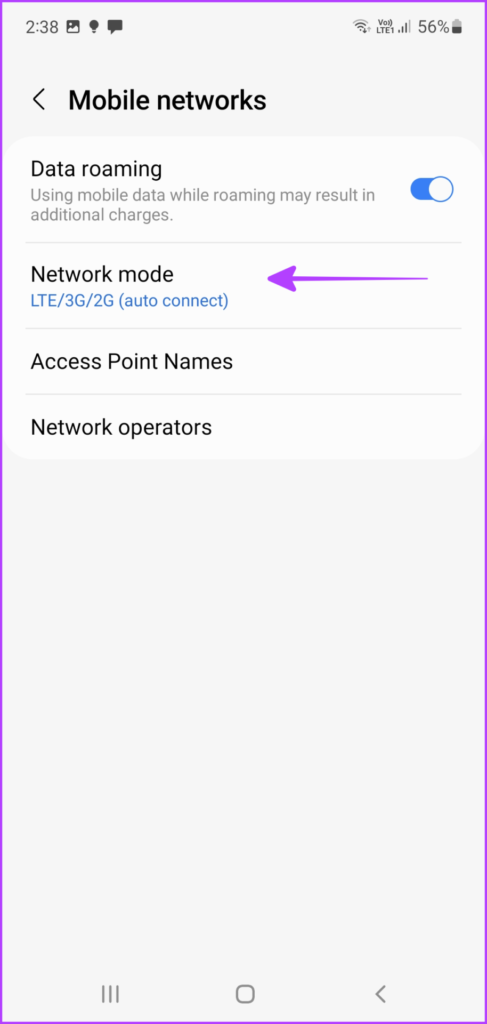
Step 2: Here, tap Network mode or Preferred network type.
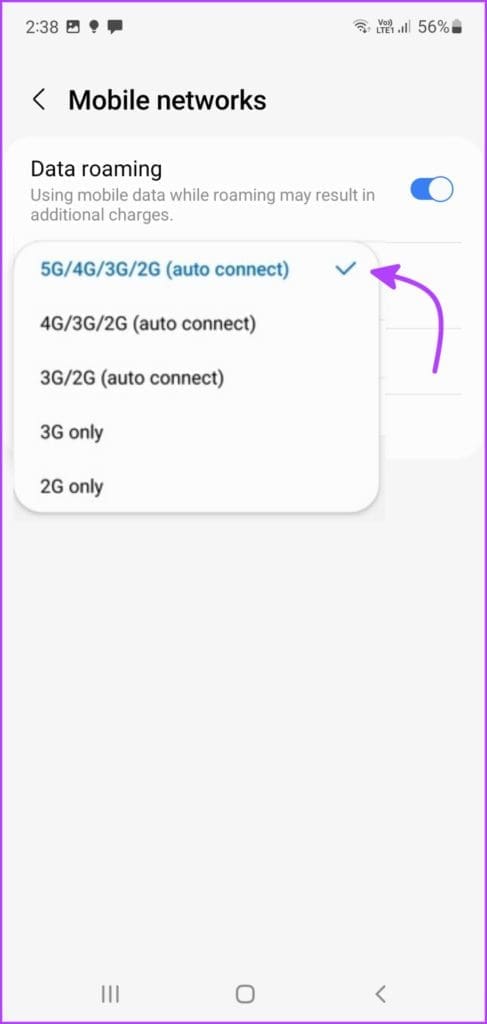
Step 3: Select Global/Auto or 5G/LTE/3G/2G (auto connect) to enable 5G.
Now that 5G is turned on, hopefully, you’ll see the 5G icon on the status bar. If not, move on to the next step.
Fix 2. Reset the APN Setting of Your Phone
The Access Point Name (APN) is the network path defined for cellular data connectivity. So, your 5G connectivity issue might be stemmed from some issue in this section.
While below are the steps, you can follow the instructions provided by your network provider (Google it!).
On iPhone
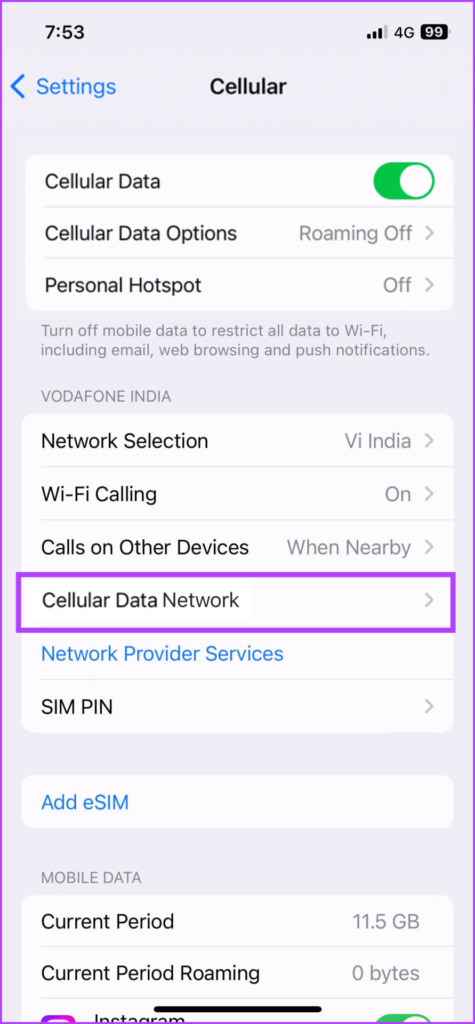
Step 1: Go to Settings → Cellular/Mobile Data. Here select Cellular/Mobile Data Network.
Step 2: Tap Reset Settings and then Reset again.
On Android Devices
Step 1: Launch Settings and go to Connections.
Step 2: Tap Mobile Networks and select Access Point Names. Here, tap the Menu button (three-dot icon)
Step 3: Select Reset to default.
Step 4: Tap Reset again to confirm the action.
Fix 3. Reset Network Settings
It’s time to bring out the big guns if 5G is still not working. Resetting network settings, i.e., returning to default settings on your iPhone or Android device can help. However, when you do so, everything from your Bluetooth devices and Wi-Fi passwords to VPN configurations will be erased. So, proceed with caution.
On iPhone
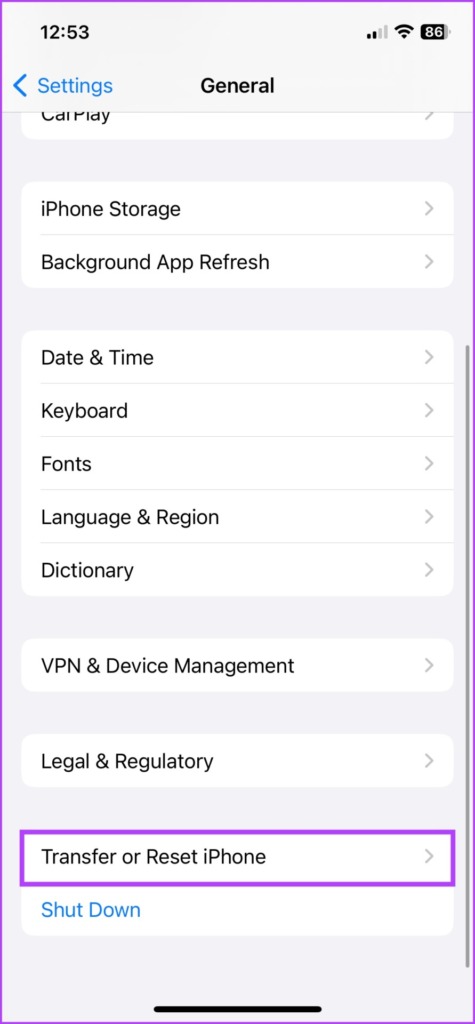
Step 1: Go to Settings → General. Scroll down to ‘Transfer or Reset iPhone‘.
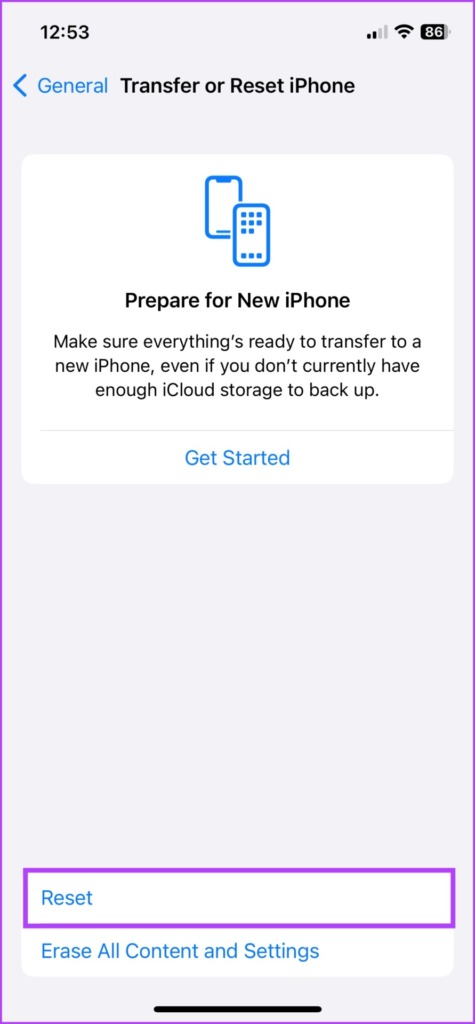
Step 2: Select Reset.
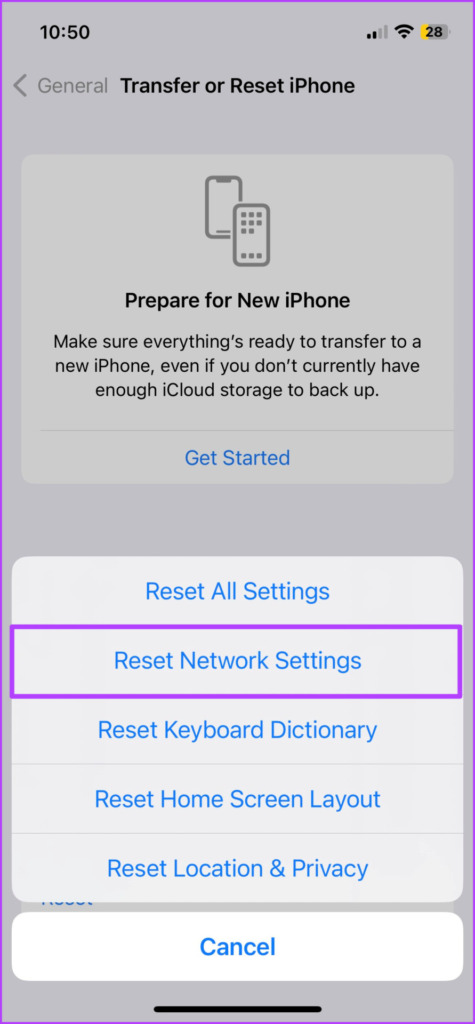
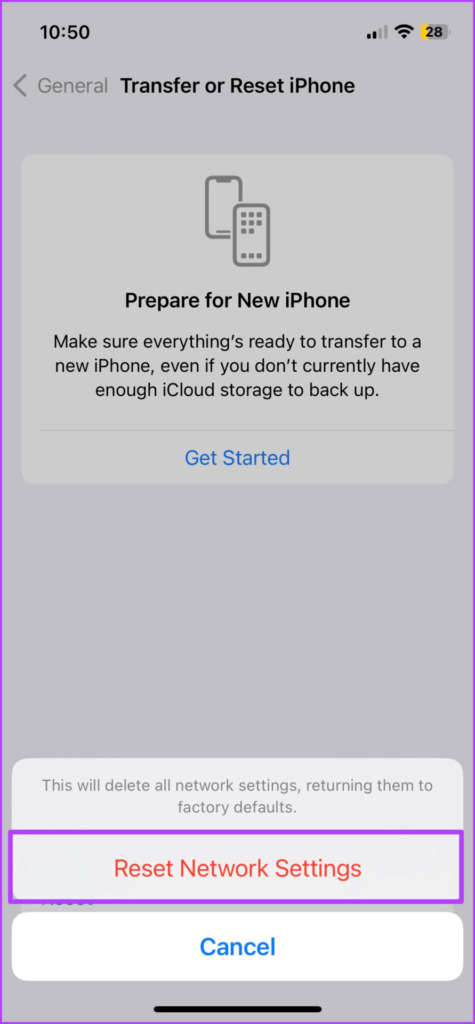
Step 3: Now, select Reset Network Settings. Enter the passcode if prompted.
Step 4: Tap Reset Network Settings again to confirm the action.
On Android Devices
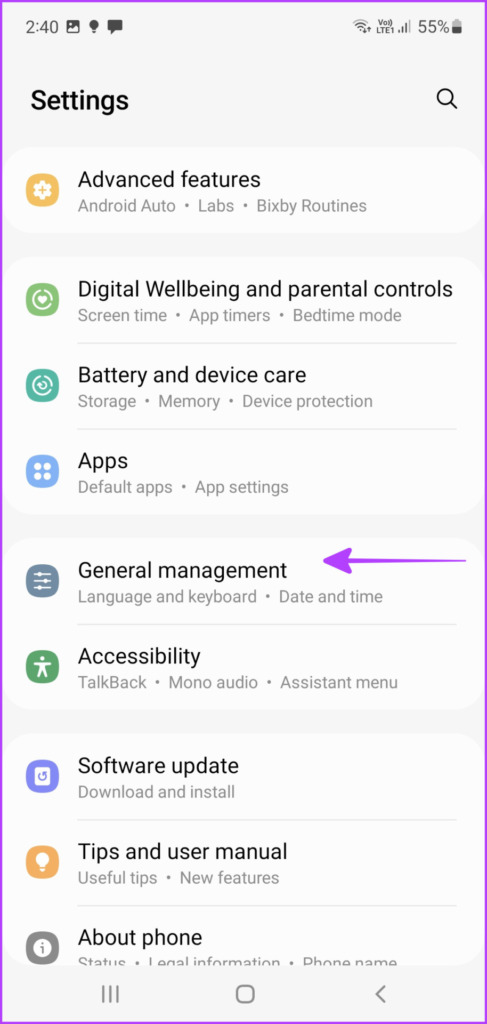
Step 1: Open the Settings app. Scroll down to General management or System.
Step 2: Tap Reset.
Step 3: Here, select Reset network settings. It might be renamed as Reset Wi-Fi, mobile & Bluetooth in some devices.
Step 4: Tap Reset settings again.
If 5G is not working on your iPhone or Android even after trying all the above fixes, the last resort is to call your carrier. Get in touch with their support team to decipher and resolve the issue.
FAQs on 5G Not Working On iPhone and Android
1. Why don’t some 5G phones still support 5G?
While your phone is built-in with 5G compatibility, an OS update might be needed to unlock it. So update! Another issue could be your carrier, also check with them and enable whatever settings and data plans are required.
2. Why is 5G not working while roaming?
Firstly, check if the region has a 5G connection. Then, ensure that your data plan supports data roaming. Lastly, verify that Data Roaming is turned on. For iPhone: Settings → Cellular → Cellular Data Options → toggle On Data Roaming. For Android phones: Settings → Connections → Mobile Networks → toggle On Data roaming.
3. How do I know if I am using 5G?
Usually, your phone’s status bar will denote which network type is active. Depending upon the connection type you might see 5G, 5G E, 5G+, 5G UW, or 5G UC.
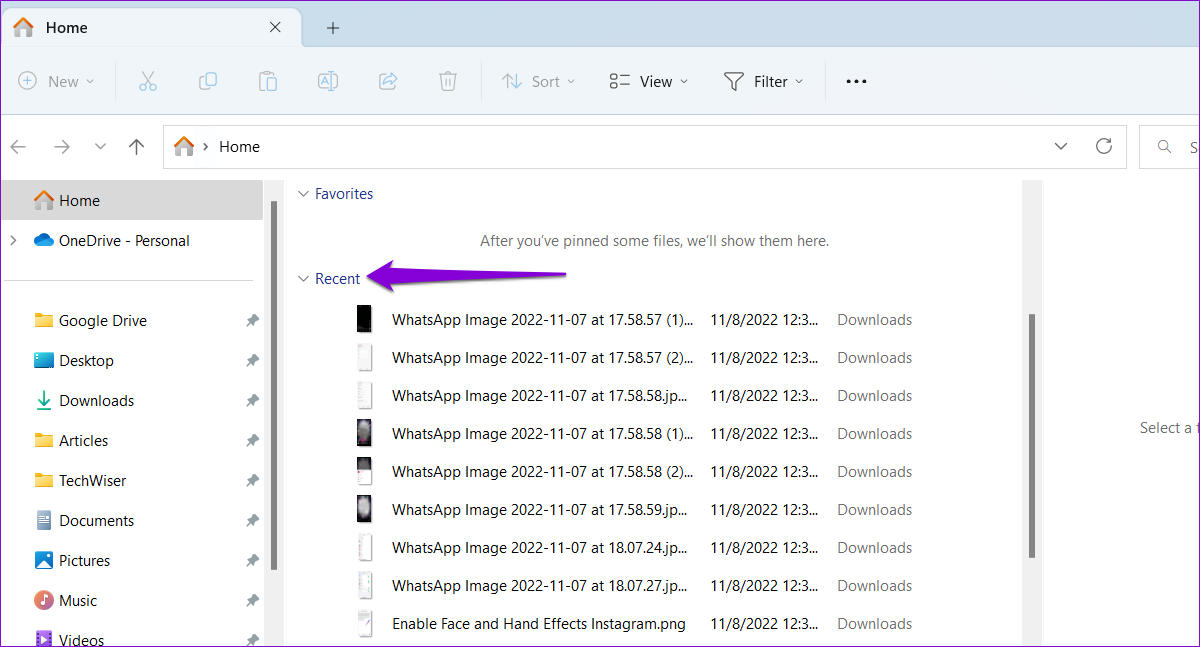
Method 1: View Recently Opened Files in the Home Tab
The Home tab in File Explorer maintains a list of recently opened files on Windows. To view them, press the Windows key + E to open File Explorer. You should see your recently opened files under the “Recent” section in the Home tab.
If you don’t see any entries in the Recent section, make sure you’ve enabled the “Show recently used files” checkbox in File Explorer Options. Here’s how to do it.
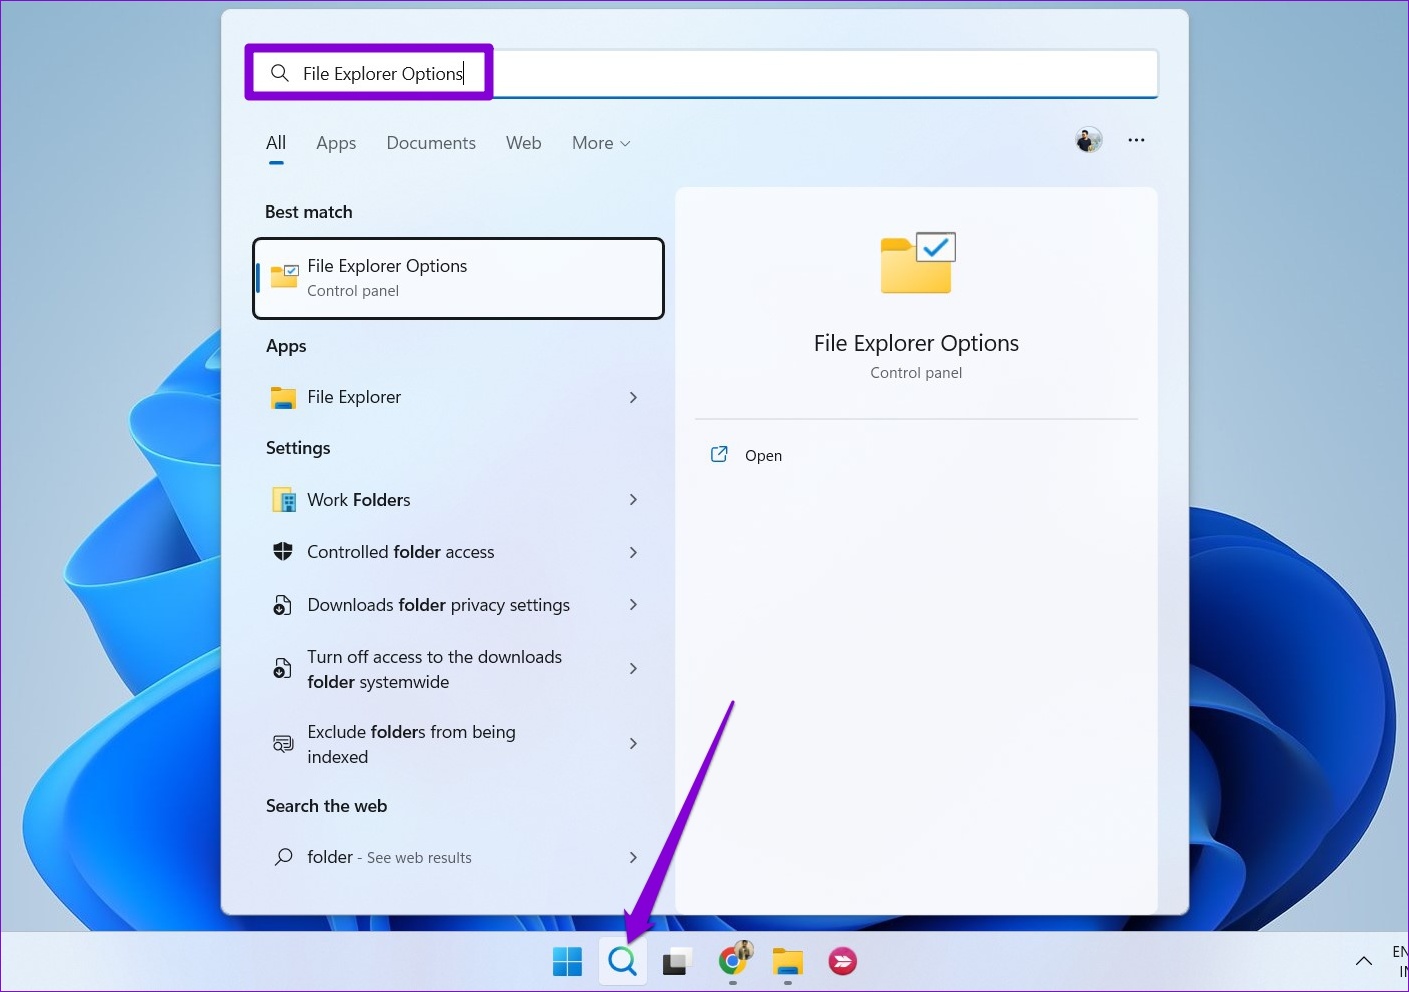
Step 1: Click the search icon on the taskbar, type in File Explorer Options, and select the first result that appears.
Step 2: Under the General tab, check the box next to Show recently used files option and click Apply.
Try opening a few files, and they should appear in the Home tab. It’s worth noting that the Home tab only displays the 20 most recently opened files. To see older files, you’ll need to access the “Recent Items” folder on Windows.
Method 2: View Recently Opened Files in the Recent Items Folder
Unlike the Home tab, the Recent Items folder displays all of the files and folders you’ve accessed in the last few weeks. Here’s how you can access that folder on Windows.
Step 1: Press the Windows key + R to open the Run dialog. Paste the following path in the Open field and press Enter.
%AppData%\Microsoft\Windows\Recent\
Step 2: In the File Explorer window, you will see all your recently accessed files and folders. You can sort this list by name, size, type, or date. For that, right-click anywhere on an empty space, go to Sort by, and select your preferred option.
You can remove individual entries from this folder by clicking the trash icon at the top. This does not delete the file or folder from your PC.
Alternatively, you can clear the File Explorer history to delete all the entries simultaneously. To do so, click the three-dot menu icon at the top and select Options. In the Folder Options window, click the Clear button next to Clear File Explorer history.
Method 3: View Recently Opened Files in the Start Menu
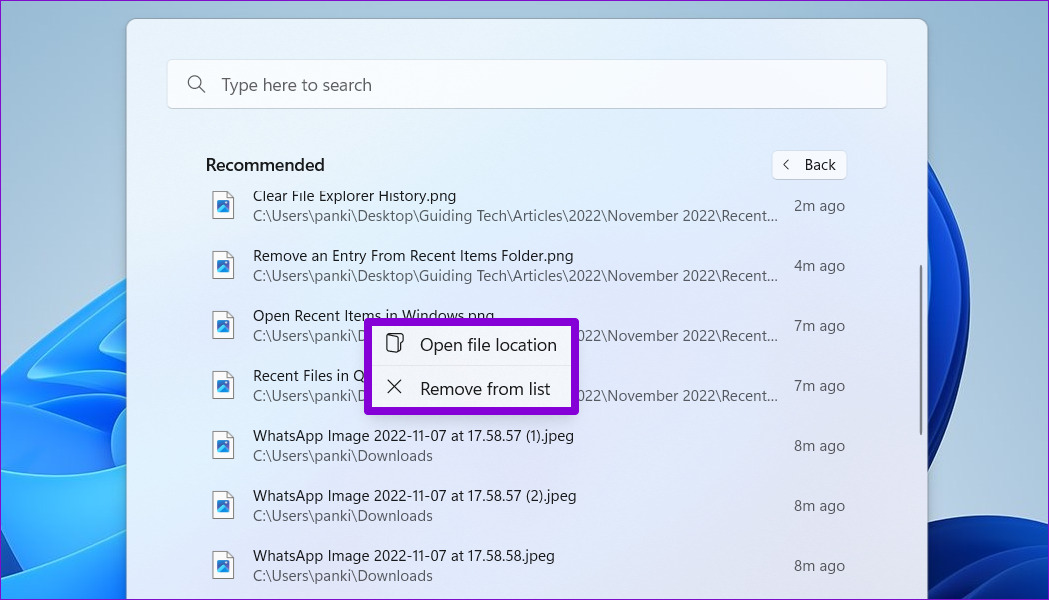
The Windows 11 Start menu shows your recently opened files under the Recommended section. It also shows when you last opened that file or folder. You can click the More button to view a complete list of files and folders you’ve opened recently.
You can right-click on a file or folder to view its location or remove its entry from the list.
If you don’t see your recent files or folders under the Recommended section, you may have disabled the “Show recently opened items in Start, Jump List, and File Explorer” option in the Settings app. Here’s how to enable it.
Step 1: Press the Windows key + I to open the Settings app and head to Personalization > Start.
Step 2: Toggle on the switch next to Show recently opened items in Start, Jump Lists, and File Explorer.
Method 4: View Recently Opened Files for a Specific App
Windows 11 also lets you view recently opened files for a particular app. This can be useful if you already know the name of the app or program you were working on.
To view recently opened files for a specific app, use these steps.
Step 1: Press the Windows key + S to open the search menu. Type in the name of the app for which you want to view recent files.
Step 2: You’ll see a list of recently opened items in the right pane. You can click on a file to open it.
Alternatively, you can right-click on the file to remove or pin it.
If the app for which you want to view recently opened files is already pinned to the taskbar, you can view its recent files by right-clicking on the app icon. From there, you can open, pin, or remove the file entry.
Check Facebook’s status: Maybe Facebook servers are down, visit Downdetector and search for Facebook. If the issue exists, wait for Facebook to fix it.
Check your mobile data status: Have you exhausted your mobile data? Or does Facebook not have network access permission? Check these details before you move on.
Change network type: Is your internet connection stable? Try switching the network (disable 5G) to see if the condition improves.
Disable system-wide data saver mode: Both Android and iOS boast a dedicated data saver mode to apply some breaks on cellular data consumption. If you browse Facebook when the data saver mode is on, it may fail to load the content. Disable it for unrestricted use.
Update or reinstall Facebook: Facebook regularly releases updates to add new features and fix bugs, such as the app not working on mobile data. You should install the latest Facebook update and try again.
Fix 1. Disable Data Saver Mode on Facebook
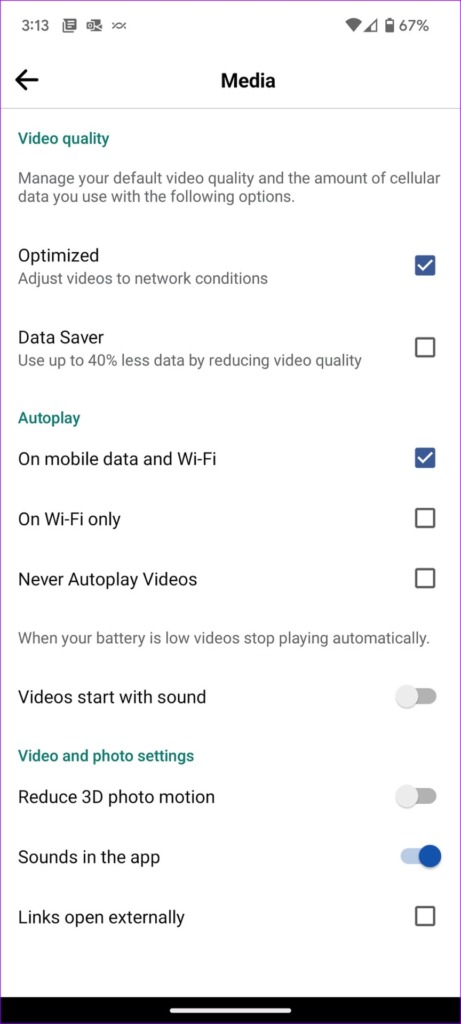
While an active Data Saver mode in Facebook uses up to 40% less data, it may interfere with app function on cellular data. You can follow the steps below to disable it.
Step 1: Open the Facebook app on your phone > select the hamburger menu at the top right (Android) or bottom right (iPhone).
Step 2: Tap the gear icon to open Settings.
Step 3: Here, scroll down and select Media. Disable the Data saver mode from the following menu.
Fix 2. Enable Data Roaming
It could be as silly a reason as this. If you’re traveling or using an outstation SIM, the data roaming setting can be the culprit. Let’s ensure that data roaming is enabled.
On iPhone
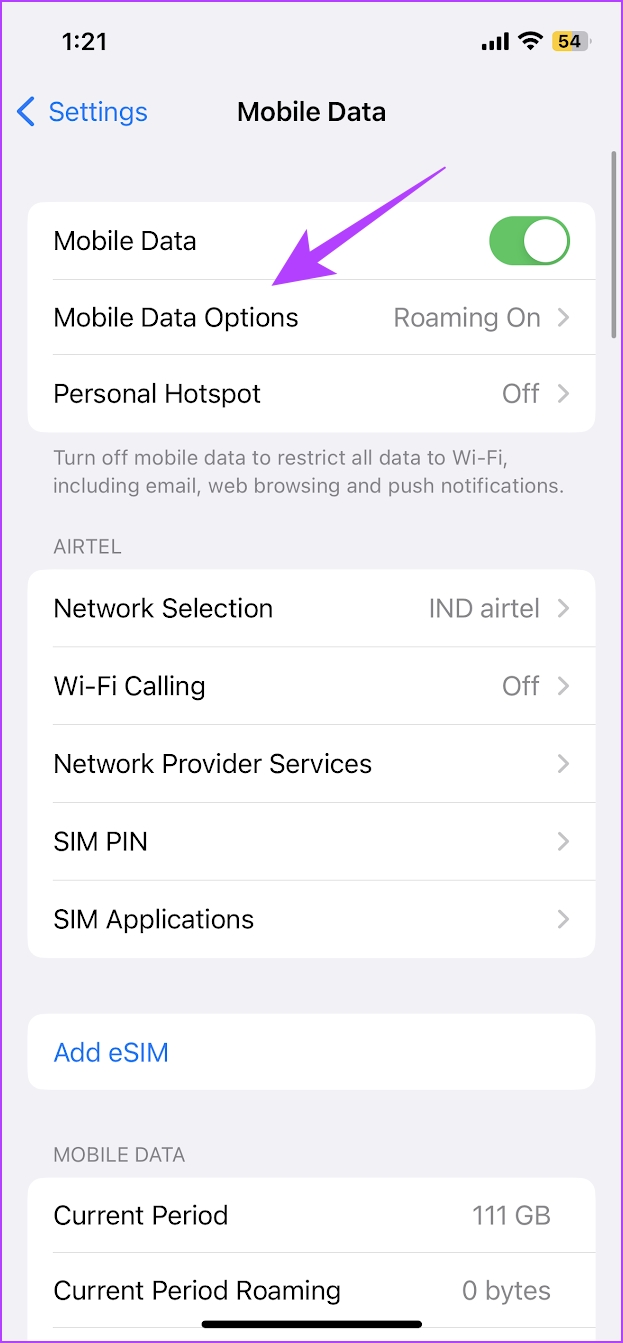
Step 1: Go to Settings → Cellular or Mobile Data.
Step 2: Next, select Cellular Data Options (or Mobile Data Options). Here, toggle on Data Roaming.
On Android
Step 1: Open Settings → tap Mobile Networks → select the SIM.
Step 2: Toggle on Data Roaming.
Fix 3. Reset APN Settings
Whenever you face a cellular data-related issue, such as 5G not working, resetting the APN is a viable solution. The Access Point Name (APN) defines the network path for cellular data connectivity.
Resetting it will reset the bug that might be behind Facebook not working on mobile data. So, let’s do so.
On iPhone
Step 1: Go to Settings → Cellular/Mobile Data. Here, select Cellular/Mobile Data Network.
Step 2: Tap Reset Settings > Reset again to confirm.
On Android Devices
Step 1: Launch Settings > go to Connections.
Step 2: Tap Mobile Networks > select Access Point Names > tap the Menu button (three-dot icon).
Step 3: Select Reset to default > tap Reset again to confirm the action.
If nothing else works, try resetting the network settings to see if Facebook works on mobile data. Additionally, you can contact Facebook support and raise a complaint to resolve the issue.
Check Slack servers: If Slack’s servers are down, you may not be able to upload images. So, check the server status of Slack, and if it says that it is down, wait for Slack to fix it.
Check network connectivity: Ensure your device is connected to a stable cellular/Wi-Fi network.
Don’t exit the app before the file is uploaded: Slack may have an issue with running a few processes in the background. Do not exit the app before the image is fully uploaded to the chat.
Reinstall Slack: Reinstalling Slack removes any corrupt app files or elements, and a fresh installation will likely fix any issues.
Fix 1: Clear Slack Cache
Accumulated cache and junk files can cause issues, such as Slack not uploading images and media. Here’s how to clear the cache.
On iPhone
Offloading an application on your iPhone removes cache and junk files. Don’t worry, it won’t remove any app data or sign you out from Slack.
Step 1: On your iPhone, go to Settings > General > tap on iPhone Storage.
Step 2: Scroll down, select Slack, and tap on Offload App. Tap on the Offload App once again to confirm your action.
Step 3: Now, tap on Reinstall App.
On Android
Step 1: Long-press on the Slack app icon in the app drawer and tap on App Info.
Step 3: In the next window, tap on Clear Data > Clear Cache.
Fix 2: Disable Low Data Mode
If you have the Data Saver enabled on your phone, we suggest turning it off so that it does not restrict any image or media upload on Slack under the pretext of saving data.
On iPhone
Step 1: Open Settings > tap on Cellular Data/Mobile data.
Step 2: Tap on Mobile Data Options (or Cellular Data Options).
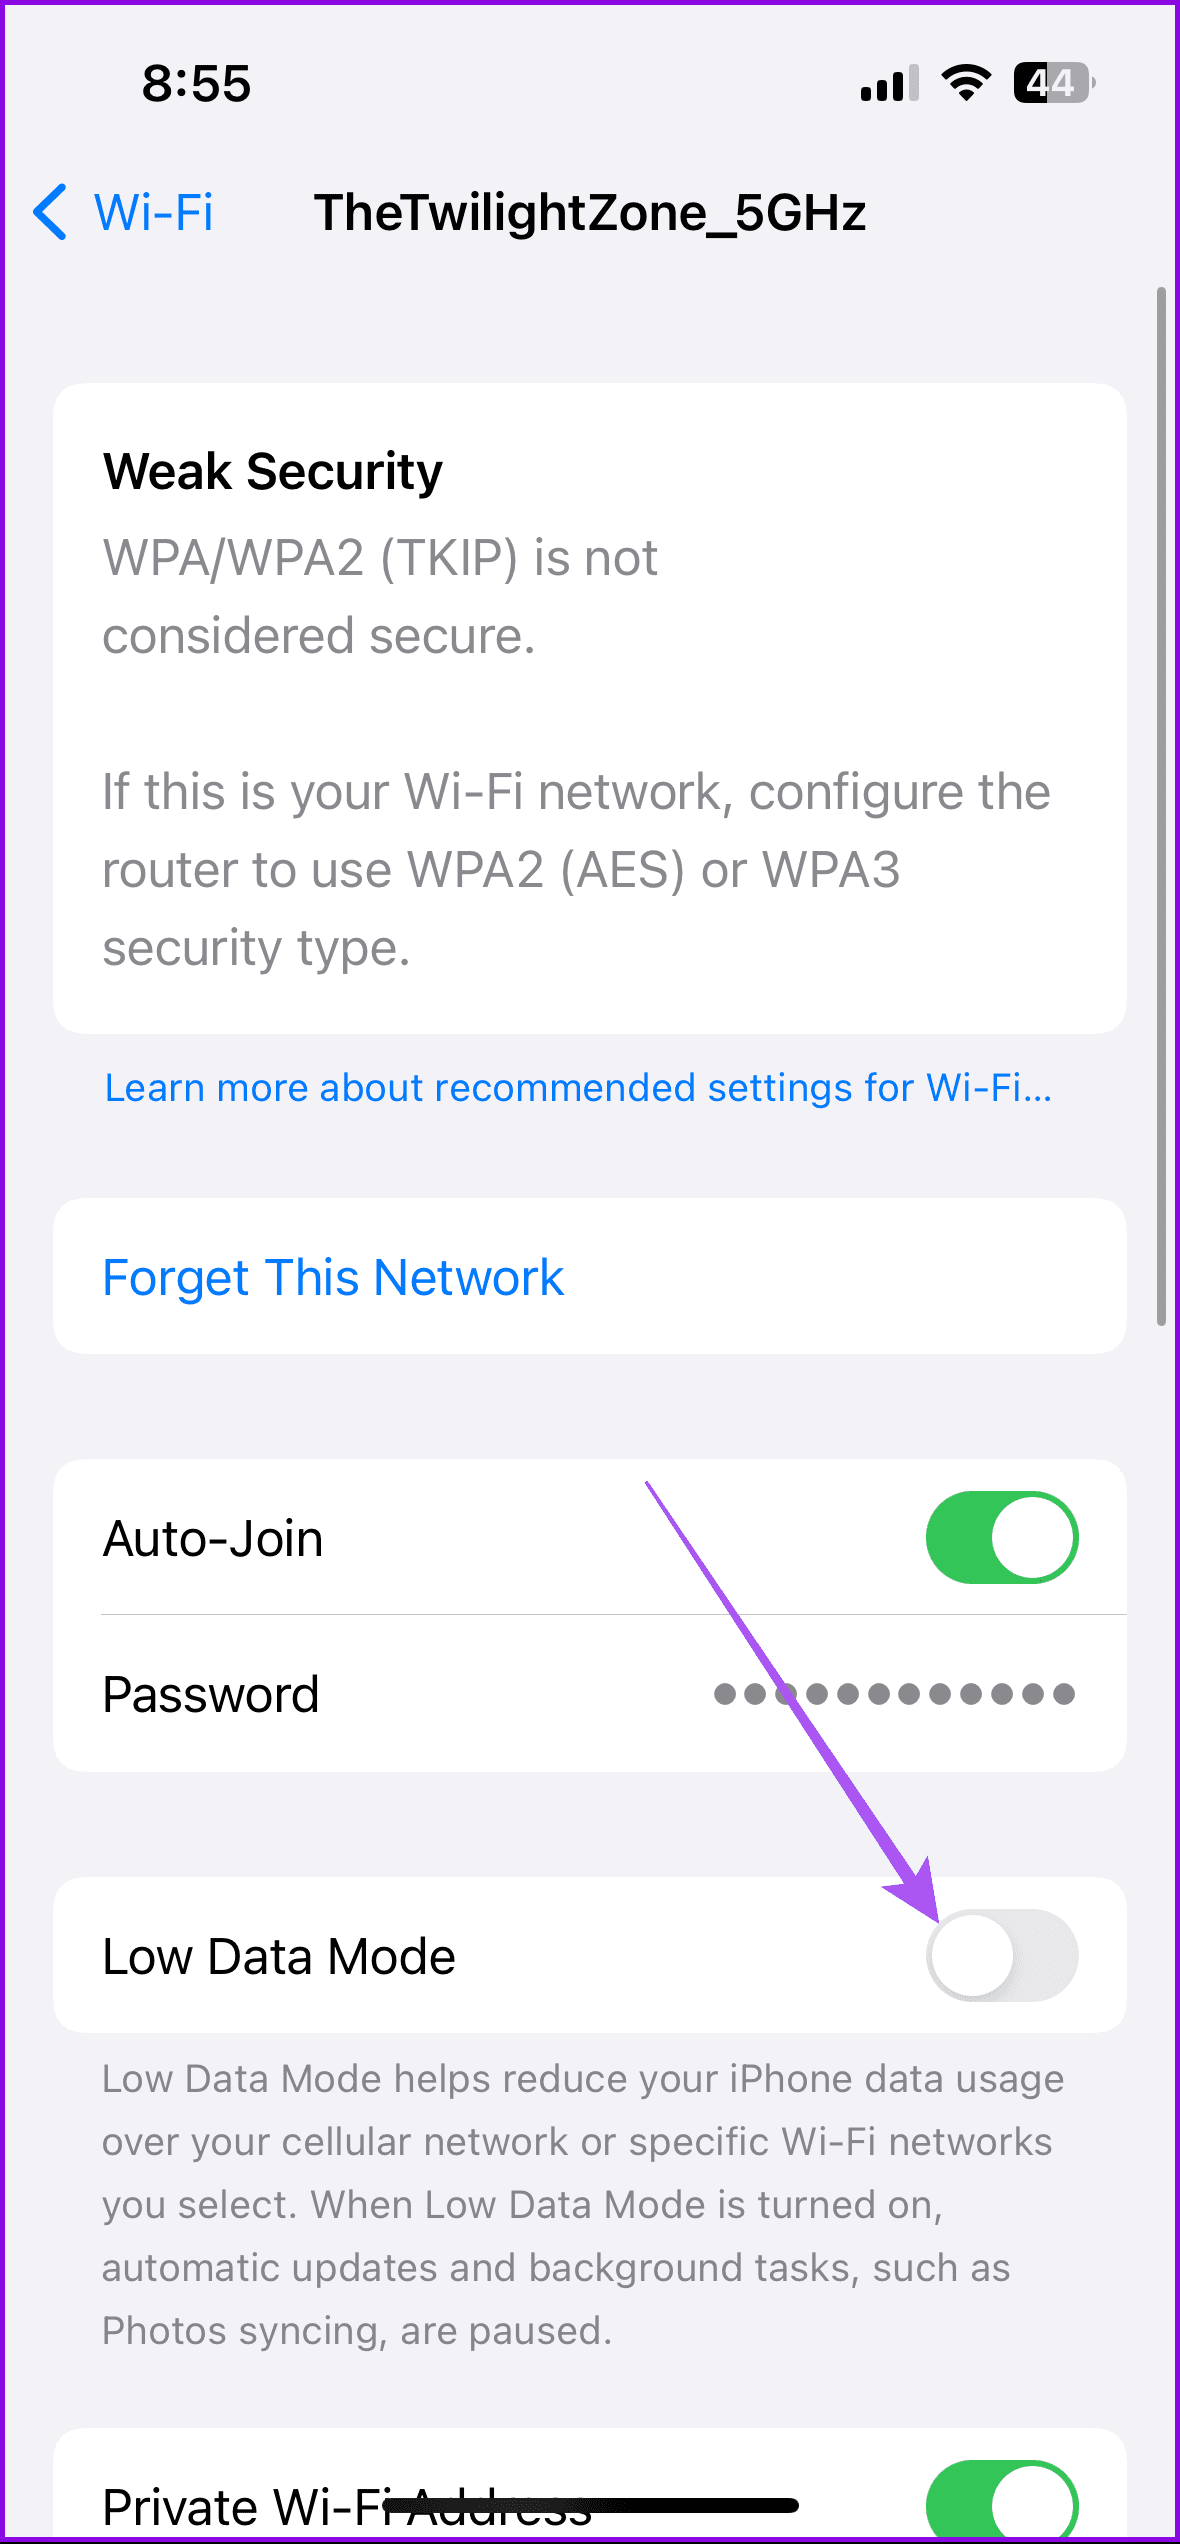
Step 3: Tap on Data Mode. Ensure you haven’t selected Low Data Mode. Select Allow More Data on 5G or Standard.
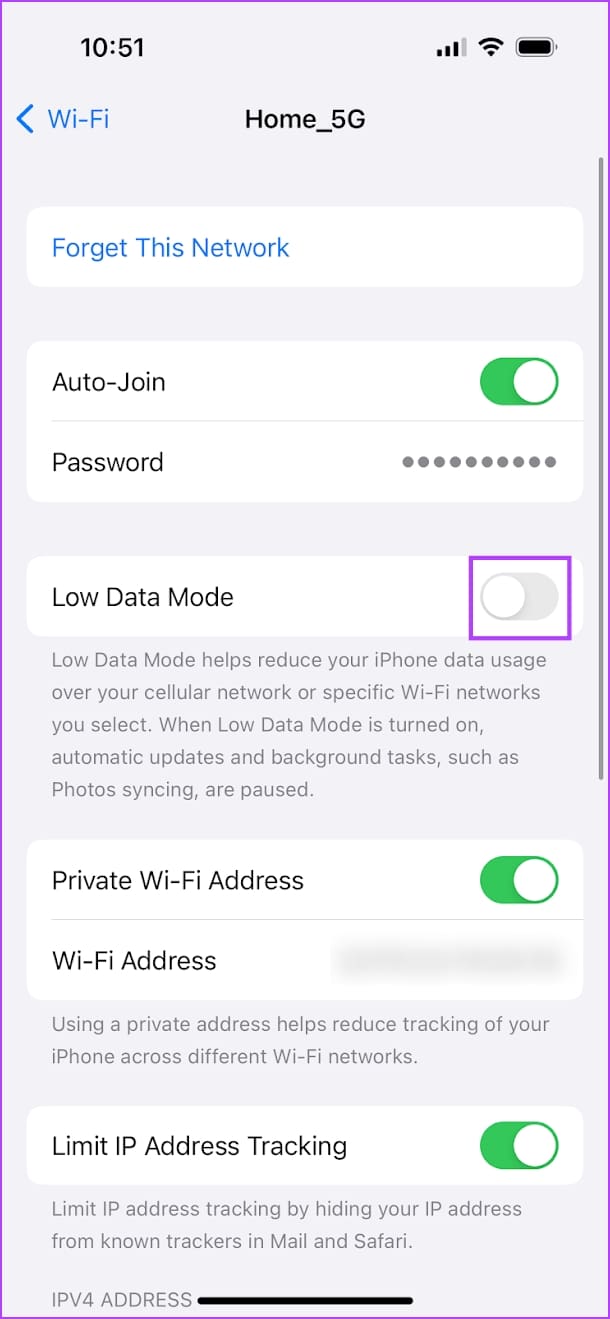
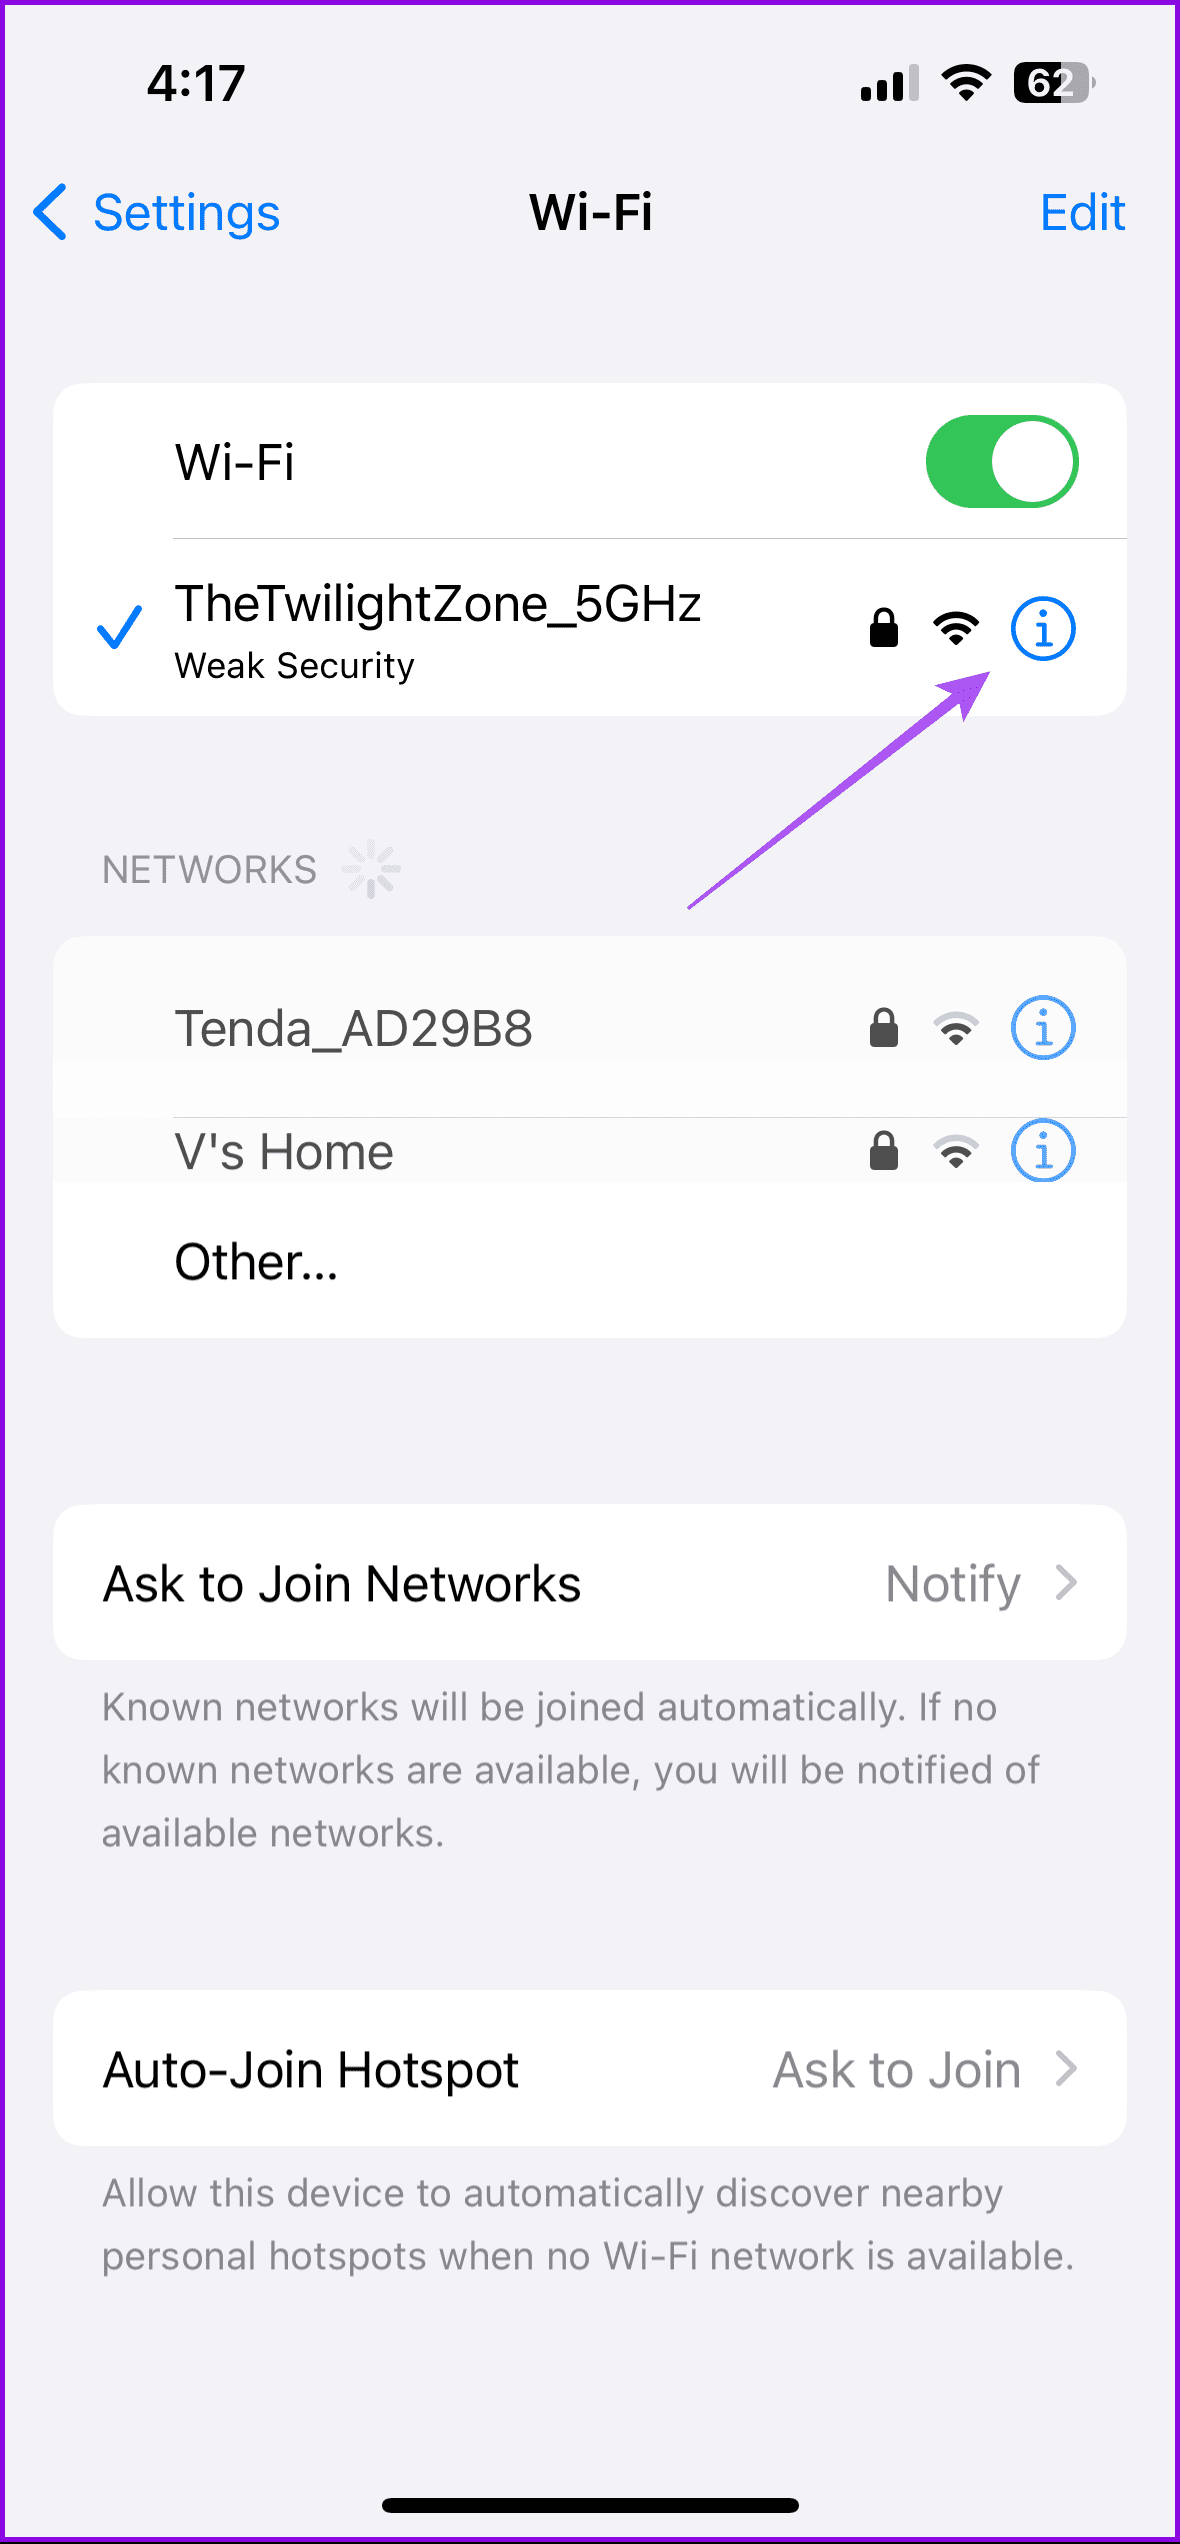
Additionally, ensure you’ve not enabled Low Data Mode for Wi-Fi networks as well. Open the Settings app > tap on Wi-Fi > tap on the info icon next to the connected network > turn off the toggle for Low Data Mode.
On Android
Open the Settings app > go to Network & Internet > ensure you have not enabled the toggle for Use Data Saver.
Fix 3: Enable Autostart or Background App Refresh
If Slack has issues uploading images and media in the background, enabling Background App Refresh (iPhone) or Autostart (Android) can help the app complete tasks even after exiting the app.
On iPhone
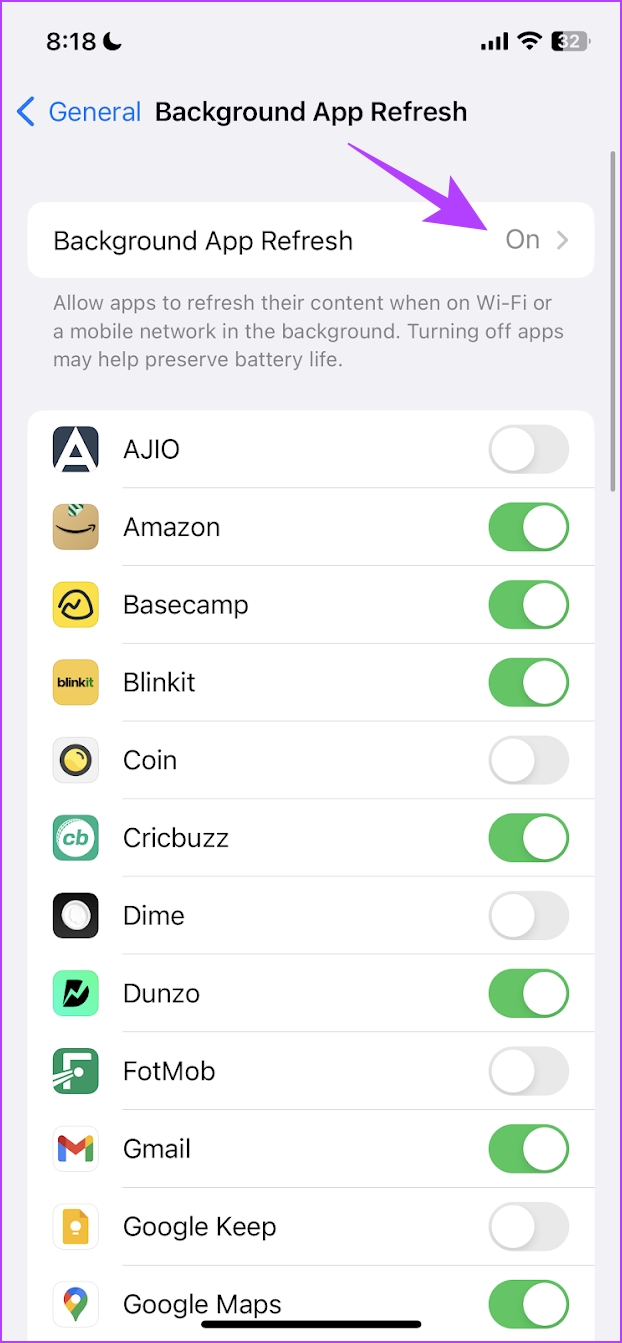
Step 1: Open the Settings app > tap on General. Tap on Background App Refresh and select Background App Refresh again.
Step 2: Select the Wi-Fi & Mobile Data option to enable Background App Refresh on all network modes.
Step 3: Go back to the Background App Refresh menu, scroll down, and check whether you have it enabled for Slack individually, too.
On Android
Step 1: Long-press on the Slack app icon in the app drawer.
Wondering why the Freeform app appeared on your iPhone? Well, Apple finally released the much-awaited Freeform app in December 2022 with the iOS/iPadOS 16.2 update. However, if you’re wondering what is Apple Freeform app, what it can do, and how can you make the most of the Freeform app, keep scrolling.
While the Notes app is great and boasts decent collaborative features, there was something a miss. To fill the vacuum and bring a wholesome whiteboard experience onboard, Apple has introduced the Freeform app for iPhone, iPad, and Mac. This guide has been created after hours of exploring and experimenting. So, expect many tips, tricks, and interesting observations coming your way.
What Is Apple’s Freeform App on iPhone and iPad
Freeform is Apple’s version of a digital whiteboard. You literally get a white seamless and neverending canvas to start with. Here, you can jot down ideas/observations, doodle, and add media like images, videos, or links. Simply put, you are free to paint the town i.e., the board, any color you want.
Furthermore, you can collaborate with friends, family, and colleagues, up to 99 people, to work simultaneously on the board. Remarkably, all collaborators can stay connected in real-time via iMessage or FaceTime.
Requirements to Use Freeform
You’ll need at least one of the following devices to use Freeform:
iPhone running on iOS 16.2 or later.
iPad running on iPadOS 16.2 or later.
Mac running on macOS Ventura 13.1 or later.
Creative Ways to Use Apple’s Freeform App
While we are going to take you through a step-by-step guide on how to use Freeform on your iPhone and iPad, let’s first see some of its amazing use cases.
Create a virtual vision board – Ditch that third-party graphic design app; instead, make your vision board come alive on Freeform’s whiteboard. Add images, videos, links, post-its, doodles, and whatever more you need. Moreover, you can access it on any device, thanks to iCloud sync.
Brainstorm ideas – Whether you’re going solo or with a team, simply pen down, doodle, or import your ideas, observations, and inspirations on Freeform. What’s more, the collaboration features allow you to view what others are doing in real-time and discuss things simultaneously on FaceTime or Messages.
Make travel plans – Instead of exploring Google My Maps or any other third-party apps, try Freeform to build and manage your travel itinerary. Why? Because you can,
Attach details of your flight, hotel/hostel stays, required documents, and lists for travel and packing essentials, shopping, and more.
Furthermore, you can even add ref images for clothes to wear, photo ops, transition videos, etc., so you don’t miss out on anything.
Last but not least, you can easily convert this itinerary into a travel journal for all the memories you created.
And this is just the start, you can explore more freeform examples here. Now that we’ve given you a glimpse of what can be done, here’s a guide on how to do it.
How to Use Freeform on iPhone and iPad
Before we start, it’s wiser to check whether Freeform is enabled and synced with your iCloud.
Enable Freeform on iPhone and iPad
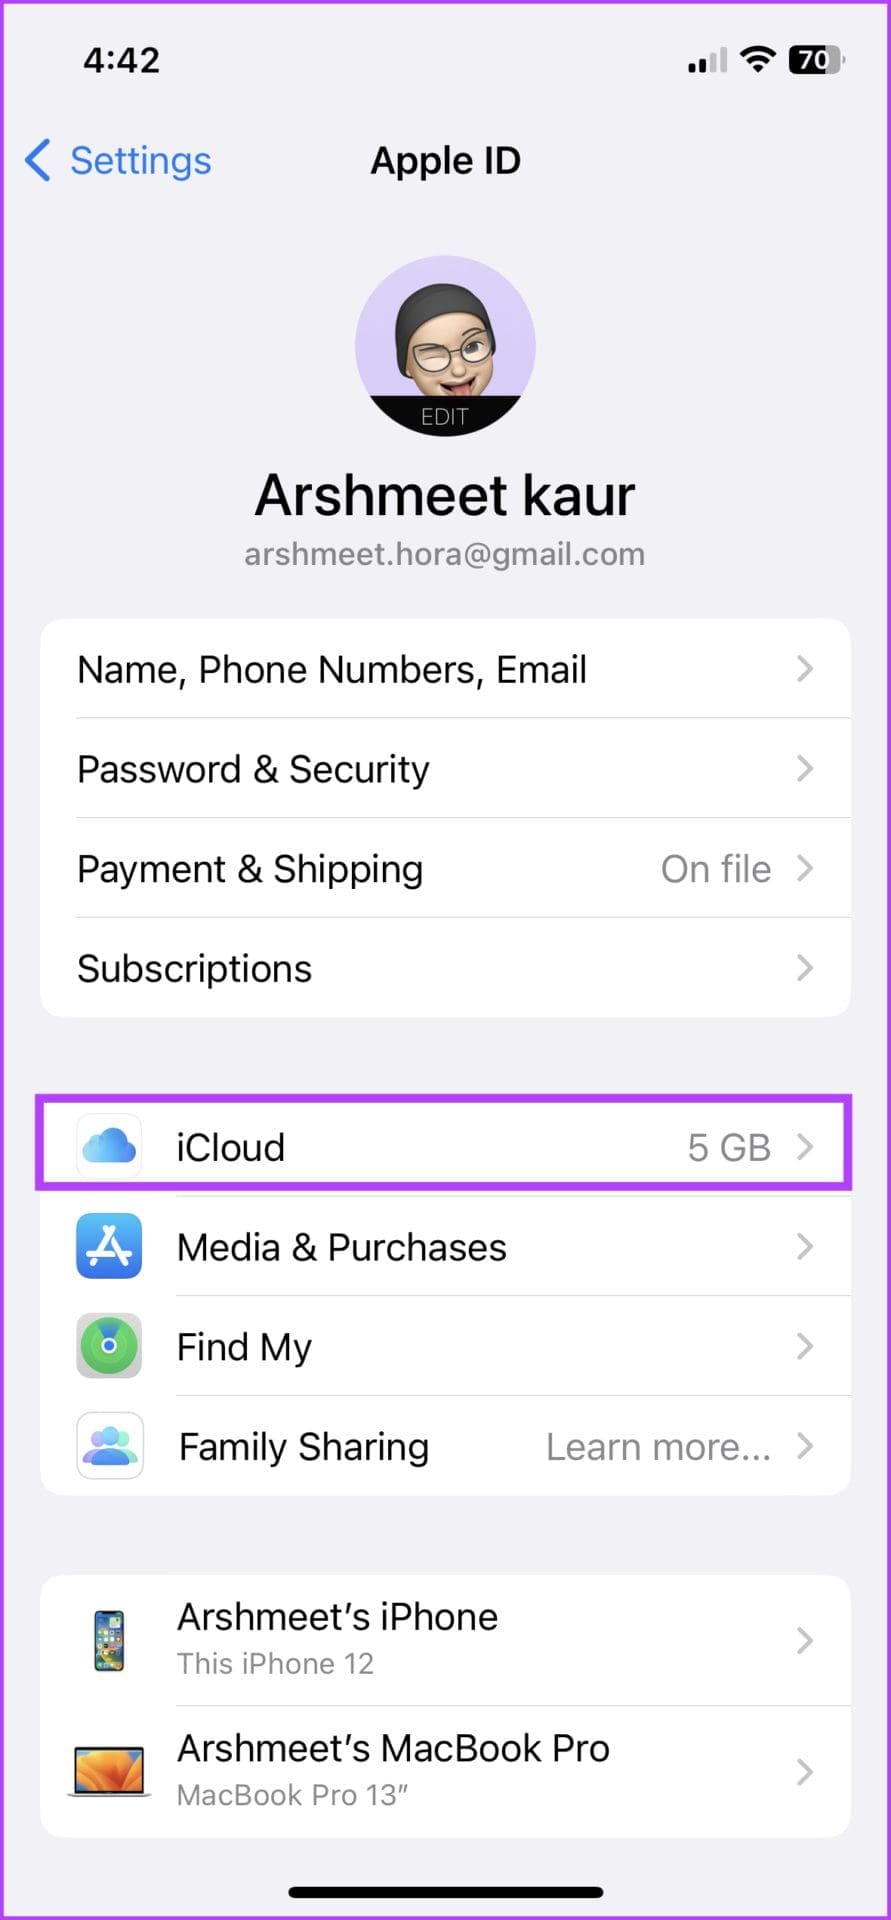
Step 1: Launch the Settings app and tap your name/display picture.
Step 2: Tap iCloud.
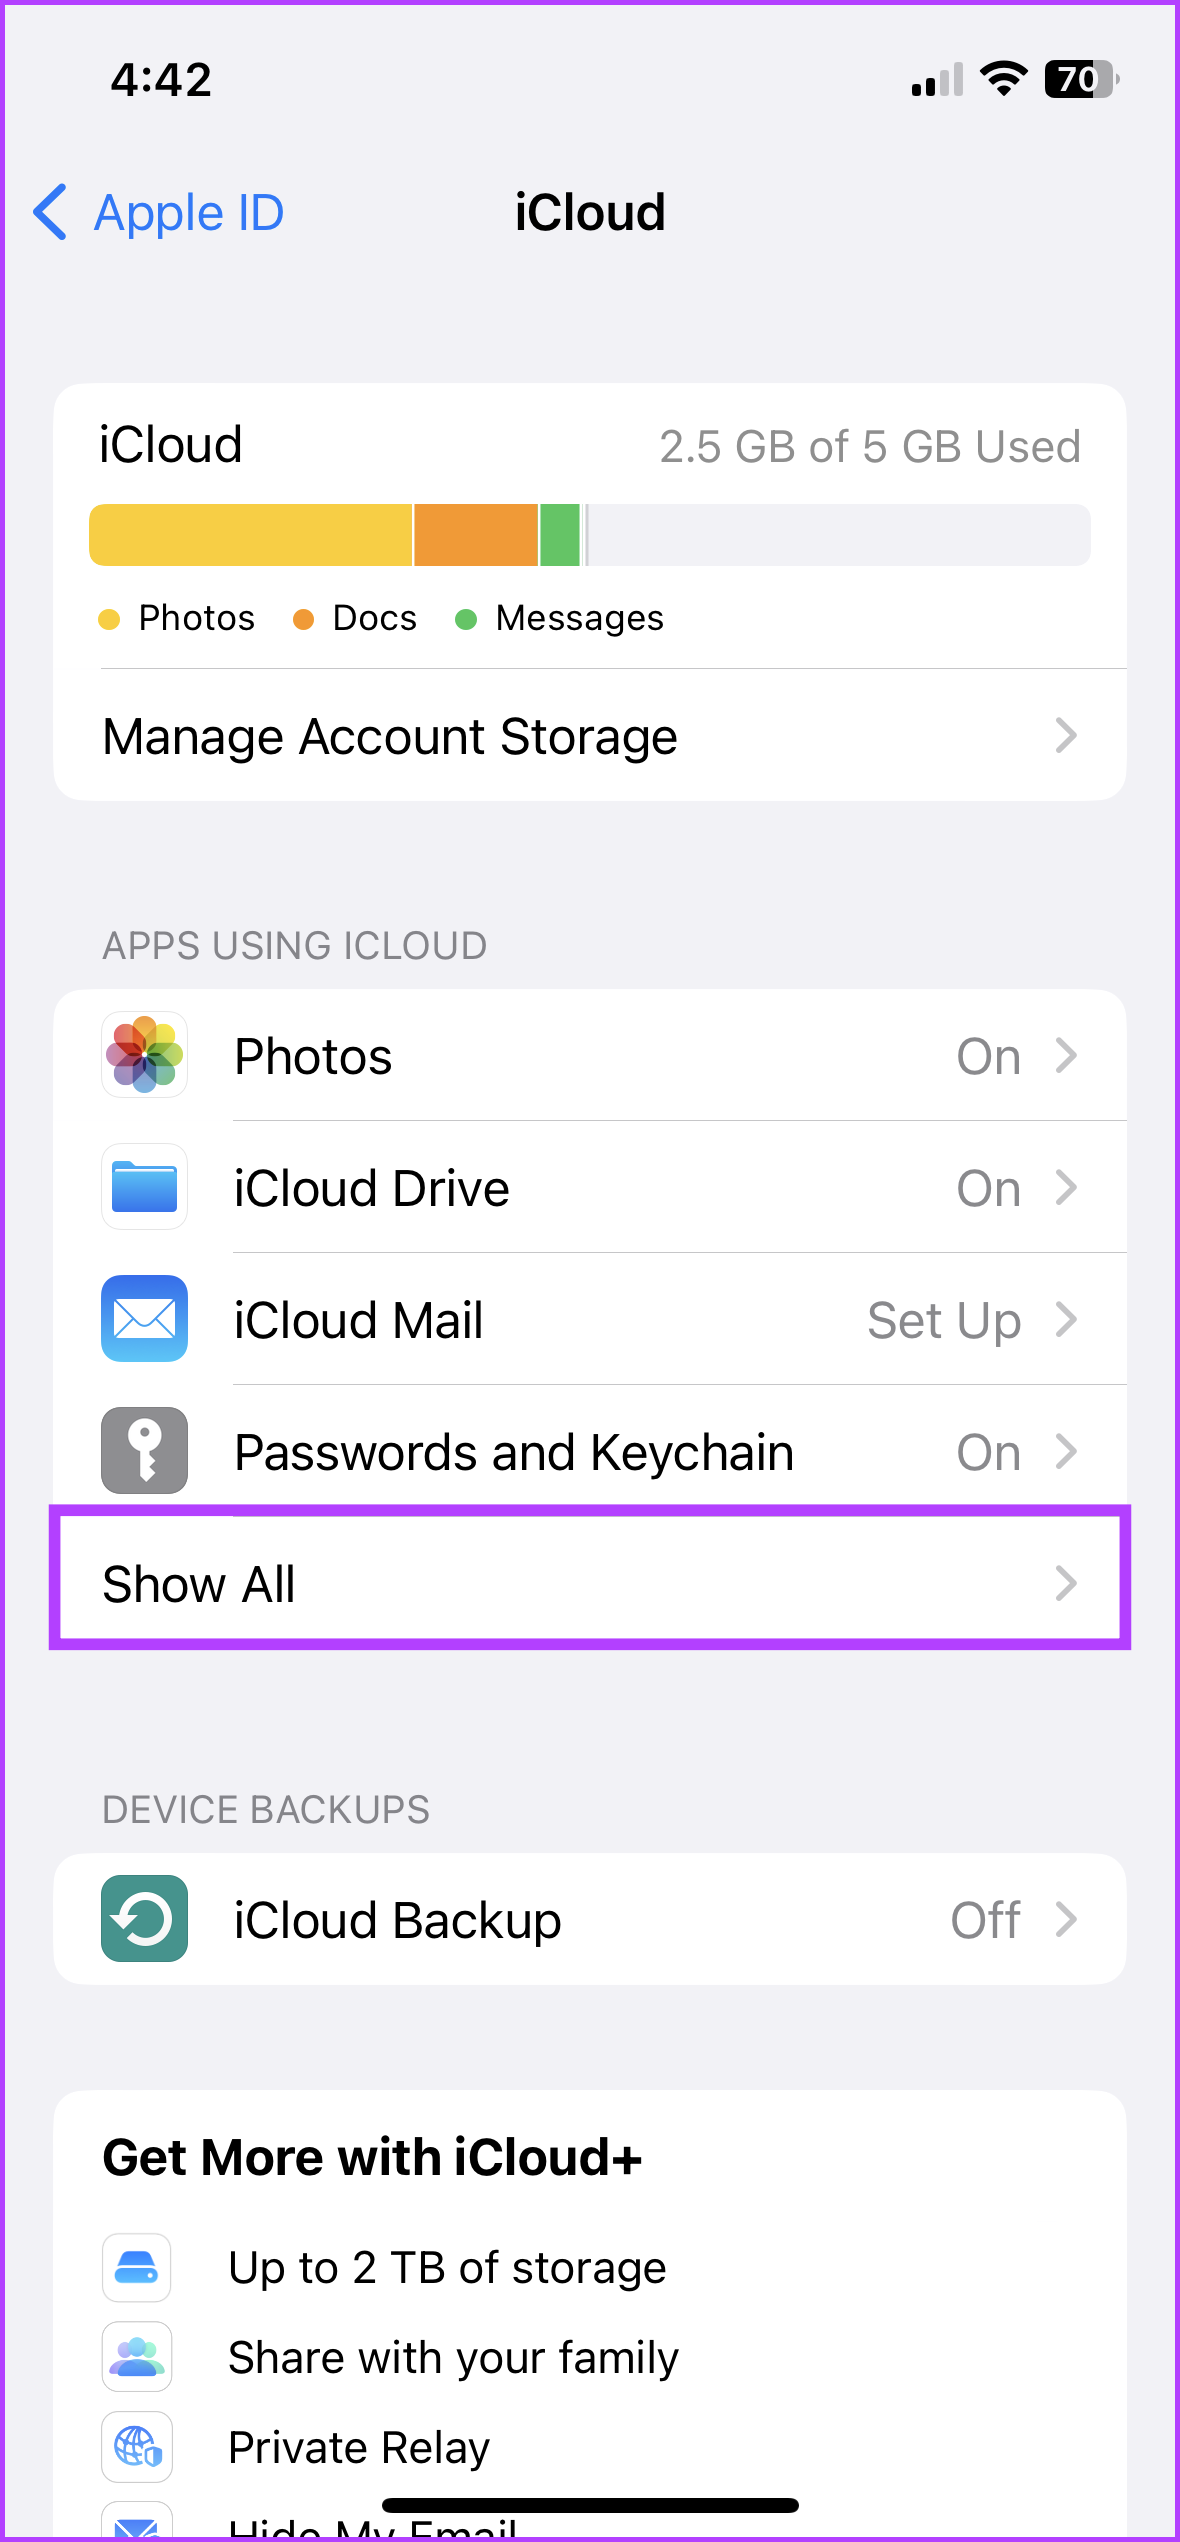
Step 3: Here, select Show All (under the App Using iCloud section).
Step 4: Scroll down and turn on the toggle for Freeform.
Note: If you use Apple Pencil, go to Settings → Freeform → under the Apple Pencil section, toggle on Select and Scroll.
Start a Board in the Apple Freeform App
The Freeform app should automatically show up on the Home Screen or App Library of the compatible device. Although, if you can’t find it, download it from the App Store using the link below.
When you open the app for the first time, a welcome message will show up. Tap Continue to create your first board. And here’s where all the magic happens; the canvas where you can make notes, pen down plans, and collaborate with others. By default, the board, page, or project (whatever you want to call it) has grids.
You can zoom in or out to your heart’s content. As you can see from the above screenshot, the board boasts a toolbar at the bottom of the page and some tools on top, so let’s explore each feature in detail.
Insert a Colorful Note Into Your Freeform Board
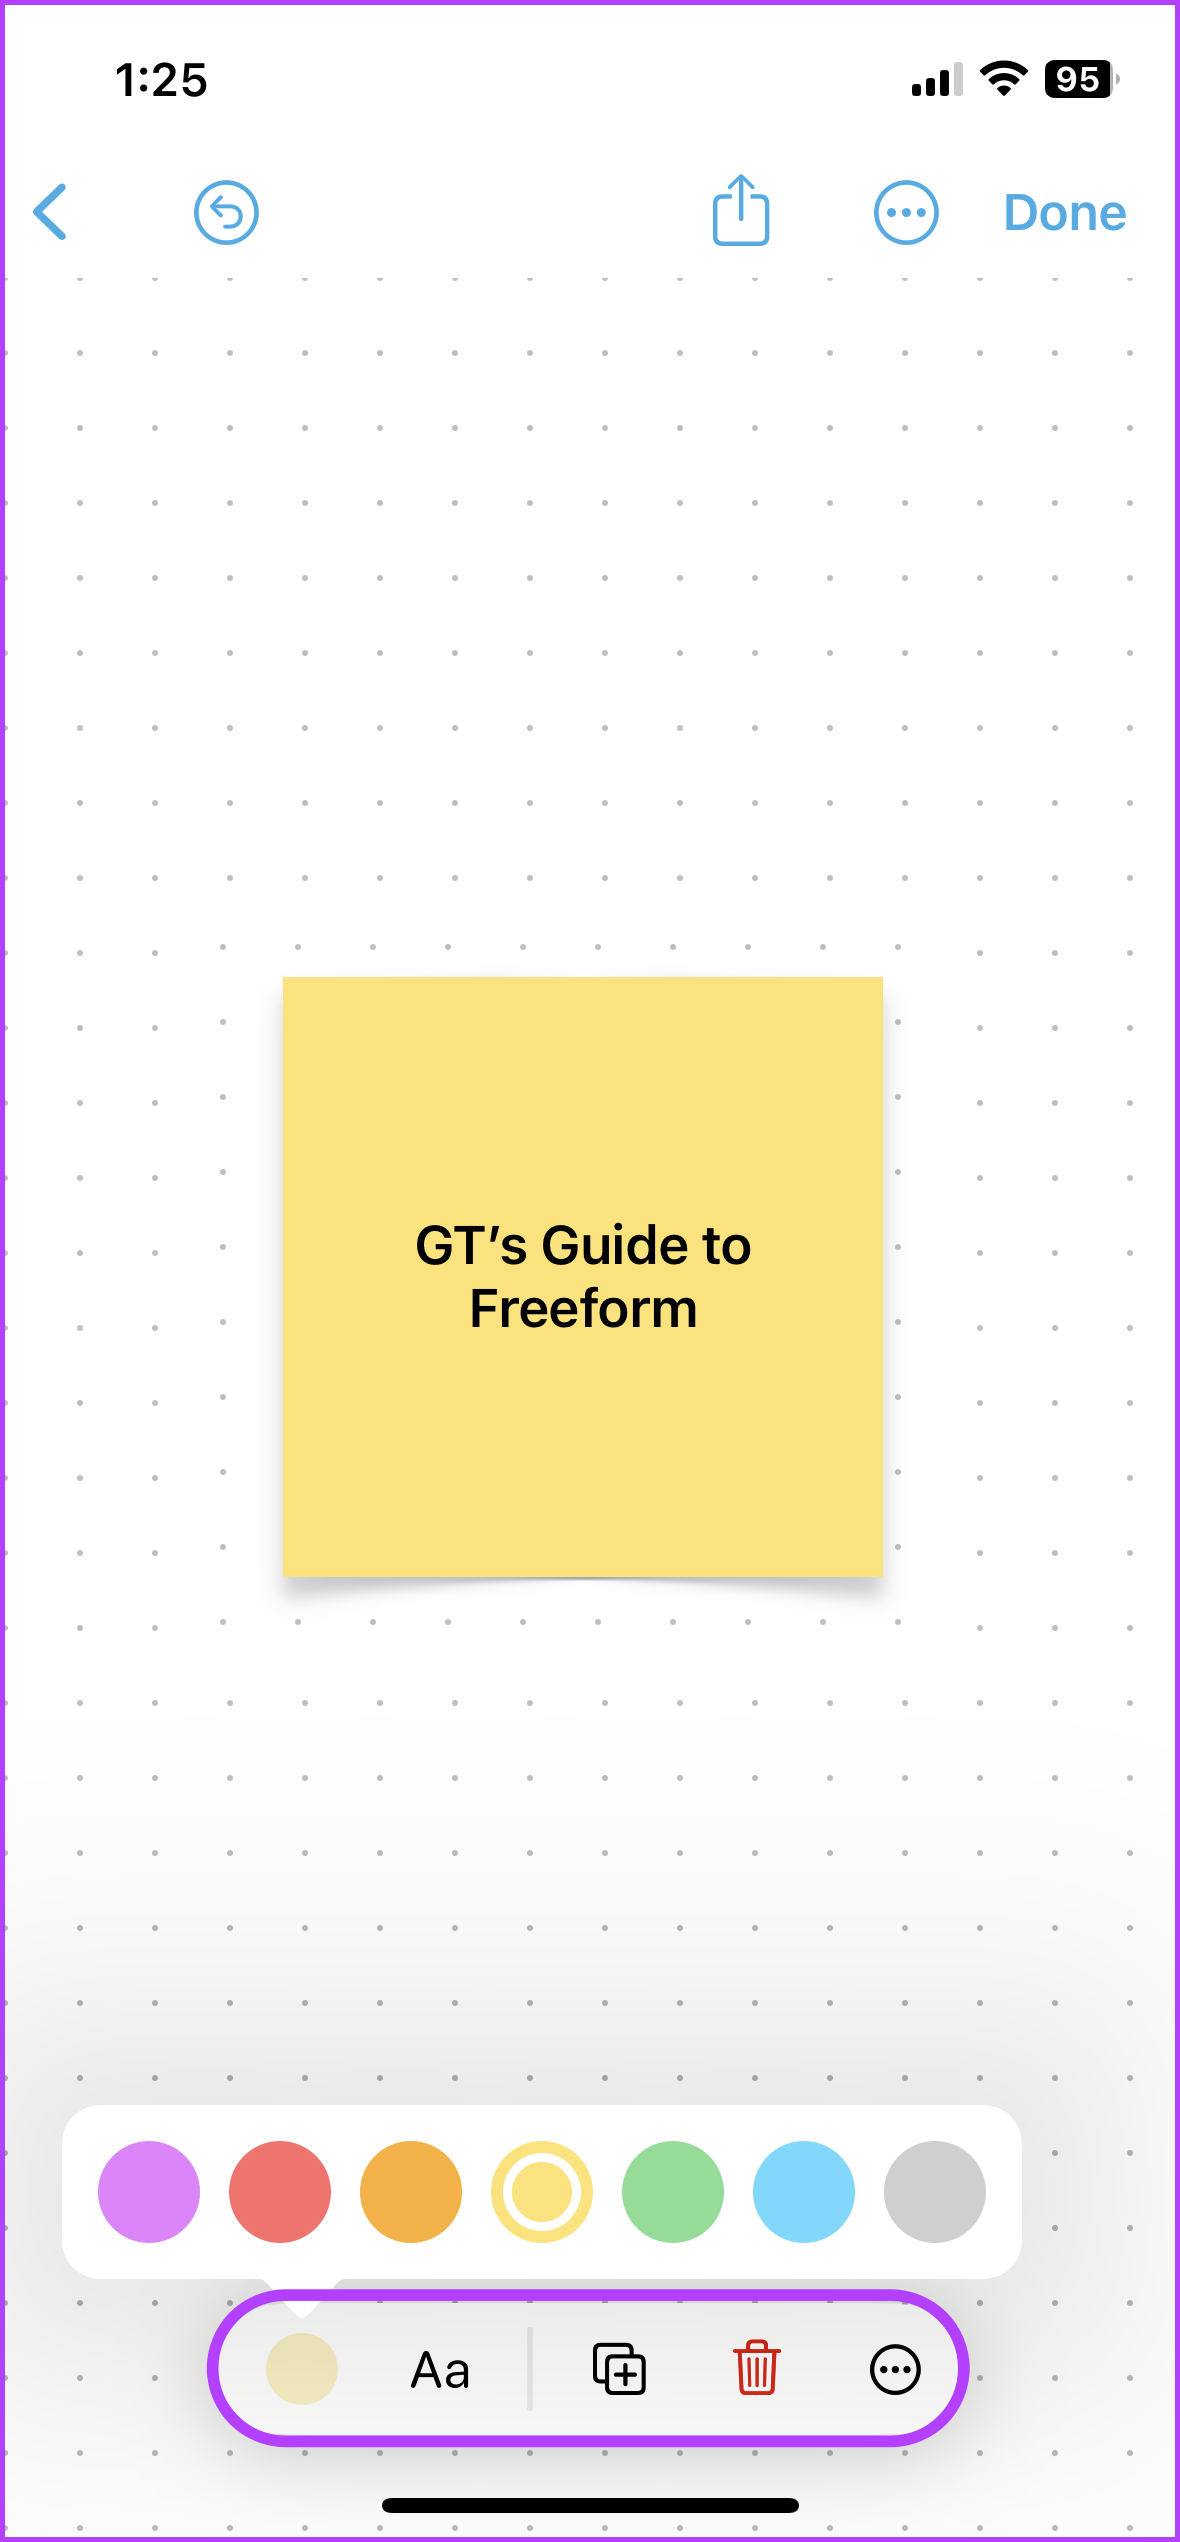
In your board, press the Note icon (bottom-left corner). A colorful square note will instantly pop up.
Enter text: Double-tap it to start typing. You can manage the font size, style, and text alignment from the toolbar bar above the keyboard. Moreover, you can also make lists if needed. Tap return once you’re done writing.
Resize the note: Tap the note, then hold the blue dot from any corner and pull out or in to increase or decrease the square’s size.
Move the note: Press, hold, drag, and drop the note at any desired location.
Edit the note: Tap it to bring up a host of editing options. Here, you can,
Change the color of the note.
Edit the font size and style.
Duplicate.
Delete.
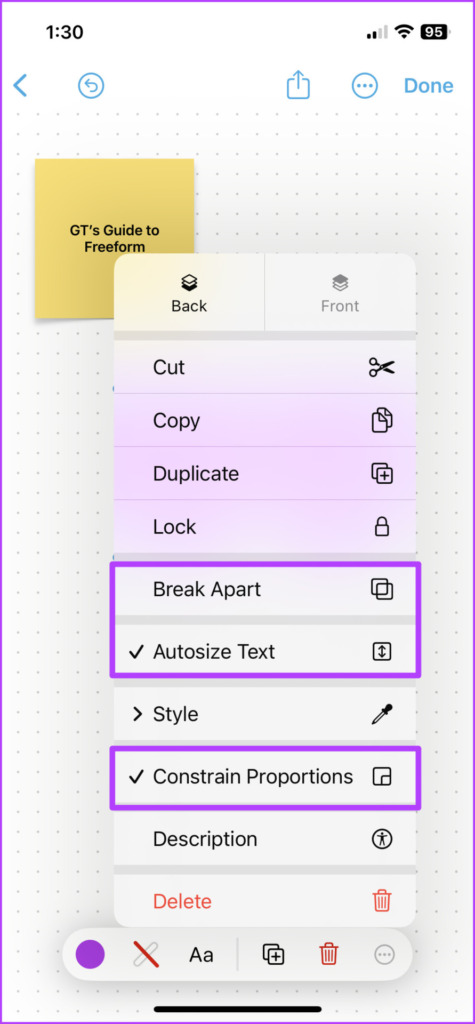
Tap More (three-dotted icon) for more options like:
Manage layers (Bring the note in front or send it back)
Cut or Copy
Lock (you won’t be able to move it across the board)
Style (copy/paste the style of the note)
Description (can be used by assistive technology for voice-over)
Add Shapes to the Freeform Board
Tap the Shape (second icon) to find an extensive variety of shapes and icons, neatly tucked under an array of categories. If you’ve something particular in mind, tap the search icon and type away.
Select the shape you like and drop it on the board. Tap and pull the blue dots to resize it.
Add text: Double-tap any shape and start writing.
Edit the shape’s appearance: Tap the Shape icon and then you can,
Change its color (you can even use the picker tool for the desired tool).
Add a border of the preferred color and thickness.
Adjust the text size, color, alignment, etc.
Duplicate.
Delete.
The more menu: When you tap the three-dot icon, tools similar to notes pop up. Although, three interesting and useful options are also available in the mix:
Break Apart
Autosize Text
Constrain proportions
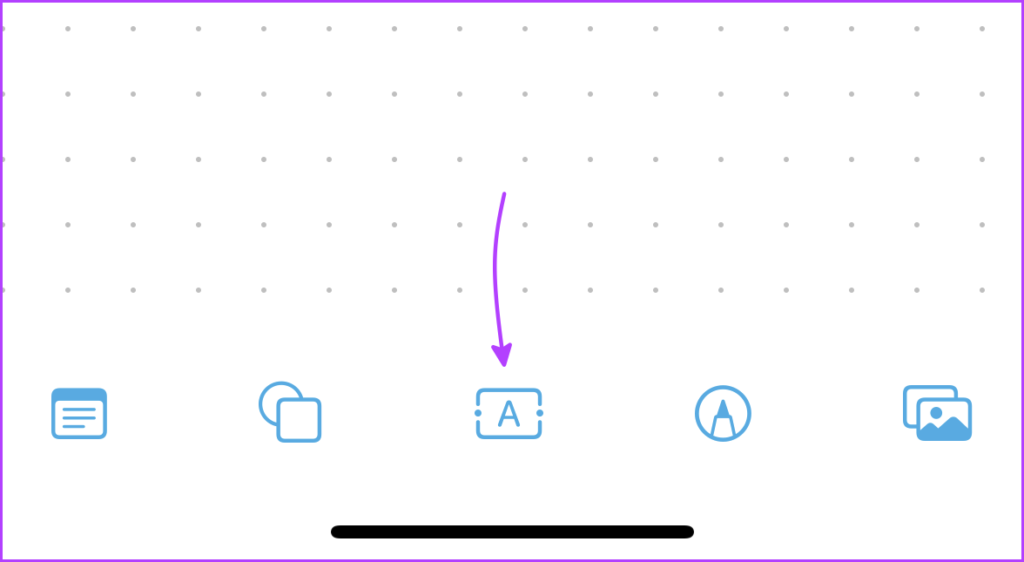
How to Add Text Box In Freeform
This one’s pretty basic. Tap the Text box (center icon) and place the box in the desired place. Next, pull in/out the blue dots to resize and double-tap to enter text.
Tap on the text box for more options to:
Change text color
Text style
Font size
Duplicate
Delete
The more menu has regular options.
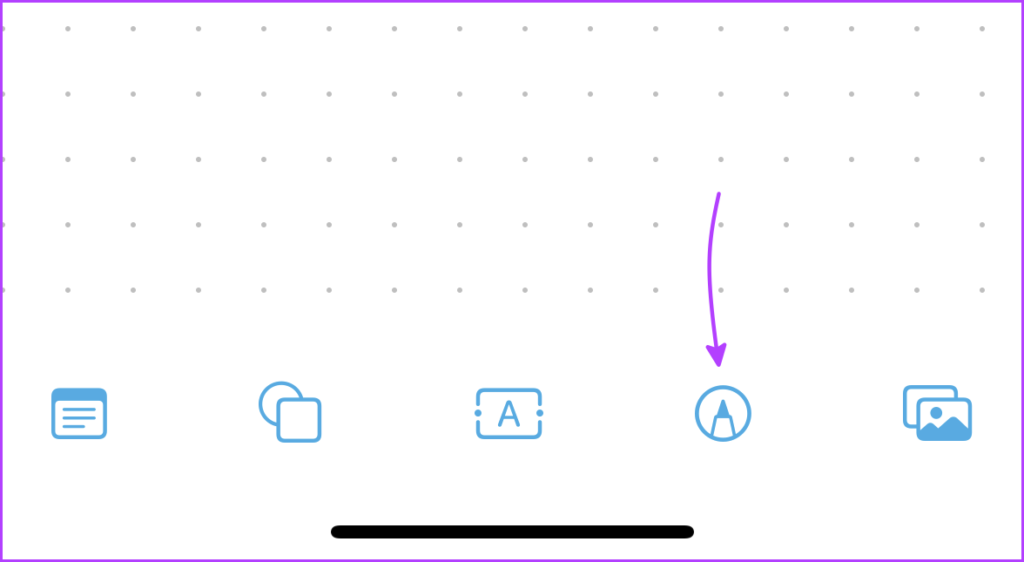
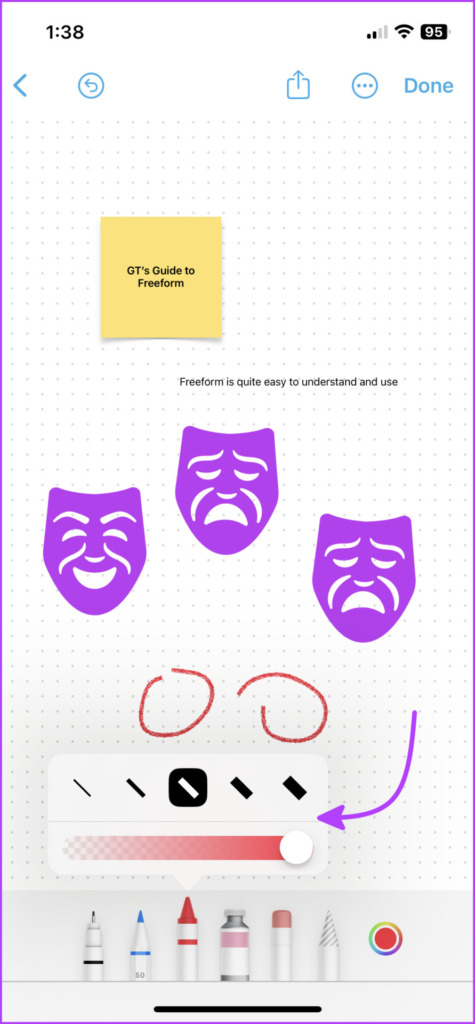
How to Draw in Freeform on iPhone and iPad
Tap the Markup (second last) icon from the bottom.
The usual set of tools will be for your perusal (except you can’t sign documents here). Select the tool of your choice and draw.
To change the size of the pen/brush/eraser or change the opacity, long-press the tool. If you want to change color, tap the color wheel. Once finished, press Done.
If you want to edit something, tap the drawing. Select the desired tool and edit away.
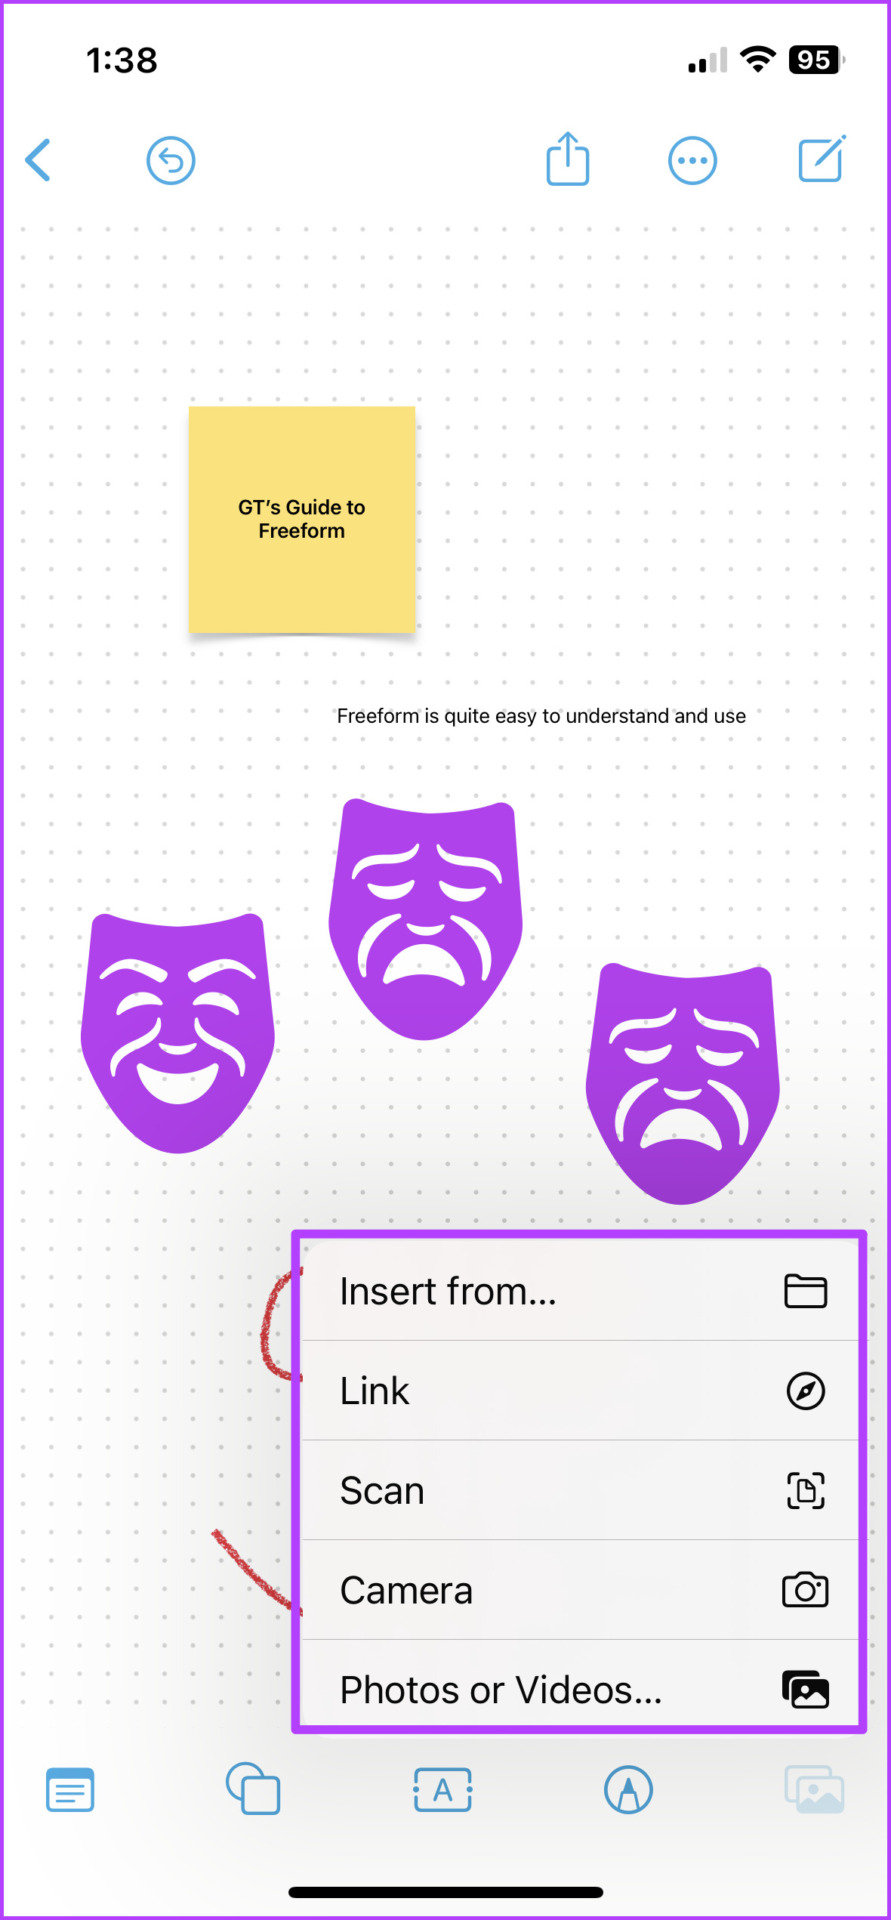
How to Insert Photos, Videos, Documents, and Links Into a Freeform Board
Tap the last icon from the bottom toolbar, and from here, you can insert the following objects:
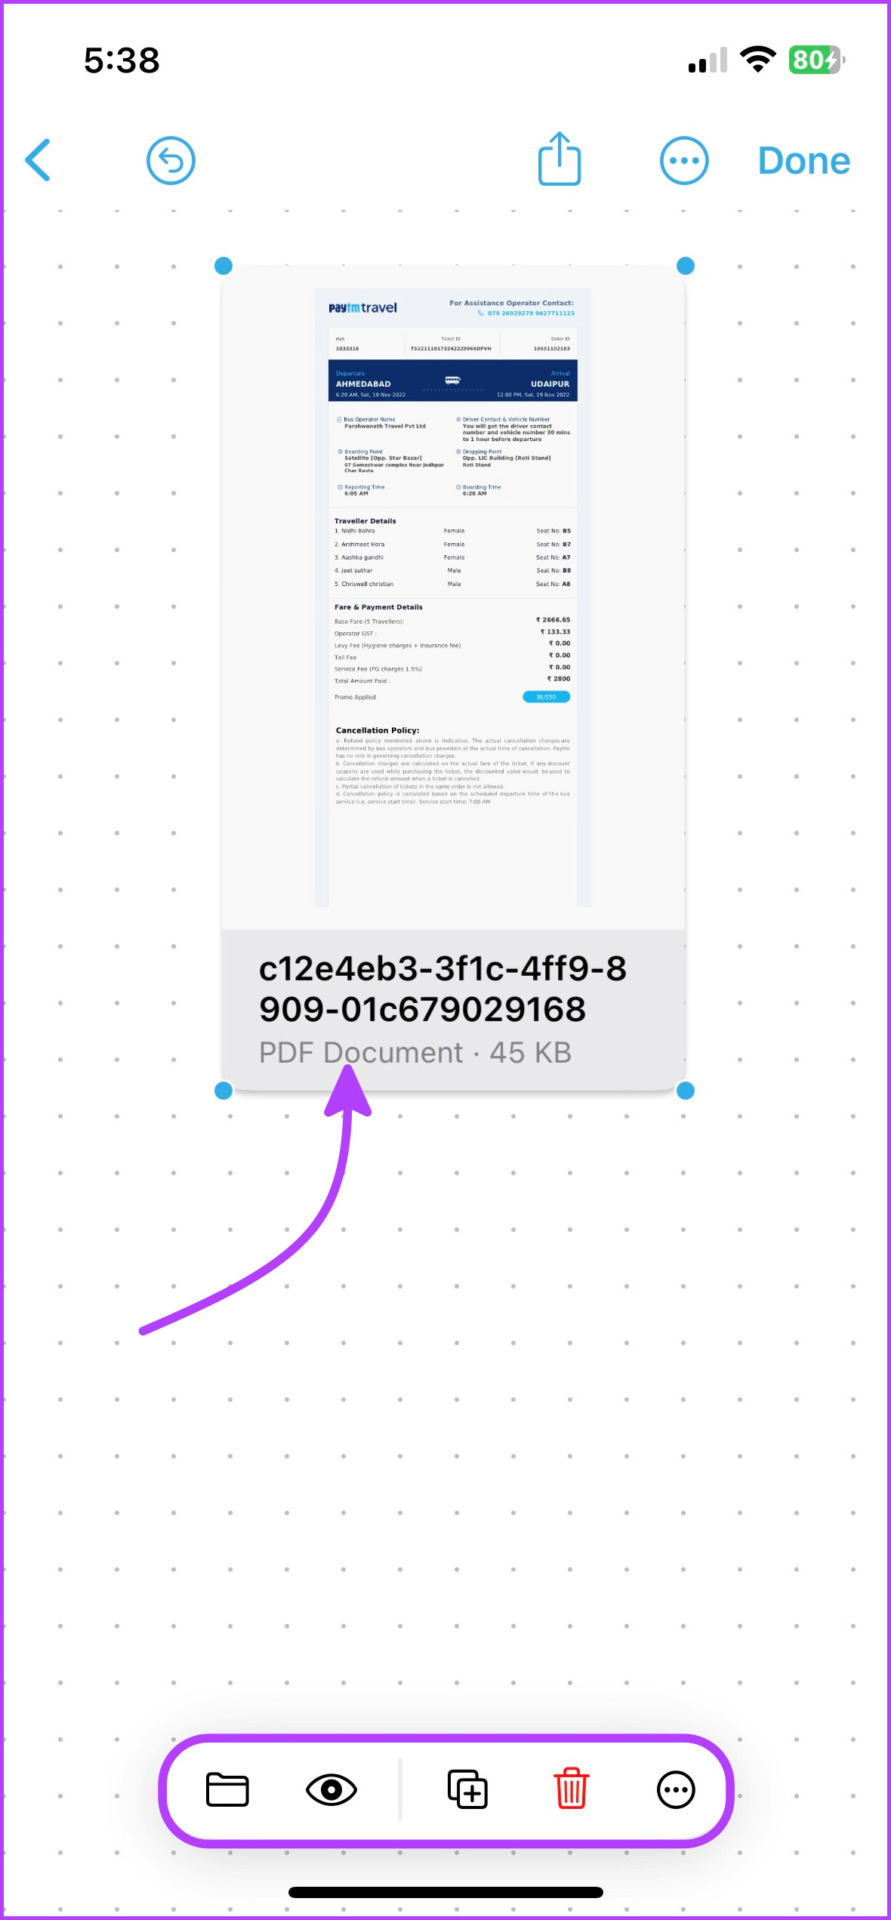
Insert from: It opens into the Files app, and you can insert almost any type of file, from documents and PDFs to photos, videos, and beyond.
Tap the File icon to replace the file and the Eye icon to view it. You can also share or save the file from here.
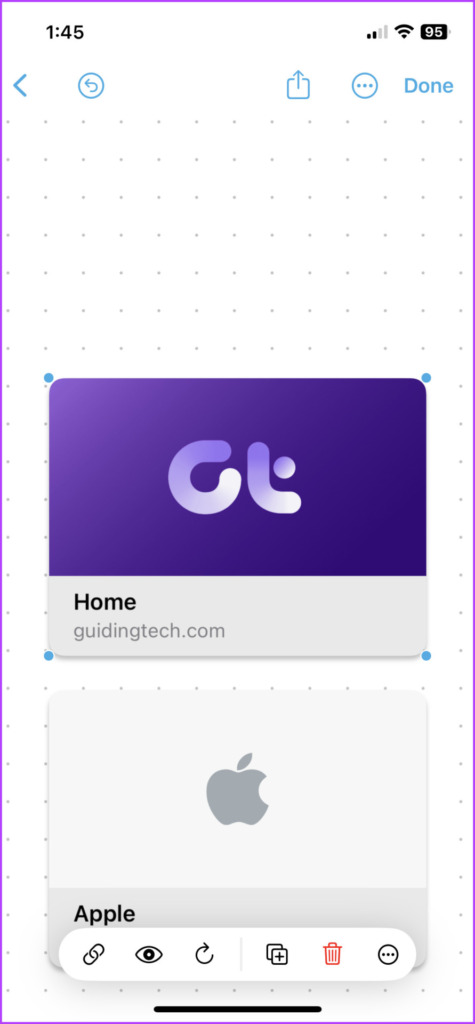
Link: Type or paste the link and tap insert. Tap the link icon to edit the link. To open it tap the Eye icon; it will open in iPhone or iPad’s default browser.
Scan: Use the built-in scanning feature of iPhone and iPad to scan and insert a document into the board. Again tap the Eye icon to view, share, or save the document.
Camera: For real-time updates, use the camera to capture and insert photos or videos into the board. You can replace, crop, view fullscreen, duplicate, or delete the media file from its accompanying toolbar.
Note: The photos clicked within Freeform aren’t saved in the Photos app. Tap the photo → Eye icon → Share icon → Save Image.
Photos or Videos: The last option allows you to insert saved photos/videos from the camera roll. Almost the same tools as above are available for this section.
Freeform Tips and Tricks
While we were exploring the Freeform board, we noticed some hidden tricks. Enjoy!
Remove background from photos: You can use Apple’s latest background-removing feature in Freeform as well. Add and tap the image → tap the Eye icon → tap and hold the subject → leave a white line that appears → select Copy.
You can paste this image anywhere on the board. Naturally, we had to test the Live Text feature, and it also worked surprisingly well.
Shadows and round corners: By default, the media files in the board sport rounded edges and shadows. To remove, tap the More (three-dot) icon and uncheck Shadow and Round Corners.
Video playback speed: Tap the video and select the Eye icon. Here, tap the More icon → Playback Speed and select the desired speed. You can also extract the text from the video, AirPlay, and mute it from here.
Select multiple objects:
Tap and hold an item with one finger and use another finger to tap other items.
Long-press the canvas and drag your finger to create a box around the items you want to select.
Tap any empty space on the board → select Objects. Now, either Select All objects on the board or tap the once you want.
Once the desired objects are selected, you can move, rotate, or resize them as needed.
Align and group multiple items: Select the items → tap the Group icon from the bottom bar → tap Group or any alignment option of your choice.
Rename, Duplicate, Print, or Export Freeform Board
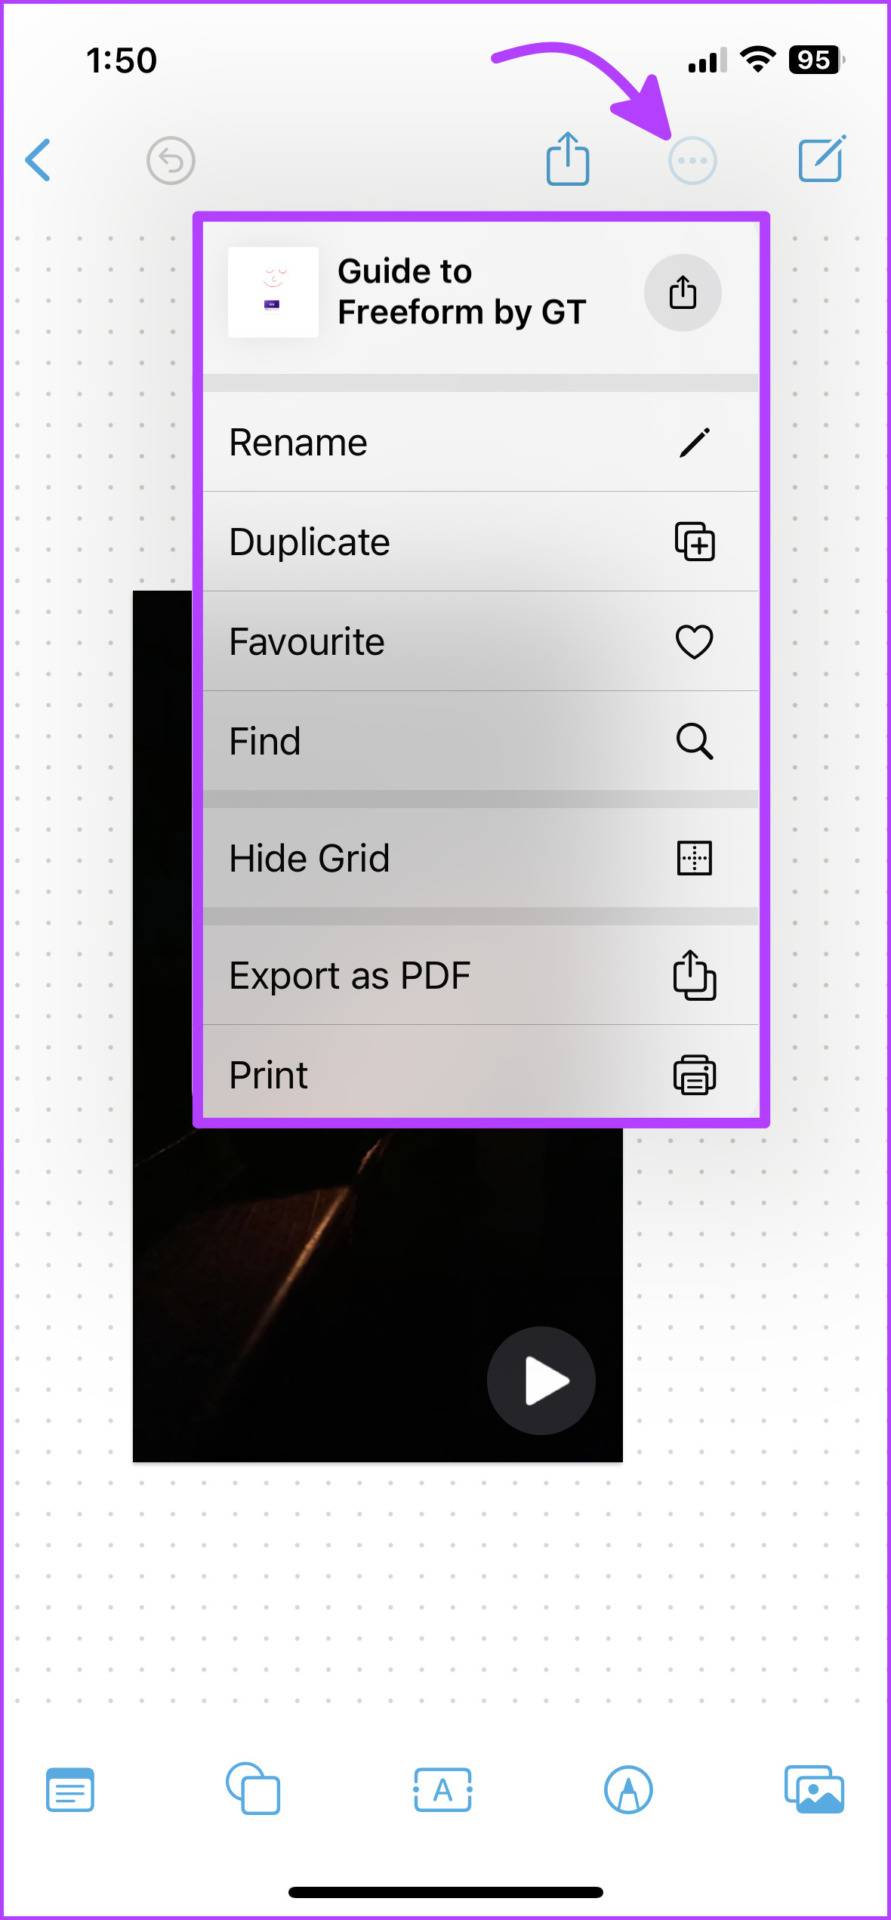
While limited, Freeform offers some potent setting options to manage and organize the board. Tap the More icon from the top bar to,
Rename or duplicate the board.
Add the board to Favorite.
Find something on the board.
Hide or show the grid
Export the Freeform board as PDF.
Print the Freeform board.
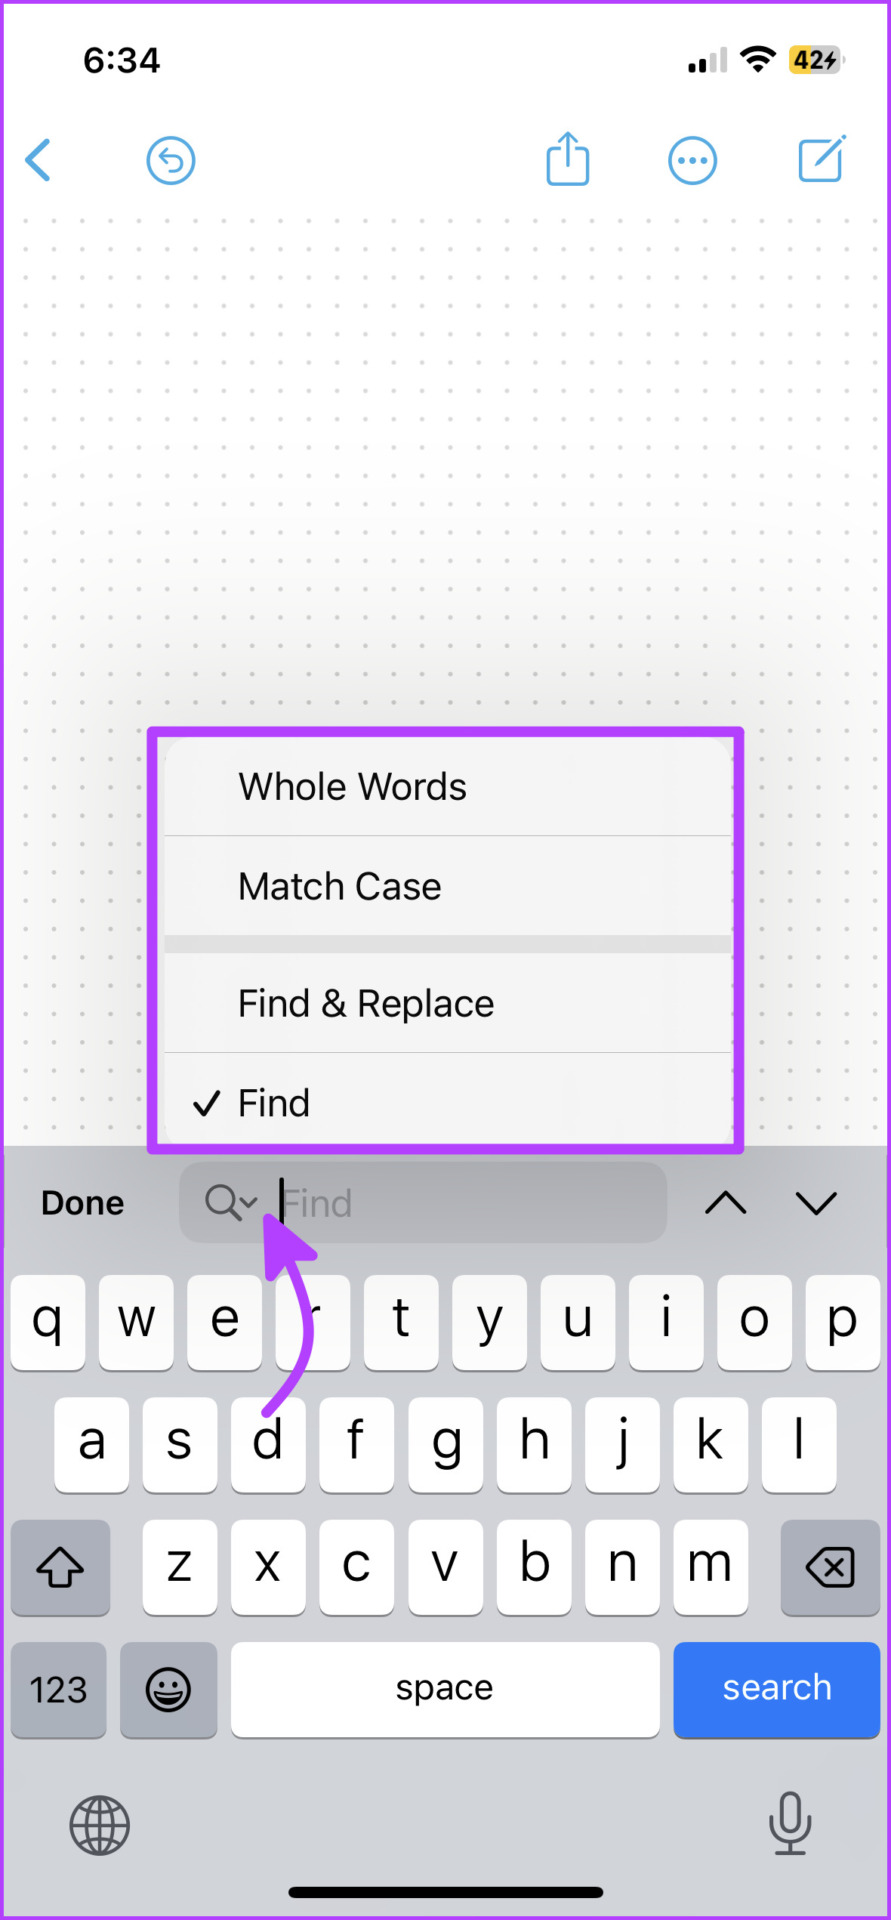
Tip: You can not only search text across the board but also replace it. When you tap Find from the option, a search bar pops up. Select the down arrow next to the Search icon, and you’ll get these options shared in the screenshot on the right.
How to Turn On or Off the Alignment Guides
Freeform also offers alignment guides, when enabled that help in precise item placement. They act as visual cues and become visible as you drag an item on a board, automatically aligning with other items.
Notably, you can enable or disable these guidelines as needed. To do so, go to Settings → Freeform → Toggle on/off the following options,
Center Guide
Edge Guide
Spacing Guides
That’s how you can create and manage the board. Next up, let’s learn how to invite others to collaborate with others on any Freeform board.
How to Share and Collaborate on Freeform Boards
The basic premise is quite like sharing Notes on iPhone and iPad. You can invite your friends, family, or colleagues to collaborate on the board. Moreover, decide who can view and edit the board with ease.
Step 1: Open the Freeform board you want to share.
Step 2: Tap the Share icon from the top bar.
Step 3: To manage the collaboration setting, tap ‘Only invited people can edit’ under Collaboration.
Step 4: Here, check suitable options for Who Can Access and Permissions.
Step 5: Further, toggle on/off ‘Allows others to invite’ and tap Done.
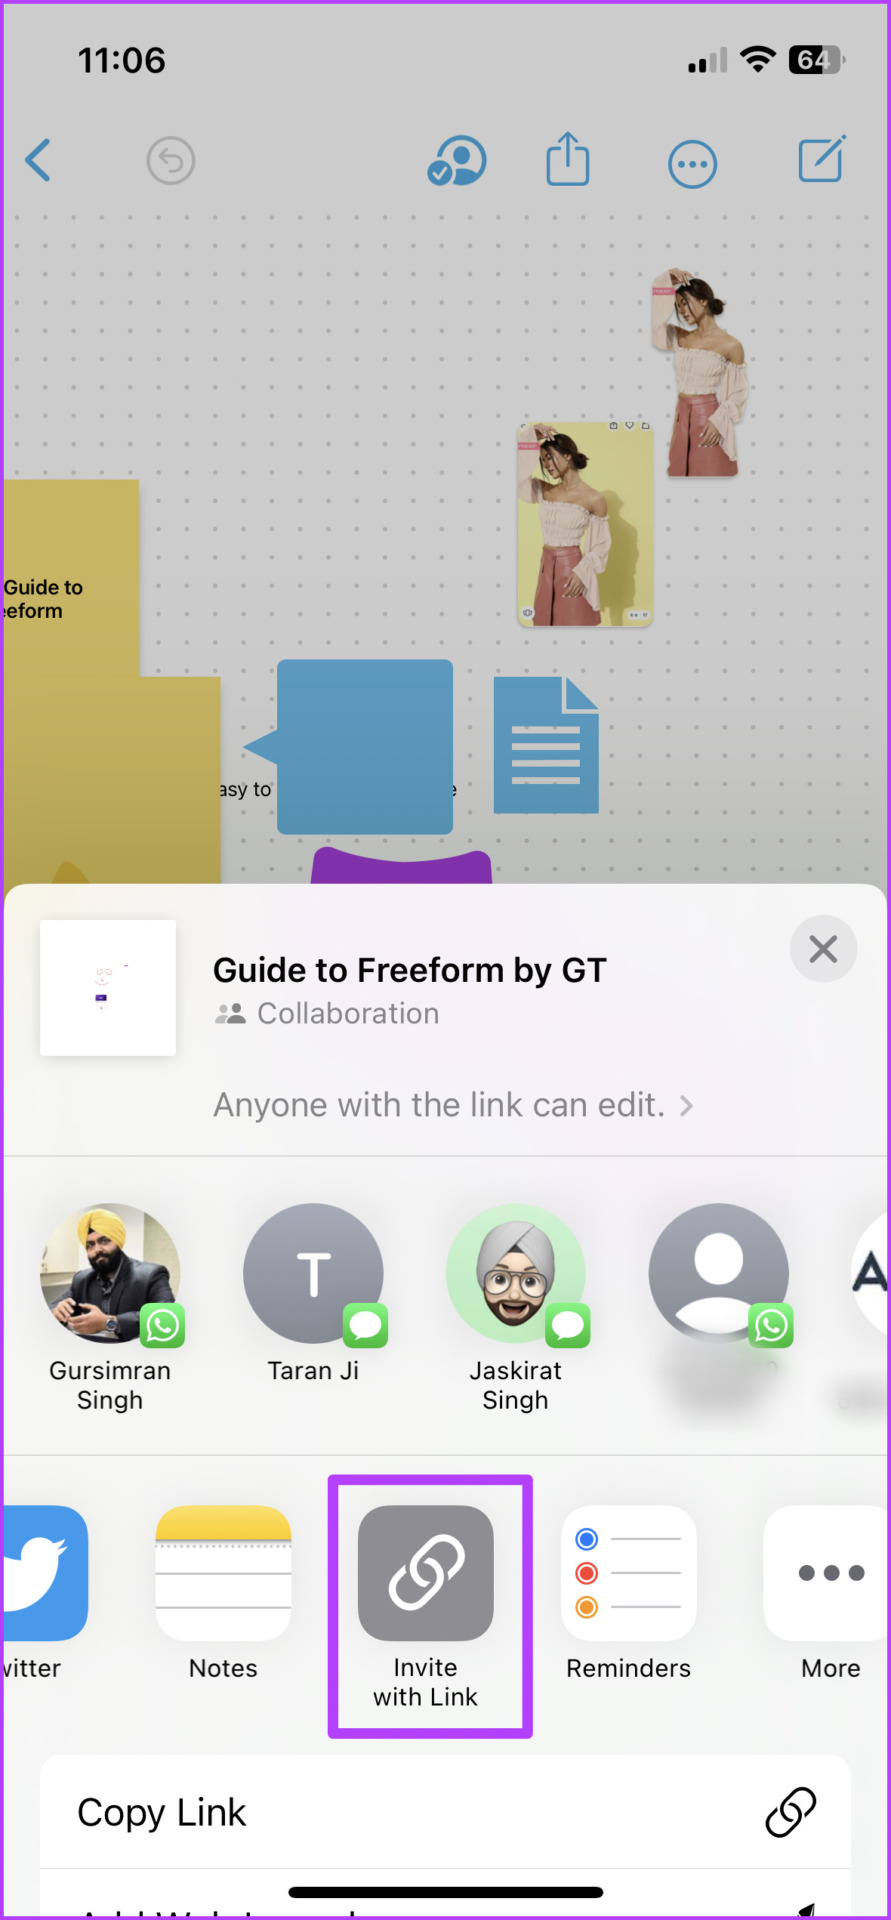
Step 6: You can either select the contacts from the share sheet or slide the apps menu to find and tap Invite with Link.
You’ll be notified when the recipient accepts the request. Moreover, thanks to Apple’s latest project collaboration via Messages, you can also receive updates when someone makes changes on the board.
Interestingly, each collaborator on the board will sport a unique cursor. This allows you to see who’s working on what in real time.
Modify Freeform Board’s Sharing Options
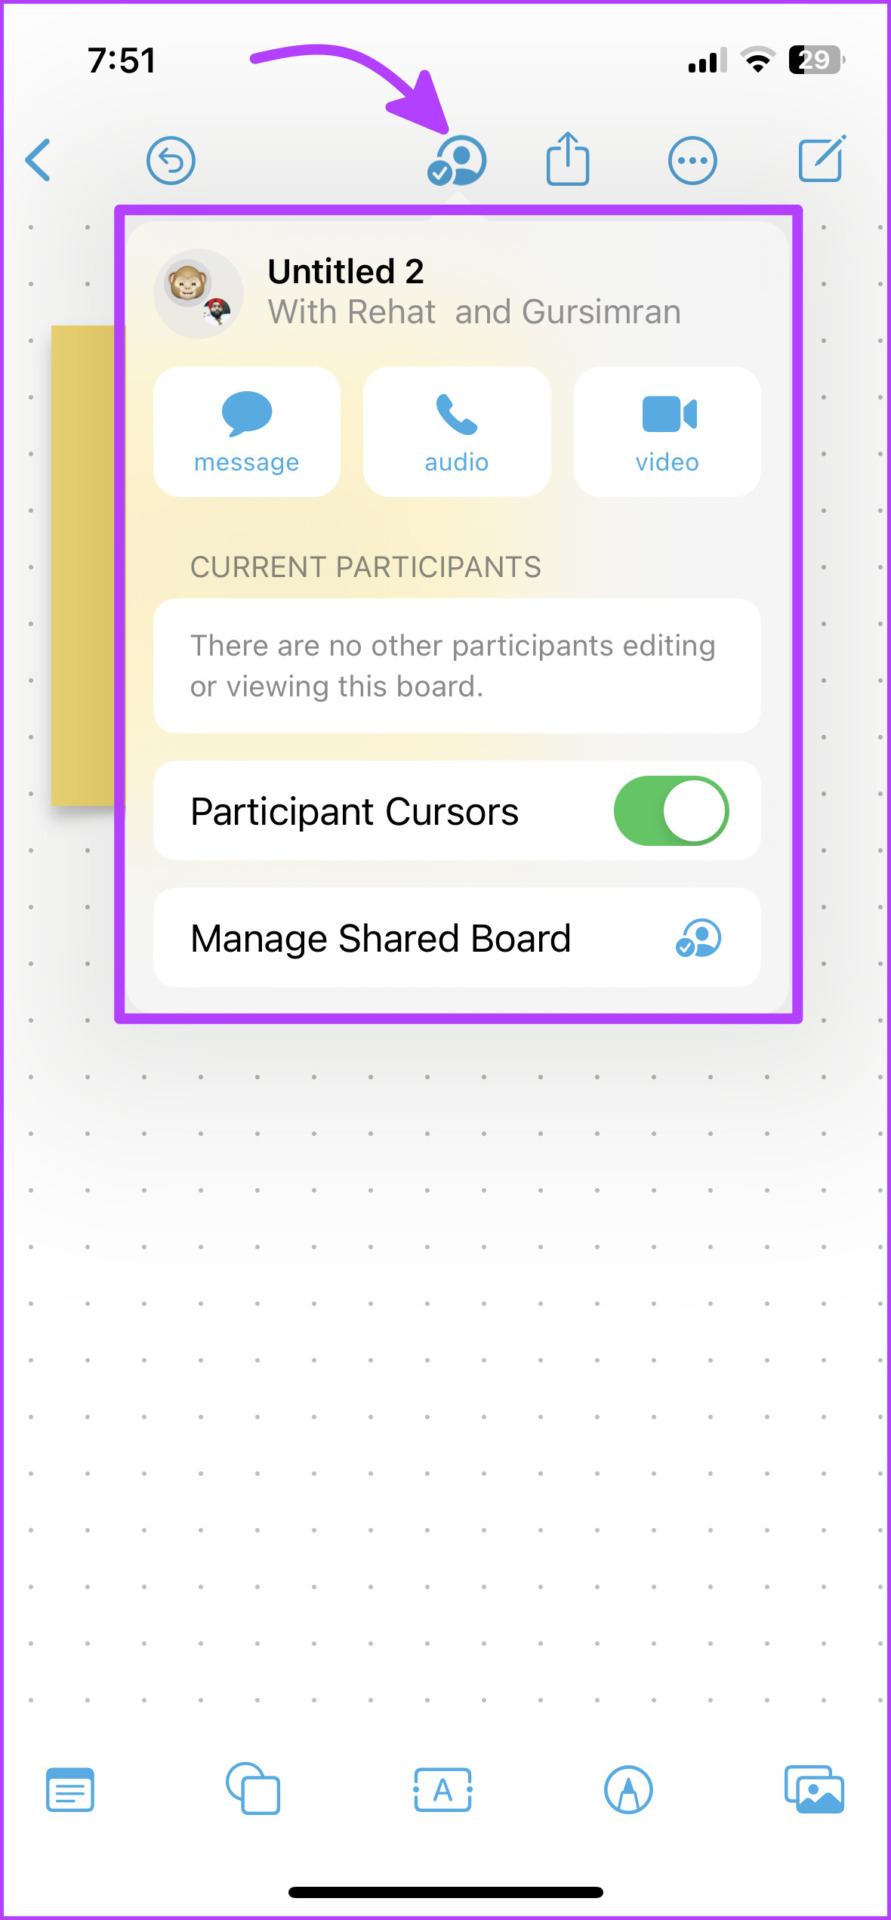
Once the board is shared, a Collaboration icon will appear on the top bar. Tap it to reveal a host of options. You can Message, Voice, or Video call (FaceTime) any one or all collaborators right from here.
Additional options appear when you tap the Manage Shared Board option. From here, you can:
See who has access to the board, with viewing or editing rights.
Re-adjust the sharing options if needed.
Copy link.
Stop sharing.
How to Open or Manage Boards on Freeform
Freeform restarts from the last closed board/window. So, you can lift off from where you left off or navigate the app for what you need.
Manage All Boards
If you’re stuck on a board, tap < (back) from the top bar to view All Boards. Here, you can create a new board or tap the More icon to:
Select one or more boards to Duplicate or Delete.
Adjust the viewing options – Icons or List.
Change sorting order – Sort by Date or Name.
Arrange the boards in groups or not.
You can also search all boards here, it will show all the boards containing the searched text.
Navigate to the Home Page
While you’ll spot it instantly on the iPad (in the sidebar), tap < Freeform from the All Boards page to view the Home Page of the app. The UI here is pretty similar to the Notes or Reminders app on iPhone and iPad.
The Home Page is divided into multiple sections as seen in the screenshot below.
Things We Wish Would Come to Freeform
We know there are a lot of features in Freeform to start with, but a heart wants what it wants, right? And while the app is impressive, little things like tags, mentions, smart folders, etc., everything we love in Notes and Reminders, is sorely missed.
Have you tried Freeform yet? Is it the best whiteboard app for iPad and iPhone? What other features would you love to incorporate in Freeform? Share in the comments below.
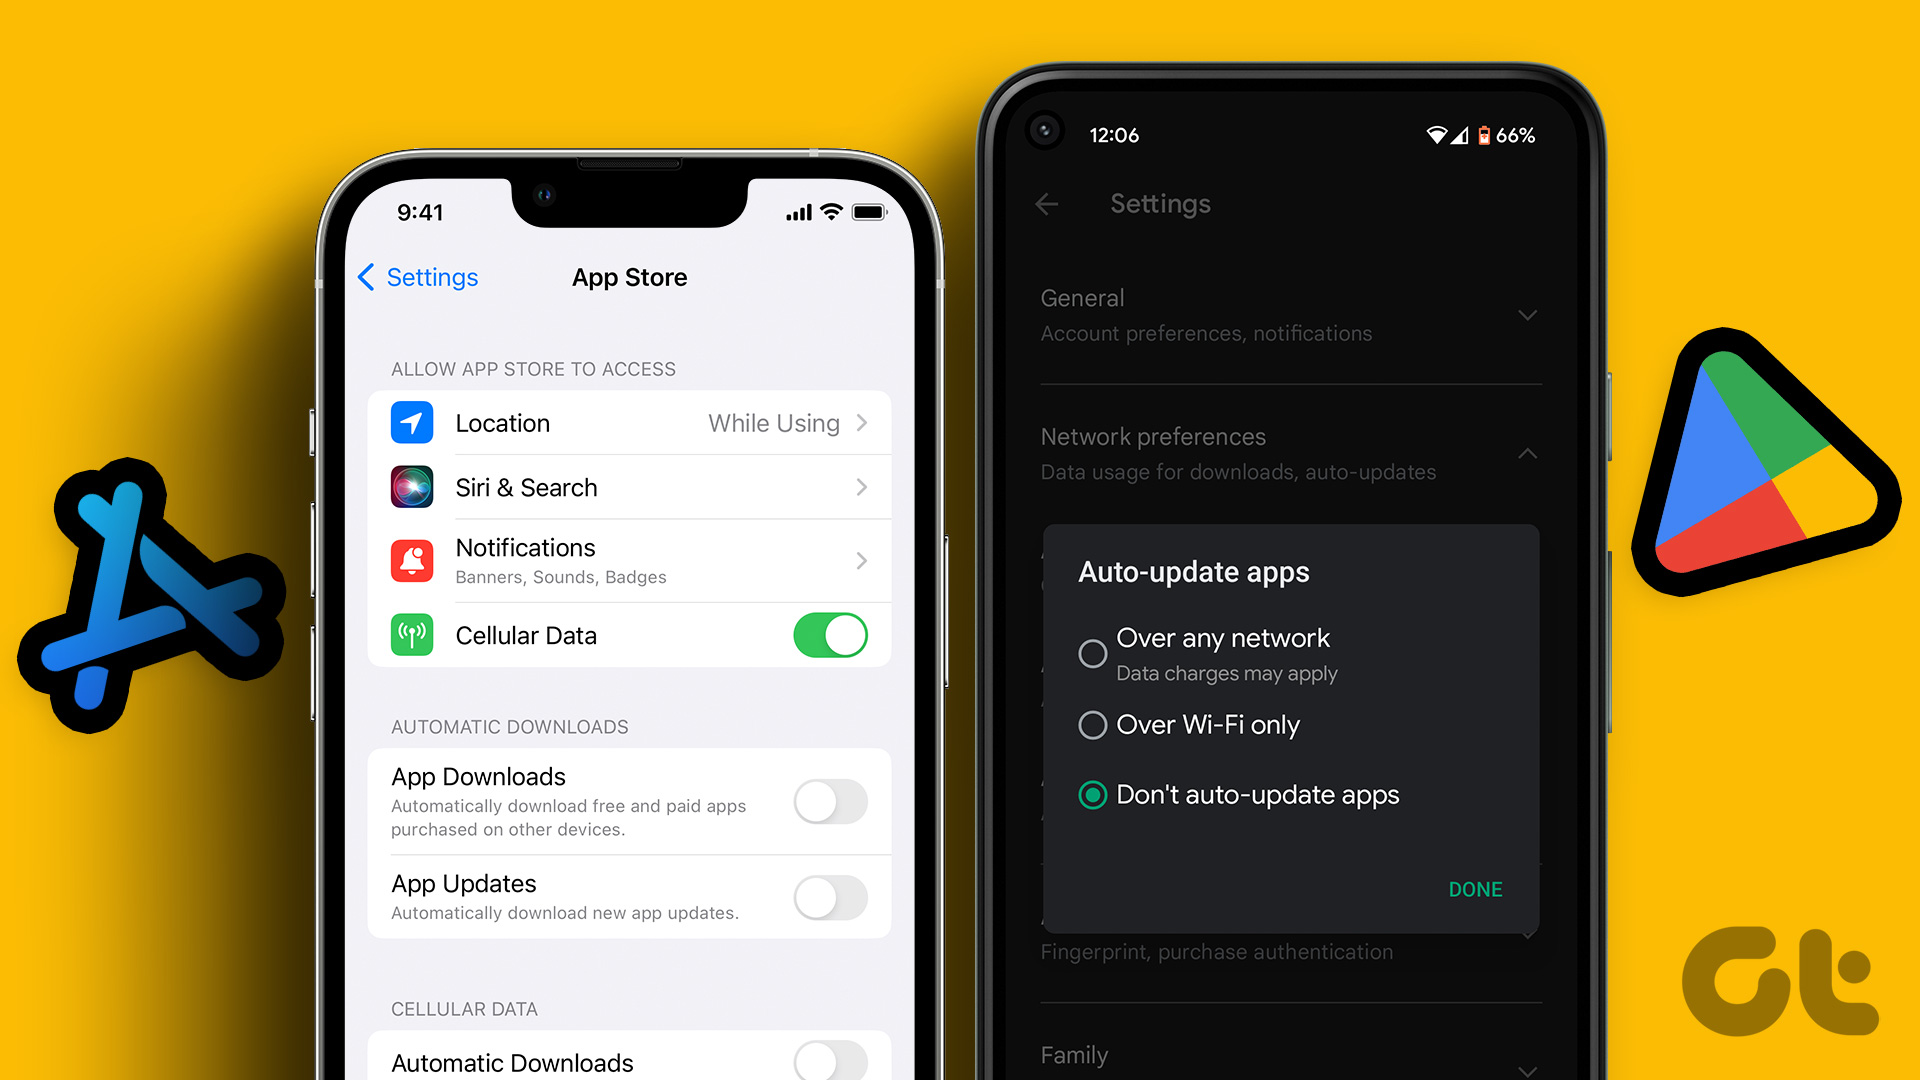
Automatic app updates ensure that your favorite apps are always updated and bug-free. Besides, you enjoy the latest features. However, letting your phone apps update automatically means that they consume significant cellular data. That means you’ll get fewer data when you really need it.
Fortunately, you can turn off these automatic app updates if you want to open the Play Store to update the apps manually. Here’s how to disable automatic app updates on Android and iOS.
Should You Disable Automatic App Updates
You may have decided to disable the automatic app updates to save up on mobile data or any other reason, but it won’t help you in the long run. There are two reasons you need to reconsider before disabling automatic app updates – experience and security. Older and outdated apps may crash or become incompatible with your phone, especially when new features start rolling out. Also, keeping all apps updated ensure no vulnerabilities in it. That’s why its necessary to always keeps app updated from your banks and other institutions carrying your personal data.
How to Disable Automatic App Updates on Android
The modern Android flavours let you turn off auto updates for all apps or just a few apps at once. These options are hidden inside the Google Play Store app. Here are the steps to disable automatic updates for all apps or few:
Disable Automatic App Updates for All Apps
The modern flavours of Android allow the flexibility to turn off automatic updates for all apps at once. Here are the steps to do the same on your phone.
Step 1: Open the Google Play Store app on your phone. You can use the search bar in the app drawer to locate it.
Step 2: Tap on your profile picture in the top-right corner.
Step 3: From the menu that appears, select the Settings option.
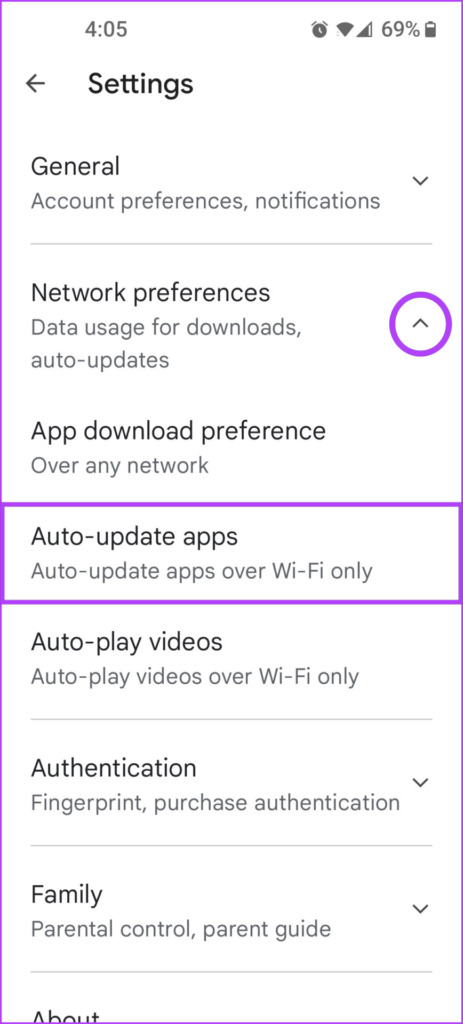
Step 4: Tap on the Network preferences drop-down, followed by the Auto-update apps option.
Step 5: When a pop-up appears, select ‘Don’t auto-update apps.’ Then, tap on Done.
On the other hand, if you want to enable automatic app updates but only when you connect your phone to Wi-Fi, select the ‘Over Wi-Fi only’ option.
If you want to do this for individual apps, move to the next section.
Disable Automatic App Updates for Individual Apps
It’s natural to not let Android automatically update select apps, especially the ones you barely use often. Luckily, Android lets you disable automatic app updates for individual apps too. Here’s how:
Step 1: Open the App Drawer on your phone and launch the Google Play Store. You can search for it in App Drawer too.
Step 2: Tap on your profile picture located in the top-right corner.
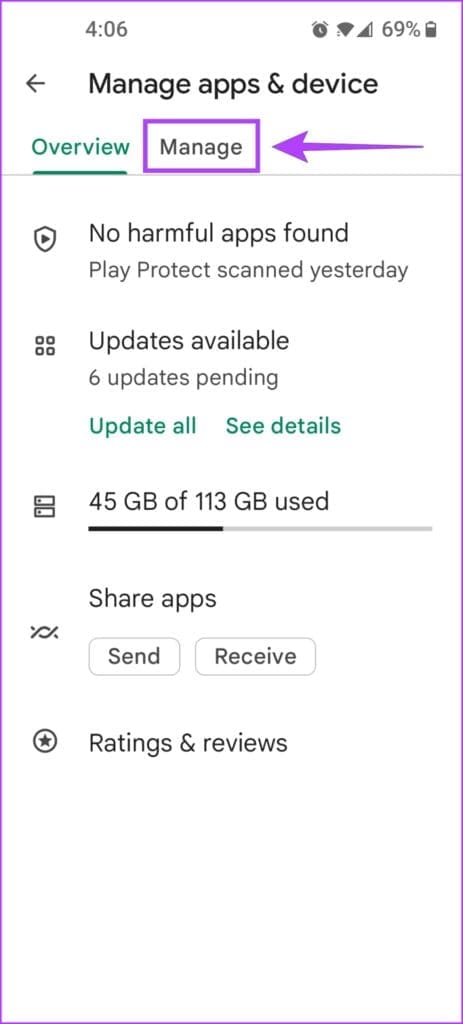
Step 3: From the menu that appears, select Manage apps & device.
Step 4: Now, tap on the Manage tab to see all the apps installed on your Android phone or tablet.
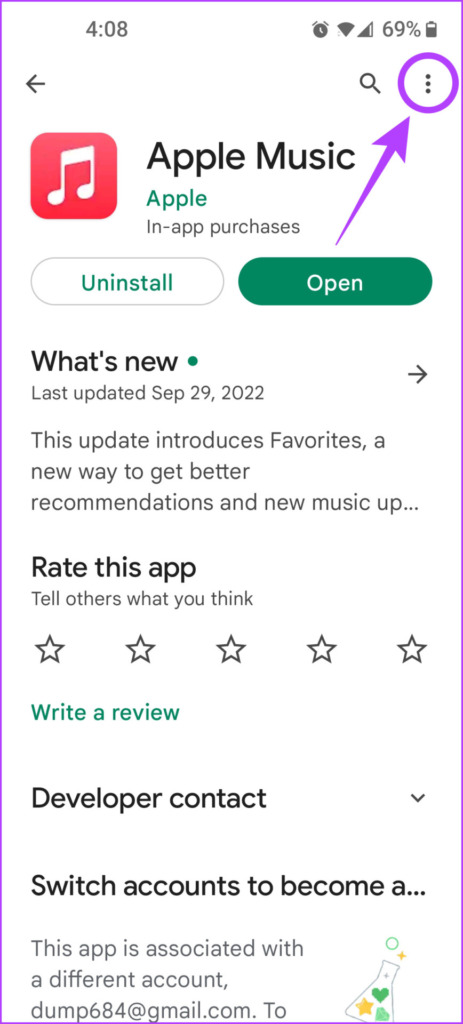
Step 5: Tap on the app you want to disable automatic updates for.
Step 6: Now, tap on the vertical three-dot menu and uncheck the option that says Enable auto-update.
Following the steps mentioned above should allow you to turn off Automatic app updates for individual apps on your Android phone or tablet.
How to Disable Automatic App Updates on iPhone
You can quickly disable automatic app updates for all your apps on iOS by toggling it off under the App Store page of the Settings app. Unfortunately, iOS does not offer an option to turn off automatic app updates for individual apps.
With that out of the way, let’s take a look at how you can disable automatic app updates on iOS:
Step 1: Locate and open the Settings app on your iPhone.
Step 2: Scroll down and tap on App Store.
Step 3: Turn off the toggle next to App Updates.
After following the steps listed above, you can quickly turn off automatic app updates on your iPhone and manually decide which apps to update. However, if you’re having trouble updating apps on your iPhone, check out our previous troubleshooting guide.
Alternatively, suppose you only want apps to automatically update when you’re connected to a Wi-Fi network. In that case, you can skip the first two steps and turn off the toggle called Automatic Downloads. You can still use automatic app updates without exceeding your phone’s data limit
Stop Apps From Automatically Updating Themselves Without Your Permission
Step 1: Download the Outlook app and sign in using your Microsoft account details.
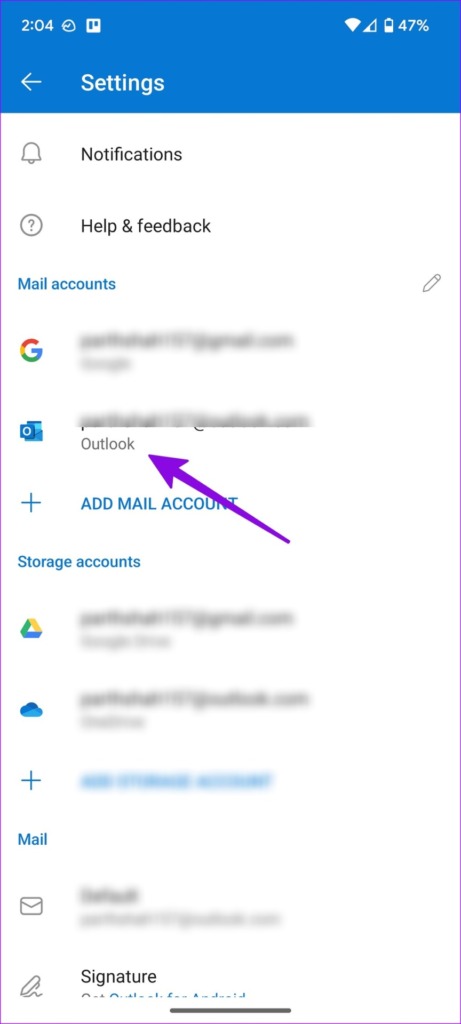
Step 2: When the app syncs your email, tap the Home icon at the top-left corner and go to Settings.
Step 3: Select Outlook under your mail accounts and turn on the toggle for Sync contacts.
Return to the Home screen and open the Contacts app. The Outlook contacts will start to appear there.
Method 2: Use the Settings Menu
If the trick above doesn’t work, use the default Settings menu to sync Outlook contacts on Android.
Step 1: Set up the Outlook email app on Android.
Step 2: Open Settings on your Android phone and go to Password and accounts.
Step 3: Select Outlook from the following menu and tap on Account Sync. Then, enable the Contacts toggle from the following menu.
Method 3: Use the Google Contacts App
First, create a .VCF file from Outlook contacts and sync them with your Android phone using the Contacts app. We will use Outlook for web to generate a .CSV file and convert it to .VCF format.
Step 1: Visit Outlook on the desktop and move to the People tab.
Step 2: Enable the checkmark beside All contacts and open Manage Contacts at the top.
Step 3: Select Export Contacts and Outlook will save a file in .CSV format.
Step 4: Use online tools like Anyconv to convert your .CSV file to a .VCF format (since the default Contacts app on Android can’t read and import numbers from a .CSVfile).
When you have an Outlook contacts file in .VCF format, move it to your phone, and use the default Contacts app to import it.
Step 5: Launch the Contacts app on your phone and go to the Fix & manage menu.
Step 6: Select Import from file > select email account or device to save imported contacts.
Step 7: It will open the default file manager menu. Find your .vcf file to import on Android.
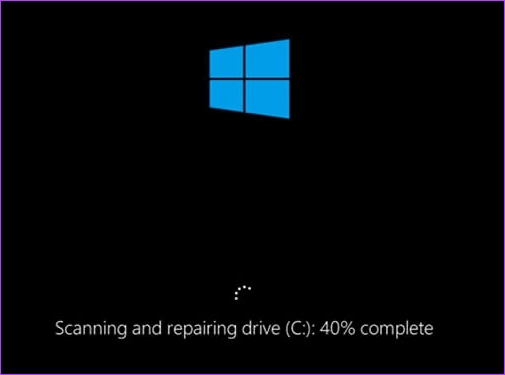
If your Windows PC is stuck on repairing disk errors and shows that ‘this might take an hour to complete,’ we are here to fix this issue without you having to face data loss, system instability, or even complete failure of the hard drive. Here are 8 ways to fix Windows stuck on repairing disk errors.
But what exactly causes repairing disk errors in Windows? There are several reasons including bad sectors on the hard drive, corruption in the file system, or problems with the hardware itself. This article will cover all significant ways you can use to quickly fix disk errors. The best part is that all the mentioned repair tools in Windows are built-in. That said, let’s begin with the fixes.
1. Patiently Wait Until Windows Complete Repairing
The first and foremost thing you must do is wait patiently for the repair process to finish. Give the system enough time (at least an hour) to repair the disk errors, which you will also see mentioned on the screen below the loading animation.
What can go wrong? Interrupting the repair process may damage your hard drive, potentially resulting in data loss. Moreover, interruptions could make your PC unresponsive or crash, and you may have to start the process again. That said if you are done waiting, jump to the next method.
2. Remove External Devices Connected to Windows PC
If waiting didn’t help, taking out all external devices might. These could be the obstacles getting in the way of fixing Windows. However, removing external devices doesn’t fix the problem; it makes it easier for Windows to figure out what’s wrong.
Aside from that, removing external devices can help make sure that the repair process is as thorough and effective as possible. More importantly, if there are any external devices connected to the system, they may be using resources that could be needed for the repair process.
3. Run Chkdsk Command in Safe Mode
In this method, we will use the CHKDSK command, which will help us check the hard disk for bad sectors, recover any readable data from them, and fix any errors. All you need to do is try restarting the PC or laptop from Safe Mode. Follow the steps below.
Step 1: Press the Windows key on your keyboard, hold the Shift key, click the Power button, and select Restart.
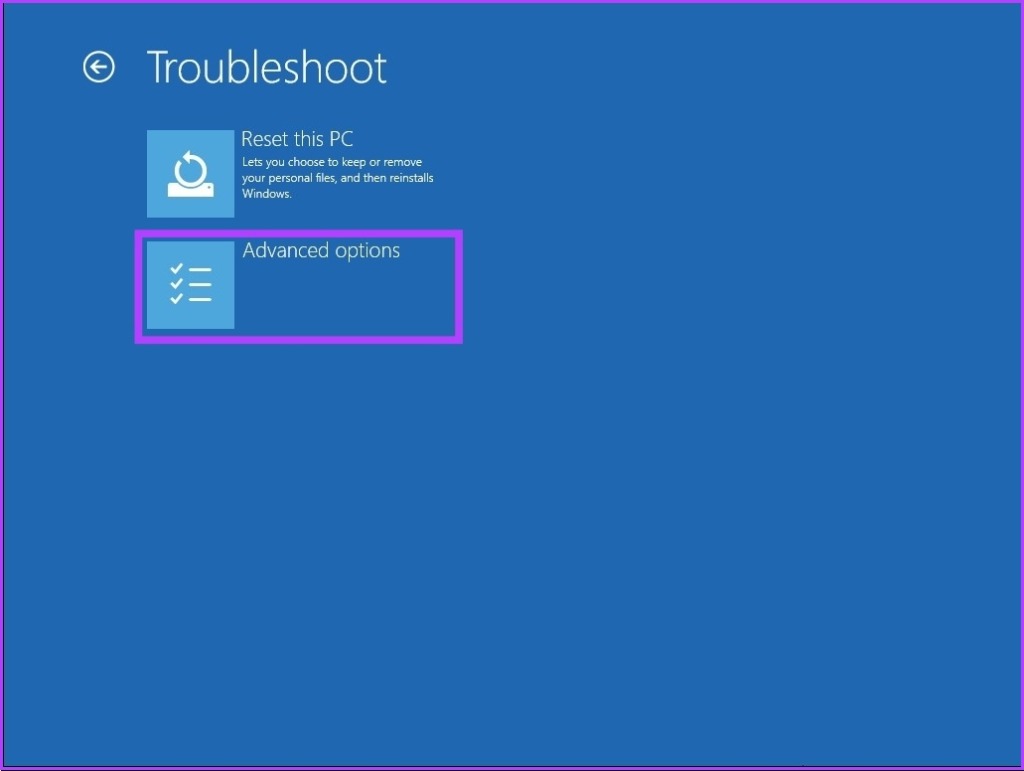
Step 2: In the ‘Choose an option’ screen, go to Troubleshoot.
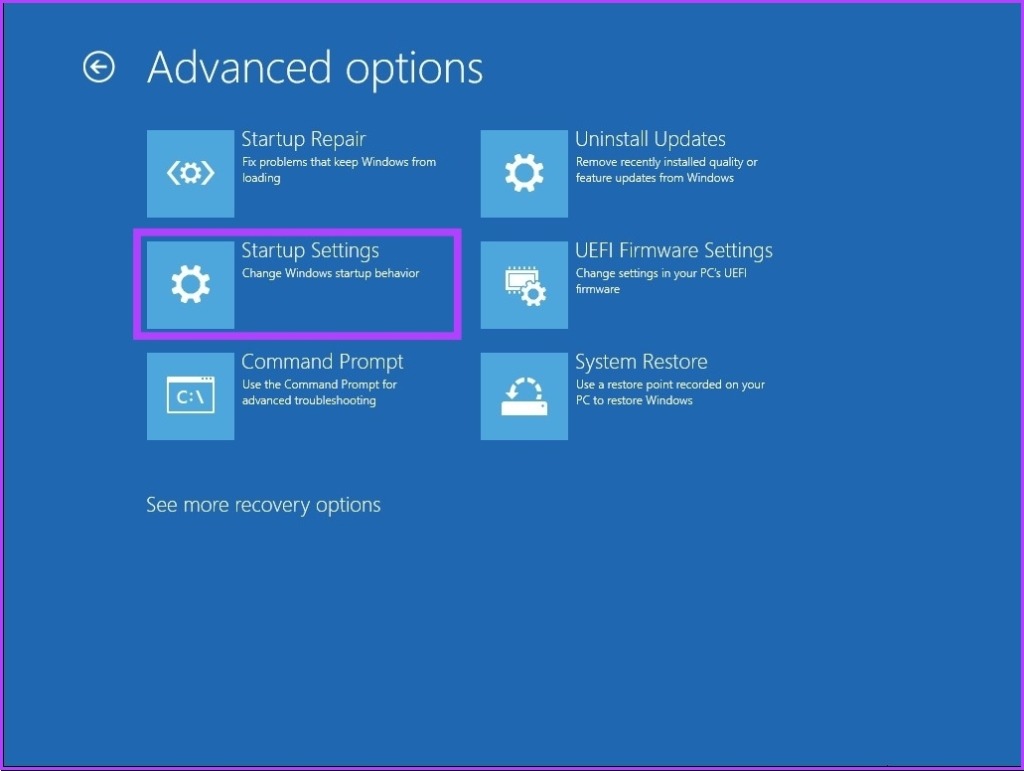
Step 3: Go to Advanced options.
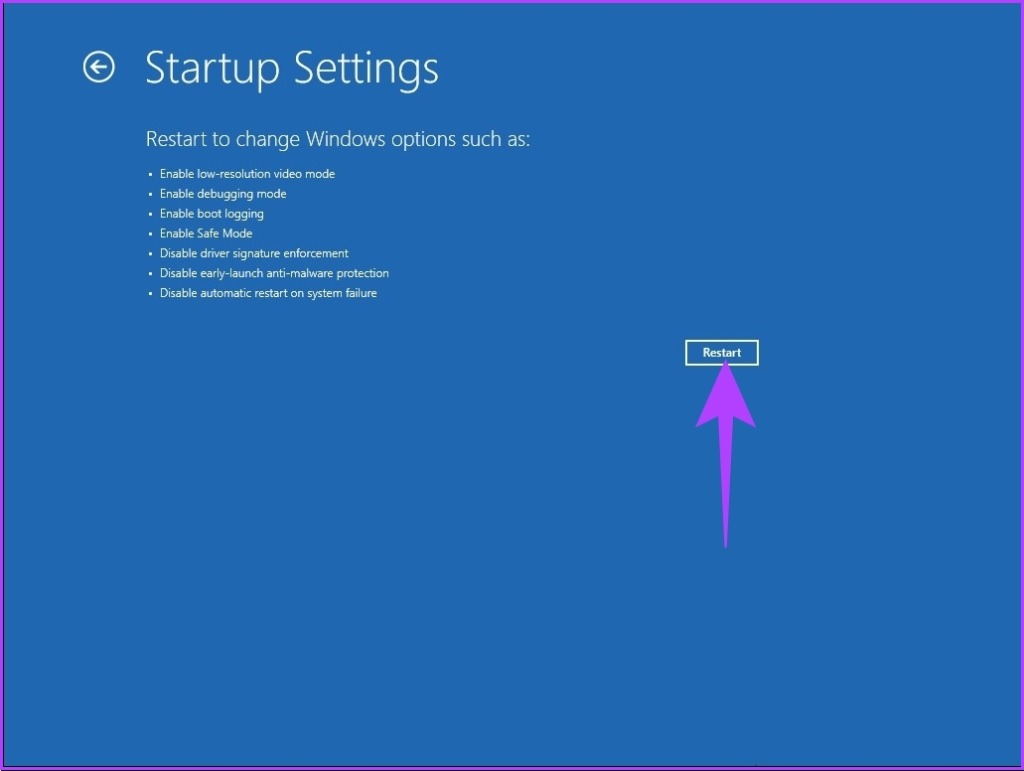
Step 4: Select Startup Settings.
Step 5: Under the Startup Settings, click on the Restart button.
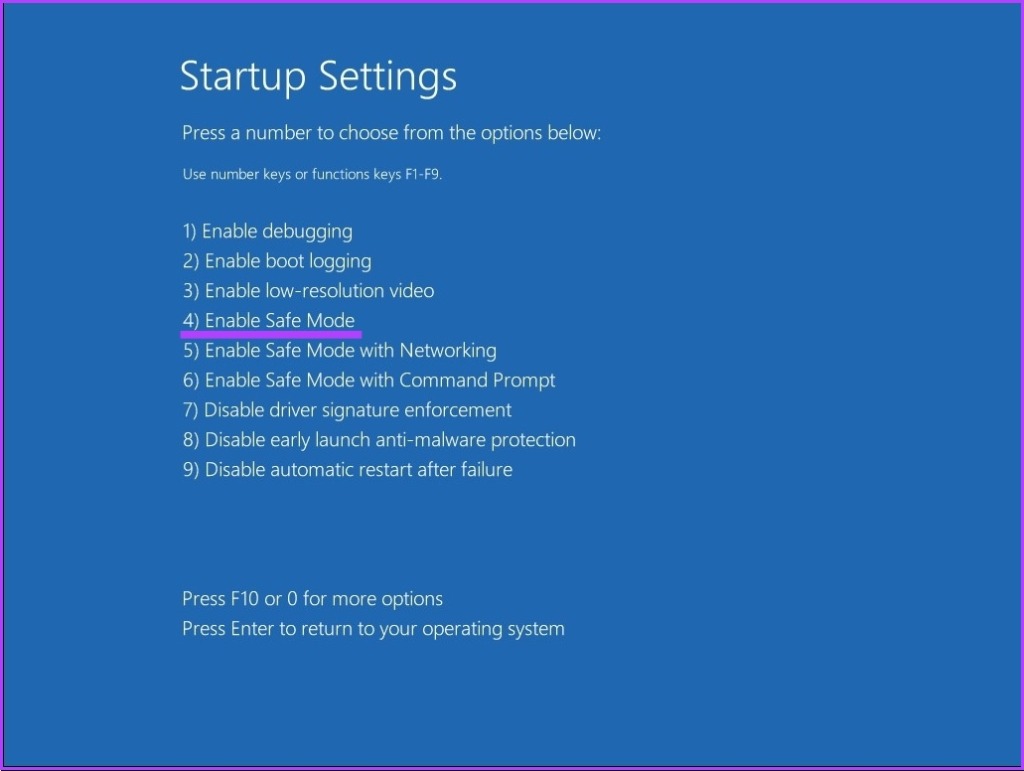
Step 6: Now, select ‘Enable Safe Mode’ by pressing the mentioned number (4) on the keyboard.
Your PC will restart automatically in Safe Mode.
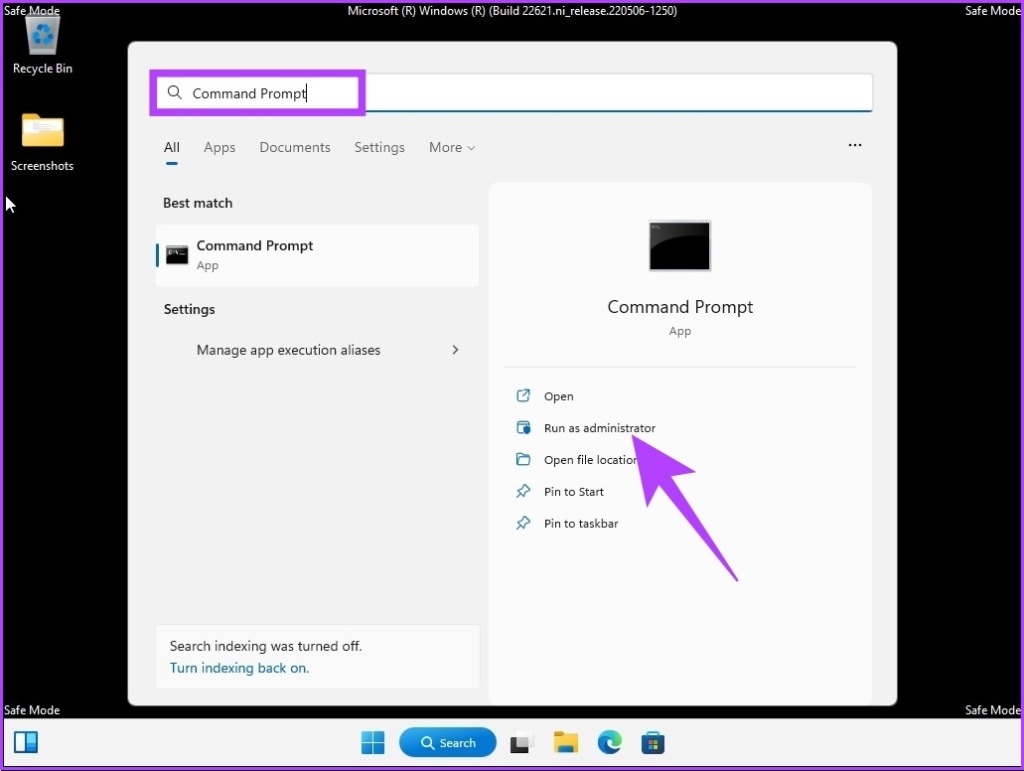
Step 7: Press the Windows key on your keyboard, type Command Prompt, and click ‘Run as administrator.’
In the prompt, click Yes.
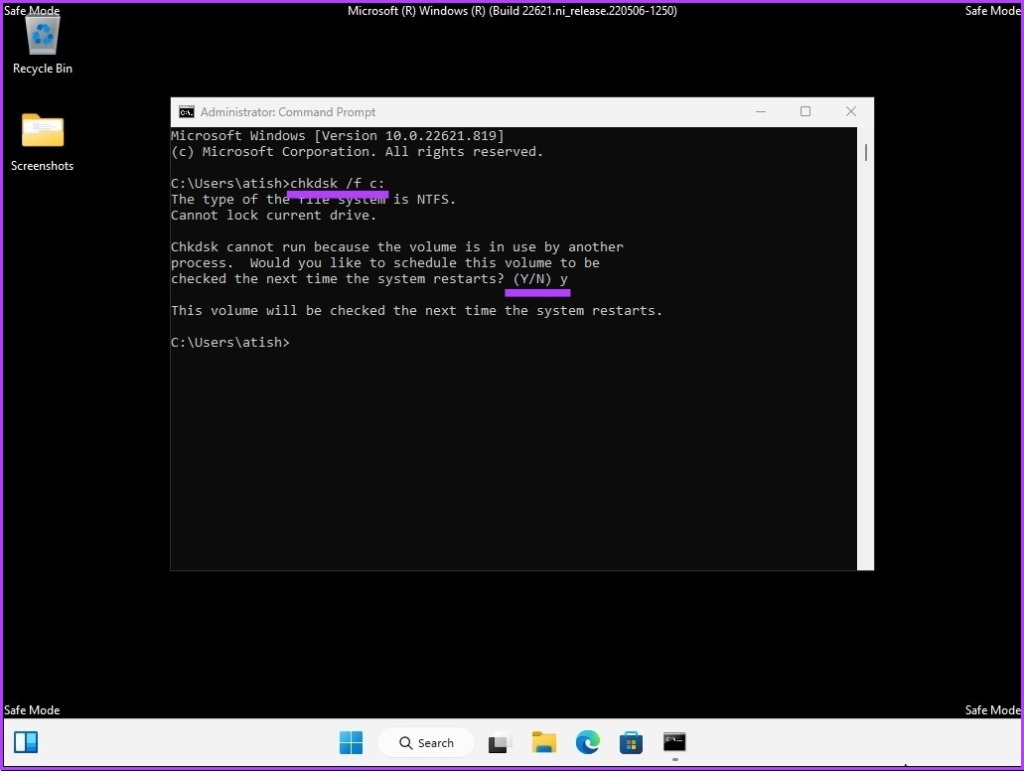
Step 8: Type the below command and press Enter.
Chkdsk /f c:
You will be asked, “Would you like to schedule this volume to be checked the next time the system restarts? (Y/N),’ Press Y on your keyboard.
With this, your PC will get unstuck from repairing disk errors. If it didn’t help, jump to the next method.
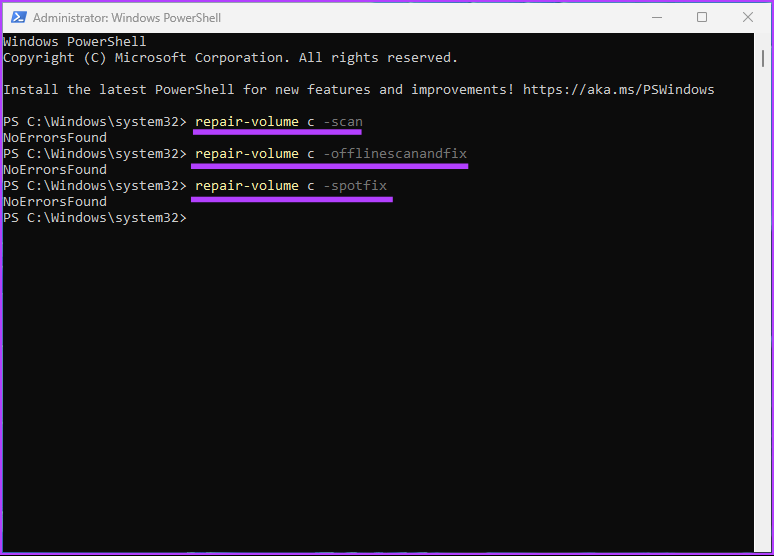
4. Repair Windows Disk Errors Using the Repair-Volume Command
In this method, we will be utilizing the repair-volume command using Windows PowerShell. Before proceeding, make a note of the driver’s letter on your external drive.
Step 1: Press the Windows key on your keyboard, type PowerShell, and click ‘Run as administrator.’
In the prompt, click Yes.
Step 2: Type the below command and press Enter.
Note: Replace ‘driver-letter’ with your original driver letter in the command line below.
repair-volume drive-letter -scan
repair-volume drive-letter -offlinescanandfix
repair-volume drive-letter -spotfix
Once the scanning process is complete, restart your computer. This will fix the Windows stuck on repairing disk error. If this method does not work, perhaps the next one will.
5. Attempt Repairing Windows Disk Error Using System Restore
This method’s execution depends on whether you created any System Restore Point before running into the issue. If you created a restore point, follow the below-mentioned steps.
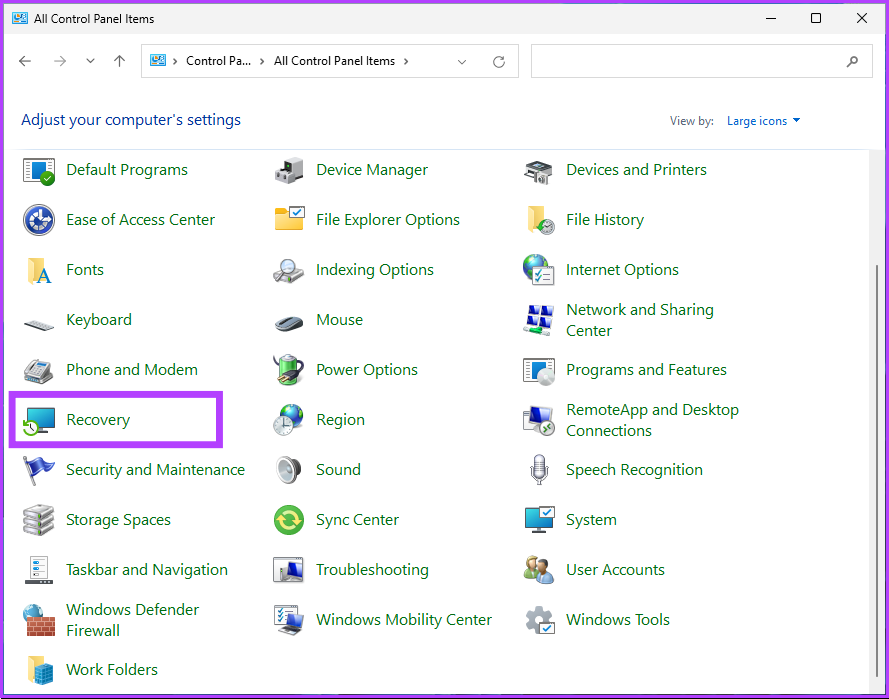
Step 1: Press the Windows key on your keyboard, type Control Panel, and click Open.
Step 2: Go to Recovery.
Note: If you don’t see Recovery, click on the drop-down next to ‘View by:’ and select Large icons.
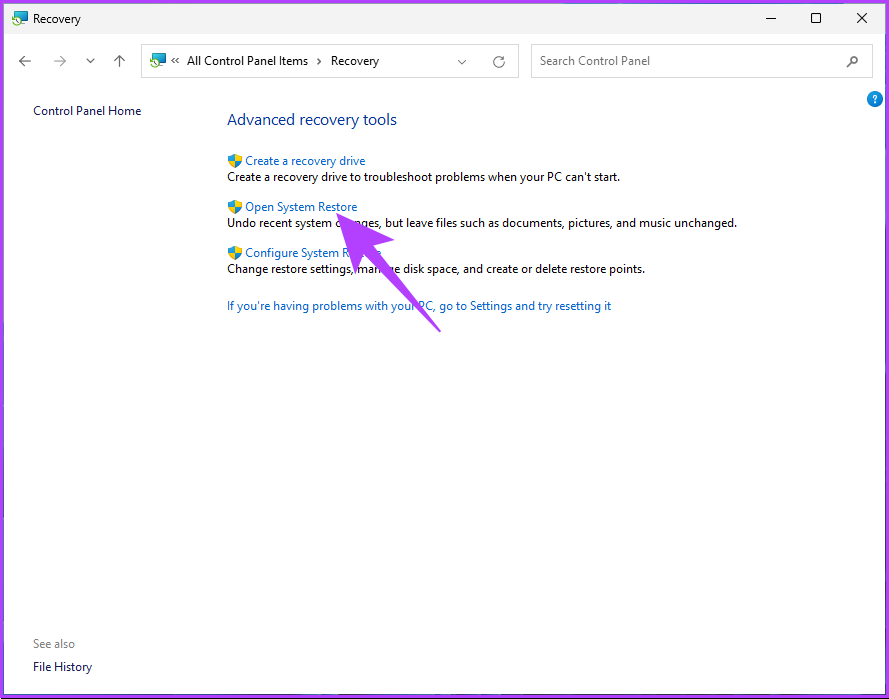
Step 3: Select ‘Open System Restore.’
Step 4: In the System Restore window, click Next.
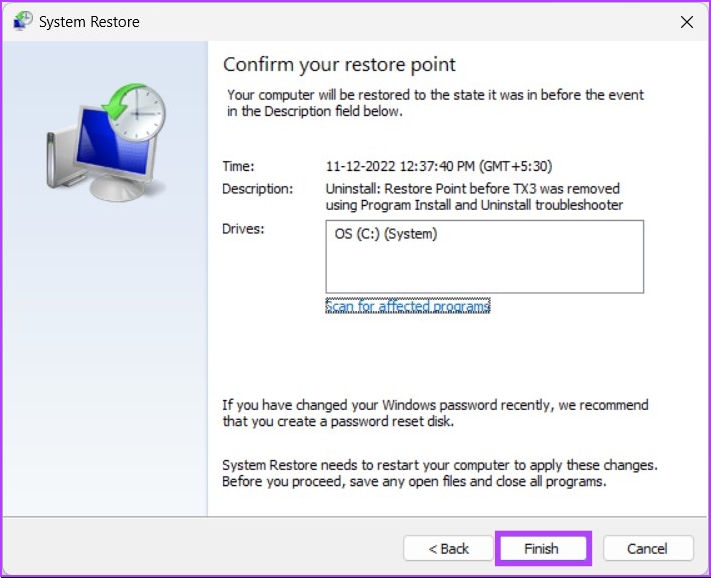
Step 5: Now, choose the Restore Point related to the problematic app, driver, or update, then click Next.
Step 6: Finally, click Finish.
This should resolve the PC’s inability to repair itself. If you are someone who didn’t create any System Restore points, ignore the next method and hop on to the other one.
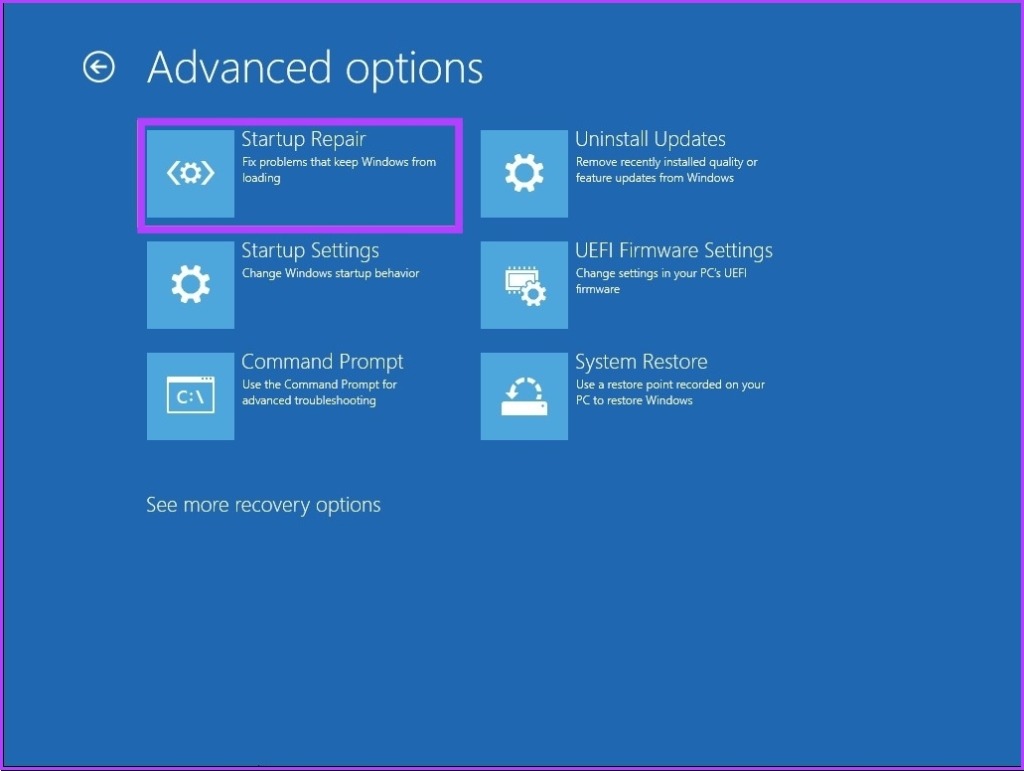
6. Run Automatic Startup Repair
This is another way to fix the repairing disk error if you don’t have a System Restore point. We will be using the Automatic Startup Repair options to fix Windows repair disk errors. Follow the steps below.
Step 1: Press the Windows key on your keyboard, hold the Shift key, click the Power button, and select Restart.
Step 2: In the ‘Choose an option’ screen, go to Troubleshoot.
Step 3: Go to Advanced Options.
Step 4: Select Startup Repair.
There’s a high chance that Windows Automatic Repair will fix the repairing disk error.
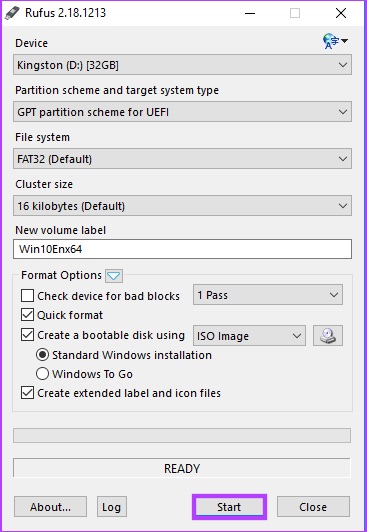
7. Use Windows Installation Media
This is another way to fix stuck disk errors on Windows. The steps involved in this method use bootable installation on Windows. Follow the below steps.
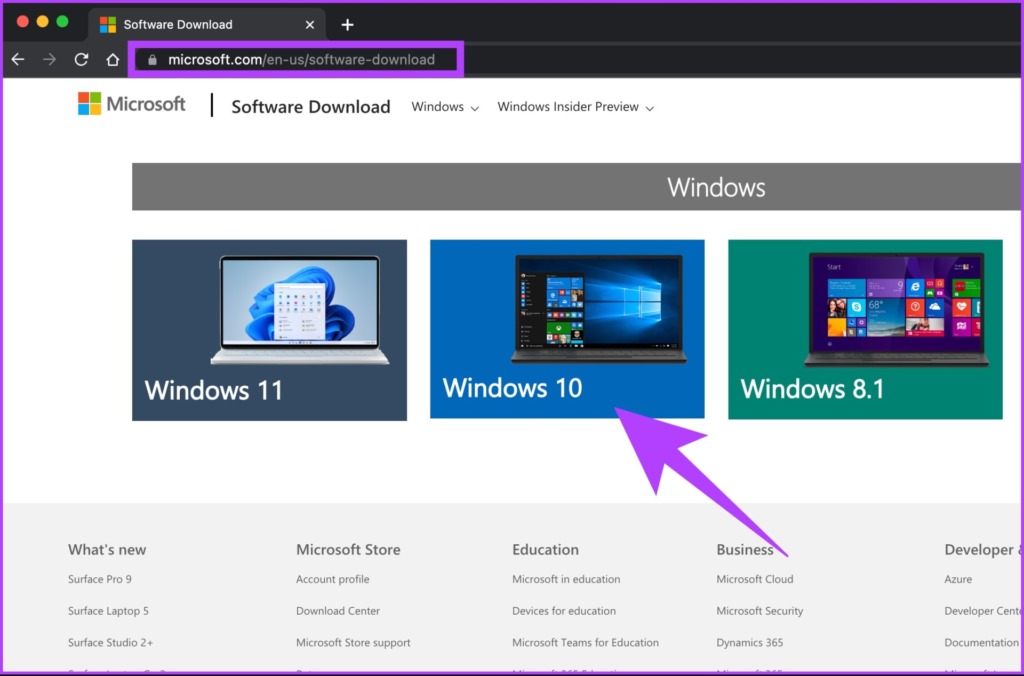
Step 1: Download the Windows ISO file from Microsoft’s website on a normal computer.
Step 4: From the Windows Setup screen, click Next.
Step 5: In the next screen, choose ‘Repair your computer.’
This will boot your computer into Advanced Recovery. Give it some time.
Step 6: In the ‘Choose an option’ screen, go to Troubleshoot.
Step 7: Select Advanced Options.
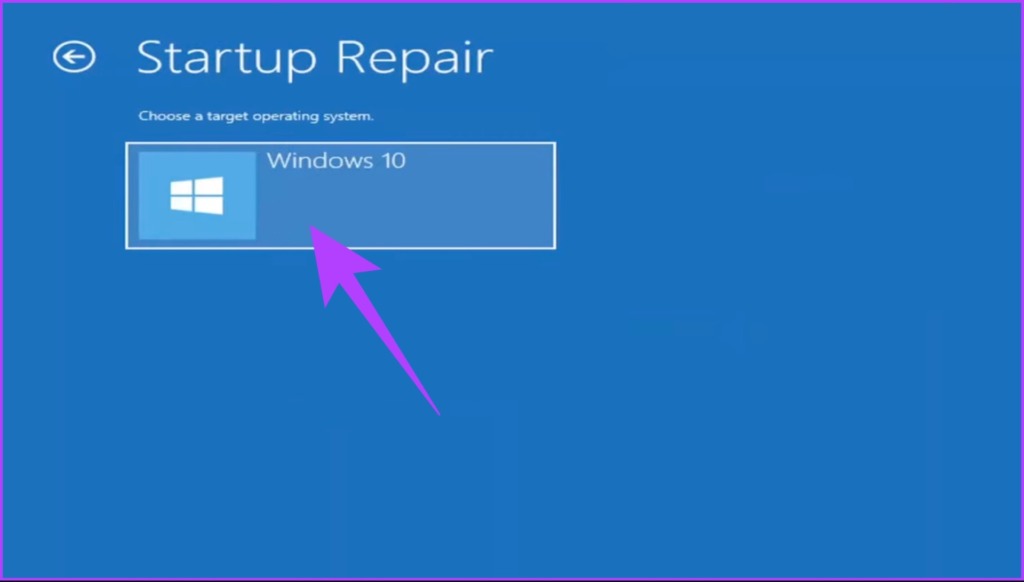
Step 8: Select Startup Repair.
Step 9: Finally, select the operating system.
All you need to do is follow the instructions displayed. You will be required to verify your status as an admin by putting the account password in the associated email. Once the verification is complete, Windows will diagnose your computer and attempt repairs.
8. Check and Replace Your Hard Disk
This is the last resort. If none of the above methods worked to resolve the Windows stuck on repairing disk error, the damage was likely already done. Now, you will need to repair your computer’s hard disk; if not, get a new one.
FAQs on Repairing Windows Disk Errors
1. Does repairing a Windows drive erase it?
It depends on the specific repair process. If you run the chkdsk utility, no data is erased. However, other repair processes may require formatting the drive, which wipes out all data.
2. Can a disk be corrupted?
Yes, a disk can become corrupted. Disk corruption can occur for many reasons, including hardware failures, power outages, software bugs, and malicious attacks.
Unstuck Windows Disk Errors
All the methods mentioned in this article can help you fix Windows stuck on repairing disk errors. However, not all methods may work for you. We would recommend you start method 1 and move down from there. We hope this article helps you resolve the issue.
Phone rings and grips have become incredibly popular with iPhone owners. So, without further ado, let’s check out some of the best MagSafe ring holders for iPhone users.
The Anker Magnetic Phone Grip is a simple magnetic phone ring. It uses a strong magnet and doesn’t protrude much. The inner ring is quite versatile and can be used like a kickstand.
It rotates 360 degrees and can flip up by 125 degrees. That’s not all, as the inner ring purportedly has impressive magnetic strength. However, it has earned mixed durability reviews. That said, it’s one of the cheapest MagSafe ring holders for the iPhone.
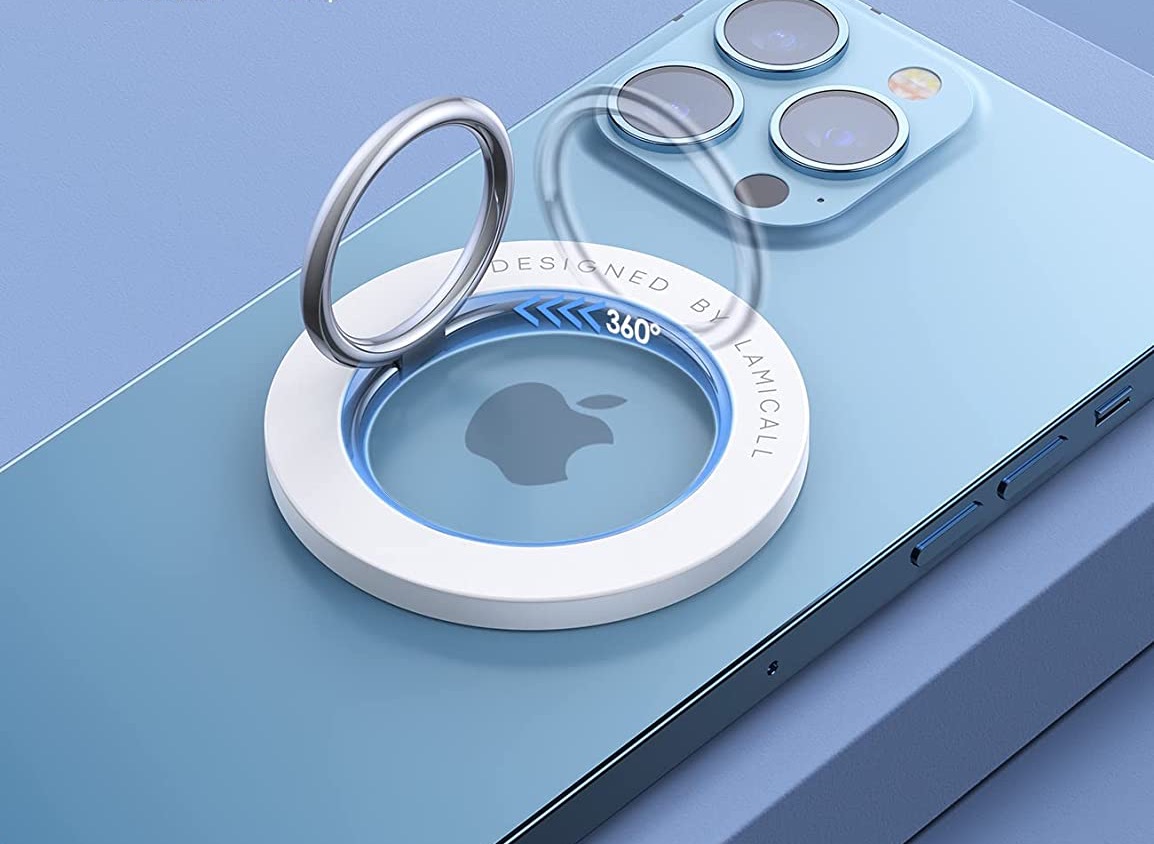
Lamicall is known for its sharp-looking laptop and phone accessories, and this one is no different. The brand’s ring holder sits flush on your iPhone and can rotate up to 360 degrees.
It’s also available in several colors to match your iPhone. Additionally, the company claims that you can use wireless charging with the ring on. Some users have disputed the claim, though, so take this with a pinch of salt. Lamicall has a slightly loud branding, and if you are okay with it, this iPhone MagSafe ring holder is a good buy.
The Lisen Ring Holder is a sleek, minimalistic-looking magnetic phone ring. Unlike the one above, it comes with a simple magnetic ring and an inner half-ring. The half-ring lifts up 90 degrees easily, so you won’t have to pry it up.
Its sleek design means it doesn’t stick out like a sore thumb, and the matte base is the cherry on top. If anything, the product can seem too bulky, especially when paired with a bigger-sized iPhone. Moreover, it’s too big for smaller phones like the iPhone 13 Mini.
The Spigen O-Mag ring is slightly more expensive than its counterparts above and combines looks and functionality. Its stark black color gives it a sharp look. It has a solid build and is sturdy.
The magnet used is strong, too, so you can put it on even if you have a MagSafe case on your iPhone. In fact, Spigen advertises that it works best with the Spigen EZ Fit, but as you may have guessed, it works with the majority of MagSafe-compatible cases. Plus, Spigen’s customer service is quite responsive, which is an added plus.
Another simple MagSafe ring holder is the one by Weetla. This one has a soft aluminum look, and the metallic look gives it a slightly distinctive look. It shares several features with its counterparts, such as a 360-degree rotating ring.
For its price, it’s a well-made iPhone accessory. Several users have praised the strong magnets used to make the product. Add to that, the inner ring moves smoothly, too. On the flip side, the ring requires extra effort to pull it out. On the plus side, the strong magnetism ensures the holder doesn’t come off even if you drop your iPhone.
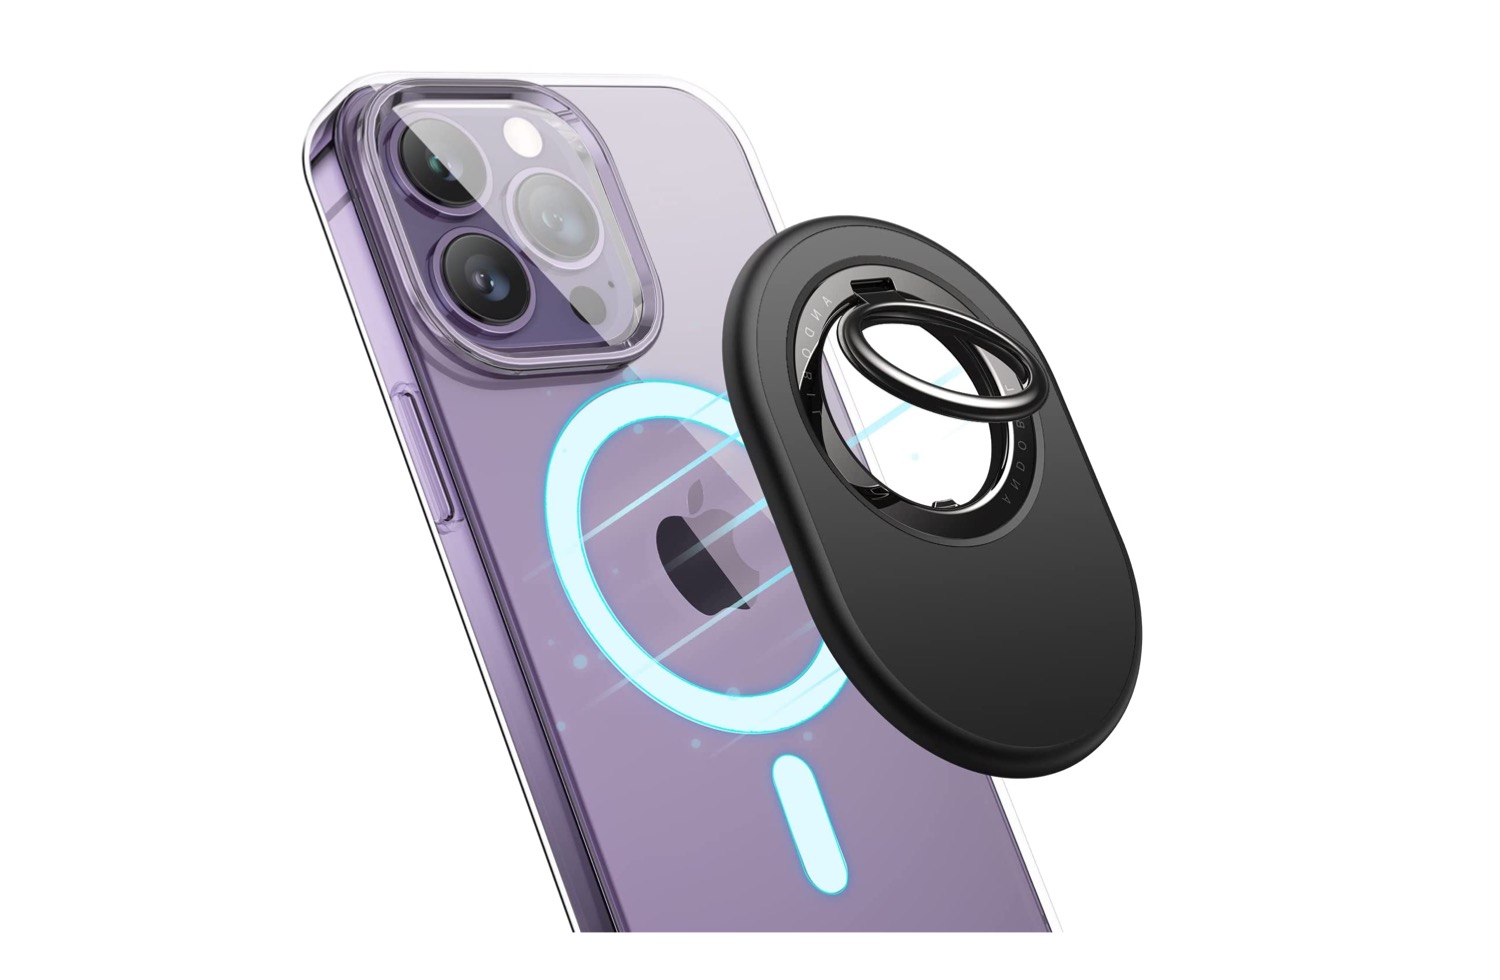
The Andobil Magnetic Phone Grip is the most expensive MagSafe ring holder on this list. It has an expansive feature set, including an oval design and dual magnet surface that let you affix your phone on a tripod for recording hands-free videos.
It’s a well-built case with premium looks that justify the price tag. It doesn’t feel cheap, which is why it has several positive reviews. The back has a slightly rubbery feel that makes it grippy. The only tradeoff is the hefty and bulky design. On the upside, it’s the perfect fit for bigger iPhone variants like the iPhone 14 Pro Max and the iPhone 13 Pro Max.
Toggle airplane mode: Turning airplane mode on and off is an easy way to refresh all the network connections on your Android. If it’s just a minor network glitch preventing Play Store from connecting to the internet, toggling the airplane mode should help.
Temporarily disable VPN: Although a VPN connection protects your privacy and allows you to bypass region-specific restrictions, it can occasionally cause internet connectivity issues. To check for this possibility, you can temporarily disable the VPN connection on your phone.
Fix 1: Clear Play Store Cache
The Google Play Store accumulates cache data on your phone to perform certain tasks faster. Over time, this data could become outdated or corrupted for various reasons and conflict with app processes. You can try clearing this cache data and see if that gets the Play Store to work.
Step 1: Long-press the Play Store app icon and tap the info icon from the resulting menu.
Step 2: Go to Storage and tap the Clear cache option at the bottom.
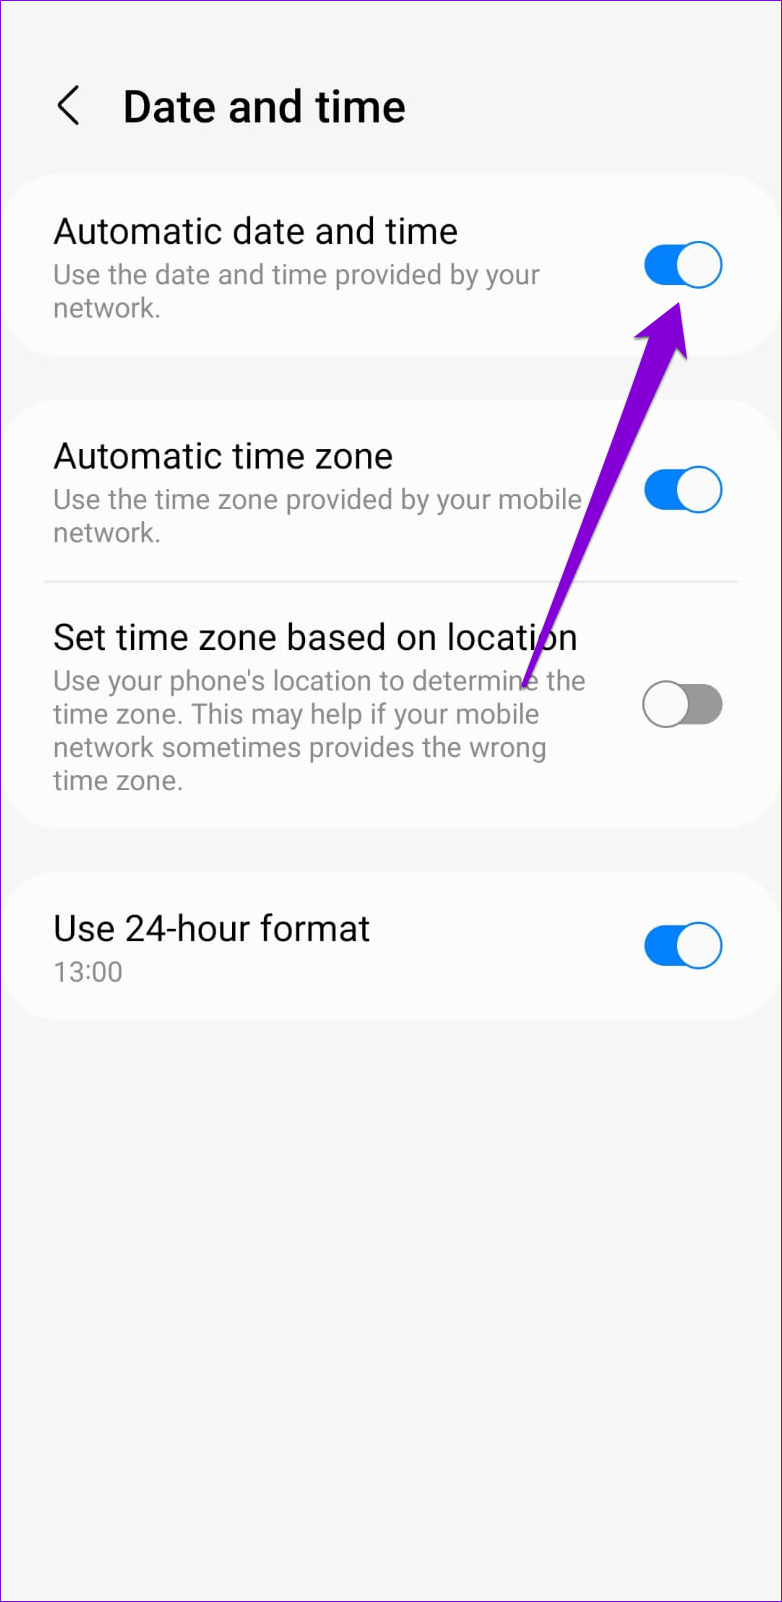
Fix 2: Check System Date and Time Settings
Having your phone set to an incorrect date or time can prevent the Play Store from connecting to the servers and lead to various errors. This usually happens when you disable the automatic date and time feature on your Android. Here’s how to enable it.
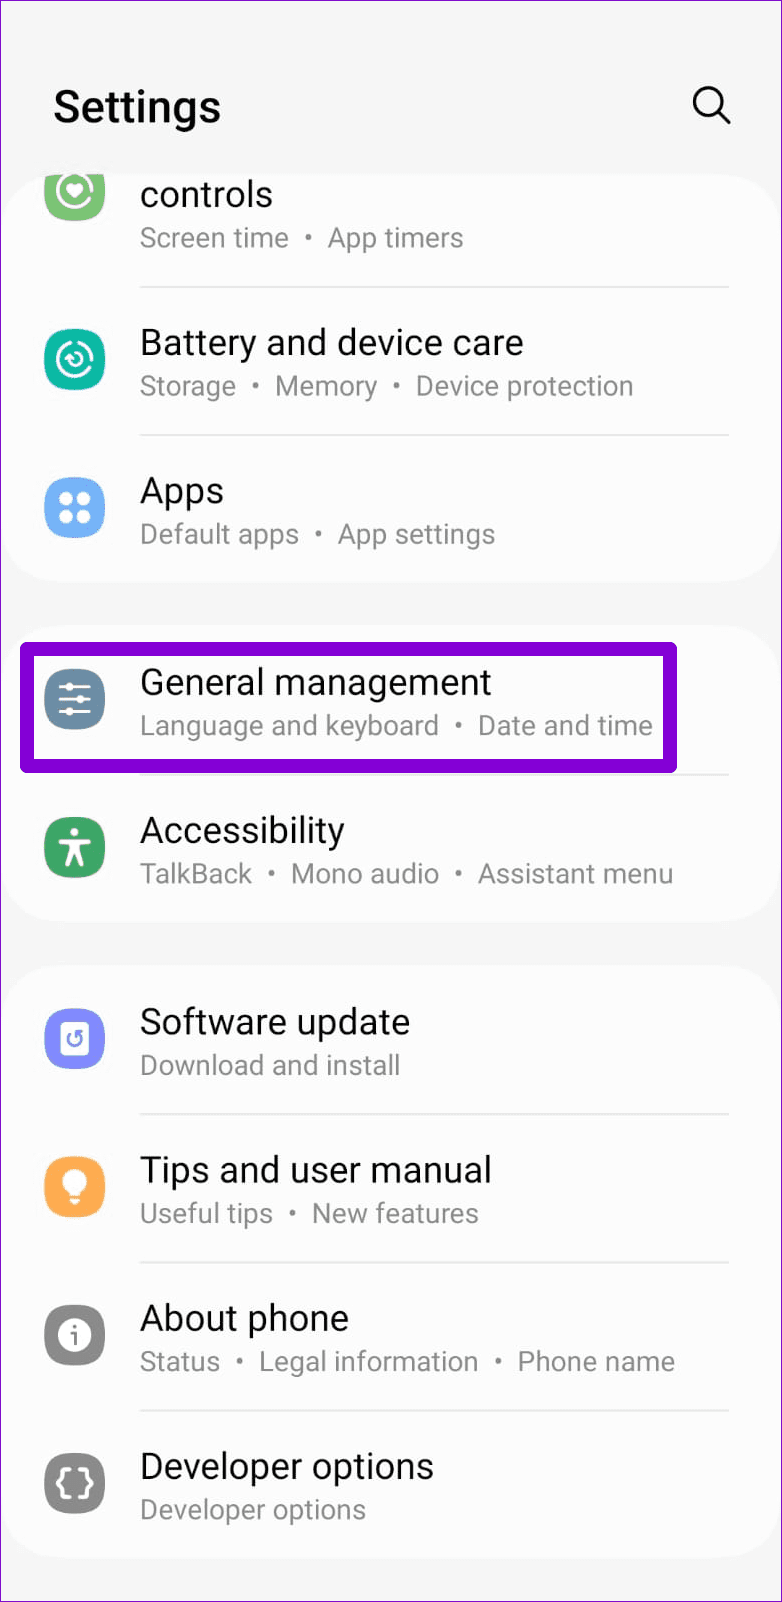
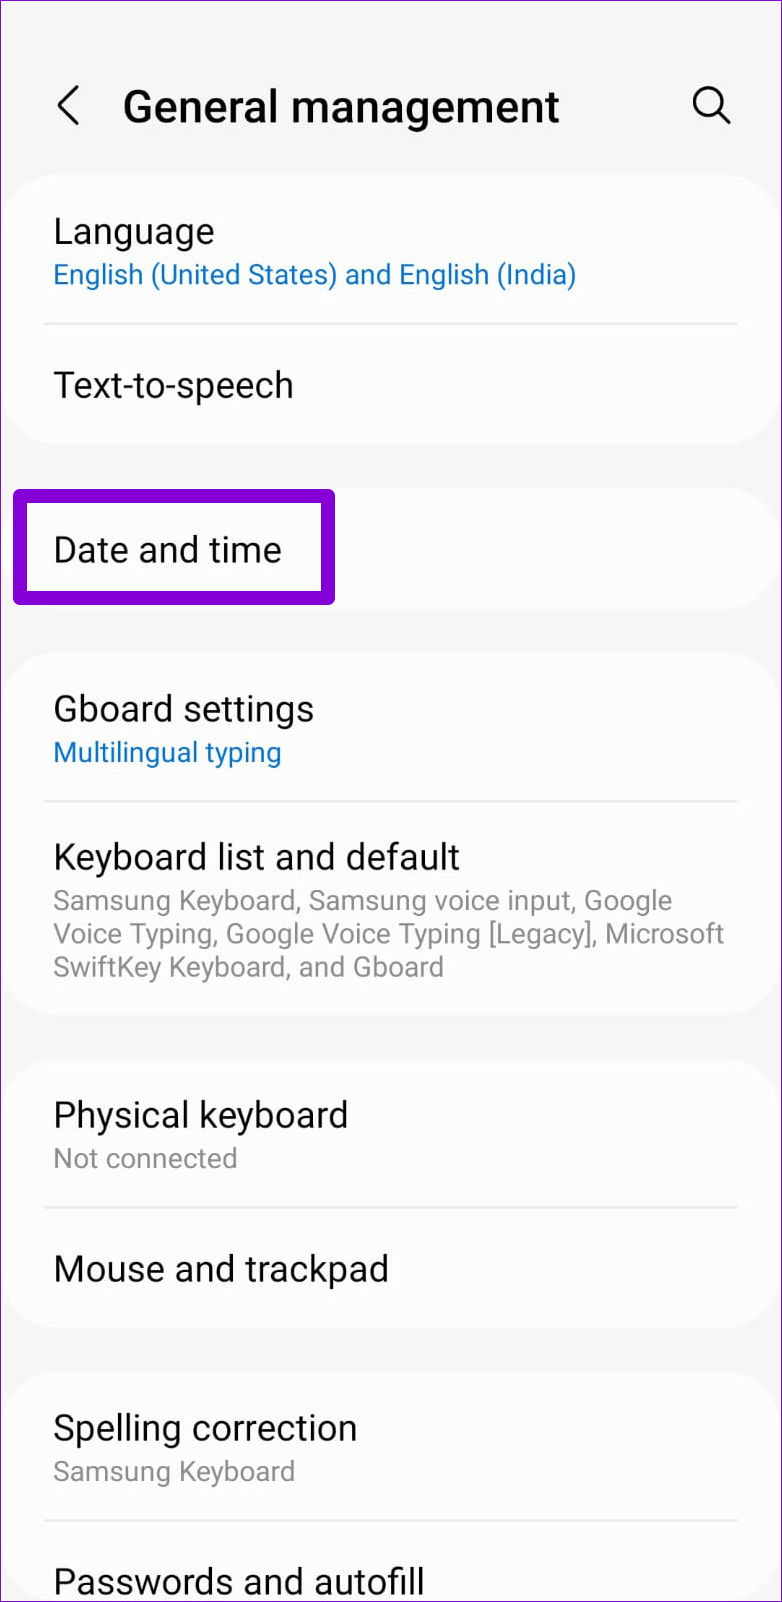
Step 1: Open the Settings menu on your phone and go to General management.
Step 2: Tap on Date and time and enable the toggle for Automatic date and time from the following menu.
Fix 3: Reset Google Play Services
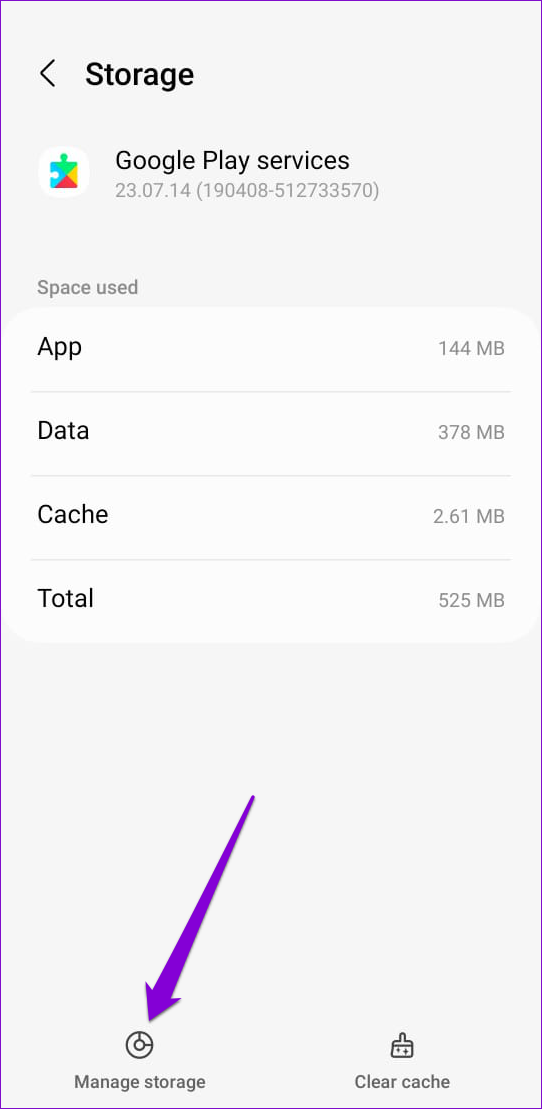
Google Play Services is a system app that works behind the scenes to connect apps and Google services together. If Google Play Services is experiencing any issues, it may affect your other apps. In most cases, you can fix such issues by resetting Google Play Services on your phone.
Step 1: Open the Settings app and navigate to Apps.
Step 2: Scroll down to tap on Google Play Services.
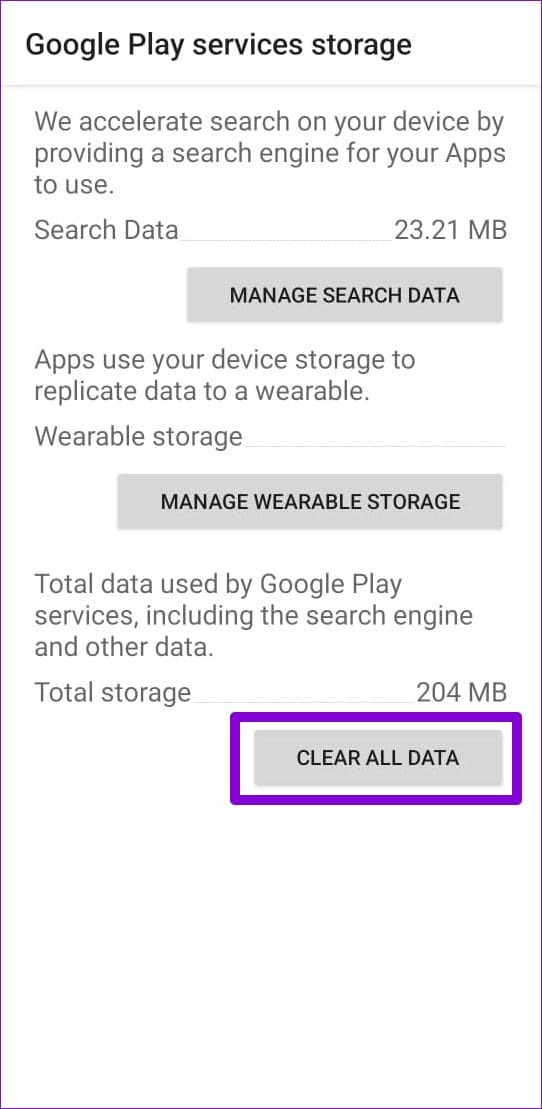
Step 3: Go to Storage > Manage storage and hit the Clear All Data button.
Fix 4: Uninstall Google Play Store Updates
The Google Play Store, like any other app, receives regular updates. Since these updates are installed automatically in the background, you may not notice them. It’s possible that a recent Play Store update installation has gone wrong and caused this issue. If that’s the case, uninstalling Play Store updates should help.
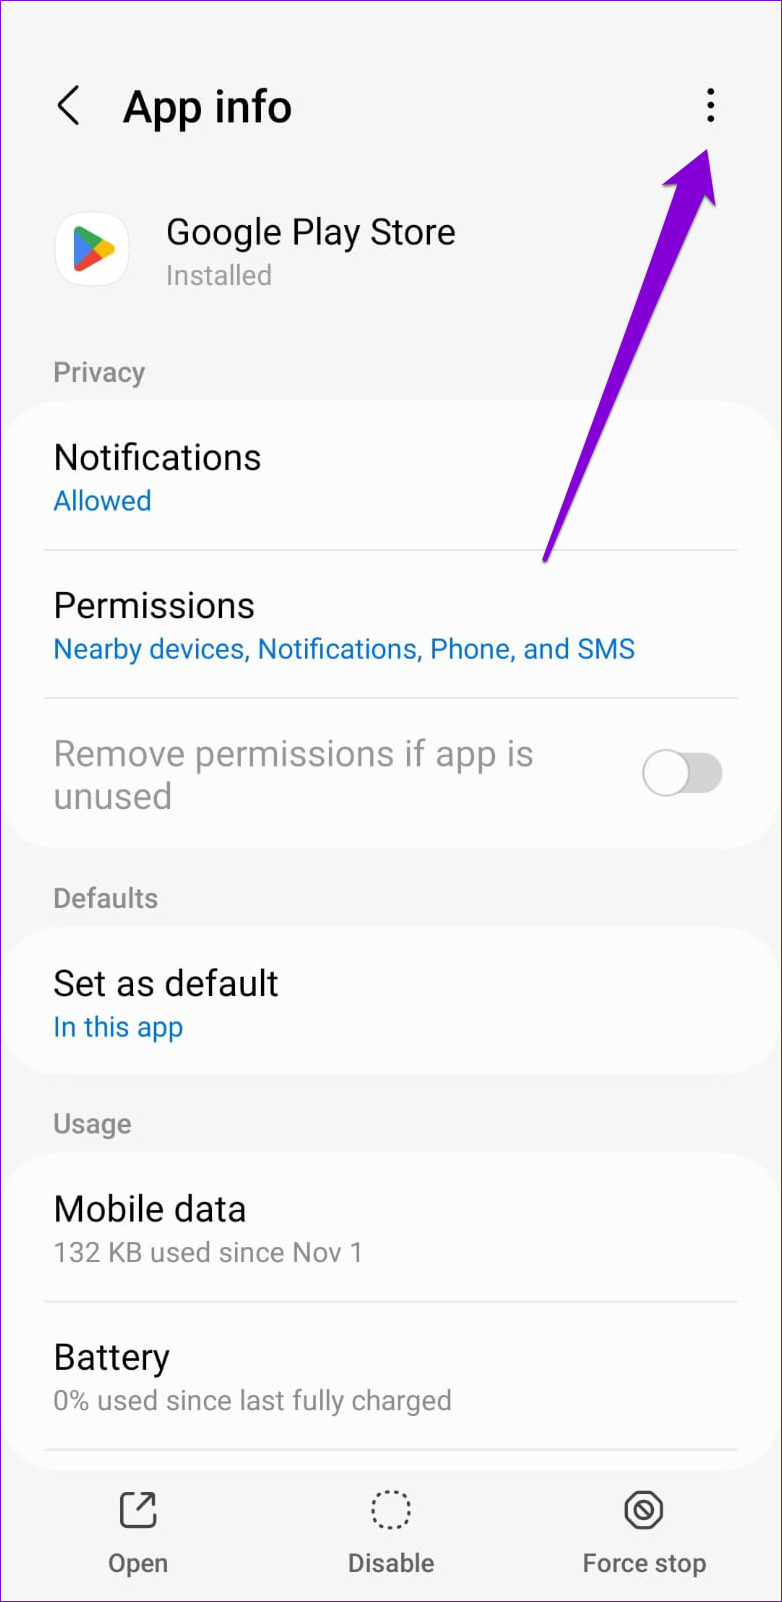
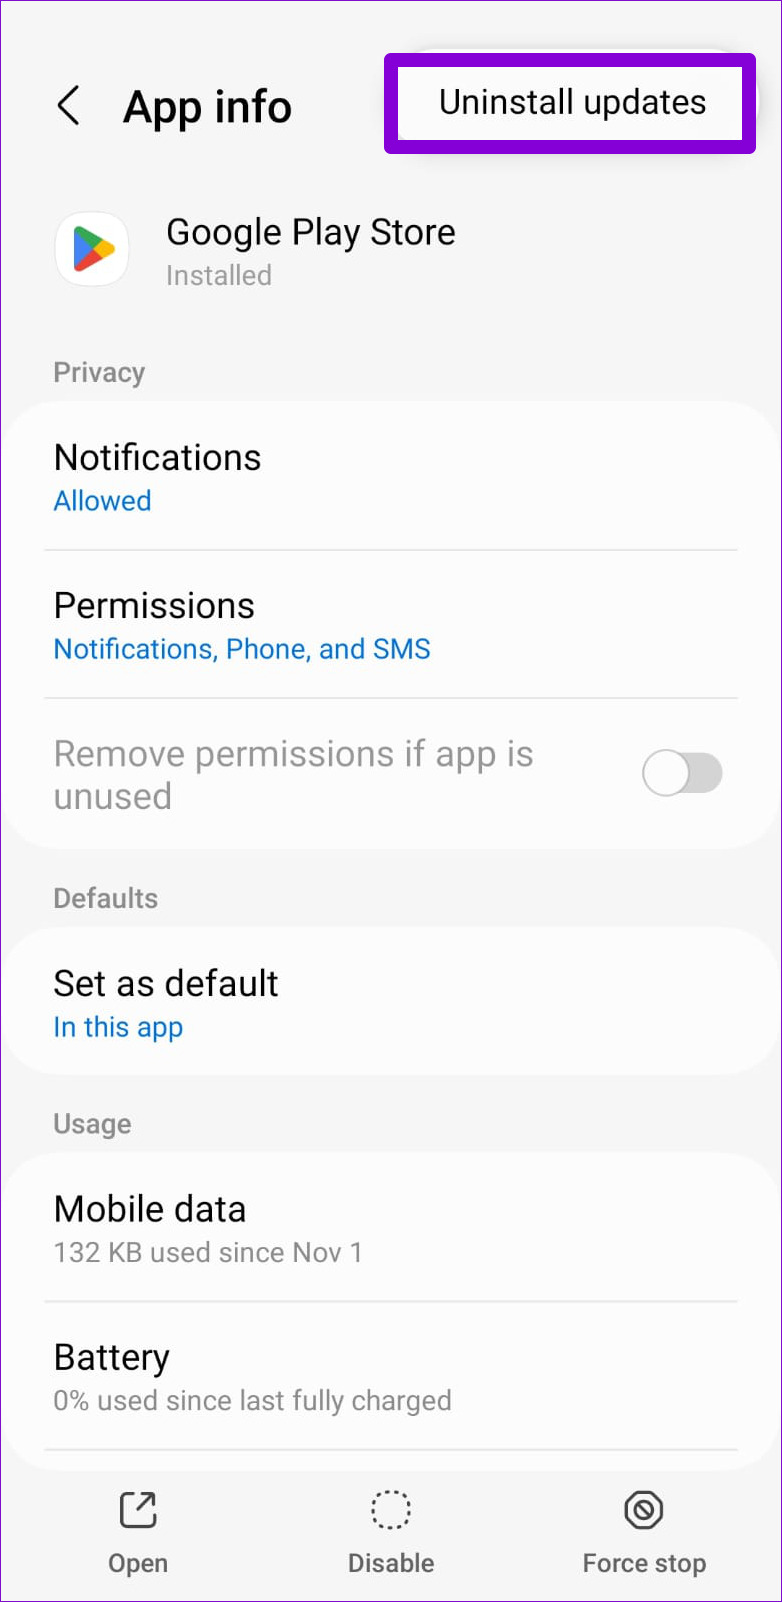
Step 1: Long-press on the Play Store icon and tap the info icon from the resulting menu.
Step 2: Tap the three-dot menu icon in the top right corner and select Uninstall updates. Then, hit OK to proceed.
Check internet speeds: We suggest connecting to a 5GHz Wi-Fi network. This will speed up the process of downloading files from WhatsApp Web.
Switch to a different web browser: You can try switching to a new web browser and see if the issue gets solved.
Fix 1: Clear Browser Cache
You can refer to our dedicated posts to learn the steps for the same, depending on your browser. While we have covered the guides to clear cache in Chrome and Microsoft Edge, here are the steps for other browsers.
Clear Cache in Safari
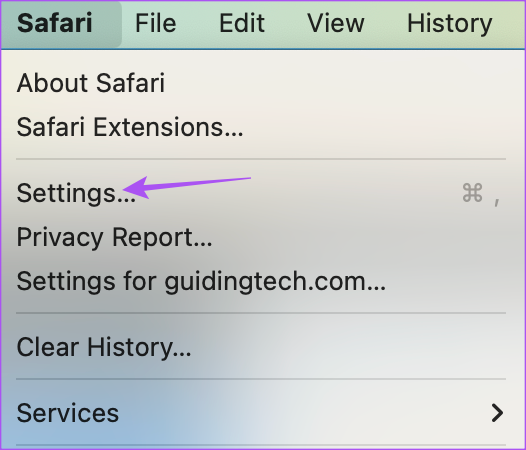
Step 1: Open Safari on your Mac > click Safari at the top right corner > select Settings.
Step 2: Click the Privacy tab and select Manage Website Data.
Step 3: Search for WhatsApp, select the listing, and click on Remove > Done to confirm.
Clear Cache in Firefox on Mac and Windows
Step 1: Open Firefox on your Mac or Windows PC. Click the hamburger menu at the top right corner > select Settings.
Step 2: Select Privacy and Security from the top left corner. Scroll down and click on Clear Data under Cookies and Site Data.
Step 3: Click on Clear at the bottom right corner to confirm.
If this doesn’t work, switch to a different web browser.
Fix 2: Use WhatsApp Desktop App
If none of the steps worked, we suggest using the official WhatsApp Desktop app on your Mac or Windows PC. You can download the app using the links below and scan the QR code to sign in.
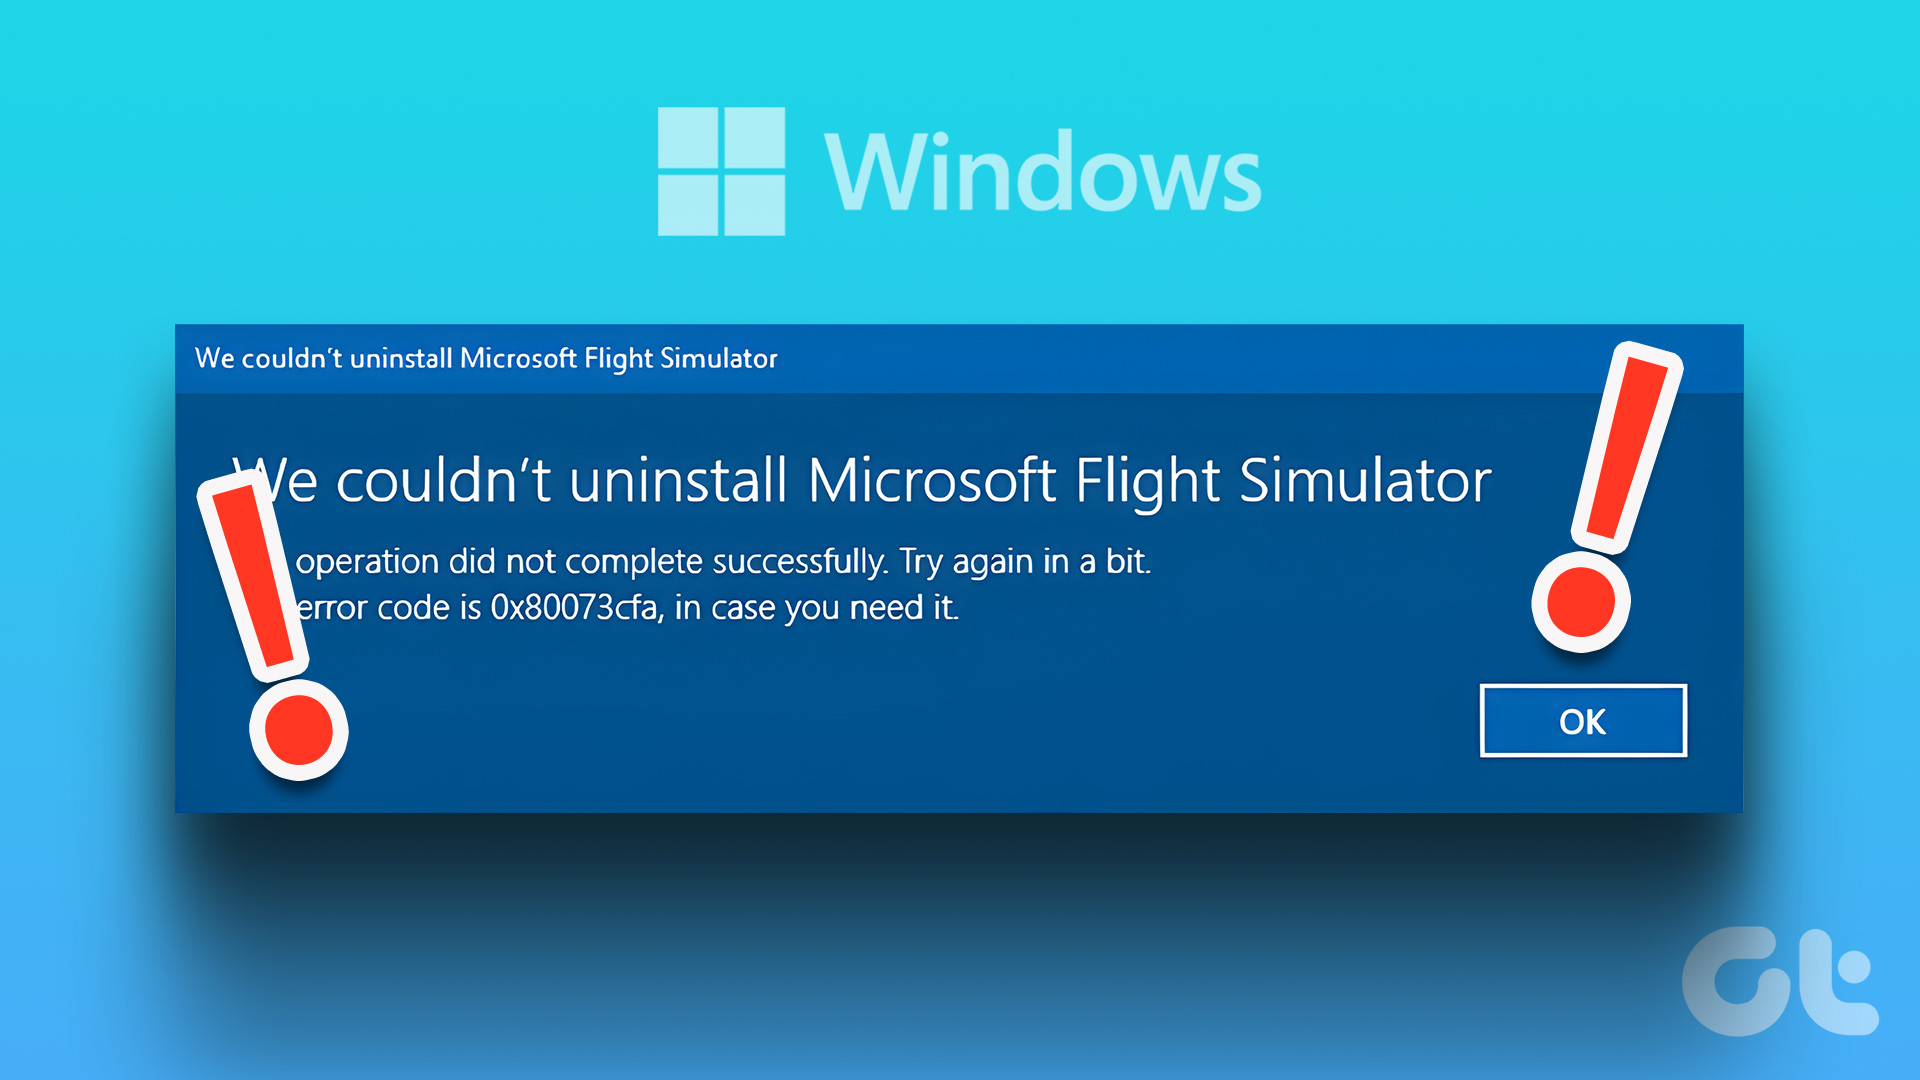
If the 0x80073CFA error only occurs while uninstalling a specific app, try resetting it first. This will delete all data from your computer and restore the app to its factory settings.
Step 1: Right-click on the Start icon > select Installed apps from the list.
Step 2: Scroll down or use the search tool to locate the problematic app. Click the three-dot icon next to it > select Advanced options.
Step 3: Scroll down and click Reset.
Wait for Windows to reset the app, and then try to uninstall it again.
Fix 2: Uninstall the App Using PowerShell
Windows PowerShell also lets you uninstall apps with a few commands. So, if you have trouble removing an app from the Start menu or the Settings app, use the following steps.
Step 1: Click the search icon on the taskbar, type Windows PowerShell, and select Run as Administrator.
Step 2: Paste the following command and press Enter to view a list of apps on your computer.
Get-Appxpackage -Allusers
Step 3: Scroll through the list to copy the package name of the app you want to remove.
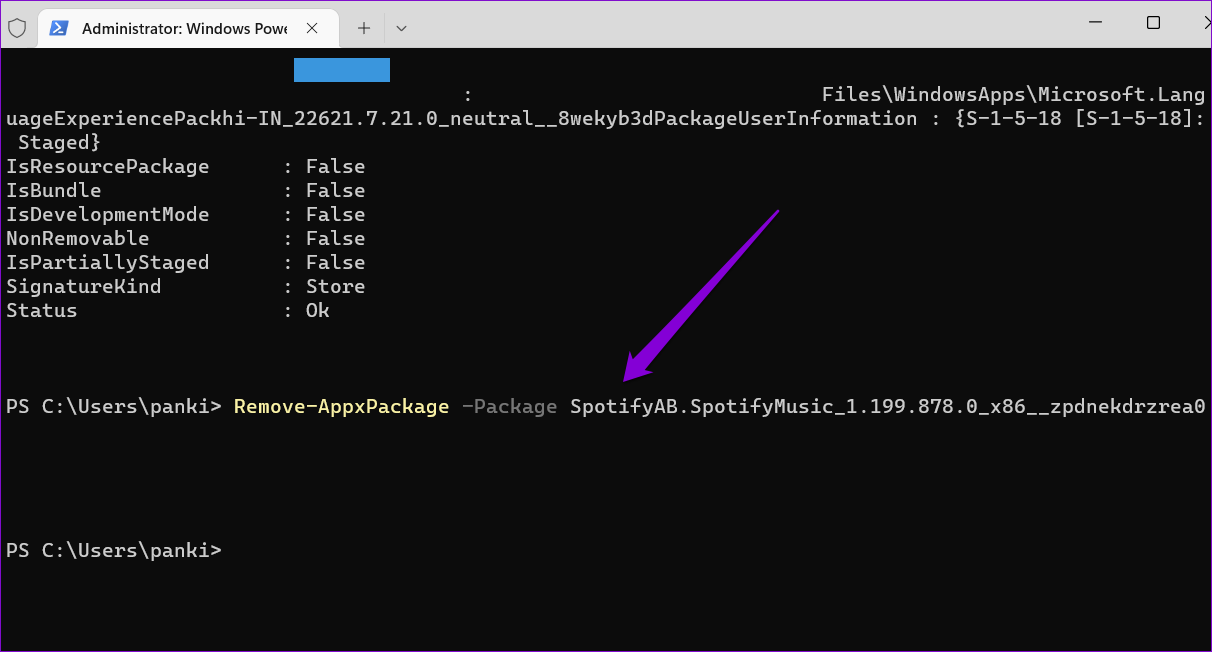
Step 4: Paste the following command in the console and press Enter to remove the app.
Remove-AppxPackage -Package PackageFullName
Replace PackageFullName in the above command with the package name noted in the previous step.
Fix 3: Run the SFC and DISM Scans
If you’re still getting the 0x80073CFA error, some of your PC’s system files may be corrupt or missing. Thankfully, Windows 11 includes some command-line tools—System File Checker and Deployment Image Servicing and Management—that can find and repair such damaged system files. Here’s how to run them.
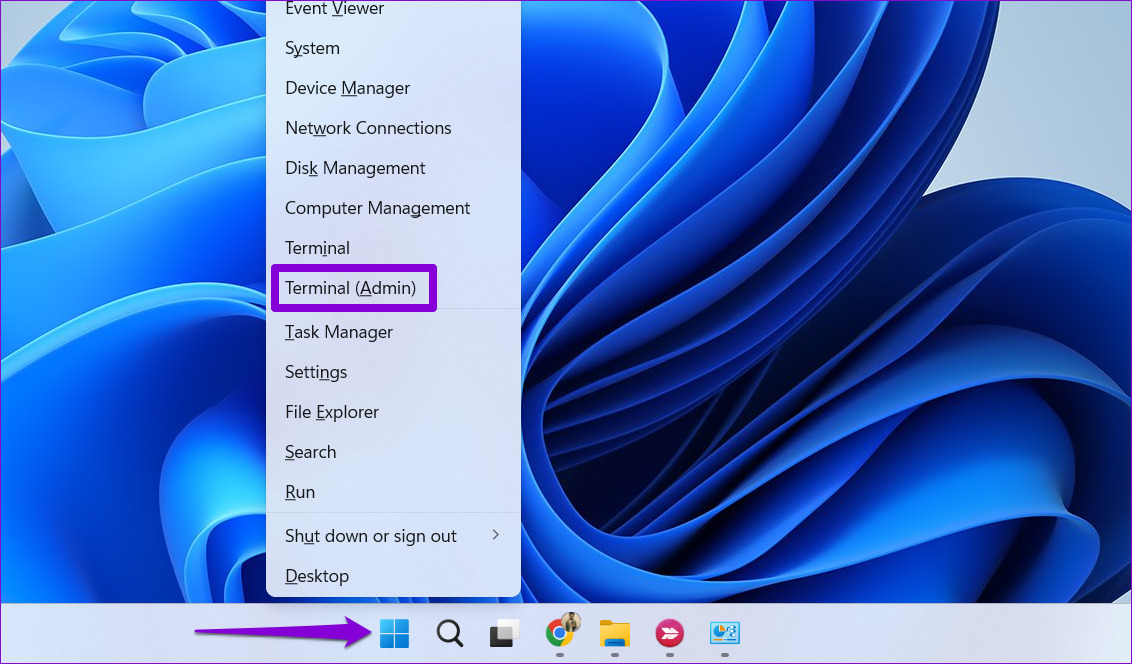
Step 1: Right-click on the Start icon > select Terminal (Admin) from the list.
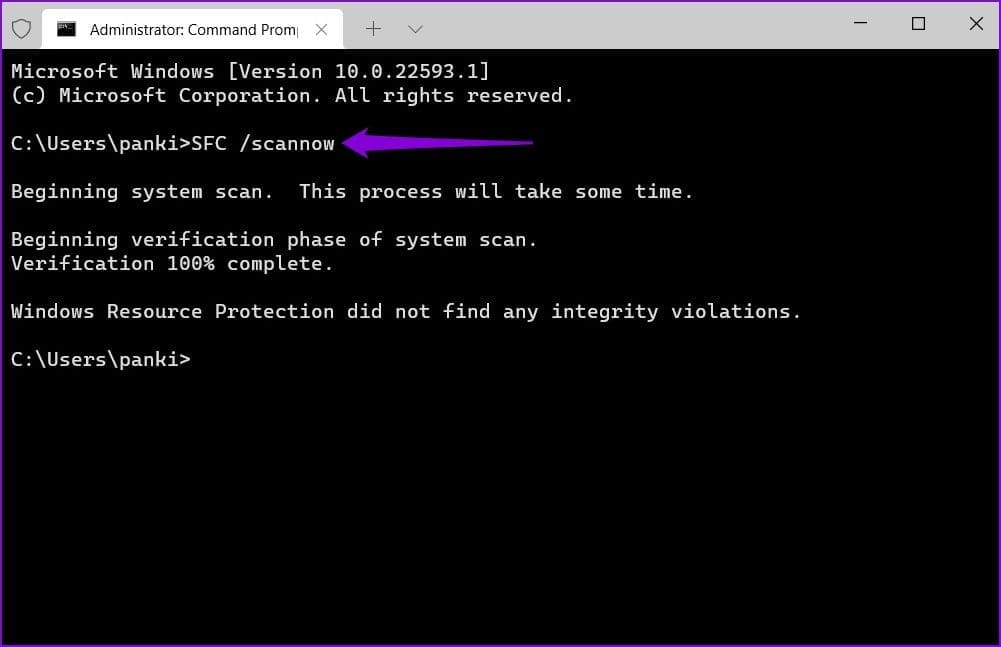
Step 2: Paste the following command in the console and press Enter.
sfc /scannow
Step 3: Run the DISM scan by entering the following commands one by one.
This might take a while, so be patient. After the scan is complete, restart your PC and see if you can uninstall apps.
Fix 4: Uninstall the App in Clean Boot Mode
Third-party programs and services on your computer can also obstruct the app uninstallation process and cause problems. To avoid any interference, boot your PC in a clean boot state and try to remove the app again.
Step 1: Press the Windows key + R to open the Run dialog box, type msconfig in the Open field, and press Enter.
Step 2: Navigate to the Services tab > tick the box for Hide all Microsoft services > click Disable all.
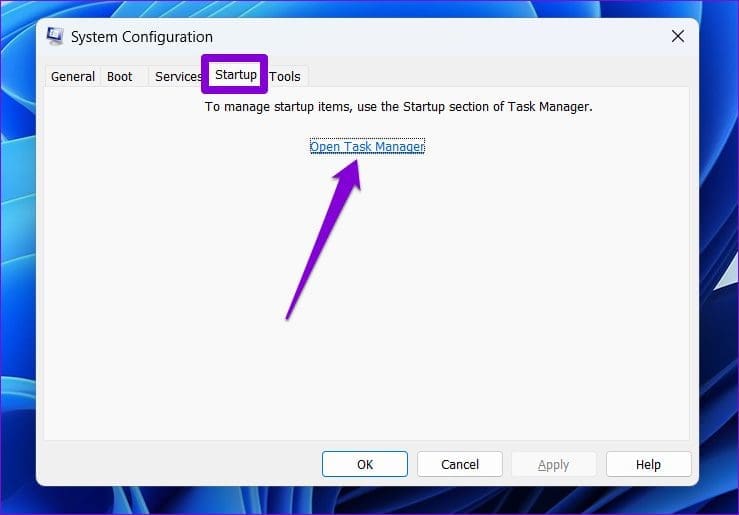
Step 3: Switch to the Startup tab and click on Open Task Manager.
Step 4: Select a third-party app > click Disable. Repeat this step to disable all third-party apps and programs.
Restart your PC to enter the clean boot state and uninstall the app again.
Force restart Microsoft Excel: When Microsoft Excel is stuck at starting on Windows 11, a force restart can often resolve the issue. To do so, open the Task Manager > locate the Microsoft Excel process > click End Task.
Check if the file is corrupt: Corrupted files can cause Excel to hang or crash during startup. To check if the file is the problem, try opening other Excel files to see if they load correctly. If they do, the issue is likely with the specific file.
Update Microsoft Excel: An outdated Microsoft Excel build can lead to issues like being stuck at starting and not opening on Windows 11. To update MS Excel, open the application > navigate to File > Account > Update Options > Update Now.
Fix 1: Use Quick Repair For Microsoft Office
Step 1: Press the Windows + I keys to open Settings.
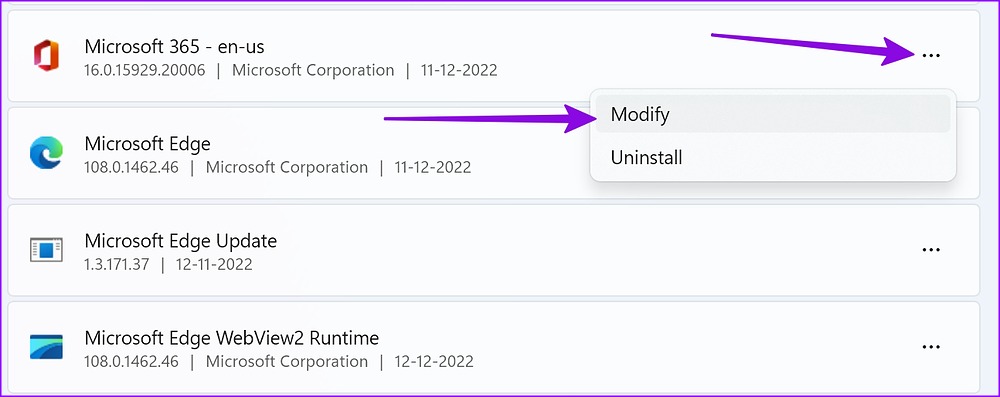
Step 2: Select Apps and click on Installed Apps from the right-hand side.
Step 3: Scroll to Microsoft Office.
Step 4: Select the three-dot menu beside it and click Modify.
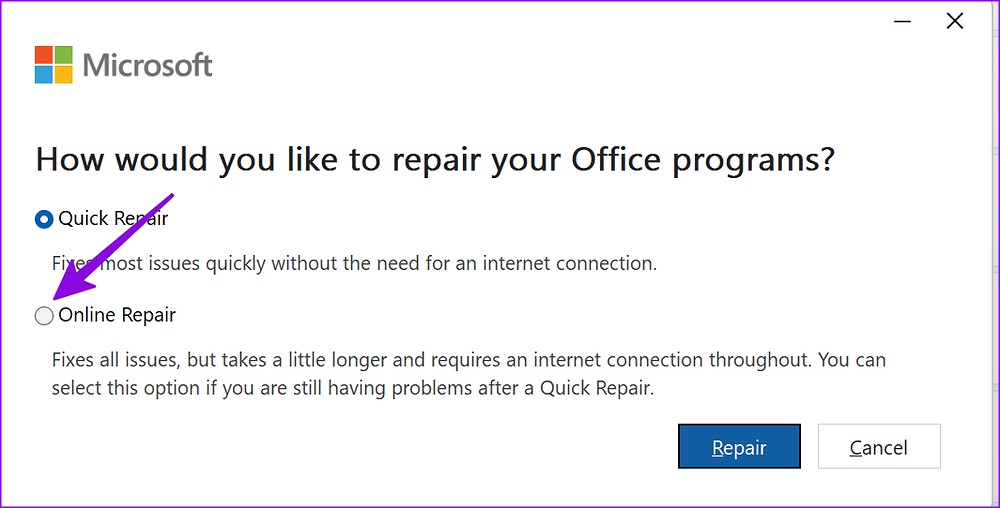
Step 5: Select the radio button for Quick Repair and let Windows fix the problem.
When Windows completes running the repair tool, open Microsoft Excel without any issue.
Fix 2: Use Online Repair With Microsoft Office
If the trick above didn’t work, try the Online Repair Tool. Before you follow the steps below, ensure an active internet connection (refer to the second section).
Step 1: Head to Microsoft Office in the Installed Apps menu on Windows (check the steps above).
Step 2: Open the More menu > select Modify.
Step 3: Click Online Repair > hit Repair.
The option fixes all issues but takes a little longer and requires an internet connection until it detects, diagnoses, and fixes the issue.
Fix 3: Open Microsoft Excel in Safe Mode
Safe Mode starts Excel without any add-ins, templates, or other customizations, which helps troubleshoot issues related to these elements that cause it to get stuck at the starting screen.
Step 1: Press the Windows + R keys to open the Run menu.
Step 2: Type excel/safe and hit OK to open the app in safe mode.
If Excel opens successfully in Safe Mode, the problem is likely due to an add-in or custom setting. You can disable or adjust them accordingly.
Fix 4: Disable Third-Party Add-ins
Step 1: Launch Microsoft Excel on your computer.
Step 2: Select File at the top right.
Step 3: Select Options.
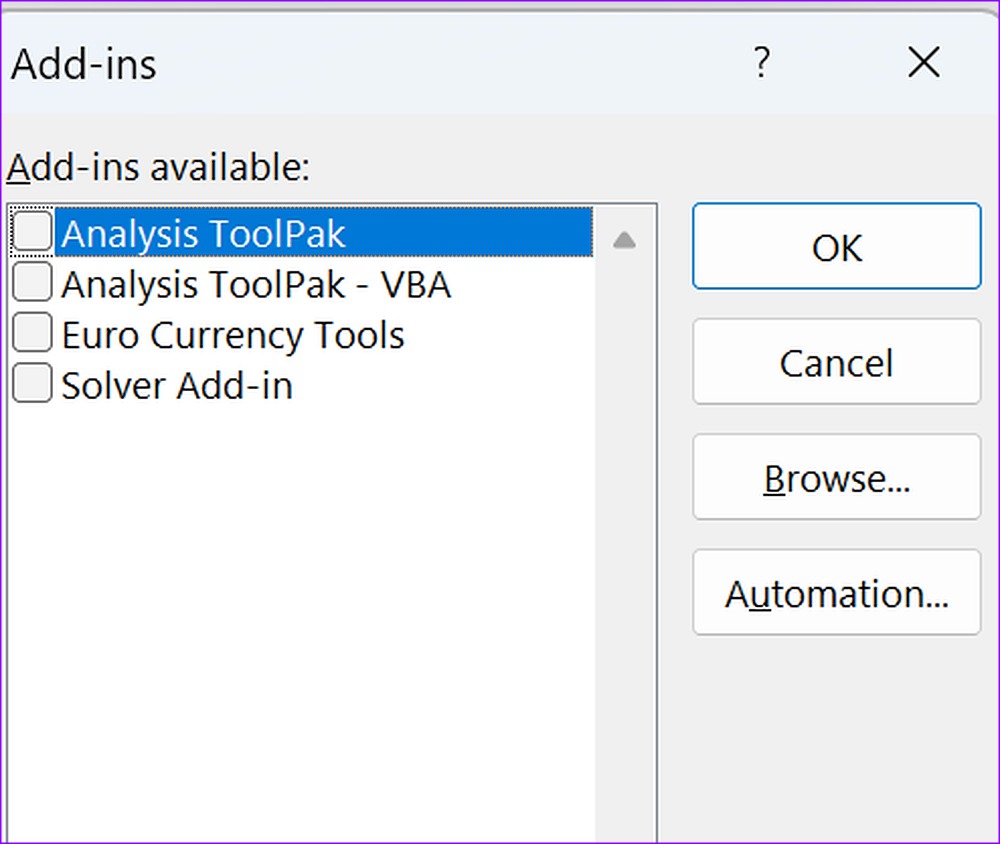
Step 4: Click Add-ins from the left sidebar and select Go at the bottom.
Step 5: Uncheck the boxes to disable Add-ins and click OK.
Close all background apps: If the camera is not working in Google Chrome, check and see if other apps are using the camera in the background. Identify and close them using the Task Manager.
Check for Chrome updates: Browser bugs can occasionally prevent Chrome from accessing the camera on your Windows PC. In this case, check and install the latest software updates for Google Chrome.
Fix 1: Ensure Chrome Has Camera Access
Google Chrome needs the necessary permissions to use your computer’s camera. If you haven’t allowed that, you can’t use the camera in Google Chrome. So, here’s how to check if Google Chrome has access to the camera on your Windows 11 PC.
Step 1: Use the Window + I shortcut to open Settings. Then, click on the Privacy & security option and select Camera.
Step 2: Scroll down and turn on the toggle for Let desktop apps access your camera.
Fix 2: Run the Camera Troubleshooter
The dedicated camera troubleshooter in Windows can detect problems with your computer’s camera. It will also apply relevant fixes to repair your computer’s camera if any issues are detected. Here’s how to access and use it on your Windows 11 device.
Step 1: Open the Settings app using the Window + I shortcut. In the side menu, click on System. Then, click on Troubleshoot.
Step 2: Here, click on the Other troubleshooters option.
Step 3: Scroll to the Other section and click on Run next to Camera.
Let the troubleshooter run and look for issues. If something is detected, follow the on-screen instructions to resolve it accordingly. Then, restart Google Chrome and check again.
Fix 3: Check Site Permissions
Besides letting Google Chrome use the camera, you must also permit a particular website to access it. This is important since these decide permissions on whether websites can access the camera. Here’s how to change a website’s camera permissions in Google Chrome.
Step 1: Open Google Chrome and go to the relevant website. Then, click on the site information iconnext to the URL in the address bar.
Step 2: From the menu options, ensure the Camera toggle is turned on.
Fix 4: Update or Reinstall Camera Drivers
Your Windows 11 device may suffer from hardware-related issues due to unstable or outdated drivers. So, it’s a good idea to update or reinstall the camera drivers on your computer. Here’s how to first update and, if it doesn’t work, reinstall the camera driver on Windows 11.
Step 1: Open Device Manager and click on Cameras. Once the options appear, right-click on the relevant camera and choose Update driver.
Step 2: From the Update Drivers window, click on Search automatically for drivers.
Let it search for the latest camera drivers. If any driver updates are available, it will find and install it on your computer. But if no updates are available, reinstall the camera drivers.
Step 1: Click on Cameras and right-click on the relevant camera. Then, click on Uninstall device.
Step 2: In the confirmation dialog box, click on Uninstall.
Once done, restart your Windows device. Once your PC finishes restarting, it will automatically search for the relevant camera drivers and install them again on Windows 11.
Fix 5: Disable MediaFoundation Video Capture Flag in Chrome
Flags are an experimental feature on Google Chrome and can sometimes interfere with regular browser functions. So, if you still can’t use the camera on Google Chrome, disable the MediaFoundation Video Capture flag. Follow the below steps to do it.
Step 1: Open Google Chrome and type chrome://flags/ in the address bar. Press enter to open the Chrome Flags page.
Step 2: Once the Chrome Flags page opens, type MediaFoundation Video Capture in the search bar.
Step 3: Now, go to the flag and click on the drop-down. Here, select Disabled.
When prompted, restart Google Chrome to update the flag. Then, open the relevant website and check again.
Check internet connection: If you use Mobile Data for the Messages app, you might need better internet speeds in your current area. Switch to Wi-Fi.
Force quit and relaunch: The next solution is to remove the Messages app from running in the background and relaunch it. This will give the app a fresh start after connecting to a 5GHz frequency band.
Update the Messages app: To use the latest version of the Messages app, install the latest version of iOS, depending on your iPhone model.
Fix 1: Disable Low Data Mode
If you still can’t send voice messages using the Messages app, we suggest disabling Low Data Mode on your iPhone. This helps prevent excessive internet usage but can also prevent voice messages from being delivered to your contacts.
Step 1: Open Settings > tap on Wi-Fi > Info icon next to the connected Wi-Fi network > disable Low Data Mode.
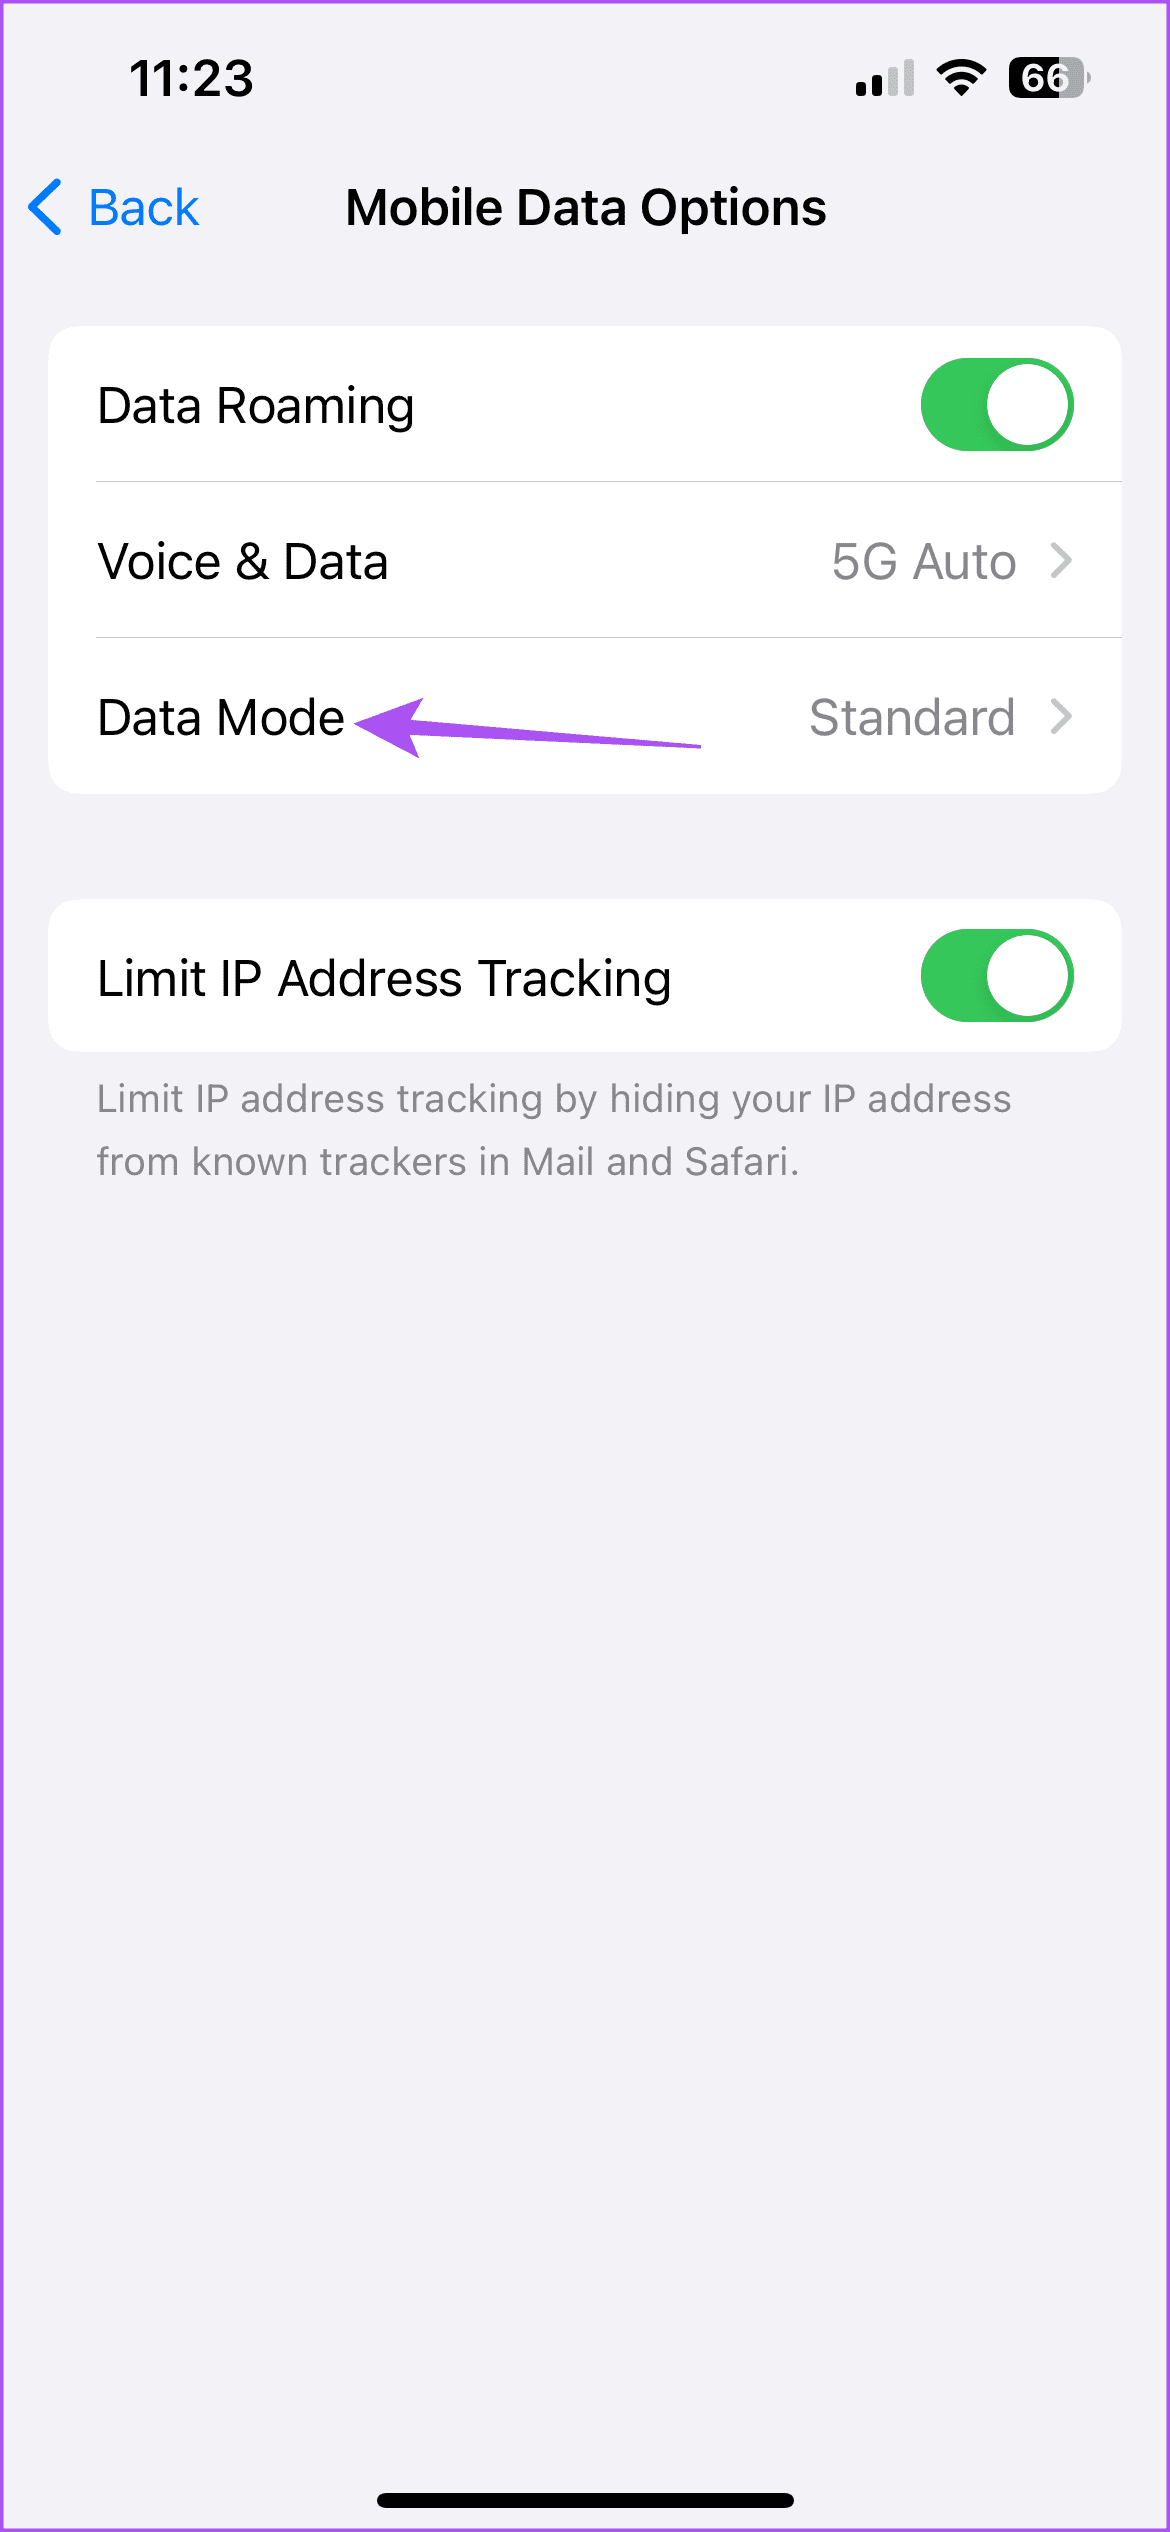
Step 2: Go back and tap on Mobile Service > Mobile Data Options > Data Mode > disable Data Saver.
Once done, close Settings and open Messages to check if the problem is solved.
Fix 2: Ask Siri to Send Voice Message
You can also summon Siri to send your voice message using the Messages app. Just say, ‘Hey Siri, send a voice message to (contact name).’ Once the contact is selected, record your voice message and send it.
Fx 3: Reactivate iMessage
It’s time to try some advanced solutions. You can reactivate the iMessage service on your iPhone and check if it solves the problem. By following this step, all your iMessage data will download again on your iPhone.
Open Settings > Messages > disable iMessage > wait for some time and then enable it again.
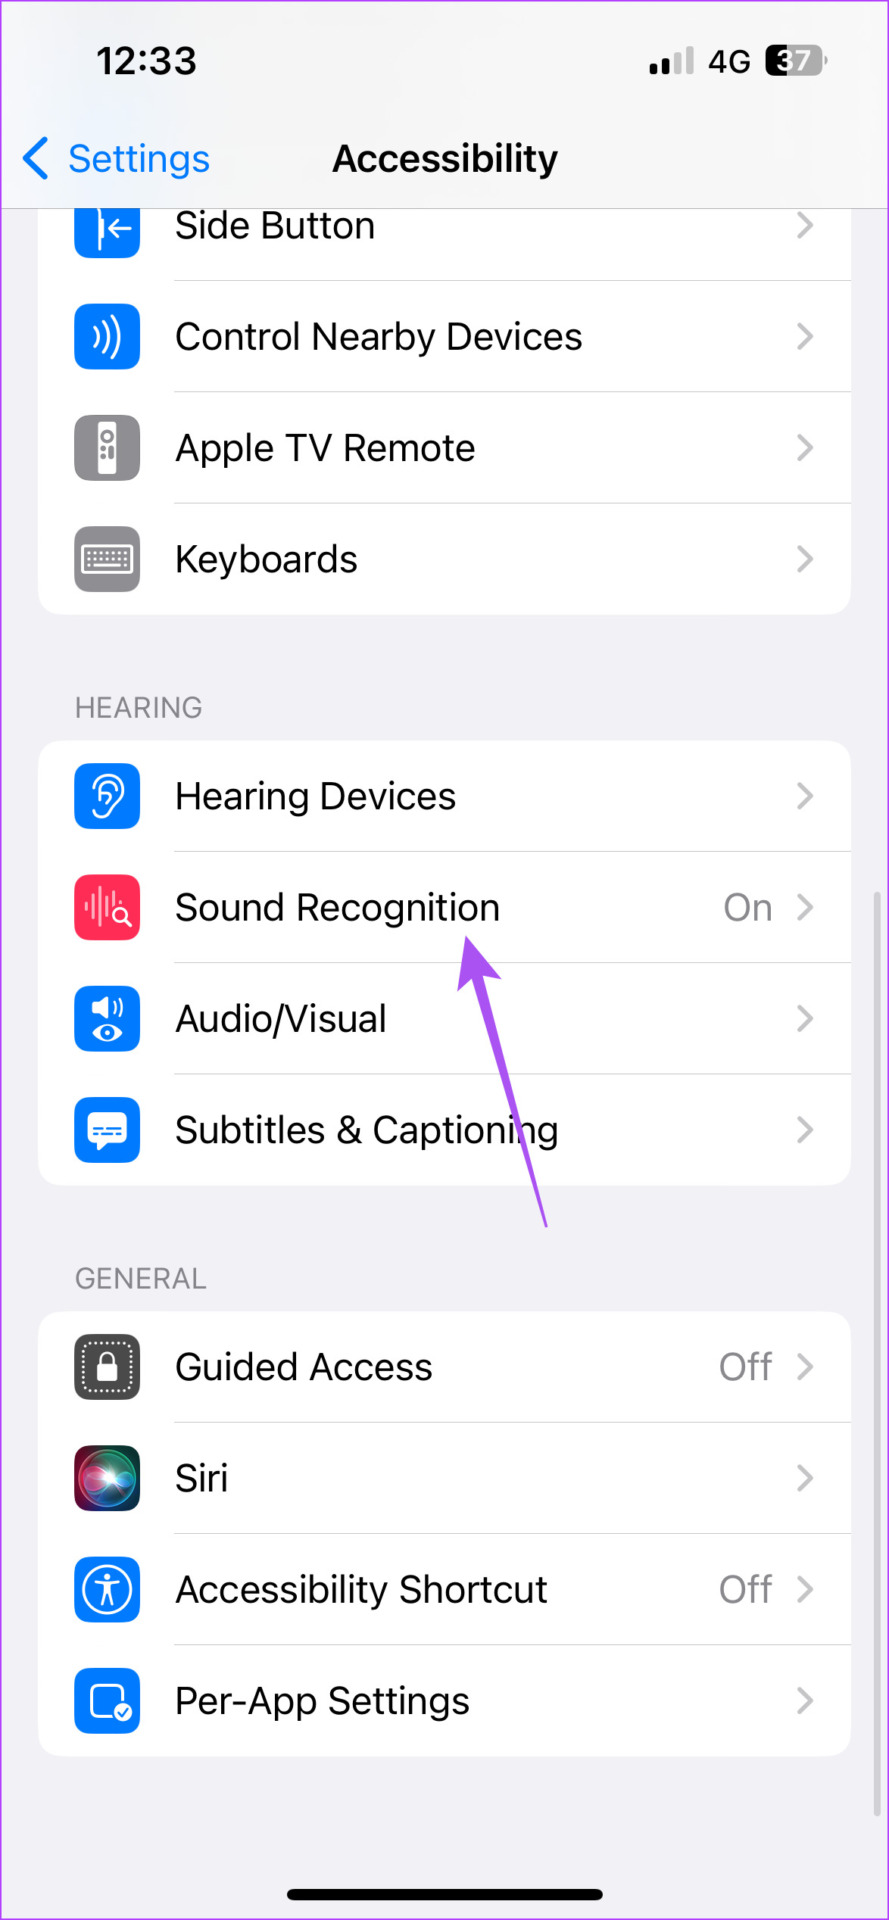
Fix 4: Turn Off Sound Recognition
The Sound Recognition feature makes you listen for certain sounds around you, such as doorbells, sirens, coughing, etc., to recognize them and notify you. Turning off this feature might help solve this issue with Audio Messages on your iPhone. Here’s how to try it.
Open Settings > Accessibility > Sound Recognition > toggle off Sound Recognition.
Alternative: Use the Voice Memos App
If none of the solutions have worked, the Voice Memos app installed on your iPhone can help you send Voice Messages. You can read our post to use the Voice Memos app on your iPhone.
Check your internet connection: The Samsung Internet browser may have trouble loading web pages if there is a problem with your internet connection. To avoid this, ensure your internet connection is working properly.
Restart the Samsung Internet browser: Long-press on the Samsung Internet browser icon and tap the info icon from the menu. On the app info page, tap the Force stop option. Now, try loading a few web pages on the browser.
Update the app: Running an outdated version of the browser can also cause such issues. Head to Play Store to update the Samsung Internet Browser and see if that fixes the issue.
Fix 1: Disable Ad Blocker and Browser Add-Ons
Samsung Internet is one of the few Android web browsers supporting add-ons. However, these add-ons can sometimes interfere with a site’s script and prevent specific content from appearing. You can try disabling them to see if that helps.
Step 1: In the Samsung Internet browser, tap the menu icon (three horizontal lines) at the bottom-right corner and select Ad blockers.
Step 2: Use the toggles to disable any ad blocker.
Step 3: Return to the home page, tap the menu icon, and select Add-ons.
Step 4: Disable all your add-ons.
After completing the above steps, check if Samsung Internet can load pages.
Fix 2: Enable JavaScript
JavaScript is a programming language that developers use to incorporate various features and visual elements into websites. If JavaScript is disabled in the Samsung Internet browser, web pages may not load properly.
Step 1: Open the Samsung Internet browser menu and select Settings.
Step 2: Go to Sites and downloads.
Step 3: Tap on Site permissions and enable the toggle next to Allow JavaScript.
Fix 3: Delete Browsing Data
If the Samsung Internet browser still fails to load web pages, clear the browsing data. This should help eliminate problems caused by cached data.
Step 1: In the Samsung Internet browser, tap the menu icon at the bottom-right corner and select Settings.
Step 2: Tap on Personal browsing data and select Delete browsing data from the following menu.
Step 3: Select Cookies and site data and Cached images and files and hit the Delete data button. Then, choose Delete to confirm.
Fix 4: Turn Off Experimental Features
Have you recently enabled any experimental features in the Samsung Internet browser? The issue with those features, as the name implies, is that they are indeed experimental and can result in unexpected issues. Hence, it’s best to disable them if the Samsung Internet browser is not working properly.
Step 1: Open the Samsung Internet browser, tap the menu icon, and select Settings.
Step 2: Scroll down to tap on Labs and disable all the experimental features from the following menu.
Fix 5: Clear Samsung Internet App Data
There’s a chance that some Samsung Internet browser’s data on your phone has become corrupt. If that’s the case, try clearing it. Note that this will remove your browser history and reset the app to its default settings.
Step 1: Long-press on the Samsung Internet browser icon and tap the info icon from the menu that appears. Then, go to Storage.
Step 2: Tap Clear data and hit Delete to confirm. Now, reopen the Samsung Internet browser; it should load pages as expected.
Being the largest social media platform worldwide, Facebook comes with several privacy tools to report harassment, restrict the recipient, and prevent others from peeking at your account. Anyone can become a target for cyberbullying, scammers, and impersonators. If you are among those, report such accounts on Facebook Messenger.
Sometimes, your unhappy employees or customers may abuse or harass you on the platform. While blocking an account solves the problem, we recommend reporting such abusers to Facebook. You may wonder what happens when you report someone on Facebook Messenger. Let’s discuss the implications of reporting someone on Messenger.
How to Report Someone on Facebook Messenger
If you frequently encounter nasty comments and abusive messages on Facebook Messenger, follow the steps below to report such accounts. Here’s what you need to do.
Note: Facebook Messenger for iOS and Android use an identical interface. We will show Messenger for iPhone in the screenshots below. You can follow the same steps on the Android version to report someone.
Step 1: Open the Messenger app on your Android or iPhone.
Step 2: Select a conversation and tap the recipient’s name at the top.
Step 3: Scroll to ‘Privacy and support’ and select ‘Report.’
Step 4: Select a problem to report. Here are the possible reasons:
Harassment
Self-injury
Pretending to be someone
Sharing inappropriate things in chat
Hate speech
Unauthorized sales
Scams
Other
Step 5: Select a relevant reason and hit ‘Submit report’ at the bottom.
If someone is in immediate danger, call your local authorities and emergency services. You needn’t wait for Facebook to take action.
Report Someone on Facebook Messenger for Web
The ability to report someone on Messenger isn’t limited to mobile apps. You can do the same on Messenger for web too. Here’s how.
Step 1: Head to Facebook Messenger on the web. Login with your Facebook account details.
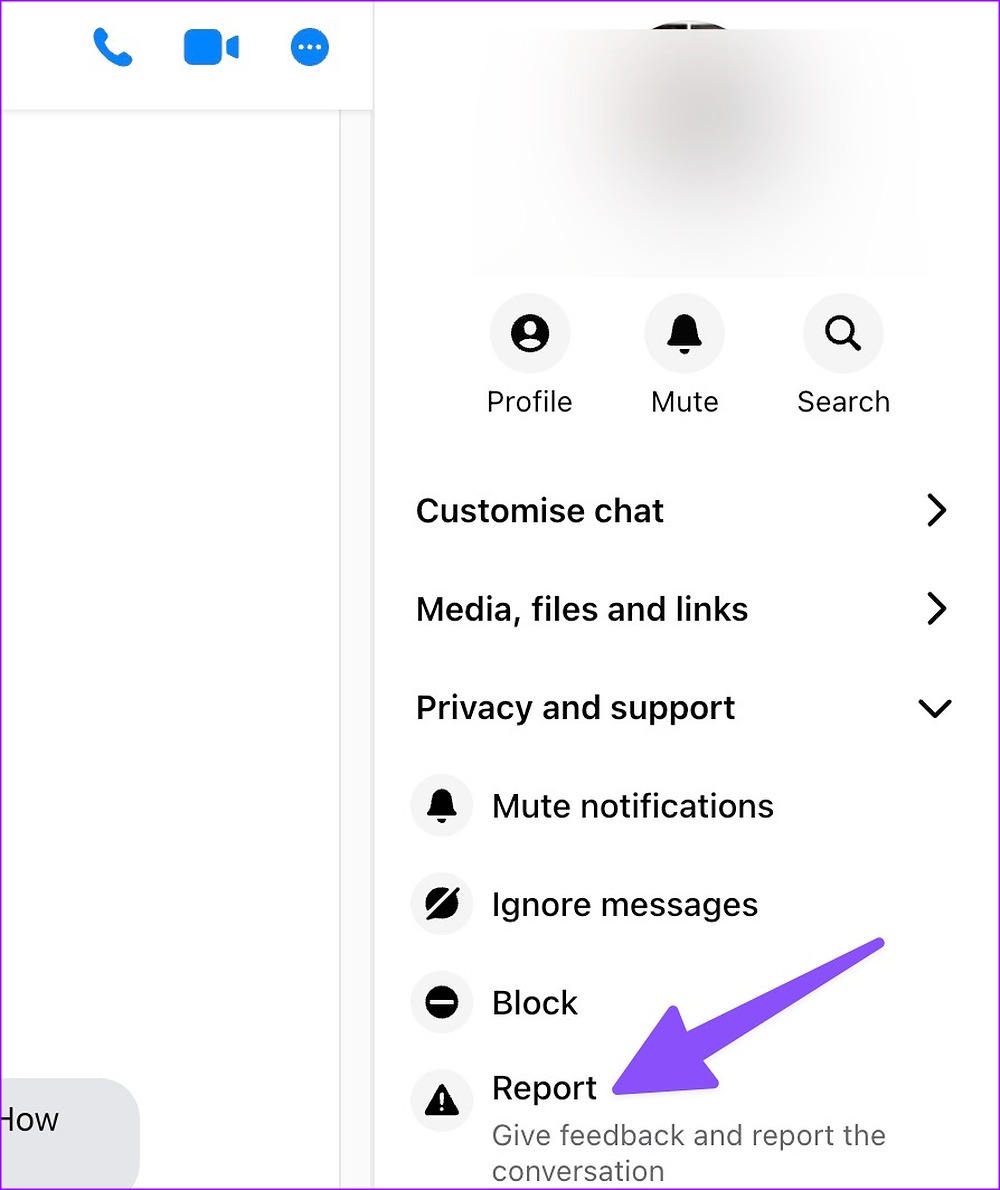
Step 3: Click the three-dot menu in the top-right corner.
Step 4: Expand the ‘Privacy and support’ menu from the left sidebar.
Step 5: Select Report.
Step 6: Click the relevant reason from the following menu.
After you report someone on Messenger, you have several options to choose from.
Mute conversation: The option turns off notifications for a specific time.
Ignore conversation: The Messenger will move the conversation to Spam, and you won’t receive any alerts.
Block: Messenger blocks the person on the platform. You can read our dedicated post to learn more about blocking someone on Messenger.
Report conversation: The option will send your conversation to Facebook for review.
Implications of Reporting Someone on Facebook Messenger
When you report someone on Messenger, a member of Facebook’s support team will review your complaint. It usually takes up to 48 hours to determine if the recipient has violated Facebook guidelines or not.
Does the Person Know When You Report an Account on Messenger
Reporting someone is a privacy add-on in Messenger. All the submitted reports stay anonymous. Facebook doesn’t reveal your identity to the recipient. The option doesn’t even notify the recipient.
What Happens When You Report a Message for Harassment on Facebook?
When you report someone for harassment, Facebook asks you to share specific messages to review your claim. If the support team finds a relevant issue, the company takes the necessary steps to limit the account.
Can I Undo Reporting Someone on Facebook Messenger?
Did you accidentally report someone on Messenger? There is no way to undo the action. In this case, Facebook won’t find your claim relevant or take any action against the reported account. You won’t face any consequences for submitting fake reports, either. But you need not make a habit of reporting irrelevant conversations for personal vendetta.
Do I Remain Friends With Reported Accounts?
Reporting someone on Facebook Messages doesn’t change your friendship status. You remain friends with the affected account. The person can easily reach you with messages and calls. If you want to stop receiving messages, mute the conversation, ignore it, or block the person.
What About Existing Messages?
Your existing messages and chat history remain unaffected when you report someone on Facebook Messenger. It’s a sensible move, as Facebook or the local authorities may need to review your chat history to check your claims.
Remove Spam From Facebook
You may wonder how many reports it takes to delete someone’s Facebook account. Sometimes, even one relevant report can make Facebook delete an account within 24 hours. How’s your experience with reporting someone on Messenger? Did you notice Facebook taking quick action? Share your experience in the comments below.
If you’re like me, who has hit the Delete for me button instead of the Delete for everyone option in haste, this new feature is a lifesaver.
It allows you to undo the delete action and restore the message. After doing this, you can delete the message for everyone if that’s what you intended to do in the first place. It saves you from embarrassment.
How to Undo Deleted WhatsApp Messages
Step 1: Open the conversation where you want to delete a WhatsApp message. Tap and hold on to a message to delete.
Step 2: If you accidentally delete the message for yourself by tapping Delete for me, you will see a small banner at the bottom with an Undo button. Tap on it.
Step 3: Now, select the message again and choose Delete for everyone.
1. Can I undo the deletion of an image on WhatsApp?
Yes, the same procedure can be used to restore a deleted image. In fact, this method can be used to restore any media file, including a video, audio, or document.
2. Within what duration can I undo a deleted WhatsApp message?
WhatsApp gives you 5 seconds to undo a deleted message. As soon as you delete a message for yourself, you will see a small banner at the bottom of the screen that lasts for 5 seconds. If you don’t tap on the undo button in that duration, it will disappear and you cannot restore the message after that.
3. Can I undo a message I deleted earlier?
No, you can only undo messages you delete at present. However, you can delete and restore older messages from a chat even if the message was sent before this feature was rolled out.
4. Can you undo a deleted WhatsApp chat?
Unfortunately, the ability to undo deleted WhatsApp chats isn’t available yet. It would indeed be a nice feature, though. We hope WhatsApp rolls it out soon.