Fix 1: Reset the Problematic App
If the 0x80073CFA error only occurs while uninstalling a specific app, try resetting it first. This will delete all data from your computer and restore the app to its factory settings.
Step 1: Right-click on the Start icon > select Installed apps from the list.

Step 2: Scroll down or use the search tool to locate the problematic app. Click the three-dot icon next to it > select Advanced options.

Step 3: Scroll down and click Reset.

Wait for Windows to reset the app, and then try to uninstall it again.
Fix 2: Uninstall the App Using PowerShell
Windows PowerShell also lets you uninstall apps with a few commands. So, if you have trouble removing an app from the Start menu or the Settings app, use the following steps.
Step 1: Click the search icon on the taskbar, type Windows PowerShell, and select Run as Administrator.

Step 2: Paste the following command and press Enter to view a list of apps on your computer.
Get-Appxpackage -Allusers

Step 3: Scroll through the list to copy the package name of the app you want to remove.

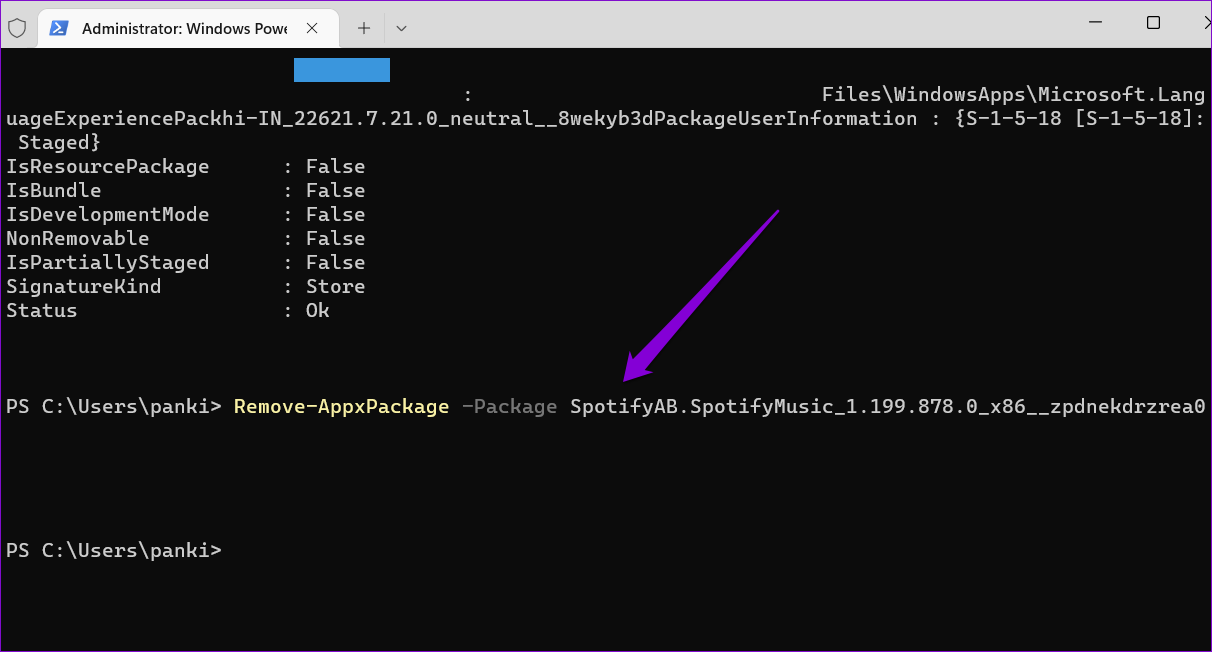
Step 4: Paste the following command in the console and press Enter to remove the app.
Remove-AppxPackage -Package PackageFullName
Replace PackageFullName in the above command with the package name noted in the previous step.
Fix 3: Run the SFC and DISM Scans
If you’re still getting the 0x80073CFA error, some of your PC’s system files may be corrupt or missing. Thankfully, Windows 11 includes some command-line tools—System File Checker and Deployment Image Servicing and Management—that can find and repair such damaged system files. Here’s how to run them.
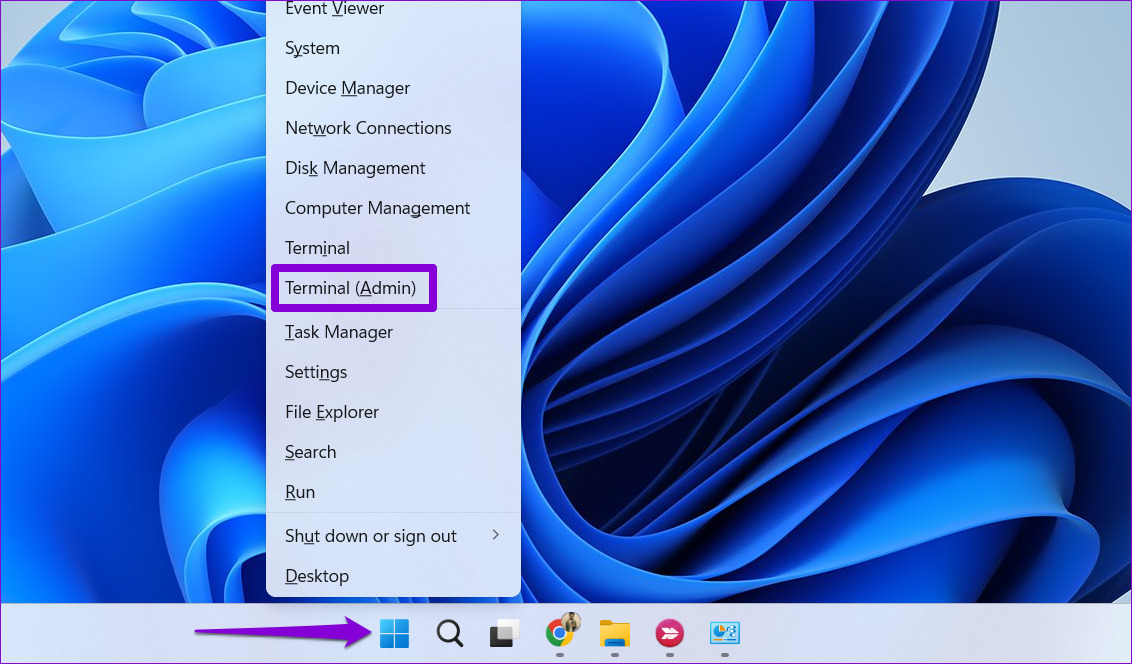
Step 1: Right-click on the Start icon > select Terminal (Admin) from the list.
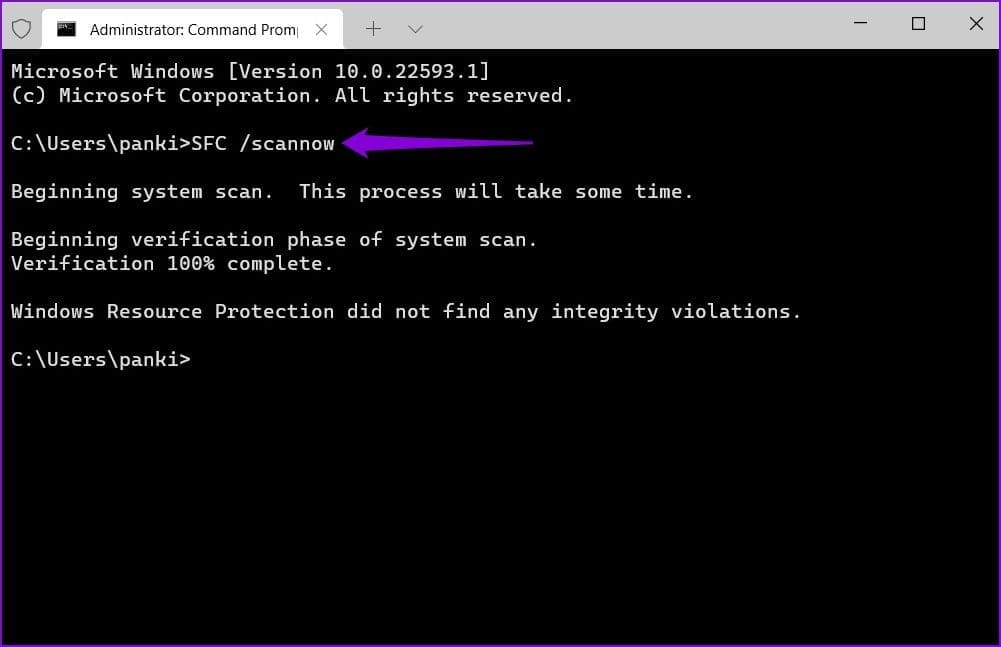
Step 2: Paste the following command in the console and press Enter.
sfc /scannow
Step 3: Run the DISM scan by entering the following commands one by one.
DISM /Online /Cleanup-Image /CheckHealth
DISM /Online /Cleanup-Image /ScanHealth
DISM /Online /Cleanup-Image /RestoreHealth

This might take a while, so be patient. After the scan is complete, restart your PC and see if you can uninstall apps.
Fix 4: Uninstall the App in Clean Boot Mode
Third-party programs and services on your computer can also obstruct the app uninstallation process and cause problems. To avoid any interference, boot your PC in a clean boot state and try to remove the app again.
Step 1: Press the Windows key + R to open the Run dialog box, type msconfig in the Open field, and press Enter.
Step 2: Navigate to the Services tab > tick the box for Hide all Microsoft services > click Disable all.

Step 3: Switch to the Startup tab and click on Open Task Manager.
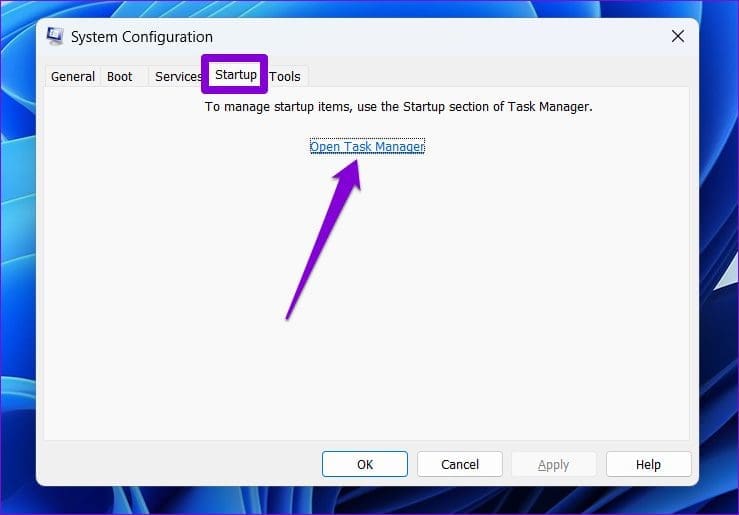
Step 4: Select a third-party app > click Disable. Repeat this step to disable all third-party apps and programs.

Restart your PC to enter the clean boot state and uninstall the app again.
Was this helpful?
Last updated on 26 August, 2024
Read Next
 Top 5 Ways to Fix the nvlddmkm.sys Failed Error in Windows
Preliminary Fixes Plug the GPU Into Another PCIe Slot: The nvlddmkm.sys failed error is often related to GPU issues.
Top 5 Ways to Fix the nvlddmkm.sys Failed Error in Windows
Preliminary Fixes Plug the GPU Into Another PCIe Slot: The nvlddmkm.sys failed error is often related to GPU issues.
 6 Ways to Fix Failed to Load Web Page Error in Steam for Windows
Fix 1: Terminate Steam Processes and Reopen the App The "Failed to load web page" error in Steam can occur if one of the app processes is experiencing issues.
6 Ways to Fix Failed to Load Web Page Error in Steam for Windows
Fix 1: Terminate Steam Processes and Reopen the App The "Failed to load web page" error in Steam can occur if one of the app processes is experiencing issues.
 Top 10 Ways to Fix ‘Display Driver Failed to Start’ Error in Windows 10 and 11
Display drivers facilitate communication between the Windows operating system (or any OS) with your GPU.
Top 10 Ways to Fix ‘Display Driver Failed to Start’ Error in Windows 10 and 11
Display drivers facilitate communication between the Windows operating system (or any OS) with your GPU.
 6 Ways to Fix Microsoft Outlook Failed to Delete a Message Error
Fix 1.
6 Ways to Fix Microsoft Outlook Failed to Delete a Message Error
Fix 1.
 5 Fixes for “User Profile Service Failed the Sign-In” Error in Windows 11
Fix 1: Configure the User Profile Service If the User Profile Service on your PC is not set to run automatically, you could encounter the "User Profile Service failed the
5 Fixes for “User Profile Service Failed the Sign-In” Error in Windows 11
Fix 1: Configure the User Profile Service If the User Profile Service on your PC is not set to run automatically, you could encounter the "User Profile Service failed the
 6 Fixes for “The Operation Failed” Error in Microsoft Outlook for Windows
Fix 1: Open Outlook in Safe Mode Running Office apps like Outlook in safe mode can help you determine if one of the add-ins is responsible for the issue.
6 Fixes for “The Operation Failed” Error in Microsoft Outlook for Windows
Fix 1: Open Outlook in Safe Mode Running Office apps like Outlook in safe mode can help you determine if one of the add-ins is responsible for the issue.
 4 Fixes for “This Interaction Failed” Error in Discord for Windows
Try Basic Fixes Update the Discord app: You may be getting the "This interaction failed" error due to an outdated or buggy Discord app.
4 Fixes for “This Interaction Failed” Error in Discord for Windows
Try Basic Fixes Update the Discord app: You may be getting the "This interaction failed" error due to an outdated or buggy Discord app.
 7 Ways to Fix Camera Failed Error on Samsung Galaxy Phones
Fix 1: Check Internal Storage and Phone Temperature You must have sufficient internal storage on your Samsung Galaxy phone for the Camera app to store new photos and videos.
7 Ways to Fix Camera Failed Error on Samsung Galaxy Phones
Fix 1: Check Internal Storage and Phone Temperature You must have sufficient internal storage on your Samsung Galaxy phone for the Camera app to store new photos and videos.
The article above may contain affiliate links which help support Guiding Tech. The content remains unbiased and authentic and will never affect our editorial integrity.