Preliminary Fixes
- Plug the GPU Into Another PCIe Slot: The nvlddmkm.sys failed error is often related to GPU issues. One of the potential causes could be a faulty or improperly seated PCIe slot on the motherboard of your desktop. By moving the GPU to another PCIe slot, you can determine if the problem is due to a faulty slot.
- Change the GPU: If plugging the GPU into another PCIe slot doesn’t resolve the nvlddmkm.sys error, the GPU itself may be faulty. Replacing the GPU with a new or known working one can help determine if the GPU is the cause of the issue.
Fix 1: Disable Fast Startup
Fast Startup helps you boot the PC faster after a shutdown. It hibernates the computer and kernel-level processes to achieve this feat. But if these processes and services glitch, you will face errors with apps and drivers.
Step 1: Press the Windows + R keyboard shortcut to open the Run dialog box.
Step 2: Paste the following code and press Enter:
control /name Microsoft.PowerOptions /page pageGlobalSettings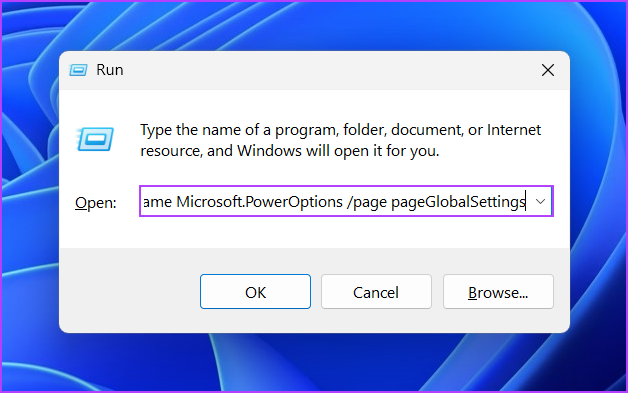
Step 3: Click on the Change settings that are currently available option.

Step 4: Uncheck the Turn on Fast startup (recommended) option. Click on the Save changes button.

Once everything is set and done, restart your PC and check if this has fixed the Video TDR failure nvlddmkm.sys failed error. If this didn’t work, check out the next fix.
Fix 2: Modify Registry
You can change the TDR value, which forces Windows to wait for more time for a response from the GPU. Here’s how.
Step 1: Press the Windows key, type cmd, and press the Ctrl + Shift + Enter keyboard shortcut simultaneously.
Step 2: When the User Account Control window opens, click on the Yes button.
Step 3: Type the following command and press Enter:
reg add "HKEY_LOCAL_MACHINE\SYSTEM\CurrentControlSet\Control\GraphicsDrivers" /v TdrDelay /t REG_DWORD /d 60 /fStep 4: After that, type this command and press Enter:
reg add "HKEY_LOCAL_MACHINE\SYSTEM\CurrentControlSet\Control\GraphicsDrivers" /v TdrDdiDelay /t REG_DWORD /d 60 /f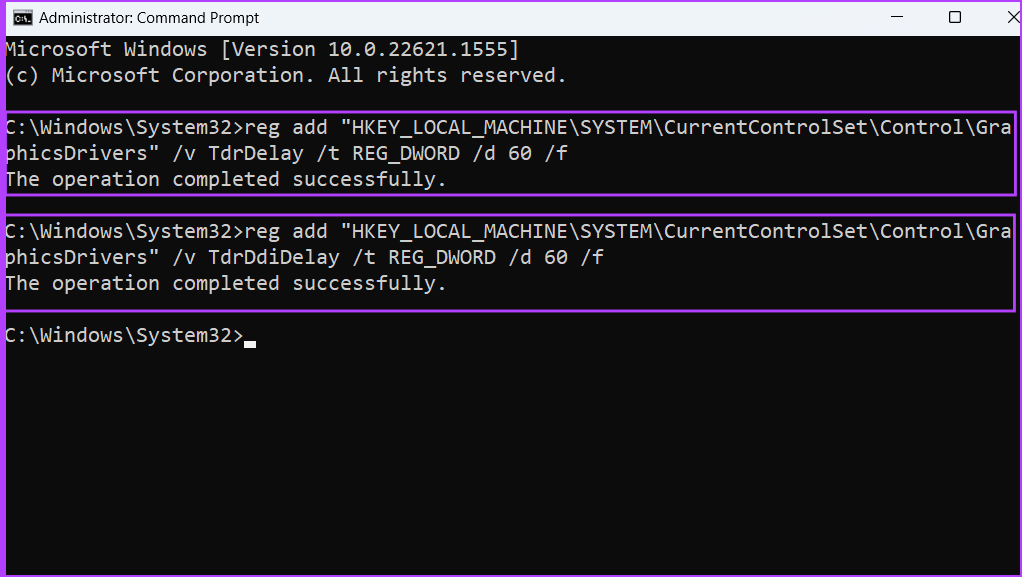
Step 5: Close the Command Prompt window. Restart your computer to apply the changes.
Fix 3: Uninstall Other NVIDIA Apps
Some users found that the NVIDIA Broadcast app was causing the nvlddmkm.sys error on their PCs. If you use the same app, uninstall it using the Settings app. Here’s how to do it:
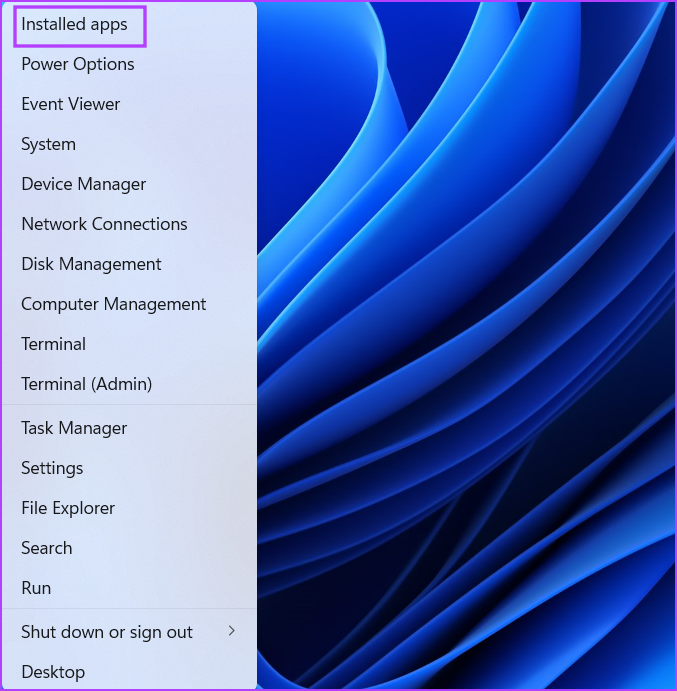
Step 1: Right-click on the Start button to launch the Power User menu. Click on the Installed apps.
Step 2: Locate the NVIDIA Broadcast app in the list. Click on the three horizontal dots icon next to it.
Step 3: Click on the Uninstall button.

Step 4: Wait for the app to uninstall completely and restart your PC.
Fix 4: Underclock the GPU
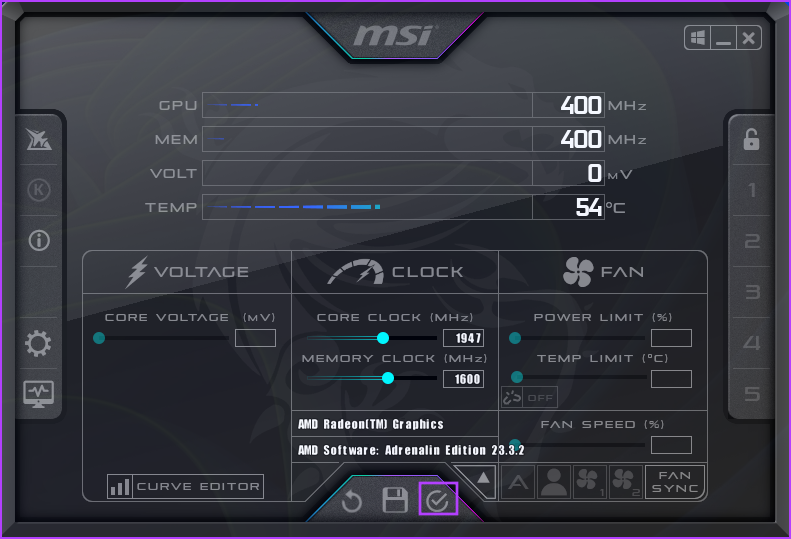
Video TDR failure nvlddmkm.sys can also occur if the GPU overheats. So, you can try underclocking your GPU using an app meant for your computer’s motherboard or MSI Afterburner.
Step 1: Download and install the MSI Afterburner on your PC.
Step 2: Launch the MSI Afterburner app.
Step 3: You need to adjust the Core clock of the GPU. Note down the current value of the Core clock and the Memory clock. After that, adjust the slider to lower the Core clock value by 100 MHz.
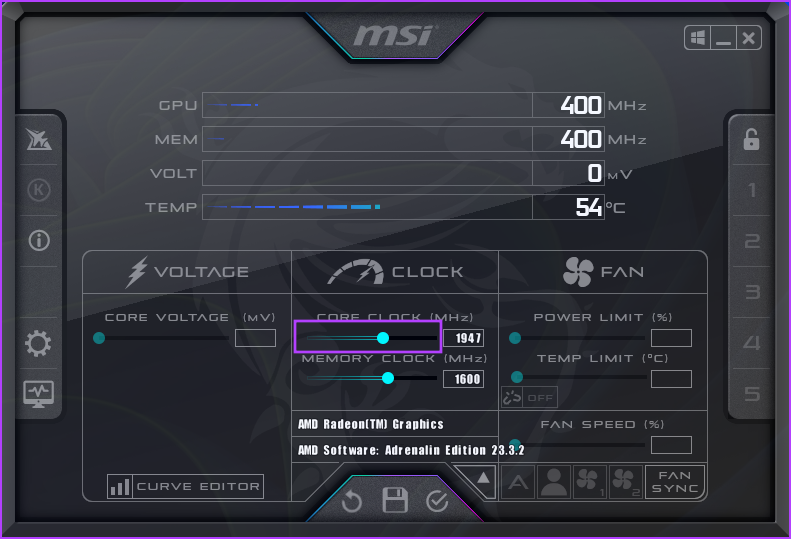
Step 4: Click on the checkmark icon to apply the settings.
Now, run a GPU-intensive app or a game and check if you face the same BSOD error.
Fix 5: Reinstall GPU Drivers Using DDU
Drivers can get corrupt and outdated over time. So you can update the drivers for your GPU. Here’s how to do it:
Step 1: Right-click on the Start button to open the Power User menu. Select the Device Manager.
Step 2: Expand the Display adapters option. Right-click on it and select the Update driver option.

Step 3: Click on the Search automatically for drivers option.
Wait for the tool to download and install the latest drivers on your PC.

Step 4: Close the Device Manager.
But if the driver update doesn’t have any effect, you must use Display Driver Uninstaller (DDU) to completely wipe the existing NVIDIA GPU drivers and then reinstall them. Repeat the following steps:
Step 1: Download the Display Driver Uninstaller tool.
Step 2: Extract the portable version on your PC. Then, open the Display Driver Uninstaller (DDU) folder and launch the application.
Step 3: When the User Account Control window appears, click on the Yes button.
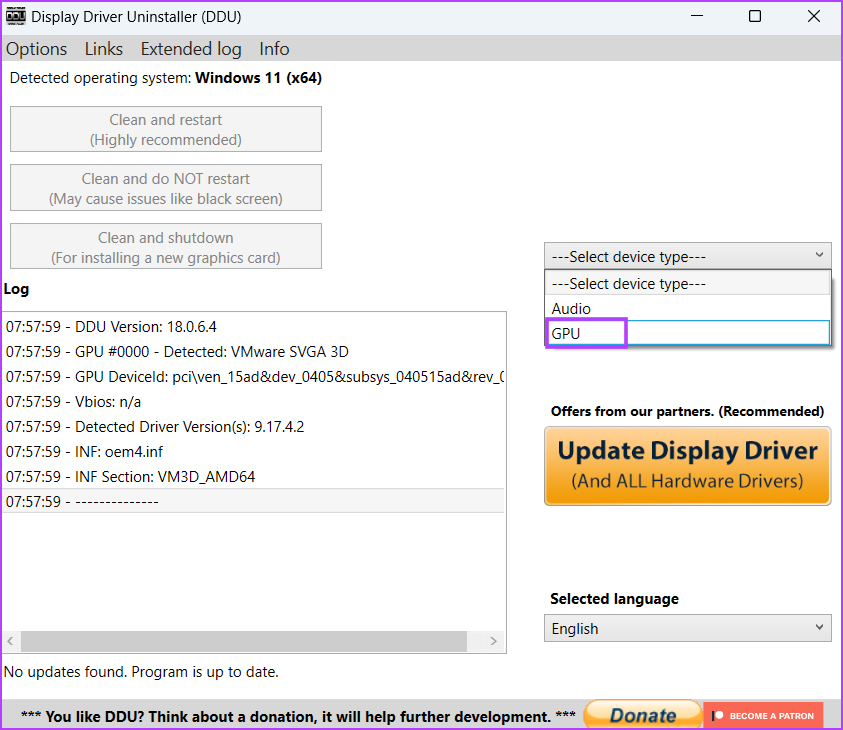
Step 4: Click on the Select device type drop-down list and click on the GPU option.
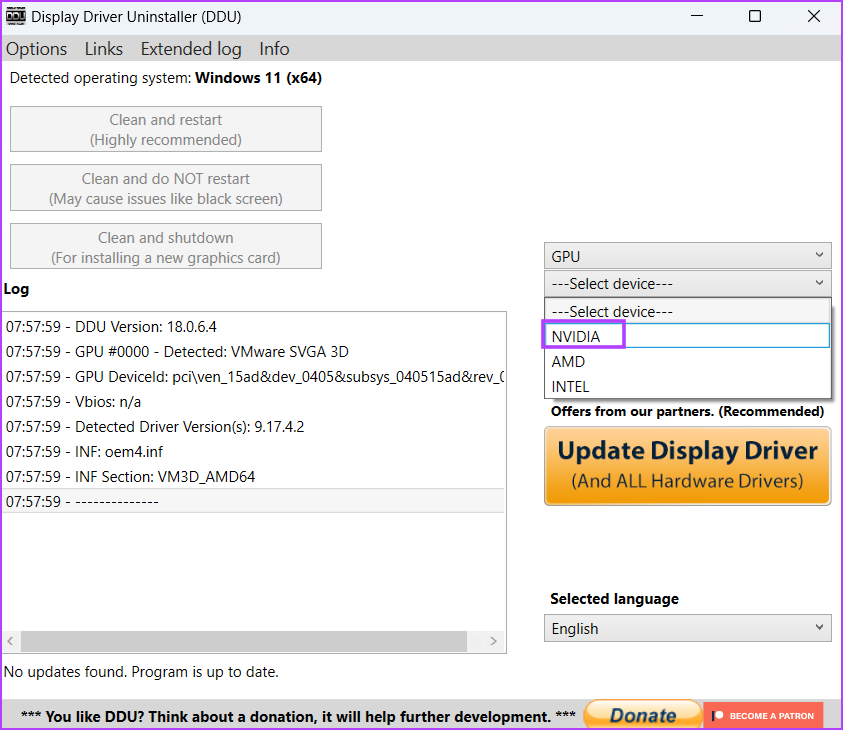
Step 5: Expand the next select device drop-down list and click on the NVIDIA option.
Step 6: Click on the Clean and restart option.

Display Driver Uninstaller will remove the GPU drivers and restart your PC.
Step 7: Visit the NVIDIA driver download page and download the appropriate game-ready driver for your GPU.
Finally, run the installer file. Follow the on-screen instructions to complete the installation.
Was this helpful?
Last updated on 10 August, 2024
Read Next
 5 Best Ways to Fix Hardlock.sys Error in Windows 10
Windows updates are riddled with issues, and this has been the case since the beginning of Microsoft.
5 Best Ways to Fix Hardlock.sys Error in Windows 10
Windows updates are riddled with issues, and this has been the case since the beginning of Microsoft.
 Top 10 Ways to Fix ‘Display Driver Failed to Start’ Error in Windows 10 and 11
Display drivers facilitate communication between the Windows operating system (or any OS) with your GPU.
Top 10 Ways to Fix ‘Display Driver Failed to Start’ Error in Windows 10 and 11
Display drivers facilitate communication between the Windows operating system (or any OS) with your GPU.
 4 Ways to Fix “App Removal Failed” Error 0x80073CFA in Windows 11
Fix 1: Reset the Problematic App If the 0x80073CFA error only occurs while uninstalling a specific app, try resetting it first.
4 Ways to Fix “App Removal Failed” Error 0x80073CFA in Windows 11
Fix 1: Reset the Problematic App If the 0x80073CFA error only occurs while uninstalling a specific app, try resetting it first.
 6 Ways to Fix Failed to Load Web Page Error in Steam for Windows
Fix 1: Terminate Steam Processes and Reopen the App The "Failed to load web page" error in Steam can occur if one of the app processes is experiencing issues.
6 Ways to Fix Failed to Load Web Page Error in Steam for Windows
Fix 1: Terminate Steam Processes and Reopen the App The "Failed to load web page" error in Steam can occur if one of the app processes is experiencing issues.
 Top 9 Ways to Fix Failed to Obtain IP Address Error on Android
Is your Android phone showing the ‘Failed to obtain IP address’ error while connecting to a Wi-Fi network?
Top 9 Ways to Fix Failed to Obtain IP Address Error on Android
Is your Android phone showing the ‘Failed to obtain IP address’ error while connecting to a Wi-Fi network?
 6 Ways to Fix Microsoft Outlook Failed to Delete a Message Error
Fix 1.
6 Ways to Fix Microsoft Outlook Failed to Delete a Message Error
Fix 1.
 5 Fixes for “User Profile Service Failed the Sign-In” Error in Windows 11
Fix 1: Configure the User Profile Service If the User Profile Service on your PC is not set to run automatically, you could encounter the "User Profile Service failed the
5 Fixes for “User Profile Service Failed the Sign-In” Error in Windows 11
Fix 1: Configure the User Profile Service If the User Profile Service on your PC is not set to run automatically, you could encounter the "User Profile Service failed the
 4 Fixes for “This Interaction Failed” Error in Discord for Windows
Try Basic Fixes Update the Discord app: You may be getting the "This interaction failed" error due to an outdated or buggy Discord app.
4 Fixes for “This Interaction Failed” Error in Discord for Windows
Try Basic Fixes Update the Discord app: You may be getting the "This interaction failed" error due to an outdated or buggy Discord app.
The article above may contain affiliate links which help support Guiding Tech. The content remains unbiased and authentic and will never affect our editorial integrity.

