Windows 11 personalizes the experience by providing recommendations based on your usage patterns. However, removing the Recommended section becomes essential if you prefer a more streamlined desktop environment. This article will explore the best ways to remove Recommended in Windows 11.
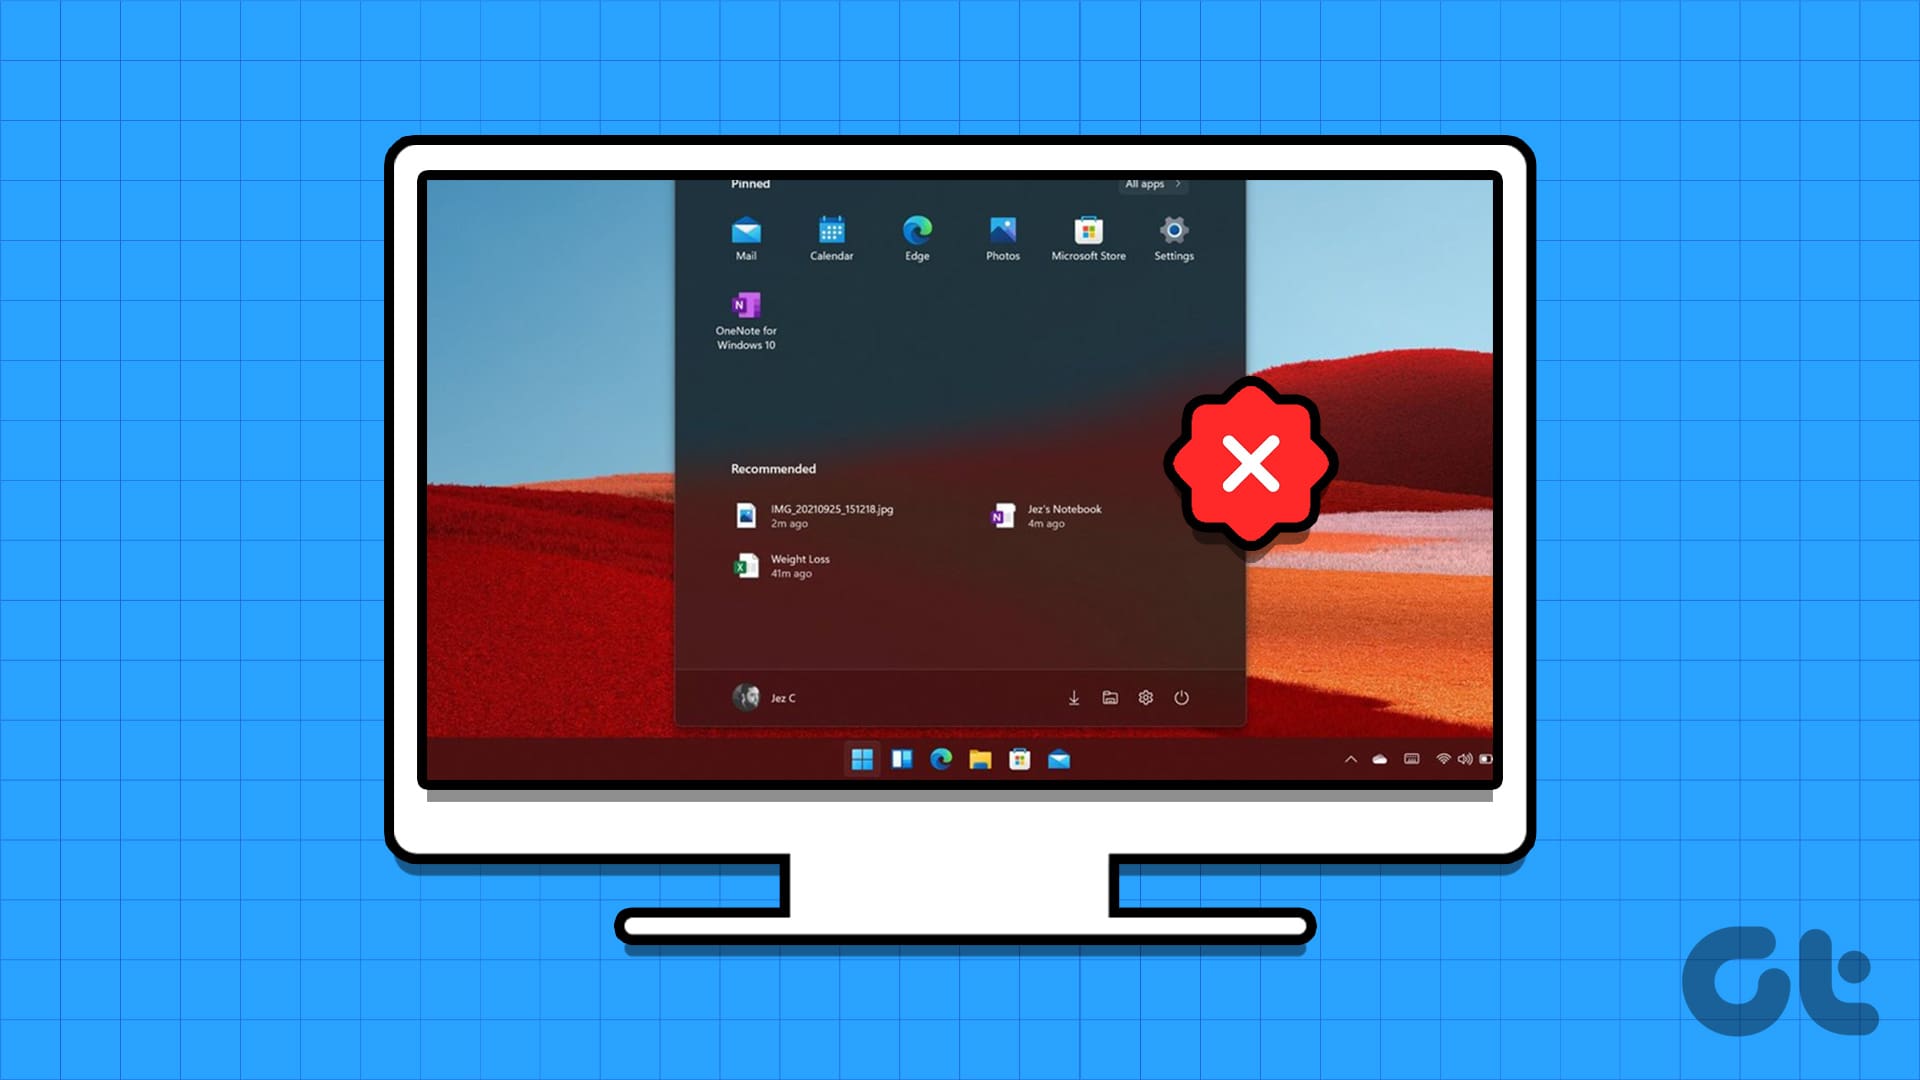
There are various reasons to hide Windows 11 recommendations. You may have privacy concerns regarding the data used to generate recommendations. Or perhaps removing them creates a more minimalist desktop environment, promoting concentration. So, here’s how you can do it in multiple ways.
1. Remove Recommended Section Via Settings
This method is one of the most common and easiest ways to hide Recommended in Windows 11. Follow the below steps.
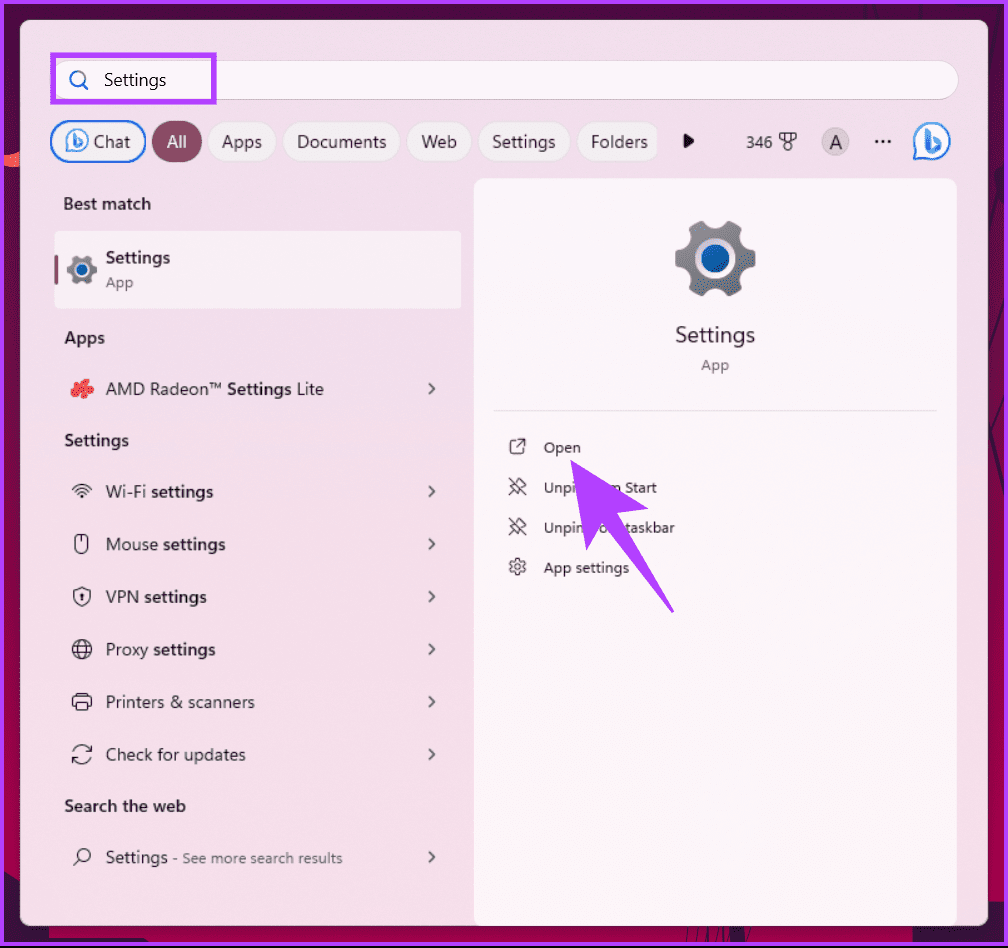
Step 1: Press the Windows key on your keyboard, type Settings, and click Open.
Note: Alternatively, press ‘Windows key + I’ on your keyboard to open Windows Settings quickly.
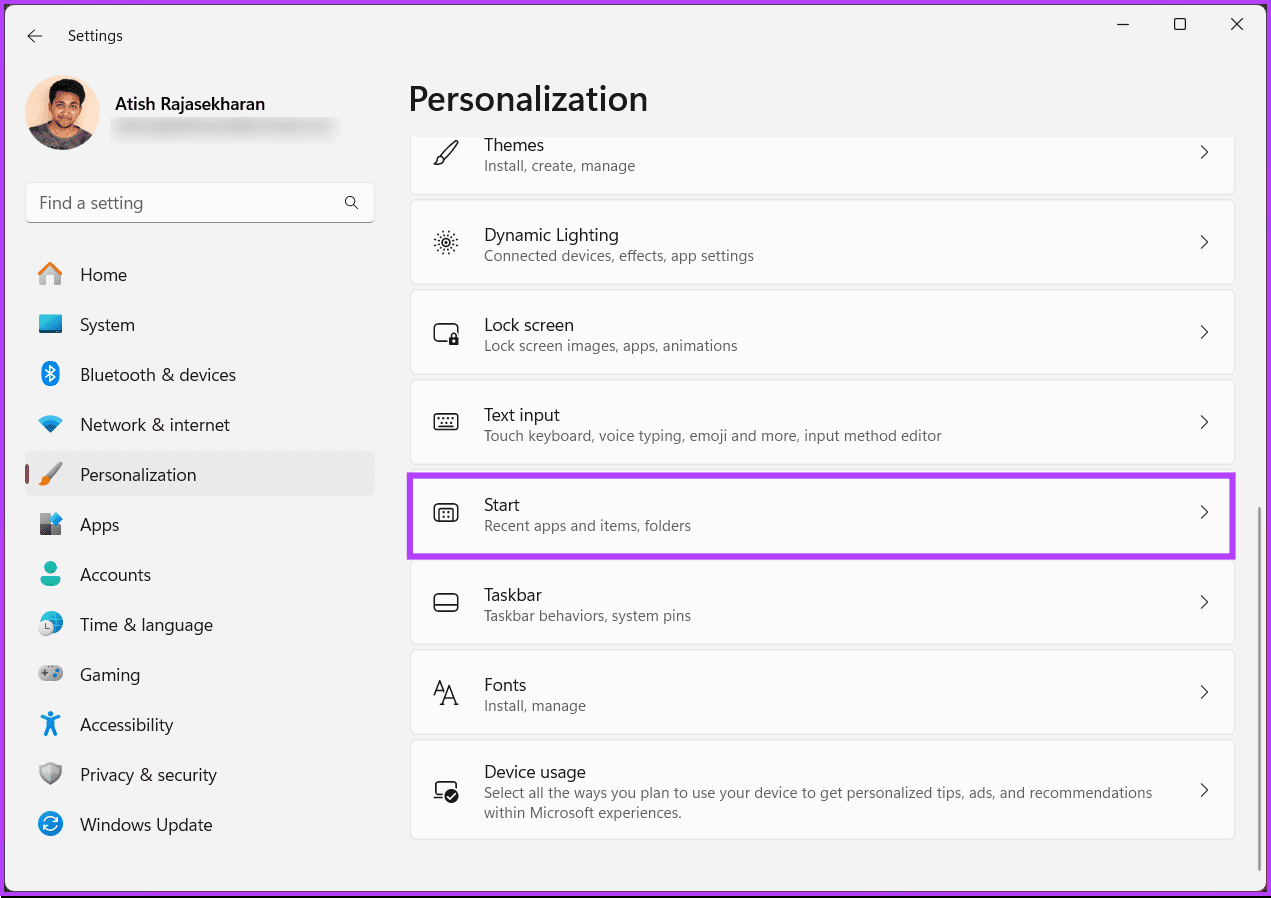
Step 2: Click on Personalization in the sidebar.
Step 3: Select Start on the right.
Step 4: Now, toggle off the following options:
- Show recently added apps
- Show most used apps
- Show recently opened items in Start, Jump Lists, and File Explorer
- Show recommendations for tips, shortcuts, new apps, and more.
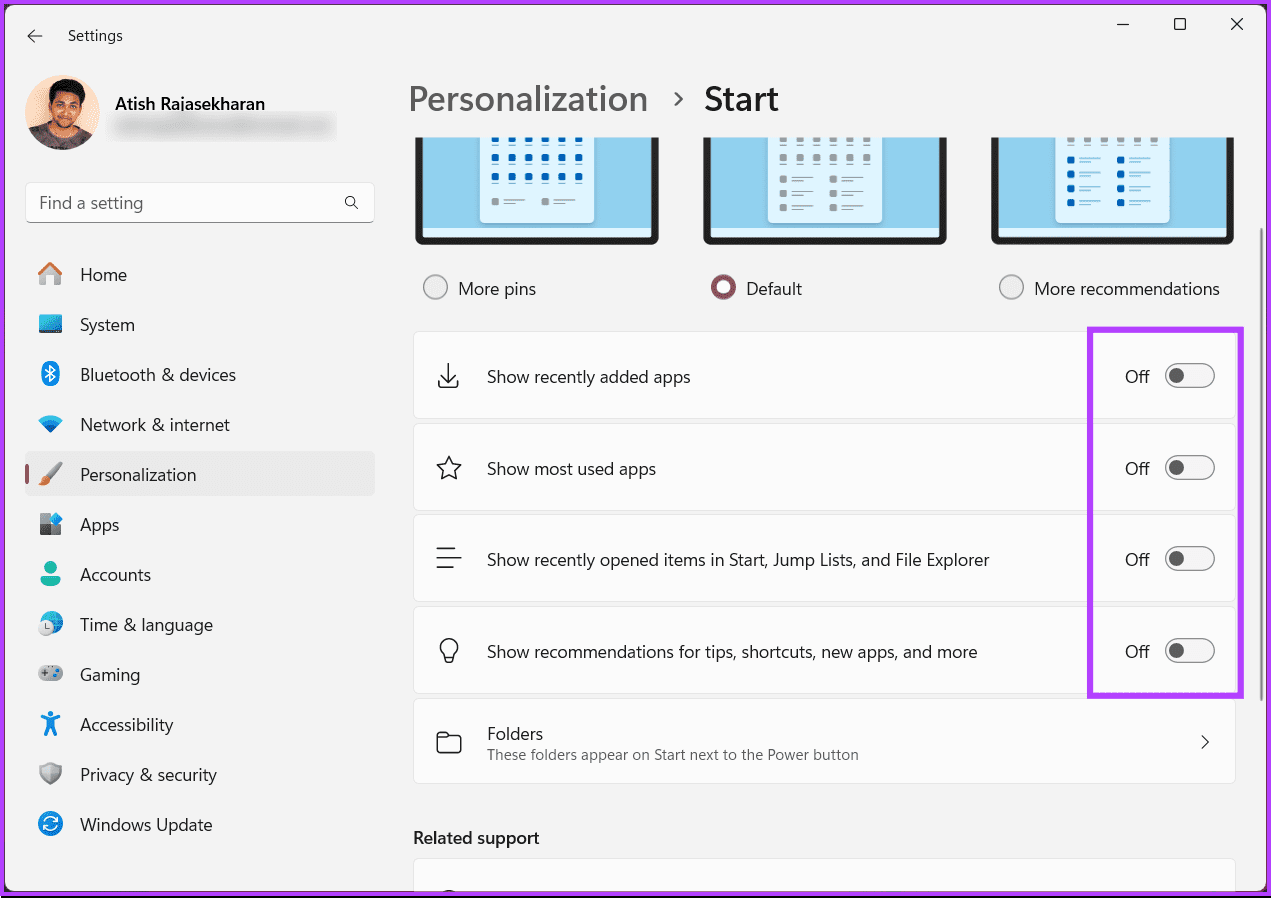
That’s it. The recommendations will be removed from your PC. Check out the next method if you only wish to remove selected recommendations.
Also Read: How to remove Bing from Windows 11
2. Disable Recommendations Individually in the Start Menu
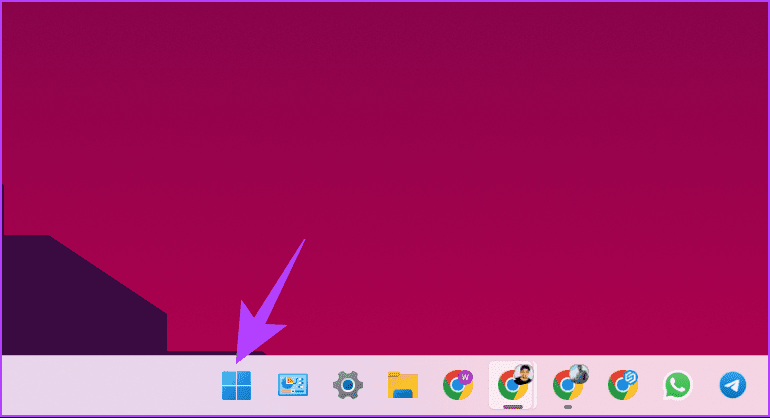
Step 1: Click the Windows icon on the taskbar.
Note: Alternatively, press the Windows key on your keyboard.
Step 2: Under the Recommended section, right-click on the item you want to remove and select ‘Remove from list.’
Note: You will notice a More button in the top right corner if you have many items. You can also right-click items to remove them individually.
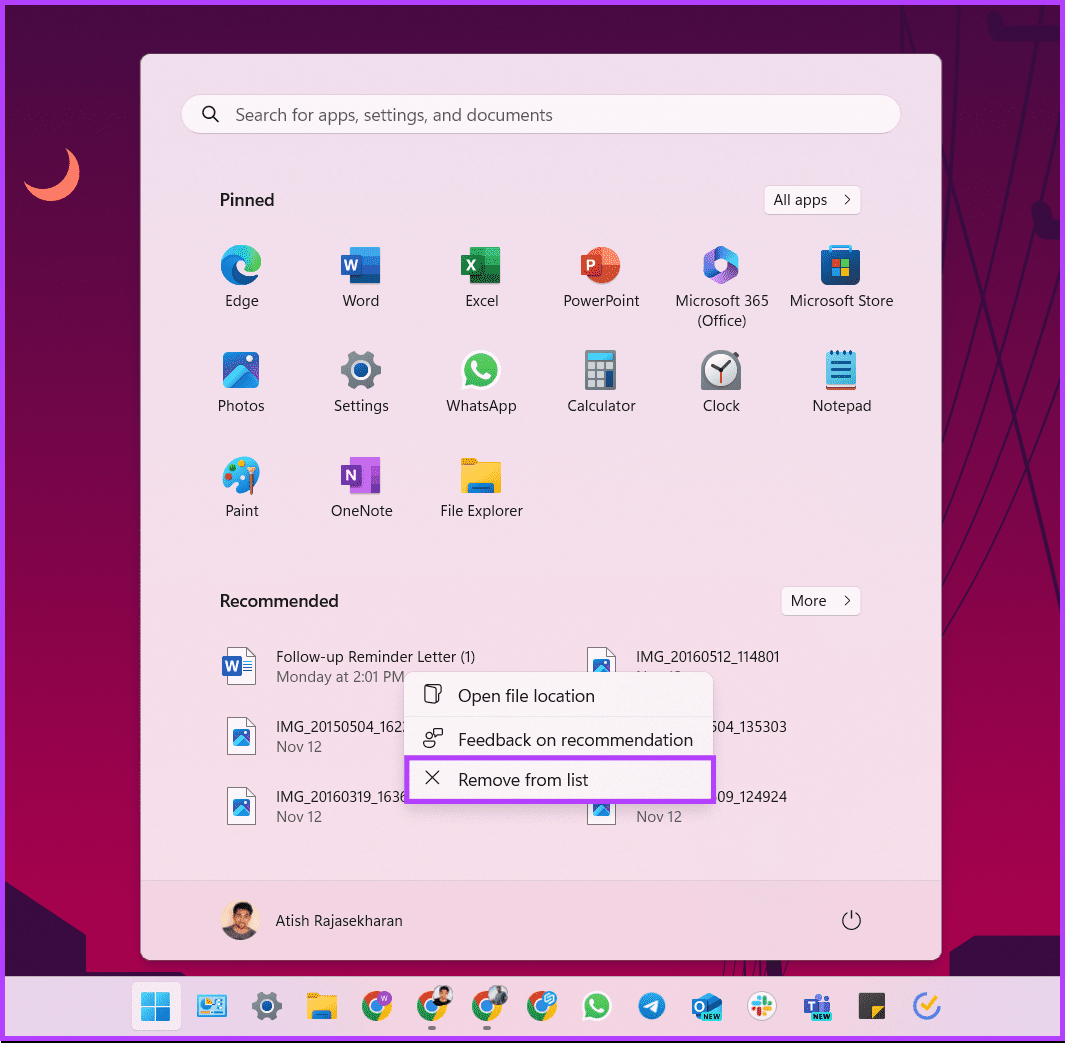
There you go. You have successfully removed the selected recommendations from the Start menu.
3. Remove Recommended Items Through Windows PowerShell
This method is not as straightforward as the above methods, as you use commands to execute it. However, if you like using command line tools, follow the below steps.
Note: You cannot disable it in Windows 11 Home/Pro editions. This method works only on Windows 11 Education/SE editions.
Step 1: Press the Windows key on your keyboard, type PowerShell, and click ‘Run as administrator.’

In the prompt, select Yes.
Step 2: Type (or copy-paste) the below command and press Enter.
New-ItemProperty -Path "HKLM:\SOFTWARE\Policies\Microsoft\Windows\Explorer" -Name "HideRecommendedSection" -PropertyType DWord -Value 1 -Force
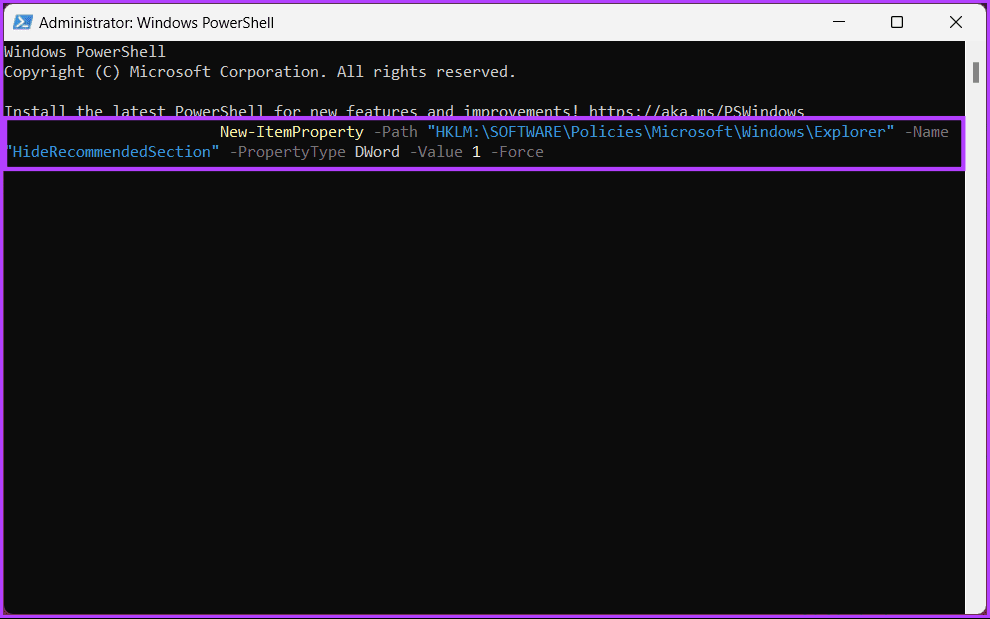
There you go. You have disabled recommendations in the Start menu. If you don’t want to do it through PowerShell, you can do it through the Registry Editor; continue reading.
Also Read: How to update DirectX on Windows 11
4. Remove Recommended ‘Items’ via Registry Editor
This step is more difficult than all the earlier ones. So, proceed with caution. Moreover, because we will use the Registry Editor, we strongly advise you to back up the Windows Registry before proceeding with the steps below. This will help restore your data if things go south.
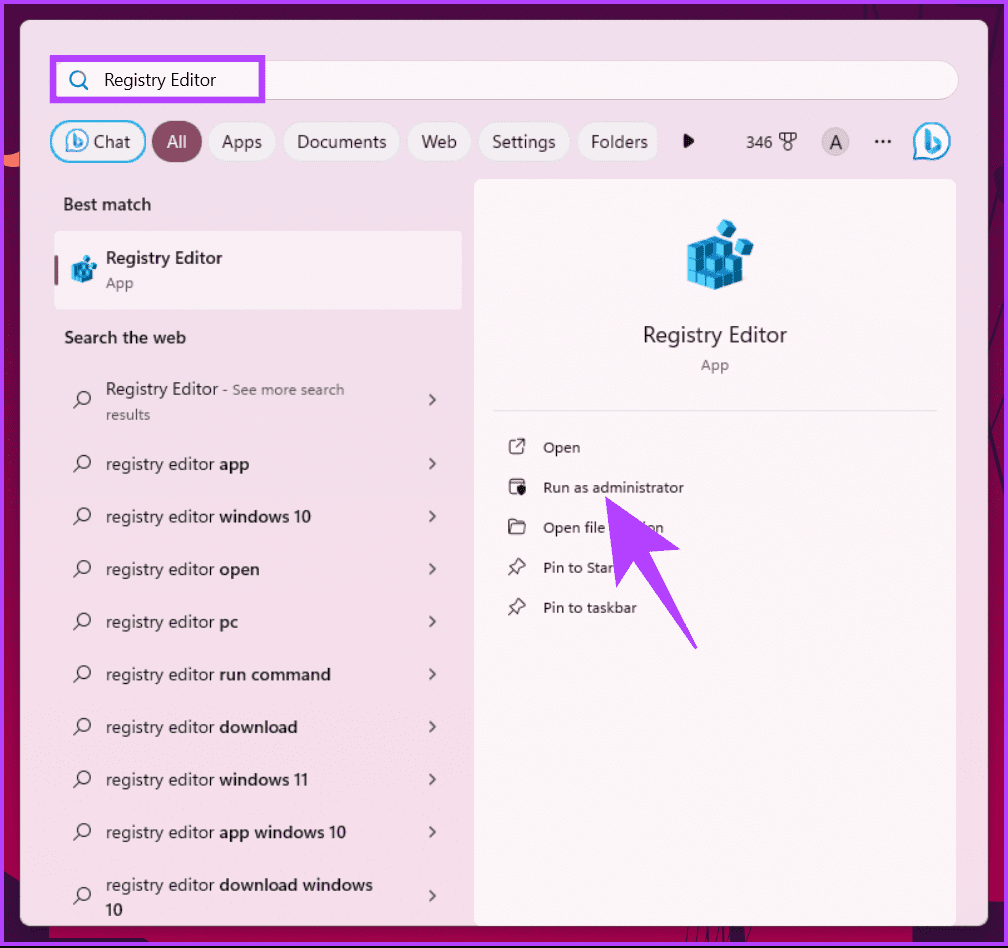
Step 1: Press the Windows key on your keyboard, type Registry Editor, and click ‘Run as administrator.’
Note: Alternatively, press ‘Windows key + R’ to open the Run dialog box, type regedit.exe, and click OK to open Registry Editor.
In the prompt, select Yes.
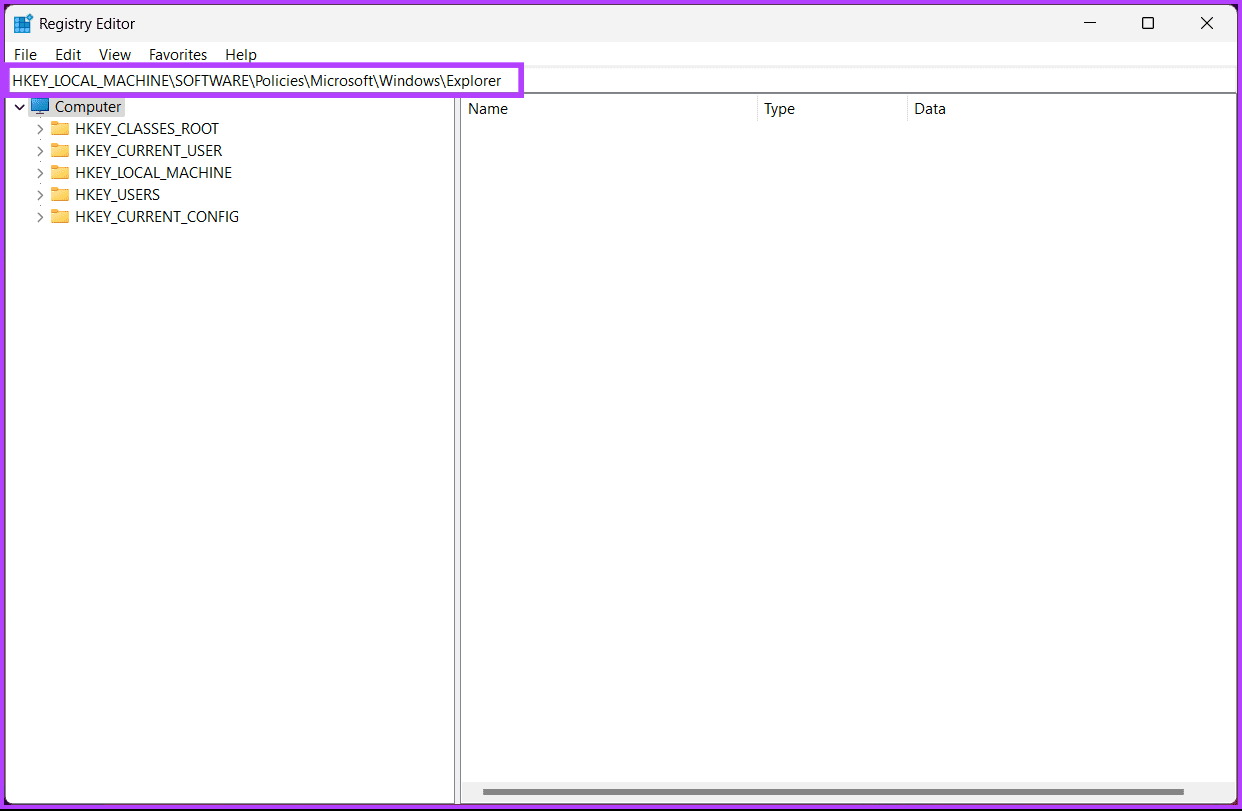
Step 2: In the top address bar, enter the following path.
HKEY_LOCAL_MACHINE\SOFTWARE\Policies\Microsoft\Windows\Explorer
Note: You can manually navigate to the section too.
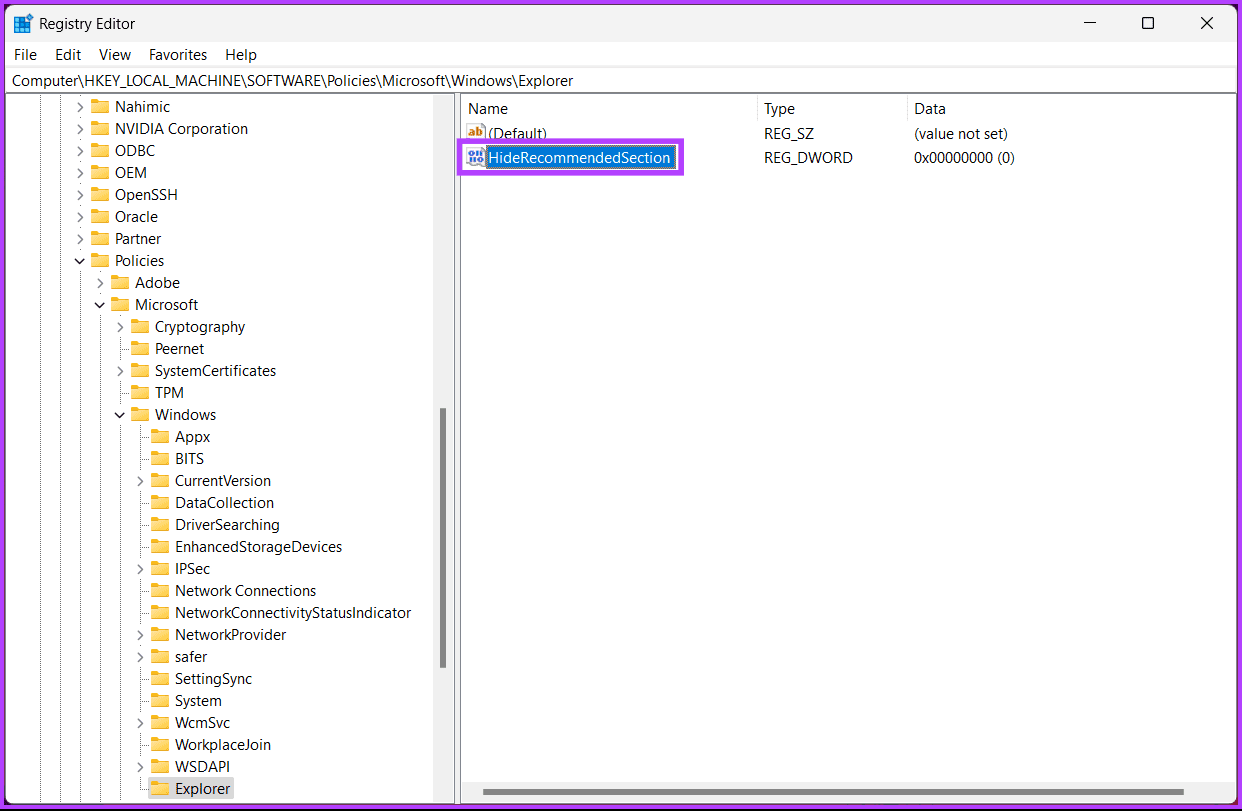
Step 3: Find and double-click on HideRecommendedSection.
Step 4: Now, type 1 in the Value Data field and press OK.
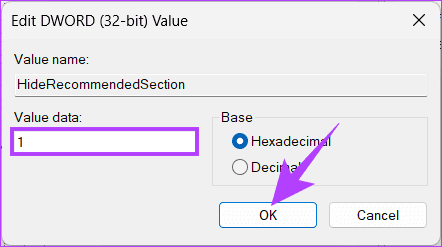
Finally, reboot the system to implement the changes. And that’s it! After booting up your PC again, you will have turned off recommendations in the Start menu.
You can go with the Group Policy editor if you don’t want to hide recommendations in Windows 11 from the registry.
5. Hide Recommended in Windows 11 Using Group Policy Editor
The Local Group Policy Editor helps you control Windows. Thus, you can also use it to turn off recommendations in the Start menu. Follow the below instructions.
Note: Group Policy Editor is only available for Windows 11 Pro and Enterprise versions. You can skip this method if you are on Windows 11 Home Edition.
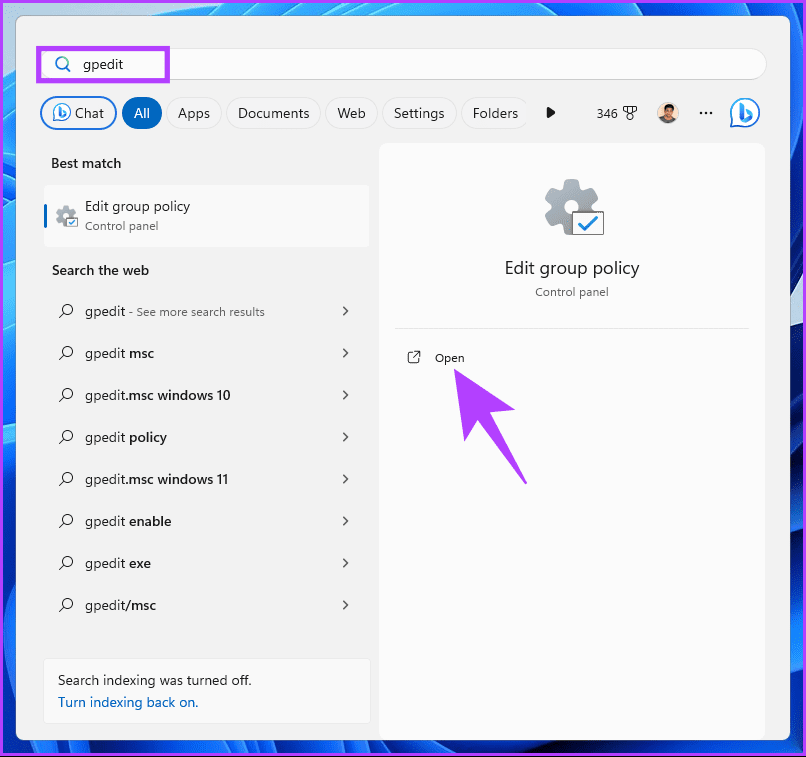
Step 1: Press the Windows keys on your keyboard, type gpedit.msc, and click Open.
Note: Press ‘Windows key + R’ to open the Run dialog box, type gpedit.msc, and click OK.
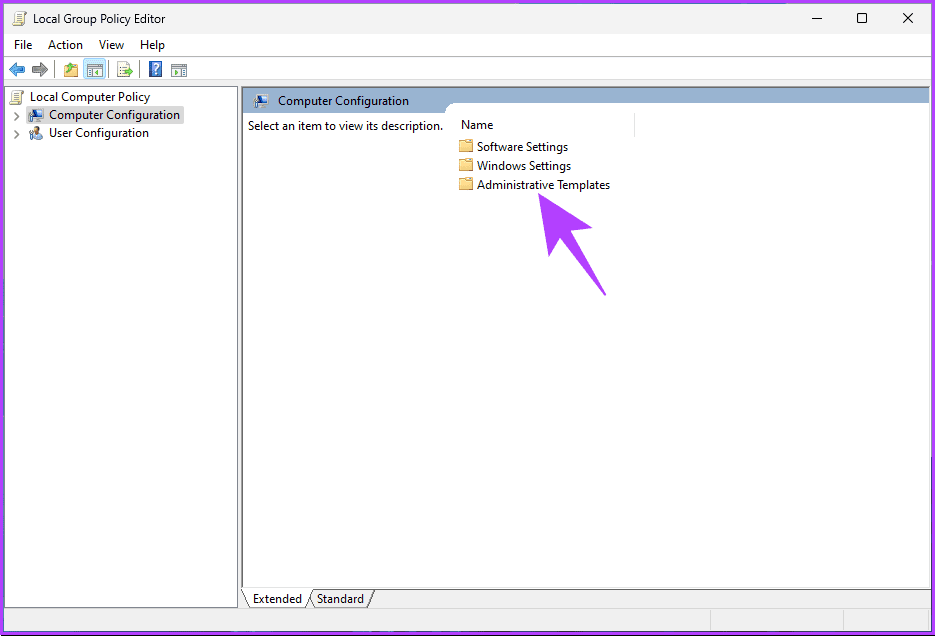
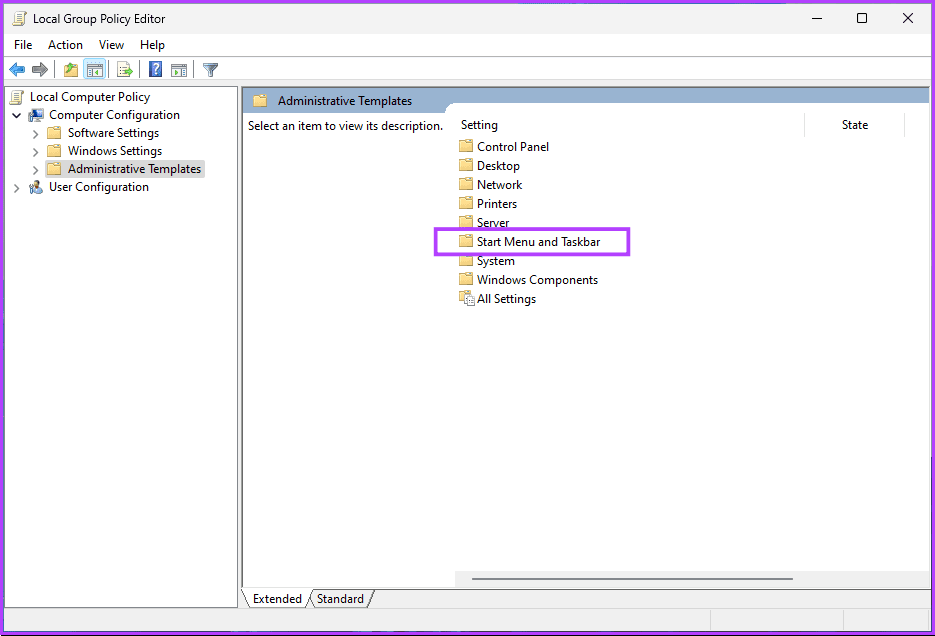
Step 2: In the left pane, select Computer Configuration under ‘Local Computer Policy’.

Step 3: In the right pane, double-click on Administrative Templates.
Step 4: Select the ‘Start Menu and Taskbar’ option.
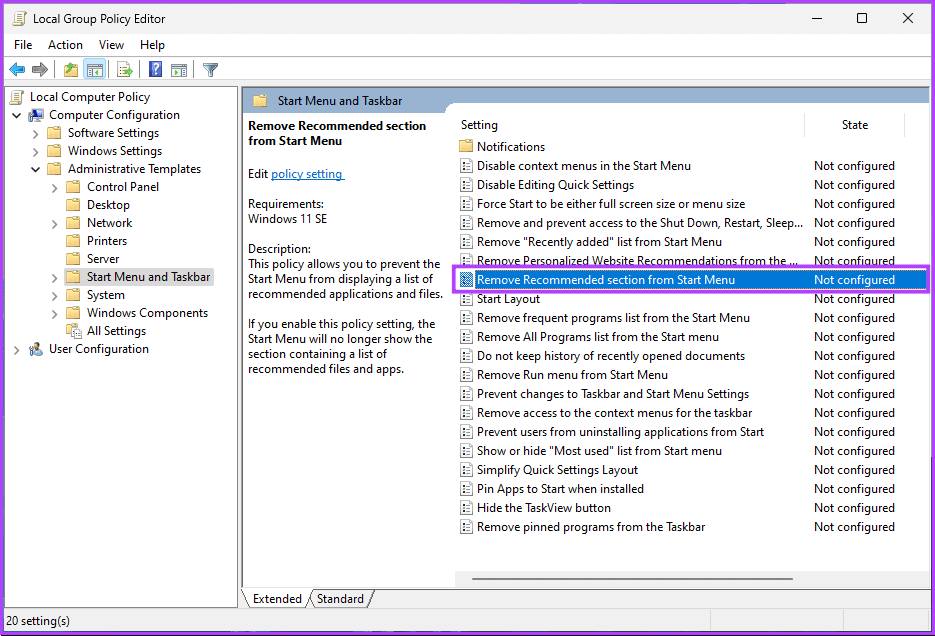
Step 5: Under the ‘Start Menu and Taskbar’ option, double-click on ‘Remove Recommended section from Start Menu.’
Step 6: Choose the Enabled option. Finally, click on Apply, followed by OK.
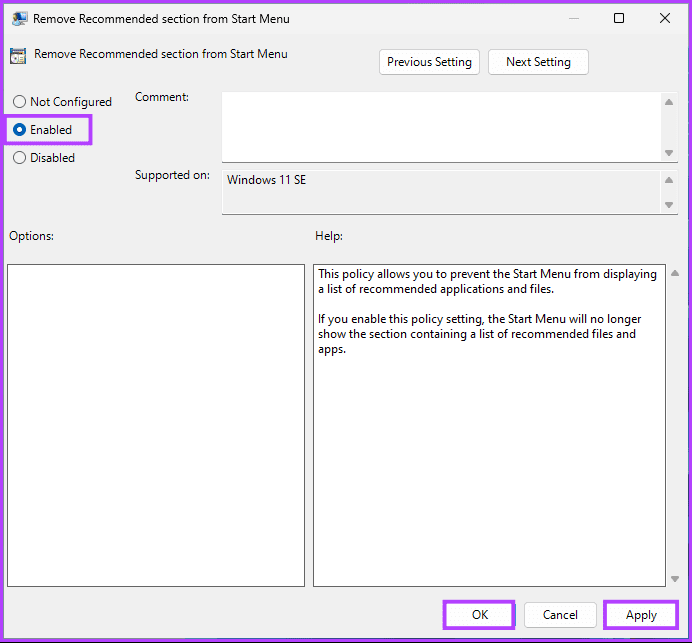
That’s it. You have successfully removed the recommendation section from the Start menu. That said, if you have any queries, check out the FAQ section below.
FAQs on Removing Recommended in Windows 11
Yes, you can submit feedback to Microsoft through the Feedback Hub app. This lets you share your thoughts, suggestions, or concerns directly with the Windows development team.
The removal of Recommendations has a negligible impact on system performance. The primary purpose is personalization rather than resource-intensive functionality.
Remove Those Recommendations
Whether aiming for a simplified interface, addressing privacy concerns, expressing personal preference, or minimizing distractions, these methods offer effective ways to remove recommended in Windows 11. You can also read how to remove recent files from Quick Access.
Was this helpful?
Last updated on 23 November, 2023
The article above may contain affiliate links which help support Guiding Tech. The content remains unbiased and authentic and will never affect our editorial integrity.


