Basic Fixes:
- Ensure the camera lens is unobstructed: Certain laptops come with built-in privacy shutters for the device camera. So, ensure this shutter is fully open. Also, clean the camera lens to remove any dirt or debris.
- Restart your Windows 11 device: For most temporary system glitches or bugs, restarting your device seems to be a one-stop solution. So, if you’ve recently started seeing a black screen when using the camera, restart your Windows 11 device to fix it.
- Check camera compatibility with your PC: While most cameras work well with Windows 11, certain devices are specifically built for Mac. So, before buying the product, check its specifications to ensure it is compatible with Windows 11.
- Unplug and re-plug the camera: When using an external camera with your Windows 11 device, it is advised to unplug and plug in the device again. Ensure the external camera’s cable is damage-free and properly plugged in.
- Check for Windows updates: Windows updates contain important bug fixes that can help resolve software issues, like the camera showing a black screen. Use the Settings app to download and install the latest software updates for your Windows PC. Then, check again.
Fix 1: Ensure Camera Permission Is Enabled
If the Camera app doesn’t have sufficient permission or if permission is revoked altogether, you might see a black screen when accessing the camera. So, check and see if all the relevant permissions have been enabled. Follow the below steps to do it.
Step 1: Press Windows + I keys to open Settings. From the side menu options, click on Privacy & security > Camera.
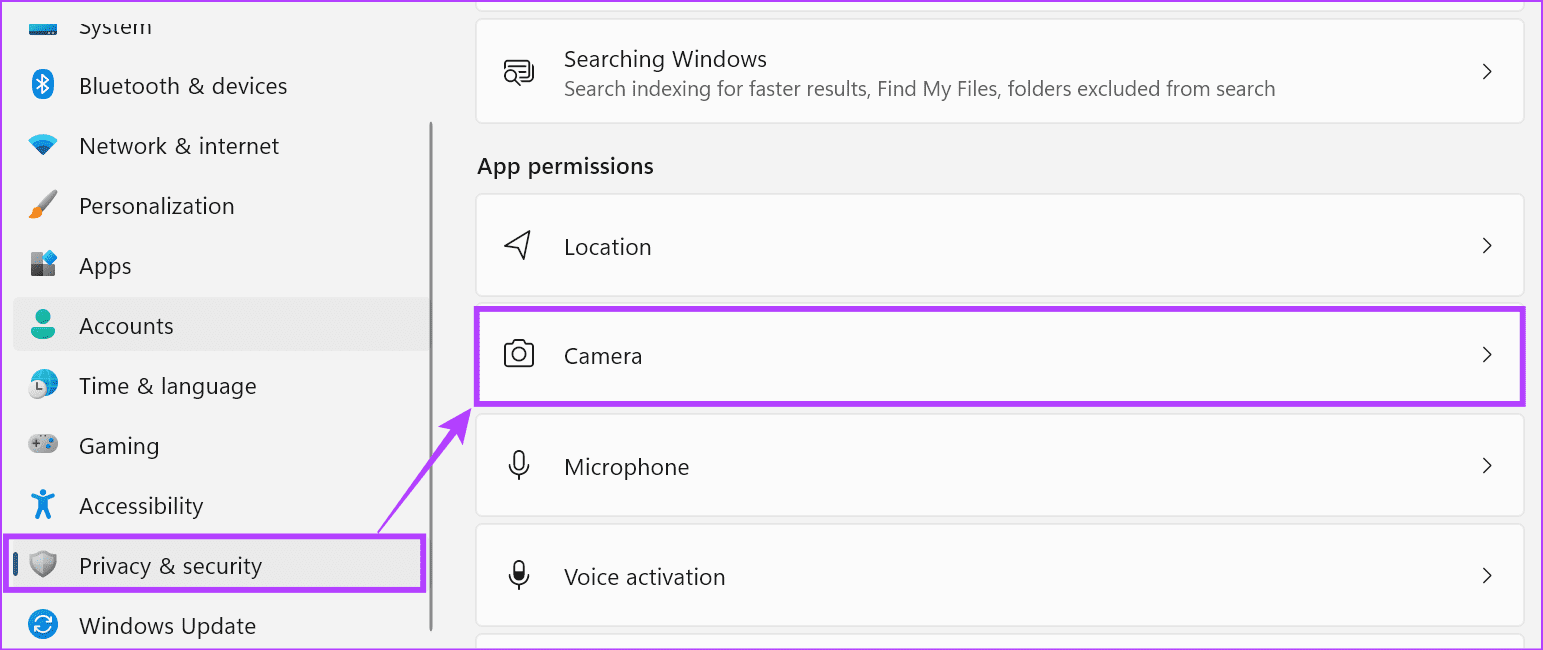
Step 2: Now, turn on the toggle for Camera access.

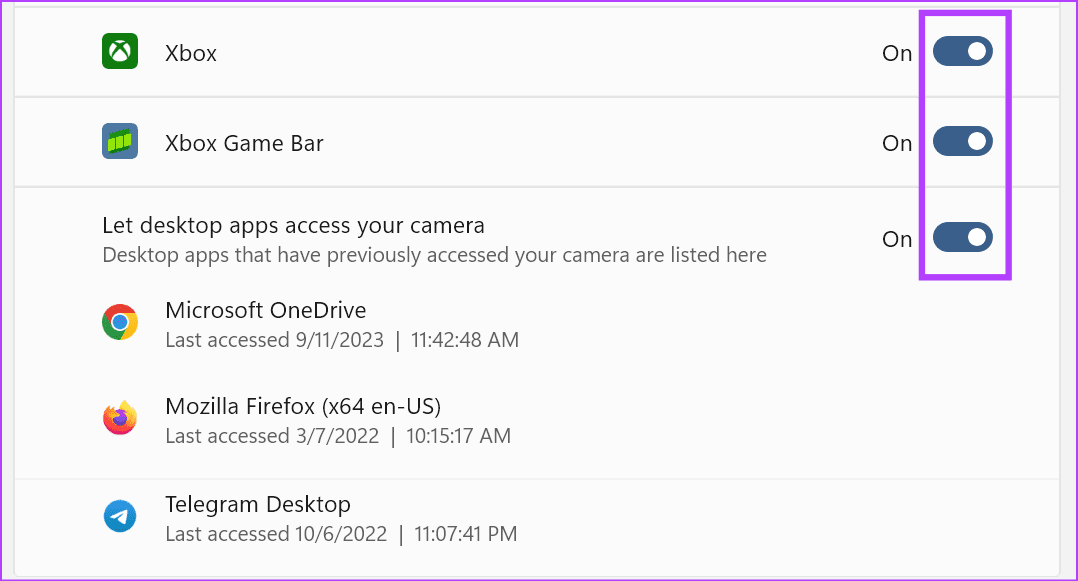
Step 3: You can also turn on individual app toggles. Additionally, turn on the Let desktop apps access your camera toggle for desktop app camera access.
Fix 2: Update Drivers for the Camera App
If driver updates are pending or have been turned off, manually check and install them as well. This will ensure your device’s camera drivers stay compatible with other apps and services on your Windows 11 laptop. Here’s how to do it.
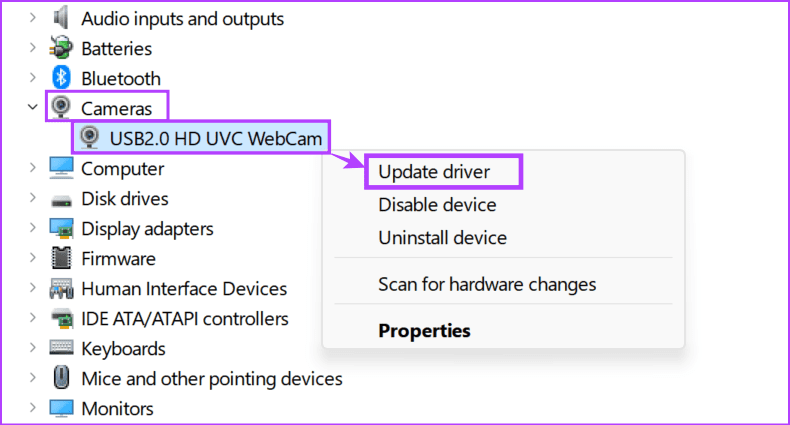
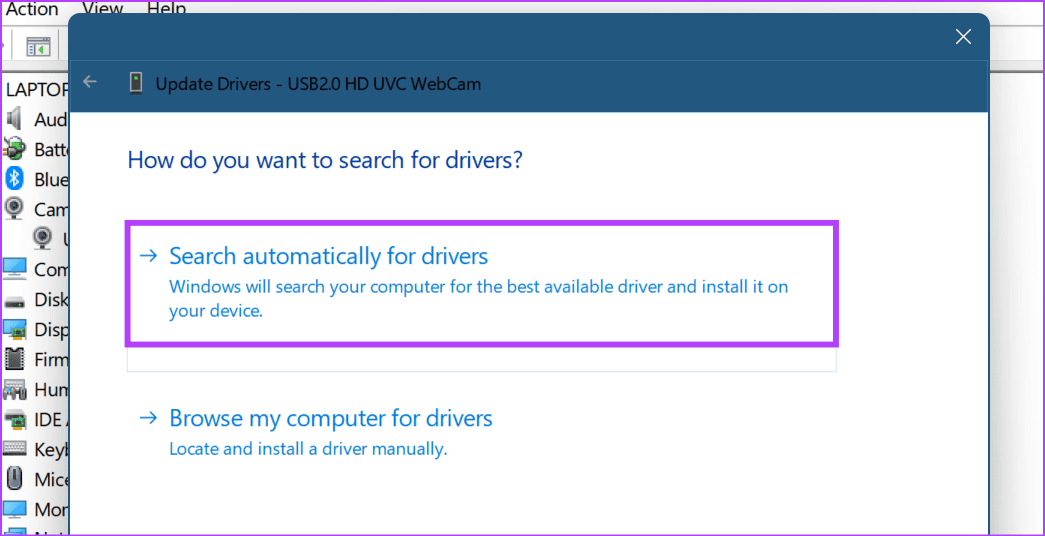
Step 1: Open Device Manager and click on Cameras to expand the options. Right-click on your camera driver and click on Update driver.
Step 2: Now, click on Search automatically for drivers. If any driver update is found, it will be downloaded and installed.
Fix 3: Run Camera App Troubleshooter
Windows devices come with troubleshooters that can help diagnose and fix most issues. This can be especially handy when you encounter the webcam black screen issue and don’t know why. Here’s how to access and run it on your Windows 11 device.
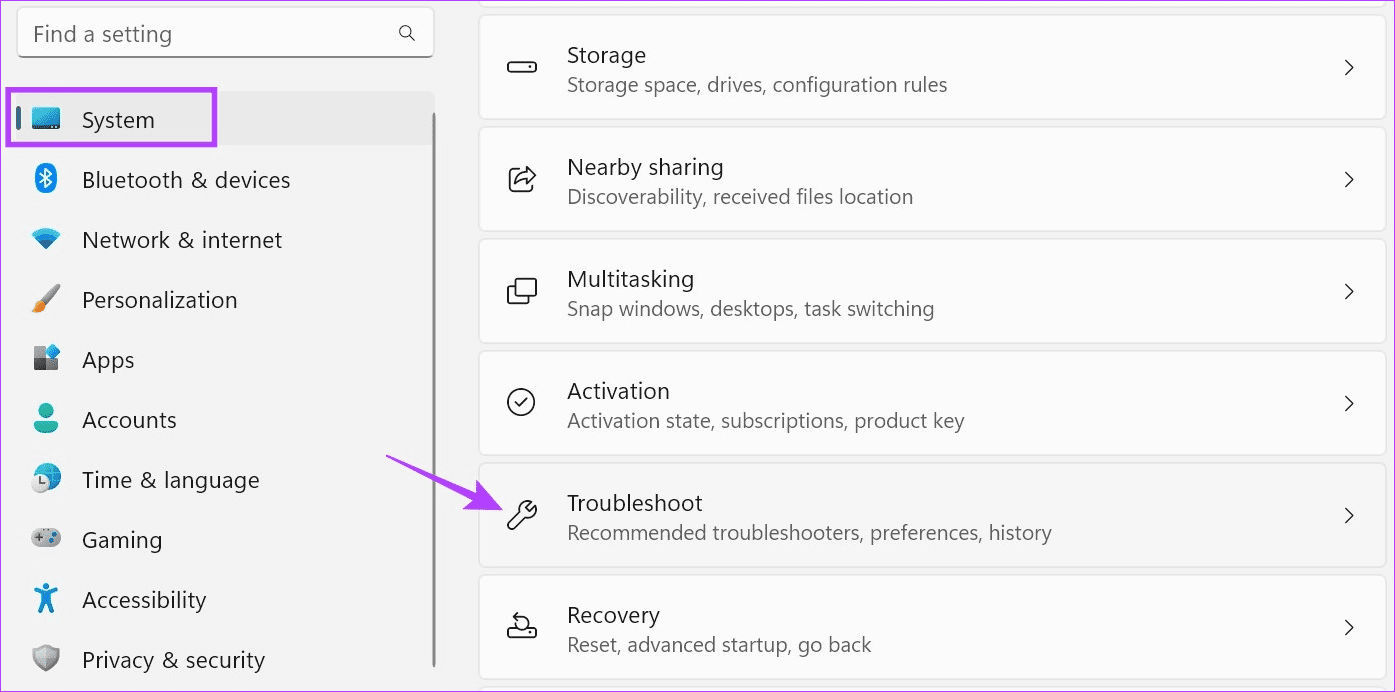
Step 1: Use the Windows + I key to open Settings. From the menu options, select System > Troubleshoot.
Step 2: Here, click on Other troubleshooters.

Step 3: Go to Camera and click on Run.

Wait for the troubleshooter to run. Then, follow the on-screen recommendations to fix the issue and get your PC’s webcam back to normal.
Also Read: How to fix camera not working on Windows 11
Fix 4: Try Using the Official Camera App
If you use the integrated webcam through third-party apps and websites and get a black screen, open the official Camera app and check again. This will help you determine whether the issue is with the device camera or the app or website you’re using. Here’s how.
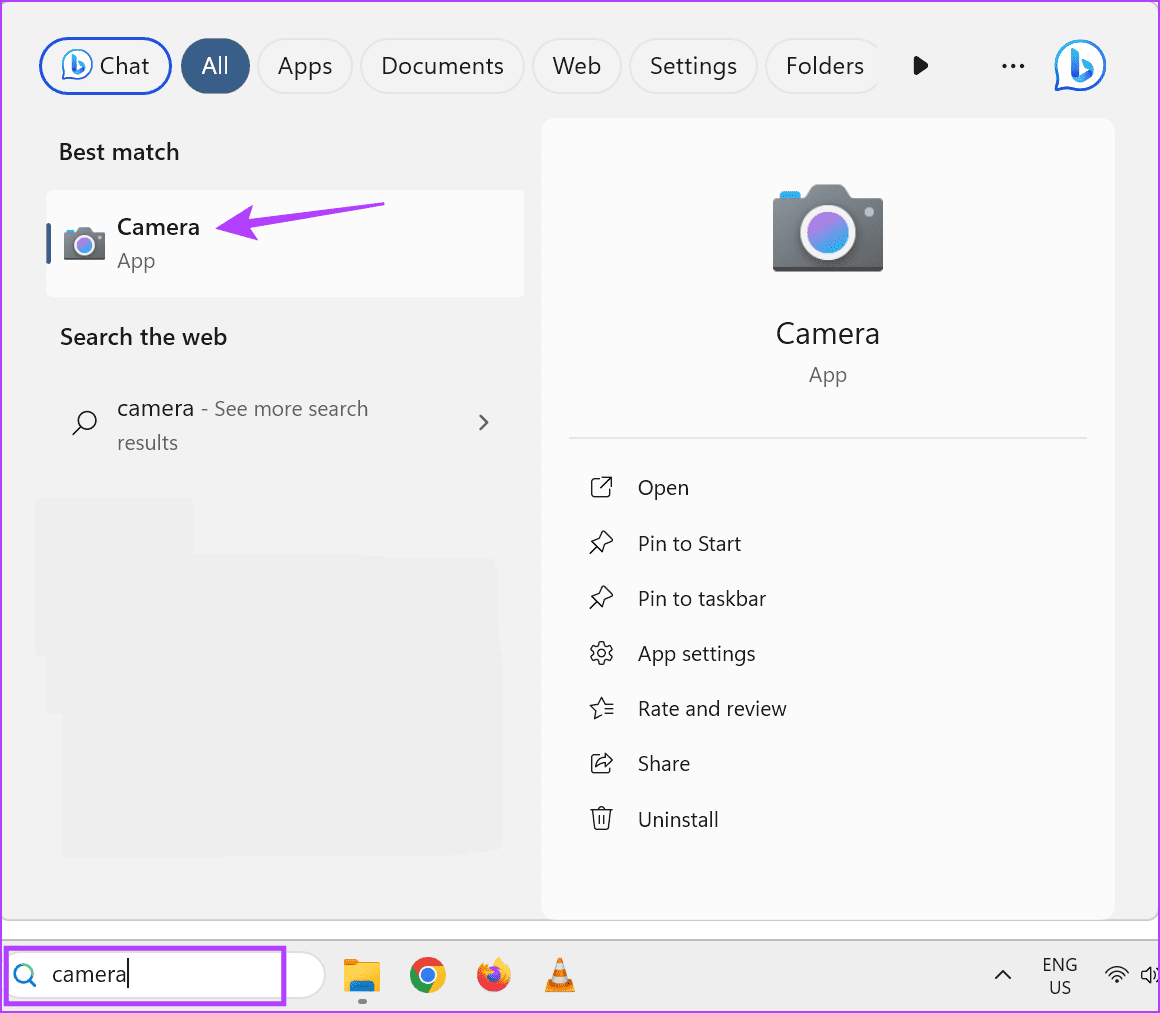
Step 1: Go to the taskbar and click on Search. Here, type Camera and open the Camera app from the search results.
If the camera works within the Camera app, the issue is with the app or site. In this case, double-check and see if all settings and permissions are on.
Was this helpful?
Last updated on 17 May, 2024
Read Next
 8 Ways to Fix Crunchyroll Showing Black Screen Issue
Streaming on Crunchyroll is extremely convenient, thanks to the desktop and mobile app support.
8 Ways to Fix Crunchyroll Showing Black Screen Issue
Streaming on Crunchyroll is extremely convenient, thanks to the desktop and mobile app support.
 6 Fixes for iPhone Camera Black Screen
Basic Troubleshooting Switch between the back and front camera: The camera may be stuck between front or back camera modes, between lenses, etc., leading to a black screen.
6 Fixes for iPhone Camera Black Screen
Basic Troubleshooting Switch between the back and front camera: The camera may be stuck between front or back camera modes, between lenses, etc., leading to a black screen.
 Top 3 Ways to Fix Google Chrome Black Screen Issues on Windows 10
Do you often witness a black screen whenever you launch Google Chrome on your Windows PC?
Top 3 Ways to Fix Google Chrome Black Screen Issues on Windows 10
Do you often witness a black screen whenever you launch Google Chrome on your Windows PC?
 Top 6 Ways to Fix Microsoft Edge Black Screen Issues on Windows 10
Microsoft Edge continues to quickly pace ahead in the browser race on mobile and desktop.
Top 6 Ways to Fix Microsoft Edge Black Screen Issues on Windows 10
Microsoft Edge continues to quickly pace ahead in the browser race on mobile and desktop.
 4 Ways to Fix Windows 11 Black Screen Issue
Try Basic Fixes Check connections: If you are using a Windows 11 desktop, check the wired connections between your CPU and the monitor.
4 Ways to Fix Windows 11 Black Screen Issue
Try Basic Fixes Check connections: If you are using a Windows 11 desktop, check the wired connections between your CPU and the monitor.
 2 Ways to Fix Discord Black Screen at Startup on Windows 11
Basic Fixes Check the Discord server: Head to the Discord Status page to check an active service outage.
2 Ways to Fix Discord Black Screen at Startup on Windows 11
Basic Fixes Check the Discord server: Head to the Discord Status page to check an active service outage.
 5 Ways to Fix the Black Screen Issue in Amazon Prime Video on Windows
Try Basic Fixes Temporarily disable your VPN connection: Although VPNs are great for maintaining privacy, they can often cause problems with streaming services such as Prime Video, especially if you
5 Ways to Fix the Black Screen Issue in Amazon Prime Video on Windows
Try Basic Fixes Temporarily disable your VPN connection: Although VPNs are great for maintaining privacy, they can often cause problems with streaming services such as Prime Video, especially if you
The article above may contain affiliate links which help support Guiding Tech. The content remains unbiased and authentic and will never affect our editorial integrity.