Method 1: Disable Bing Cloud Content Search
Here’s how to disable Bing from providing search results on your Windows PC. However, note that disabling the toggles below will also disable search results from online apps and services that you have signed into with your Microsoft account.
Step 1: Open the Settings app on your PC.
Step 2: Select Privacy & Security from the sidebar > click on Search Permissions.

Step 3: Disable the toggles for Microsoft Account and Work or School Account under the Cloud content search menu.

If search results from Bing still appear after disabling the above settings, proceed to the next set of methods.
Method 2: Disable Bing Search on Windows Using Registry Editor
Here’s how to modify policies using the Registry Editor on your Windows PC to disable search results from Bing on your Windows PC.
Note: Using the registry editor to modify policies can break a few settings on your Windows PC. Proceed with caution and at your own risk.
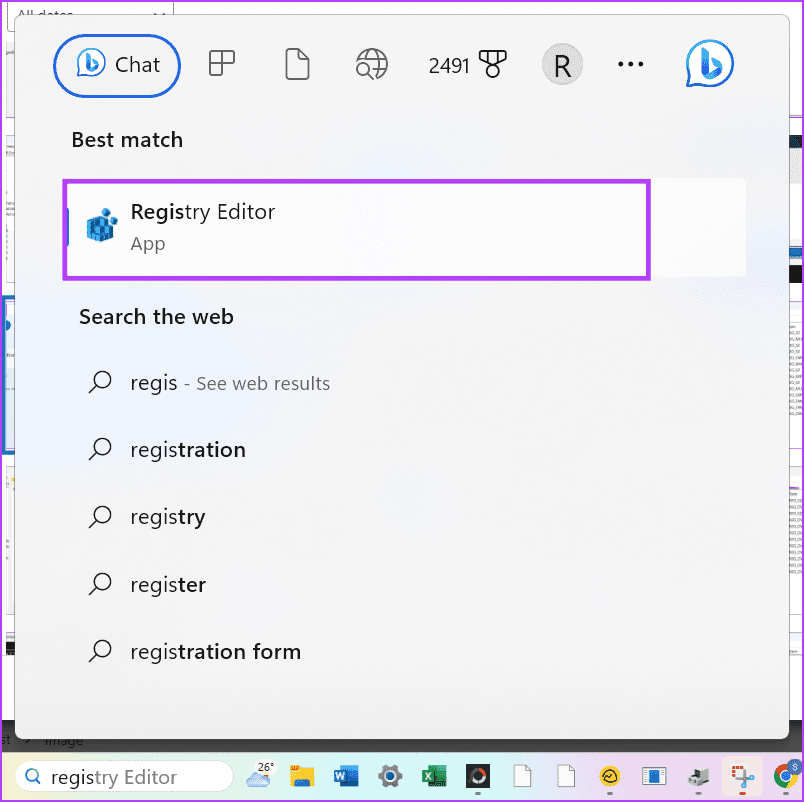
Step 1: Open the Registry Editor app from the start menu.
Step 2: Enter the following in the address bar and press the Enter key.
HKEY_CURRENT_USER\Software\Microsoft\Windows\CurrentVersion\Search

Step 3: Right-click on Search > select New > DWORD (32-bit) Value.

Step 4: Name the New Value BingSearchEnabled and press Enter. You can also right-click on the New Value > select Rename to change the name.

Step 5: Double-click BingSearchEnabled. Set the Value data to 0.

Step 5: We also have to add another policy. So, navigate to the following by pasting the below in the address bar and pressing the Enter key.
Computer\HKEY_CURRENT_USER\Software\Policies\Microsoft\Windows\Explorer

Step 6: Right-click on Windows > click on New > DWORD (32-bit) Value.

Step 7: Name the New Value DisableSearchBoxSuggestions and press Enter.
Step 8: Double-click on DisableSearchBoxSuggestions.

Step 9: Enter the value as 1 and click on OK.

Method 3: Disable Bing as Default Search Engine on Edge
Microsoft may not have the best search engine, but its web browser, Edge, has proven to be one of the best web browsers for Windows. Therefore, if you want to continue using Microsoft Edge but do not want to use Bing, here’s how to change the default search engine to Google.
Step 1: Click on the three dots icon at the top right corner of Microsoft Edge. Click on Settings.

Step 2: Click on Privacy, Search, and Services in the side panel.
Step 4: Scroll down and click on Address Bar and Search.

Step 5: Click on the drop-down menu for the Search Engine used in the Address Bar.
Step 6: Select Google as your default search engine. Restart Microsoft Edge for the changes to take effect.

Method 4: Remove Bing From the Microsoft Edge Sidebar
Additionally, you can also remove the large Bing icon at the top right of Microsoft Edge. You must use the registry editor once again.
For more methods on how to do so, read our detailed article on how to remove the Bing Chat button from Microsoft Edge.
Note: Using the registry editor to modify policies can break a few settings on your Windows PC. Proceed with caution and at your own risk.
Step 1: Open the Registry Editor app from the start menu.
Step 2: Enter the following in the address bar and press the Enter key.
Computer\HKEY_LOCAL_MACHINE\SOFTWARE\Microsoft\Edge

Step 3: Right-click on Edge > select New > DWORD (32-bit) Value.

Step 4: Name the New Value HubSidebarEnabled and press Enter.
Step 5: Double-click the new value. Set the Value data to 0.

Method 5: Hide or Disable the Bing Icon on the Windows Taskbar
You may also notice a Bing icon on your taskbar that acts as a shortcut to Bing. Here’s how to disable that as well.
Step 1: Open the Settings app on your PC.
Step 2: Select Privacy & Security from the sidebar > click on Search Permissions.
Step 3: Disable the toggles for Show Search Highlights.

This will disable the Bing icon on the search bar.
Alternatively, you can also hide it. Here’s how to do the same.
Step 1: Open the Settings app.
Step 2: Click on Personalization in the sidebar > select Taskbar.

Step 3: Click on the drop-down menu next to Search.

Step 4: To hide the Bing icon on your taskbar, select Search icon only or Search icon and Label.

Here’s how the search bar will appear under the different options.
Search Icon Only :
Search Icon and Label :

Was this helpful?
Last updated on 02 August, 2024
Read Next
 3 Ways to Fix Google Chrome Search Engine Changing to Bing
Why Is Chrome Searching With Bing?
3 Ways to Fix Google Chrome Search Engine Changing to Bing
Why Is Chrome Searching With Bing?
 How to View, Export, and Delete Bing Chat History
How to Find Bing Chat History On PC Step 1: Open Bing Chat by clicking the Chat button from the Bing Home screen.
How to View, Export, and Delete Bing Chat History
How to Find Bing Chat History On PC Step 1: Open Bing Chat by clicking the Chat button from the Bing Home screen.
 How to Use Bing Image Creator to Create Cool AI Images
How to Create Images With Bing Image Creator Based on OpenAI's Dall-E, Bing AI image generator lets users use the same service capabilities without a subscription.
How to Use Bing Image Creator to Create Cool AI Images
How to Create Images With Bing Image Creator Based on OpenAI's Dall-E, Bing AI image generator lets users use the same service capabilities without a subscription.
 5 Ways to Fix Unable to Remove Bluetooth Device on Windows 11
Fix 1: Try Removing Device in Airplane Mode To start, enable Airplane mode and remove the Bluetooth device again.
5 Ways to Fix Unable to Remove Bluetooth Device on Windows 11
Fix 1: Try Removing Device in Airplane Mode To start, enable Airplane mode and remove the Bluetooth device again.
 6 Ways to Fix Unable to Remove Printer on Windows 11
Fix 1: Run the Printer Troubleshooter Start by running Windows' built-in printer troubleshooter to see if it can detect and resolve any pending printing errors.
6 Ways to Fix Unable to Remove Printer on Windows 11
Fix 1: Run the Printer Troubleshooter Start by running Windows' built-in printer troubleshooter to see if it can detect and resolve any pending printing errors.
 6 Ways to Remove Residual Files After Uninstalling Software on Windows
Method 1: Delete Registry Keys Registry keys are a database that includes an app's configuration and installation data, such as the product key, custom install settings, etc.
6 Ways to Remove Residual Files After Uninstalling Software on Windows
Method 1: Delete Registry Keys Registry keys are a database that includes an app's configuration and installation data, such as the product key, custom install settings, etc.
 4 Ways to Remove Login Password From Windows 11
Method 1.
4 Ways to Remove Login Password From Windows 11
Method 1.
 3 Ways to Remove Shortcut Arrows in Windows
Method 1: Remove Shortcut Arrows by Manually Editing the Registry The Windows Registry is a database that stores configuration settings for your computer.
3 Ways to Remove Shortcut Arrows in Windows
Method 1: Remove Shortcut Arrows by Manually Editing the Registry The Windows Registry is a database that stores configuration settings for your computer.
The article above may contain affiliate links which help support Guiding Tech. The content remains unbiased and authentic and will never affect our editorial integrity.