Method 1: Remove Shortcut Arrows by Manually Editing the Registry
The Windows Registry is a database that stores configuration settings for your computer. You can edit the Registry to change how your computer looks and works. This includes removing the shortcut arrow on icons in Windows.
Editing the Windows Registry contains a high risk, as if you make a mistake, you could damage your computer or make it impossible to start up. Make sure to back up your Registry before editing it. Once done, follow the steps below to hide the shortcut icon on your Windows PC.
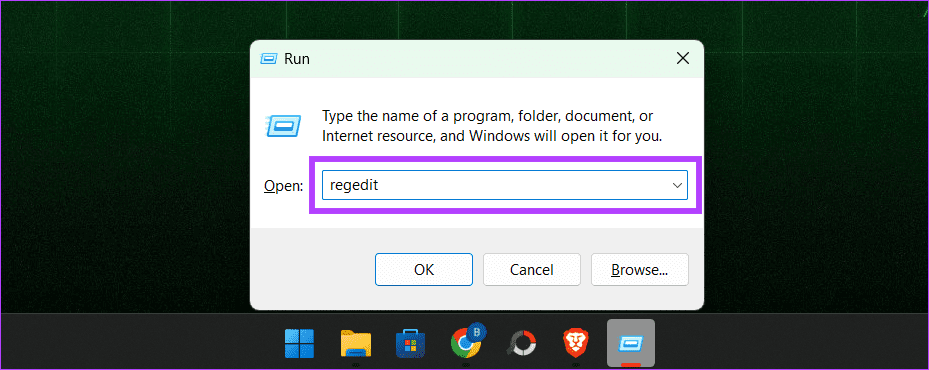
Step 1: Open the Run box by pressing Windows + R on your keyboard. Type regedit and press enter.
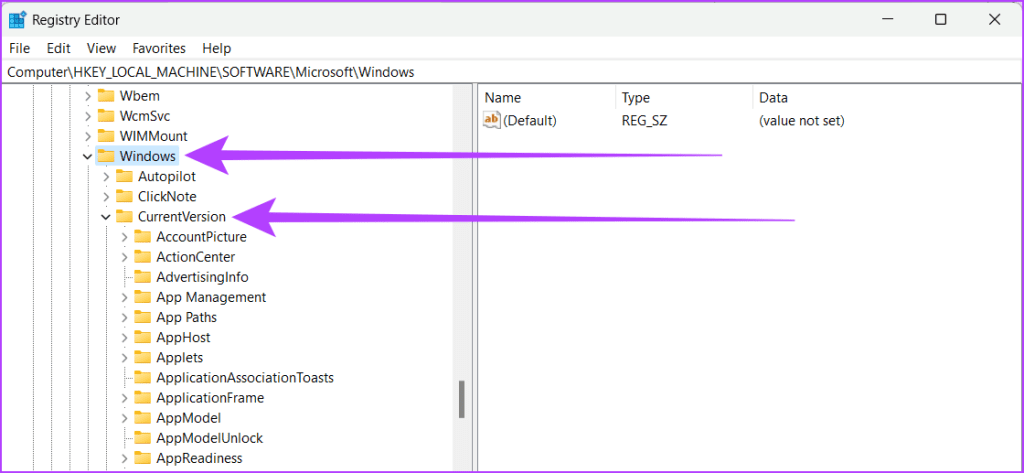
Step 2: In the left pane, head to HKEY_LOCAL_MACHINE > SOFTWARE > Microsoft.

Step 3: Select Windows > CurrentVersion.
Step 4: Find and select Explorer. Right-click on it and choose New, then select Key.

Step 5: Rename it as Shell Icons.
Step 6: Select the new Shell Icons registry key. Right-click on the space within the right pane to select New > String Value.
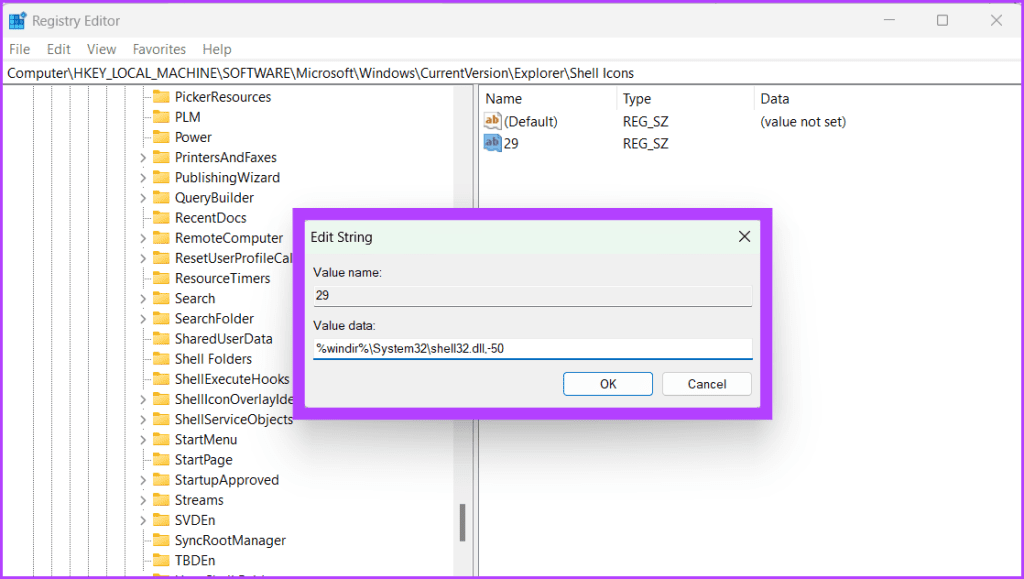
Step 7: Name the new String as 29. Double-click the 29 string to view its Edit String window.
Step 8: Next to the Value data, type the following and press Enter.
%windir%\System32\shell32.dll,-50
Step 9: Close the Registry Editor by clicking the x icon on the top left corner of the window.
Step 10: Restart your PC to save changes.
Also Read: How to fix Registry Editor not working on Windows
Method 2: Remove Arrows From Desktop Icons Using Third-Party Software
If you’re not a tech-savvy person and don’t want to bother with multiple clicks or risk editing the Registry files yourself, you can use third-party tools to save time and effort. These tools make it easy to remove the small shortcut arrows and customize your desktop.
For illustration, we will use ShortcutArrow Changer software, but the steps remain more or similar for other tools. Here’s how to go about it:
Step 1: Download and install the ShortcutArrow Changer software.

Step 2: Once done, press Windows + S on your keyboard.
Alternatively, you can also click the Windows icon.
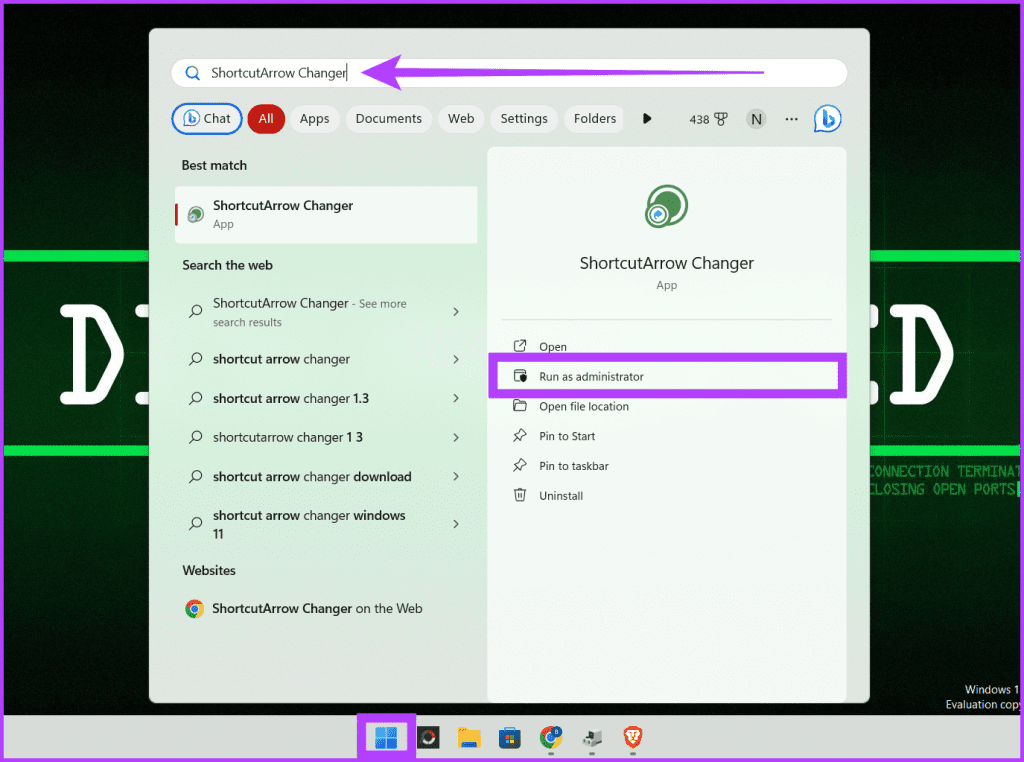
Step 3: Type Shortcutarrow Changer, and on the right pane, click Run as administrator.
Step 4: On the pop-up, click Yes to allow the software to modify the computer.
Step 5: Select the Remove shortcut arrow icon and click Apply.
This is it. Alternatively, you can also use Winaero Tweaker, another popular tool for removing shortcut arrows on Windows icons.
Method 3: Use a Registry Hack to Get Rid of Shortcut Arrows
If you didn’t find the methods above interesting, no worries! We have another quick and easy way to do it using a Registry hack. We’ve done all the hard work for you, so you don’t have to edit the Registry yourself. Just follow the steps below.
Step 1: Open any web browser and download this particular Registry file.
Step 2: Extract the downloaded Registry file.
Step 3: Double-click the remove_shortcut_arrow_icon file to apply it.
Step 4: Click Run and follow the on-screen instructions.

Step 5: Restart your computer.
That’s it! The shortcut arrows will disappear now, and you’ll have a clean Windows desktop.
Also Read: How to safely clean Registry on Windows 10 and 11
Was this helpful?
Last updated on 26 August, 2024
Read Next
 4 Ways to Add Arrows or Text to Photos on Windows
Method 1: Using Microsoft Photos The Microsoft Photos app is a fantastic tool to view and edit a picture on a Windows computer.
4 Ways to Add Arrows or Text to Photos on Windows
Method 1: Using Microsoft Photos The Microsoft Photos app is a fantastic tool to view and edit a picture on a Windows computer.
 5 Apps to Add Arrows and Text to Images on Android
1.
5 Apps to Add Arrows and Text to Images on Android
1.
 4 Ways to Fix Snipping Tool Keyboard Shortcut Not Working
Basic Fixes: Check your keyboard for damages: Any physical damage to keyboard keys might prevent them from working as expected.
4 Ways to Fix Snipping Tool Keyboard Shortcut Not Working
Basic Fixes: Check your keyboard for damages: Any physical damage to keyboard keys might prevent them from working as expected.
 6 Fixes for Alt + Tab Shortcut Not Working on Windows 11
Fix 1.
6 Fixes for Alt + Tab Shortcut Not Working on Windows 11
Fix 1.
 How to Create Incognito Mode Shortcut on Windows Desktop
Create a Shortcut to Open Incognito Tab on Desktop Nearly all browsers offer Incognito/Private mode, but the feature is named differently on every browser.
How to Create Incognito Mode Shortcut on Windows Desktop
Create a Shortcut to Open Incognito Tab on Desktop Nearly all browsers offer Incognito/Private mode, but the feature is named differently on every browser.
 3 Ways to Fix Chrome Create Shortcut Not Working Issue
Fix 1: Create Shortcut Option Grayed Out Issue Sometimes, the Create Shortcut option will be grayed out if you use an Incognito or Guest window in Chrome.
3 Ways to Fix Chrome Create Shortcut Not Working Issue
Fix 1: Create Shortcut Option Grayed Out Issue Sometimes, the Create Shortcut option will be grayed out if you use an Incognito or Guest window in Chrome.
 How to Add the Shazam Shortcut on iPhone
Method 1: Add Shazam to the Control Center Now that Shazam is a part of Apple, we can add a Shazam button directly to the control center, and here's how
How to Add the Shazam Shortcut on iPhone
Method 1: Add Shazam to the Control Center Now that Shazam is a part of Apple, we can add a Shazam button directly to the control center, and here's how
The article above may contain affiliate links which help support Guiding Tech. The content remains unbiased and authentic and will never affect our editorial integrity.

