Basic Fixes:
- Check your keyboard for damages: Any physical damage to keyboard keys might prevent them from working as expected. This can also be why the shortcut for the Snipping Tool stopped working.
- Restart Windows 11: Restarting Windows will close all services and functions and start them again. So, if any temporary glitch causes this error, it should be resolved.
- Check for app updates: App updates are crucial to ensure they function properly and remain bug-free. So, if the Snipping Tool needs some important updates, open the Microsoft Store app and install them accordingly.
Fix 1: Assign PrtScn Key to Launch Snipping Tool
If you can open the Snipping Tool or if one of the relevant shortcut keys is damaged, you can also use the Print Screen shortcut keys (Windows + PrtSc key) to open the Snipping Tool in Windows. Here’s how.
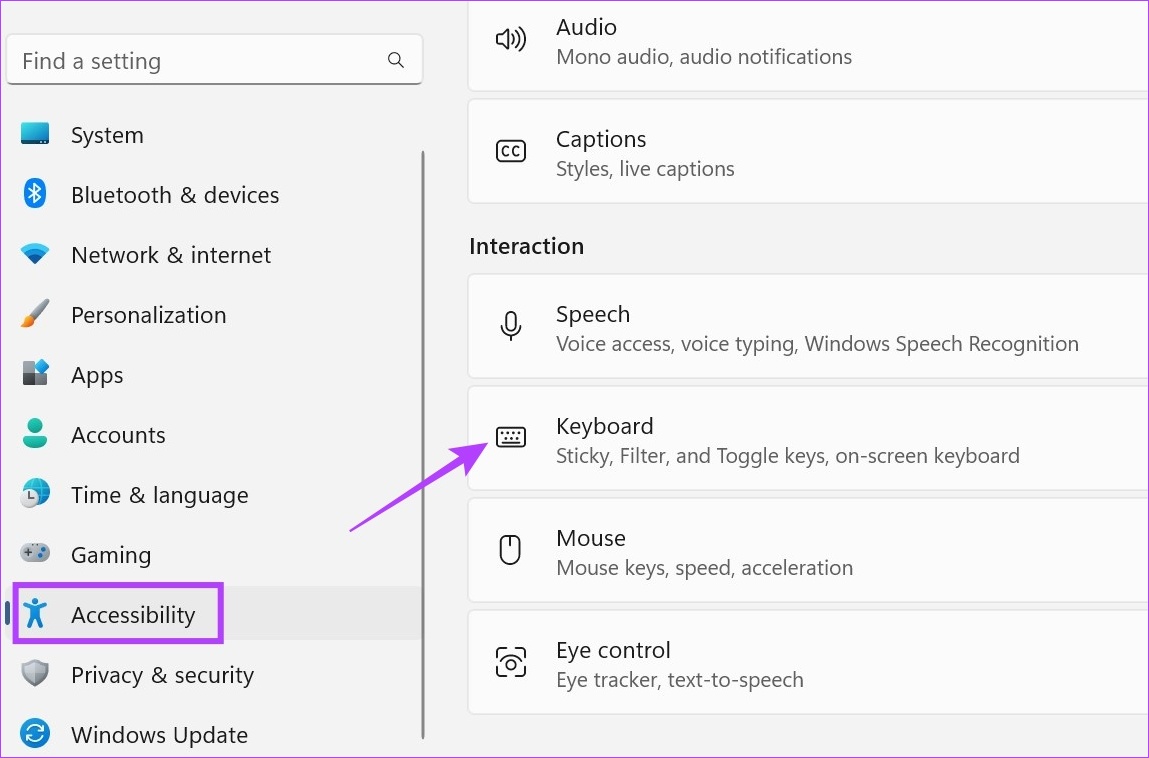
Step 1: Open Settings using the Windows + I key. Here, click on Accessibility in the sidebar > Keyboard.
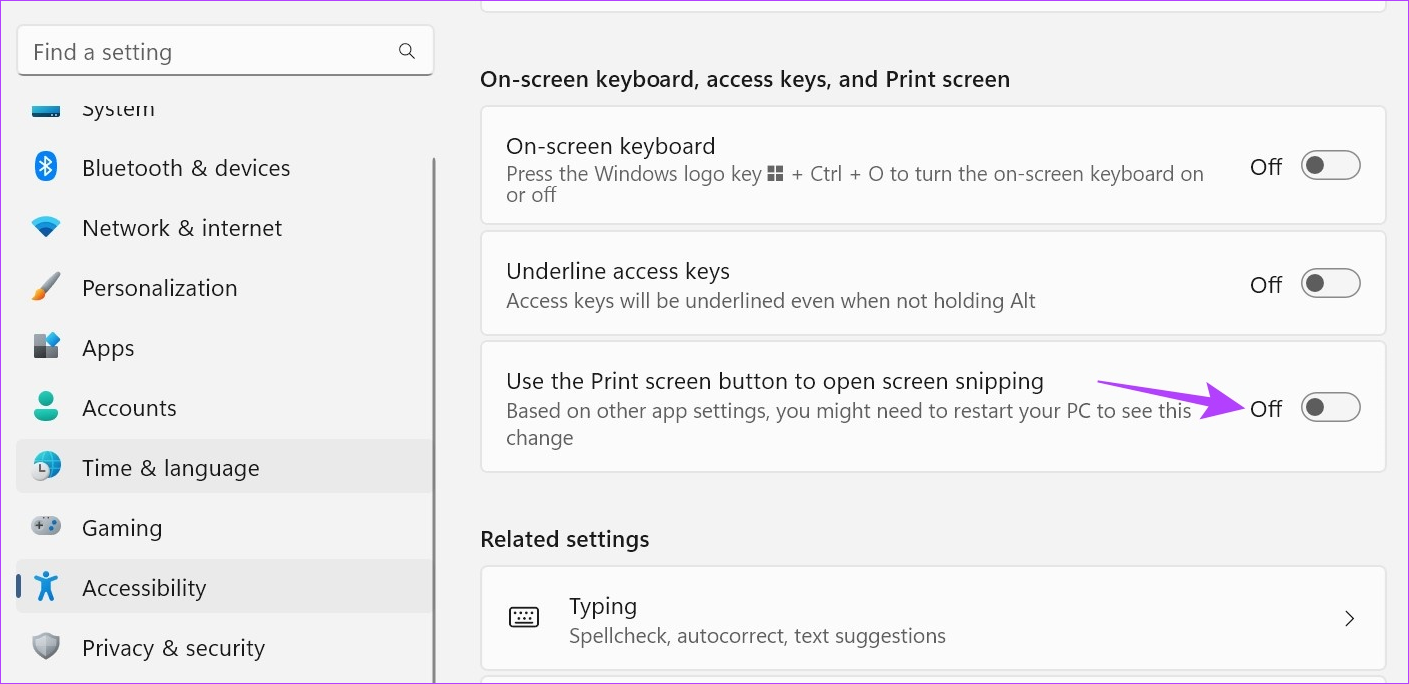
Step 2: Then, turn on the toggle for Use the Print screen button to open screen snipping.
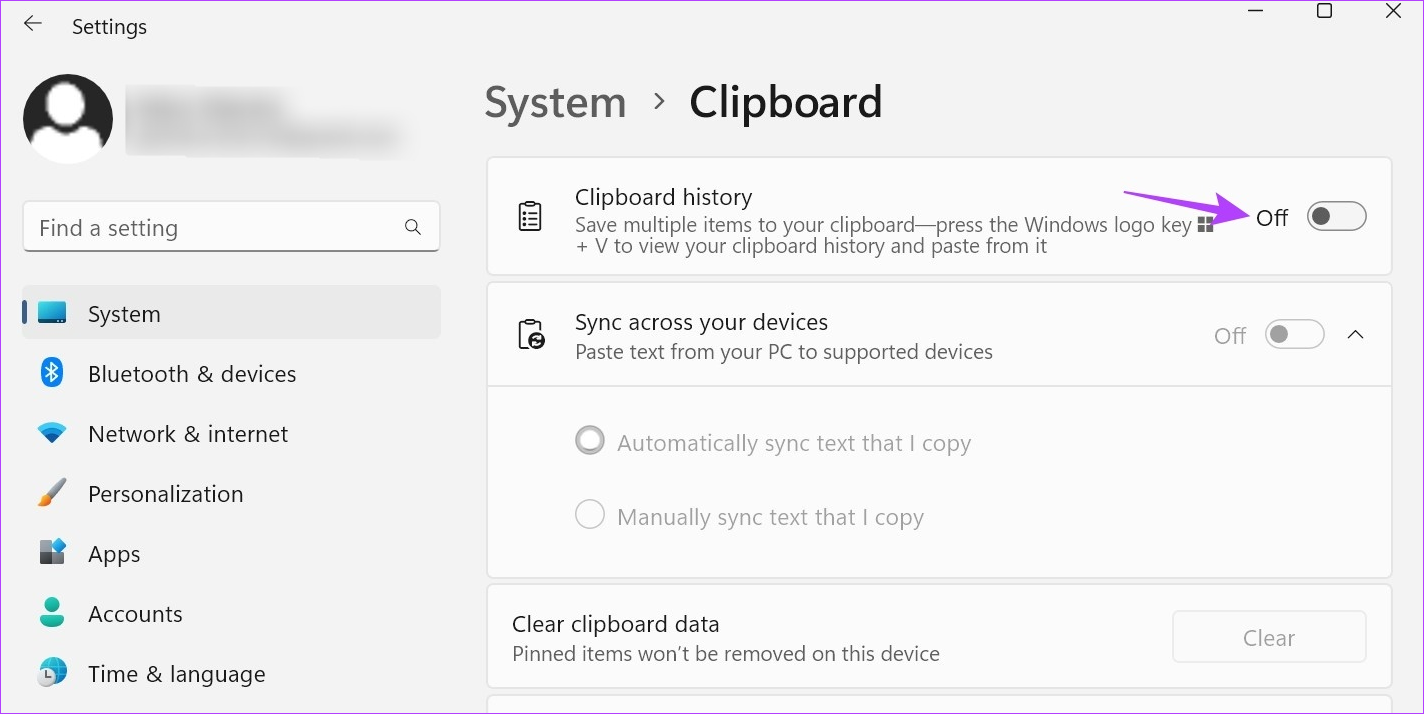
Fix 2: Turn on Clipboard History
The Snipping Tool uses your device’s clipboard to store screenshots temporarily. This means that if the clipboard history is off, it might cause issues when using the Tool. If so, you can go into the clipboard settings and turn on the history. Here’s how.
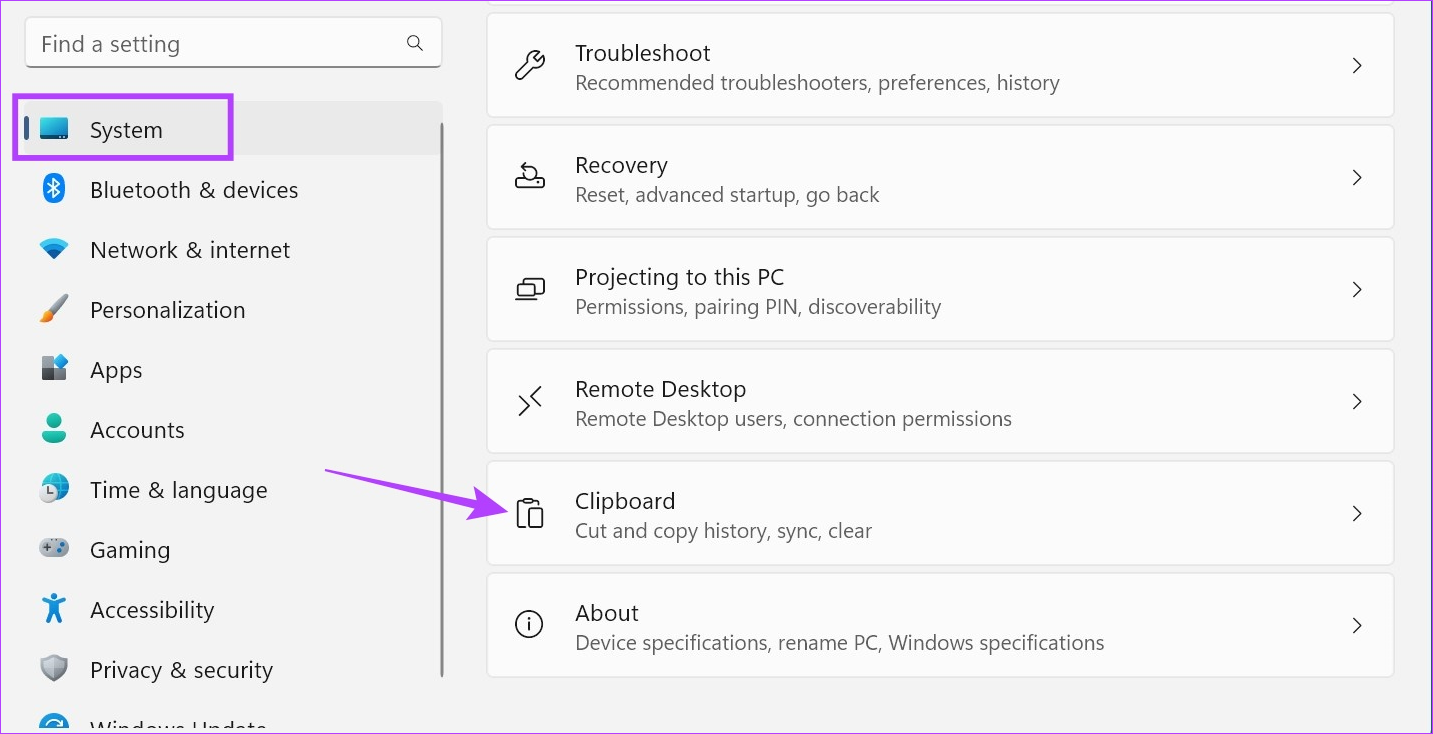
Step 1: Use the Windows + I keys to open Settings. Click on System in the sidebar. Then, click on Clipboard.
Step 2: Turn on the toggle for Clipboard history.
Also Read: How to fix the recording stopped error in Snipping Tool for Windows 11
Fix 3: Check Windows Notification Settings
The Snipping Tool notifies you once the screenshot is taken. However, if the notification settings are off or Focus Mode is on, Windows might restrict the Snipping Tool app. This can also cause issues the next time you open the Snipping Tool. Here’s how to ensure Notification settings are enabled on Windows 11.
Step 1: Open Settings and click on System from the sidebar. Here, click on Notifications.

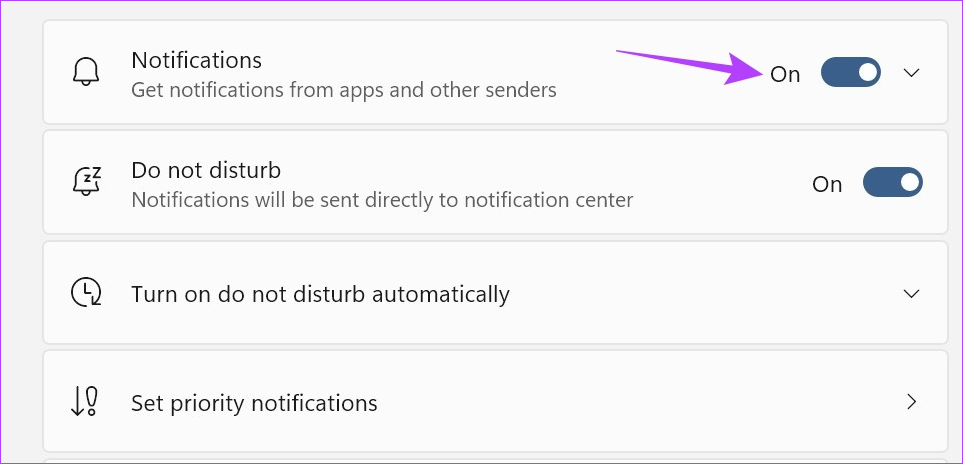
Step 2: Turn on the toggle for Notifications.
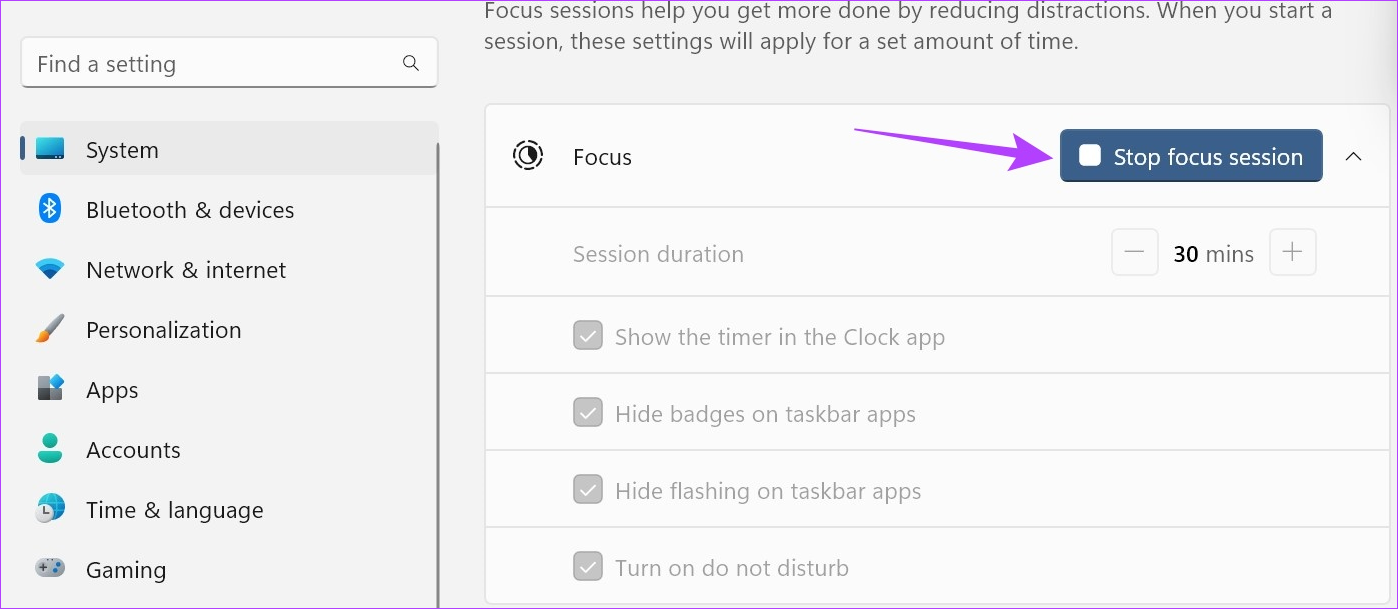
Step 3: Now, scroll down and turn on the toggle for Snipping Tool. Additionally, to turn off Focus Mode, click on Focus.
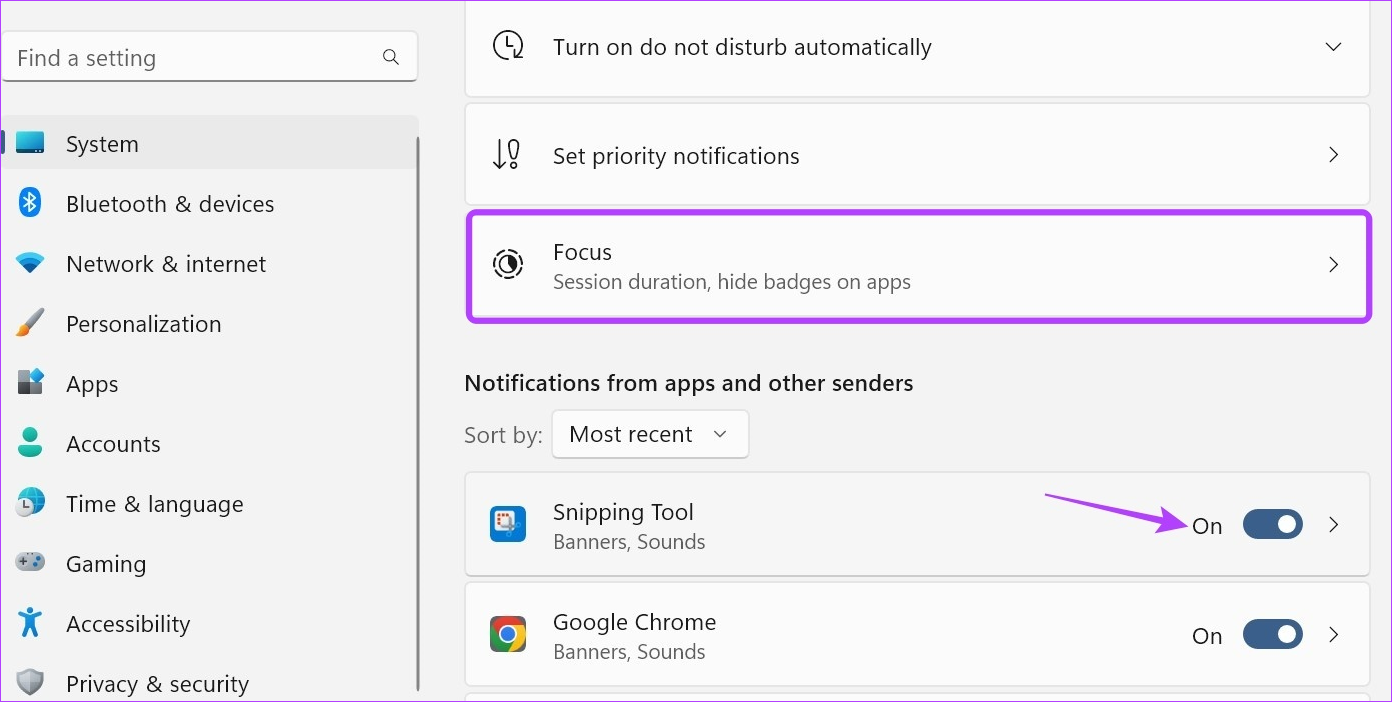
Step 4: Here, click on Stop focus session to disable the Focus Mode on your Windows device.
Also Read: How to fix Snipping Tool not working on Windows 11
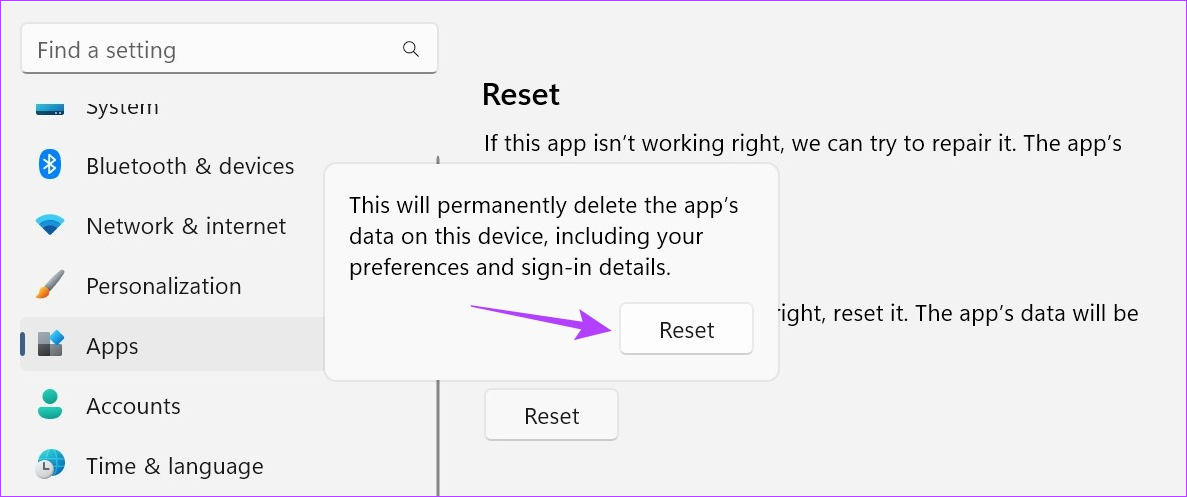
Fix 4: Reset the Snipping Tool
Resetting the Snipping Tool app will clear all app data. So, if the issue of the Snipping Tool keyboard shortcut not working is because of a particular setting or data error, it will be resolved too. Follow the below steps to do it.
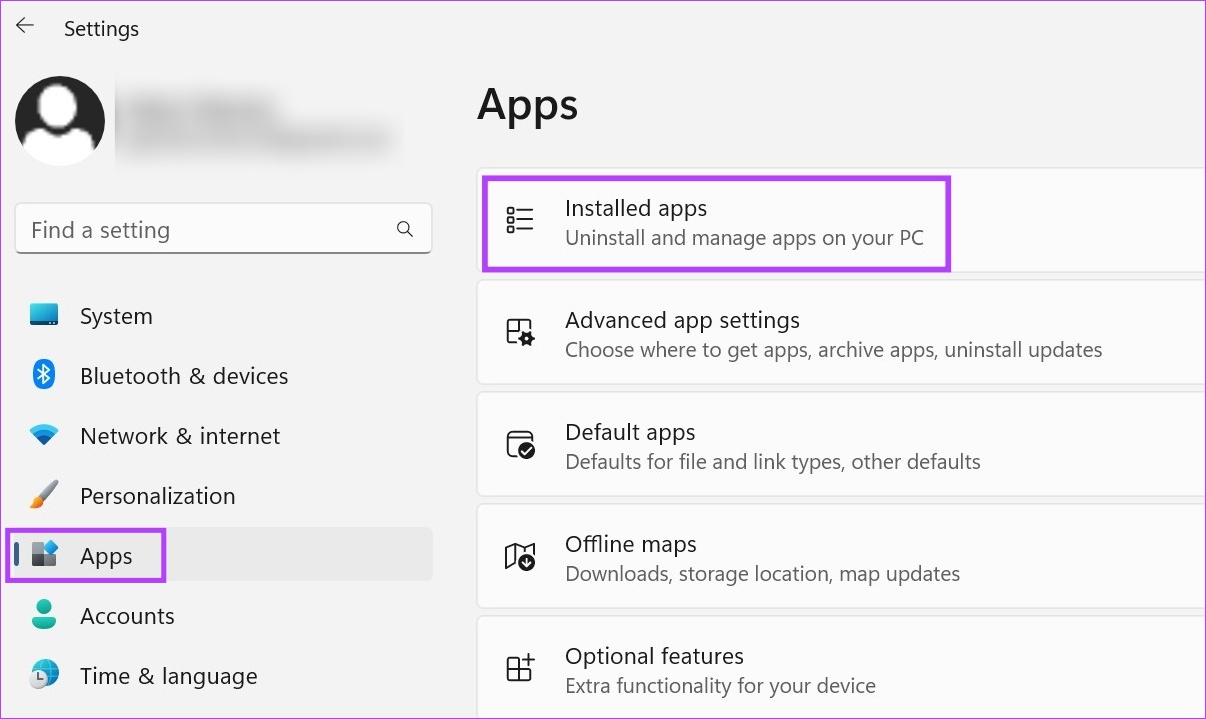
Step 1: Open Settings using the Windows + I key and click on Apps. Then, click on Installed apps.
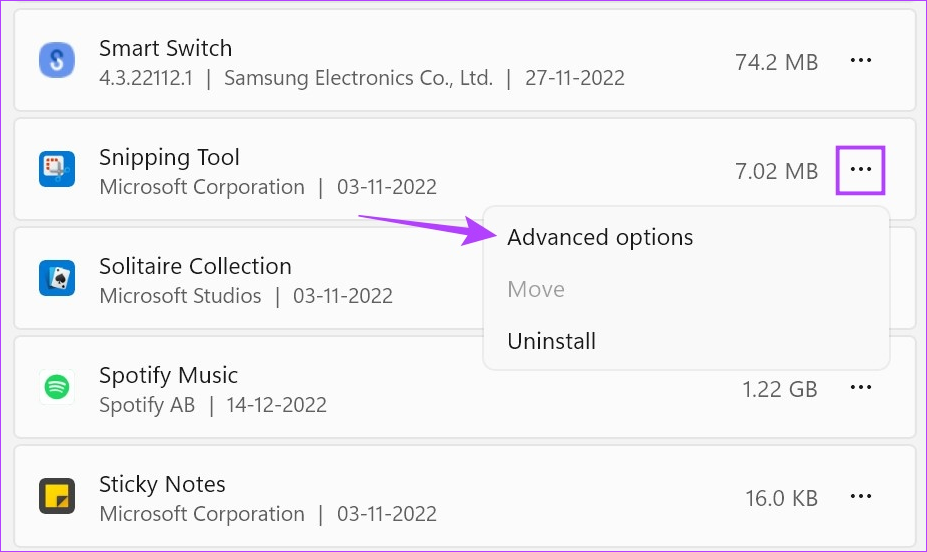
Step 2: Go to Snipping Tool > click on the three-dot icon > Advanced options.
Step 3: Scroll down and click on Reset.
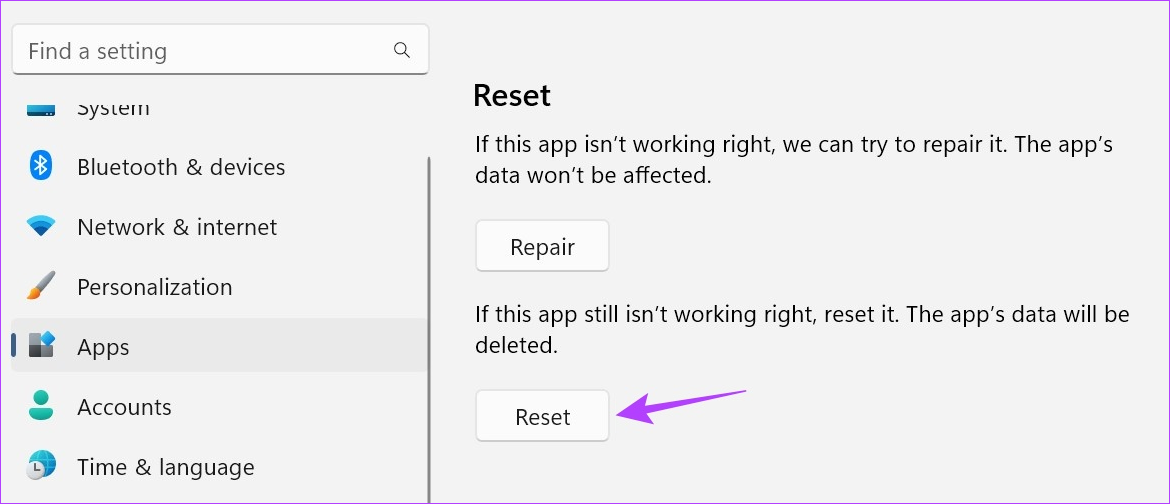
Step 4: Click on Reset again to confirm.
Now, try using the Windows + Shift + S keys to open the Snipping Tool in Windows 11. It should work as usual.
Was this helpful?
Last updated on 26 June, 2024
Read Next
 6 Ways to Fix Snipping Tool Not Working on Windows 11
Fix 1: Ensure Snipping Tool Notifications Are Enabled Snipping Tool may fail to show screenshots after capturing them if you have turned off its notification permission.
6 Ways to Fix Snipping Tool Not Working on Windows 11
Fix 1: Ensure Snipping Tool Notifications Are Enabled Snipping Tool may fail to show screenshots after capturing them if you have turned off its notification permission.
 3 Ways to Fix the “Recording Stopped” Error in Snipping Tool for Windows 11
Try Basic Fixes Disable screen projection: The Snipping Tool may sometimes have trouble recording the screen if you are using multiple displays.
3 Ways to Fix the “Recording Stopped” Error in Snipping Tool for Windows 11
Try Basic Fixes Disable screen projection: The Snipping Tool may sometimes have trouble recording the screen if you are using multiple displays.
 Snipping Tool vs Snip & Sketch: How Do They Differ
The easiest way to take screenshots on Windows is by using the PrtScn key.
Snipping Tool vs Snip & Sketch: How Do They Differ
The easiest way to take screenshots on Windows is by using the PrtScn key.
 3 Ways to Fix Chrome Create Shortcut Not Working Issue
Fix 1: Create Shortcut Option Grayed Out Issue Sometimes, the Create Shortcut option will be grayed out if you use an Incognito or Guest window in Chrome.
3 Ways to Fix Chrome Create Shortcut Not Working Issue
Fix 1: Create Shortcut Option Grayed Out Issue Sometimes, the Create Shortcut option will be grayed out if you use an Incognito or Guest window in Chrome.
 6 Fixes for Alt + Tab Shortcut Not Working on Windows 11
Fix 1.
6 Fixes for Alt + Tab Shortcut Not Working on Windows 11
Fix 1.
 4 Fixes for Microsoft Word Dictation Tool Not Working on Windows 11 and 10
Fix 1: Check Microphone Permission Windows lets you enable or disable microphone permissions for each app and program individually.
4 Fixes for Microsoft Word Dictation Tool Not Working on Windows 11 and 10
Fix 1: Check Microphone Permission Windows lets you enable or disable microphone permissions for each app and program individually.
 5 Ways to Open the DirectX Diagnostic Tool on Windows 11
Method 1: Open the DirectX Diagnostic Tool With the Task Manager The Task Manager app on Windows 11 allows you to monitor and manage all running applications and processes.
5 Ways to Open the DirectX Diagnostic Tool on Windows 11
Method 1: Open the DirectX Diagnostic Tool With the Task Manager The Task Manager app on Windows 11 allows you to monitor and manage all running applications and processes.
 7 Quick Ways to Open Remote Desktop Connection Tool in Windows 11
Method 1.
7 Quick Ways to Open Remote Desktop Connection Tool in Windows 11
Method 1.
The article above may contain affiliate links which help support Guiding Tech. The content remains unbiased and authentic and will never affect our editorial integrity.