Fix 1: Ensure Snipping Tool Notifications Are Enabled
Snipping Tool may fail to show screenshots after capturing them if you have turned off its notification permission. Hence, it’s the first thing you should check.
Step 1: Press the Windows key + I to open the Settings app and head to System > Notifications.
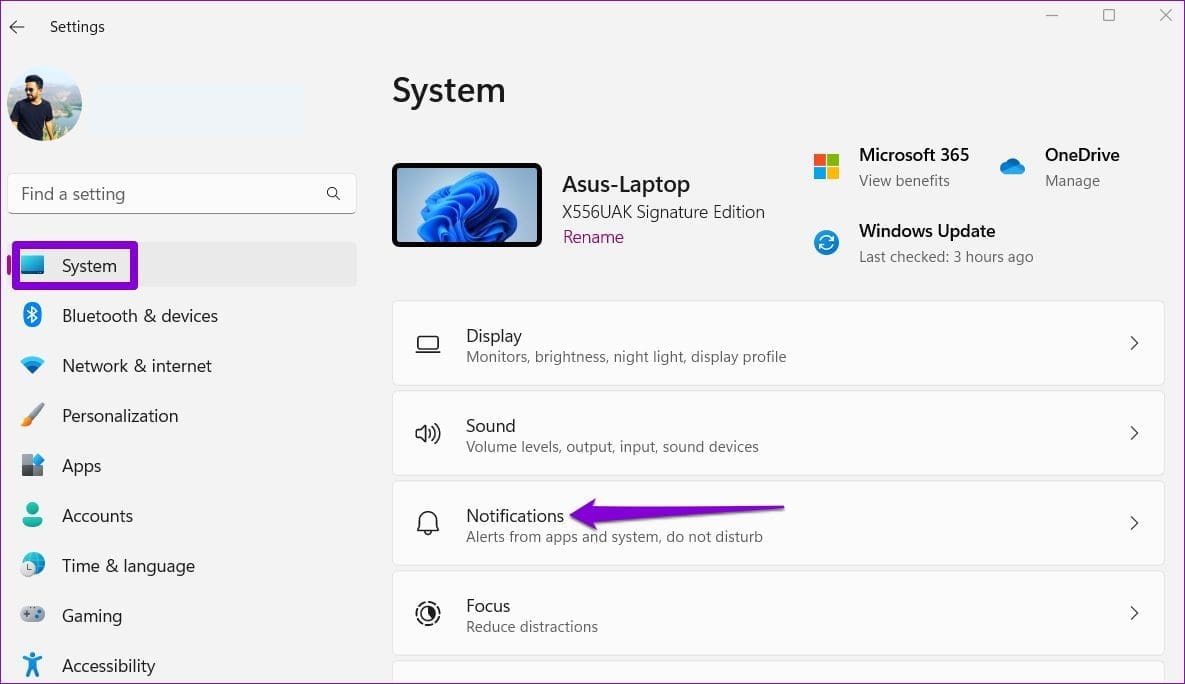
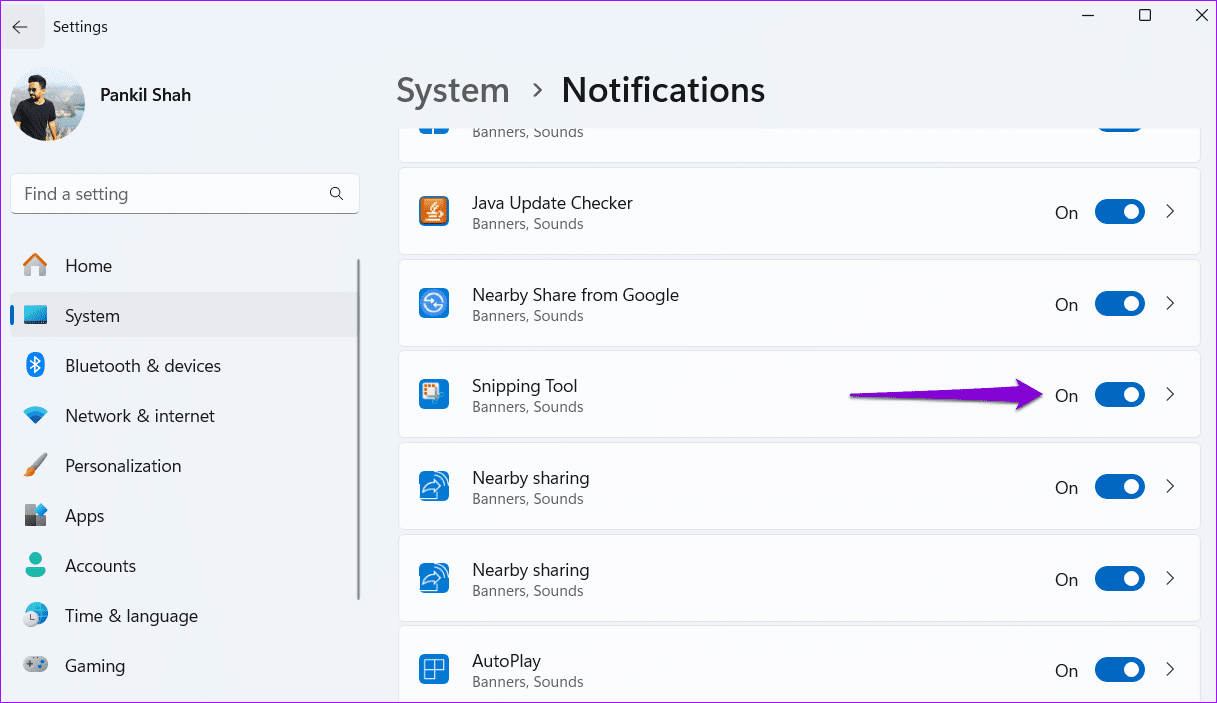
Step 2: Scroll through the list to locate the Snipping Tool and enable the toggle next to it.
Fix 2: Disable Do Not Disturb
Have you enabled Do not disturb mode on your Windows PC? If so, Snipping Tool notification won’t appear. Here’s how to turn it off.
Step 1: Press the Windows key + I to open the Settings app and head to System > Notifications.
Step 2: Turn off the toggle for Do not disturb.

Fix 3: Allow the Snipping Tool to Run in the Background
Snipping Tool may fail to respond to its keyboard shortcut if the app does not have the necessary permission to run in the background. Here’s what you can do to change that.
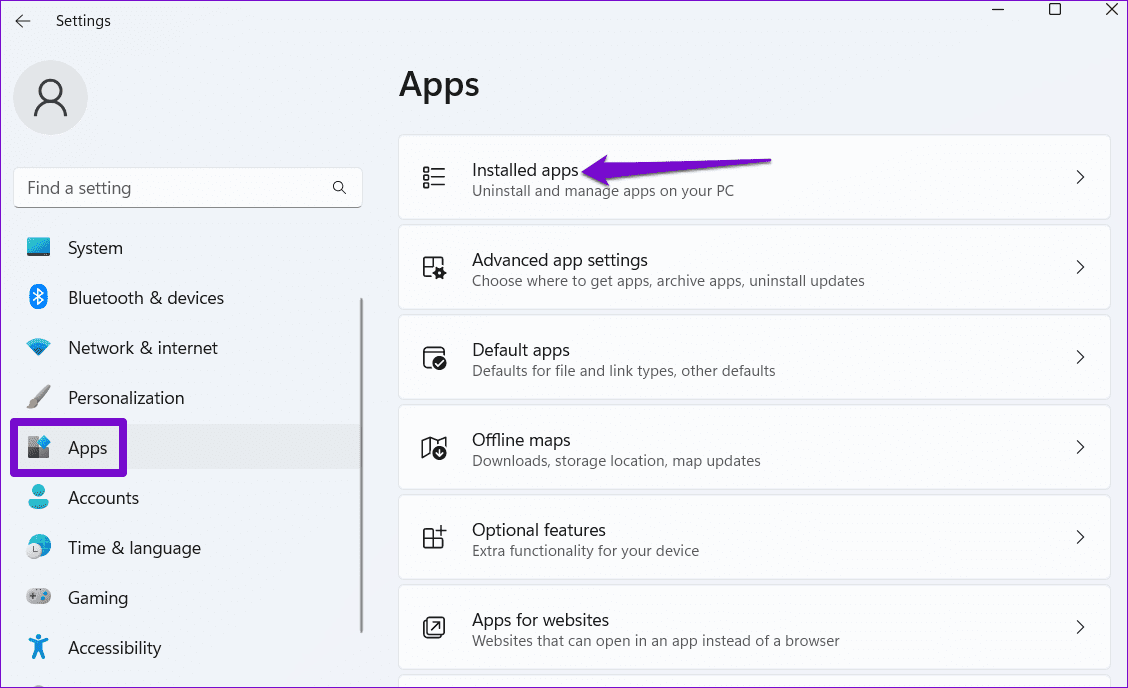
Step 1: Press the Windows key + I to open the Settings app and head to Apps > Installed apps.
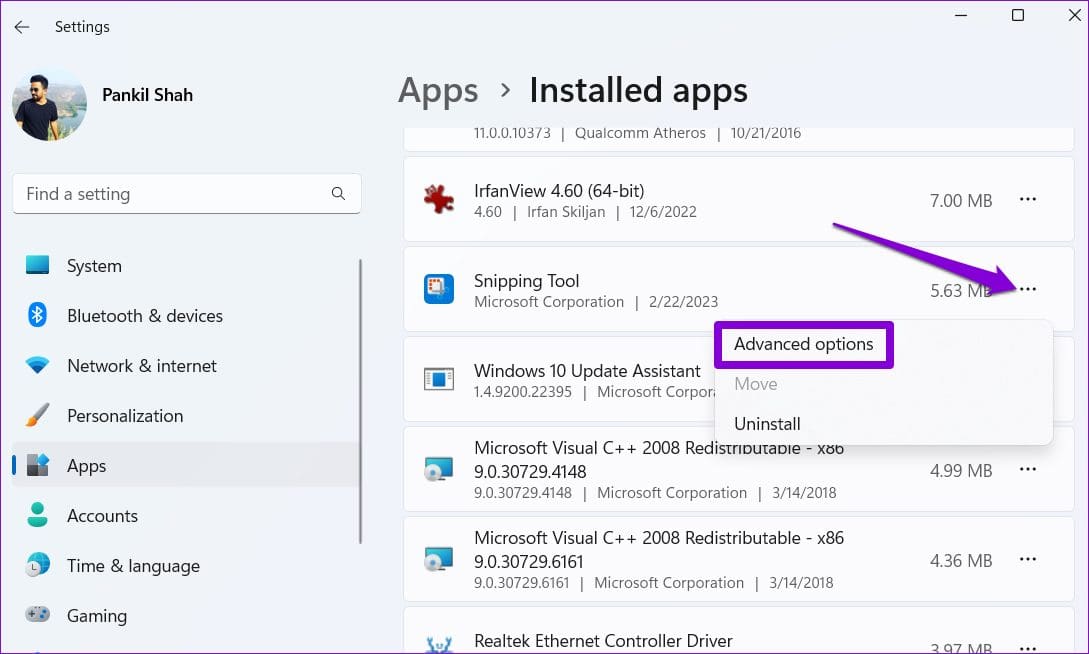
Step 2: Scroll through the list to locate the Snipping Tool app. Click the three-dot menu icon next to it and select Advanced options.
Step 3: Under Background apps permissions, use the drop-down menu to select Always.

Exit the Settings app and press the Windows key + Shift + S on your keyboard to access the Snipping Tool.
Fix 4: Repair or Reset the App
Apps on Windows 11 are bound to encounter problems occasionally. Thankfully, your Windows PC can repair most app-related issues on its own. Here’s how to repair the Snipping Tool app on Windows 11.
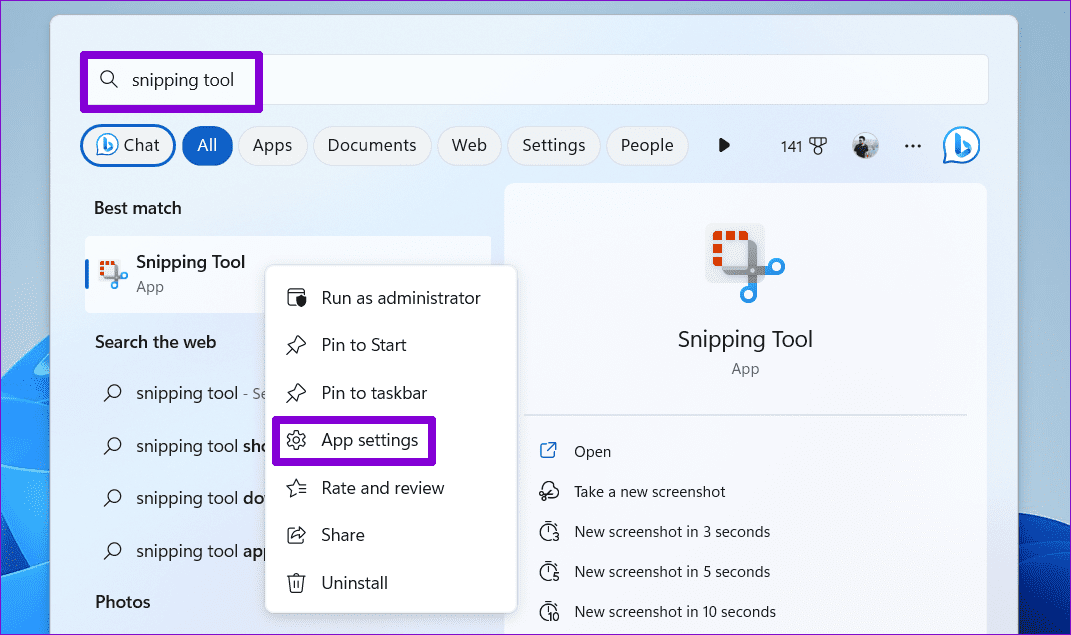
Step 1: Press the Windows key + S to open the search menu. Type snipping tool in the text box, right-click on the first result, and select App settings from the list.
Step 2: Scroll down to the Reset section and click the Repair button.
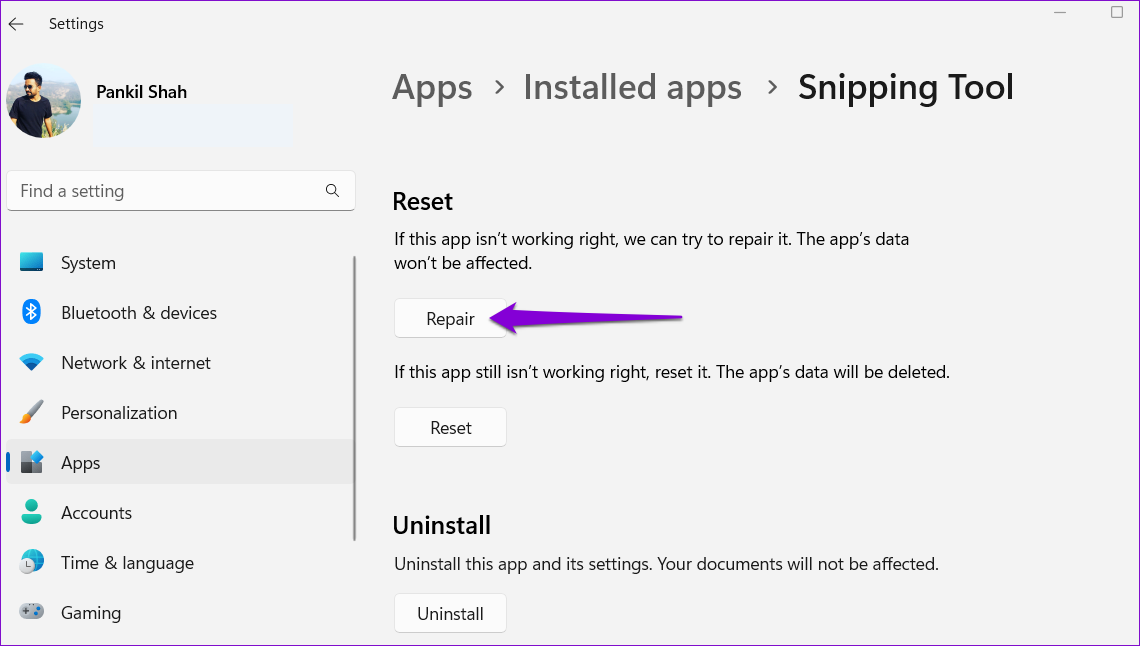
If the problem persists, try resetting it from the same menu. Doing so will delete all the app data and reset app configurations.

Fix 5: Reinstall the Snipping Tool App
If repairing or resetting the Snipping Tool does not work, try reinstalling the app on your Windows 11 PC to get it working. Here are the steps for the same.
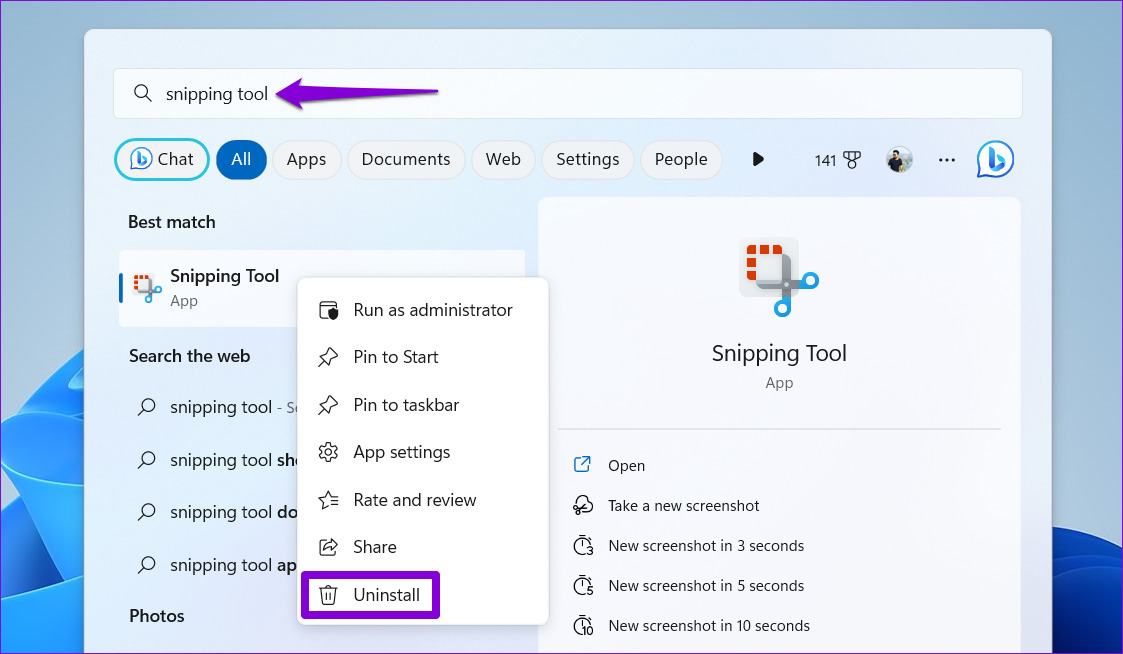
Step 1: Press the Windows key + S to open the search menu.
Step 2: Type snipping tool in the text box. Right-click on the first result and select Uninstall.
Step 3: Hit Uninstall to confirm.
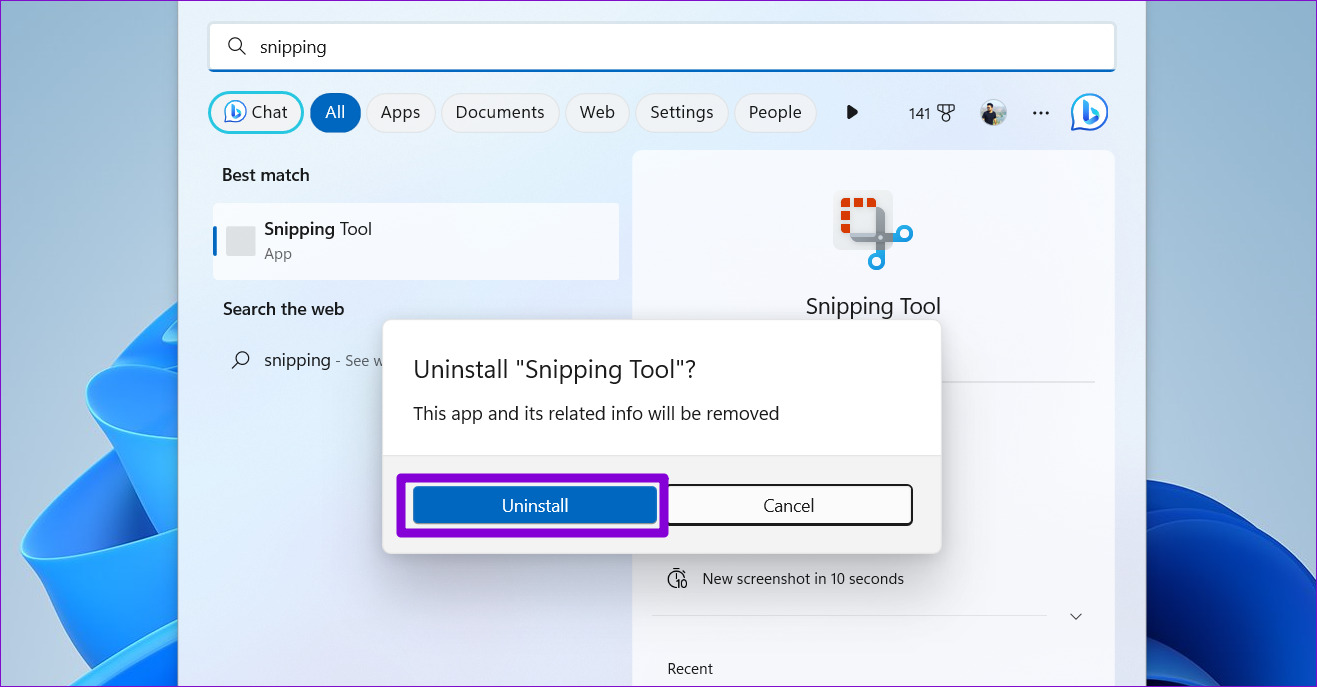
Step 4: Open the Microsoft Store on your PC to download and install Snipping Tool.
Fix 6: Enable Automatic Date and Time
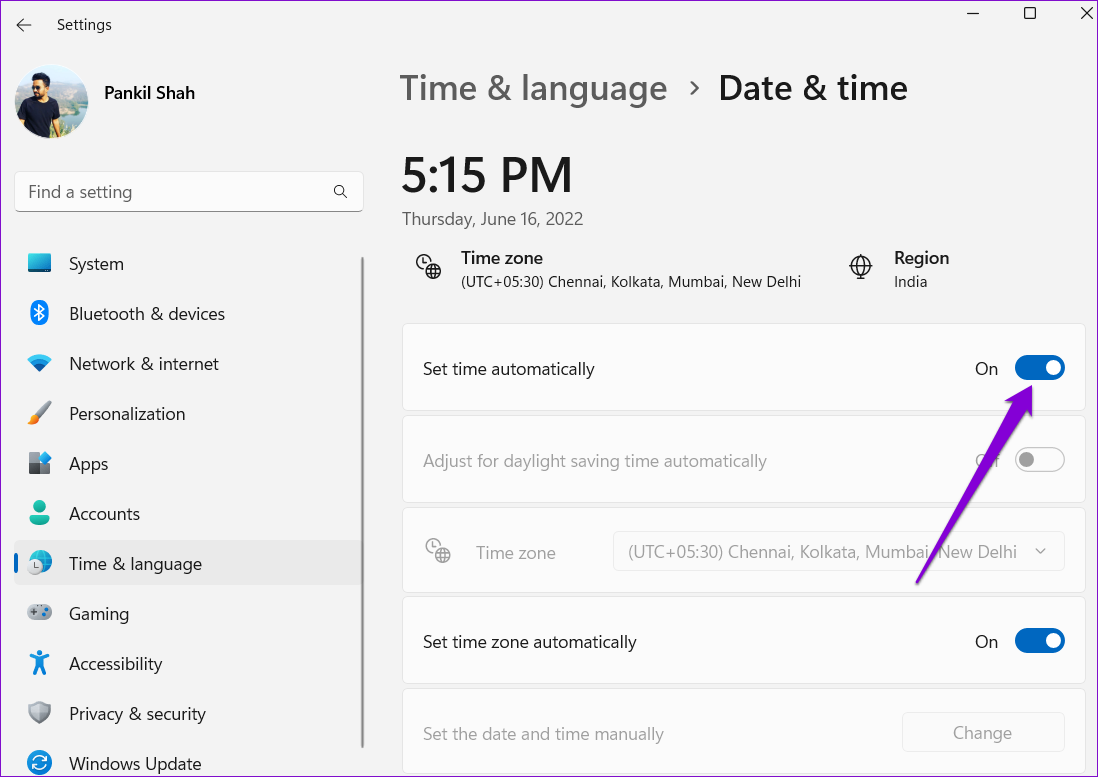
This may seem strange, but if your Windows 11 PC is set to an incorrect date or time, apps like Snipping Tool may fail to work. To avoid such issues, enable the automatic date and time feature on Windows by following the steps below.
Step 1: Press the Windows key + I to open the Settings app. In the Time & language tab, click on Date & time.

Step 2: Enable the toggle next to Set time automatically.
Was this helpful?
Last updated on 07 May, 2024
2 Comments
Leave a Reply
Read Next
 4 Ways to Fix Snipping Tool Keyboard Shortcut Not Working
Basic Fixes: Check your keyboard for damages: Any physical damage to keyboard keys might prevent them from working as expected.
4 Ways to Fix Snipping Tool Keyboard Shortcut Not Working
Basic Fixes: Check your keyboard for damages: Any physical damage to keyboard keys might prevent them from working as expected.
 3 Ways to Fix the “Recording Stopped” Error in Snipping Tool for Windows 11
Try Basic Fixes Disable screen projection: The Snipping Tool may sometimes have trouble recording the screen if you are using multiple displays.
3 Ways to Fix the “Recording Stopped” Error in Snipping Tool for Windows 11
Try Basic Fixes Disable screen projection: The Snipping Tool may sometimes have trouble recording the screen if you are using multiple displays.
 Snipping Tool vs Snip & Sketch: How Do They Differ
The easiest way to take screenshots on Windows is by using the PrtScn key.
Snipping Tool vs Snip & Sketch: How Do They Differ
The easiest way to take screenshots on Windows is by using the PrtScn key.
 4 Fixes for Microsoft Word Dictation Tool Not Working on Windows 11 and 10
Fix 1: Check Microphone Permission Windows lets you enable or disable microphone permissions for each app and program individually.
4 Fixes for Microsoft Word Dictation Tool Not Working on Windows 11 and 10
Fix 1: Check Microphone Permission Windows lets you enable or disable microphone permissions for each app and program individually.
 5 Ways to Open the DirectX Diagnostic Tool on Windows 11
Method 1: Open the DirectX Diagnostic Tool With the Task Manager The Task Manager app on Windows 11 allows you to monitor and manage all running applications and processes.
5 Ways to Open the DirectX Diagnostic Tool on Windows 11
Method 1: Open the DirectX Diagnostic Tool With the Task Manager The Task Manager app on Windows 11 allows you to monitor and manage all running applications and processes.
 7 Quick Ways to Open Remote Desktop Connection Tool in Windows 11
Method 1.
7 Quick Ways to Open Remote Desktop Connection Tool in Windows 11
Method 1.
 How to Use the Windows Memory Diagnostic Tool on Windows 11
How to Use the Windows Memory Diagnostic Tool You can open the diagnostic tool from the search, Command Prompt, Control Panel, and Recovery.
How to Use the Windows Memory Diagnostic Tool on Windows 11
How to Use the Windows Memory Diagnostic Tool You can open the diagnostic tool from the search, Command Prompt, Control Panel, and Recovery.
 Optimize Windows 11 Startup Using System Configuration Tool (MSConfig)
How to Use System Configuration Tool on Windows 11 The System Configuration Tool is divided into five tabs for easy navigation, each with different functions.
Optimize Windows 11 Startup Using System Configuration Tool (MSConfig)
How to Use System Configuration Tool on Windows 11 The System Configuration Tool is divided into five tabs for easy navigation, each with different functions.
The article above may contain affiliate links which help support Guiding Tech. The content remains unbiased and authentic and will never affect our editorial integrity.
Or we can uninstall the Snip tool and install a third-party app. Nice work Microsoft; they borked so many things in Windows 11.
Step one should be to make sure your Notifications are turned on. A Microsoft update turned them off and I couldn’t figure out why my screenshot wasn’t popping up. Turned Notifications back on and it was working again.