Things to Know Before Disabling Microsoft Verified Apps on Windows 11
The Microsoft-verified feature is designed to protect Windows users. You could get the warning “the app you’re trying to install isn’t a Microsoft-verified app” to keep you alert when downloading or installing apps outside the company’s safety net. If you still wish to proceed, there are a few things to remember.
- You stand an increased risk of exposure to malware and other malicious tools.
- You may experience more erratic behavior and instability by installing non-verified apps.
- You will get reduced to no support from Microsoft for apps installed outside the verified cluster.
To minimize the risks associated with using non-verified apps, download them from only vendors you trust or know. You should also ensure your firewall is on and your antivirus is updated.
If you must continue, below are the best ways to turn off Microsoft-verified apps on Windows 11.
Method 1: Using the Settings App
The Settings app on Windows 11 offers a high level of control over the operating system and app controls. To install non-verified apps, update the ‘Choose where to get apps’ option. Follow the steps below.
Step 1: Open your Settings app by pressing the Windows + I keys.
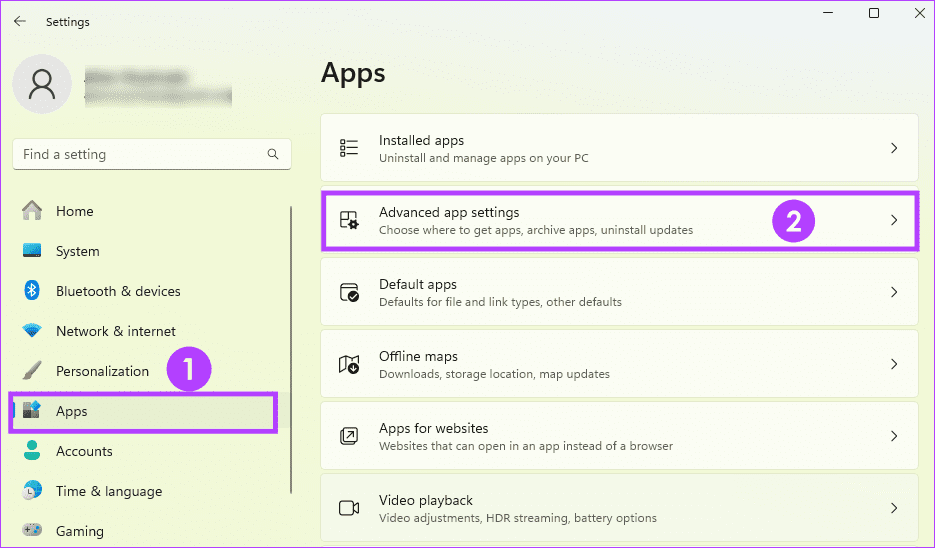
Step 2: Click Apps on the left pane, then Advanced App Settings on the right.
Step 3: Set the Choose where to get apps value to Anywhere.

Method 2: By Tweaking Registry Values
The Windows registry is a hierarchical database of Windows settings and configurations. If you use a Windows 11 pro computer, you may disable the Microsoft-verified apps feature from the Registry Editor. Remember to back up your registry before making any changes.
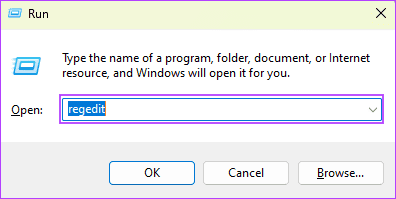
Step 1: Press Windows + R to launch your Run dialog.
Step 2: Type regedit and hit Enter to launch the Registry Editor.
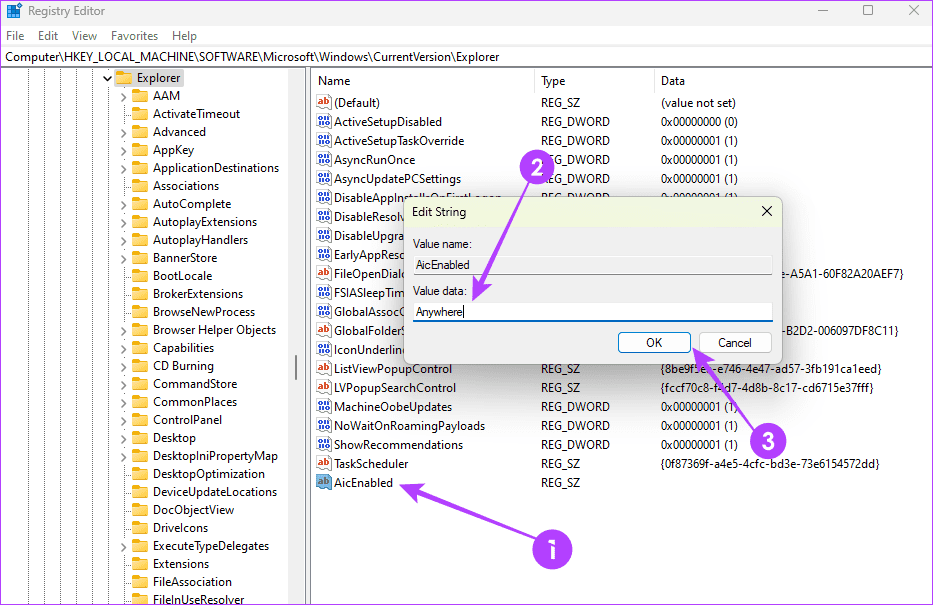
Step 3: Navigate to the path below:
Computer\HKEY_LOCAL_MACHINE\SOFTWARE\Microsoft\Windows\CurrentVersion\Explorer
Step 4: Lastly, double-click AicEnabled on the right pane, change the value to Anywhere, and click OK.
Method 3: Using the Command Prompt
The Command Prompt, or cmd.exe, is a Windows command line interpreter that allows you to interact with the operating system using text-based commands. You can run specific commands on the Command Prompt utility to allow non-verified apps.
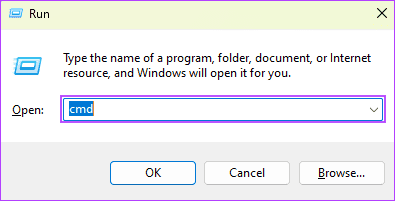
Step 1: Press Windows + R to launch your Run dialog.
Step 2: Type cmd and hit the Ctrl + Shift + Enter keys to launch the Command Prompt with admin rights.
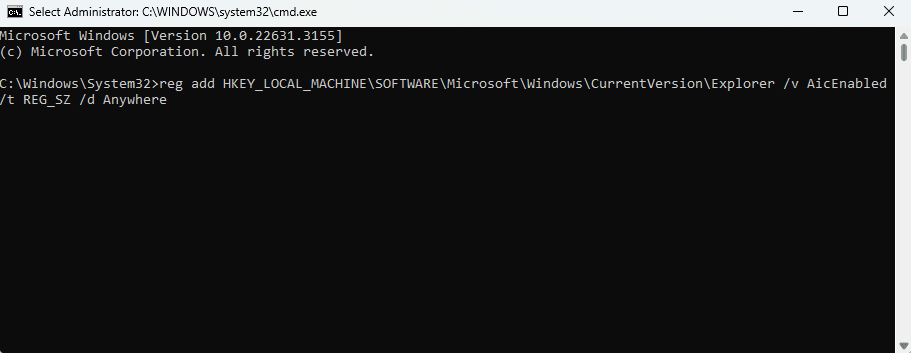
Step 3: Type the command below and hit Enter.
reg add HKEY_LOCAL_MACHINE\SOFTWARE\Microsoft\Windows\CurrentVersion\Explorer /v AicEnabled /t REG_SZ /d Anywhere
Step 4: Lastly, restart your computer.
Method 4: Using the Group Policy Editor
Another method for Windows 11 pro users to disable the Verified Apps feature is via the Group Policy Editor. For those unaware, GPE is a Windows administration tool for configuring settings on several computers. Follow the steps below.
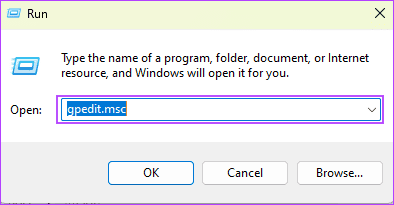
Step 1: Press Windows + R to launch your Run dialog.
Step 2: Type gpedit.msc and hit Enter to launch the Registry Editor.
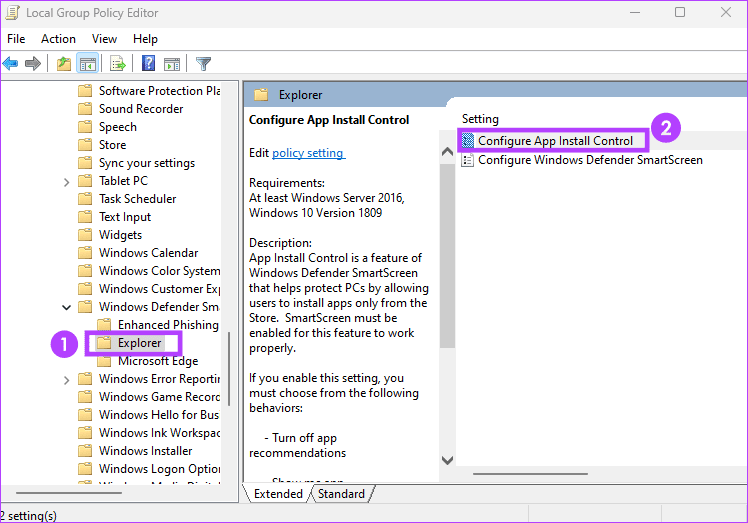
Step 3: Navigate the path below, and on the right pane, click Configure App Install Control.
Computer Configuration / Administrative Templates / Windows Components / Windows Defender SmartScreen / Explorer
Step 4: Finally, click the Disabled option, then click OK.

Was this helpful?
Last updated on 20 August, 2024
Read Next
 How to Turn off Dark Mode in Microsoft Excel, Word, and PowerPoint
Dark mode is savored by many.
How to Turn off Dark Mode in Microsoft Excel, Word, and PowerPoint
Dark mode is savored by many.
 2 Ways to Turn on Picture in Picture on Microsoft Edge
Method 1: Use the Inbuilt PiP Option in Microsoft Edge Picture-in-Picture (PiP) mode was officially released in Microsoft Edge with the stable release of Microsoft Edge version 78.
2 Ways to Turn on Picture in Picture on Microsoft Edge
Method 1: Use the Inbuilt PiP Option in Microsoft Edge Picture-in-Picture (PiP) mode was officially released in Microsoft Edge with the stable release of Microsoft Edge version 78.
 7 Ways to Fix Microsoft Store Not Downloading Apps or Games
Fix 1: Restart Microsoft Store Shutting down the app can kill any bugs, and it is unlikely to appear once you open the Microsoft Store again.
7 Ways to Fix Microsoft Store Not Downloading Apps or Games
Fix 1: Restart Microsoft Store Shutting down the app can kill any bugs, and it is unlikely to appear once you open the Microsoft Store again.
 5 Ways to Fix Microsoft Store Apps Not Updating Automatically
Fix 1: Verify Auto Update Settings in the Microsoft Store The first thing you should do is verify the auto-update settings in the Microsoft Store app.
5 Ways to Fix Microsoft Store Apps Not Updating Automatically
Fix 1: Verify Auto Update Settings in the Microsoft Store The first thing you should do is verify the auto-update settings in the Microsoft Store app.
 5 Ways to Turn off OneDrive Memories Notifications on Windows and Mobile
Method 1.
5 Ways to Turn off OneDrive Memories Notifications on Windows and Mobile
Method 1.
 5 Ways to Turn On Bluetooth on Windows 11
Method 1.
5 Ways to Turn On Bluetooth on Windows 11
Method 1.
 5 Ways to Turn off Automatic Updates on Windows 11
Note: All the methods mentioned below help pause or restrict automatic updates on Windows 11.
5 Ways to Turn off Automatic Updates on Windows 11
Note: All the methods mentioned below help pause or restrict automatic updates on Windows 11.
 3 Ways to Turn off Copilot on Windows 11
https://youtu.be/WmmLAoyJSpo Method 1: Via Taskbar Settings Step 1: Right-click on the Taskbar and choose Taskbar settings from the menu.
3 Ways to Turn off Copilot on Windows 11
https://youtu.be/WmmLAoyJSpo Method 1: Via Taskbar Settings Step 1: Right-click on the Taskbar and choose Taskbar settings from the menu.
The article above may contain affiliate links which help support Guiding Tech. The content remains unbiased and authentic and will never affect our editorial integrity.