Fix 1: Make Sure the Add-In Is Enabled
One possible reason for an Outlook add-in to disappear is if it has been disabled, either by the user or system administrator. If that’s the case, you can use these steps to restore the missing Outlook add-in on your Windows PC.
Step 1: Open the Microsoft Outlook app on your PC and click the File menu at the top-left corner.
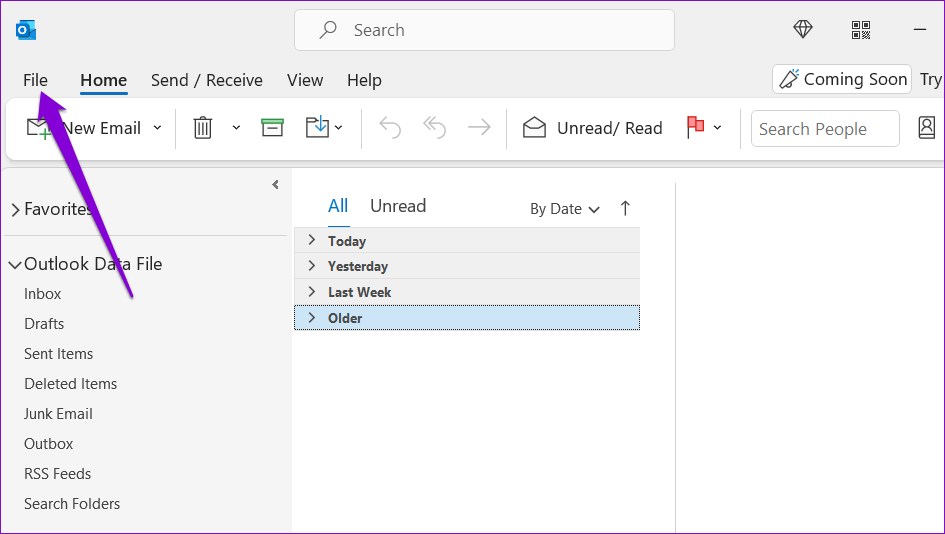
Step 2: Select Options from the left pane.
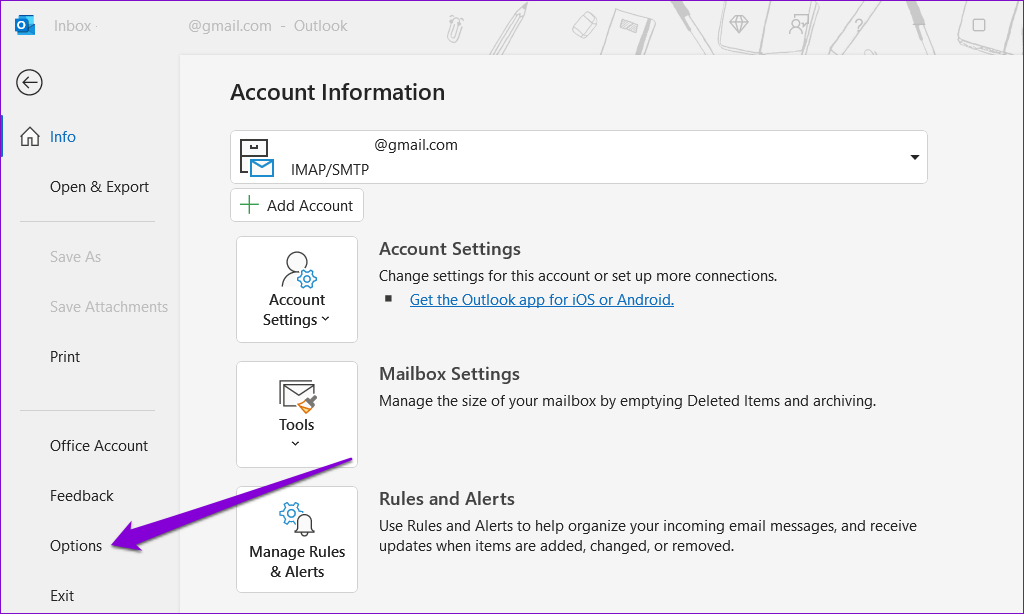
Step 3: Switch to the Add-ins tab. In the Manage drop-down menu, select Disabled Items and click the Go button.

Step 4: Select the add-in you want to restore and click the Enable button.

Fix 2: Scan Outlook Data File
Issues with Outlook data files on your PC can also cause your add-ins to go missing or stop working. Fortunately, Microsoft includes a tool that can find and repair problematic Outlook data files automatically. Here’s how to run it.
Step 1: Press the Windows + E to open File Explorer and navigate to the following folder.
C:\Program Files\Microsoft Office\root\Office16
Step 2: Double-click the SCANPST.EXE file.

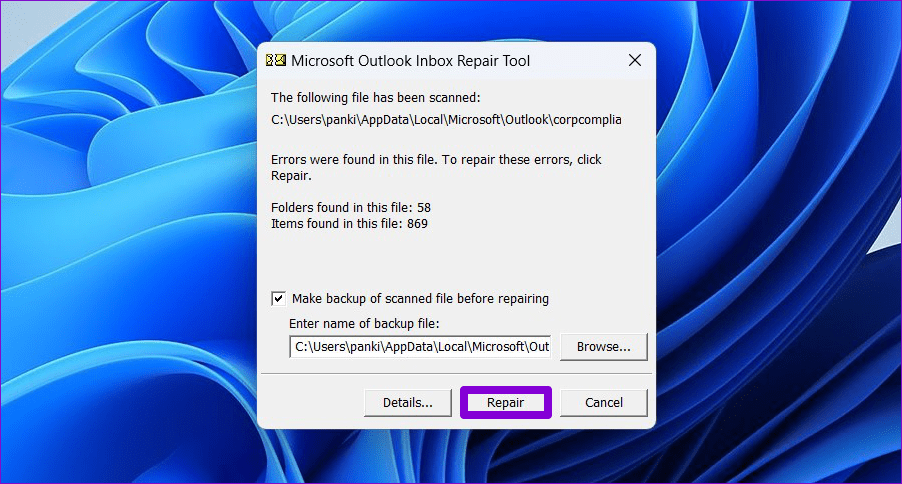
Step 3: Click Start to initiate the scan.

Step 4: If the tool finds any issues, click on Repair.
After completing the above steps, check if your add-ins work.
Fix 3: Modify Registry Files to Prevent Outlook From Disabling Add-Ins
At times, Microsoft Outlook may disable an add-in if it causes the app to run slowly or crash. If you don’t want that, you can modify a few registry files to stop Outlook from automatically disabling add-ins.
Step 1: Press the Windows key + R to open the Run dialog box. Type regedit in the box and press Enter.
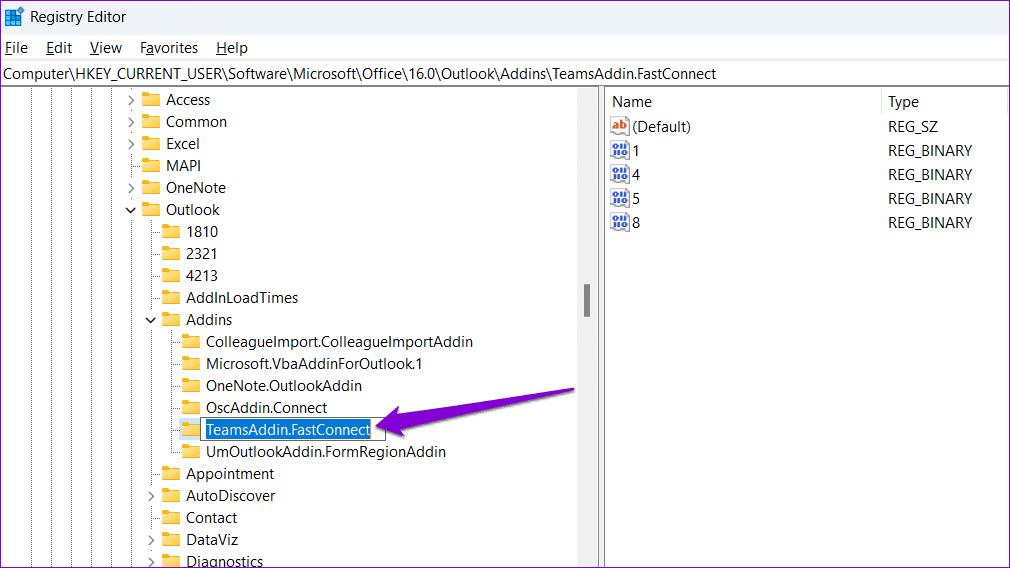
Step 2: Type the following path in the address bar at the top and press Enter.
Computer\HKEY_CURRENT_USER\Software\Microsoft\Office\16.0\Outlook\Addins
Step 3: Locate the add-in you don’t want Outlook to turn off and copy its name.
Step 4: Paste the following path in the address bar at the top and press Enter.
HKEY_CURRENT_USER\Software\Policies\Microsoft\Office\16.0\Outlook\Resiliency\AddinList
Step 5: In the right pane, right-click anywhere on an empty spot and select New > String Value. Name it with the add-in key name copied earlier.

Step 6: Double-click the newly created string value, enter 1 in the text box and click OK.

Fix 4: Run the Office Repair Tool
If all else fails, you can run the Office repair tool on Windows to fix issues that may be causing the Outlook add-ins to misbehave. Here are the steps for the same.
Step 1: Press the Windows + R keyboard shortcut to launch the Run command. In the Open field, type appwiz.cpl and press Enter.
Step 2: In the Programs and Features window, select Microsoft Office Suite or Microsoft 365 and click the Change option.

Step 3: Select Online Repair and click the Repair button to continue.

Was this helpful?
Last updated on 15 August, 2024
Read Next
 5 Fixes for Email Templates Missing in Microsoft Outlook
Fix 1: Check the Email Templates Folder An obvious reason why your Outlook email templates may not show up is that you have accidentally deleted them.
5 Fixes for Email Templates Missing in Microsoft Outlook
Fix 1: Check the Email Templates Folder An obvious reason why your Outlook email templates may not show up is that you have accidentally deleted them.
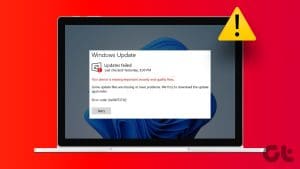 8 Fixes for “Your Device Is Missing Important Security and Quality Fixes” on Windows
Is there anything more frustrating than seeing the "Your Device Is Missing Important Security and Quality Fixes" message when waiting for your Windows updates to complete?
8 Fixes for “Your Device Is Missing Important Security and Quality Fixes” on Windows
Is there anything more frustrating than seeing the "Your Device Is Missing Important Security and Quality Fixes" message when waiting for your Windows updates to complete?
 6 Ways to Find Missing Outlook Notes
Fix 1.
6 Ways to Find Missing Outlook Notes
Fix 1.
 Top 5 Fixes for Language Bar Missing in Windows 10
Windows 10 includes language packs to make it easy for people who often deal with foreign languages.
Top 5 Fixes for Language Bar Missing in Windows 10
Windows 10 includes language packs to make it easy for people who often deal with foreign languages.
 3 Fixes for Chrome Send to Devices Missing or Not Working Issue
Note: The steps are the same for Windows and Mac on desktop and Android and iOS on mobile.
3 Fixes for Chrome Send to Devices Missing or Not Working Issue
Note: The steps are the same for Windows and Mac on desktop and Android and iOS on mobile.
 Top 7 Fixes for Outlook Notifications Not Working on Windows 10
How many times have you missed an important email when Outlook didn't send you a notification on Windows 10?
Top 7 Fixes for Outlook Notifications Not Working on Windows 10
How many times have you missed an important email when Outlook didn't send you a notification on Windows 10?
 5 Fixes for Spell Check Not Working in Microsoft Outlook for Windows
Fix 1: Check Spelling and Autocorrect Settings The first thing you should do is ensure that spell check is enabled and configured correctly in Outlook.
5 Fixes for Spell Check Not Working in Microsoft Outlook for Windows
Fix 1: Check Spelling and Autocorrect Settings The first thing you should do is ensure that spell check is enabled and configured correctly in Outlook.
 Top 4 Ways to Change New Outlook Back to Old (Classic View) Outlook on Windows and Mac
The new Outlook app for desktop boasts a modern and simplified design, aligning it more closely with the web version of Microsoft Outlook.
Top 4 Ways to Change New Outlook Back to Old (Classic View) Outlook on Windows and Mac
The new Outlook app for desktop boasts a modern and simplified design, aligning it more closely with the web version of Microsoft Outlook.
The article above may contain affiliate links which help support Guiding Tech. The content remains unbiased and authentic and will never affect our editorial integrity.