Being a Microsoft product, you’d naturally expect Edge browser to work flawlessly on a Windows computer. But, Microsoft Edge does consume a significant portion of system resources to boost its performance. When this happens, Edge’s memory usage on Windows may shoot up, affecting the overall performance.
It can be tricky to track down the exact cause of Edge’s high memory usage issue, except for frozen or sluggish tabs. Here are some solutions that you can try to bring Edge’s memory usage back to normal on your Windows 10 or Windows 11 computer.
1. Use Microsoft Edge’s Task Manager to Close Unwanted Tabs
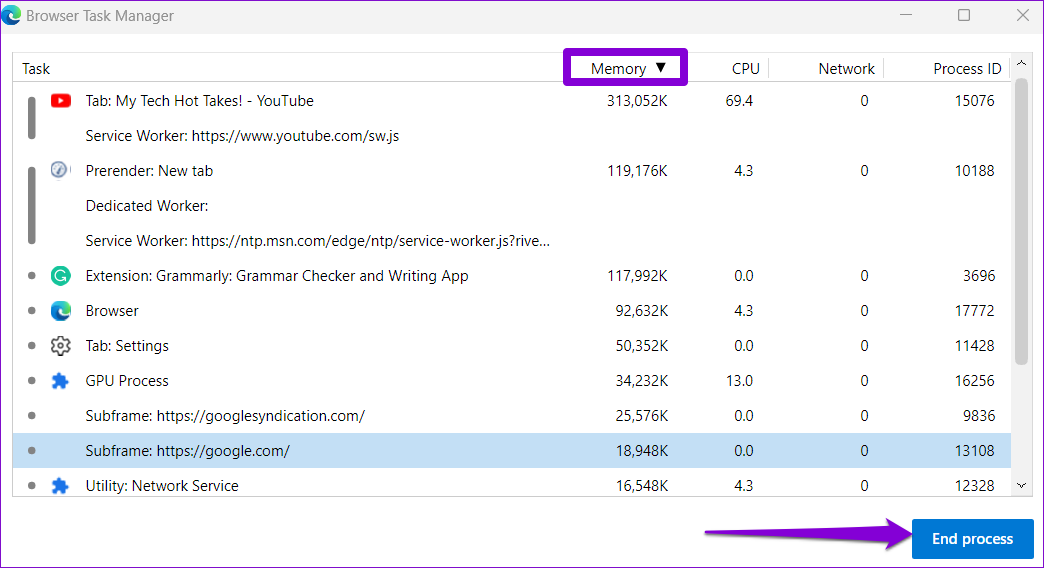
To start, you can use Microsoft Edge’s built-in task manager to identify any resource-hungry tabs and close them. If it’s nothing major, this may bring Edge’s memory usage down drastically.
While the Edge browser is open, press Shift + Esc on your keyboard to open the Browser Task Manager. Then, click on the Memory column to sort tabs based on their RAM usage. Select unwanted tabs and use the End process button to close them.
Note that you may lose unsaved data on those tabs you forcefully close.
2. Enable Efficiency Mode
Efficiency mode is a nifty feature in Microsoft Edge that enables to use the system resources judiciously. The browser restricts certain tab activities and putting some of your inactive tabs to sleep.
To enable efficiency mode in Microsoft Edge:
Step 1: Open Microsoft Edge, click the three-dot menu icon in the top right corner, and select Settings from the list.

Step 2: Navigate to the System and performance tab. Use the drop-down menu next to ‘Turn on efficiency mode when’ to select Always.

3. Disable Hardware Acceleration
While enabling hardware acceleration in Edge speeds up specific tasks and improves the overall user experience, it can occasionally cause Edge’s memory usage on Windows to skyrocket. You can disable this feature to see if that makes any difference.
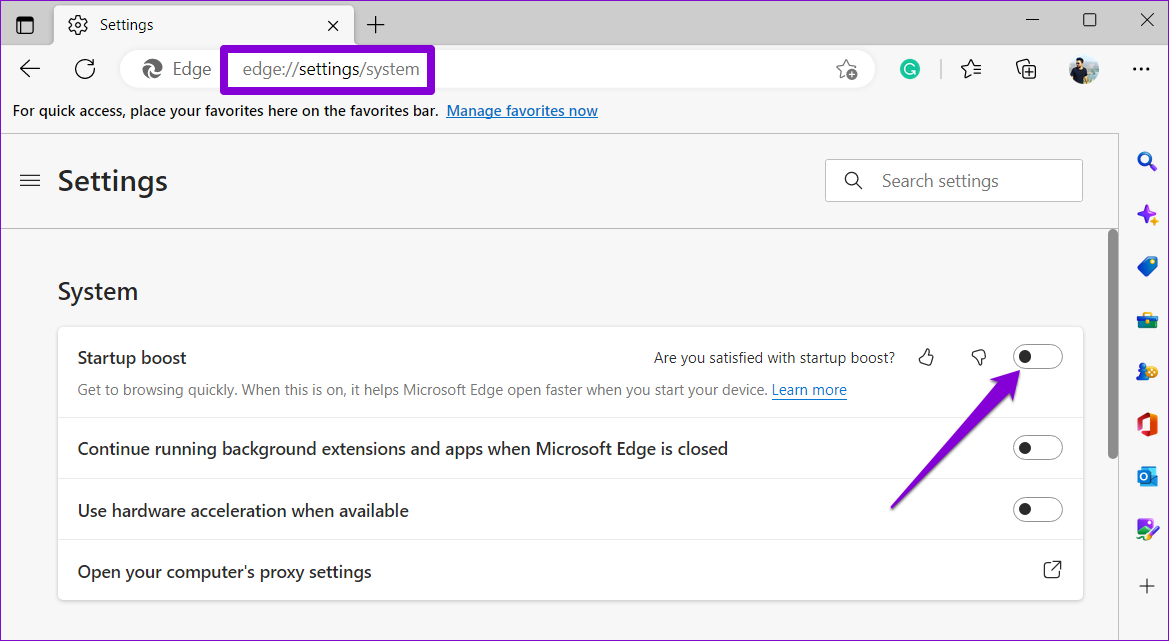
In Microsoft Edge, type edge://settings/system in the address bar at the top and press Enter. Then, turn off the toggle next to ‘Use hardware acceleration when available.’ Restart Edge browser to check if this helps.

4. Disable Startup Boost in Edge
Microsoft Edge’s startup boost feature allows the browser to pre-load some of its core processes during system boot and open faster whenever you want to browse on your Windows PC. However, this can cause Edge to consume more RAM and other system resources to pre-load a few things.
To disable startup boost in Edge, type edge://settings/system in the address bar at the top and press Enter. Then, turn off the toggle next to ‘Startup boost.’
5. Delete Unused Extensions
Running Microsoft Edge with too many extensions can negatively impact the browser’s performance. Hence, it’s best to remove extensions that you no longer use.
In Edge, type edge://extensions/ in the URL bar at the top and hit Enter. Use the toggles to disable unwanted extensions or click the Remove button to uninstall them.

Restart Edge after your disable or remove unwanted extensions and monitor its memory consumption using Windows Task Manager.
6. Clear Browser Cache
Overwhelming amount of browsing data is a common cause of many browser-related issues. Hence, it’s always a good idea to clear existing cache and browser data when Edge acts strangely on Windows.
Press Ctrl + Shift + Delete shortcut on your keyboard to open the ‘Clear browsing data’ panel. Tick the box that reads ‘Cached images and files’ and hit the Clear now button.
If you choose ‘Cookies and other Site Data’ option, that will sign you out from all the sites you’ve visited and also remove the login credentials. That means, you’ll need to manually enter those details or fetch them from the built-in password manager.

7. Repair Microsoft Edge
Repairing an app on Windows is an easy way to fix any issues affecting its functioning. Plus, it’s completely safe to repair Microsoft Edge as it does not affect your data.
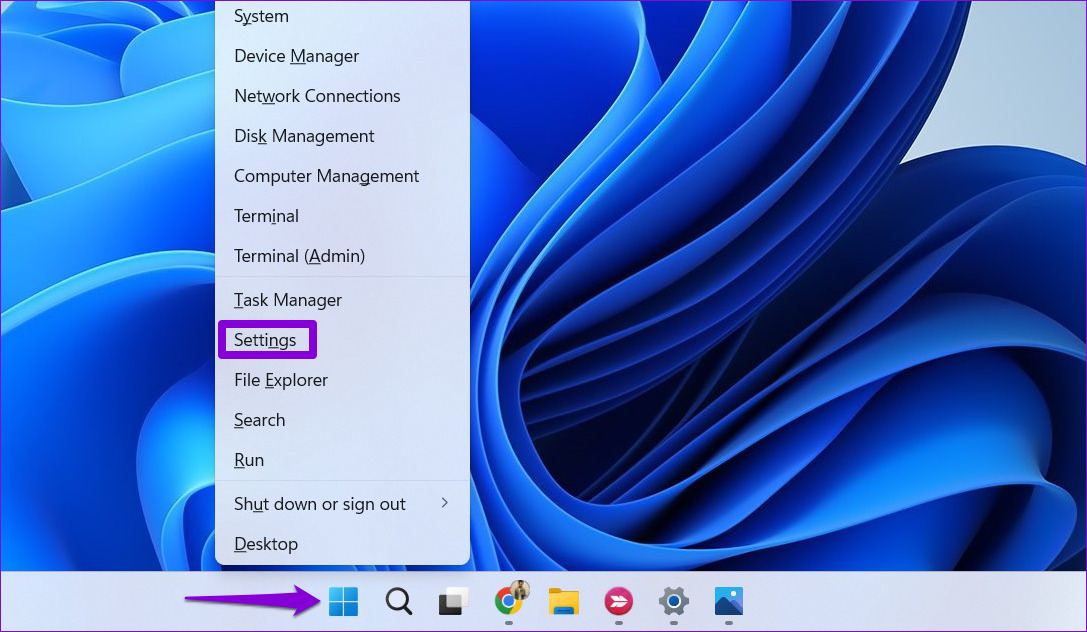
Step 1: Right-click on the Start icon and select Settings from the list.
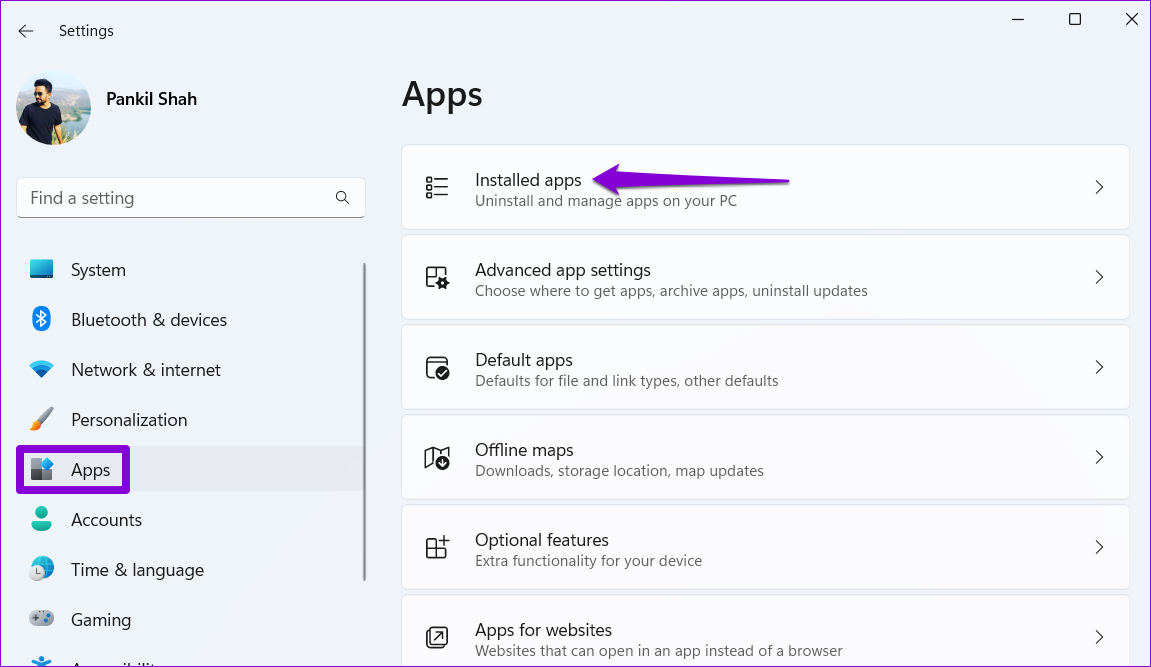
Step 2: Navigate to the Apps tab on your left and click on Installed apps.
Step 3: Scroll down to locate Microsoft Edge on the list. Click the three-dot menu icon next to it and select Modify.

Step 4: Click the Repair button.

Wait for the process to complete and check if the high memory usage problem is still there.
8. Scan for Malware
If none of the above solutions work, there’s a good chance that your PC is infected by malware. If that’s the case, you may notice unusual CPU and memory usage on Windows. To check for this possibility, run an in-depth system scan with Windows Defender or Malwarebytes (free version) to check for infections.
Keep Edge’s Memory Usage Under Control
Once you apply the above fixes, Microsoft Edge’s memory usage on Windows should return to normal. However, if you continue to experience abnormal memory usage issues on Windows, you should use the Windows Memory Diagnostic tool to check your system for memory-related issues.
Was this helpful?
Last updated on 06 September, 2023
The article above may contain affiliate links which help support Guiding Tech. The content remains unbiased and authentic and will never affect our editorial integrity.

