Why Is My Ping So High in Valorant
High ping in Valorant can be frustrating, but there are a few reasons behind it. One key factor is your distance from the game’s servers. The farther you are, the longer it takes for data to travel back and forth, resulting in higher ping.
Internet congestion can also play a role, especially during peak hours when many people use the same network.

If you’re on a wireless connection, interference or a weak signal might be causing delays in data transmission. Background downloads or streaming on the same network can eat up bandwidth and lead to higher ping as well.
Additionally, you might encounter high ping and lagging issues in Valorant if you have unoptimized network connections, limited bandwidth, improper DNS settings, or outdated network drivers.
Now that you know what might be causing the issue, let’s fix it.
Basic Fixes
- Test Your Internet Connection: The first step to fixing high ping and latency spikes in Valorant is to test your Internet connection. It’s recommended to have at least 20Mbps speed to play Valorant online. You can use a speed test website to check your internet speed.
- Restart Your Router: If your internet connection is fast, the next step is to restart your router. This often fixes minor problems with your internet connection. To restart your router, unplug it from the power outlet and plug it back in after 30 seconds.
- Switch Your Internet Connection: If restarting your router doesn’t fix the problem, try changing your Internet connection. If you use Wi-Fi, try connecting to an ethernet cable instead. Alternatively, there might be an issue with your LAN port or its drivers, in which case you can try using the Wi-Fi connection, provided you are positioned close to the Wi-Fi router.
Fix 1: Close Any Unnecessary Applications
Apps that use high bandwidth, such as streaming services, can contribute to high ping and latency spikes in Valorant. Before playing, close any unnecessary apps that you are not using. You can do that with the help of the Windows Task Manager.
Step 1: Press the Ctrl + Shift + Esc keys on your keyboard to launch the Windows Task Manager.
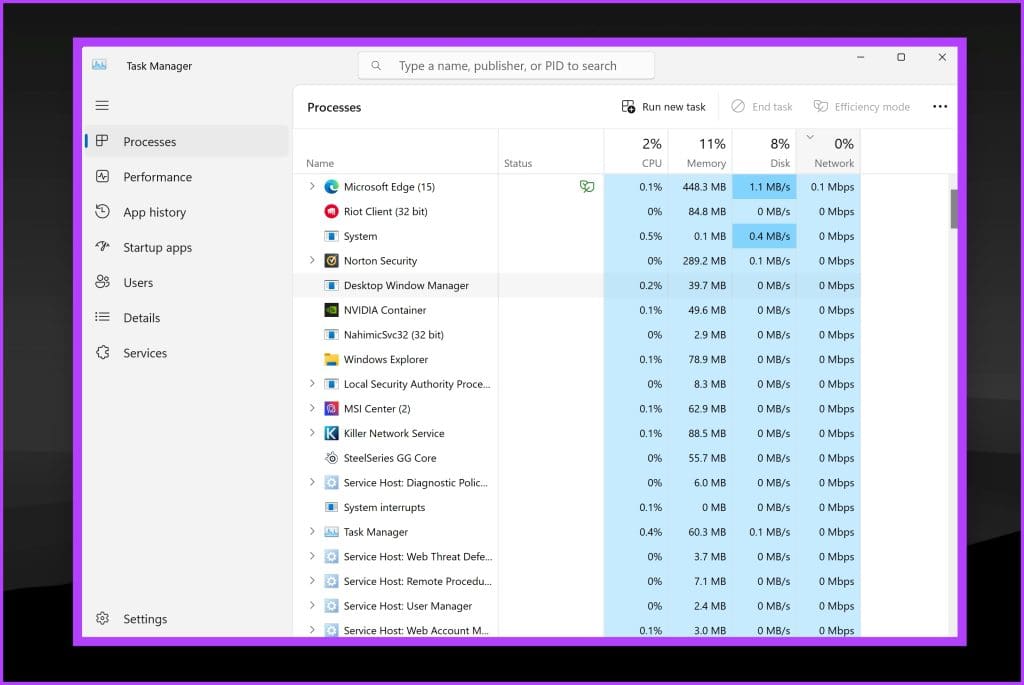
Step 2: Inside the Task Manager window, check for any applications that might use the internet heavily in the background. Simply right-click on an unwanted application and click on End task.

Fix 2: Update Your Network Driver
It’s also possible that your internet in itself is fast enough. However, a faulty driver prevents you from using it to its best ability. Outdated network drivers can cause problems with your internet connection. To update your internet drivers, follow these steps:
Step 1: Right-click on the Start button and select Device Manager.

Step 2: Inside the Device Manager window, click on Network Adapters to expand it. You should now see the various network adapters connected to your system. Right-click on the adapter you use for Internet connectivity, such as Ethernet or Wireless. Then select Update driver.
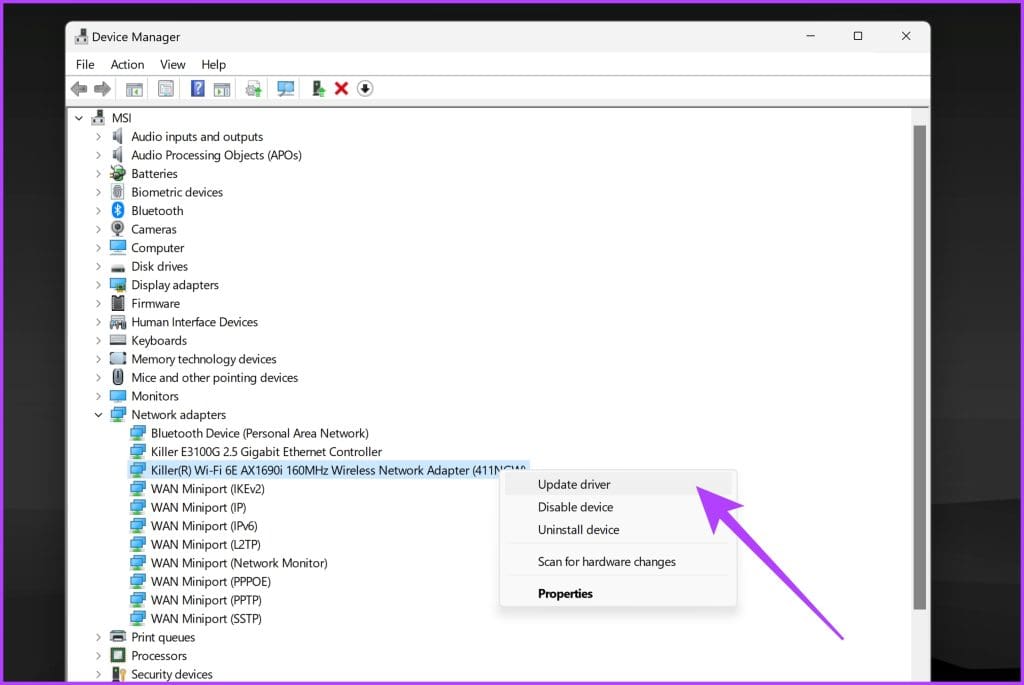
Step 3: Choose Search automatically for drivers. Windows will now automatically search and update to the latest drivers.

Once the process is complete, reboot your PC and try to launch Valorant post that. Hopefully, your issue of Valorant lagging is now resolved.
Fix 3: Set Valorant to High Priority in Task Manager
Valorant can also be affected by other apps running in the background. To give Valorant a higher priority, you can set it to high priority in Task Manager.
Step 1: First up, ensure Valorant is running in the background. Then, press the Ctrl + Shift + Esc keys on your keyboard to open Task Manager.
Step 2: Switch to the Details option from the sidebar. You should now get a list of all the various tasks running on your computer. Right-click on VALORANT-Win64-Shipping.exe and select Set priority. Then, click on High.

This will allocate more system resources to the game, thus, reducing your ping.
Fix 4: Flush DNS Cache
The DNS cache stores the IP addresses of websites you have recently visited. If the DNS cache is corrupt, it can cause problems with your internet connection. You can try flushing the existing DNS cache to see if it reduces the ping and latency inside Valorant. Here’s how to do it:
Note: The command to flush the DNS cache remains similar on PowerShell and Command Prompt. So, you can follow the below steps on either.
Step 1: Right-click on the Start icon and select Terminal (Admin) from the list.
Step 2: Select Yes when the User Account Control (UAC) prompt appears. Now, inside the console, type the following command and press Enter.
ipconfig /flushdns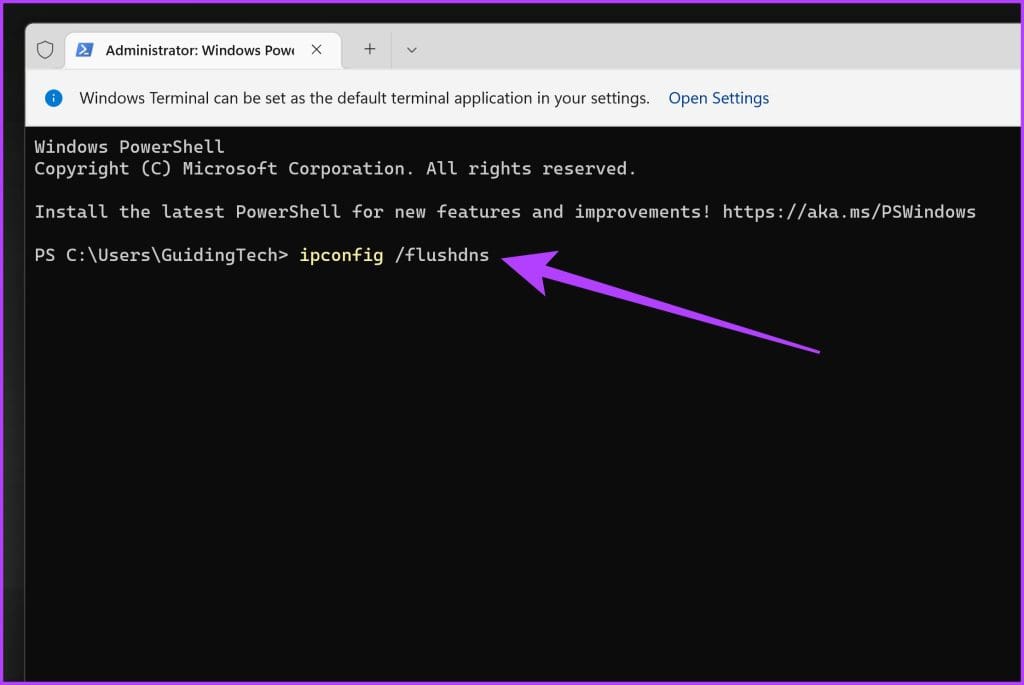
Once done, you should see a message that reads, ‘Successfully flushed the DNS Resolver Cache’. Try playing Valorant now to see if you have a better ping.
Fix 5: Change the DNS Server
While your ISP usually provides the default DNS, you can try using a different DNS server. Changing to a faster DNS server can sometimes fix random ping spikes and lagging issues. Consider using Google DNS (8.8.8.8 and 8.8.4.4) or Cloudflare DNS (1.1.1.1).
Step 1: Press the Windows + R keys to launch the Run dialog box. Once the Run window opens, type ncpa.cpl, and press Enter.
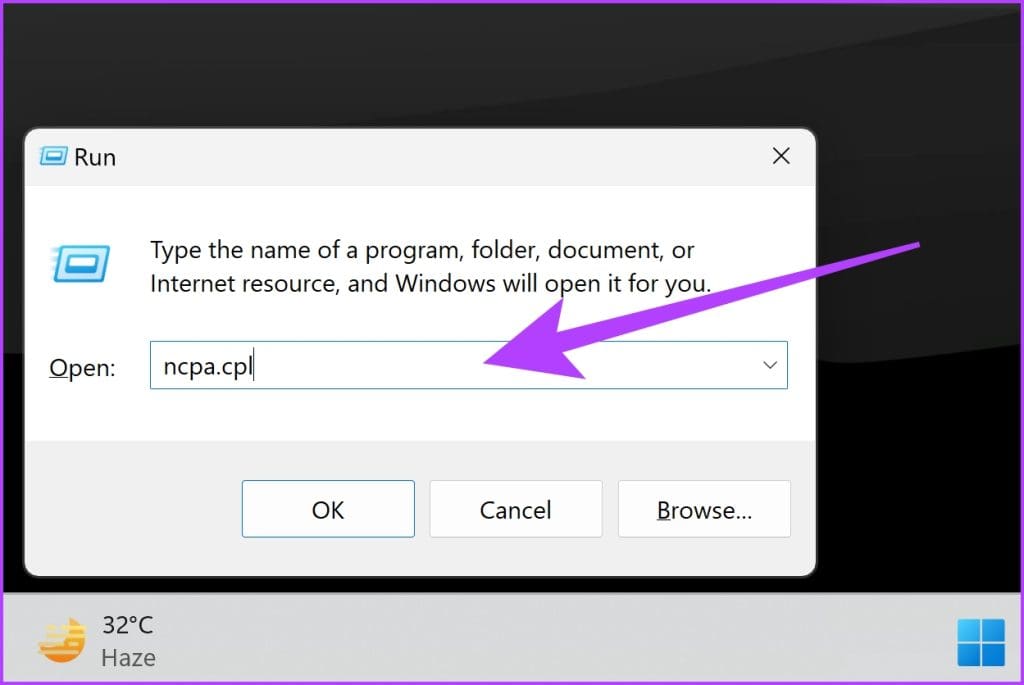
Step 2: In Network Connections, right-click on your internet connection and select Properties.

Step 3: Head over to Networking > Internet Protocol Version 4 (TCP/IPv4). Then, click on Properties.

Step 4: Select ‘Use the following DNS server addresses.’ In the text fields next to the Preferred DNS Server and the Alternate DNS Server, enter 1.1.1.1 and 1.0.0.1, respectively. Alternatively, you can also use 8.8.8.8 and 8.8.4.4, respectively.
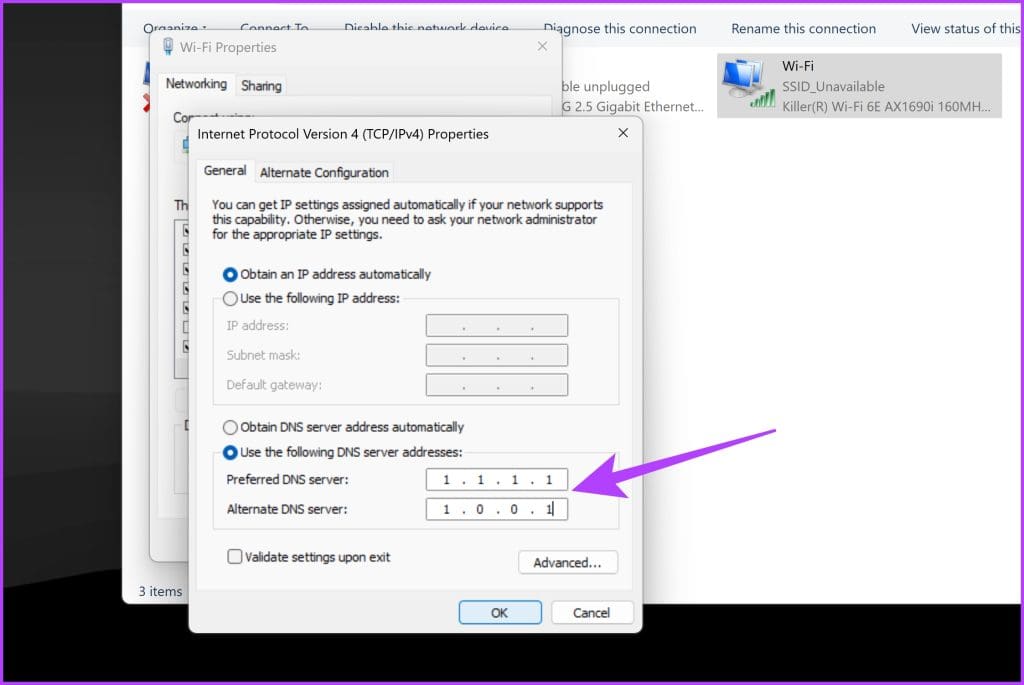
Step 5: Once done, click on OK.
Fix 6: Use Third-Party Tools
For better results, you can also try using third-party tools. For instance, ExitLag is a popular solution amongst gamers that can help with faster connection routes to game servers. Alternatively, users can also check out Cloudflare WARP, which is a free tool, and performs quite similar to ExitLag.
Cloudflare WARP is a VPN service that can optimize your connection for gaming. It can help reduce ping and latency in Valorant. WARP routes your traffic through Cloudflare’s network, which can improve your connection to the relevant servers.
Here’s how to set up and use WARP on your PC.
Step 1: Download Cloudflare WARP and install it like any other software on your PC.
Step 2: Once the installation is done, launch WARP by clicking on its icon from the system tray.
Step 3: You should see a big toggle inside the WARP window. Enable the toggle to connect to Cloudflare’s WARP VPN.

Once you are connected to Cloudflare’s WARP, try launching Valorant and see if you get a better ping.
Fix 7: Turn Off Wi-Fi Scanning
If you use Wi-Fi, try turning off Wi-Fi scanning to see if it improves your ping and latency in Valorant. Wi-Fi scanning can sometimes cause problems with your internet connection. While Windows offers a native way to do that, it’s not as effective. Instead, you can use Command Prompt or PowerShell to disable Wi-Fi scanning.
Note: We have used PowerShell for demonstration.
Step 1: Right-click on the Start icon and select Terminal (Admin) from the list. Select Yes when the User Account Control (UAC) prompt appears.
Step 2: Type the following command in the console and press Enter.
netsh wlan show settings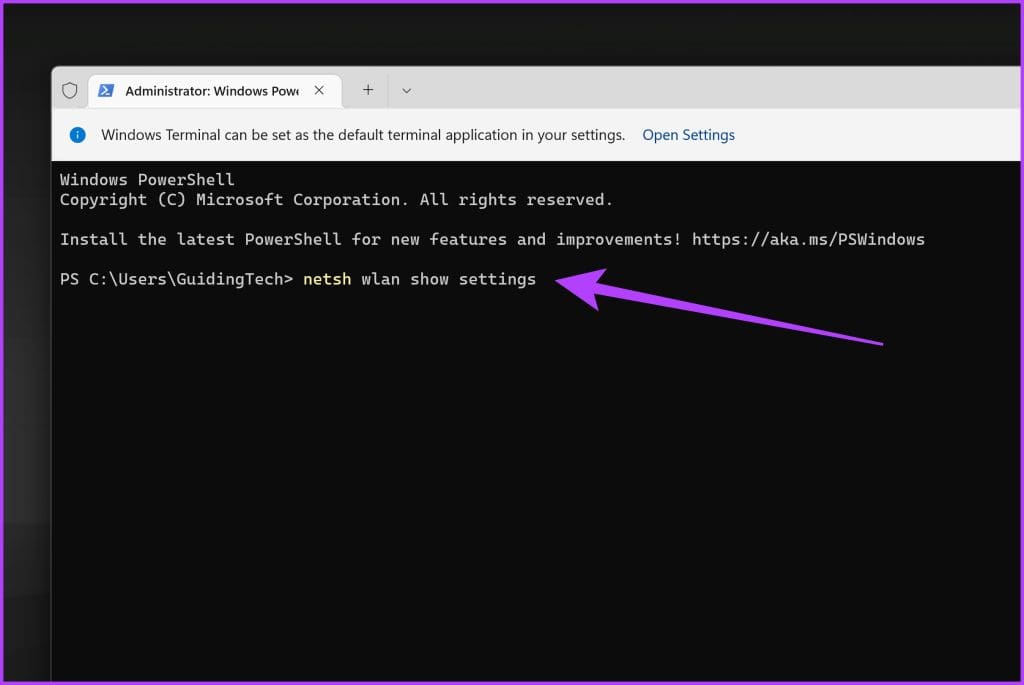
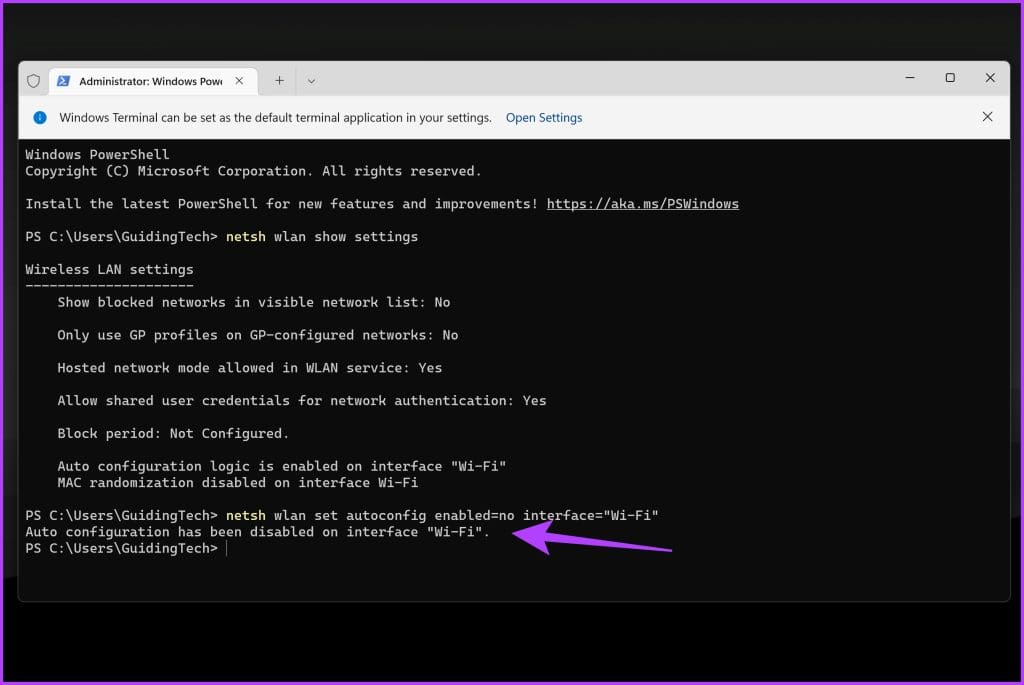
Step 3: You should now see various network settings. There should be a line stating, ‘Auto configuration logic is enabled on interface “Wireless Network Connection”.’ Here, ‘Wireless Network Connection’ is the name of your Wi-Fi connection. So, it can differ from user to user. Note down the name.
Step 4: Next, type the following command and press Enter. Replace ‘Wireless Network Connection‘ with the connection name you noted earlier.
netsh wlan set autoconfig enabled=no interface="Wireless Network Connection"
You should now get a response stating ‘Auto configuration has been disabled on interface “Wireless Network Connection”.’
And that’s it. Your Windows PC will stay connected to the Wi-Fi network you’re already on but will not search for wireless networks in the background.
Note: If you wish to enable Wi-Fi scanning later, enter the below command and press Enter.
netsh wlan set autoconfig enabled=yes interface="Wireless Network Connection"
FAQs
A good ping for Valorant is typically between 20 and 50 milliseconds (ms). This means that it takes 20 to 50 milliseconds for your actions in the game to register on the server.
Generally, a packet loss rate of 1 to 2.5 percent is acceptable. However, for some applications, such as online gaming, a packet loss rate of even 1 percent can be noticeable and cause problems.
In general, a VPN can increase ping because it adds an extra layer of encryption and routing to your internet traffic. However, in some cases, a VPN can lower ping if your ISP’s routing is inefficient or if you are connecting to a game server that is far away.
Was this helpful?
Last updated on 26 June, 2024
Read Next
 5 Best DNS Servers for Gaming for Low Ping in 2024
In the heat of battle, especially in competitive online gaming, every millisecond counts.
5 Best DNS Servers for Gaming for Low Ping in 2024
In the heat of battle, especially in competitive online gaming, every millisecond counts.
 7 Best Ways to Fix Valorant Not Launching on Windows 11
Valorant is a popular free-to-play battle royale game for Windows.
7 Best Ways to Fix Valorant Not Launching on Windows 11
Valorant is a popular free-to-play battle royale game for Windows.
 How to Ping Apple Watch from iPhone and Vice Versa
Many times, we place our Apple Watch and forget where we actually placed it.
How to Ping Apple Watch from iPhone and Vice Versa
Many times, we place our Apple Watch and forget where we actually placed it.
 How to Fix Valorant Voice Chat or Mic Not Working on Windows
Voice communication is important in multiplayer games like Valorant, enable you to effectively communicate and strategize your next move.
How to Fix Valorant Voice Chat or Mic Not Working on Windows
Voice communication is important in multiplayer games like Valorant, enable you to effectively communicate and strategize your next move.
 How to Find the Best Sensitivity for Valorant
In the world of competitive gaming, finding the perfect sensitivity for your mouse can be the difference between victory and defeat.
How to Find the Best Sensitivity for Valorant
In the world of competitive gaming, finding the perfect sensitivity for your mouse can be the difference between victory and defeat.
 5 Best Affordable Gaming Laptops for Valorant
Looking for the best laptop to play Valorant?
5 Best Affordable Gaming Laptops for Valorant
Looking for the best laptop to play Valorant?
 Top 8 Ways to Fix Mouse Cursor Lagging on Mac
A Mac is generally known for its friendly UI and smooth performance.
Top 8 Ways to Fix Mouse Cursor Lagging on Mac
A Mac is generally known for its friendly UI and smooth performance.
The article above may contain affiliate links which help support Guiding Tech. The content remains unbiased and authentic and will never affect our editorial integrity.