Fix 1: Disable GPU Hardware Acceleration in Teams
GPU hardware acceleration is enabled by default in Microsoft Teams for smooth performance. However, this feature can sometimes consume too much processing power, causing Microsoft Teams’ memory usage to skyrocket on Windows. If you don’t want that to happen, consider disabling GPU hardware acceleration in Teams.
Step 1: In the Microsoft Teams app, click the three-dot icon at the top and select Settings from the resulting menu.

Step 2: Select the General tab > tick the Disable GPU hardware acceleration option.

Fix 2: Turn off Animations and Read Receipts Teams
Although the animations in the Teams app are fun, those visual effects can increase Microsoft Teams’ memory usage on Windows. It’s best to disable them to prioritize performance.
Another thing that can help reduce Teams’ memory usage on Windows is disabling the read receipts feature, which gives a visual indication when someone has read a message.
Step 1: In the Teams app, open Settings.
Step 2: In the General tab, scroll down to Display > check the box for Turn off animations.

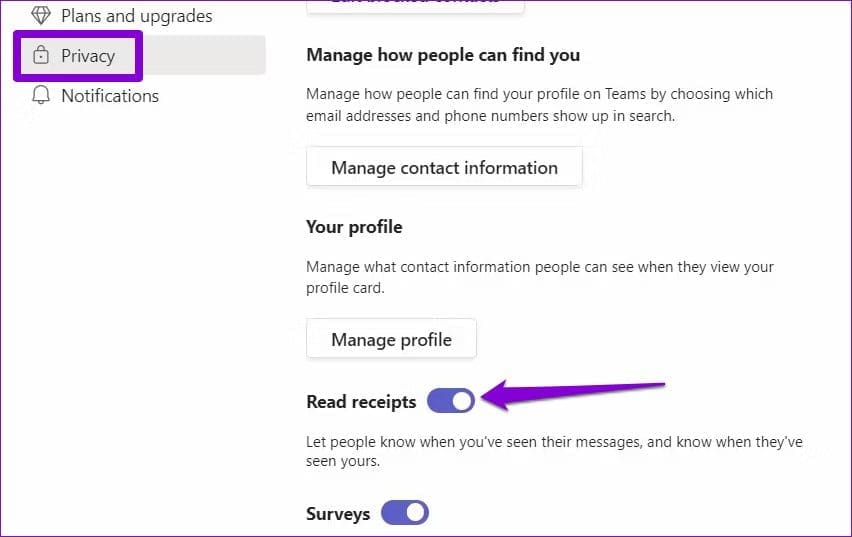
Step 3: Select the Privacy tab from the left sidebar. Then, scroll down and disable the toggle for Read receipts.
Fix 3: Disable Teams Auto-Start
By default, Microsoft Teams is configured to start automatically on Windows computers. This behavior can cause the app to consume memory even when you’re not using it. To stop Microsoft Teams from starting automatically on Windows:
Step 1: Press Ctrl + Shift + Esc to launch the Task Manager.
Step 2: In the Startup apps tab, locate Microsoft Teams. Right-click on it and select Disable.

Fix 4: Disable Teams Add-In in Outlook
The Teams add-in for Outlook lets you schedule a Teams meeting directly from the Outlook app. However, this add-in is known to cause problems with the Outlook and Teams apps on Windows. Hence, it’s best to disable it, especially if you don’t use it.
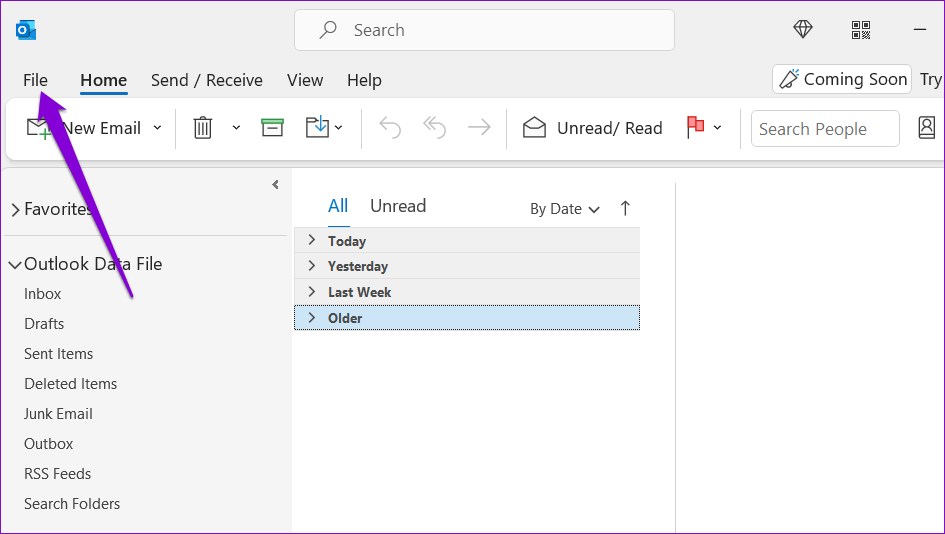
Step 1: Open the Outlook app > click the File menu at the top left.
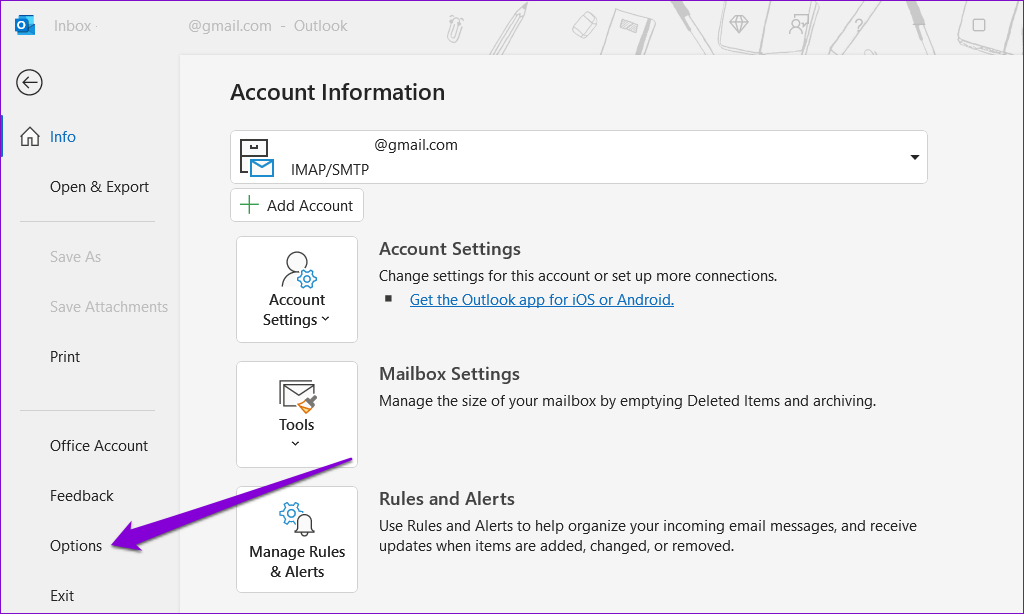
Step 2: Select Options from the left pane.
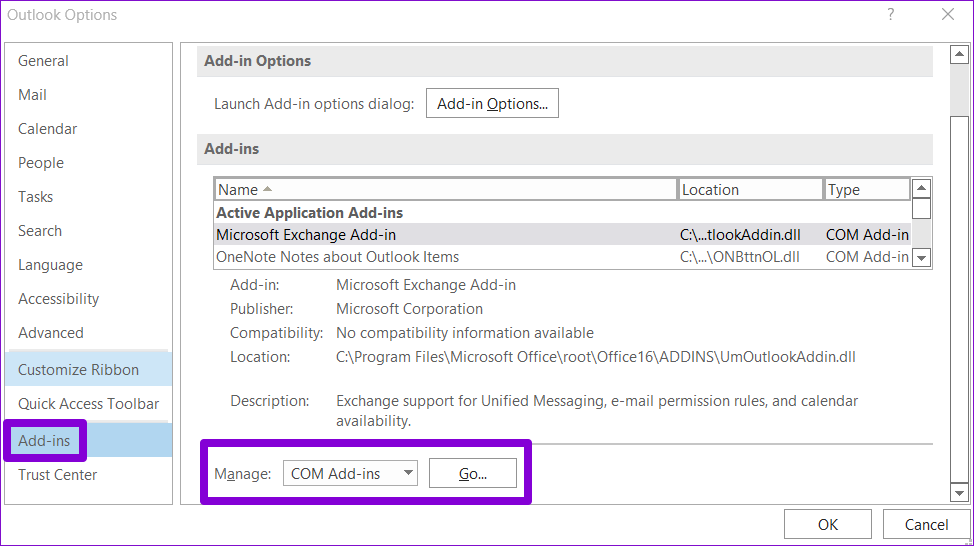
Step 3: In the Outlook Options window, switch to the Add-ins tab. Use the drop-down menu next to Manage > select COM Add-ins. Then, click the Go button next to it.
Step 4: Uncheck the box for Microsoft Teams Meeting Add-in for Microsoft Office and click OK to save the changes.

Fix 5: Clear Microsoft Teams Cache Data
Overwhelming cache data can also prevent the Teams app from working efficiently on Windows and cause its memory usage to shoot up at times. Thankfully, getting rid of existing Teams cache data is easy.
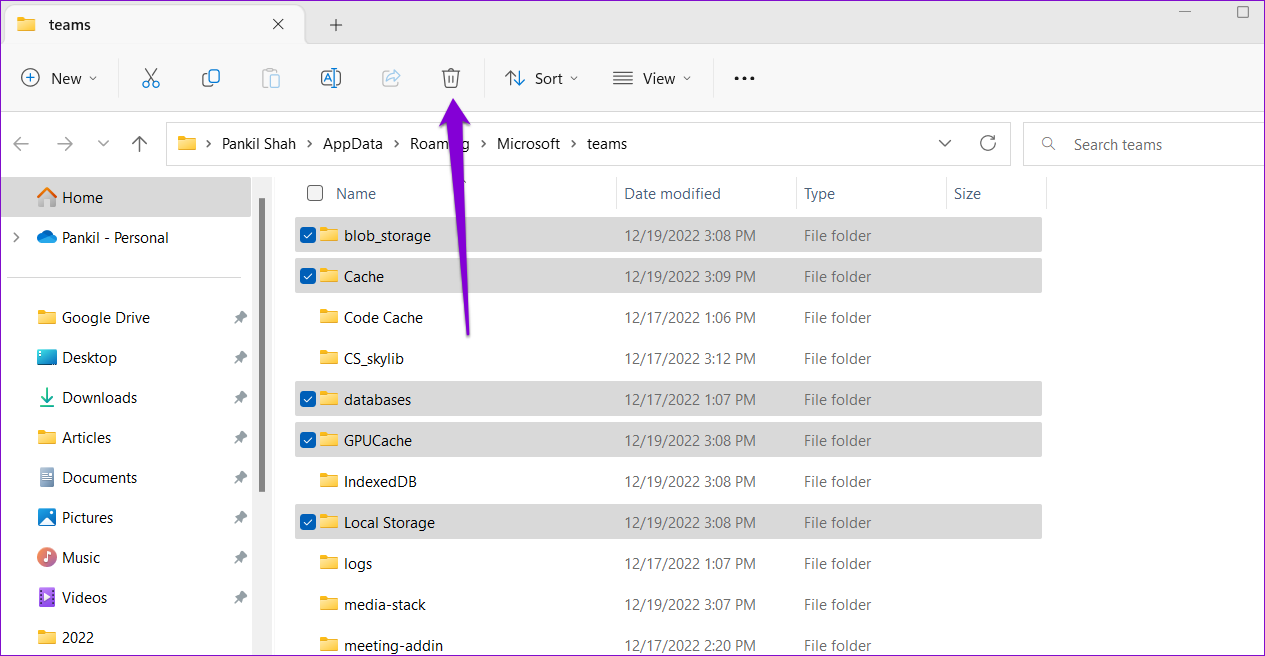
Step 1: Press the Windows key + R to open the Run dialog box. Type %appdata%\Microsoft\teams in the Open field and press Enter.
Step 2: In the File Explorer window, select the following folders: blob_storage, Cache, databases, GPUCache, Local Storage, and tmp.
Step 3: Click the trash icon at the top to delete them.
Fix 6: Repair Microsoft Teams
If clearing cache data does not help, try repairing the Microsoft Teams app on your computer. This will allow Windows to fix any common issues with the app.
Step 1: Press the Windows key + S to open the search menu > type Microsoft Teams in the search box > select App settings from the right pane.
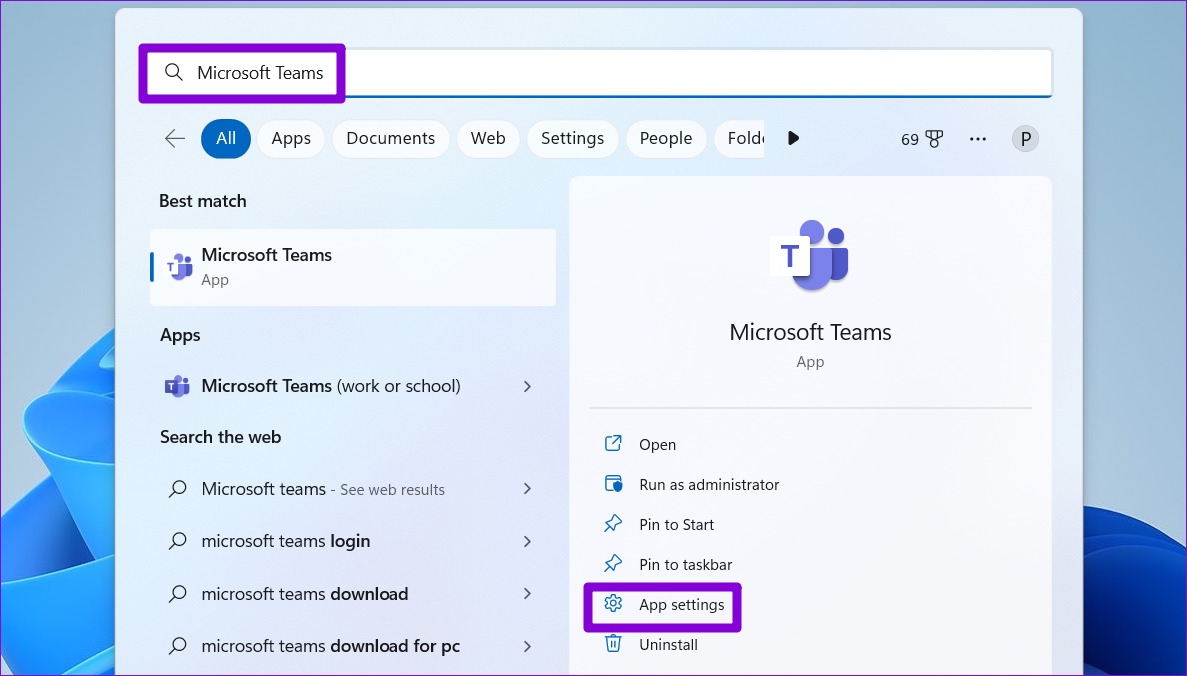
Step 2: Scroll down to the Reset section and click on Repair. Once the process is complete, a checkmark should appear next to the Repair button.

Was this helpful?
Last updated on 12 August, 2024
1 Comment
Leave a Reply
Read Next
 How to Reduce CPU and RAM Usage in Microsoft Teams on Windows 11
Common Fixes Update or reinstall the Microsoft Teams app: Open the Microsoft Store, search Microsoft Teams, and click Update (if available).
How to Reduce CPU and RAM Usage in Microsoft Teams on Windows 11
Common Fixes Update or reinstall the Microsoft Teams app: Open the Microsoft Store, search Microsoft Teams, and click Update (if available).
 4 Ways to Fix Microsoft Edge High Memory and CPU Usage
Basic Fixes Restart the Microsoft Edge browser - You should restart the browser as it may fix minor bugs and glitches that trigger the problem.
4 Ways to Fix Microsoft Edge High Memory and CPU Usage
Basic Fixes Restart the Microsoft Edge browser - You should restart the browser as it may fix minor bugs and glitches that trigger the problem.
 4 Ways to Reduce Fire TV Stick Data Usage
Basic Ways Force close apps when not in use: Go to Settings > Applications > Manage Installed Apps > select the app you want to close > Force Stop.
4 Ways to Reduce Fire TV Stick Data Usage
Basic Ways Force close apps when not in use: Go to Settings > Applications > Manage Installed Apps > select the app you want to close > Force Stop.
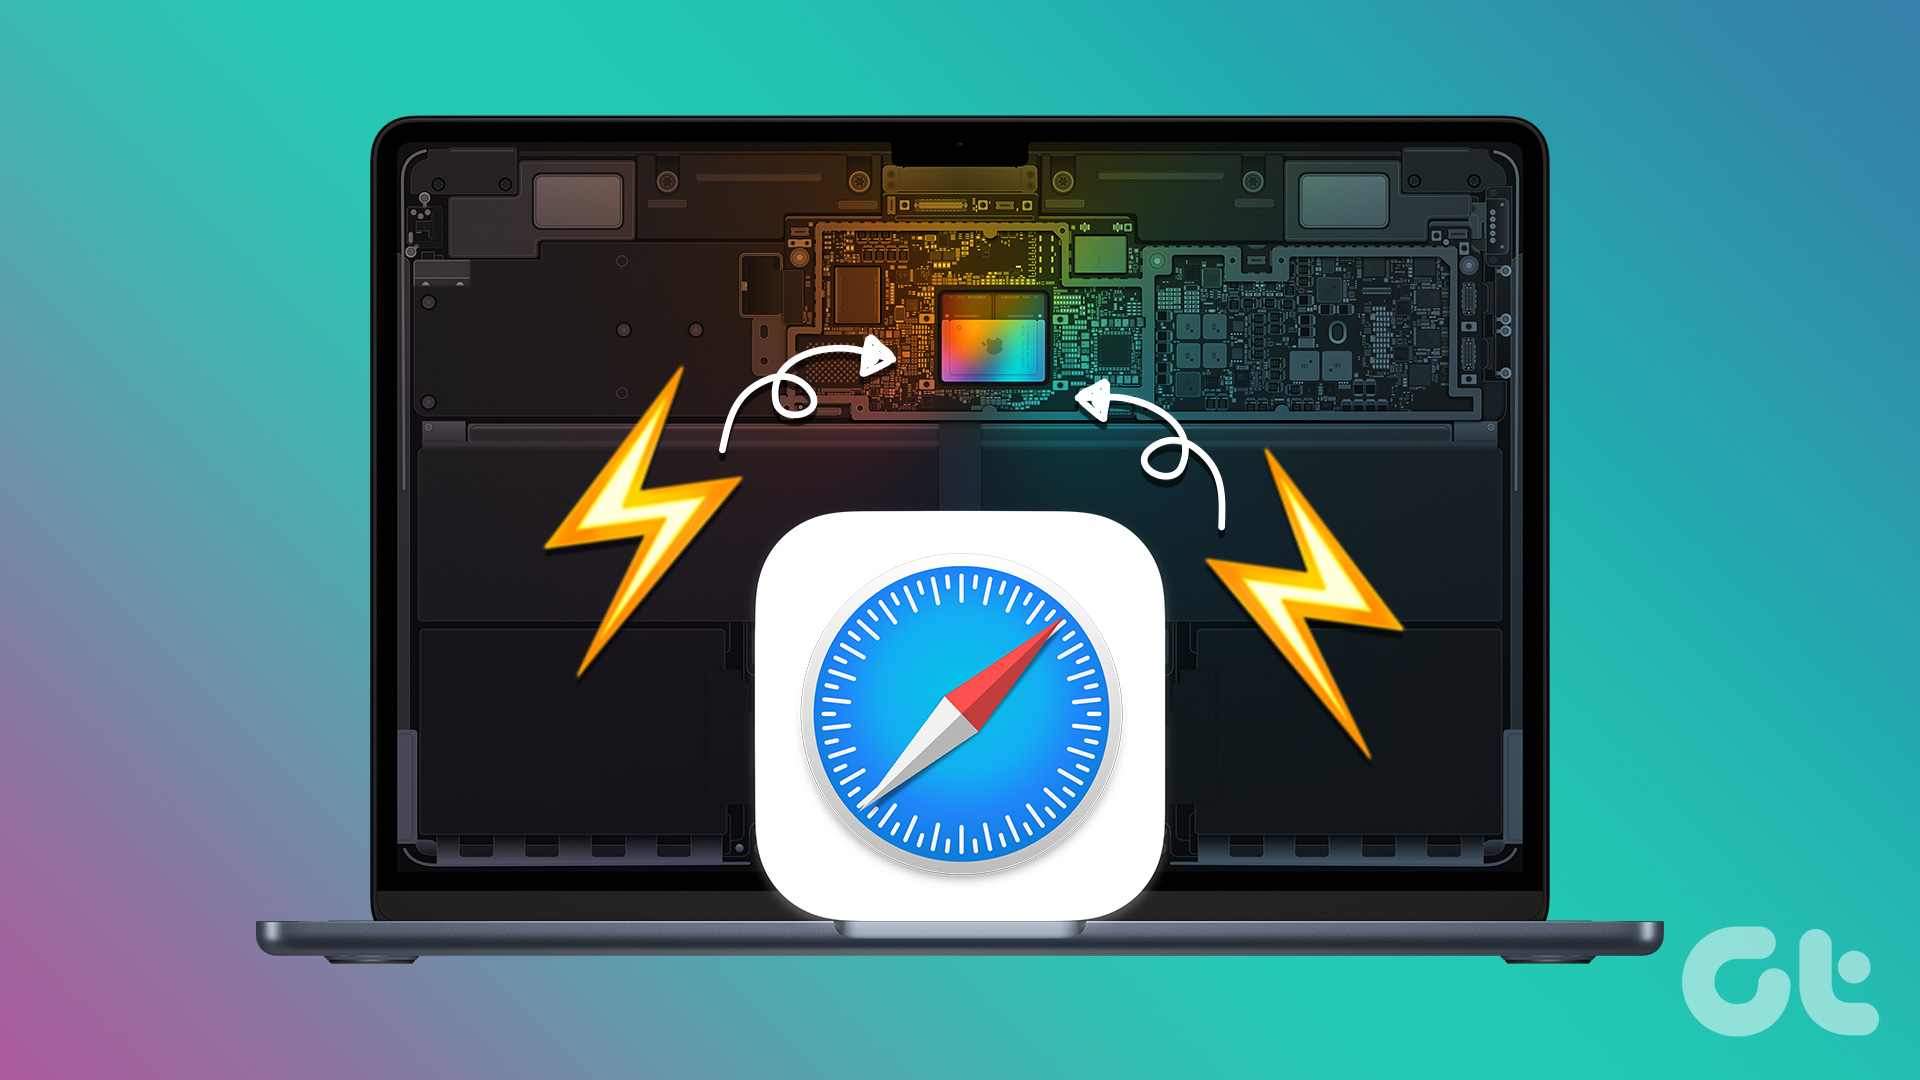 3 Ways to Fix Safari High Memory Usage on Mac
Basic Fixes Close irrelevant tabs: Close the tabs that you don't use frequently in Safari.
3 Ways to Fix Safari High Memory Usage on Mac
Basic Fixes Close irrelevant tabs: Close the tabs that you don't use frequently in Safari.
 5 Fixes for Microsoft Outlook Out of Memory or System Resources Error on Windows
Fix 1: Run the Inbox Repair Tool Damaged or corrupted PST or OST files can cause Outlook to run out of memory on your Windows computer.
5 Fixes for Microsoft Outlook Out of Memory or System Resources Error on Windows
Fix 1: Run the Inbox Repair Tool Damaged or corrupted PST or OST files can cause Outlook to run out of memory on your Windows computer.
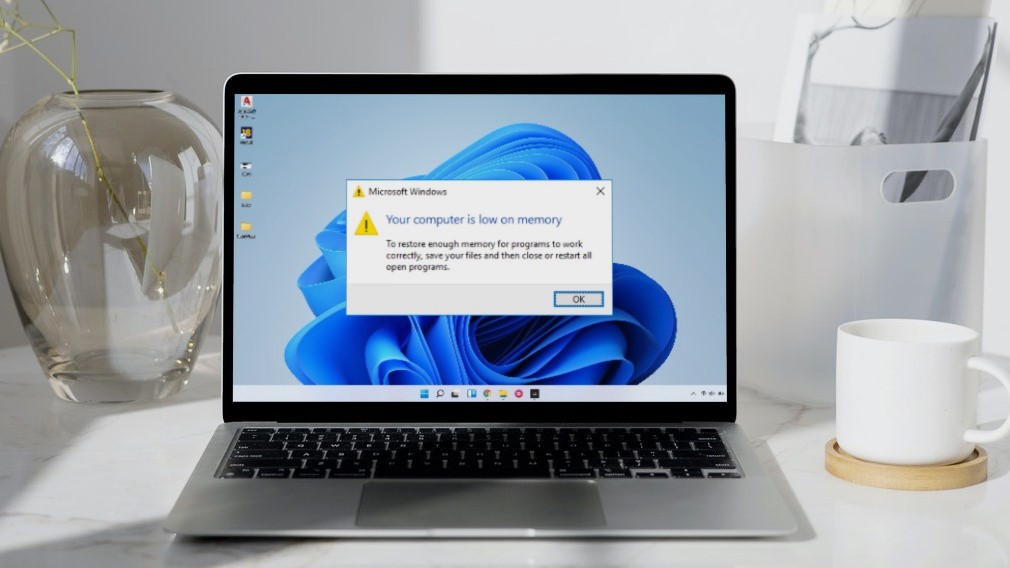 5 Ways to Fix “Your Computer Is Low on Memory” Error on Windows 10 and Windows 11
Try Basic Fixes Close unwanted apps and programs: Start by closing any unwanted apps and programs on your computer, especially the ones consuming a major chunk of your PC’s memory.
5 Ways to Fix “Your Computer Is Low on Memory” Error on Windows 10 and Windows 11
Try Basic Fixes Close unwanted apps and programs: Start by closing any unwanted apps and programs on your computer, especially the ones consuming a major chunk of your PC’s memory.
 4 Fixes for “There Isn’t Enough Memory to Complete This Action” in Microsoft Excel
Try Basic Fixes Close background apps and programs: Running too many resource-intensive apps and programs on Windows can trigger the "There isn’t enough memory to complete this action" error in
4 Fixes for “There Isn’t Enough Memory to Complete This Action” in Microsoft Excel
Try Basic Fixes Close background apps and programs: Running too many resource-intensive apps and programs on Windows can trigger the "There isn’t enough memory to complete this action" error in
 7 Ways to Reduce How Much Data Your Windows 10 PC Uses
https://youtu.be/RsUvBsjgi5k 1.
7 Ways to Reduce How Much Data Your Windows 10 PC Uses
https://youtu.be/RsUvBsjgi5k 1.
The article above may contain affiliate links which help support Guiding Tech. The content remains unbiased and authentic and will never affect our editorial integrity.

This is a very well written article, with great screenshots and instructions. These sorts of resources are getting harder and harder to find online.
Seems like everyone is making videos nowadays. I do not find videos as helpful since it is harder to find the info you need in them.
Thank you for taking the time to make this.