Windows users often complain about Google Chrome’s abnormal CPU usage. If you ignore it, then your Windows computer might feel sluggish. Luckily, you can fix Chrome’s high CPU usage and free up some resources on your computer.
If Google Chrome consistently consumes a large amount of CPU, it impacts the experience on your computer. If you don’t want to switch to Microsoft Edge, here are some solutions for fixing Google Chrome’s high CPU usage on Windows 11.
1. Close Unwanted Tabs Using Chrome Task Manager
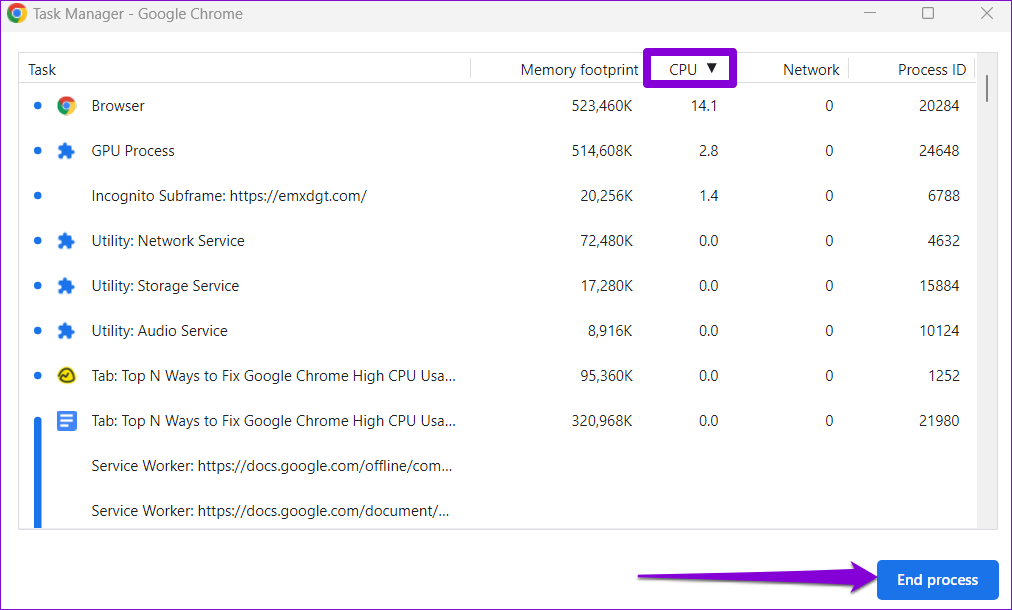
Each tab you open in Chrome consumes CPU resources, with some requiring more than others. If you like to keep a slew of tabs open while working, Chrome’s CPU usage may shoot up on Windows. You can use Chrome’s built-in Task Manager to identify resource-hungry tabs and close the ones you don’t need.
Press Shift + Esc on your keyboard to summon the Chrome’s Task Manager. Click on the CPU header to sort tabs and processes based on their CPU usage. Select the tabs you don’t need and use the End process button to close them.
2. Disable Hardware Acceleration
Enabling Hardware Acceleration in Chrome allows the browser to use your GPU instead of your CPU for graphics-intensive tasks. Although this feature is supposed to reduce the load on your CPU, it can sometimes cause more harm than good. You can try disabling hardware acceleration in Chrome to check if that makes any difference.
Type chrome://settings/system in the address bar at the top and press Enter. Then, disable the toggle for ‘Use hardware acceleration when available.’
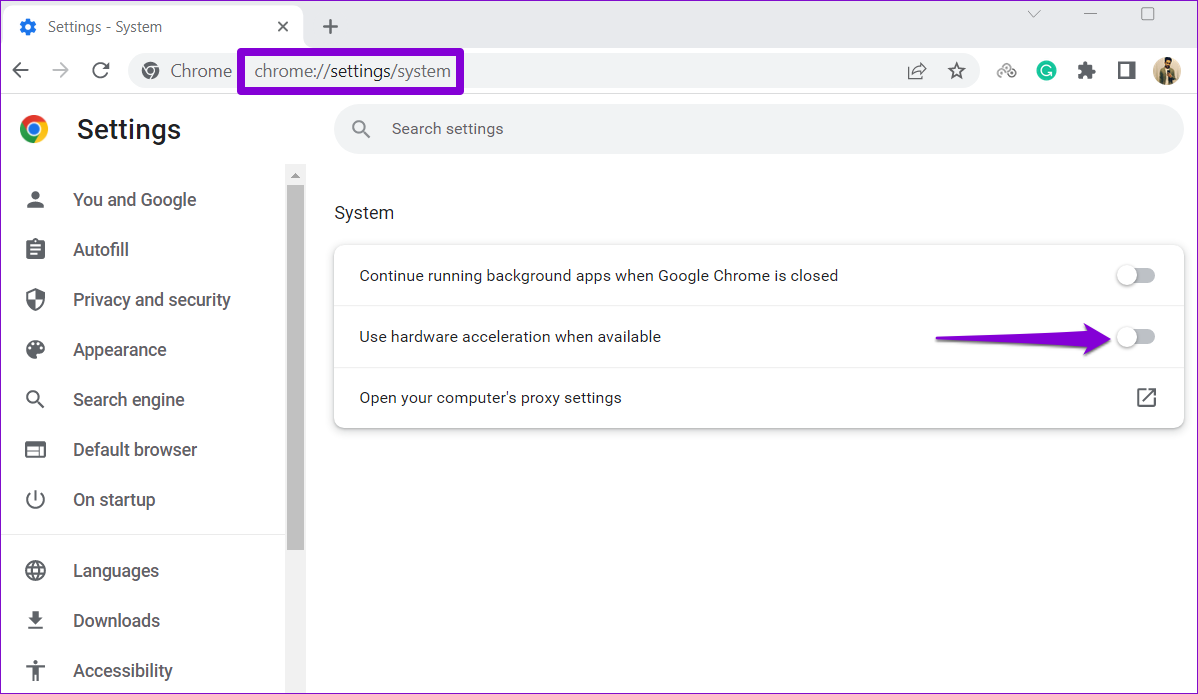
Restart Google Chrome after this and check if the CPU usage has returned to normal.
3. Remove Unused Extensions
Using too many extensions can also result in increased CPU usage on Windows. This can also happen if one of your extensions is misbehaving. You’ll need to remove any unnecessary extensions from Chrome to fix it.
Step 1: Open Google Chrome. Click the menu icon in the top-right corner, go to More tools, and select Extensions from the submenu.

Step 2: Use the toggles to disable your unused extensions or click the Remove button to delete them.

After this, restart Chrome and monitor its CPU usage using Windows Task Manager.
4. Stop Chrome From Preloading Webpages
For a faster browsing experience, Google Chrome has a feature that lets you preload webpages that you visit often. However, this behavior may cause Chrome’s CPU usage to increase on Windows. Hence, it’s best to disable this feature if you’re encountering problems.
Step 1: In Chrome, click the three-dot menu icon in the top right corner and select Settings.

Step 2: In the Privacy and security tab, click on ‘Cookies and other site data.’

Step 3: Scroll down and disable the toggle next to ‘Preload pages for faster browsing and searching.’

5. Prevent Chrome From Running in the Background After Closing
If Google Chrome continues to use CPU resources even when you close the browser, some of your Chrome apps are still active. If you don’t want that to happen, here’s how to stop Chrome from running in the background.
Step 1: Open Google Chrome on your PC. Click the three-dot menu icon in the top right corner and select Settings.
Step 2: Navigate to the System tab and toggle off the switch next to ‘Continue running background apps when Google Chrome is closed.’

6. Find Harmful Software Using Chrome
There’s a chance that Chrome’s high CPU usage on Windows is caused by a virus-affected app or program running on your PC. You can scan your computer for harmful software using Google Chrome to check for this possibility.
Type chrome://settings/cleanup in Chrome’s address bar and press Enter. Click the Find button to initiate the scan.
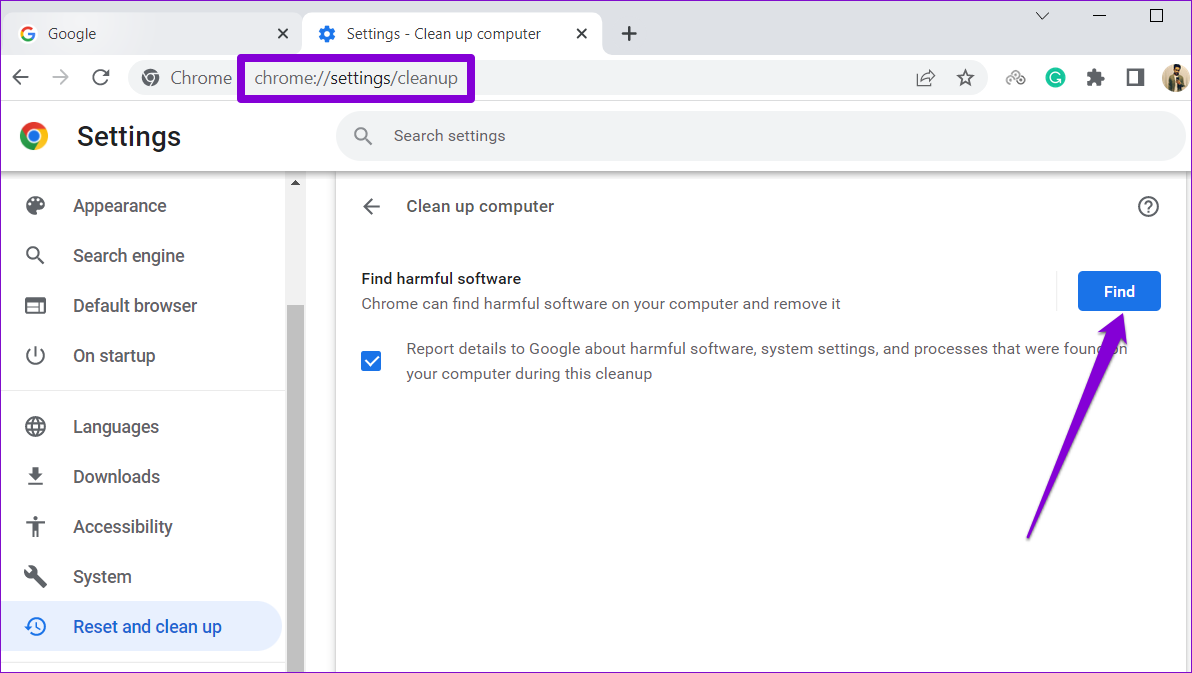
If Google Chrome detects suspicious programs, consider removing them from your computer.
7. Clear Browser Cache
Chrome’s increased CPU usage on Windows 11 could also be due to outdated or corrupt cache files. If that’s the case, clearing Chrome’s cache data should help.
Press Ctrl + Shift + Delete on your keyboard to open the Clear browsing data panel. Tick the box that reads ‘Cached images and files’ and hit the Clear data button.
![]()
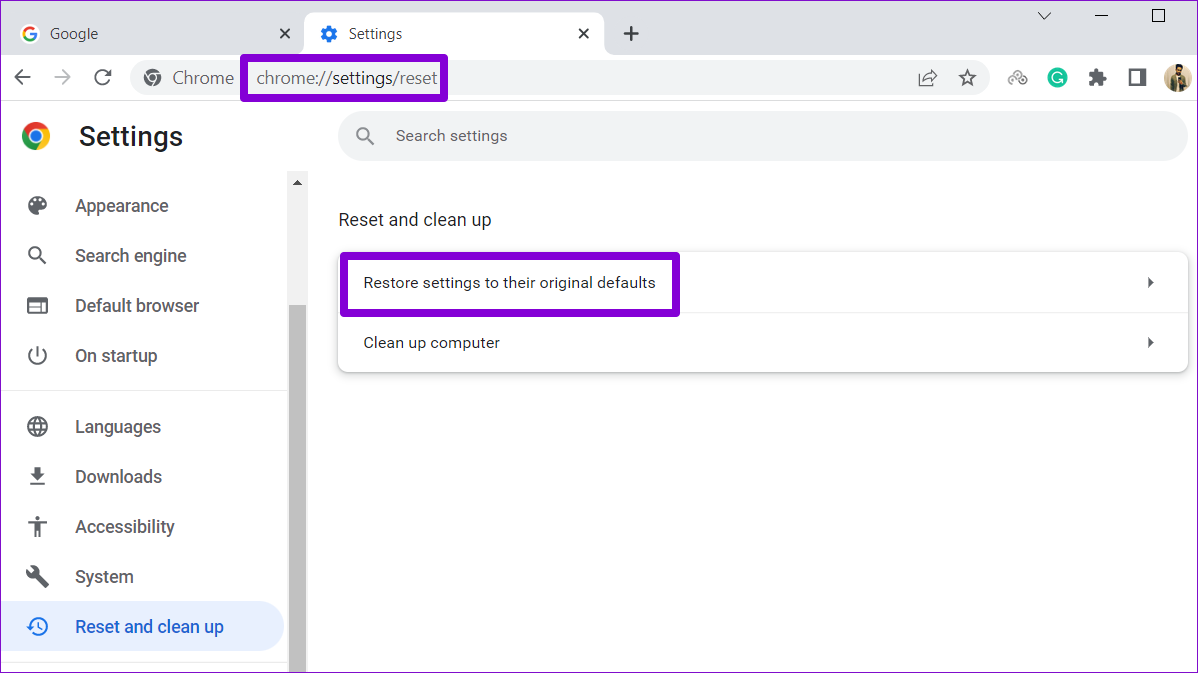
8. Reset Google Chrome
If nothing else works, you can consider resetting Google Chrome as a last resort to fix the high CPU usage problem. For that, type chrome://settings/reset in the address bar at the top in Chrome and then press Enter. Click on ‘Restore settings to their original defaults.’
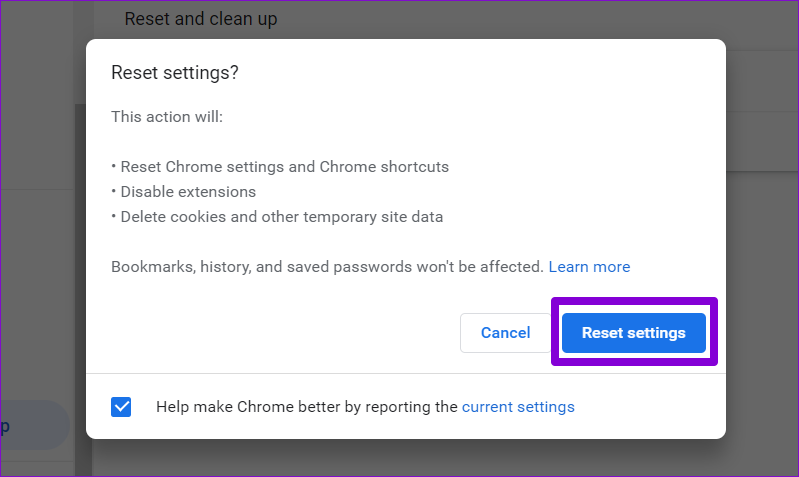
Select the Reset settings button to confirm.
Always Under Control
Even the most popular browser on earth can disappoint you with such issues at times. But if you take the right steps, fixing Chrome’s high CPU usage on Windows 11 isn’t too difficult. We hope that these solutions help to reduce Chrome’s high CPU usage on your computer.
Was this helpful?
Last updated on 15 December, 2022
Read Next
 Top 8 Ways to Fix Google Chrome High CPU Usage on Mac
Google Chrome is infamous for high RAM and CPU usage on Windows and Mac.
Top 8 Ways to Fix Google Chrome High CPU Usage on Mac
Google Chrome is infamous for high RAM and CPU usage on Windows and Mac.
 Top 8 Ways to Fix Windows Explorer High CPU Usage on Windows 11
Windows Explorer is the file manager application on Windows to view the data and also access the Control Panel options.
Top 8 Ways to Fix Windows Explorer High CPU Usage on Windows 11
Windows Explorer is the file manager application on Windows to view the data and also access the Control Panel options.
 Top 10 Ways to Fix High CPU Usage on Windows 11
When a PC appears sluggish, users often open the Task Manager and are baffled to view higher CPU usage.
Top 10 Ways to Fix High CPU Usage on Windows 11
When a PC appears sluggish, users often open the Task Manager and are baffled to view higher CPU usage.
 How to Fix Microsoft Edge High Memory and CPU Usage
Basic Fixes Restart the Microsoft Edge browser - You should restart it as it may fix minor issues that trigger the problem.
How to Fix Microsoft Edge High Memory and CPU Usage
Basic Fixes Restart the Microsoft Edge browser - You should restart it as it may fix minor issues that trigger the problem.
 8 Best Ways to Fix Microsoft Teams High CPU Usage on Windows
Microsoft Teams is an outstanding team collaboration app pre-installed on Windows.
8 Best Ways to Fix Microsoft Teams High CPU Usage on Windows
Microsoft Teams is an outstanding team collaboration app pre-installed on Windows.
 6 Ways to Fix Windows Modules Installer Worker High CPU Usage
If you've ever found your computer's fan working overtime and the CPU usage going sky-high, you're not alone.
6 Ways to Fix Windows Modules Installer Worker High CPU Usage
If you've ever found your computer's fan working overtime and the CPU usage going sky-high, you're not alone.
 Top 7 Fixes for Discord’s High CPU Usage on Windows
Is Discord using too much CPU on your Windows 10 or 11 computer?
Top 7 Fixes for Discord’s High CPU Usage on Windows
Is Discord using too much CPU on your Windows 10 or 11 computer?
 Windows Audio Device Graph Isolation: Fix High CPU Usage
The productivity of your work can be easily influenced by how your Windows PC performs.
Windows Audio Device Graph Isolation: Fix High CPU Usage
The productivity of your work can be easily influenced by how your Windows PC performs.
The article above may contain affiliate links which help support Guiding Tech. The content remains unbiased and authentic and will never affect our editorial integrity.