Common Fixes
- Check for physical damage: Ensure the HDMI cable and connectors are intact. If damaged, swap it out with a new cable.
- Re-plug the HDMI cable: Plug it out from the existing port, clean its connectors thoroughly, and reconnect it to your PC.
- Switch HDMI input on connected device: Most devices (e.g., monitor, TV) offer multiple HDMI ports. Switch and check them sequentially (using device settings) to verify getting the HDMI input.
- Disable the Battery Saver mode: Open the Quick Access panel in the bottom right corner and click Battery saver to turn it off. Alternatively, head to System > Power & battery > turn off the Battery saver.
- Update and restart PC: Press the Windows + I keys to open Settings > select Windows Update in the left sidebar > install available system updates. To restart your PC, press the Windows key > click the Power button > select Restart.
Fix 1: Manually Select the Connected Display
If the HDMI port is not working accurately, follow the below steps to detect the connected display on Windows 11 manually.
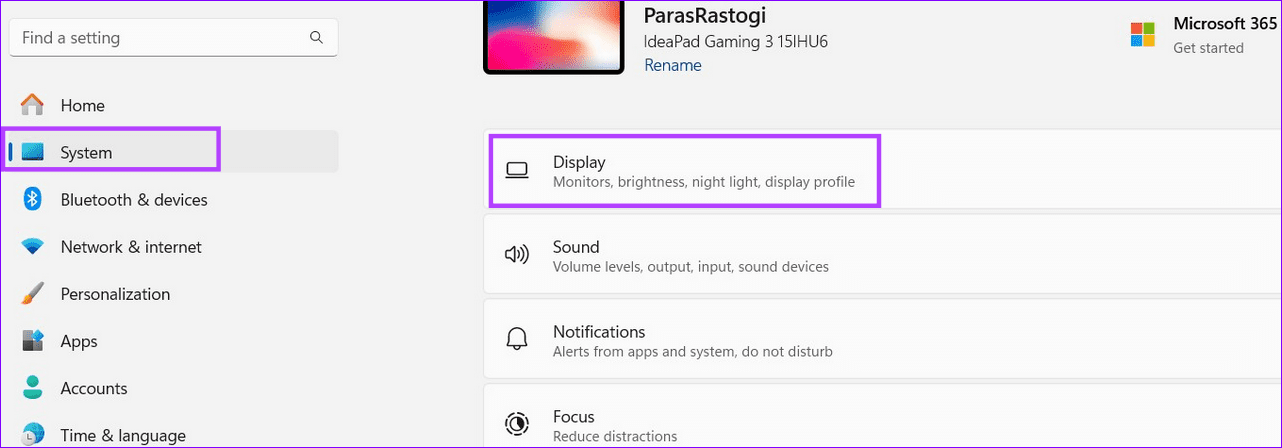
Step 1: Press the Windows + I keys to open Settings, select System in the left sidebar, and click Display.
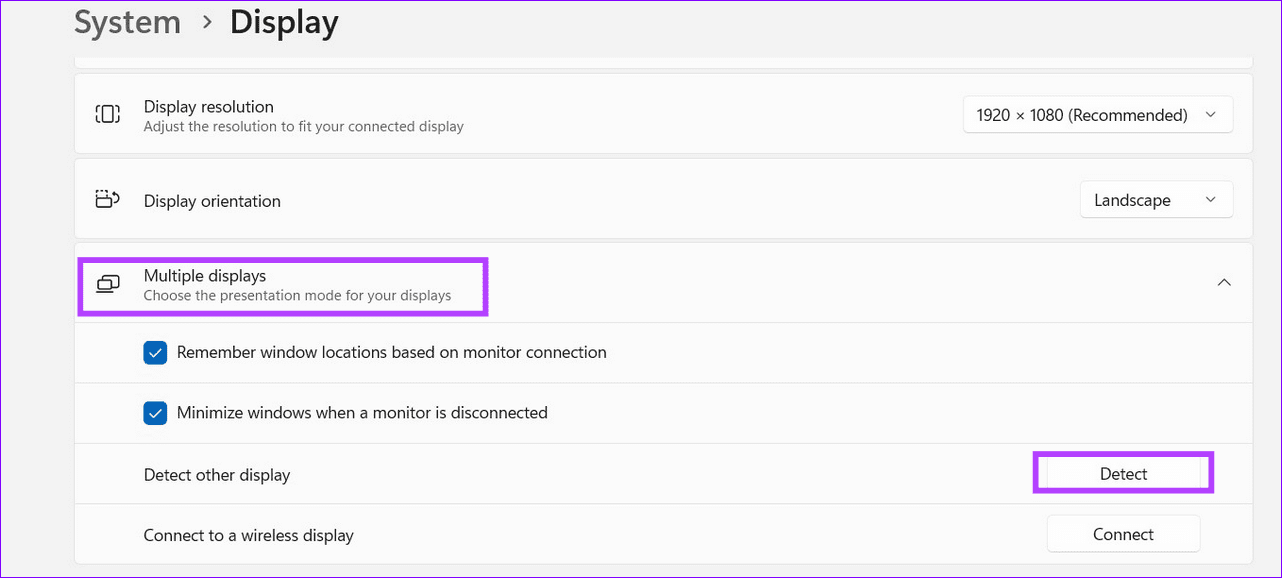
Step 2: Expand Multiple displays and click Detect next to Detect other display.
Fix 2: Check the Audio Output
If you’ve connected your PC to a TV or a monitor (via HDMI) and the audio is still coming out of your Windows machine, you can manually switch the audio output using Windows Settings.
Step 1: Open Windows Settings, click System in the left sidebar, and select Sound.

Step 2: Expand Choose where to play sound and pick your connected device to transmit the system audio.

Fix 3: Repair Corrupt System Files
HDMI port may not work due to corrupt system files on Windows. Microsoft recommends running the DISM (Deployment Image Servicing and Management) scan to fix corrupt or missing system files.
Step 1: Press the Windows key, search Command Prompt, and click Run as administrator.

Step 2: Copy-paste the following command, hit Enter, and restart your PC.
DISM.exe /Online /Cleanup-image /Restorehealth
Fix 4: Reinstall GPU Drivers
Outdated or corrupt GPU drivers can cause an HDMI port to not work on your Windows 11 PC. To fix this, you should reinstall the GPU drivers and try again.
Note: Your Windows laptop or PC screen may flicker a few times while uninstalling the GPU drivers.
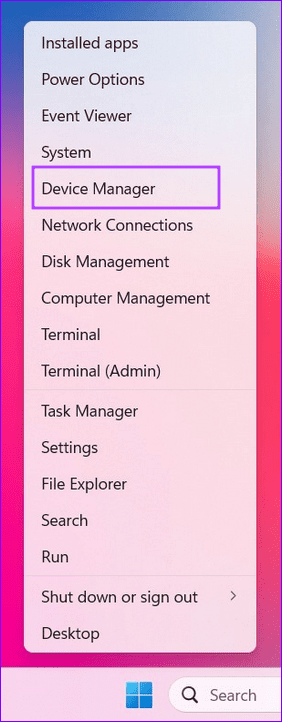
Step 1: Press the Windows + X keys simultaneously to open the Power User Menu and select Device Manager.
Step 2: Expand Display adapters, right-click your GPU adapter, and select Uninstall device. Restart your PC to let Windows reinstall the GPU drivers.

Tip: You can also update GPU drivers by installing the latest version from its official product page.
Fix 5: Rollback the Recent Windows Update
An incomplete or corrupt system update can also create HDMI port issues on your Windows machine. Roll back the recent Windows update to restore normalcy.
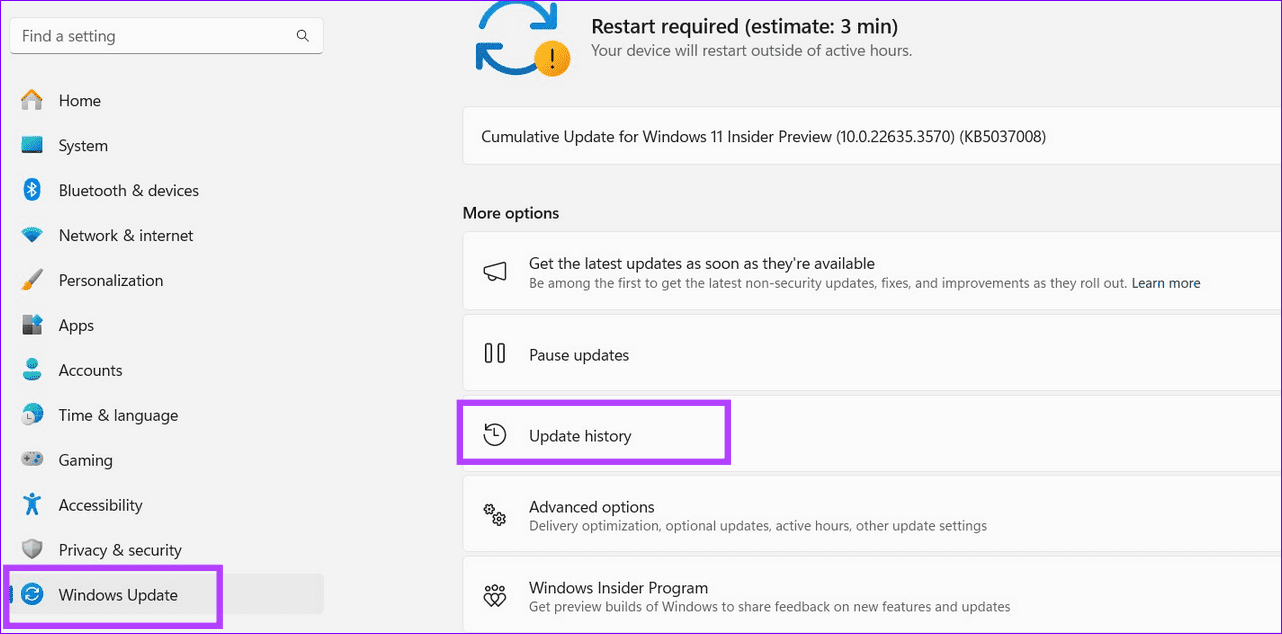
Step 1: Open Windows Settings (press the Windows + I keys), click Windows Update in the left sidebar, and select Update history.
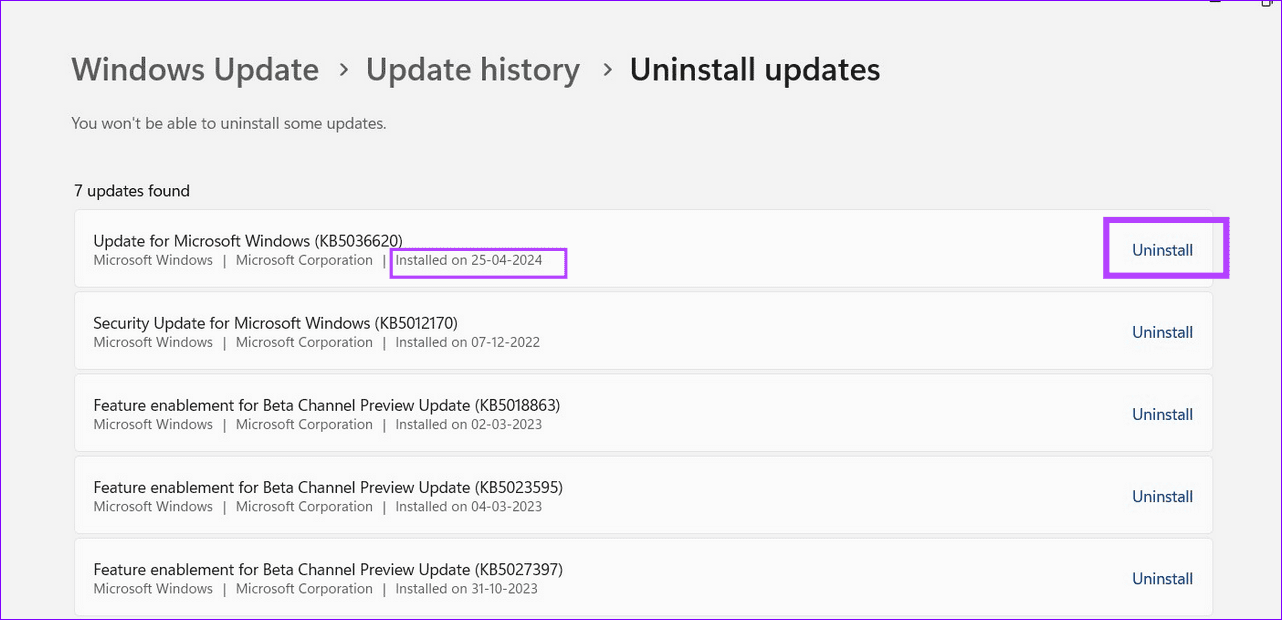
Step 2: Scroll down to the bottom > select Uninstall updates.

Step 3: Locate the recent Windows update by the Installed on date > click Uninstall to roll it back.
Alternative: Use the DisplayPort
The HDMI port isn’t the only port for viewing laptop or PC content on the big screen. If your external device has a DisplayPort, connect the Windows device with a Type-C to DisplayPort cable.
Was this helpful?
Last updated on 22 May, 2024
Read Next
 Top 10 Fixes for HDMI Port Not Working on Mac
Following a short absence, the HDMI port returned in the latest MacBook Pro line up.
Top 10 Fixes for HDMI Port Not Working on Mac
Following a short absence, the HDMI port returned in the latest MacBook Pro line up.
 6 Best Mini HDMI to HDMI Cables That You Can Buy
Whether it's a DSLR, a Raspberry Pi, or your slim ultrabook laptop, Mini HDMI ports are still quite common these days.
6 Best Mini HDMI to HDMI Cables That You Can Buy
Whether it's a DSLR, a Raspberry Pi, or your slim ultrabook laptop, Mini HDMI ports are still quite common these days.
 11 Easy Ways to Fix HDMI Audio Not Working in Windows 11
When watching a movie, series, show, etc., using HDMI audio seems to have become a staple.
11 Easy Ways to Fix HDMI Audio Not Working in Windows 11
When watching a movie, series, show, etc., using HDMI audio seems to have become a staple.
 10 Ways to Fix Moisture Detected in Charging Port Error on Samsung Galaxy Phones
Most Samsung Galaxy devices these days come with an IP rating.
10 Ways to Fix Moisture Detected in Charging Port Error on Samsung Galaxy Phones
Most Samsung Galaxy devices these days come with an IP rating.
 4 Ways to Fix HDMI to DisplayPort Not Working
Basic Fixes: Check cables, adapters, and ports: A loose connection or incorrect wire can prevent the HDMI from detecting your monitor.
4 Ways to Fix HDMI to DisplayPort Not Working
Basic Fixes: Check cables, adapters, and ports: A loose connection or incorrect wire can prevent the HDMI from detecting your monitor.
 Top 6 Wi-Fi Extender Wall Plugs With Ethernet Port
A wall Wi-Fi extender is useful when you want to expand and improve the wireless network's quality inside your home.
Top 6 Wi-Fi Extender Wall Plugs With Ethernet Port
A wall Wi-Fi extender is useful when you want to expand and improve the wireless network's quality inside your home.
 Top 4 Photo Printers With SD Card Support and USB Port
A photo printer with either SD card support or a USB port simplifies a lot of things.
Top 4 Photo Printers With SD Card Support and USB Port
A photo printer with either SD card support or a USB port simplifies a lot of things.
 4 Best Fixes for Windows 10 Not Detecting HDMI TV/Monitor
You'd find a few video connection ports on a typical Windows computer.
4 Best Fixes for Windows 10 Not Detecting HDMI TV/Monitor
You'd find a few video connection ports on a typical Windows computer.
The article above may contain affiliate links which help support Guiding Tech. The content remains unbiased and authentic and will never affect our editorial integrity.