Method 1. Using Windows Security
Step 1: Press the Windows key, type Windows Security, and click Open.
Step 2: Navigate to the Firewall & network protection settings.
Step 3: Select a Private network or Public network.
Note: We are going with a Public network.

Step 4: Toggle off the Microsoft Defender Firewall option. In the prompt, select Yes.

Now, follow the same steps to disable the firewall from the Private network or vice versa. That’s it. You successfully disabled Windows Firewall.
Method 2. Using Control Panel
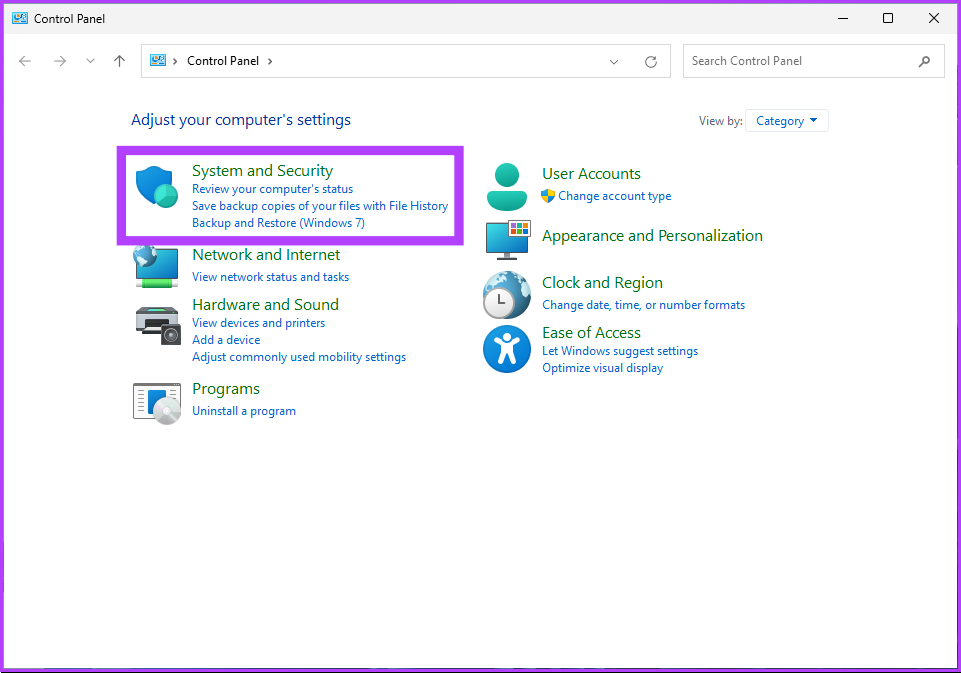
Step 1: Press the Windows key, type Control Panel, and click Open.
Step 2: Go to the System and Security option.
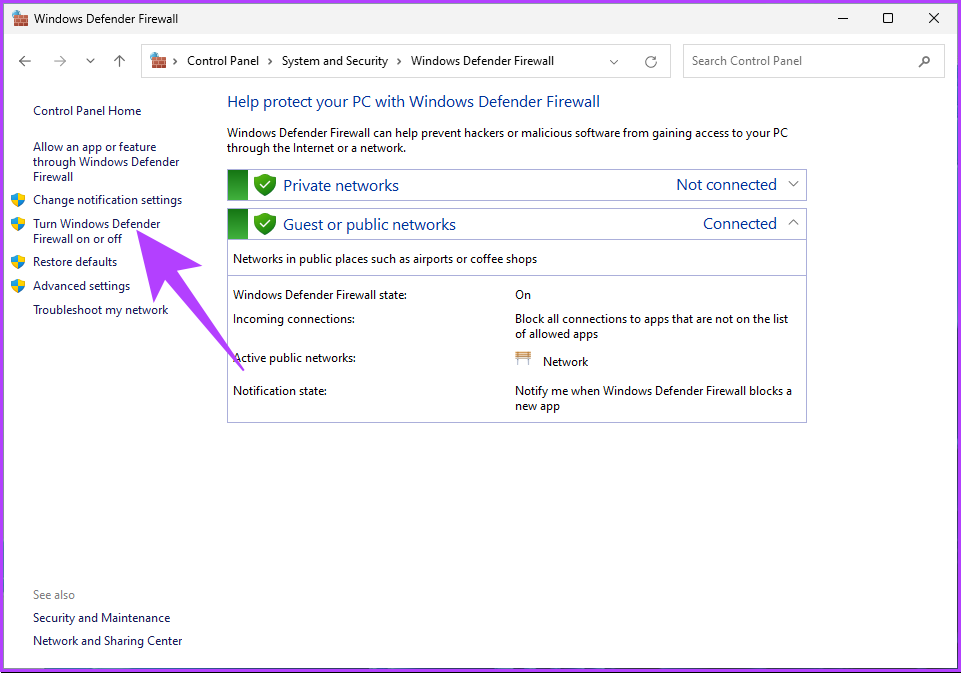
Step 3: Click on Windows Defender Firewall.
Step 4: In the left pane, click on Turn Windows Defender Firewall on or off.
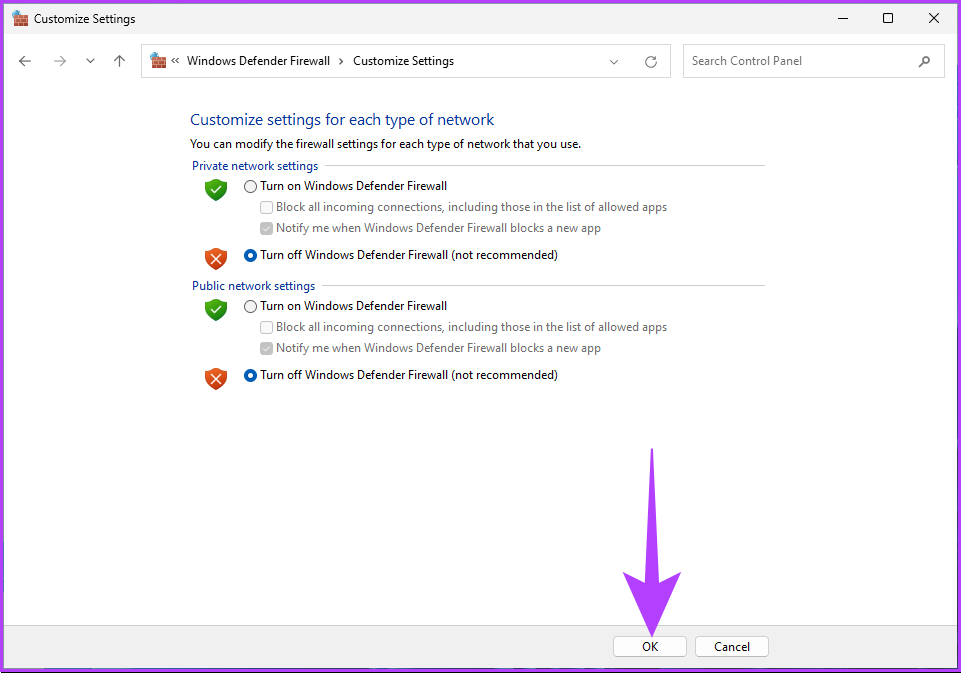
Step 5: Now, under Customize settings for each type of network, choose the Turn off Windows Defender Firewall (not recommended) option in Private network settings and Publick network settings.
Step 6: Click on OK to apply the changes.
Method 3. Using Command Prompt
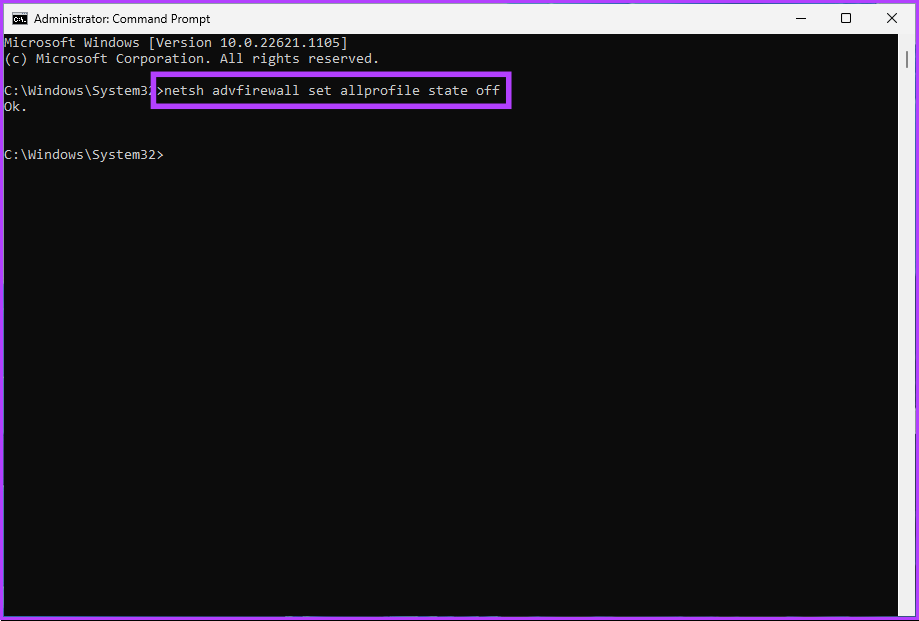
Step 1: Press the Windows key, type Command Prompt, and click Run as administrator.
Step 2: Type the below command and hit Enter.
netsh advfirewall set allprofile state off
Note: This command will turn off the firewall for all the network profiles.
If you want to disable it for the public network profile, type the below command and press Enter.
netsh advfirewall set publicprofile state off
If you want to disable it for the private network profile, type the below command and press Enter.
netsh advfirewall set privateprofile state off
If you want to disable it for the domain network profile, type the below command and press Enter.
netsh advfirewall set privateprofile state off
You can disable Windows firewalls with any of the selected commands mentioned above. If you don’t want to do it through Command Prompt, use PowerShell.
Method 4. Using PowerShell
Step 1: Press the Windows key, type Windows PowerShell, and click Run as Administrator.
Step 2: Type the below command and press Enter.
Set-NetFirewallProfile -Profile Domain,Public,Private -Enabled False

Method 5. Using Registry Editor
Step 1: Press the Windows key, type Registry Editor, and click Open. In the prompt, select Yes.
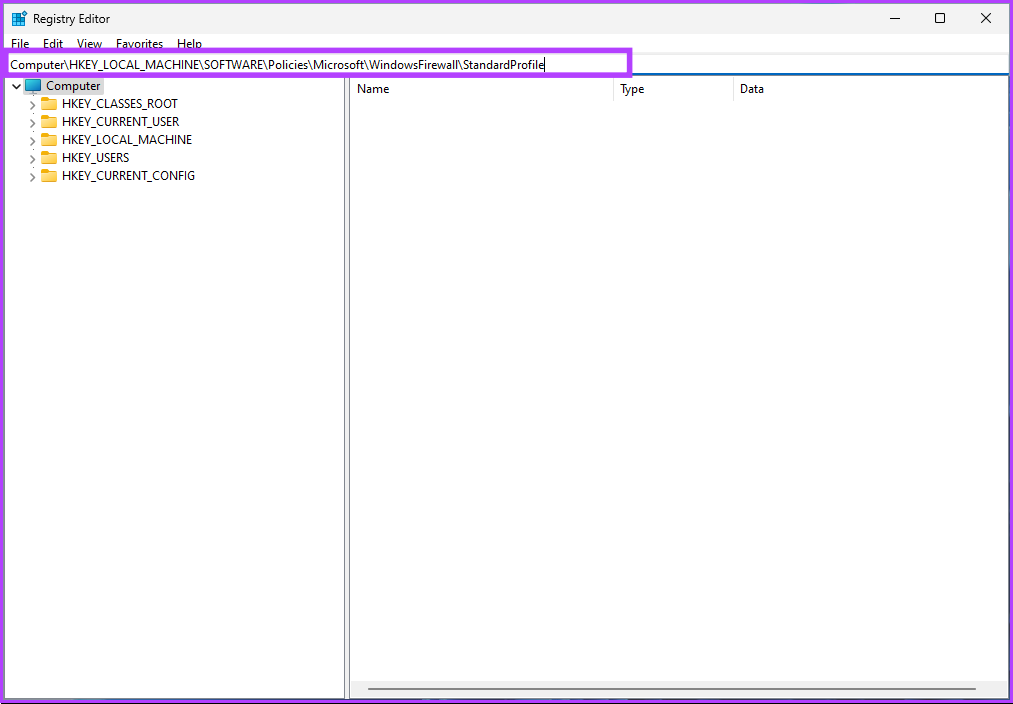
Step 2: In the top bar, enter the below-mentioned address.
HKEY_LOCAL_MACHINE\SOFTWARE\Policies\Microsoft\WindowsFirewall\StandardProfile
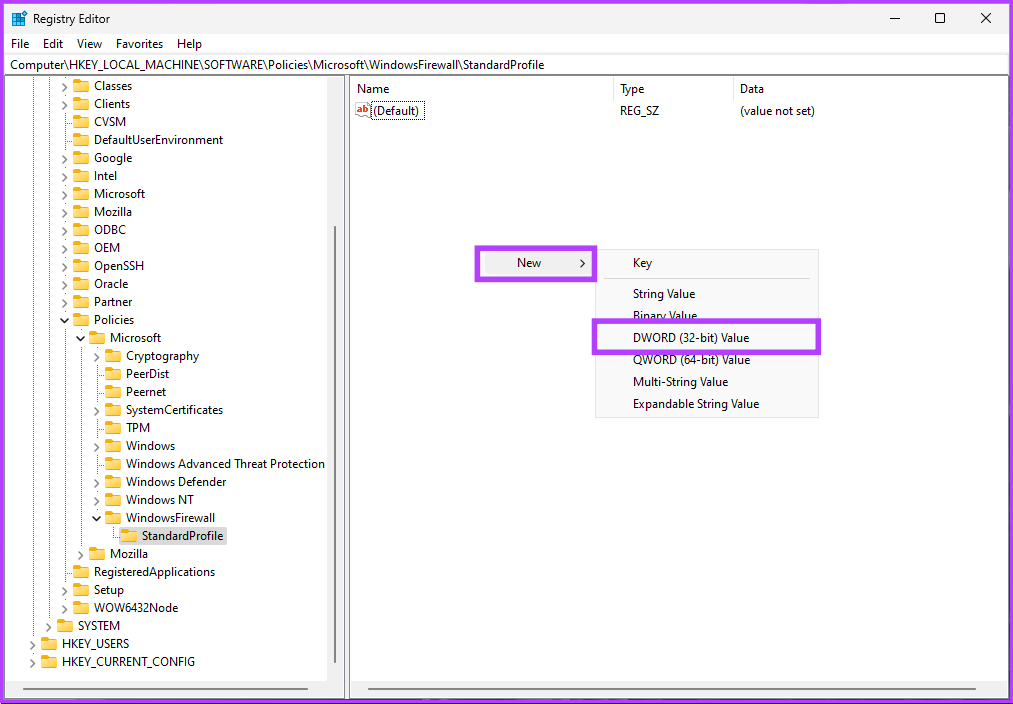
Step 3: Under the StandardProfile folder, right-click, select New, and choose DWORD (32-bit) Value.
Step 4: Type EnableFirewall in the name field.
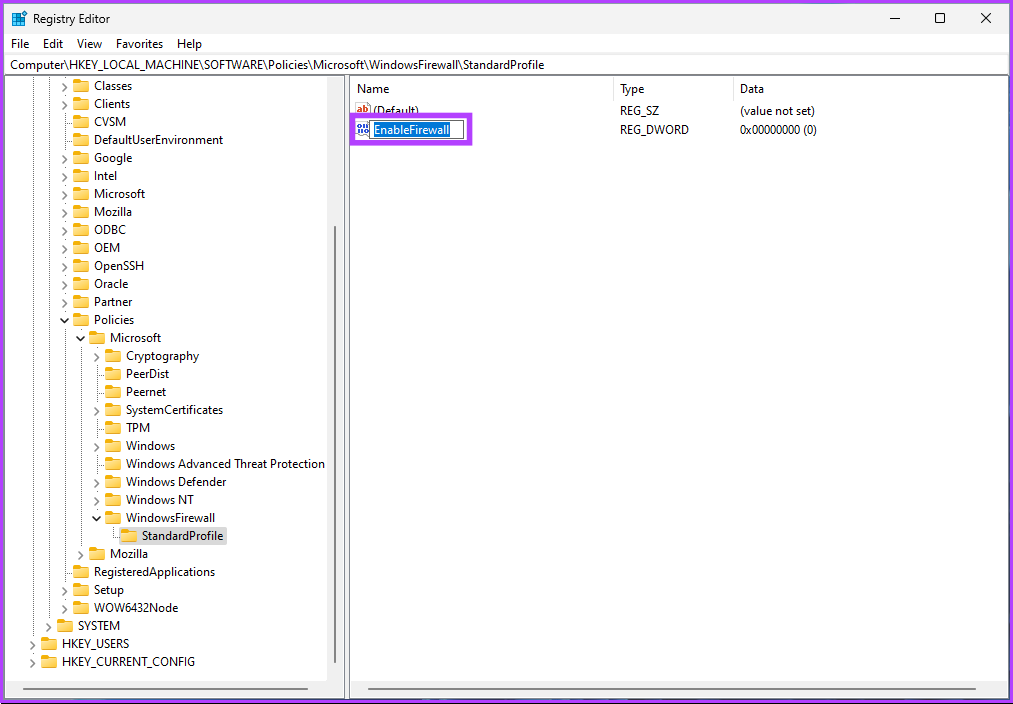
Step 5: Double-click the new value, type 0 in the Value Data field, and press OK.

Finally, reboot the system to implement the changes. And that’s it! When the system boots back up, the firewall on Windows will be disabled. If you don’t want to disable the firewall from the registry, you can use the Group Policy editor.
Method 6. How to Turn Off Firewall Using Group Policy Editor
Group Policy Editor is only available in the Windows 11 Pro and Enterprise versions. If you are using Windows 11 Home Editor, you cannot use this method.
Step 1: Press the Windows keys, type gpedit, and click Open.
Step 2: In the left pane, under Local Computer Policy, select Computer Configuration.

Step 3: In the right pane, double-click on Administrative Templates.
Step 4: Select Network.

Step 5: Under the Network option, locate and click on Network Connections.
Step 6: Navigate to Windows Defender Firewall.

Step 7: Select Standard Profile.
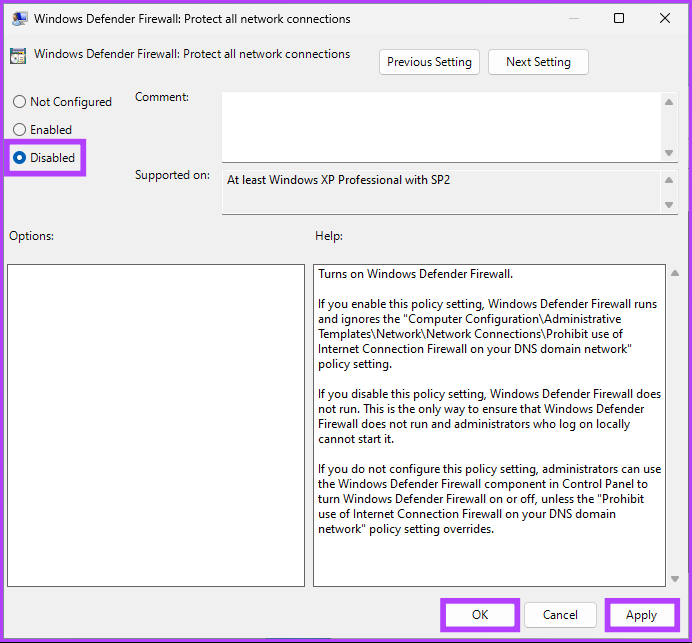
Step 8: In the right pane, select Windows Defender Firewall: Protect all network connections.

Step 9: Select Disabled > click on Apply > OK.
There you go. Now, all you need to do is reboot Windows. And once it boots back up, the Windows Firewall will be disabled.
FAQs
Firewall software monitors and controls incoming and outgoing network traffic. It runs in the background and consumes minimal resources, so disabling the firewall may not affect your system performance or internet speed.
A firewall is generally recommended for better security, as it helps protect your computer or network from unauthorized access, hackers, and malware. However, in some cases, it may cause connectivity issues. Before disabling the firewall settings, it is recommended that you check the firewall settings.
Here’s how to disable the firewall for Minecraft: Press the Windows key, type Windows Defender Firewall > select Allow an app or feature through Windows Defender Firewall > select Change Settings > under Allow apps to communicate through Windows Defender Firewall, check the box for Minecraft.
Was this helpful?
Last updated on 20 August, 2024
Read Next
 5 Ways to Reset Firewall Settings on Windows 11
Method 1: Reset Firewall Settings Using Windows Security Windows Security is the built-in antivirus program protecting your system from malware, viruses, and threats.
5 Ways to Reset Firewall Settings on Windows 11
Method 1: Reset Firewall Settings Using Windows Security Windows Security is the built-in antivirus program protecting your system from malware, viruses, and threats.
 5 Ways to Fix “A Firewall May Be Blocking Spotify” Error on Windows
Fix 1: Allow Spotify Through Windows Defender Firewall Your first step is to check the Windows Defender Firewall settings and ensure it isn’t blocking Spotify on your PC.
5 Ways to Fix “A Firewall May Be Blocking Spotify” Error on Windows
Fix 1: Allow Spotify Through Windows Defender Firewall Your first step is to check the Windows Defender Firewall settings and ensure it isn’t blocking Spotify on your PC.
 Can’t Turn on Windows Firewall? Here Is the Fix
Try Basic Fixes Disable third-party antivirus programs: Third-party antivirus programs on your PC can sometimes interfere with the Windows Firewall and prevent it from working correctly.
Can’t Turn on Windows Firewall? Here Is the Fix
Try Basic Fixes Disable third-party antivirus programs: Third-party antivirus programs on your PC can sometimes interfere with the Windows Firewall and prevent it from working correctly.
 3 Ways to Disable or Enable Search Highlights in Windows 10 and Windows 11
Method 1: Disable or Enable Search Highlights From the Settings App The Settings app on Windows allows you to control most things on your PC.
3 Ways to Disable or Enable Search Highlights in Windows 10 and Windows 11
Method 1: Disable or Enable Search Highlights From the Settings App The Settings app on Windows allows you to control most things on your PC.
 4 Ways to Disable Touchpad on Windows 11 Laptops
Method 1: Disable Touchpad From Settings The Windows 11 Settings app offers nifty features for modifying touchpad gestures, sensitivity, cursor, and more.
4 Ways to Disable Touchpad on Windows 11 Laptops
Method 1: Disable Touchpad From Settings The Windows 11 Settings app offers nifty features for modifying touchpad gestures, sensitivity, cursor, and more.
 4 Ways to Disable Sleep Mode in Windows 11
Method 1: Using the Settings App Whether it's something as simple as changing your desktop background or more advanced tasks like turning off sleep mode, you can accomplish it all
4 Ways to Disable Sleep Mode in Windows 11
Method 1: Using the Settings App Whether it's something as simple as changing your desktop background or more advanced tasks like turning off sleep mode, you can accomplish it all
 4 Ways to Disable Office Updates on Windows 11
Method 1: Using an Office App You can use any Microsoft Office app to turn off automatic updates for all Office applications.
4 Ways to Disable Office Updates on Windows 11
Method 1: Using an Office App You can use any Microsoft Office app to turn off automatic updates for all Office applications.
 6 Ways to Disable Virtualization-Based Security (VBS) in Windows
Method 1: Disable VBS/HVCI in Windows Using Core Isolation Step 1: Click on the Start icon, and search and open Core Isolation.
6 Ways to Disable Virtualization-Based Security (VBS) in Windows
Method 1: Disable VBS/HVCI in Windows Using Core Isolation Step 1: Click on the Start icon, and search and open Core Isolation.
The article above may contain affiliate links which help support Guiding Tech. The content remains unbiased and authentic and will never affect our editorial integrity.

