A Mac is generally known for its friendly UI and smooth performance. However, they may be instances where you may face certain issues while using a Mac. Whether it’s unresponsive apps or your mouse cursor stuck, it’s not a pleasant experience.
Speaking of the mouse cursor, you may also encounter at times that the mouse cursor is lagging or jumping around on the screen. This experience is also far from ideal since you cannot get the cursor to a precise location. This can hamper your workflow. If this is something you have been facing on your Mac, here are some of the best ways to fix the mouse cursor lagging on your Mac.
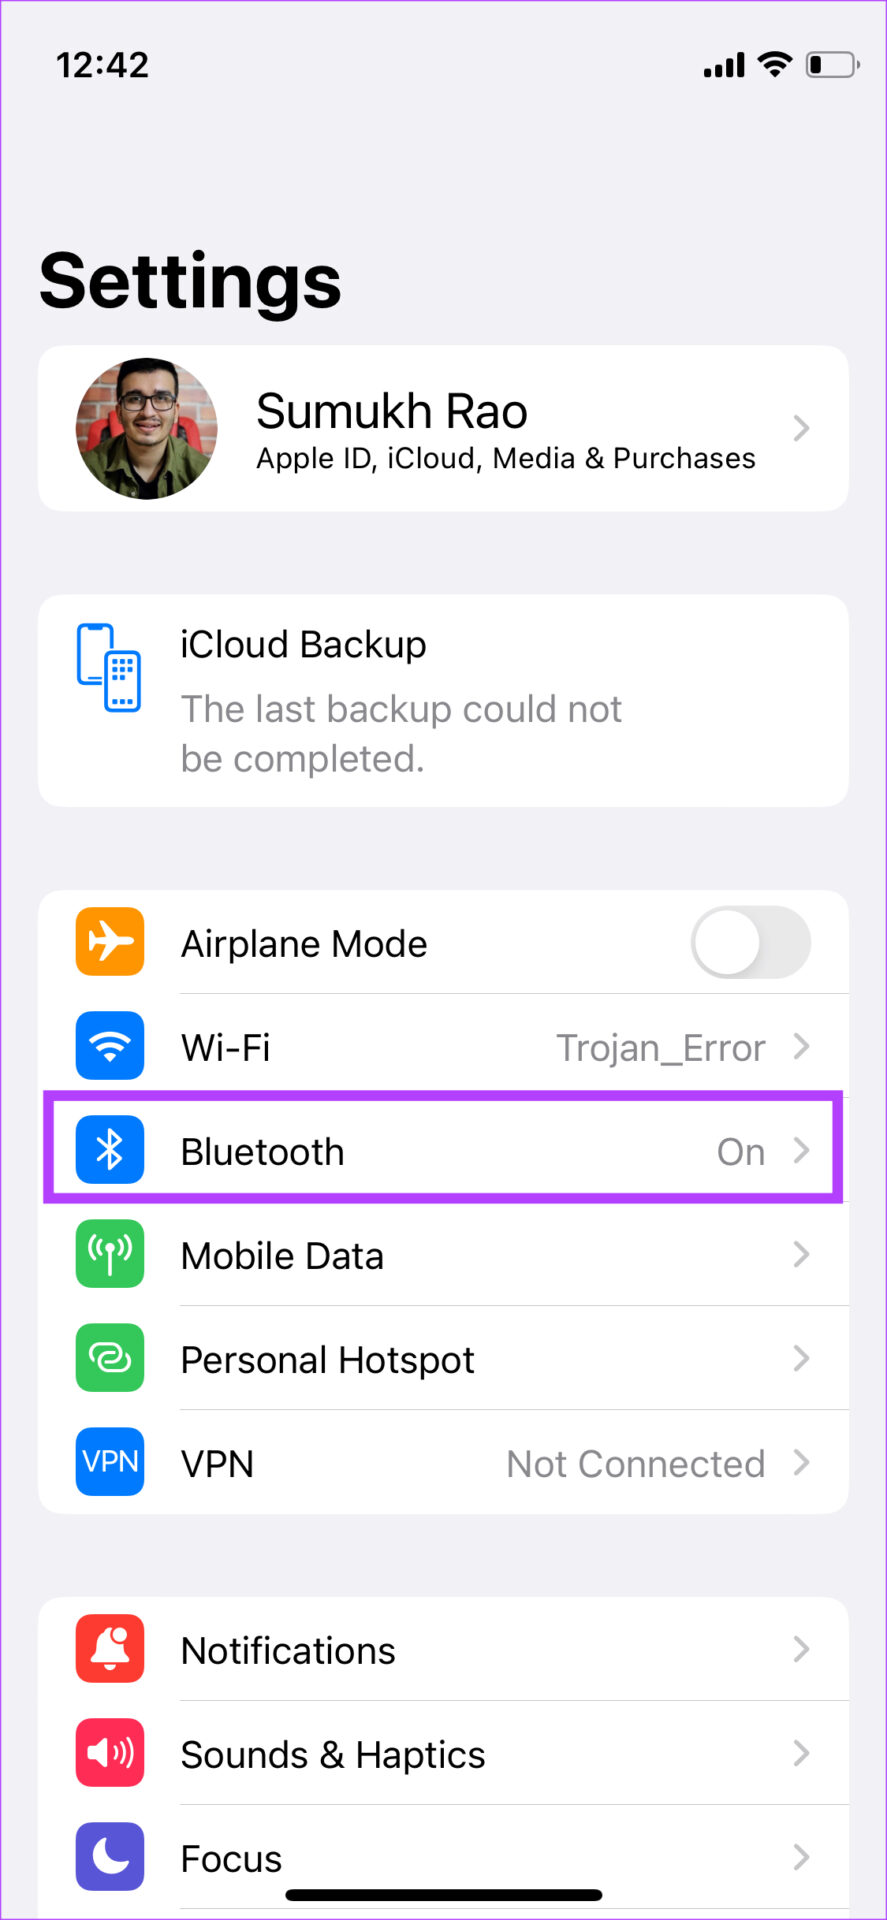
1. Toggle Bluetooth Off and On
Since the issue of mouse cursor lagging occurs majorly with a wireless mouse, it could be that the mouse cannot establish a solid connection with your Mac. One way to fix this is to disable the Bluetooth toggle and enable it again.
This will reset the Bluetooth connections on your Mac. Here’s how to do it.
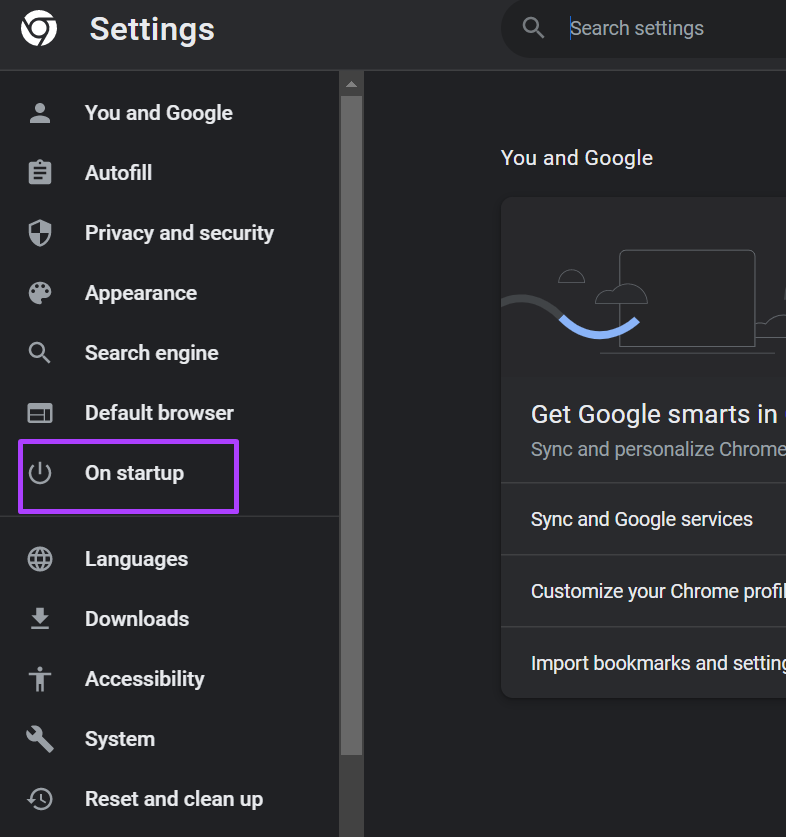
Step 1: Click on the Bluetooth icon in the menu bar right at the top of the screen.

Step 2: Use the toggle to disable Bluetooth.

Step 3: Click on the toggle once again to turn on Bluetooth. Wait for your Mac to connect to the mouse.
2. Try to Fix Any Issues With Bluetooth
Some Mac computers, especially Apple’s in-house M1 chip are known to suffer from Bluetooth issues. This in turn causes the mouse cursor to lag on your Mac since the Bluetooth connection is intermittent.
Try to fix the Bluetooth connection issues on your Mac and check if the connectivity improves and your mouse cursor stops lagging.
3. Update to the Latest Version of macOS
While select Mac models may have issues, some macOS versions can also cause similar problems. A software issue is far more common but it is also much easier to fix with an update.
So, update your Mac to the latest version of macOS to iron out any software bugs. Here’s how to do it.
Step 1: Click on the Apple logo on the top-left section of your screen.

Step 2: Select the About This Mac option.

Step 3: You will now see a pop-up window with the details about your Mac. Click on Software Update.
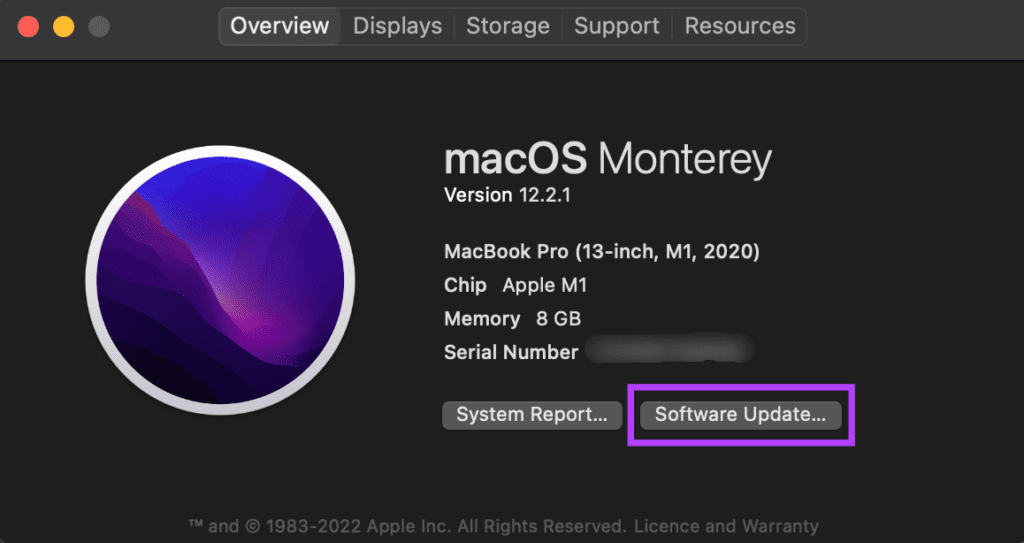
Step 4: Wait for your Mac to scan for the latest update. If an update is available, it will be displayed.
Step 5: Click on Update Now and wait for the process to complete.
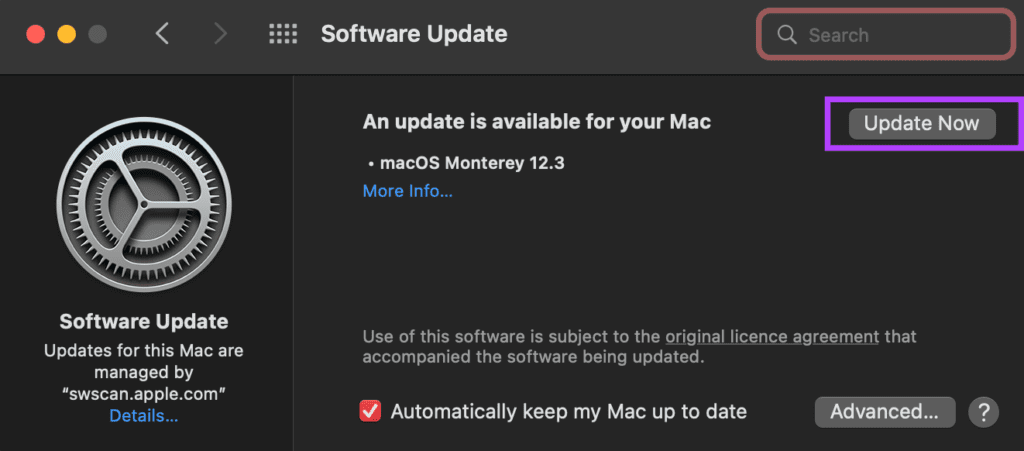
After installing updates and restarting your Mac, try using your mouse.
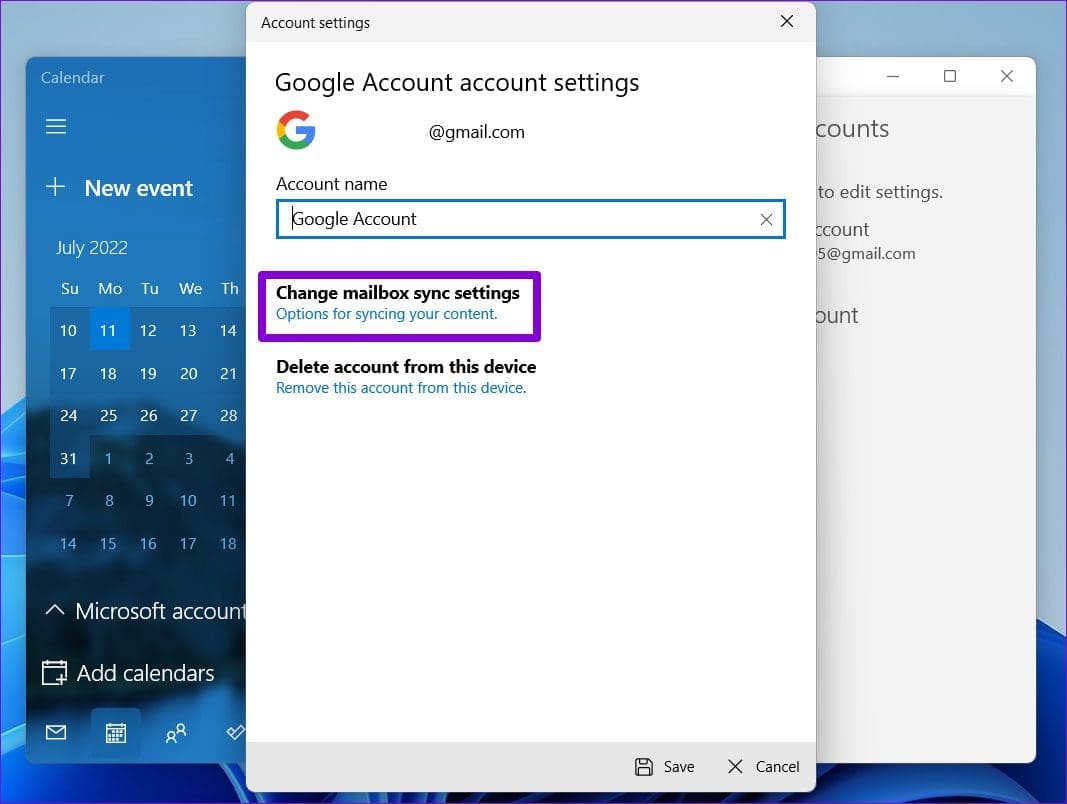
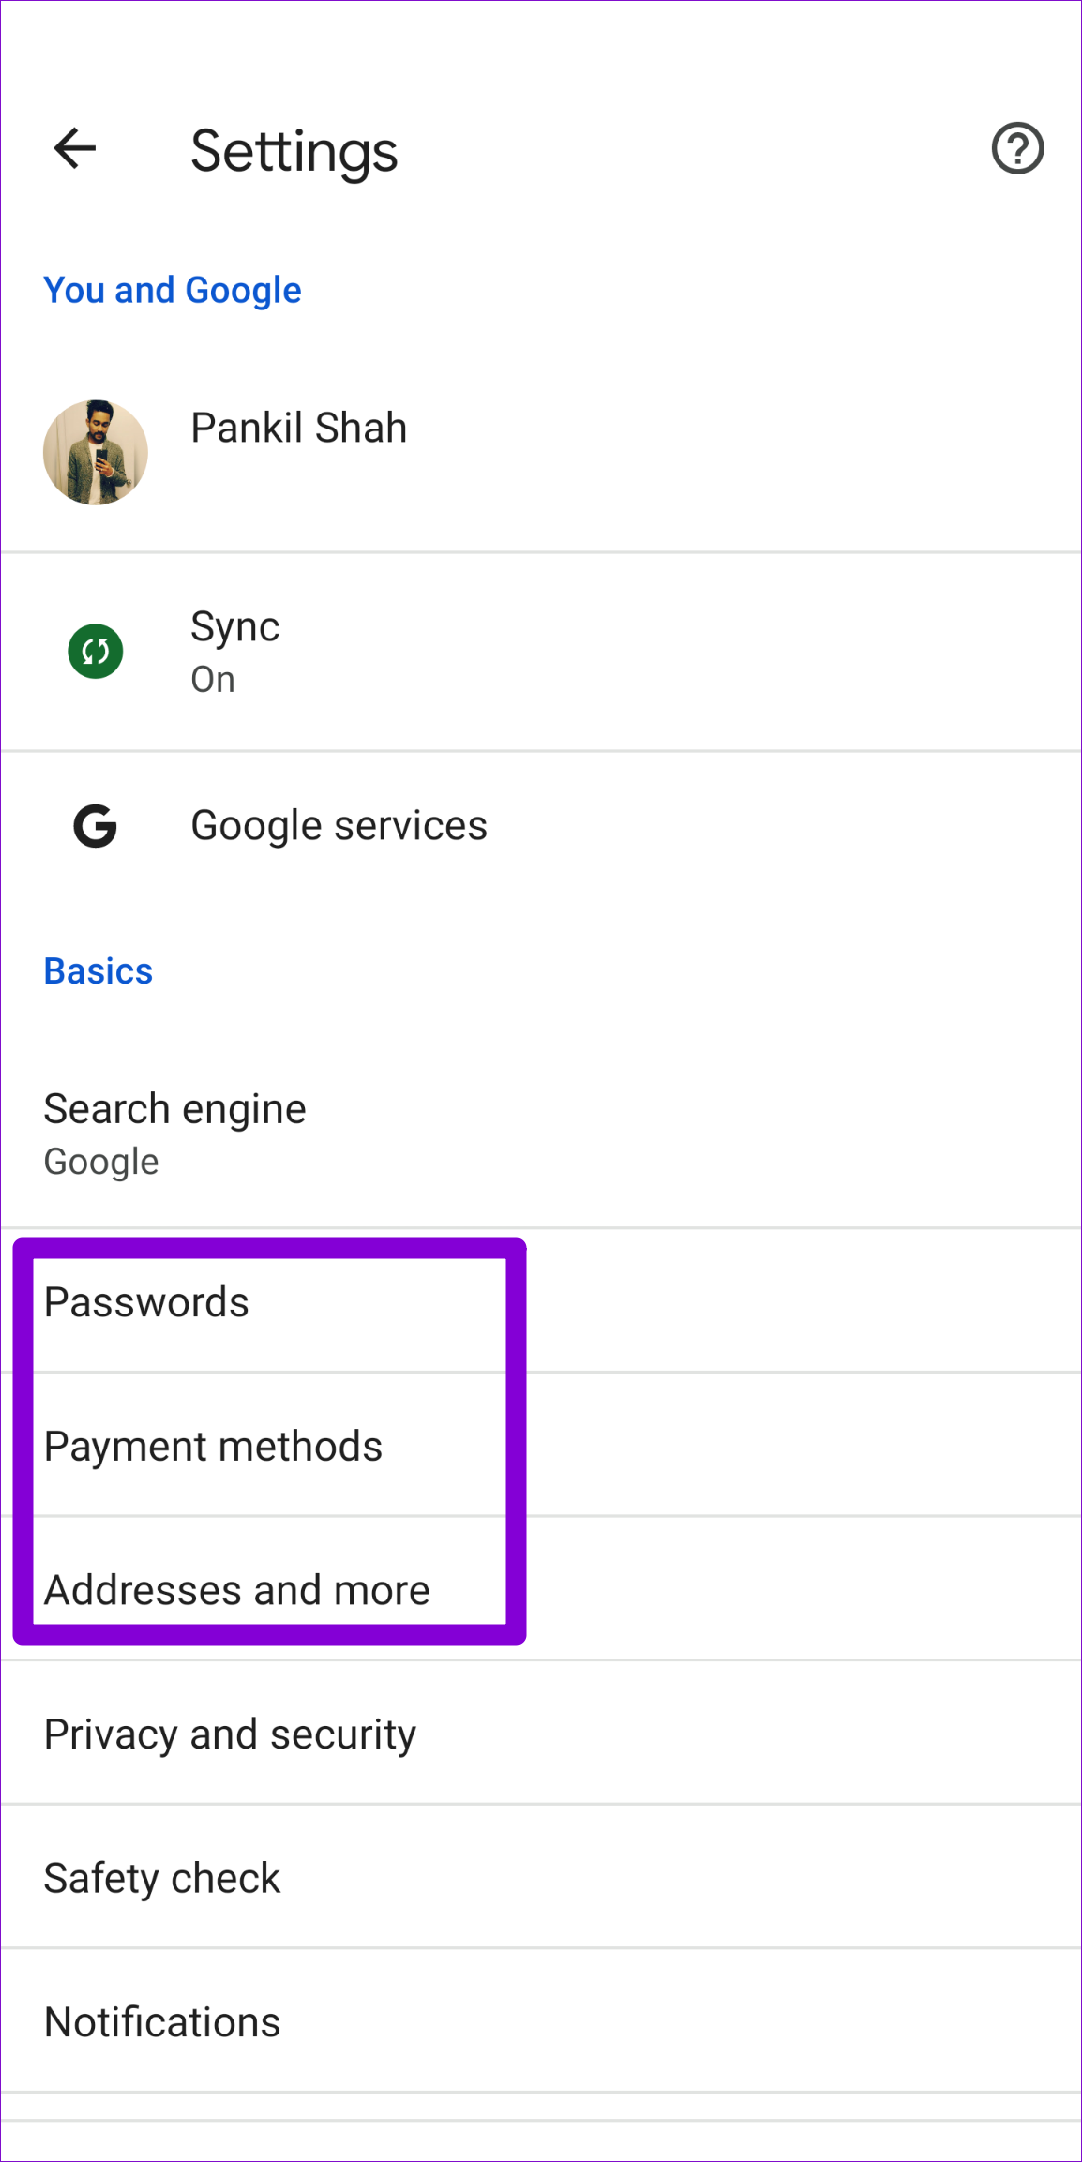
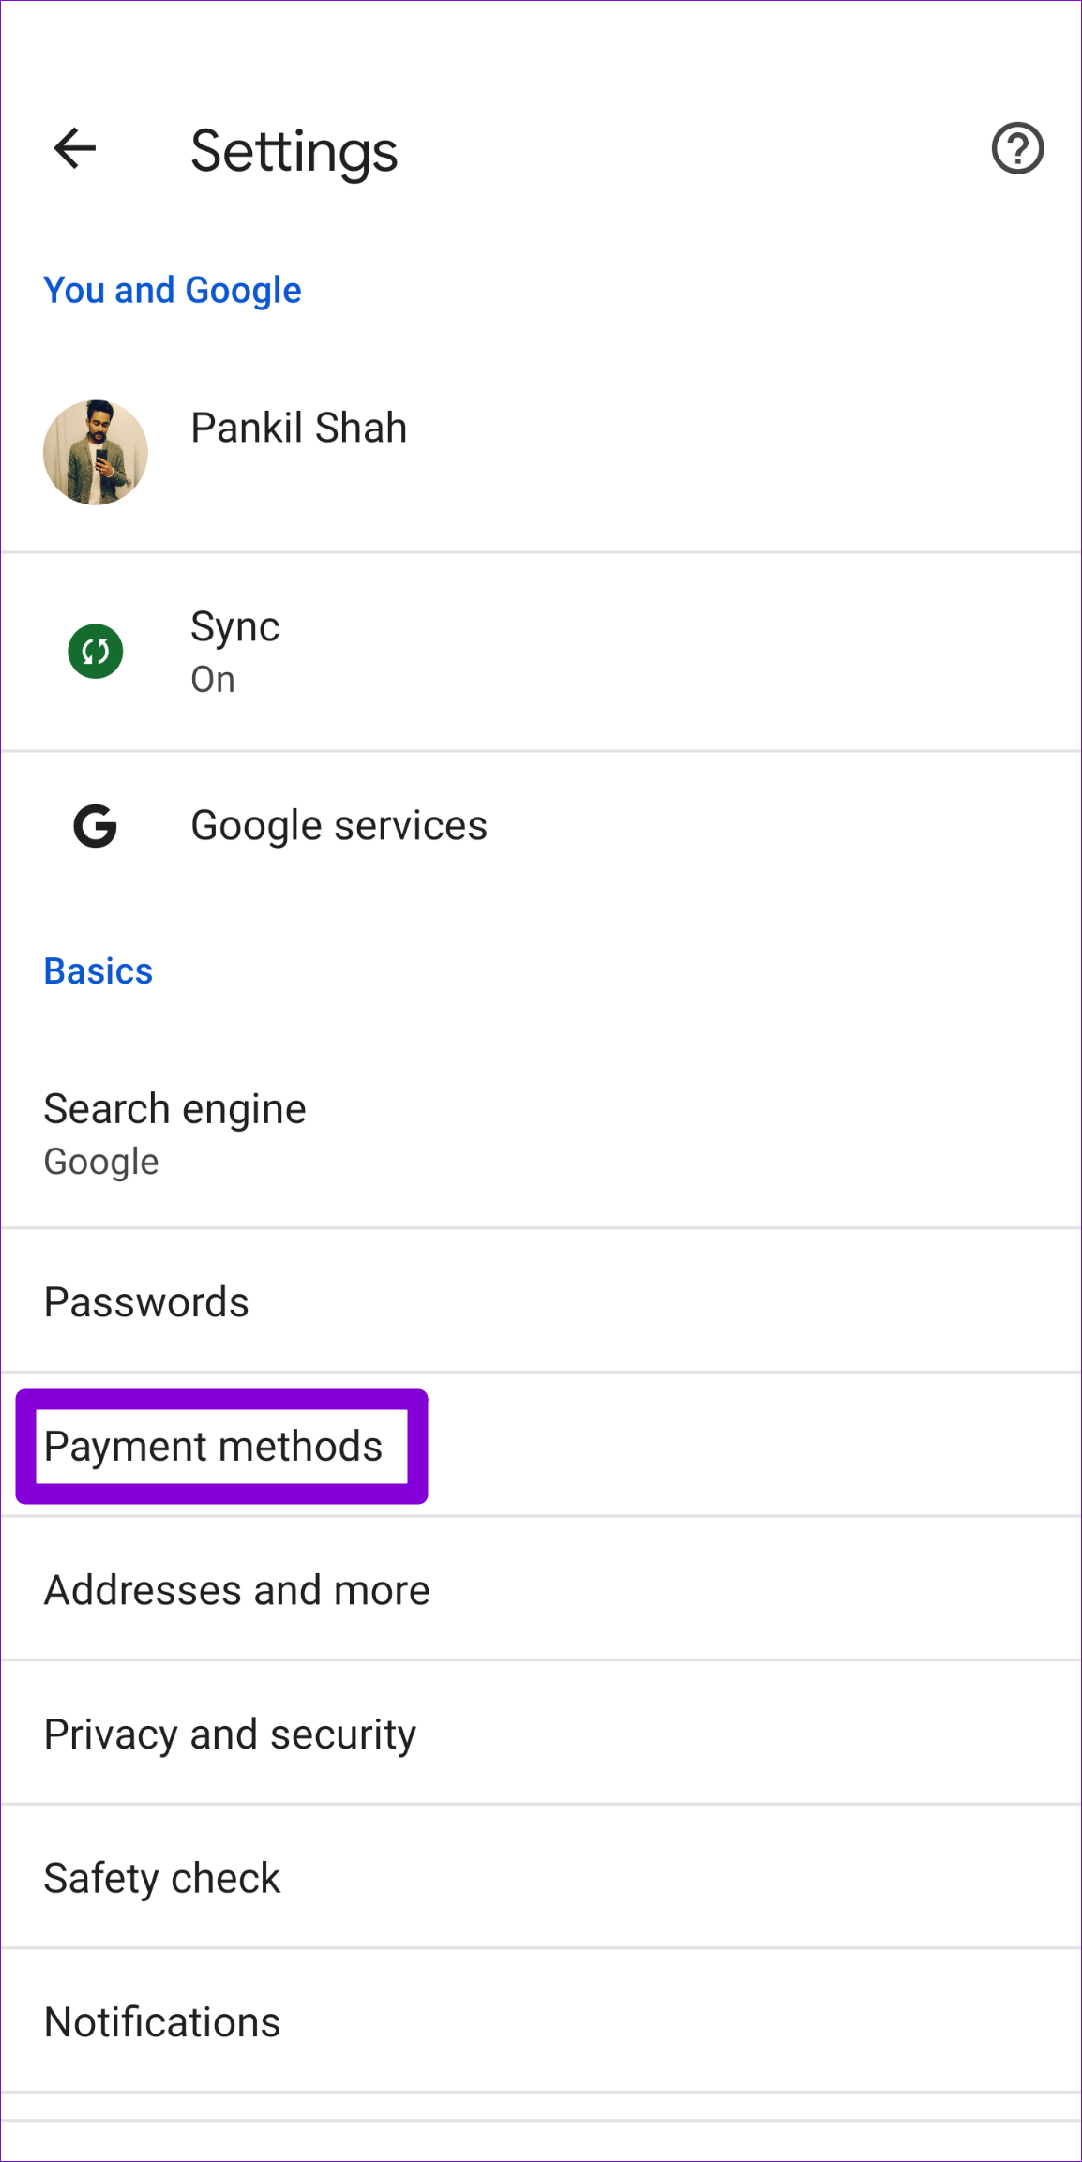
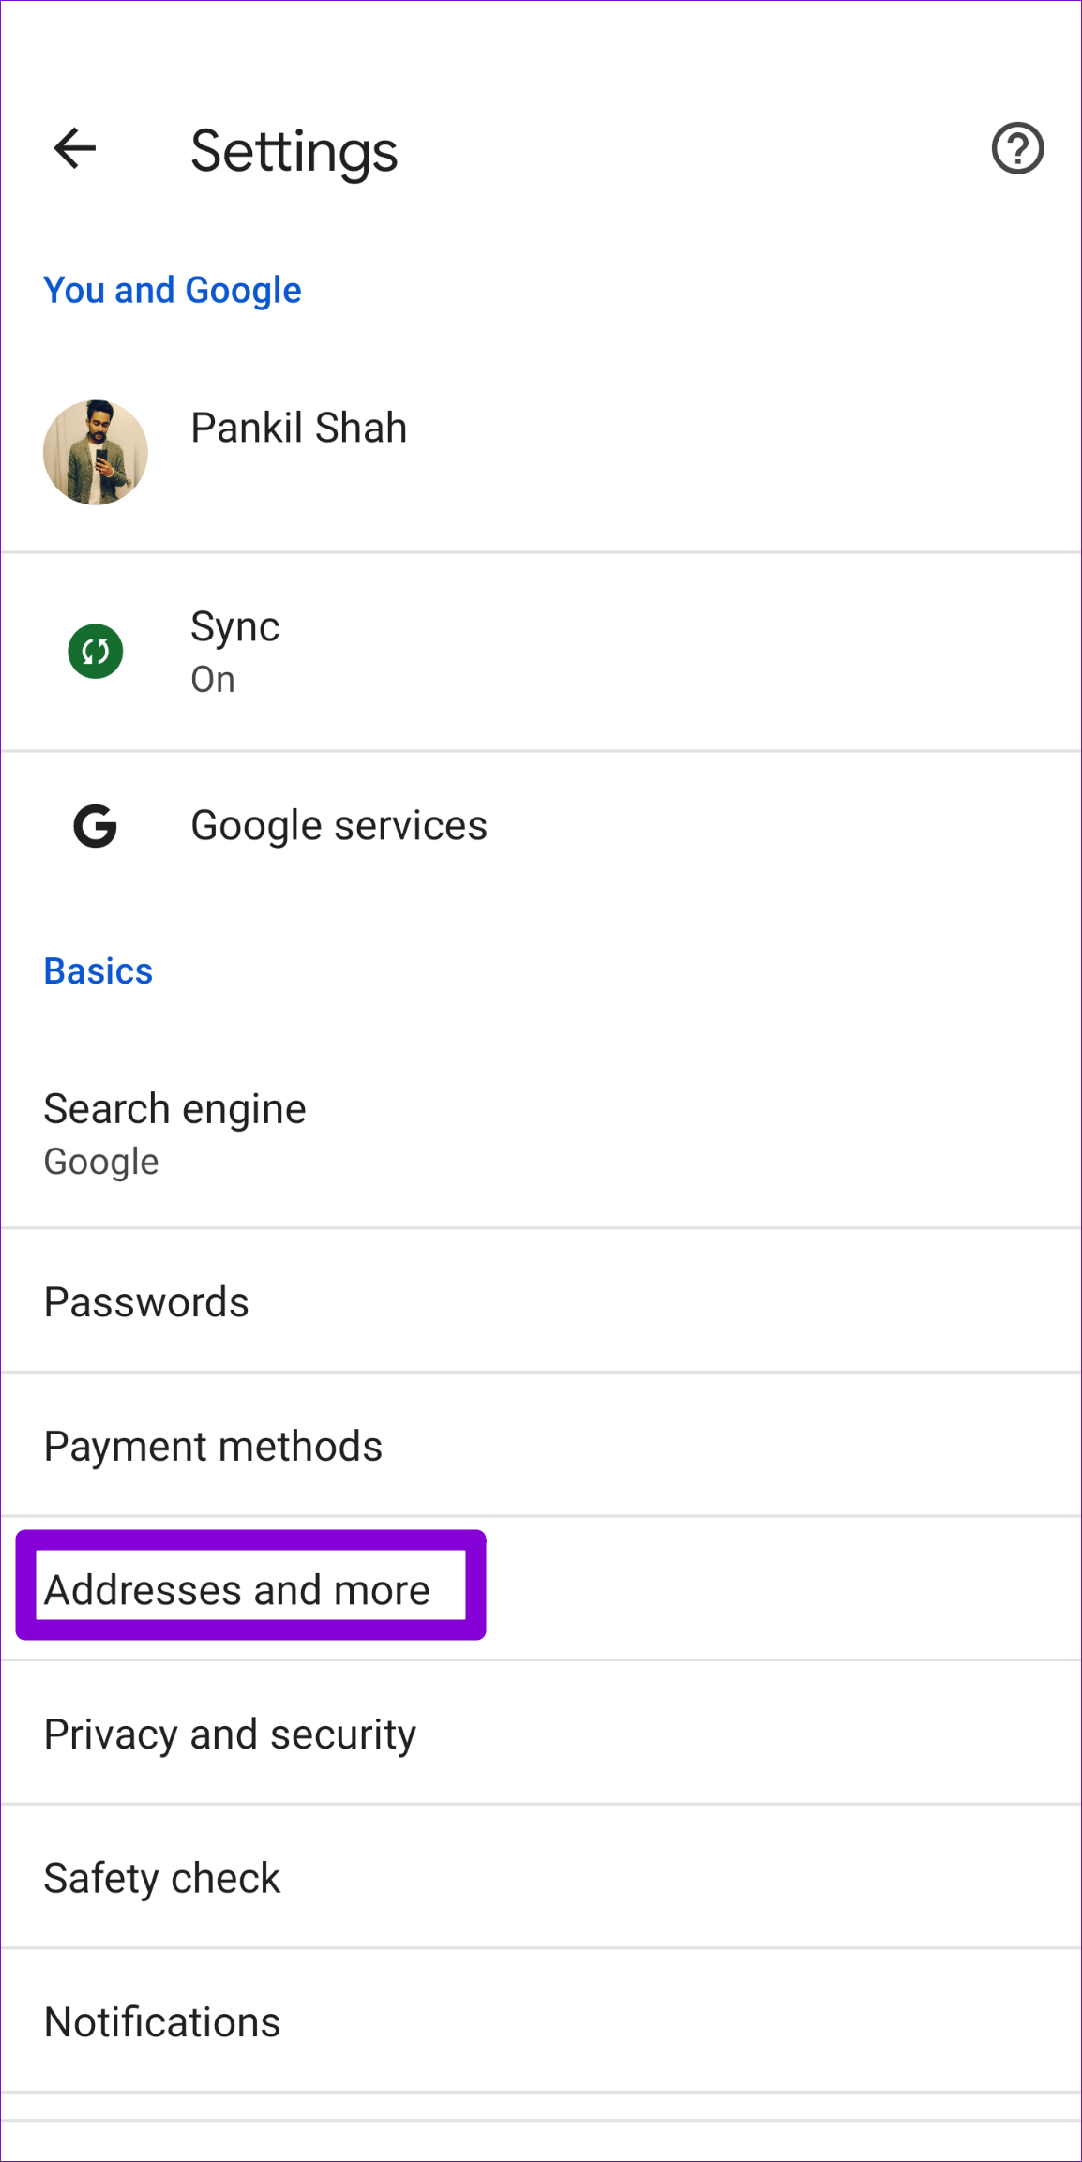
4. Unpair and Pair the Mouse Once Again
At times, simply pairing the devices again can solve issues with Bluetooth. Unpair your mouse from the Mac and then pair it back to see if it makes any difference. Here’s how you can unpair and then pair a Bluetooth device with your Mac.
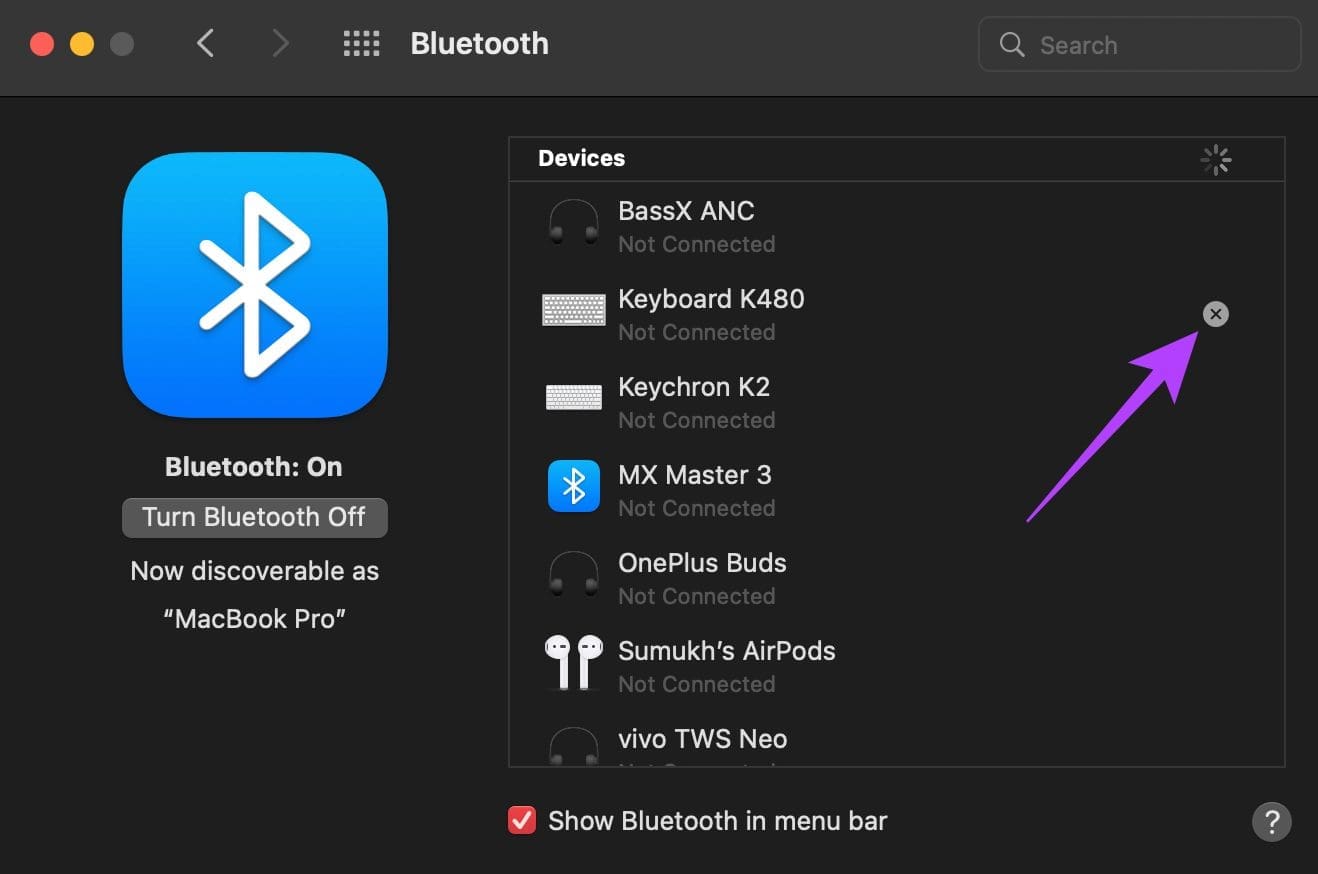
Step 1: Click on the Bluetooth icon in the menu bar right at the top of the screen.
Step 2: Select the Bluetooth Preferences options at the bottom.

Step 3: You will now see a window with all your connected devices. However your device over the device you want to delete and click on the ‘X’ icon that appears next to it.
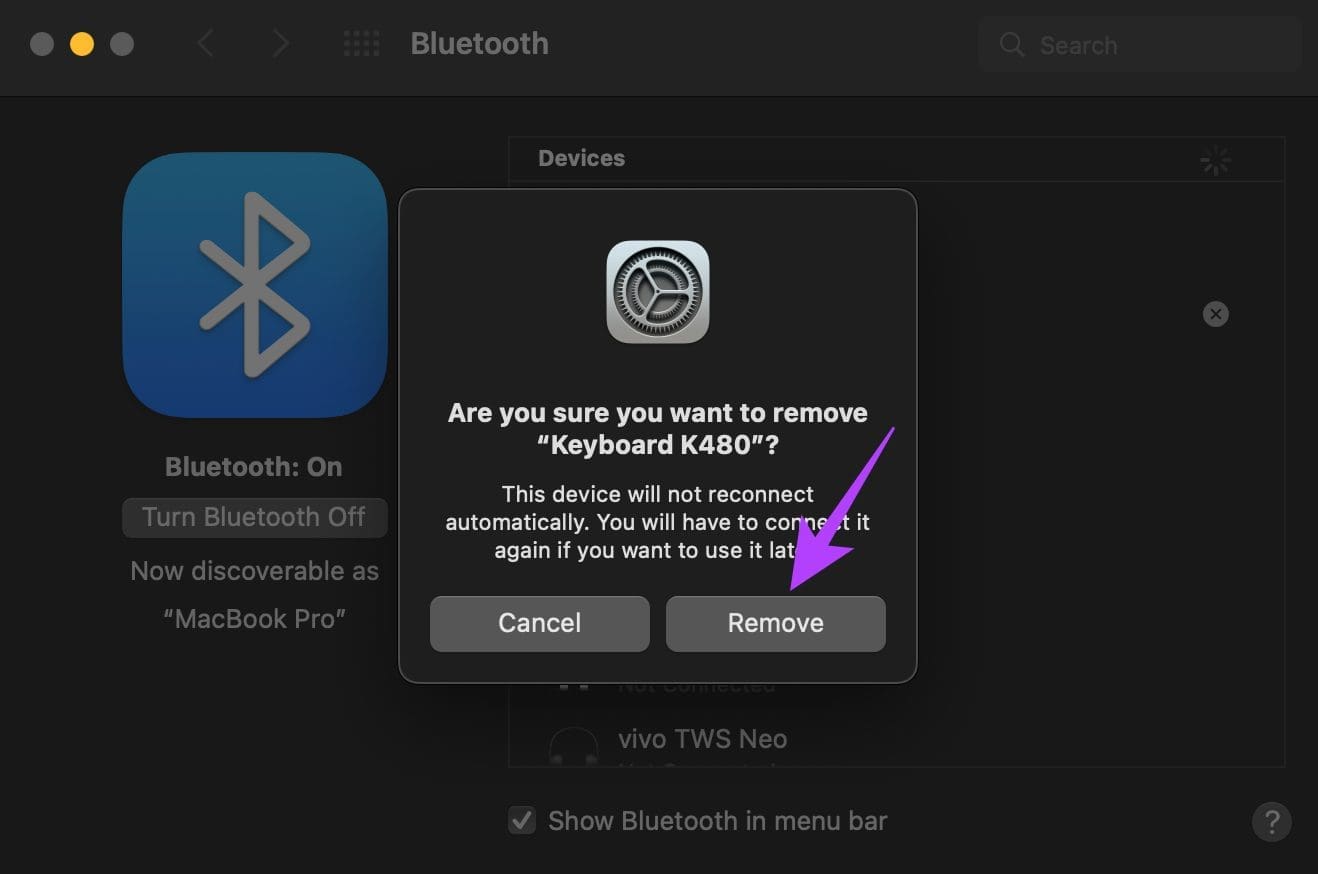
Step 4: Click on Remove to confirm the unpairing of the device.
Step 5: Then, put your mouse back into pairing mode.
Step 6: Scroll down to the bottom of the same Bluetooth preferences window you opened earlier. This is where you’ll see the list of available devices. Click on the Connect button next to the device you wish to pair.
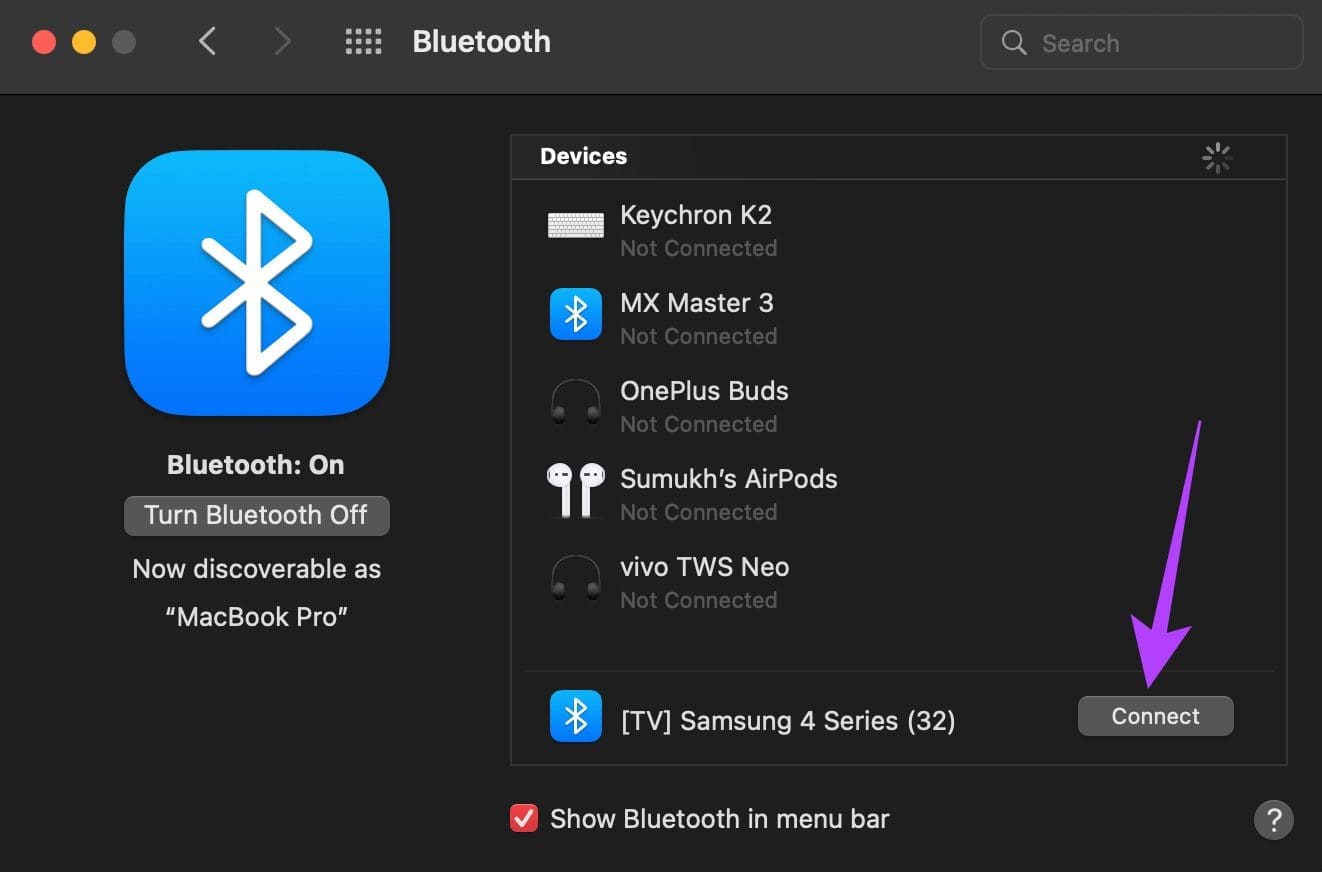
Your Mac will pair with the mouse again.
5. Use a Companion App to Update the Mouse Firmware
Many premium wireless mice come with a companion app or software that you can install on your Mac to customize the features. Such companion apps even can update the firmware on the mouse. As mentioned earlier, software bugs are common so if there is an issue with the firmware on your mouse, you can always update it to the latest version to check if that fixes the bug.

Head over to the website of your mouse’s manufacturer and check if a companion app is available. If your mouse is made by popular manufacturers like Logitech, Asus, or Razer, you will find it.
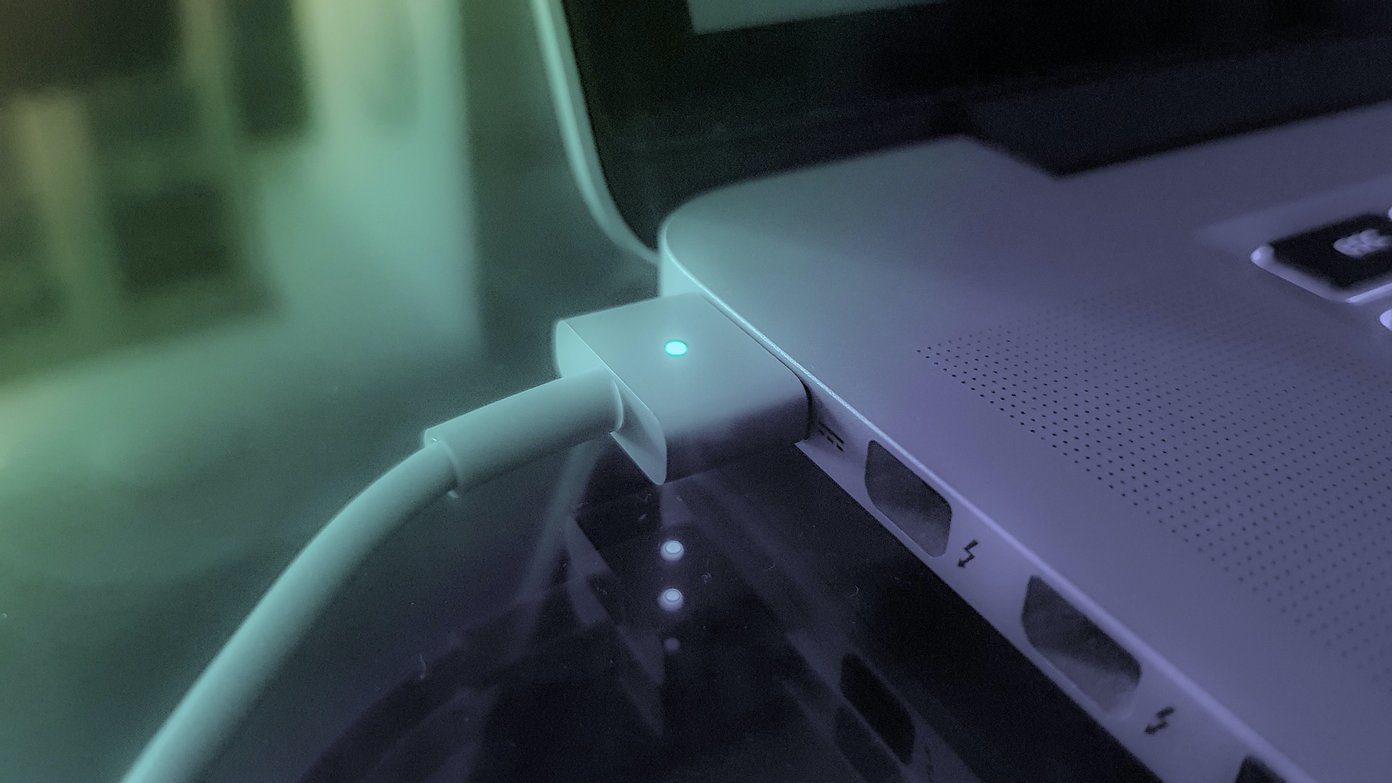
6. Ensure the Mouse Has Adequate Charge
Every wireless mouse runs on battery power. A replaceable alkaline battery or a rechargeable lithium battery, your wireless mouse will not work if it’s low on juice. If your mouse takes in AA or AAA batteries, try replacing the existing cells with new ones to see if it fixes the issue.
If you have a mouse with a built-in battery and a charging port, plug it into the charger and wait for it to charge completely. Then, try using the mouse, and you should hopefully not notice any lags.
7. Close Resources Hogging Apps
While most of the above solutions cater to the mouse, there’s a good chance that your mouse cursor lagging has nothing to do with an issue on your mouse but some app or program on your Mac. If the CPU or RAM on your Mac is stressed or apps consume a high amount of resources, you may experience lags and stutters.

As a result, the mouse cursor may also lag and jump around on the screen. Try closing apps running in the background that you may not be using. You can also try closing resource-heavy programs or apps like video editors and games to check if it fixes the issue.
8. Use a USB Dongle Instead of Bluetooth
Some wireless mice have multiple ways of connecting to a device. If the mouse you have can connect both via Bluetooth and via a wireless USB receiver that plugs into the Mac, try using the latter since it’s considered to be more stable. This is also a good workaround if you’re facing Bluetooth issues on your Mac.
If you are facing cursor lag issues with the USB dongle itself, we suggest inserting the dongle into a port on your Mac that’s closest to the mouse. If there is an interference between the dongle and the mouse, the connection won’t be seamless, and the cursor may lag.
Use Your Mouse Smoothly
The mouse is used for almost every single activity on your Mac. So, a cursor that lags or gets stuck can hamper your workflow. These solutions should help you fix the issue and make your cursor smooth again.