An image with a transparent background appears more powerful. You may be wondering why? Well, there is no background to distract you. Secondly, you can create a new image by adding the transparent image on top of any larger image to blend them perfectly.

Most importantly, you can use any color as the background since it is transparent by default.
That’s why making an image transparent makes sense. But how does one do that without installing any third-party software on Windows? That’s where Paint 3D, the updated version of our beloved Paint sweeps in.
First, you need to remove the existing background by selecting the object. The background can be of any color — white, red, pink, black, etc. or any pattern. Then, transparency needs to be added followed by saving the image with transparency.
Don’t worry. We have covered the steps in detail here. Let’s jump in.
1. Select Object Using Magic Select Tool
For that, follow these steps:
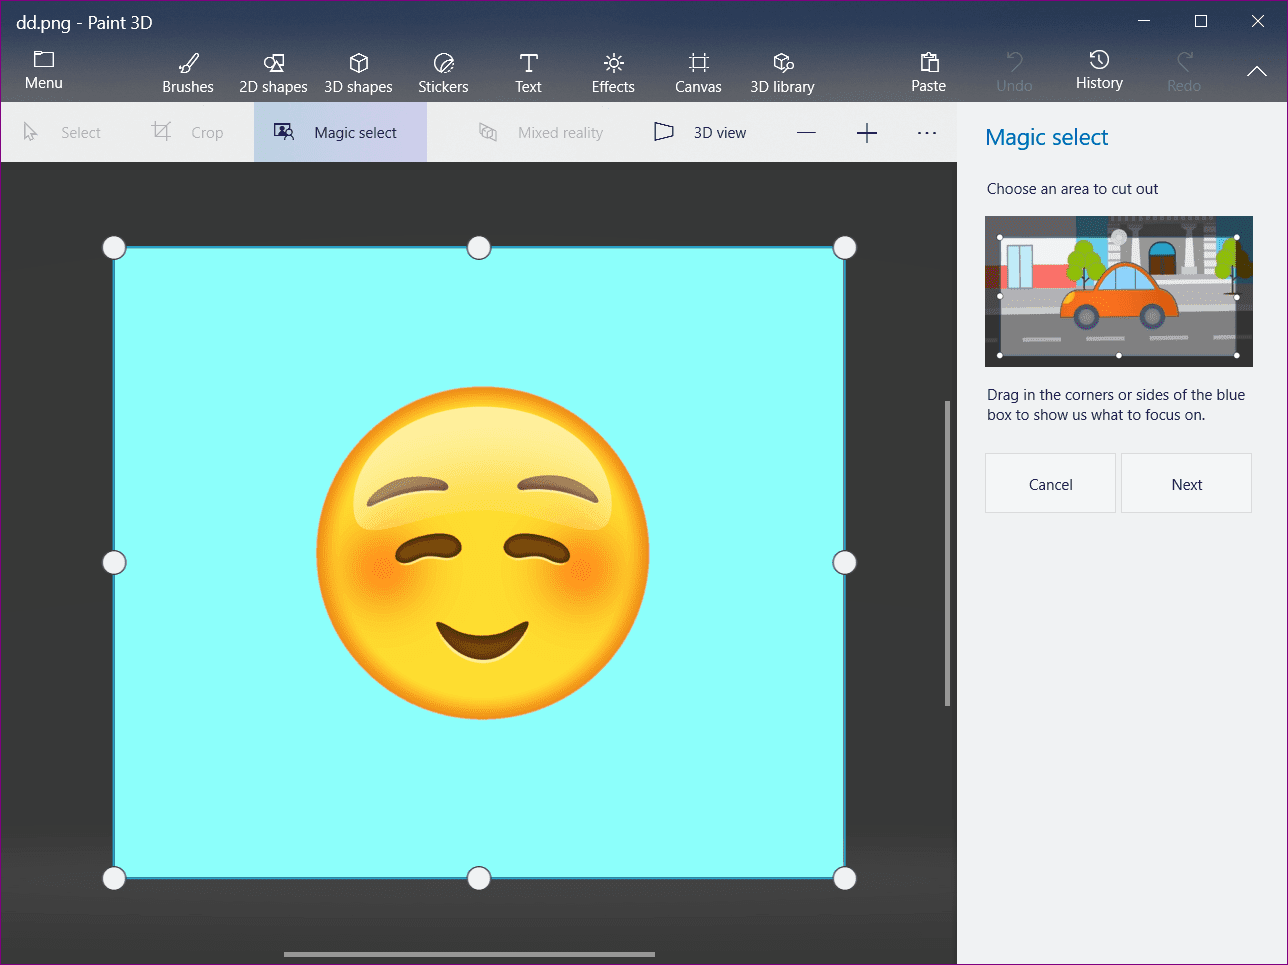
Step 1: Open your image in Paint 3D.
Step 2: Click on the Magic Select tool present in the top bar.

Step 3: A selection box will appear. Use the corners or sides of the box to select the portion of the image whose background you want to change. Then click on Next on the right side.
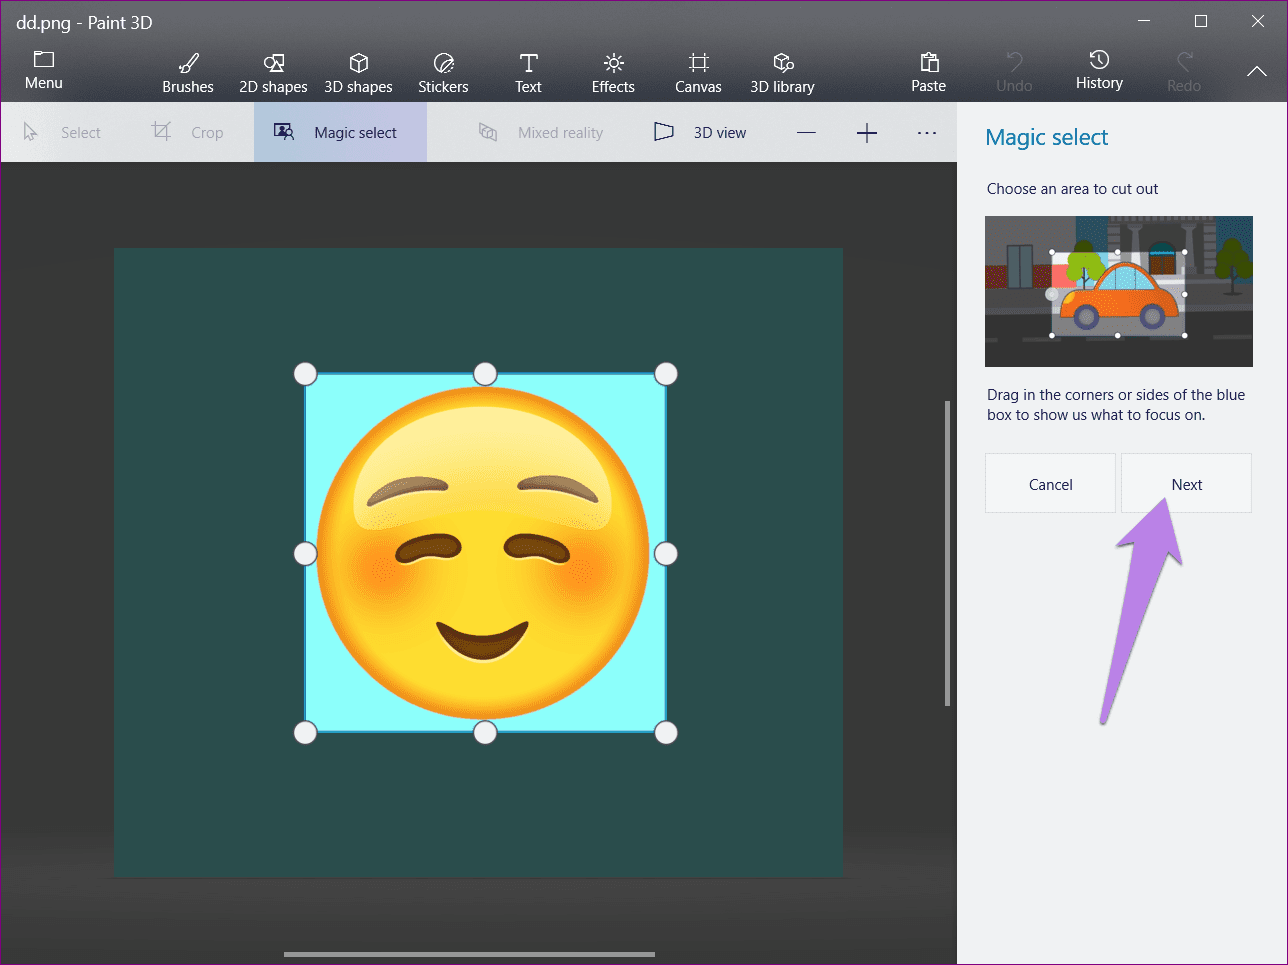
Step 4: Paint 3D will automatically detect the object inside the selection. If you are satisfied with the selection, click Done on the right side. Otherwise, use the Add or Remove tools also present on the right side to modify the selection.
Click on the Add tool and then select the part of the image that you want to add to your selection. Similarly, click on Remove tool and click the area that you want to remove.

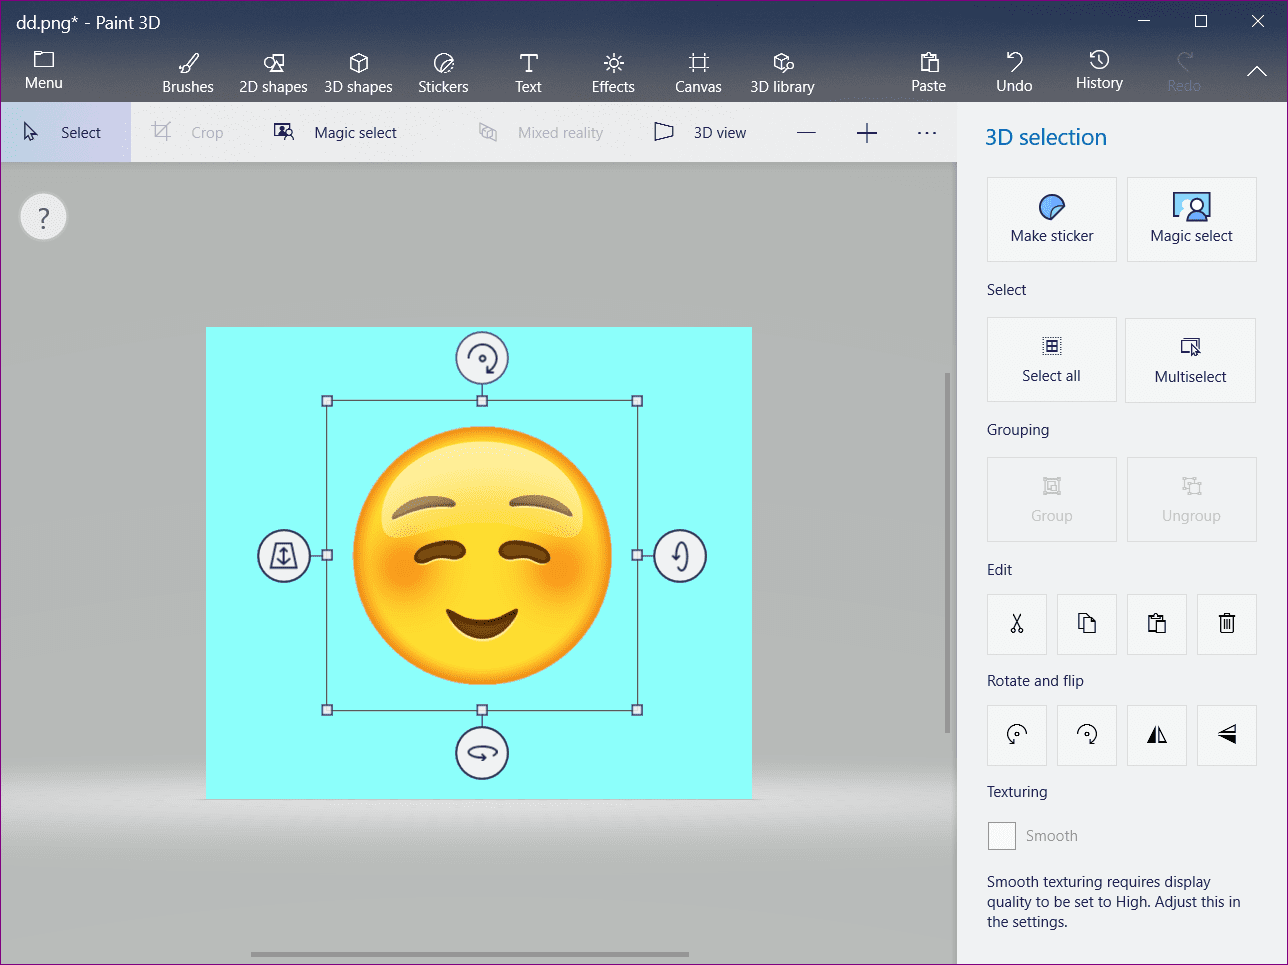
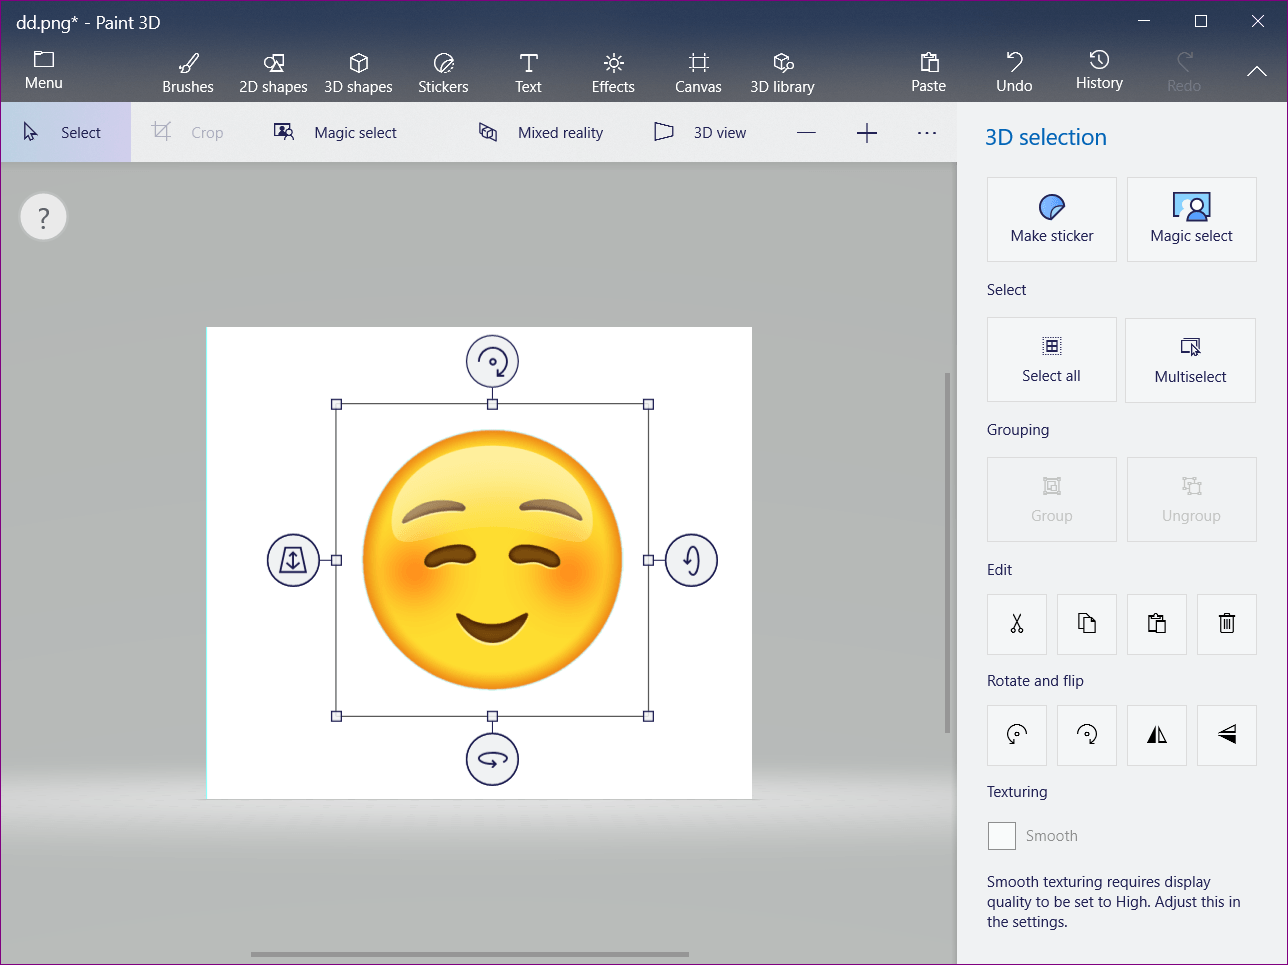
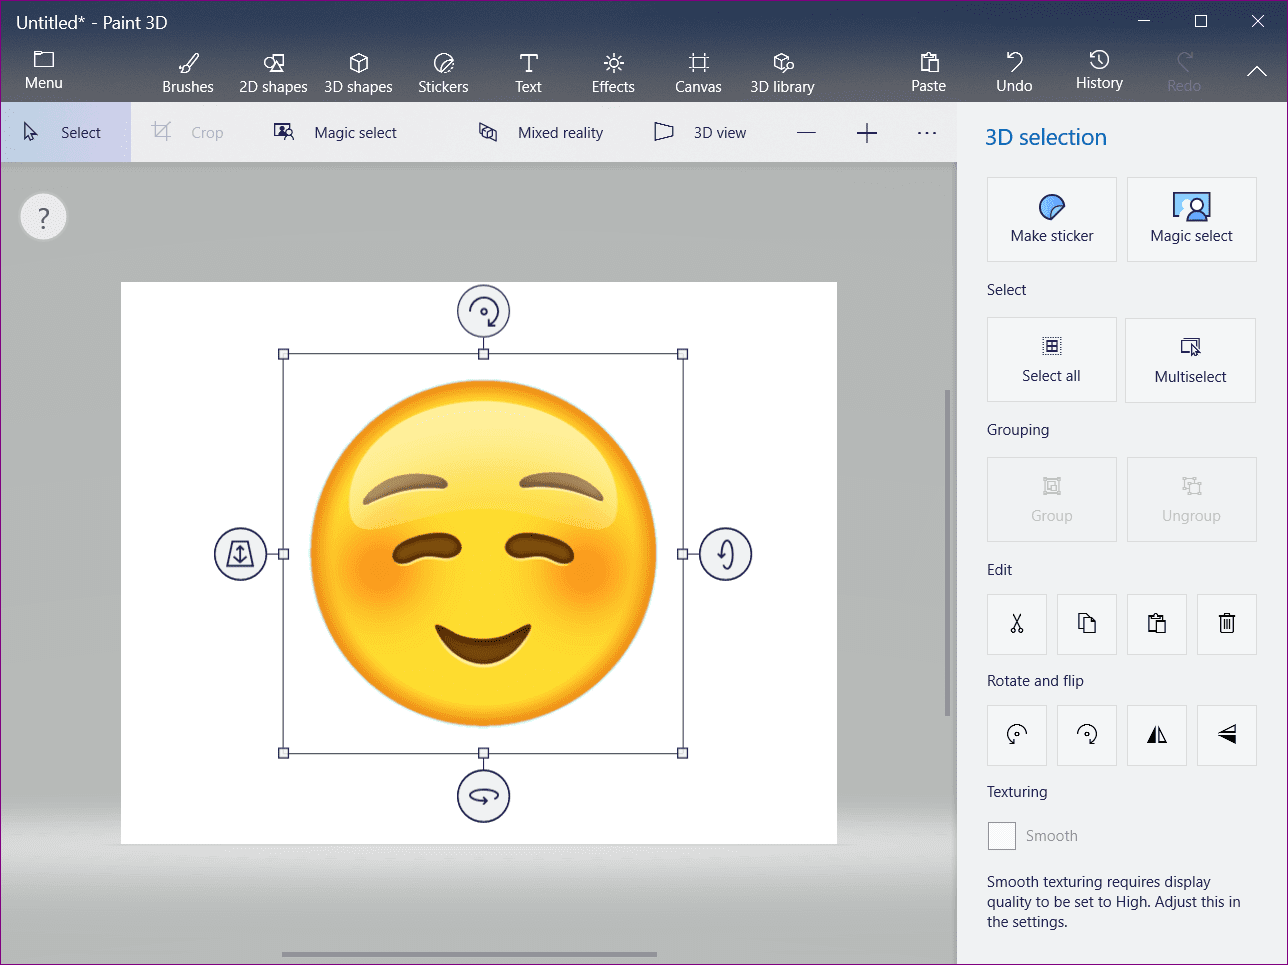
Step 5: Once you press the Done button, you will see a new box appears outside the selected image indicating that it’s now a separate object. You can use the various tools present on the box to rotate or flip the image.
2. Remove Background in Paint 3D
There are two ways to remove the background.
Method 1: Delete Background
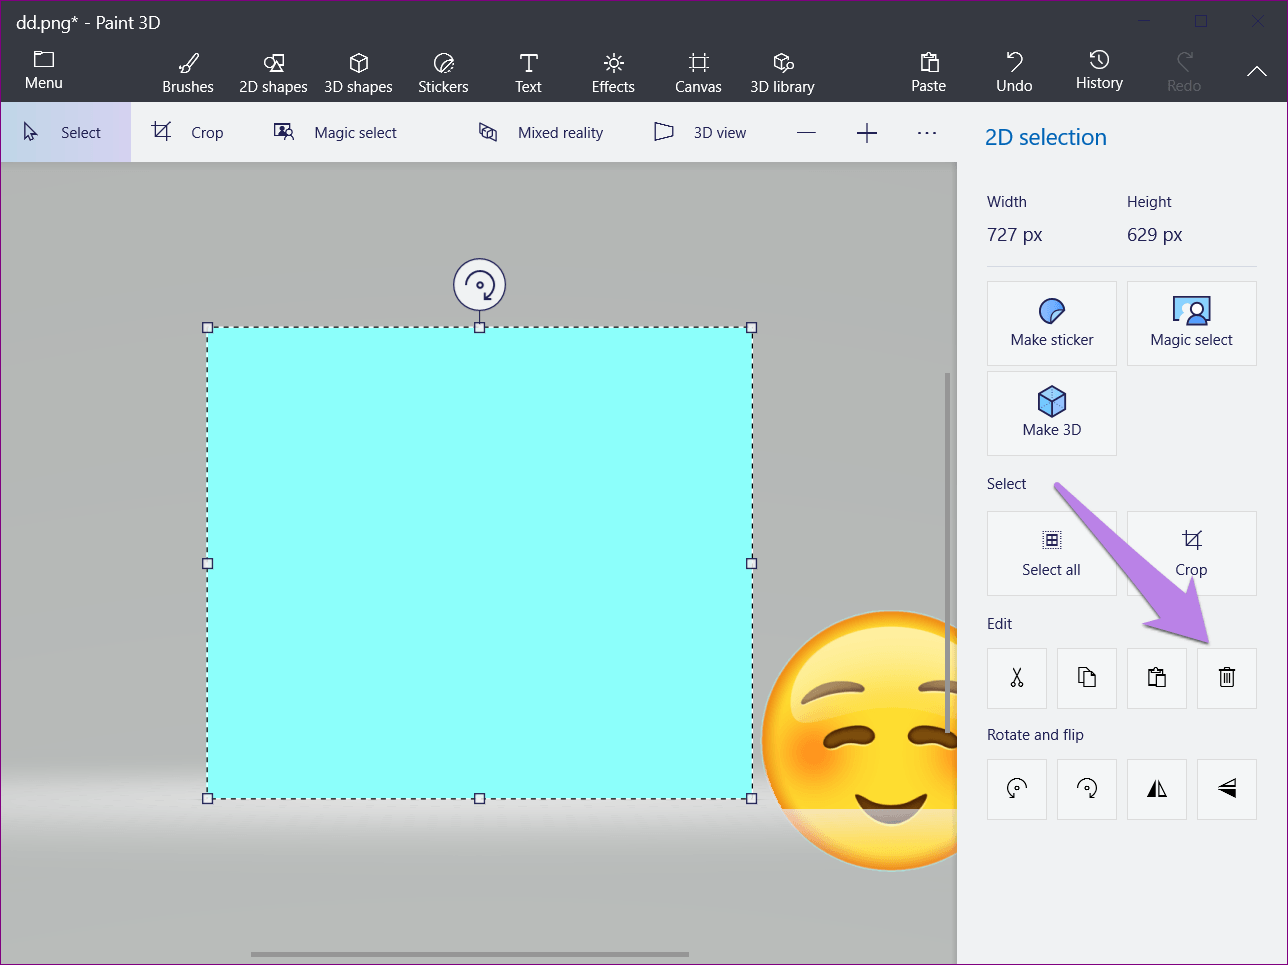
Step 1: With the image selected, drag it outside of the background using your mouse.

Step 2: Click on the Select tool at the top and select the entire background. You will see dotted lines appear around the selection.

Step 3: Now, either click on the Delete button on the right side or press the Delete key on your keyboard.
Step 4: You will see that the background turns white. Click on the object once and drag it back on the white background.
We have successfully removed the background. It’s time to make the background transparent. For that, follow the steps mentioned in the ‘Make white background transparent’ section below.
Method 2: Using New File
Another way to remove the background is to create a new image. Here are the steps:
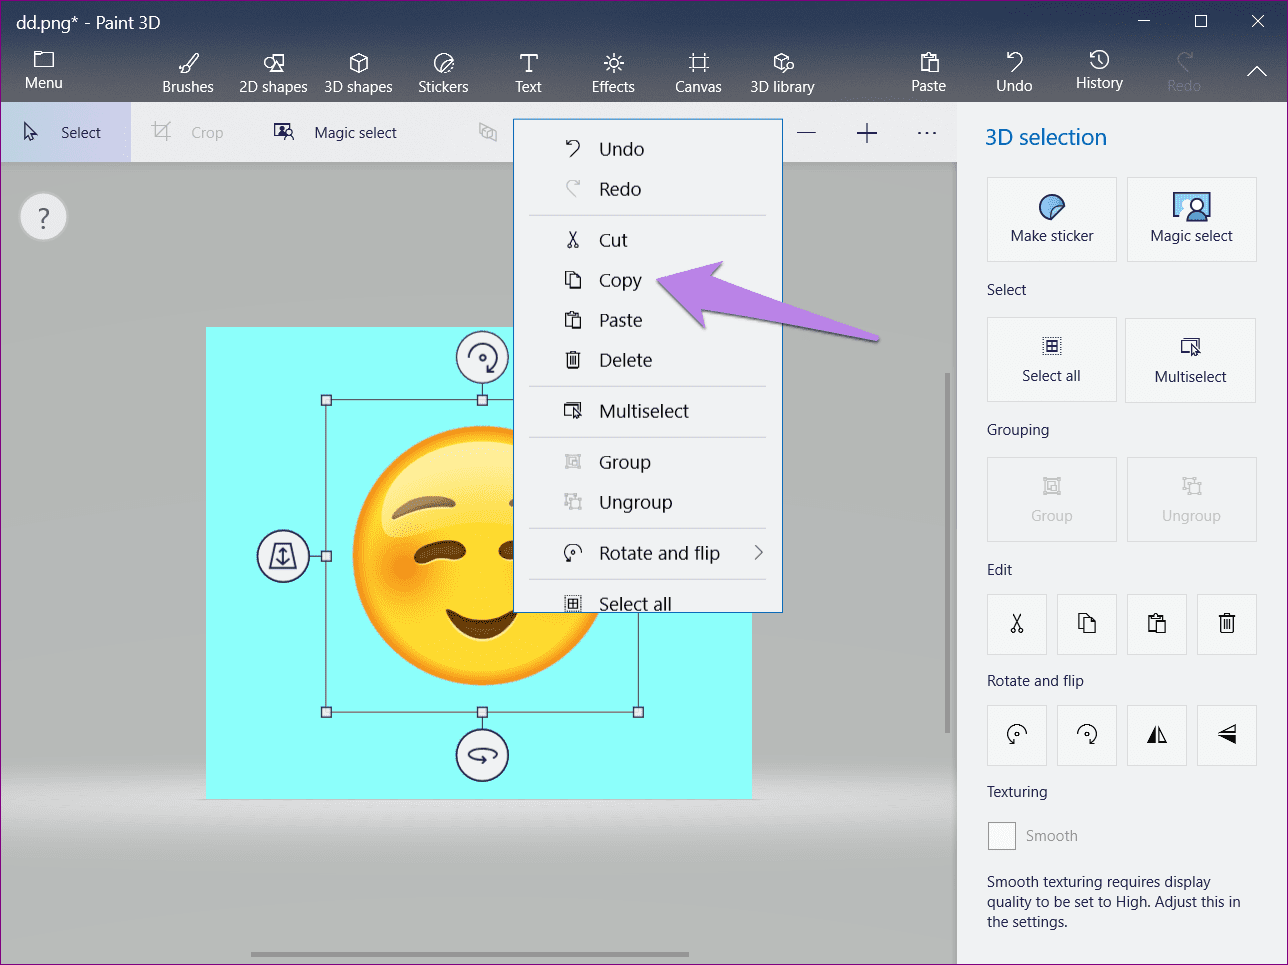
Step 1: After the Magic Select tool has extracted the image, right-click on it and select Copy from the menu.
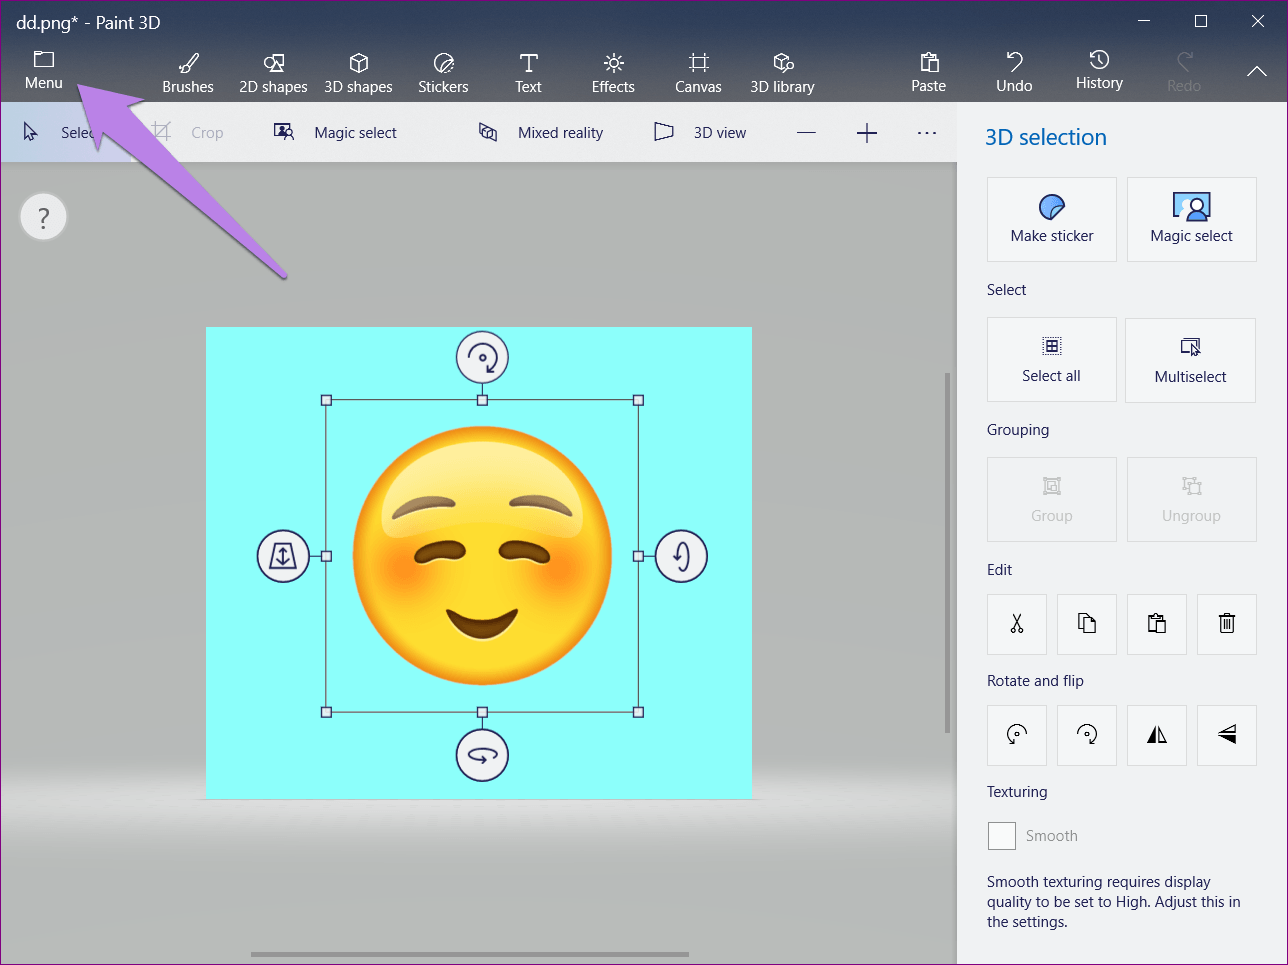
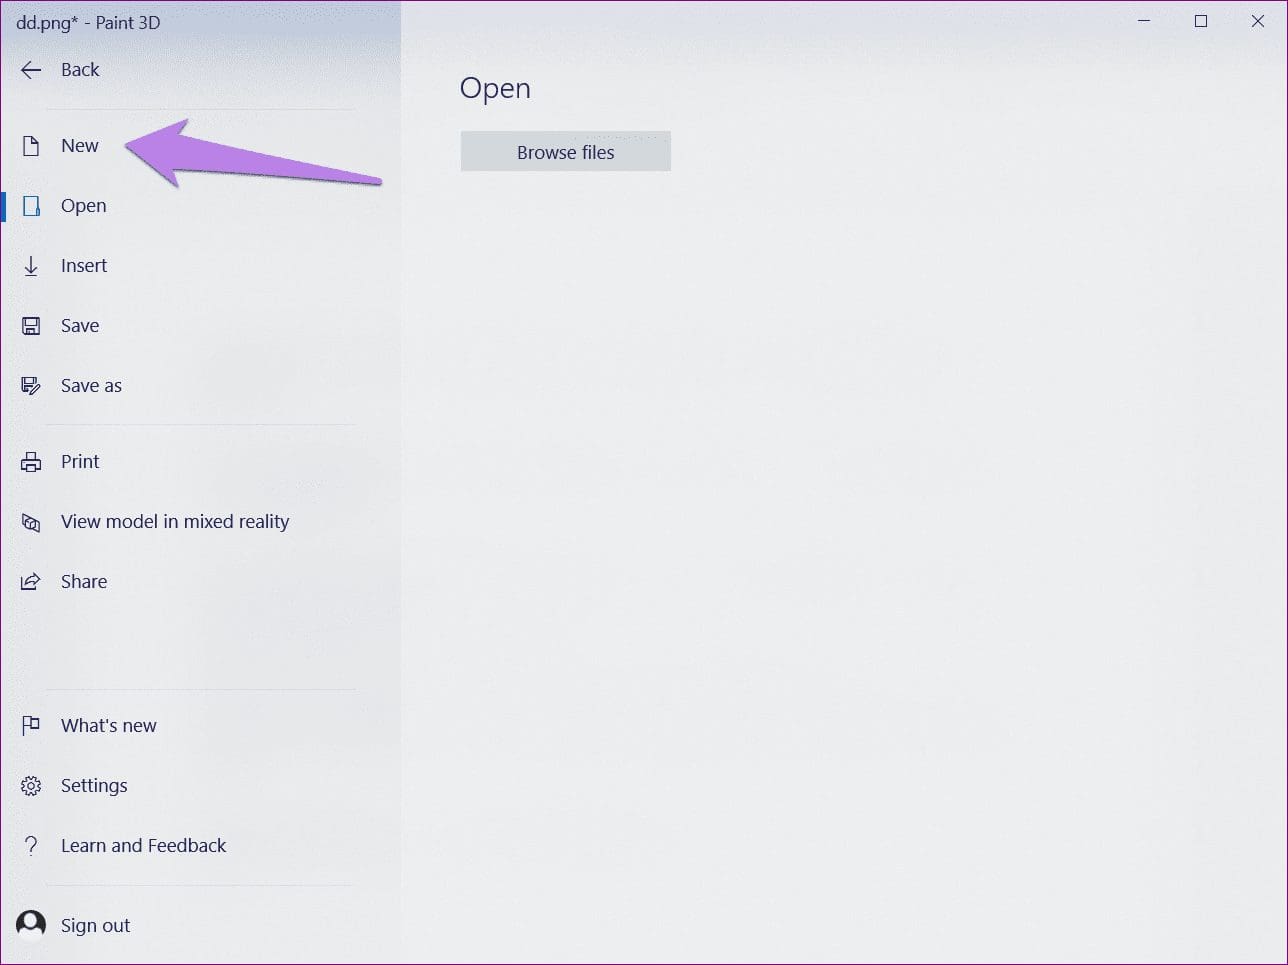
Step 2: Click on the Menu icon at the top and choose New from it. A pop-up will appear asking you to save the previous image. Click on Don’t save.
Step 3: A new blank image will open with a white background. Right-click on it and select Paste from the menu.

Your copied image without its old background will appear on the white background.
Now, it’s time to remove the background altogether.
3. Make White Background Transparent
Finally, when you have your image on a white background, you can make it transparent. For that, click on the Canvas option at the top and enable the toggle for Transparent canvas present on the right side.
Tip: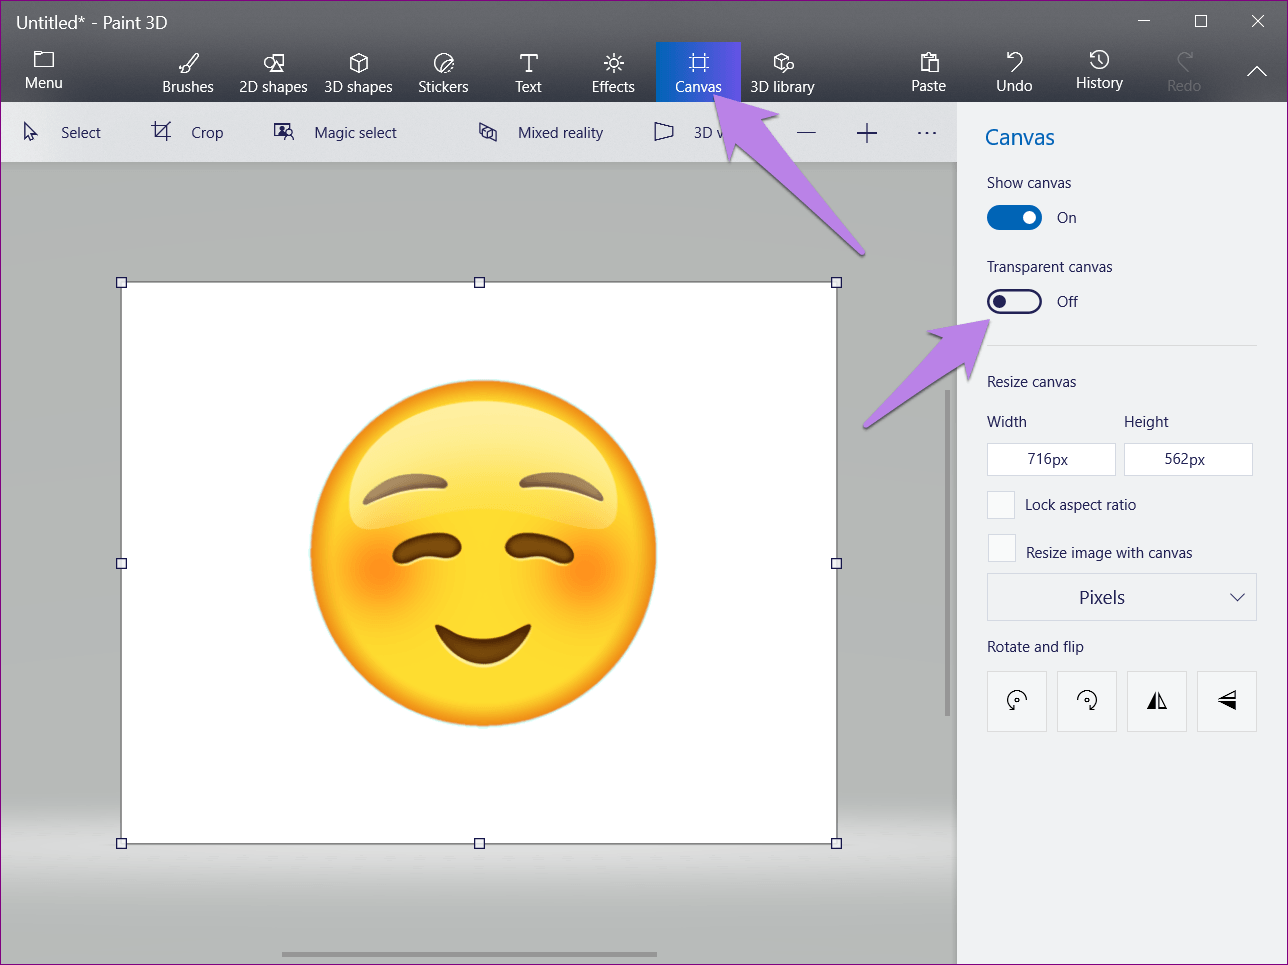
Once you do so, you will see that the white background disappears and your image becomes transparent.
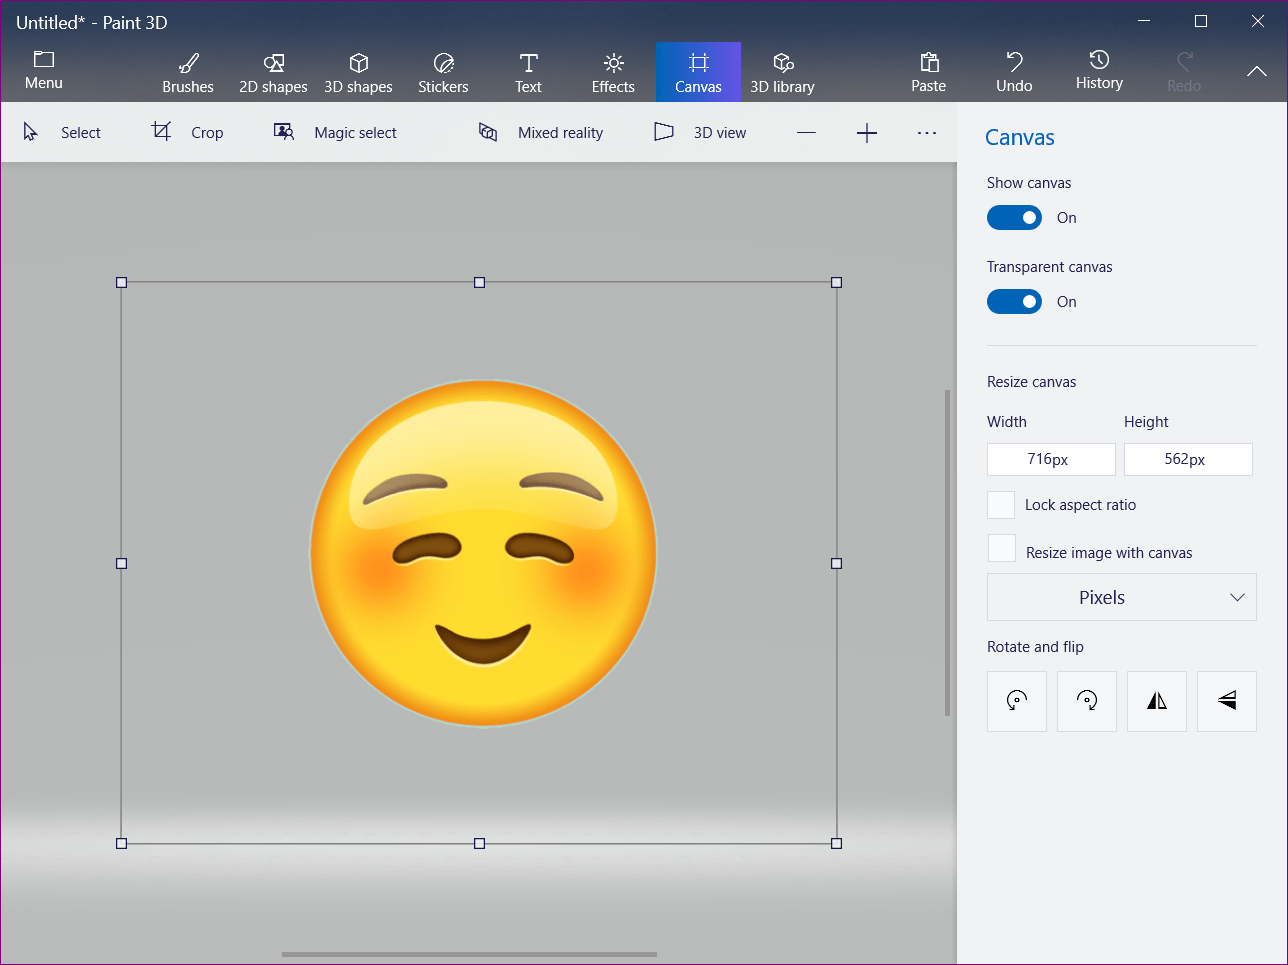
However, we are not done yet. A very crucial step of saving the image follows.
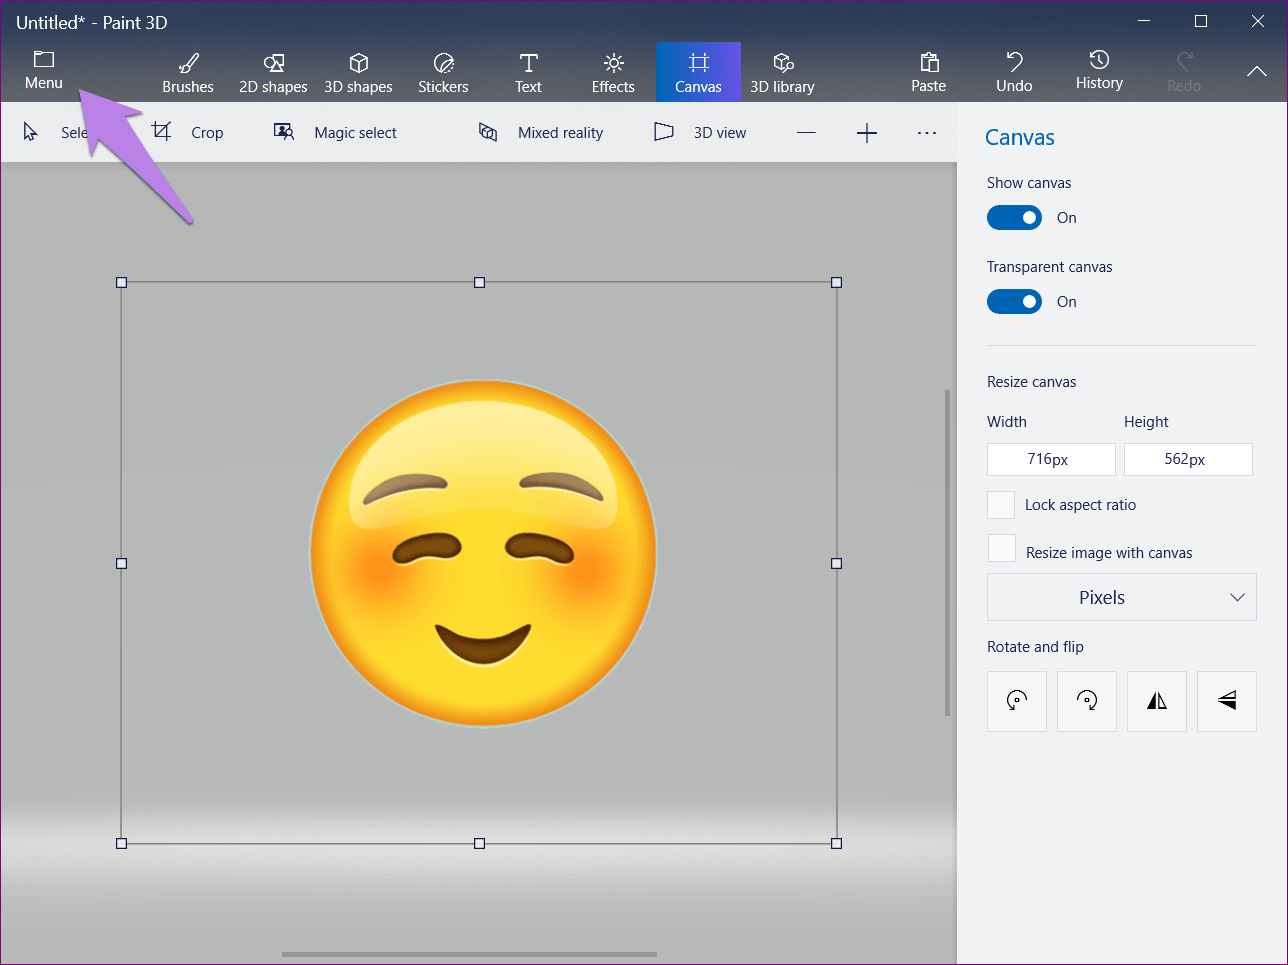
4. Save Transparent Image
With the background out of the way, it’s time to save our final image. For that, follow these steps:
Step 1: Hit the Menu icon and select Save as from the menu with the format as Image.

Step 2: Next, you need to make sure two things. First, the drop-down box under Save as type should be showing PNG (image). If it’s showing any other format, change it to PNG (image). Secondly, the Transparency box should be checked.

Saving the file in PNG format is extremely important. If you save in JPG, which is different from PNG, you will lose the transparency.
TipStep 3: Finally, click on the Save button. You will be asked to assign a name and choose the save location. Congratulations! Your image with a transparent background is ready.
Note: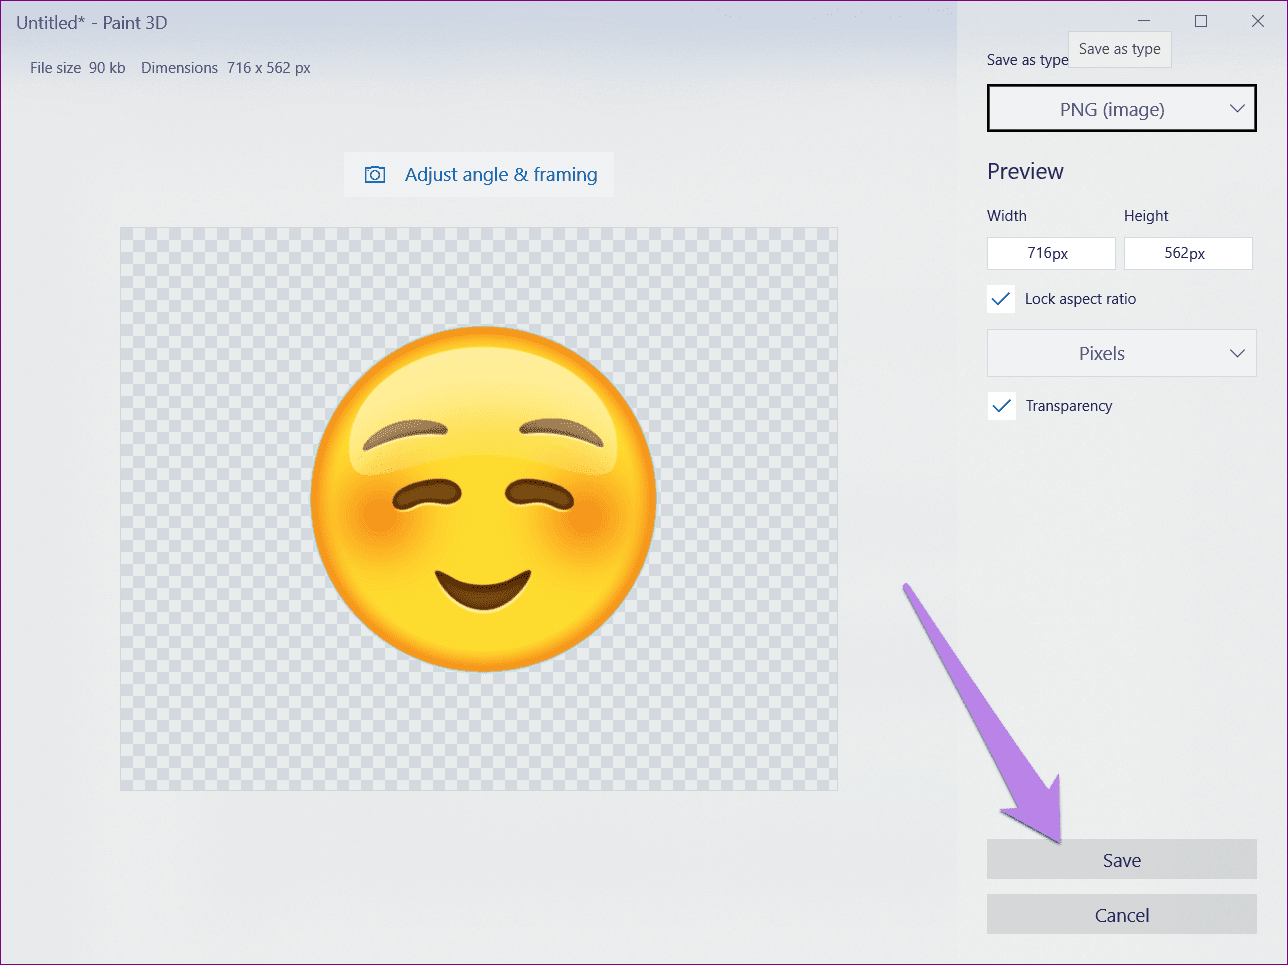
All Hail Transparency
Making an image transparent is one of the most desirable image-editing features. Fortunately, Paint 3D offers a simple way to achieve that. We hope you didn’t face any issue while removing the background and making it transparent. Do let us know if you need any other help regarding Paint 3D.
Next up: Now that the background is gone, wondering how to replace the background in Paint 3D? Check our simple tutorial on it.
Was this helpful?
Last updated on 13 July, 2021
Read Next
 How to Put Transparent Image Over Another in Paint and Paint 3D
There is a learning curve involved if you want to perform any simple task on powerful photo-editing tools such as Photoshop, GIMP, etc.
How to Put Transparent Image Over Another in Paint and Paint 3D
There is a learning curve involved if you want to perform any simple task on powerful photo-editing tools such as Photoshop, GIMP, etc.
 How To Make Image Background Transparent Using GIMP
Not everyone uses Adobe Photoshop, neither does everyone like it.
How To Make Image Background Transparent Using GIMP
Not everyone uses Adobe Photoshop, neither does everyone like it.
 How to Change Background Color in Paint 3D
Every person likes certain colors over others.
How to Change Background Color in Paint 3D
Every person likes certain colors over others.
 3 Ways to Make Taskbar Transparent in Windows 11
Windows 11 has a sleek and modern interface with an intuitive design that offers plenty of customization opportunities, including playing around with your taskbar's appearance.
3 Ways to Make Taskbar Transparent in Windows 11
Windows 11 has a sleek and modern interface with an intuitive design that offers plenty of customization opportunities, including playing around with your taskbar's appearance.
 How to Crop an Image in Circle Shape in Paint 3D
Cropping an image is one of the basic needs while editing a picture.
How to Crop an Image in Circle Shape in Paint 3D
Cropping an image is one of the basic needs while editing a picture.
 How to Add Borders to an Image Using Microsoft Paint
Method 1: Add Borders to an Image Using Shapes for Borders This method involves using the shapes within Microsoft Paint to draw borders around the image.
How to Add Borders to an Image Using Microsoft Paint
Method 1: Add Borders to an Image Using Shapes for Borders This method involves using the shapes within Microsoft Paint to draw borders around the image.
 How to Make a Logo in Paint 3D on Windows
Think about Facebook, Twitter, or any brand for a moment.
How to Make a Logo in Paint 3D on Windows
Think about Facebook, Twitter, or any brand for a moment.
The article above may contain affiliate links which help support Guiding Tech. The content remains unbiased and authentic and will never affect our editorial integrity.