There is a learning curve involved if you want to perform any simple task on powerful photo-editing tools such as Photoshop, GIMP, etc. Take the example of putting one picture over another. Simple tools such as MS Paint help in such circumstances. MS Paint is a free photo-editing software that comes pre-installed on Windows computers. It has received an upgrade in the form of Paint 3D, a free, pre-installed app on Windows PC.
Overlaying an image in Paint or Paint 3D is quite easy. You can use the concept of copying a transparent image over another picture to add watermarks and logos to your photos. It can also help you in merging two images.
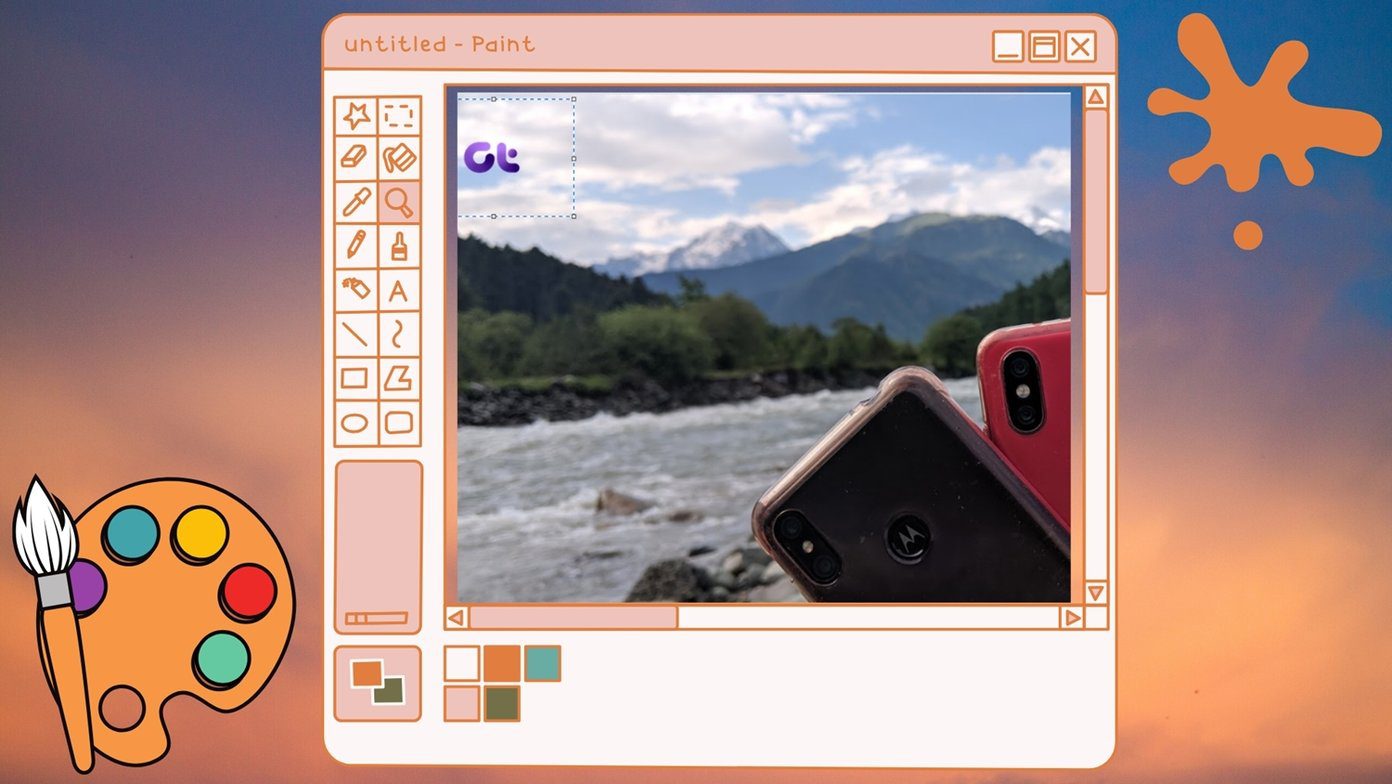
Let’s see how to put a picture, especially a transparent image on top of another in Paint and Paint 3D.
How to Put One Picture on Top of Another in Paint
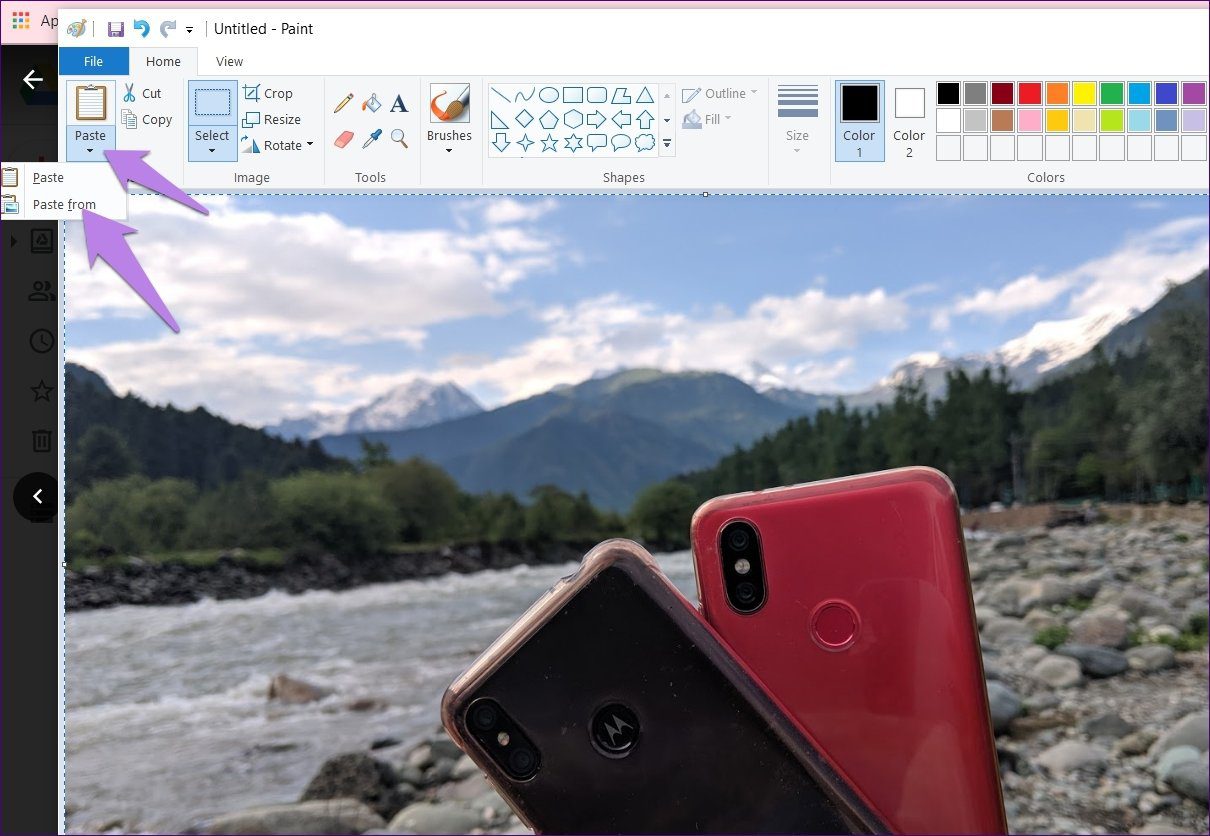
Users get disappointed when they do not see a dedicated Insert button in Paint to add images over the existing picture. However, the same feature is available with the help of the ‘Paste from’ button. You can use it to insert images in Paint.
Here are the steps to add a transparent image in Paint:
Step 1: Launch MS Paint on your computer.
Step 2: Open the first image on which you want to add another image from File > Open.

Step 3: Click on the small down arrow present below Paste. Choose the ‘Paste from’ option.
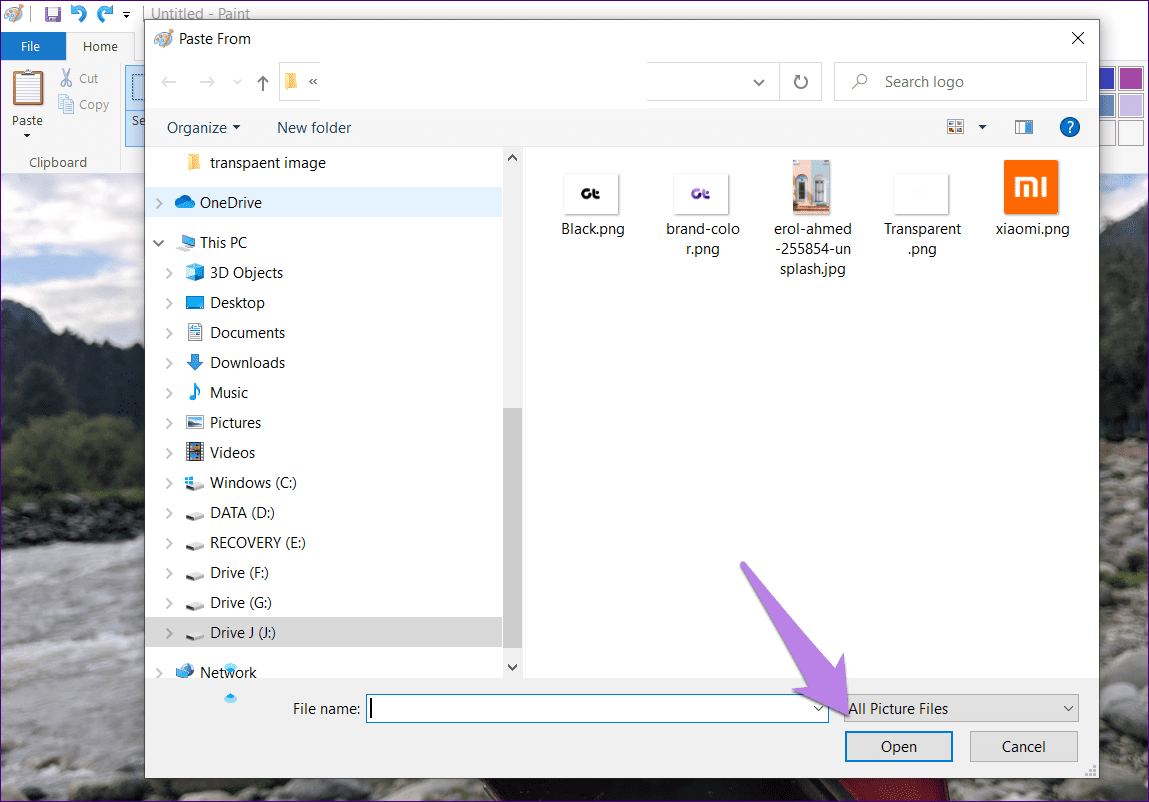
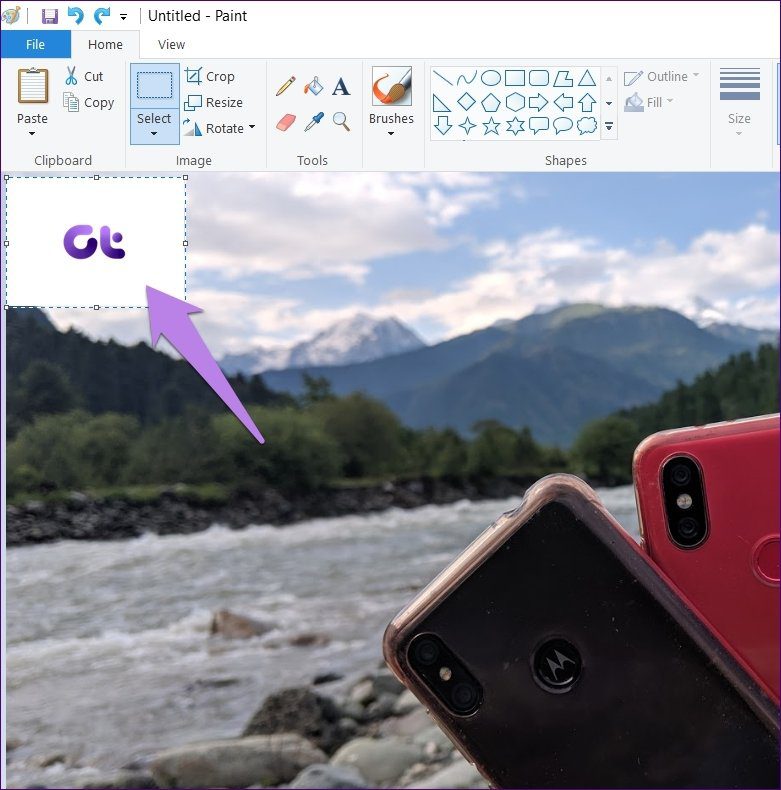
Step 4: The ‘Past From’ window will open. Navigate to the image file that you want to add over the first image. Click on Open to insert it.
Step 5: In most cases, you will notice that if you add a PNG file with a transparent background, it will appear with a white background. Don’t worry.
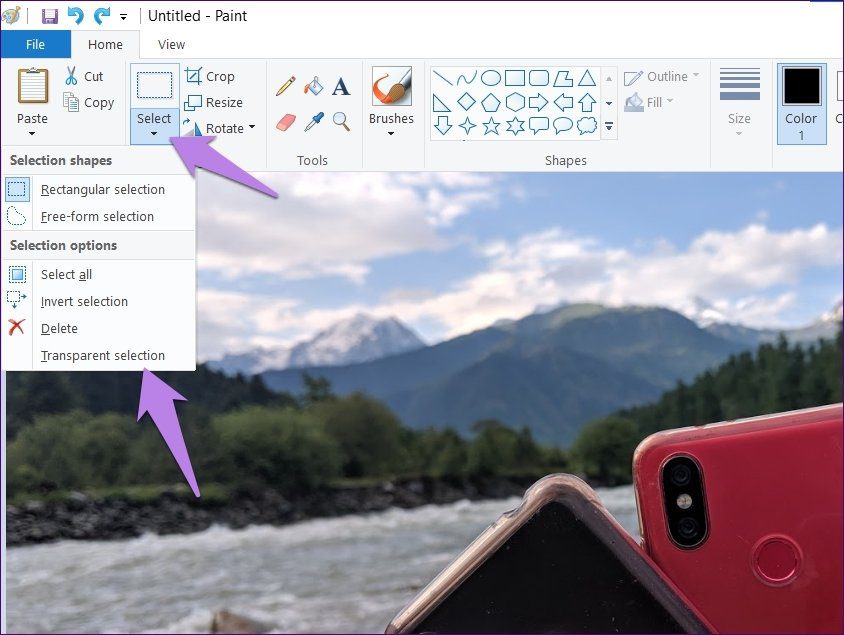
With the image selected, click on the down arrow present below the Select option. Choose Transparent selection.
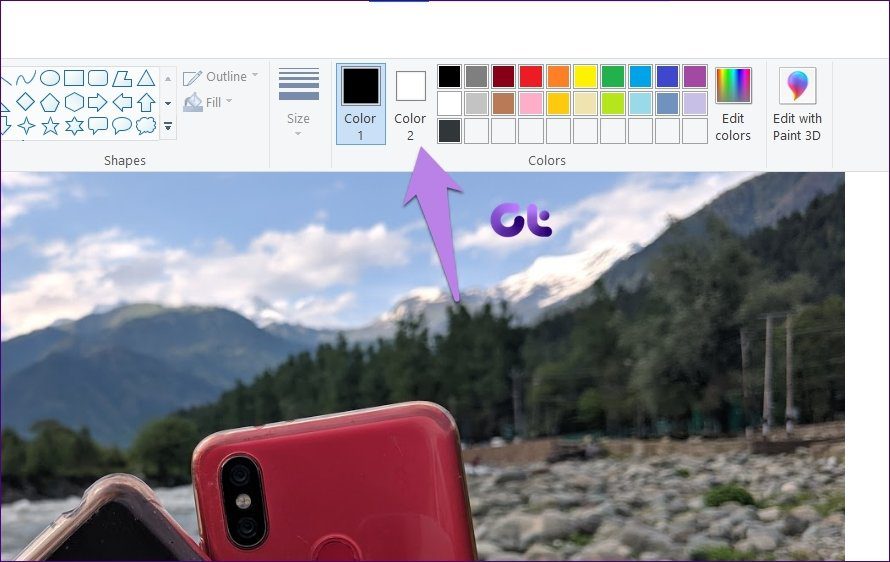
Voila! The white background will vanish instantly.

How Does Transparent Selection Work
In case you are wondering, how does the Transparent selection remove background, here’s a quick explanation.
The color selected in Color 2 in Paint will be removed when you enable Transparent selection. Since PNG images have a transparent background, they will be added with a white background in Paint. It gets removed when you click on it as the Color 2 is mostly white. If it’s a different color, the Transparent selection will not work. So click on the Color 2 box and then click on the white color.
Now if your image has a different background color, select it in the Color 2. For that, click on the Color picker icon from the toolbar. Typically, you would click on the color in the image to select it as Color 1. Since we need the color in Color 2 box, right-click on the color.

Then use the Transparent selection option. That way, you can remove any part of your image. The only thing that needs to be taken care of is that the image needs to have a solid background.
Step 6: You can resize the transparent image, change its position, and rotate it. Use the corners of the selection box to resize the image. Right-click on the image and choose Rotate.
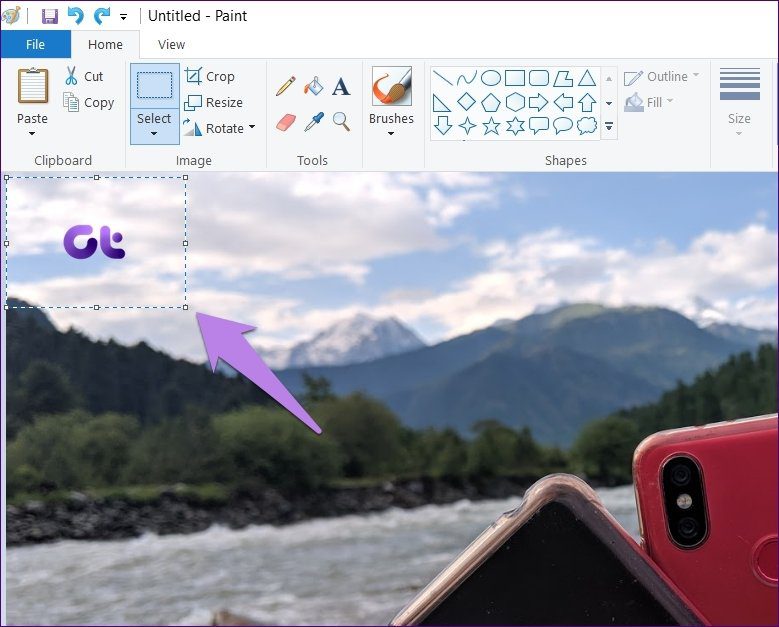
To change its position, keep your mouse pointer over the image. It will turn into a four-sided arrow. Drag it to the required position.

Similarly, you can add multiple images on top of the same image in Paint.

Step 7: To save the image, go to File > Save as.
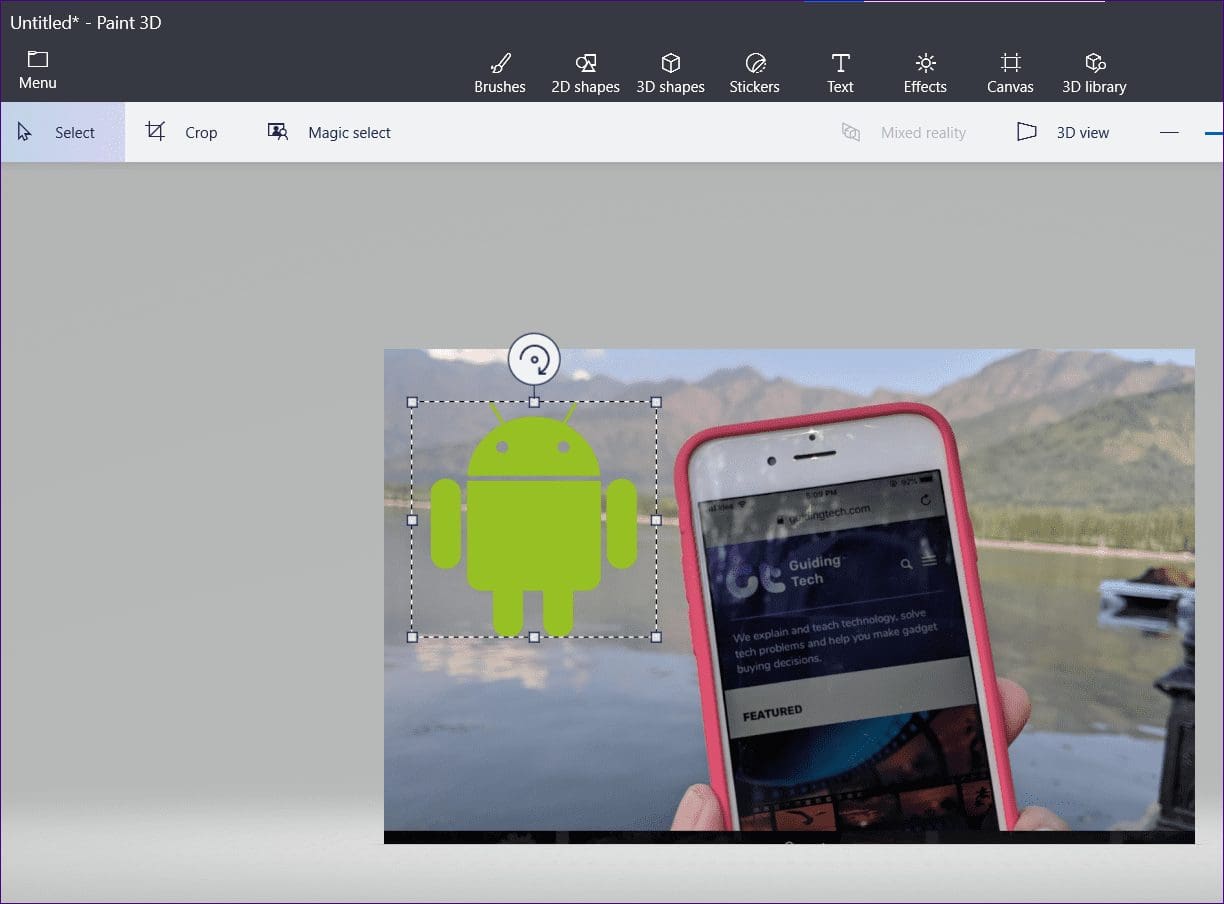
How to Put One Picture on Top of Another in Paint 3D
Layering images in Paint 3D is simple as compared to the traditional Paint. Fortunately, Paint 3D preserves the original transparency of the PNG images. Hence, you will not see any white background added to your image.
Let’s see how to insert a picture over another image in Paint 3D.
Step 1: Launch the Paint 3D app on your computer.
Step 2: Open the background image on which you want to insert another picture using Menu > Open.
Step 3: To add images, go to Menu > Insert.


Step 4: Open the image that you want to add to the background.
Resize, rotate, or change the position of the second image as per your preference. Similarly, add more images.
If the image that you want to add has a background color, you can make the background transparent in Paint 3D itself. You can also change the background color.
Step 5: Click on Menu > Save as to save your final image.
Show Your Creativity
Combining multiple images can give dramatic results. You can create wallpapers, images for social media, blog featured images using a tiled image by overlaying images on top of one another. The final result depends on your creativity. So use it to the fullest.
Next up: Paint 3D can be used to crop images into irregular shapes as well. Find out how to crop an image in the circle shape using Paint 3D from the next link.
Was this helpful?
Last updated on 13 July, 2021
Read Next
 How To Make Image Background Transparent Using GIMP
Not everyone uses Adobe Photoshop, neither does everyone like it.
How To Make Image Background Transparent Using GIMP
Not everyone uses Adobe Photoshop, neither does everyone like it.
 How to Crop an Image in Circle Shape in Paint 3D
Cropping an image is one of the basic needs while editing a picture.
How to Crop an Image in Circle Shape in Paint 3D
Cropping an image is one of the basic needs while editing a picture.
 How to Add Borders to an Image Using Microsoft Paint
Method 1: Add Borders Using Shapes for Borders This method involves using the shapes within Microsoft Paint to draw borders around the image.
How to Add Borders to an Image Using Microsoft Paint
Method 1: Add Borders Using Shapes for Borders This method involves using the shapes within Microsoft Paint to draw borders around the image.
 How to Save Image from Magic Select Tool in Paint 3D
The Magic Select tool is an interesting addition to Paint 3D, which is an upgraded version of the traditional MS Paint.
How to Save Image from Magic Select Tool in Paint 3D
The Magic Select tool is an interesting addition to Paint 3D, which is an upgraded version of the traditional MS Paint.
 3 Ways to Make Taskbar Transparent in Windows 11
Windows 11 has a sleek and modern interface with an intuitive design that offers plenty of customization opportunities, including playing around with your taskbar's appearance.
3 Ways to Make Taskbar Transparent in Windows 11
Windows 11 has a sleek and modern interface with an intuitive design that offers plenty of customization opportunities, including playing around with your taskbar's appearance.
 How to Blur a Part of Picture in Paint 3D
At times, you would want to blur a portion of a photo to conceal details.
How to Blur a Part of Picture in Paint 3D
At times, you would want to blur a portion of a photo to conceal details.
The article above may contain affiliate links which help support Guiding Tech. The content remains unbiased and authentic and will never affect our editorial integrity.