At times, you would want to blur a portion of a photo to conceal details. While powerful image editing tools are capable of doing the same, picking the best one for your needs and comfort can be a challenge. Thankfully, Microsoft has made the new Paint 3D capable enough to let you blur a part of a picture on your Windows desktop or laptop. Sure, it is a bit tricky, and that’s why we are here to help.
That said, Paint 3D, similar to its sibling MS Paint, doesn’t provide a dedicated blur option. So the process is not straightforward, but there are a couple of workarounds. You can use Paint 3D to blur screenshots, extra objects, and even background.
Let’s check the various methods to pixelate or blur a part of a photo in Paint 3D on Windows 10.
Method 1: Blur With Select Tool
In this method, you need to select the area that you want to blur. Then, you need to decrease its size as small as possible. Once that happens, increase the size again to fit the original area. The selected part of the photo will be blurred.
Here are the steps in detail:
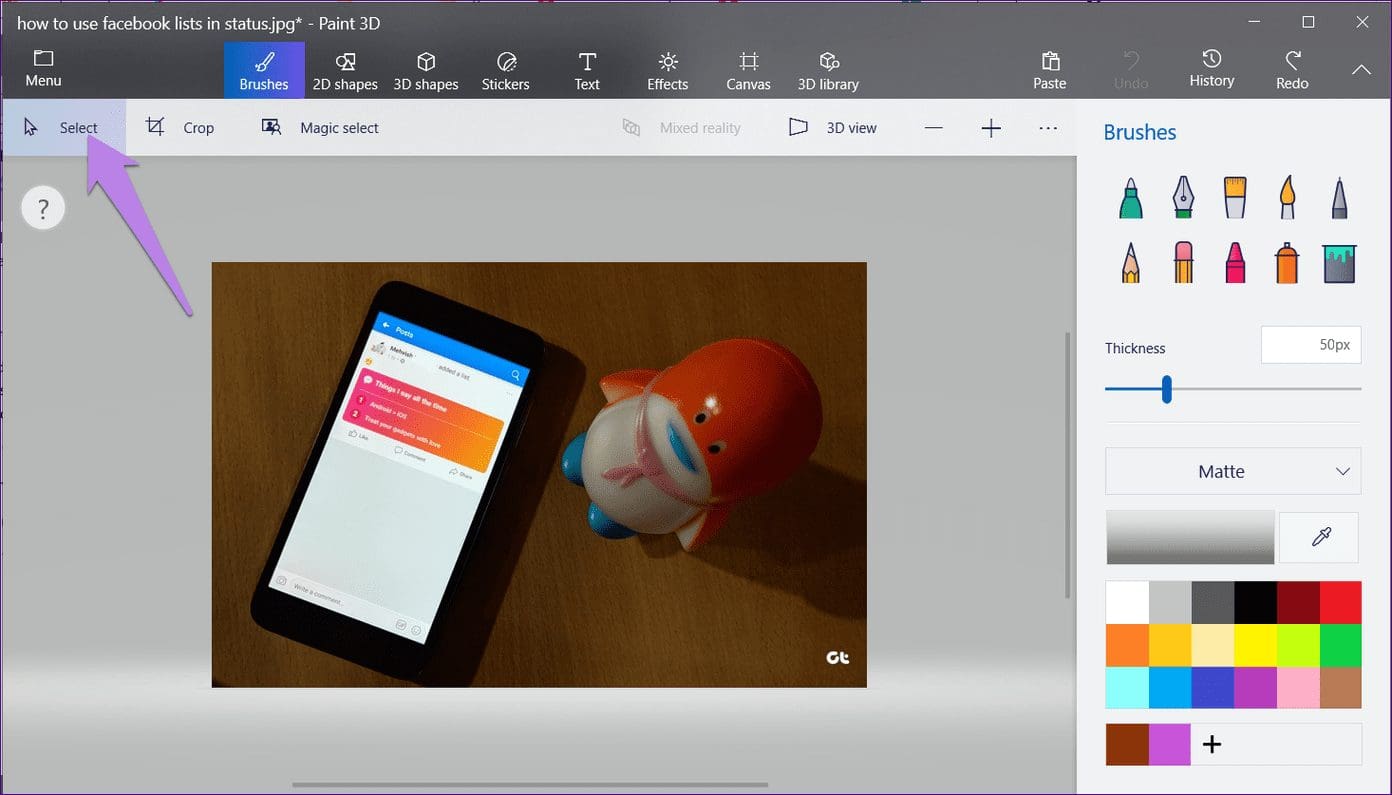
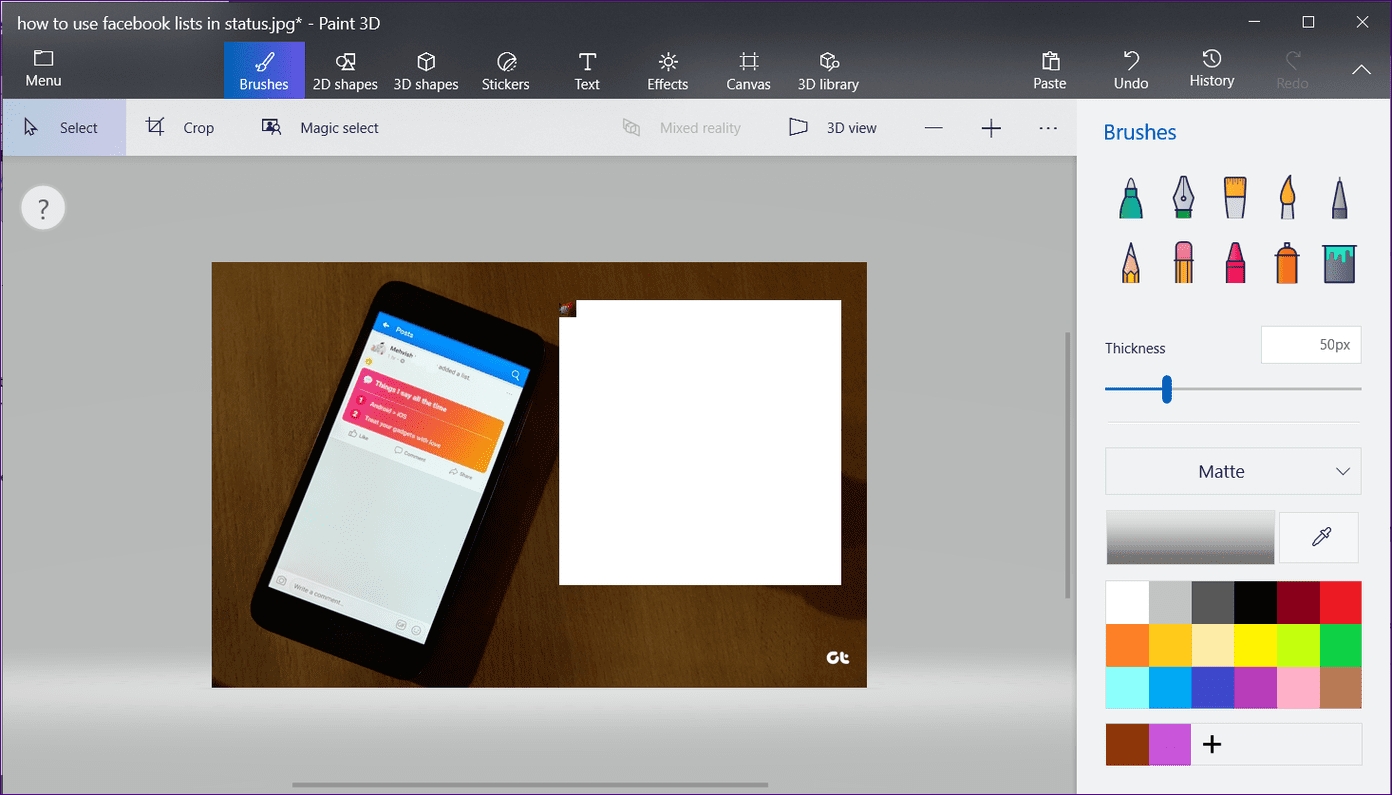
Step 1: Launch the Paint 3D app on your Windows 10 PC and open the image.
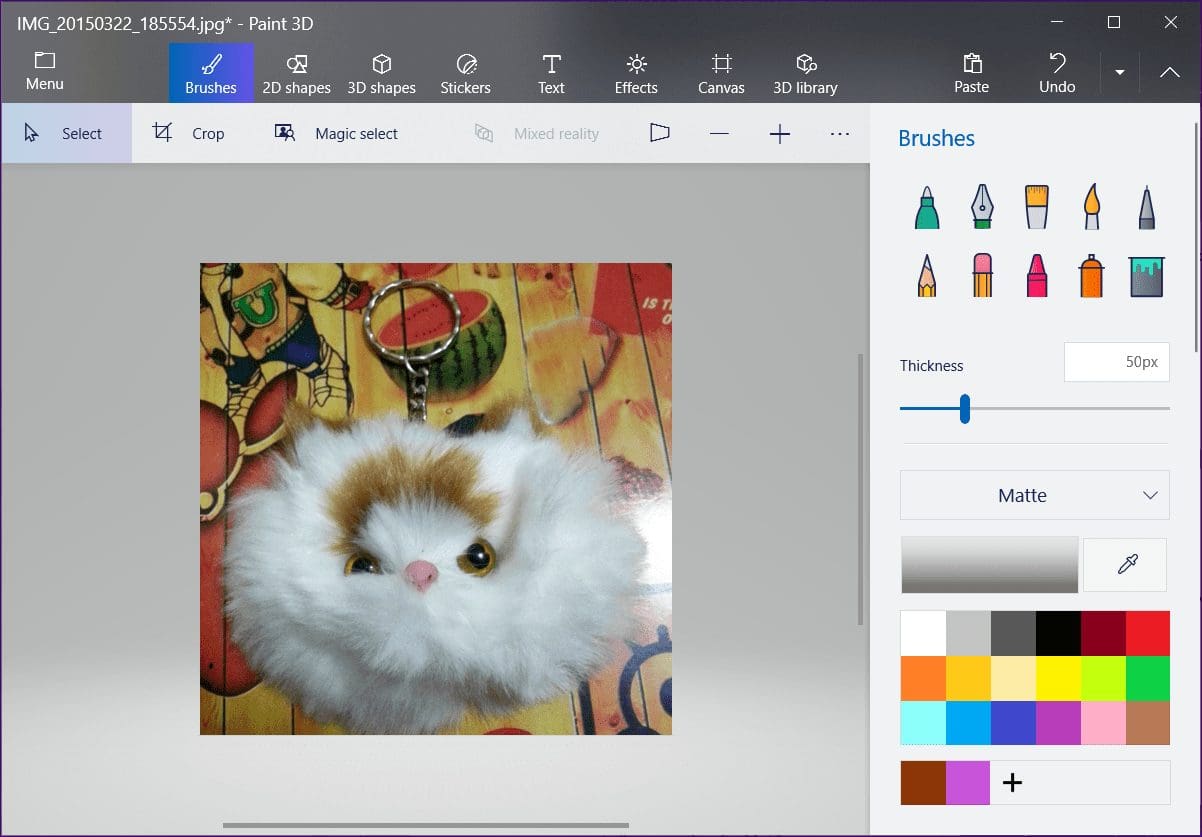
Step 2: Click on the Select tool present under the Brushes tab.
Step 3: Select the portion that you want to blur. For instance, in the following image, I want to blur the toy.
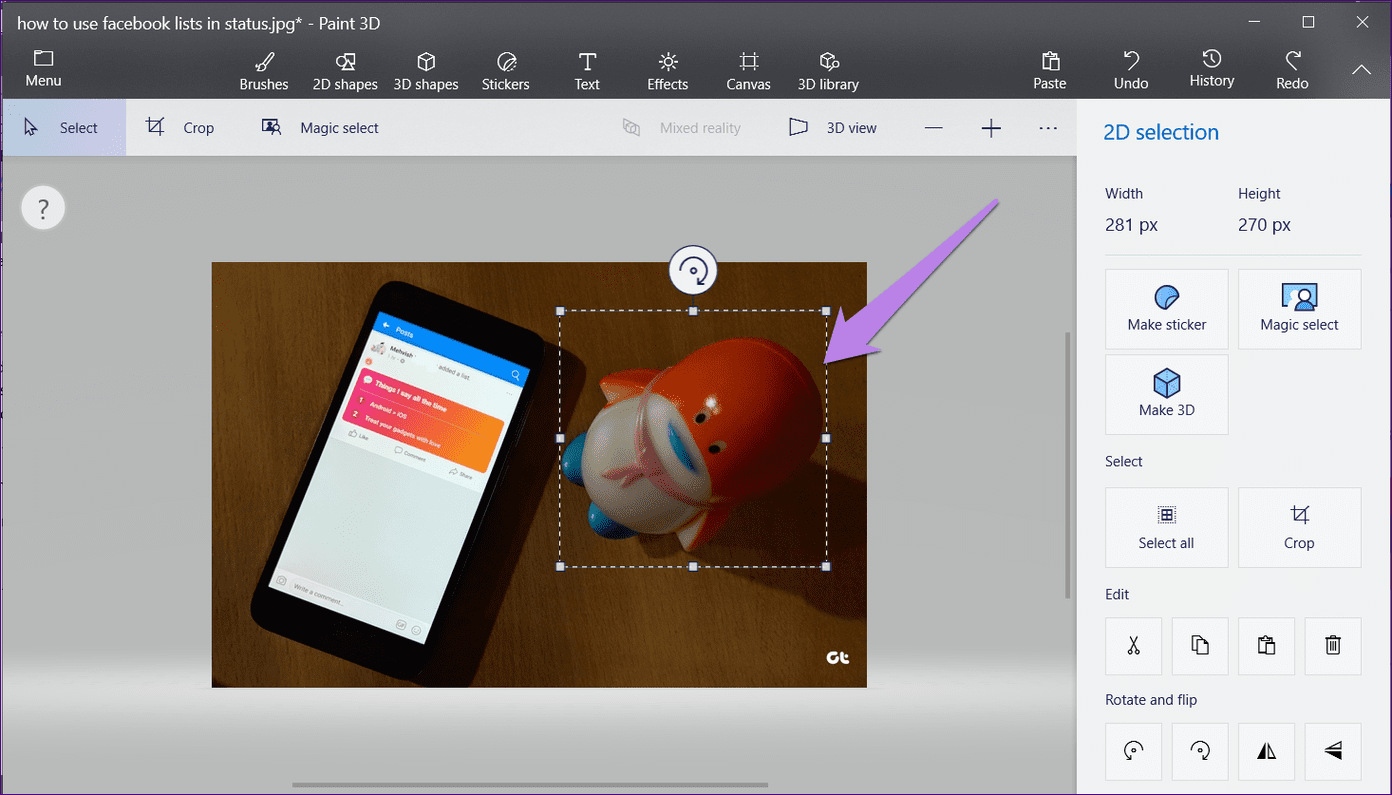
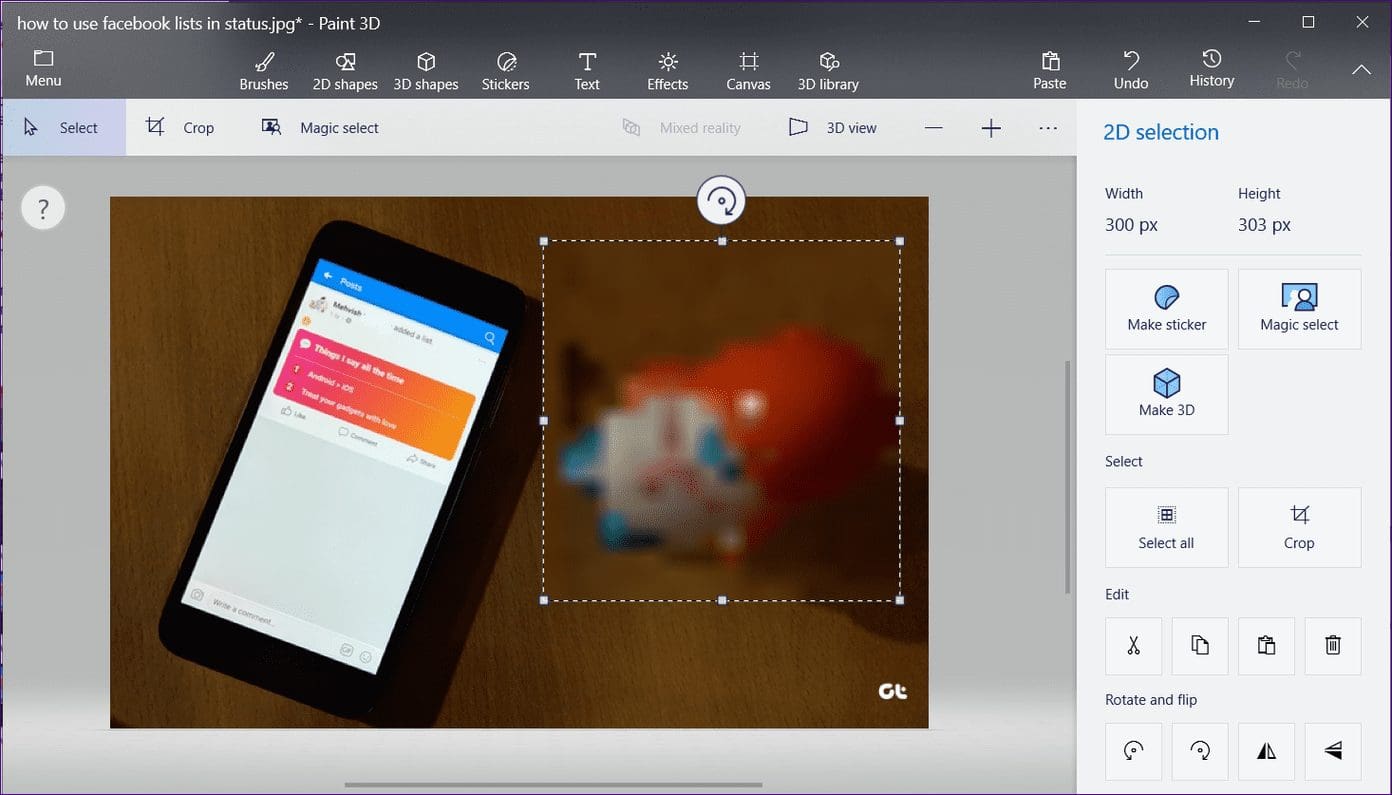
Step 4: Using the bottom-right corner of the selection, drag the selection box inwards to decrease its size. Make it very small. But keep in mind that it should be just enough for to be able to resize it again.

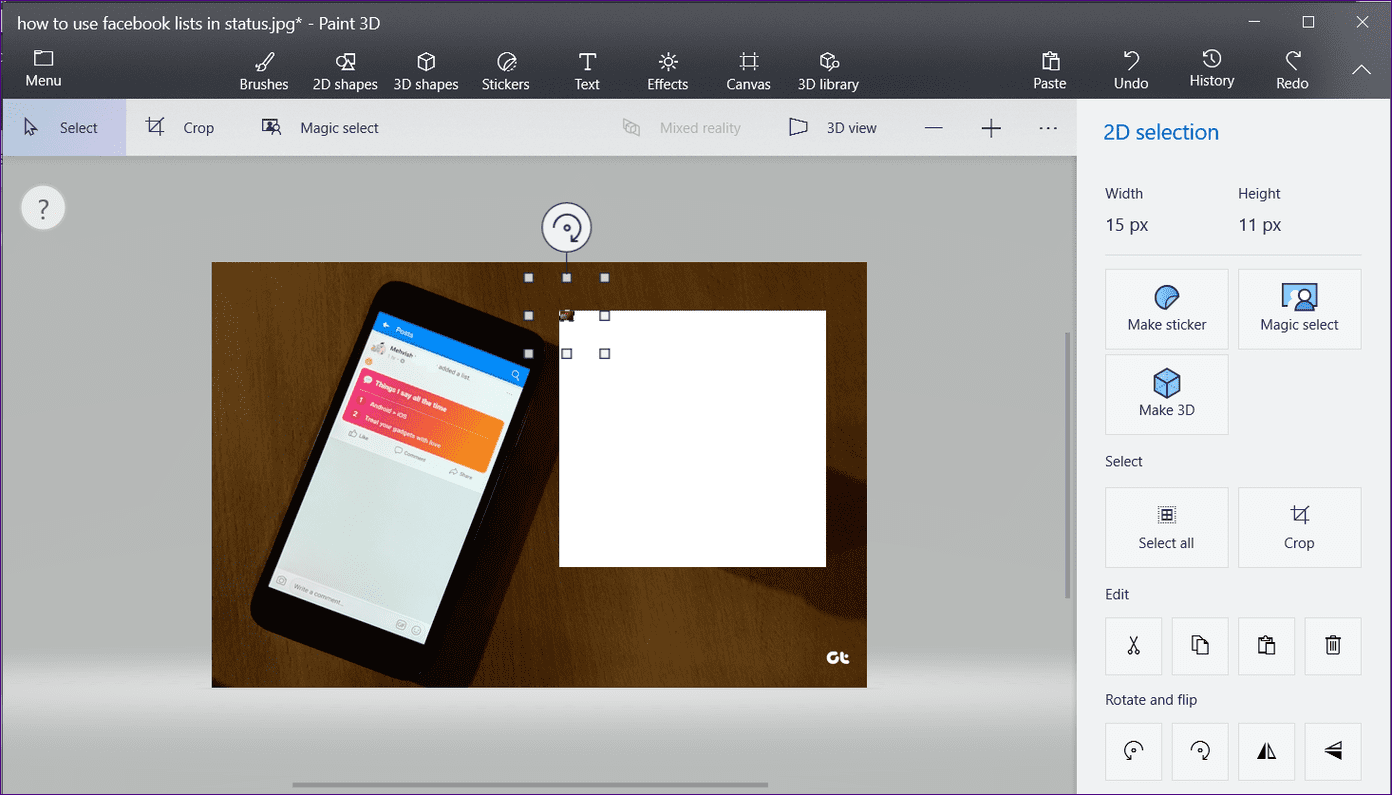
Click anywhere on the image. You will see that the remaining area becomes white.
Step 5: Select the area that you resized. Make sure not to include any white space from the remaining area.

Now, instead of decreasing the size, increase its size using the bottom-right corner in a way that it fits the white area.
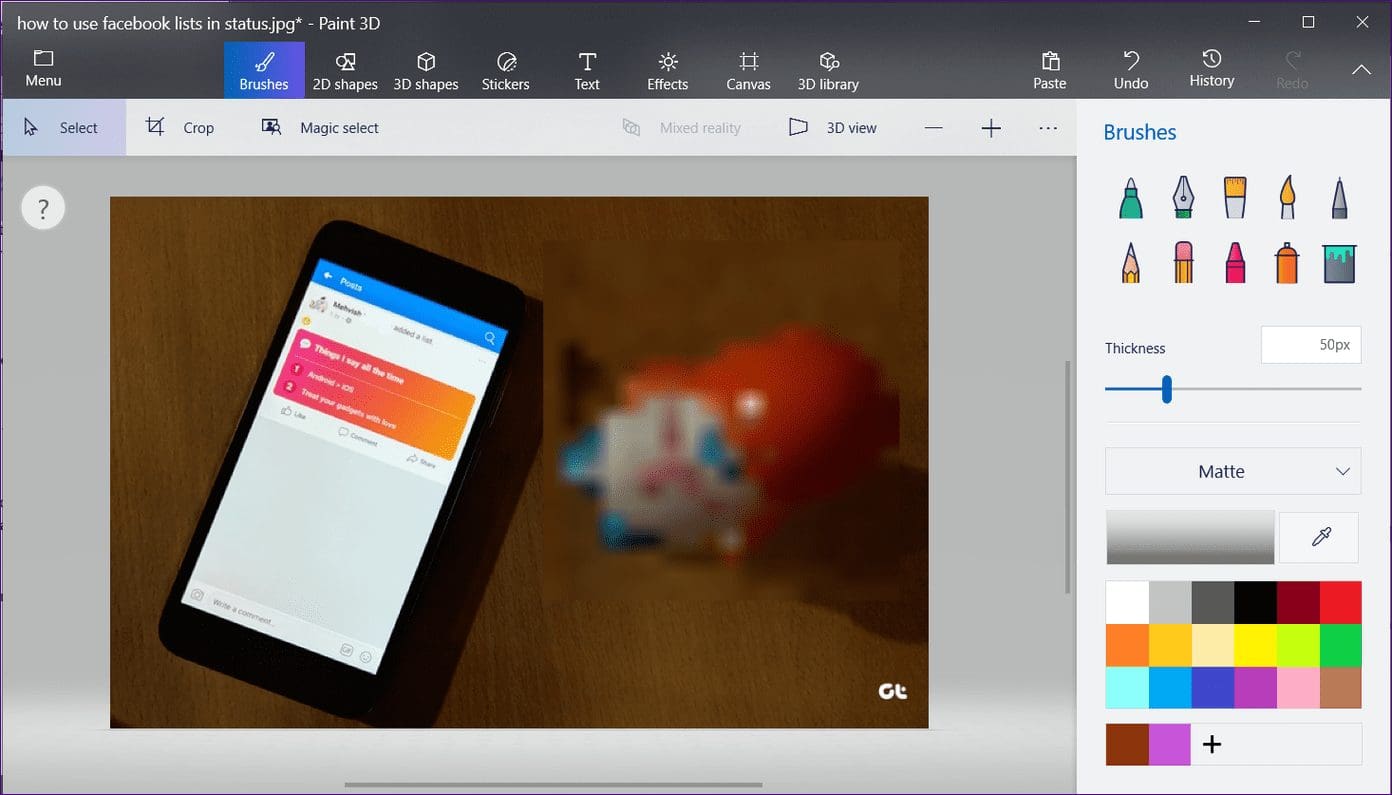
Step 6: Click anywhere on the image. Your picture with a blurred portion is ready.
Note: You may face trouble in the beginning. But after trying a couple of times, and you will get comfortable at blurring images in Paint 3D. Of course, this method doesn’t result in one of the neatest outputs. But the images should be good enough to be shared over social media or messaging apps.
Method 2: Cover With Similar Area
In this method, we will be blurring the portion of the picture with the pixels from the nearby area. The advantage of this method is that the final image looks less edited (or tacky) as compared to the previous method. If you do it carefully, you can easily remove objects and texts from your image.
Here are the steps for the same:
Step 1: Open your image in the Paint 3D app.
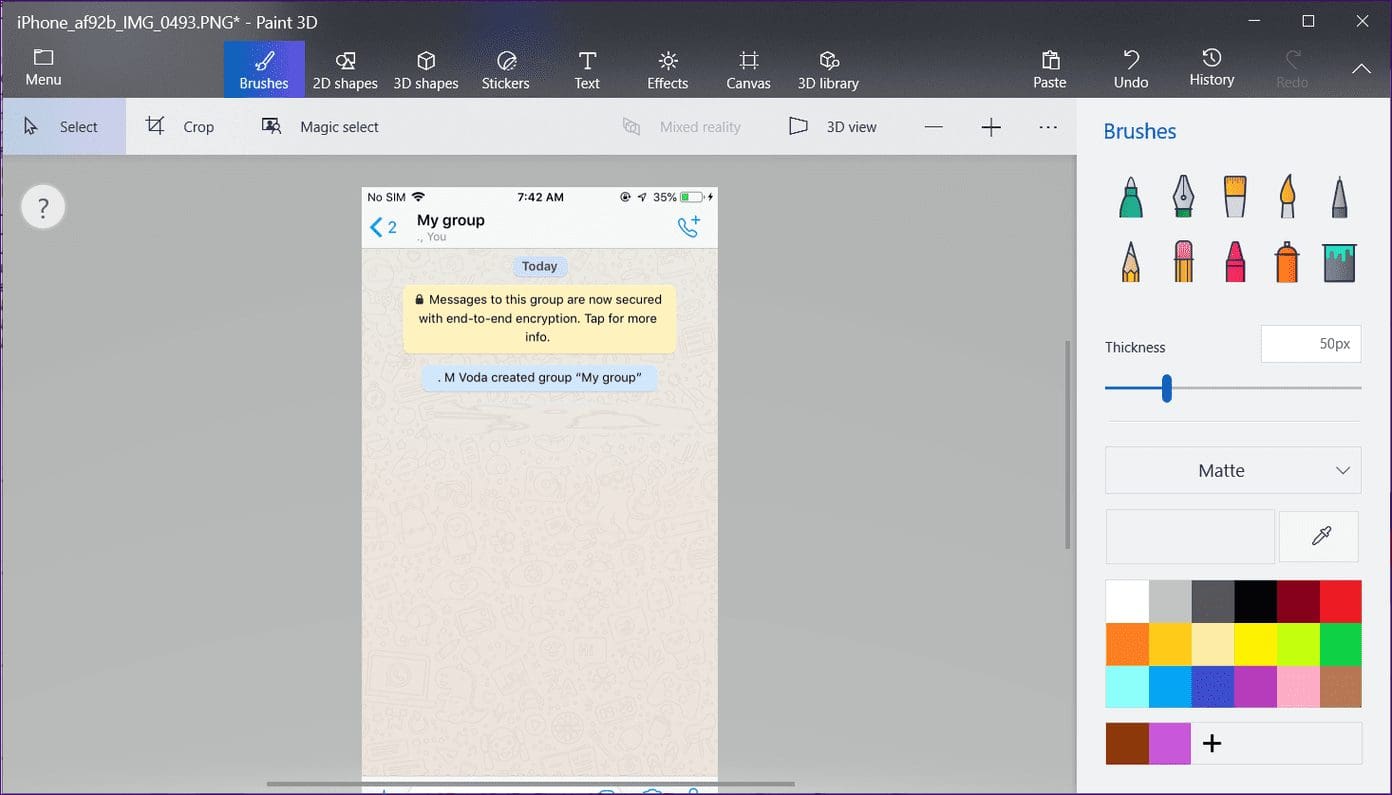
Step 2: Select a small portion either on the right or left side near the area that you want to blur or hide using the Select tool. For instance, in the following screenshot, I want to hide the text ‘M Voda added you’. I will select the right area.

Step 3: Using the middle box of the selection area, drag it towards the area that you want to hide. With the help of the other tiny boxes, you can adjust its size and position.

Step 4: Click anywhere to apply it. This is how the final image will look like.
Method 3: Using Magic Select Tool
This method uses the amazing Magic Select tool of Paint 3D to blur a portion of the picture. To do so, we need to select the portion first using the Magic select tool and then autofill the background using it.
Here are the steps:
Step 1: Open your image in the Paint 3D.
Step 2: Click on the Magic select tool present under the Brushes option.

Step 3: A box will appear on your image. Using the tiny selection boxes, choose the area that you want to blur. For instance, I want to blur the monkey in the following image. Then, click on the Next on the right side.

Step 4: Using the Add or Remove buttons, refine the selection if the automatic selection wasn’t perfect. Make sure the Autofill background is selected. Finally, hit Done.
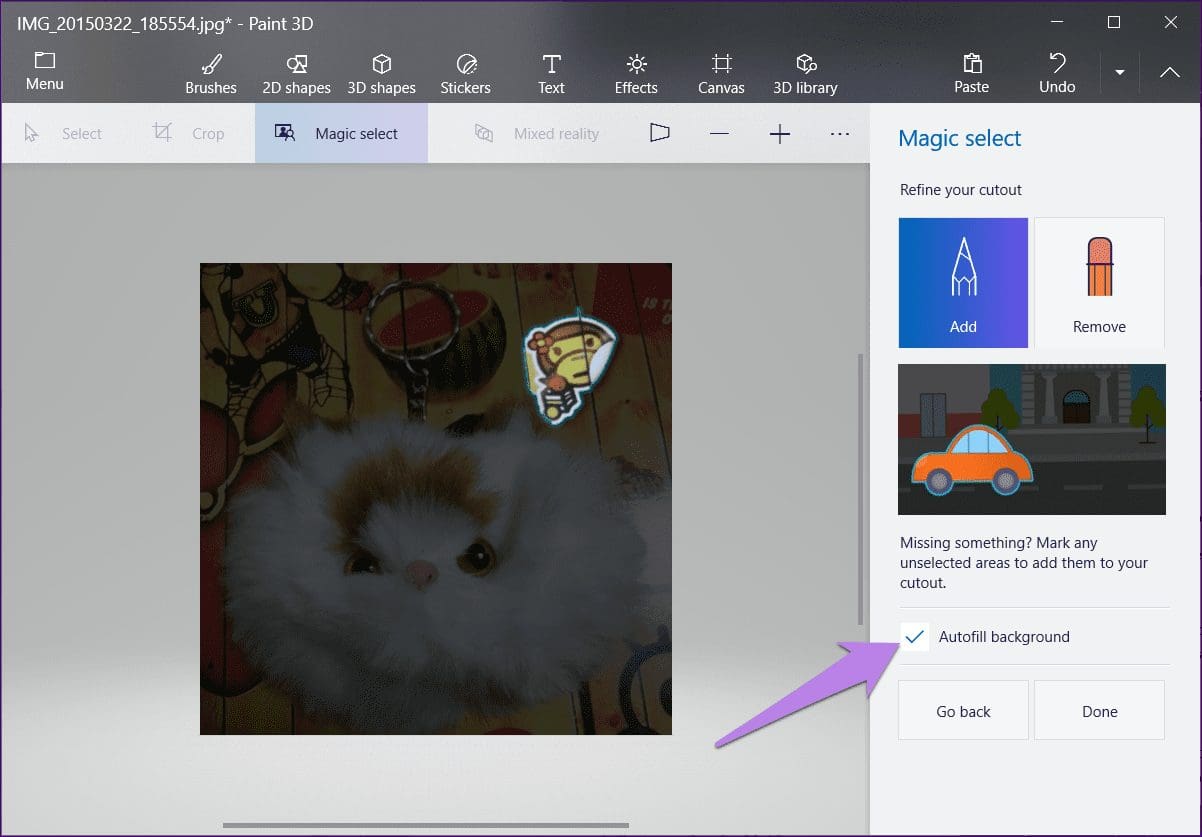
Step 5: You will notice new icons around your selected image.

Hit the Delete key on your keyboard. That will remove the desired area and fill it with a blurred background that looks similar to your actual image.
A Careful Stitch
If you want to blur a lot of images, we would suggest downloading an image editing tool that offers a dedicated button for that same. It’s quite easy that way. You can try free tools such as PhotoScape, GIMP, PicsArt, and more. For one time or casual usage, the Paint 3D should serve you fine.
Next up: Want to make a logo for free? Check out how to create a logo on Windows using Paint 3D from the next link.
Was this helpful?
Last updated on 13 July, 2021
Read Next
 How to Put Transparent Image Over Another in Paint and Paint 3D
There is a learning curve involved if you want to perform any simple task on powerful photo-editing tools such as Photoshop, GIMP, etc.
How to Put Transparent Image Over Another in Paint and Paint 3D
There is a learning curve involved if you want to perform any simple task on powerful photo-editing tools such as Photoshop, GIMP, etc.
 4 Ways to Blur Background or Part of a Picture on Samsung Galaxy Phones
https://youtu.be/ibIZ2QeeIgk Method 1: How to Blur Certain Parts of a Picture on Samsung Step 1: Launch the Samsung Gallery app on your phone.
4 Ways to Blur Background or Part of a Picture on Samsung Galaxy Phones
https://youtu.be/ibIZ2QeeIgk Method 1: How to Blur Certain Parts of a Picture on Samsung Step 1: Launch the Samsung Gallery app on your phone.
 4 Ways to Blur Out a Part of Picture on Mac
Method 1.
4 Ways to Blur Out a Part of Picture on Mac
Method 1.
 3 Ways to Blur a Part of a Picture on Android
Method 1: Use Google Photos to Blur a Face In a Photo The default gallery app on Android – Google Photos – is quite feature-rich, with ample image editing options.
3 Ways to Blur a Part of a Picture on Android
Method 1: Use Google Photos to Blur a Face In a Photo The default gallery app on Android – Google Photos – is quite feature-rich, with ample image editing options.
 5 Ways to Blur a Part of Picture on iPhone and iPad
Method 1: Use Markup Tools in the Photos App While the default markup option in the Photos app doesn’t come with a blur tool, you can get creative and use
5 Ways to Blur a Part of Picture on iPhone and iPad
Method 1: Use Markup Tools in the Photos App While the default markup option in the Photos app doesn’t come with a blur tool, you can get creative and use
 What Is WhatsApp Profile Picture Size and How to Add Any Picture to It
What’s the Best Size for a WhatsApp profile Picture While WhatsApp has opened up to many new features, from sharing HD photos to screen sharing, it remains stringent on its
What Is WhatsApp Profile Picture Size and How to Add Any Picture to It
What’s the Best Size for a WhatsApp profile Picture While WhatsApp has opened up to many new features, from sharing HD photos to screen sharing, it remains stringent on its
 3 Ways to Fix Picture-In-Picture Not Working in Facebook Messenger
Common Fixes Restart device - Long-press the physical Power button and tap Reboot to restart Android.
3 Ways to Fix Picture-In-Picture Not Working in Facebook Messenger
Common Fixes Restart device - Long-press the physical Power button and tap Reboot to restart Android.
The article above may contain affiliate links which help support Guiding Tech. The content remains unbiased and authentic and will never affect our editorial integrity.

