Method 1. Using the Photos App
The Retouch tool in the default Photos app on Mac lets you blur information in pictures. While it’s not perfect or offers precise control like other apps, the Retouch tool is still worth trying out.
Note: To transfer the image to the Photos app, drag and drop it from Finder to the Photos app. It will be stored in the Imports section.
Step 1: Launch the Photos app. Open the picture you want to edit.
Step 2: Click Edit at the top right.

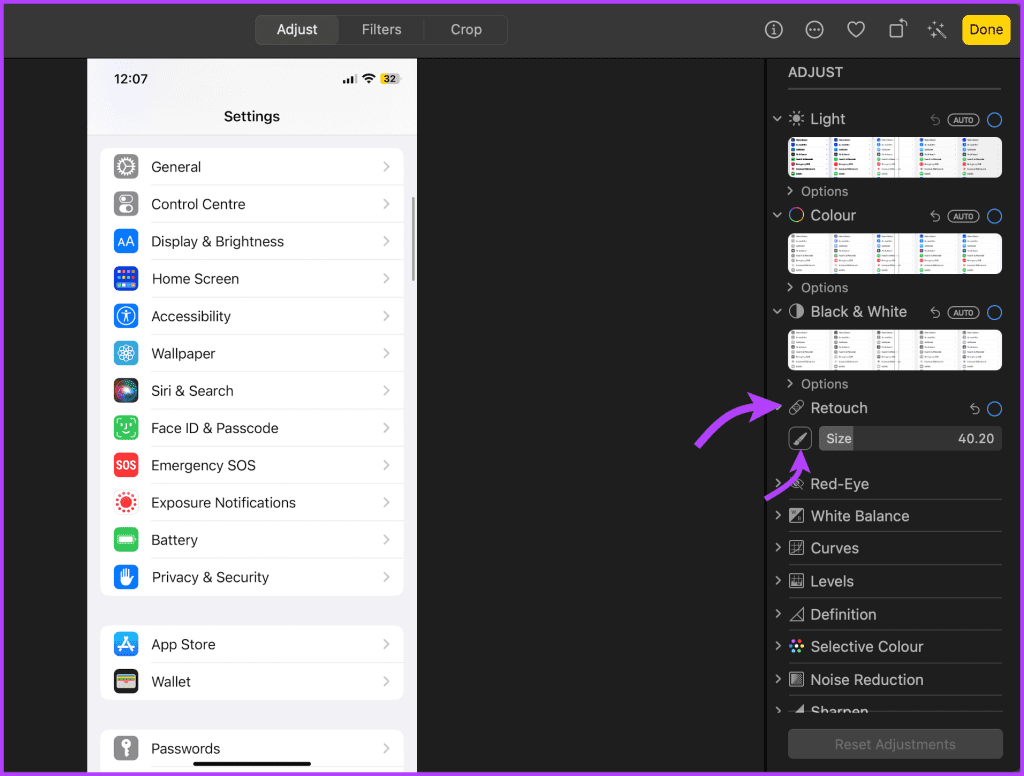
Step 3: Select the Retouch tool from the menu. Click the brush icon to activate the tool. (You can change the brush size as per your preference.)
Step 4: Click and drag the brush over the part of the picture you want to blur, and voila! The Photos app will blur the part instantly.
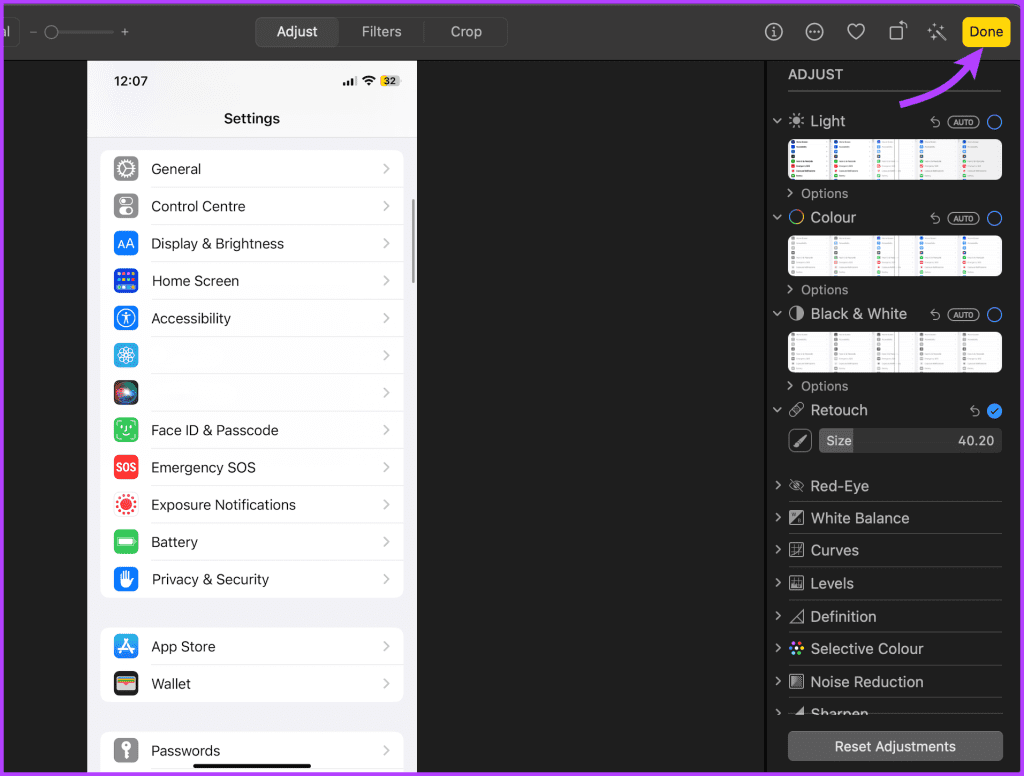
Step 5: Tap Done to save the changes. Your edited photo is now ready to share on the web.
Method 2. Use Preview to Hide Part of Picture
While the handy Preview app does not offer a blur tool, you can manage to hide some portions of an image.
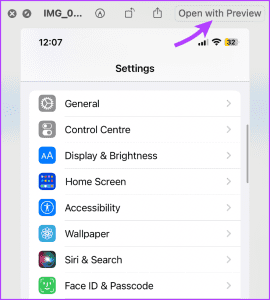
Step 1: Open Finder and select the photo. Next, click Open with Preview.
Step 2: Click Markup at the top bar. If you can’t see it, click the >> icon and select it.

Step 3: Select the Shape tool from the Markup toolbar.
Step 4: The shape will auto-appear on the image. Resize and move the shape as per requirement.


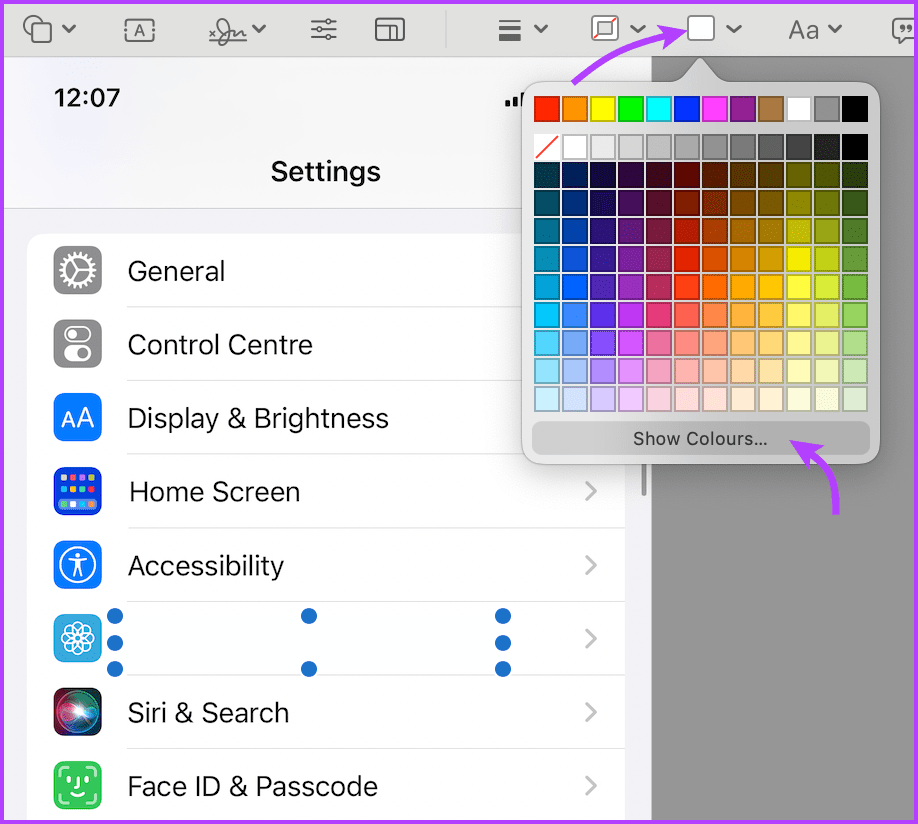
Step 5: Click the color selection tool to change the color of the box.
Step 6: To select a custom color, click Show Colors. Select the color or use the Droplet tool to pick up any color from the image.
And that’s it. You can create as many shapes and in as many colors as you want. In the end, press Cmd + S to save the changes or go to File → Export to save changes as a new image or format.
Tip: You can also use the Markup tool to hide parts of a picture on iPhone or iPad.
Method 3. Use Web tool – Photopea
Photopea is an excellent Photoshop alternative on the web. If you don’t want to download dedicated software to blur out a part of a picture on a Mac, use Photopea to do the job.
Step 1: Visit Photopea on the web. Click Open from Computer to import the image.
Step 2: Click the selection tool from the sidebar. Select a part of the image you want to blur.

Step 3: Select Filter in the top menu bar. Expand the Blur menu. Select a relevant blur option, say Gaussian Blur.

Step 4: You can change the blur radius to tweak the intensity. Hit OK.

Step 5: Once done, click File at the top left. Expand the Export as menu and save the edited picture on your Mac.

Photopea is free to use on the web. You can even use it to remove things from images, crop them, add watermarks, and more. You can start a $5 monthly subscription to remove ads and unlock 5GB of PeaDrive storage.
Alternative: You can also use Canva to blur out stuff from photos easily.
Method 4. Use Third-Party App – PhotoScape X
Several third-party apps can blur out part of a picture on Mac. I am using PhotoScape X as an example.
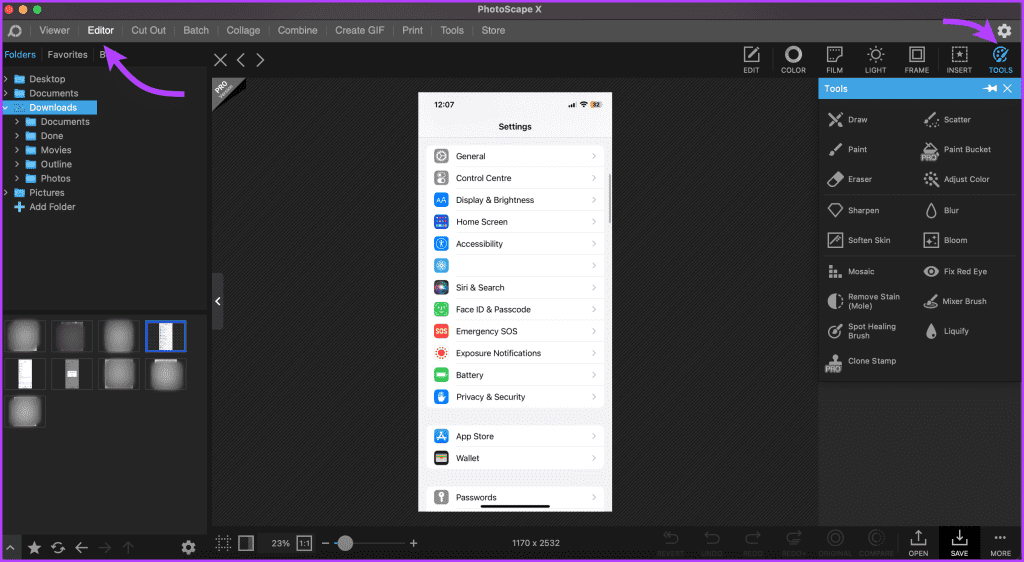
Step 1: Open the Photoscape app. Go to the Editor tab, browse the location of the image from the sidebar, and select the image.
Step 2: Click the Tools section from the left toolbar.
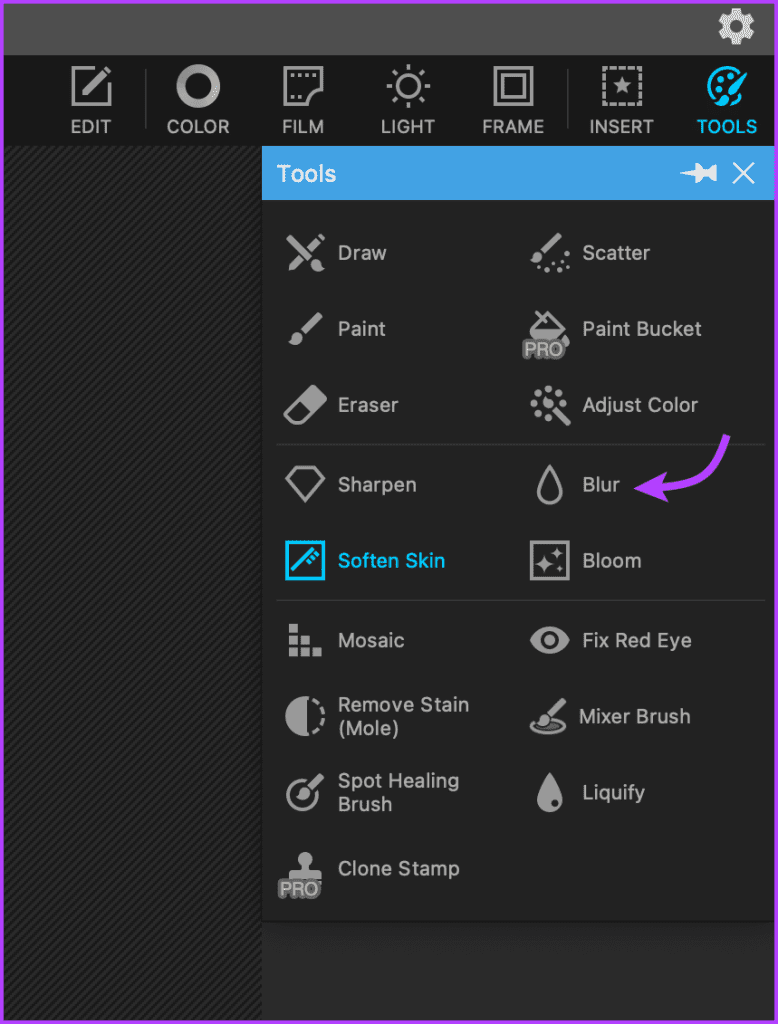
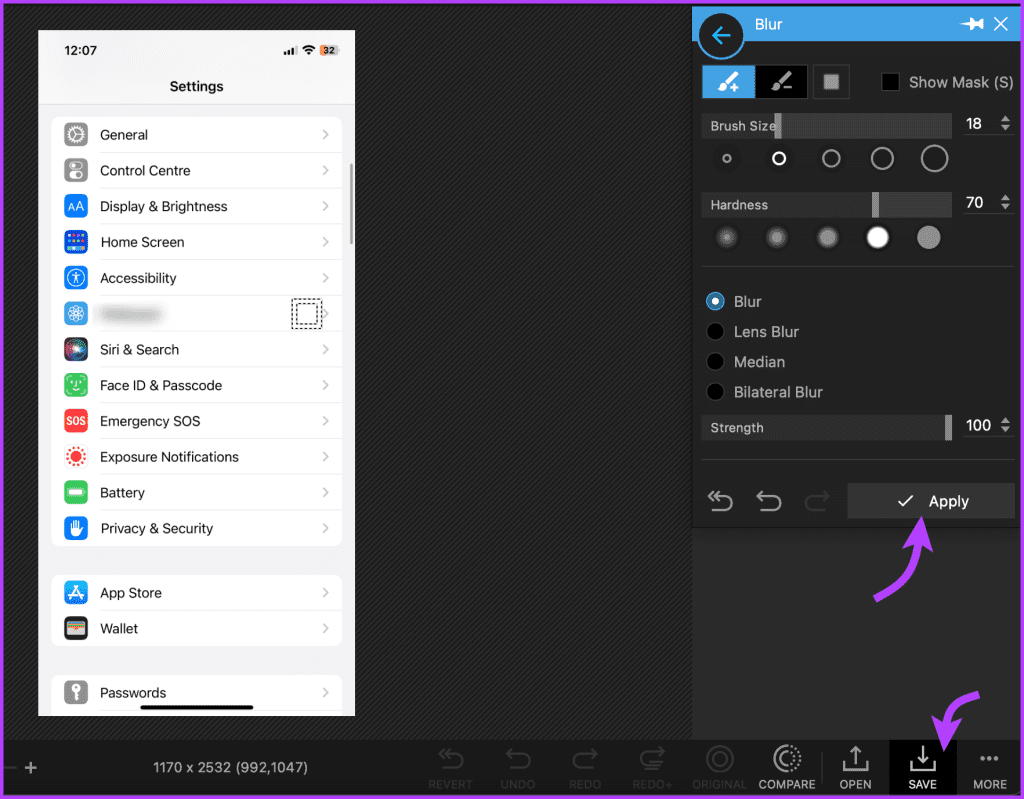
Step 3: Choose Blur from the menu. Select the brush shape and size, blur intensity, and blur style as needed.
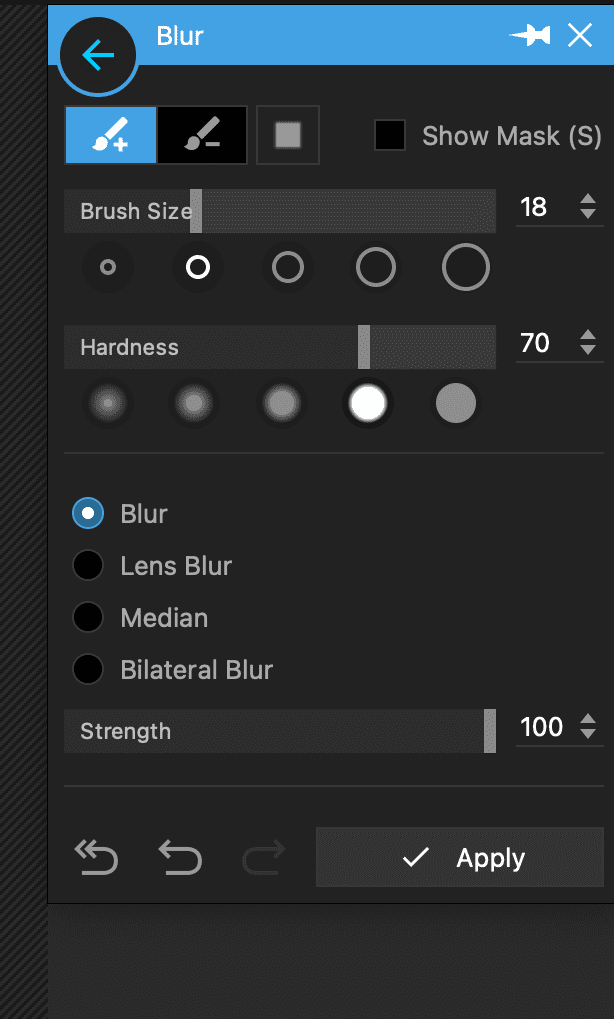
Step 4: Drag the brush of the parts to be blurred.
Step 5. Once done, tap Apply > Save to export the image as desired.
PhotoScape is free and easy to use. It has many features for editing images.
Was this helpful?
Last updated on 30 August, 2024
Read Next
 4 Ways to Blur Background or Part of a Picture on Samsung Galaxy Phones
https://youtu.be/ibIZ2QeeIgk Method 1: How to Blur Certain Parts of a Picture on Samsung Step 1: Launch the Samsung Gallery app on your phone.
4 Ways to Blur Background or Part of a Picture on Samsung Galaxy Phones
https://youtu.be/ibIZ2QeeIgk Method 1: How to Blur Certain Parts of a Picture on Samsung Step 1: Launch the Samsung Gallery app on your phone.
 3 Ways to Blur a Part of a Picture on Android
Method 1: Use Google Photos to Blur a Face In a Photo The default gallery app on Android – Google Photos – is quite feature-rich, with ample image editing options.
3 Ways to Blur a Part of a Picture on Android
Method 1: Use Google Photos to Blur a Face In a Photo The default gallery app on Android – Google Photos – is quite feature-rich, with ample image editing options.
 5 Ways to Blur a Part of Picture on iPhone and iPad
Method 1: Use Markup Tools in the Photos App While the default markup option in the Photos app doesn’t come with a blur tool, you can get creative and use
5 Ways to Blur a Part of Picture on iPhone and iPad
Method 1: Use Markup Tools in the Photos App While the default markup option in the Photos app doesn’t come with a blur tool, you can get creative and use
 How to Blur a Part of Picture in Paint 3D
At times, you would want to blur a portion of a photo to conceal details.
How to Blur a Part of Picture in Paint 3D
At times, you would want to blur a portion of a photo to conceal details.
 3 Ways to Fix Prime Video Picture-in-Picture Not Working on Android and iPhone
Basic Fixes Restart Prime Video: Restart the Prime Video app and your smartphone to eliminate bugs and glitches.
3 Ways to Fix Prime Video Picture-in-Picture Not Working on Android and iPhone
Basic Fixes Restart Prime Video: Restart the Prime Video app and your smartphone to eliminate bugs and glitches.
 4 Ways to Fix WhatsApp Picture-In-Picture Not Working
Basic Fixes Update WhatsApp: Open the Google Play Store or Apple App Store, search WhatsApp, and tap Update (if available).
4 Ways to Fix WhatsApp Picture-In-Picture Not Working
Basic Fixes Update WhatsApp: Open the Google Play Store or Apple App Store, search WhatsApp, and tap Update (if available).
 2 Ways to Turn on Picture in Picture on Microsoft Edge
Method 1: Use the Inbuilt PiP Option in Microsoft Edge Picture-in-Picture (PiP) mode was officially released in Microsoft Edge with the stable release of Microsoft Edge version 78.
2 Ways to Turn on Picture in Picture on Microsoft Edge
Method 1: Use the Inbuilt PiP Option in Microsoft Edge Picture-in-Picture (PiP) mode was officially released in Microsoft Edge with the stable release of Microsoft Edge version 78.
 3 Ways to Fix Picture-In-Picture Not Working in Facebook Messenger
Common Fixes Restart device - Long-press the physical Power button and tap Reboot to restart Android.
3 Ways to Fix Picture-In-Picture Not Working in Facebook Messenger
Common Fixes Restart device - Long-press the physical Power button and tap Reboot to restart Android.
The article above may contain affiliate links which help support Guiding Tech. The content remains unbiased and authentic and will never affect our editorial integrity.