Not everyone uses Adobe Photoshop, neither does everyone like it. While it is the most popular and powerful photo editor, it’s too complicated and heavy to use for a regular user. This is where GIMP, an amazing Photoshop alternative comes into play. While GIMP is also more complex than the conventional image editors, it doesn’t slow down your PC and is comparatively easy to use.

Removing the background is one of the most used graphic design action. There could be many reasons why you would want to do that. For instance, you don’t like the background, you want to add the image to another background, or you simply want to make the image transparent. We can use GIMP to remove the background from any image.
When you make the image background transparent, it takes up the color according to the background of the new image. For instance, if you put a transparent image on top of a yellow image, the image will now have a yellow background. This comes quite handy in graphic designing.
So here, we will tell you a few methods to remove the background of an image and make it transparent using GIMP.
Remove Solid Color Background
If your image has only one color as its background, then it’s very easy to remove it. And it’s not necessary that the color should be white (just in case you were wondering).
Here are the steps to achieve it.
Step 1. Load Image
Launch GIMP on your PC and load the image in it using File > Open. Navigate to the image and open it.
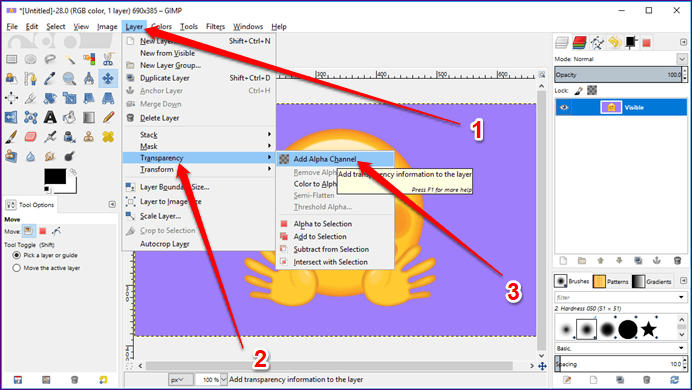
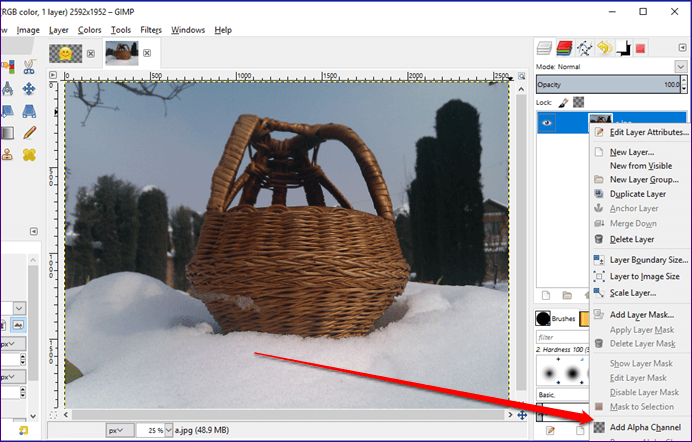
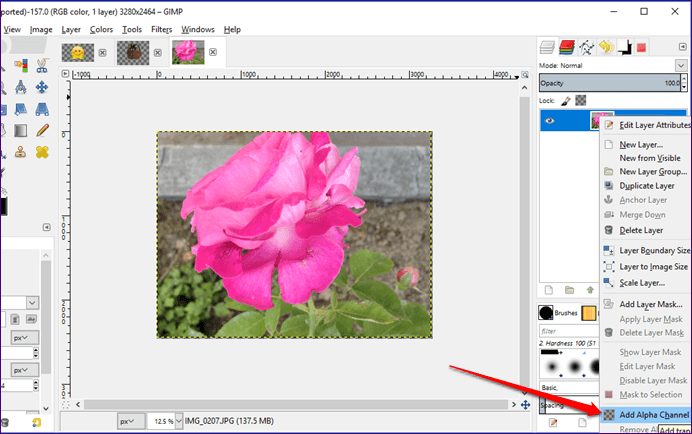
Step 2: Add Alpha Channel
To make an image transparent, it’s necessary to add an alpha channel to it. There are two ways to do so. In the first method, click on the Layer option at the top. Then go to Transparency and select Add Alpha Channel.
Alternatively, right-click on the image layer from the Layer tab in the right sidebar and select Add Alpha Channel.
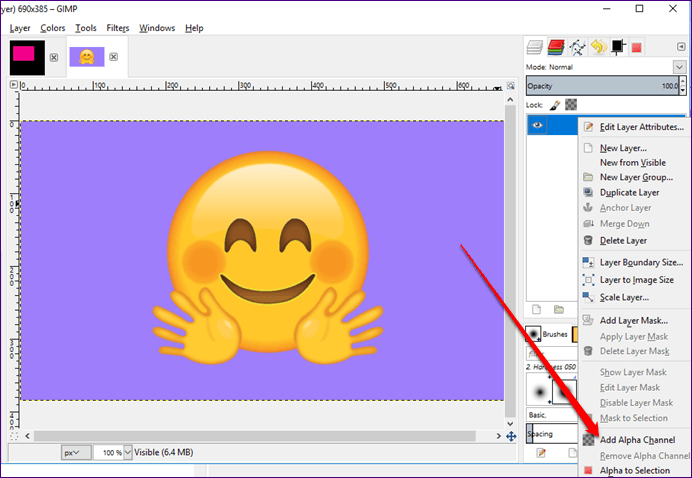
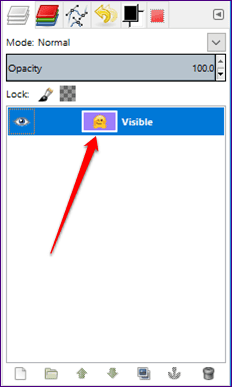
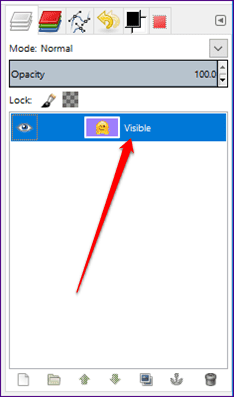
Once you add an alpha channel, you will see that the name of the layer in the Layer tab changes from bold to normal. This is an easy way to check whether the layer has an alpha channel or not.
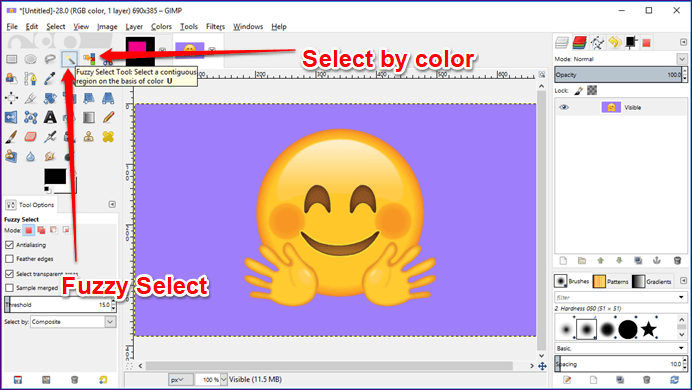
Step 3. Select Background
After adding the alpha channel, you need to select the background. To do so, you can use two tools: Color or Fuzzy Select tool. Both these tools are present in the left sidebar.
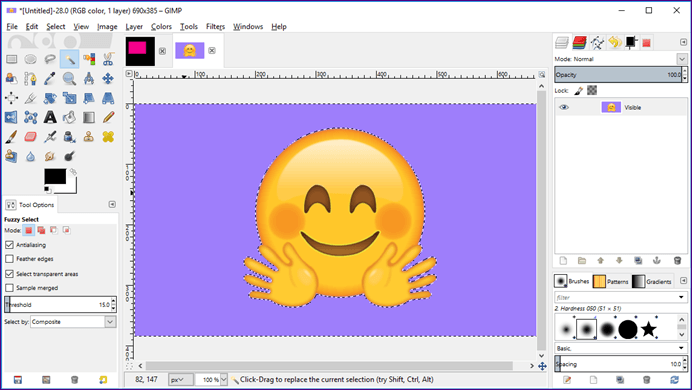
Click on any one of the tools to select it. Then click on the background color in the image that you want to remove. You will see that the background layer is selected.
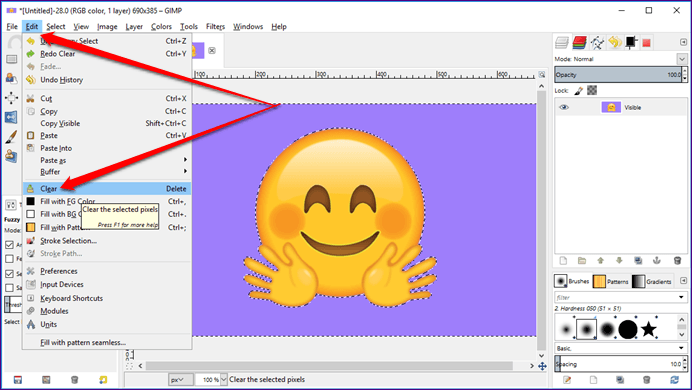
Step 4. Delete Background
Once the background is selected, go to Edit and hit the Clear button. Alternatively, tap the Delete key on your keyboard to delete it.
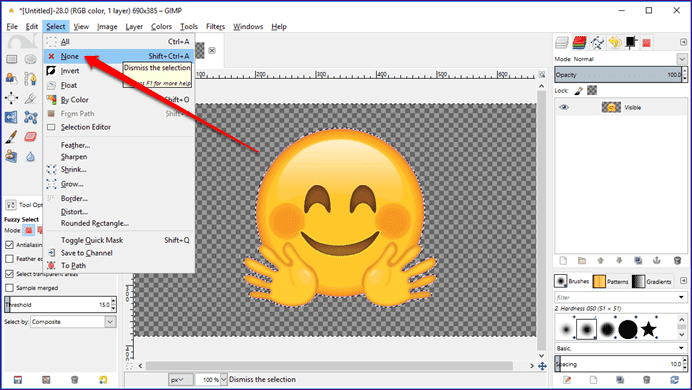
Step 5. Dismiss Selection
Then click on the Select option at the top and choose None from the menu. This will deselect the current selection.
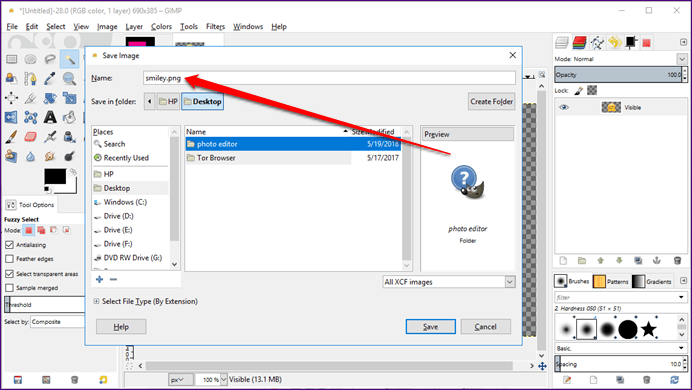
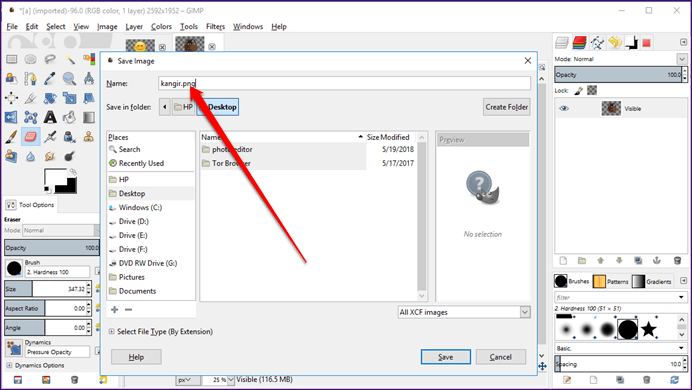
Step 6: Save Image
This is one of the most important steps that you need to take care of while saving PNG images. It is necessary to save transparent files either as .png or .gif. The .png is the widely used extension and we would suggest you use the same.
To save the image, click the File option at the top and select Export as from the menu. The dialogue box will open. Type the name that you want for your image followed by .png extension.
Remove Multiple Color Backgrounds
There are many methods to remove the background that has multiple colors. We will cover the following two here: Mask and Path tool.
Method 1. Using Mask
Step 1. Load image and Add Alpha Channel
Use the File > Open method to open the image in GIMP. Then, as mentioned before, the first step involves adding an alpha channel. Right-click on the layer in the right sidebar and select Add Alpha Channel. The title of the layer will change from bold to normal.
Step 2. Add a Duplicate Layer
Now again right-click on the same layer and select the option Duplicate Layer to create its copy. From now, make sure this is the layer that is selected as you need to work on it only.

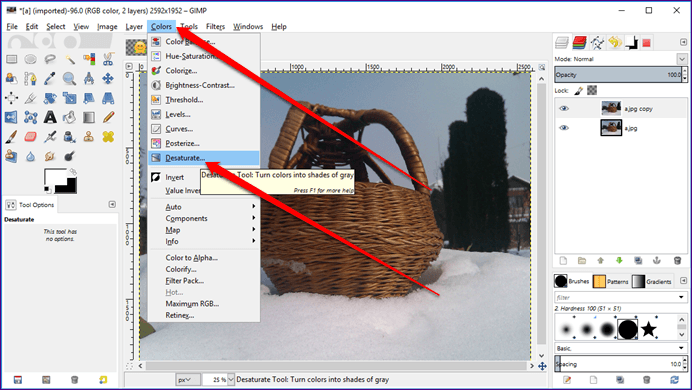
Step 3. Desaturate the Layer
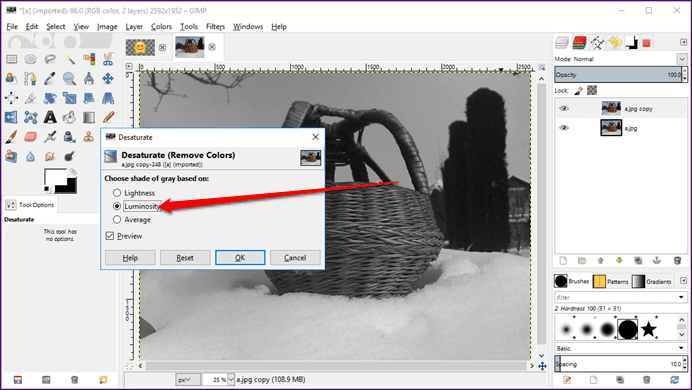
Select the duplicate layer by clicking on it once, in case it isn’t selected, then from the top bar, click on Colors followed by Desaturate.
From the dialog box that appears, click on Luminosity followed by OK.
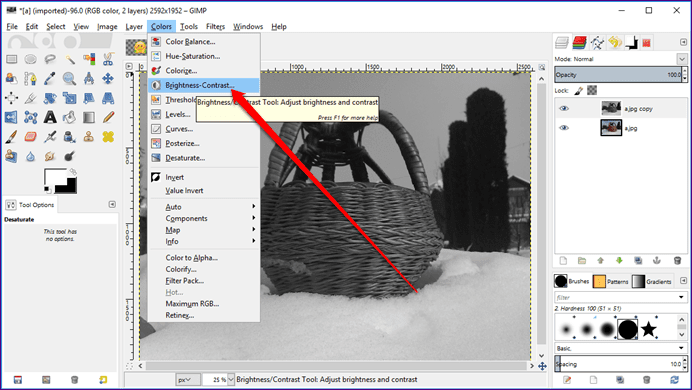
Step 4. Adjust Brightness
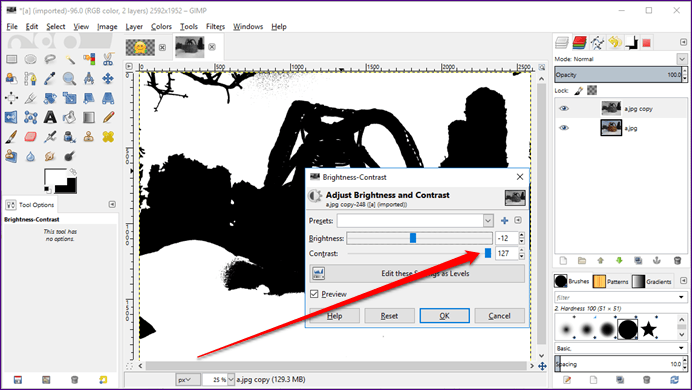
Then again, click on Colors and select Brightness – Contrast from the menu. From the dialog box, increase the contrast to maximum and adjust the brightness in such a way that you get almost a black and white image. Then click OK.
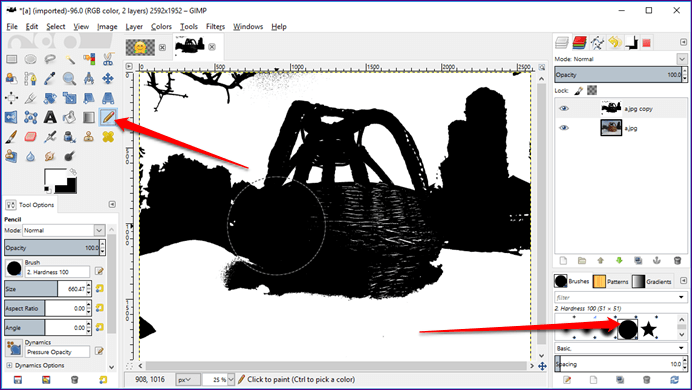
Step 5. Color Areas and Invert Colors
Then select the pencil tool and make sure the hardness strength is set to 100 in the Brushes toolbox. Color the areas that you want to keep with black color and remove the rest of the image with the white pencil. You can adjust the size of the pencil accordingly.
Then go to Colors option again and select Invert from the menu.

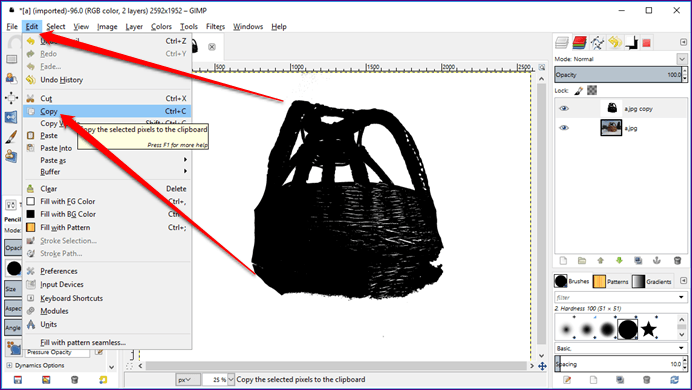
Step 6. Copy Layer and Turn it Off
Finally, go to the Edit option at the top and select Copy from the menu. You can even use the Ctrl + C shortcut. Keep in mind that all of the above steps are to be done on the duplicate layer only.
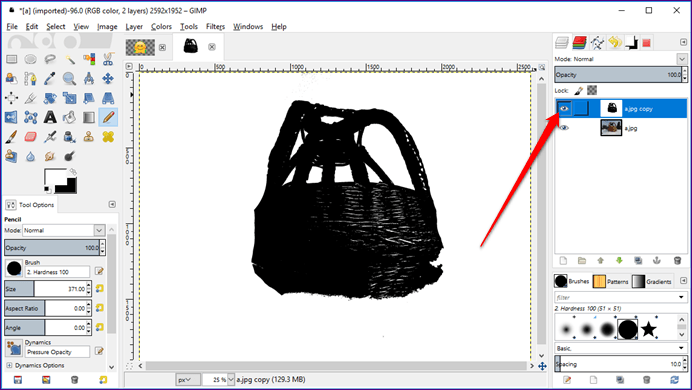
Once you have copied it, turn this duplicate layer off using the eye icon before the layer name. You will see that the original image will come back. Don’t worry.
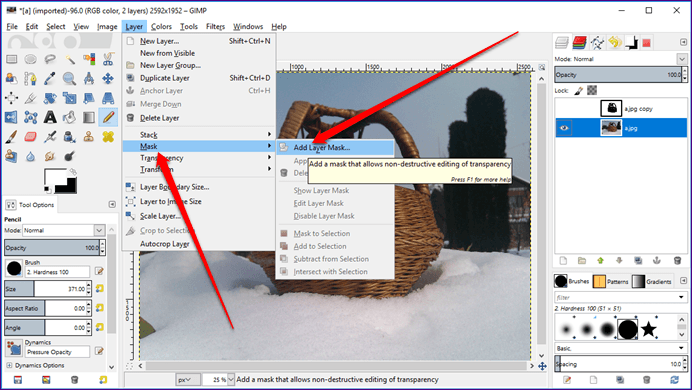
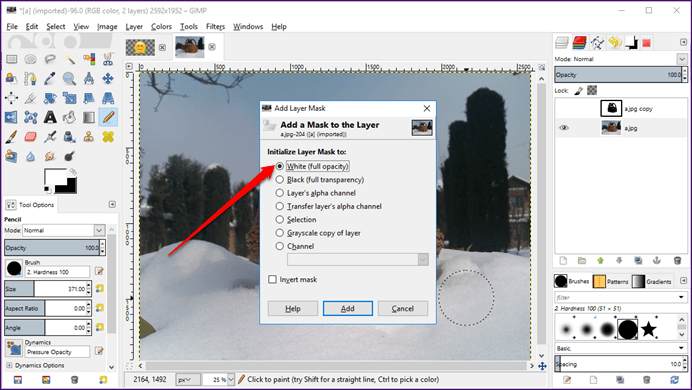
Step 7. Add Layer Mask
Then select the main layer. I repeat, select the main layer and not the duplicate one. From the options at the top, go to Layer > Mask, and select Add Layer Mask. A dialog box will open. Select White (full opacity) option and hit Add.
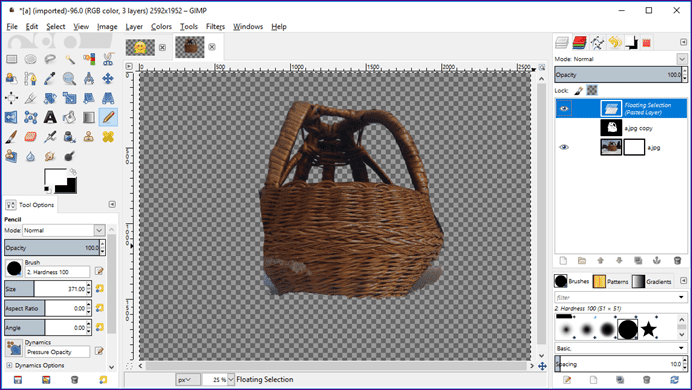
Step 8. Paste Duplicate Layer
Here you need to paste the layer that you copied. Go to Edit and select Paste or simply use the shortcut Ctrl + V. You will see that the background of the image is removed and a new Floating Selection layer is created.
Step 9. Anchor Floating Layer
With the new Floating Selection layer selected, click the Anchor layer option at the bottom. This will merge the floating and the main layer.

Step 10. Create Final Image
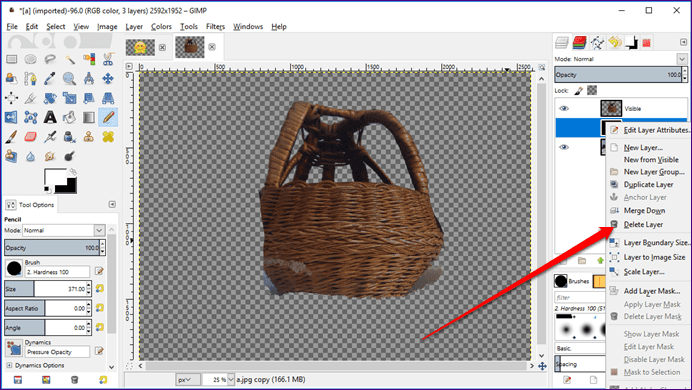
Finally, select the duplicate layer (but don’t enable it) that we had created and right-click on it. From the menu, select New from Visible.

Then select the other two old layers and delete them. To do so, right-click the layer and hit Delete from the menu.
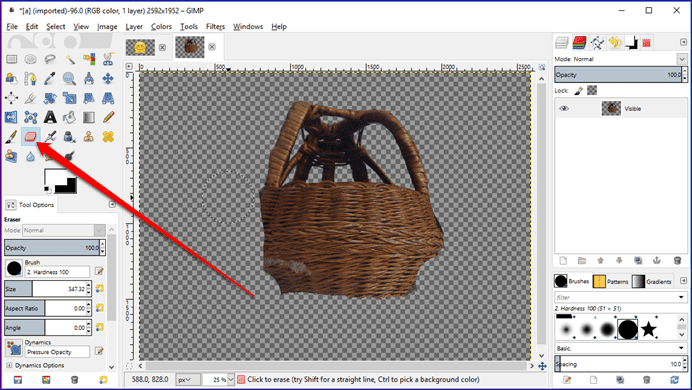
Step 11. Erase Extras
If you are satisfied with your image, go to the step 12, however, if you feel that the sides aren’t perfect, use the Eraser tool to remove the extra background and give it a proper shape.
Step 12. Save Image
Lastly, using File > Export As, save your image with the .png extension.
Method 2. Using Path Tool
Step 1. Open Image and Add Alpha Channel
As usual, load the image in GIMP and add alpha channel. You can right-click on the image layer and select Add Alpha Channel from the menu.
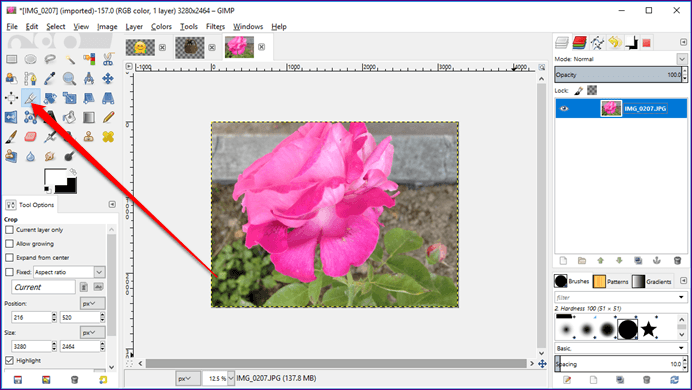
Step 2. Use Path Tool
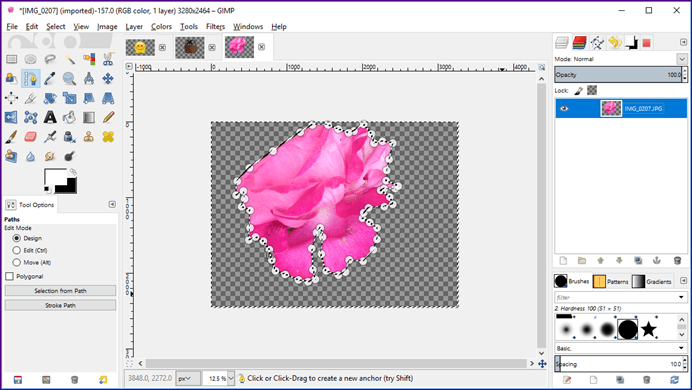
In this method, we will use the Path tool. Click on it from the left sidebar to select it. Then using this tool, draw the outline of the image that you want to keep. You need to do it manually by clicking the mouse on the outline. Draw the path a little inside the main boundary and if you want to undo the last point, hit the Ctrl + Z shortcut.
Continue doing so until the two points meet and then hit the Enter button. The object will get selected.

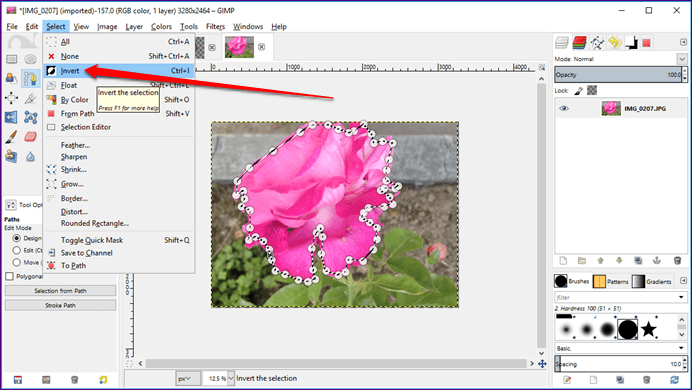
Step 3. Invert Selection
Since we need to delete the background and not the selection, we have to invert it. To do so, go to Select and click on Invert from the menu.
Step 4. Delete Background
Now that the background is selected, hit the Delete key. You will see that the image is successfully extracted with a clear and transparent background.
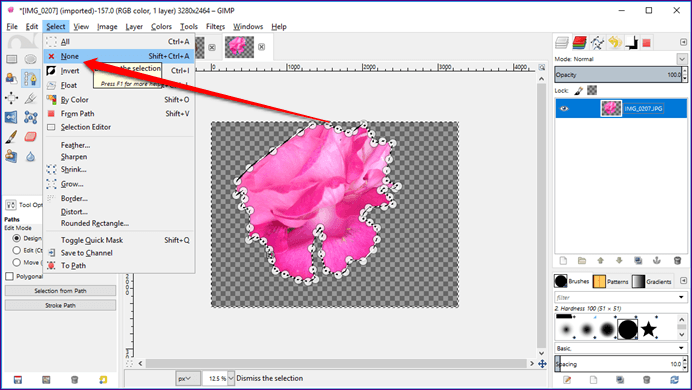
To unselect all the selections, go to the Select tab and click on None from the menu.
Step 5. Save Image
Finally, with the help of File > Export As option, save the image on your computer with the .png extension.
Enjoy the Transparency
We hope you enjoyed the tutorial. Now use your newly acquired skill to surprise your friends with cool images.
Was this helpful?
Last updated on 13 July, 2021
Read Next
 How To Change Image Background in GIMP
We know a picture is worth a thousand words.
How To Change Image Background in GIMP
We know a picture is worth a thousand words.
 How to Put Transparent Image Over Another in Paint and Paint 3D
There is a learning curve involved if you want to perform any simple task on powerful photo-editing tools such as Photoshop, GIMP, etc.
How to Put Transparent Image Over Another in Paint and Paint 3D
There is a learning curve involved if you want to perform any simple task on powerful photo-editing tools such as Photoshop, GIMP, etc.
 How to Change Color of PNG Image and Text in GIMP
Many times, we have a single color image such as an icon or a logo whose color needs to be changed.
How to Change Color of PNG Image and Text in GIMP
Many times, we have a single color image such as an icon or a logo whose color needs to be changed.
 How to Crop an Image into Circle in GIMP
In any photo editing app, the crop tool is the most useful one to remove unnecessary portions from an image.
How to Crop an Image into Circle in GIMP
In any photo editing app, the crop tool is the most useful one to remove unnecessary portions from an image.
 How to Tile an Image in GIMP
Not everyone likes Photoshop due to its pricing and slightly complicated nature for newbies.
How to Tile an Image in GIMP
Not everyone likes Photoshop due to its pricing and slightly complicated nature for newbies.
 3 Ways to Make Taskbar Transparent in Windows 11
Windows 11 has a sleek and modern interface with an intuitive design that offers plenty of customization opportunities, including playing around with your taskbar's appearance.
3 Ways to Make Taskbar Transparent in Windows 11
Windows 11 has a sleek and modern interface with an intuitive design that offers plenty of customization opportunities, including playing around with your taskbar's appearance.
 How to Use Flip Tool in GIMP
At times, the powerful image editors like GIMP and Photoshop make a simple task difficult or bury the option in an overwhelming interface.
How to Use Flip Tool in GIMP
At times, the powerful image editors like GIMP and Photoshop make a simple task difficult or bury the option in an overwhelming interface.
The article above may contain affiliate links which help support Guiding Tech. The content remains unbiased and authentic and will never affect our editorial integrity.