Many times, we have a single color image such as an icon or a logo whose color needs to be changed. One might worry that they would need a professional or a premium tool for such a task. But that’s not the case. With free tools like GIMP, you can easily change the color of your pictures and text in the PNG format. Let’s see how to recolor images using GIMP in this post.

If you aren’t familiar with Photoshop, GIMP is a superb alternative. You can use GIMP to change the color of logos, icons, etc., Whether your transparent image is black or has some other color, GIMP will help you in recoloring it easily.
There are three methods to recolor PNG images in GIMP. The first two methods will replace the entire image with a single color, and the last method will help you in adding different colors. Let’s get started.
Method 1: Change Color Using Colorize in GIMP
In this method, we will be taking the help of the Colorize feature in GIMP to change the color of a transparent image or text. Let’s check the steps:
Step 1: Launch GIMP and open your PNG image, preferably with a transparent background using File > Open. If your image has a background, know how to change background color to transparent in GIMP. Then proceed ahead.

Step 2: Click on the Colors option present in the top bar. Choose Colorize from the menu.
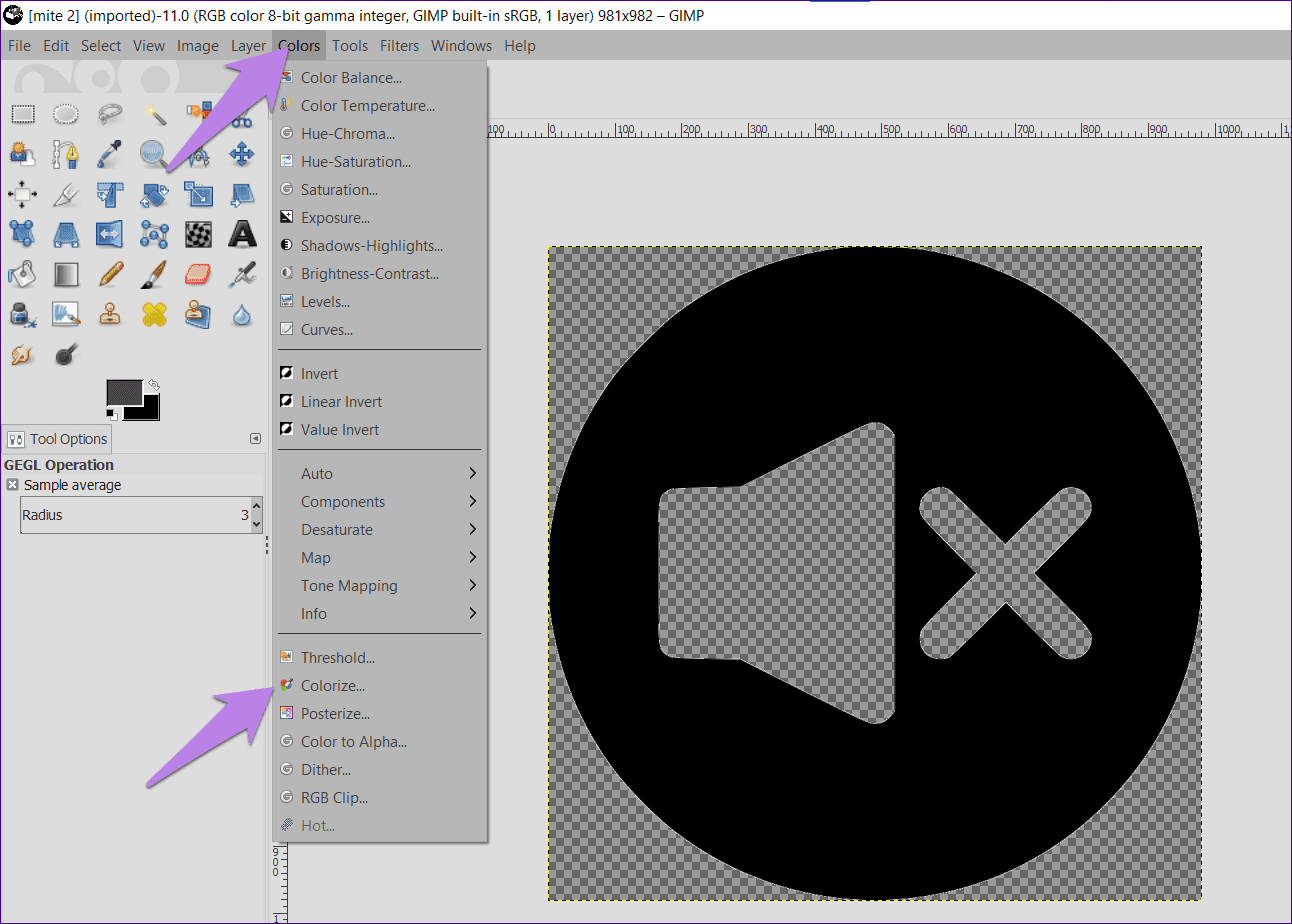
Step 3: The Colorize window will open. Click on the color to show the list of available colors.

Then choose the color and click on Ok to add the color to your image.

Step 4: Click on File > Export as to save your image. The Export window will appear. Make sure you save the image in the PNG format by adding the extension .png to the image name or else you will lose the transparency of your image. Click on Export to save it.

Method 2: Change Color Using Fill Tool
With the Fill tool’s help, we will be changing the color of an icon or text in GIMP. Here are the steps:
Step 1: Open your transparent image in GIMP using File > Open.
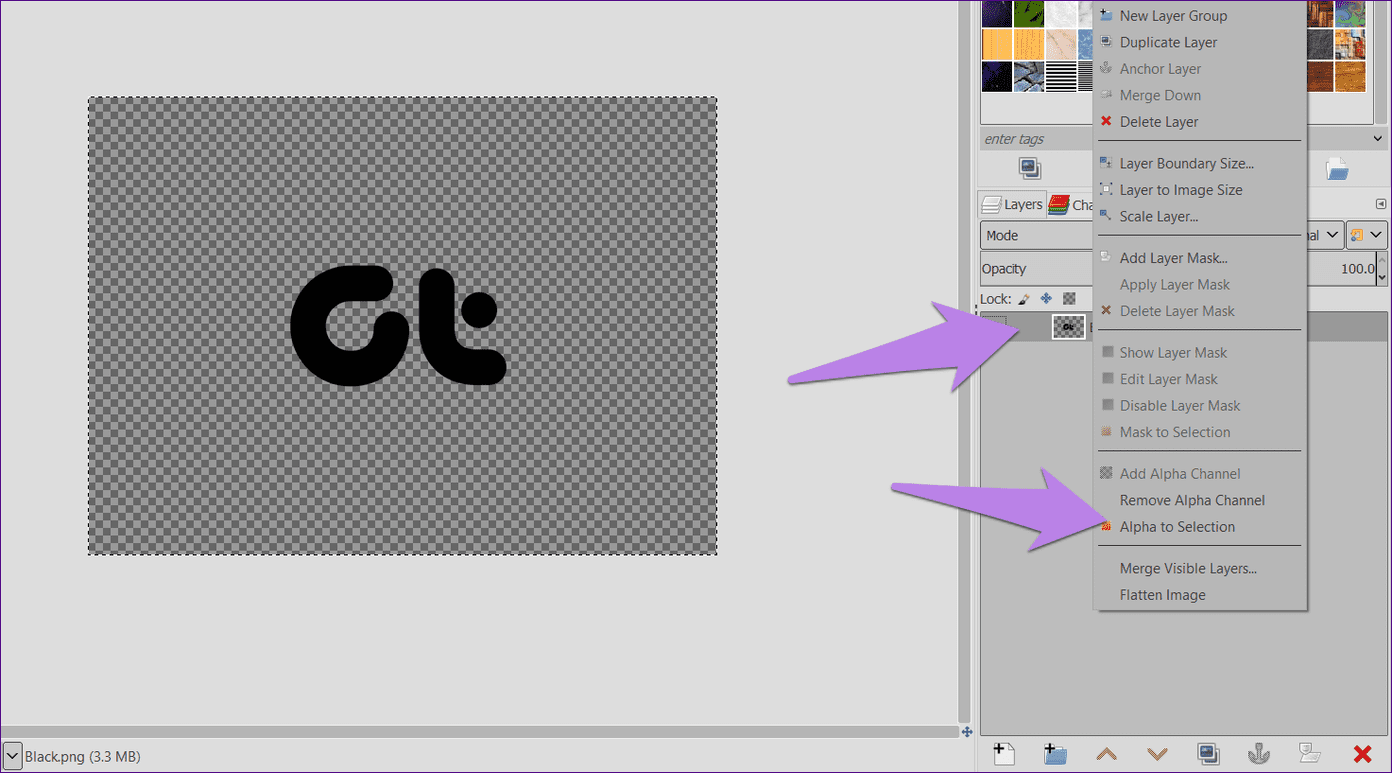
Step 2: Right-click on your image layer in the Layers dock and choose Alpha to selection. Know more about how to use layers in GIMP.
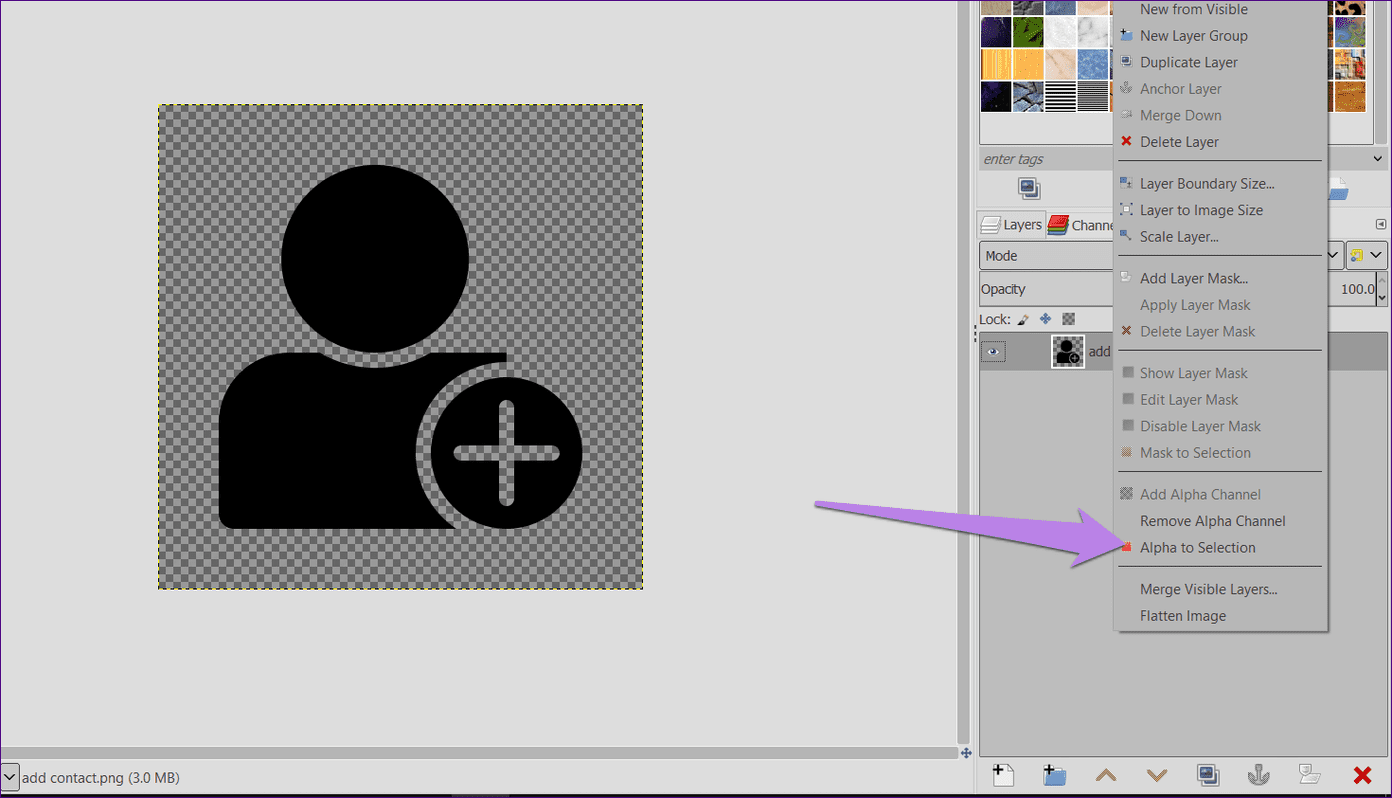
Doing so will select the visible portion of your image.

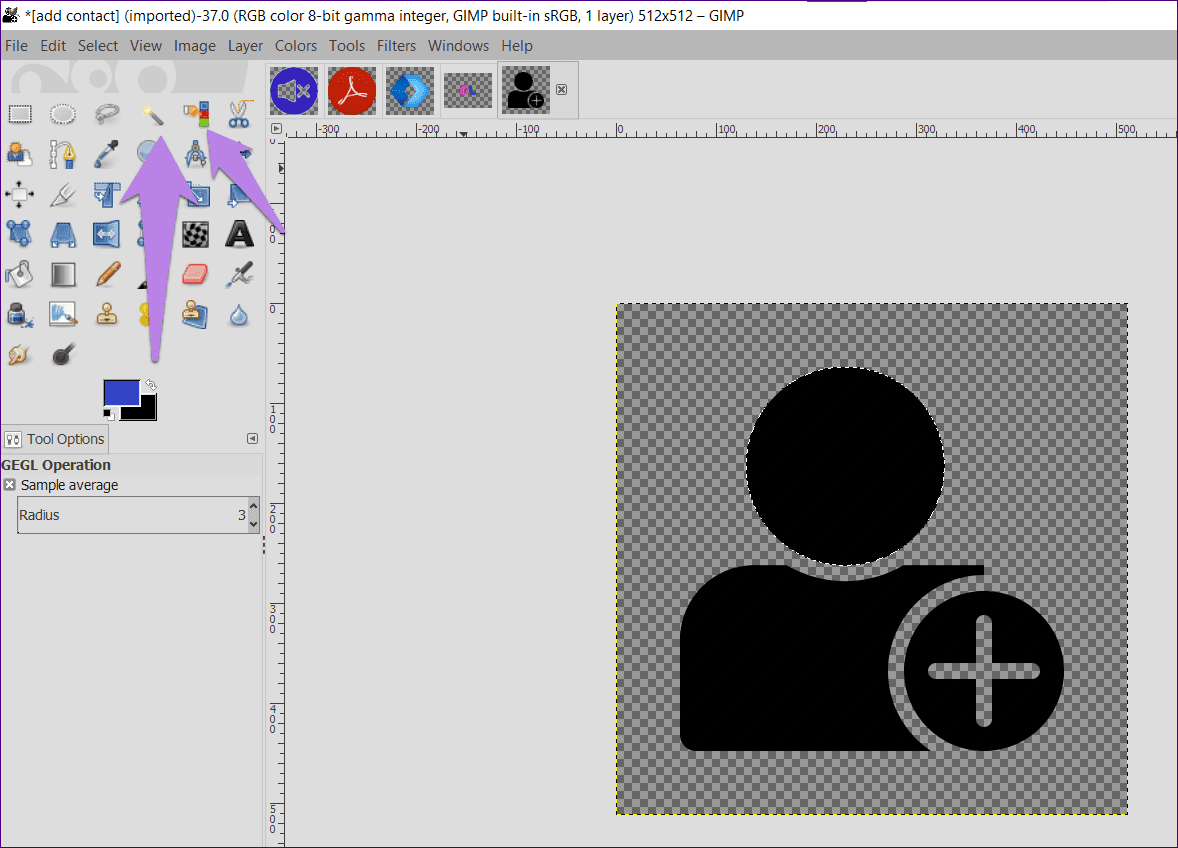
Step 3: In the color selection box, choose the foreground color to replace the original color of the image.

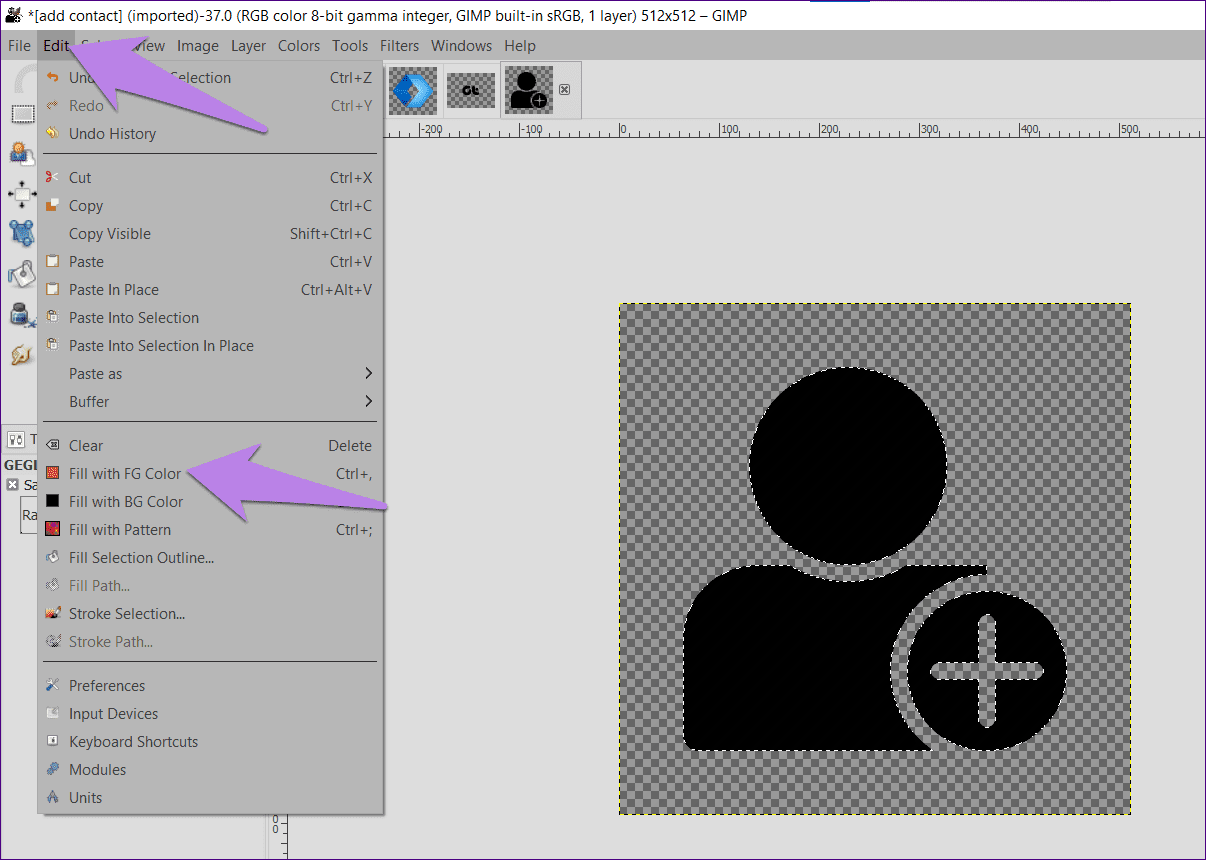
Step 4: Go to Edit in the top toolbar and select Fill with FG color. Alternatively, you can use Ctrl + , (Windows) and Command + , (macOS) keyboard shortcuts to fill the selected portion of your image with the foreground color.
Here’s how your image will look:

Step 5: It’s time to save the image. For that, go to File > Export As. As mentioned in the above method, save the image with a .png extension to keep the transparency intact.
Method 3: Replace Color With Multiple Colors Using Bucket Fill Tool
In the above methods, the entire picture or text was replaced by a single color. What if you want to add different colors to different parts of your picture? This method will help you in doing that. Let’s check the steps:
Step 1: In GIMP, open your image whose color needs to be changed.
Step 2: To select the visible portion of your image, right-click on the image layer in the Layers dock. Select Alpha to selection.
Step 3: Choose your preferred color as the foreground color in the Color selection box.

Step 4: Click on the Bucket Fill tool to activate it. Then click on the portion of the image where you want to add the color.

Repeat steps 3 and 4 for other parts of your image, choosing a different foreground color each time.
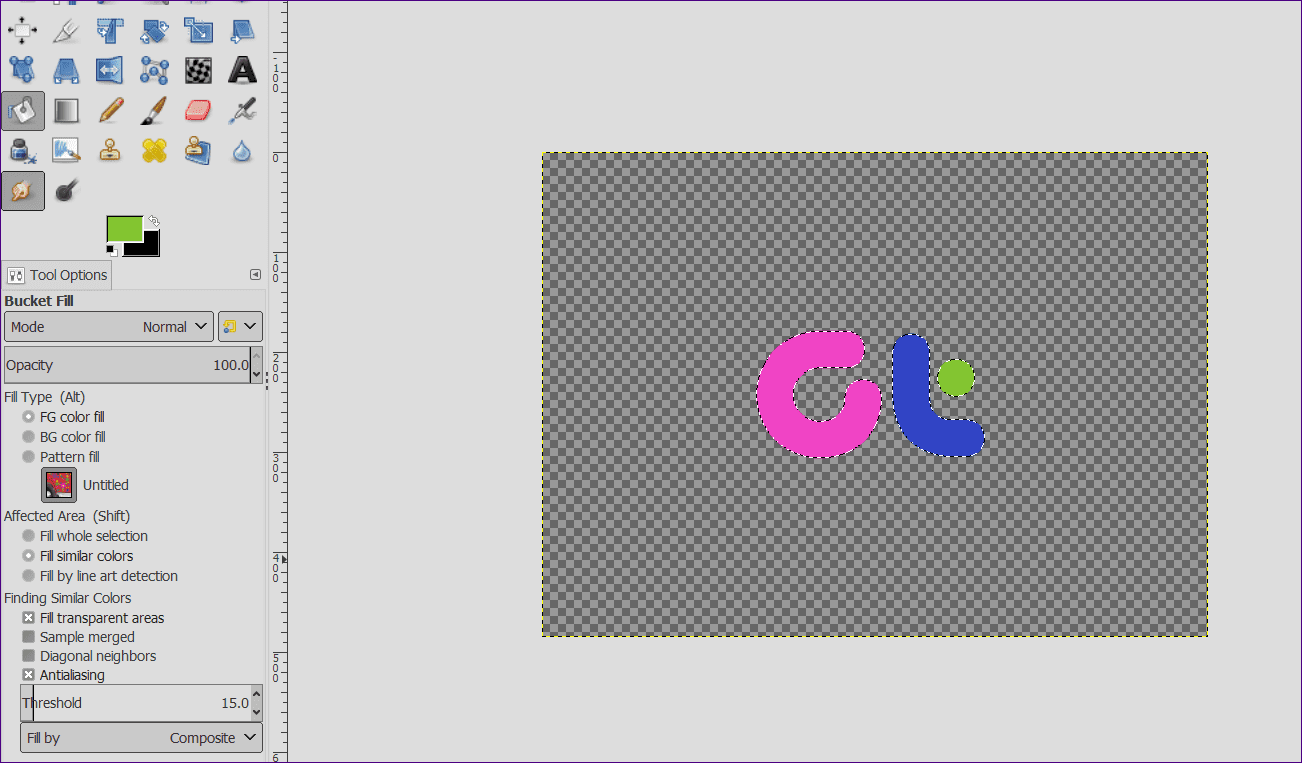
Here’s how the image used in method 2 looks like using this method:

Step 5: Finally, save the image from File > Export as. Don’t forget to save the image with a .png extension.
Tips to Replace Color in GIMP
Here are two tips for better results while changing color in GIMP.
Use Selection Tools
Instead of selecting the entire image as shown in the above methods, you can select a part of your picture by using different selection tools such as the Fuzzy Select and Select by Color tool. The former will select a contagious region by color, and all the regions having similar color will be selected by the Color select tool. Once the required part is selected, change its color using any of the methods mentioned above.
Fill With Pattern
In methods 2 and 3, you can fill your image with a pattern instead of a solid color. For that, select Fill with Pattern. Then choose a pattern and fill it in the selected part of the image by clicking on it.

Tip: The pattern used in the screenshot has been created in GIMP. Find out how to tile an image and use it as a pattern in GIMP.
Explore GIMP
The possibilities with GIMP are limitless. You can use it to change image background image, create amazing YouTube banners, crop images into shapes such as circle, create a see-through text, and much more. What are your favorite things to do in GIMP? Share them with us in the comments below.
Next up: Adding a shadow to text creates an enthralling effect. Find out how to add shadow to text in GIMP from the next link.
Was this helpful?
Last updated on 13 July, 2021
Read Next
 How To Change Image Background in GIMP
We know a picture is worth a thousand words.
How To Change Image Background in GIMP
We know a picture is worth a thousand words.
 How to Crop an Image into Circle in GIMP
In any photo editing app, the crop tool is the most useful one to remove unnecessary portions from an image.
How to Crop an Image into Circle in GIMP
In any photo editing app, the crop tool is the most useful one to remove unnecessary portions from an image.
 How To Make Image Background Transparent Using GIMP
Not everyone uses Adobe Photoshop, neither does everyone like it.
How To Make Image Background Transparent Using GIMP
Not everyone uses Adobe Photoshop, neither does everyone like it.
 How to Tile an Image in GIMP
Not everyone likes Photoshop due to its pricing and slightly complicated nature for newbies.
How to Tile an Image in GIMP
Not everyone likes Photoshop due to its pricing and slightly complicated nature for newbies.
 How to Convert JPG to PNG in Paint 3D on Windows PC
Paint 3D is a modern upgrade over the classic Microsoft Paint.
How to Convert JPG to PNG in Paint 3D on Windows PC
Paint 3D is a modern upgrade over the classic Microsoft Paint.
 7 Best Ways to Fix GIMP Not Showing New Fonts in Windows 10
When you add fonts in Windows PC, technically, they will be immediately available on all supported programs like Microsoft Word, Paint, Photoshop, and even GIMP.
7 Best Ways to Fix GIMP Not Showing New Fonts in Windows 10
When you add fonts in Windows PC, technically, they will be immediately available on all supported programs like Microsoft Word, Paint, Photoshop, and even GIMP.
 How to Use Flip Tool in GIMP
At times, the powerful image editors like GIMP and Photoshop make a simple task difficult or bury the option in an overwhelming interface.
How to Use Flip Tool in GIMP
At times, the powerful image editors like GIMP and Photoshop make a simple task difficult or bury the option in an overwhelming interface.
 How to Change Background Color of the Windows Photos App
Method 1: Change Background Through the Photos App By default, the Photos app displays the color mode specified by the operating system.
How to Change Background Color of the Windows Photos App
Method 1: Change Background Through the Photos App By default, the Photos app displays the color mode specified by the operating system.
The article above may contain affiliate links which help support Guiding Tech. The content remains unbiased and authentic and will never affect our editorial integrity.