Method 1: Turn Sync Settings On or Off Using the Settings App
The Settings app gives you several options for managing your account preferences, including the ability to enable or disable sync. Whether you want to configure a single setting or stop syncing altogether, you can use the following steps to manage sync settings in Windows.
Step 1: Press the Windows + I keys to open the Settings app. Then, head to Accounts > Windows backup.

Step 2: Click on Remember my preferences to expand it. Then, use the checkboxes to enable or disable sync for accessibility, passwords, language preferences, and other Windows settings.

Alternatively, you can use the toggle next to Remember my preferences to enable or disable sync entirely.
Method 2: Turn Sync Settings On or Off With the Registry Editor
The Registry Editor is a useful tool that lets you configure various system settings by modifying a few registry files. However, as registry files contain important settings for Windows and its system apps, it’s important to be cautious while making any changes.
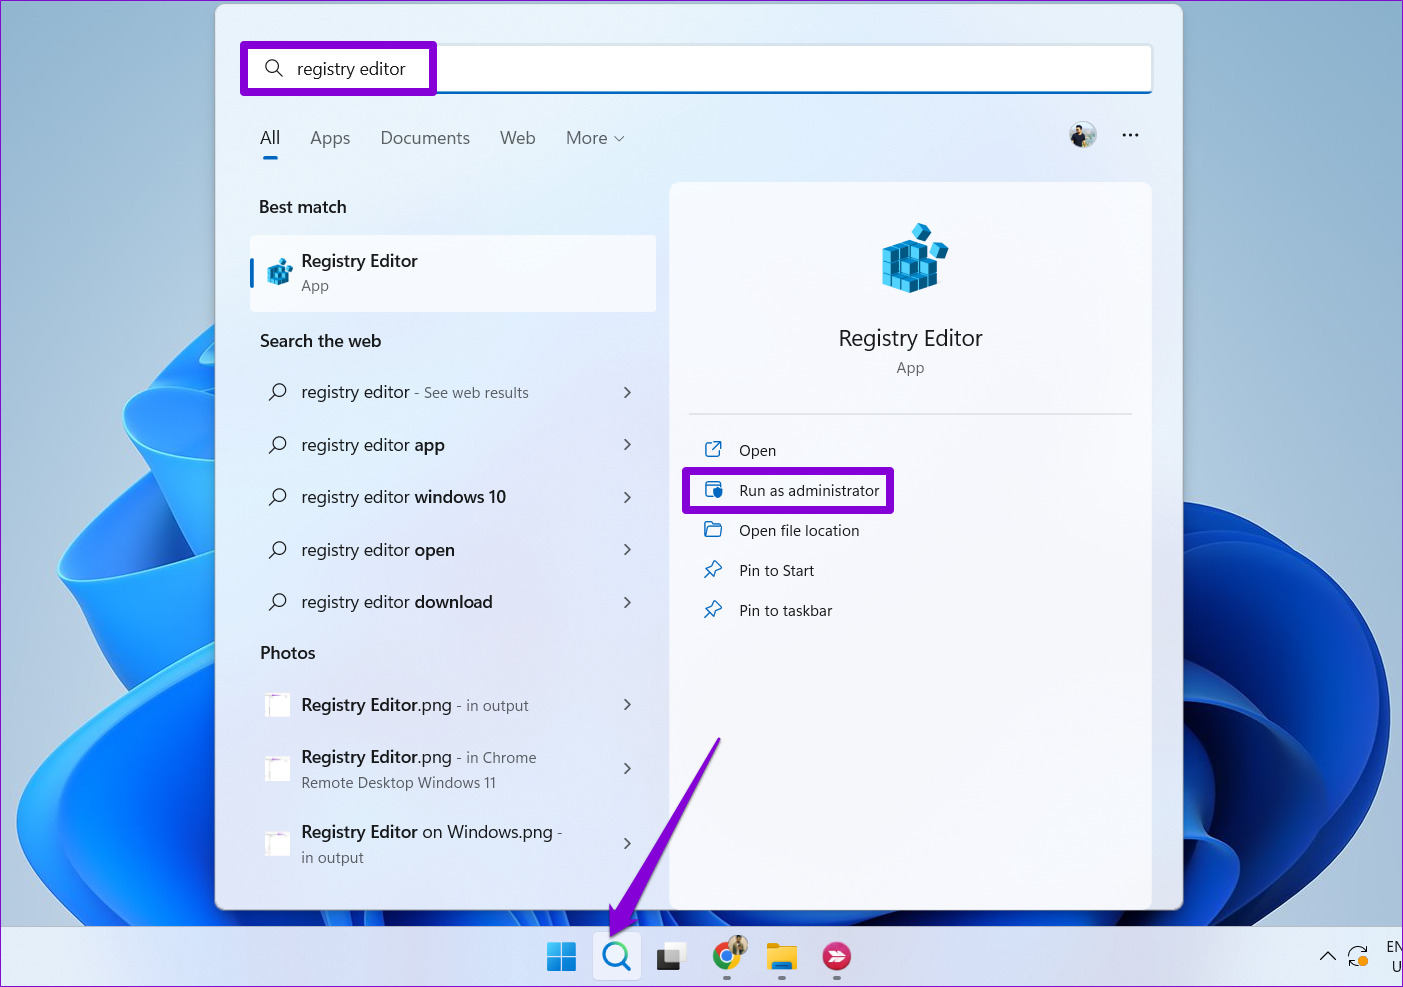
Step 1: Click the search icon on the taskbar and type in registry editor. Select Run as administrator.
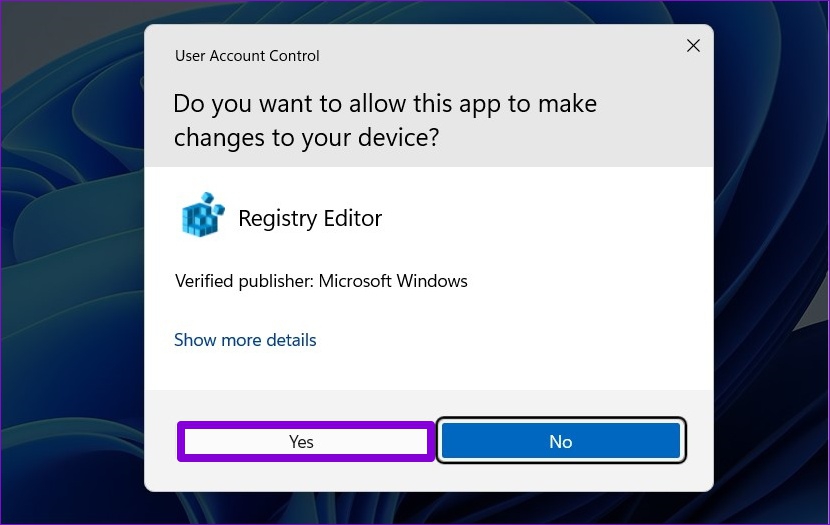
Step 2: Select Yes when the User Account Control (UAC) prompt appears.
Step 3: Paste the following path in the address bar at the top and press Enter to quickly navigate to the SettingSync key.
HKEY_CURRENT_USER\SOFTWARE\Microsoft\Windows\CurrentVersion\SettingSync

Step 4: Right-click on the SettingSync key in the left sidebar and choose New > DWORD (32-bit) Value. Name the new DWORD DisableSettingSync.

Step 5: Right-click on the SettingSync key in the left sidebar and choose New > DWORD (32-bit) Value. Name the new DWORD DisableSettingSyncUserOverride.

Step 6: Double-click the DisableSettingSync DWORD and change its value data to 2 to disable sync settings. Then, click OK.

Step 7: Double-click the DisableSettingSyncUserOverride DWORD and set its value data to 1 to disable sync settings. Then, click OK.

Similarly, if you want to configure Windows to sync settings across your devices, set the value of the DisableSettingSync and DisableSettingSyncUserOverride DWORDs to 0. Then, restart your PC to apply the changes.
Method 3: Turn Sync Settings On or Off Using the Group Policy Editor
The Group Policy Editor provides yet another way to configure sync settings on your Windows computer. However, you can only use this method if you’re using Windows 10 or Windows 11 Professional, Education, or Enterprise editions. If you’re using Windows Home Edition, you will have to use the Settings app or the Registry Editor solutions above to enable or disable sync settings.
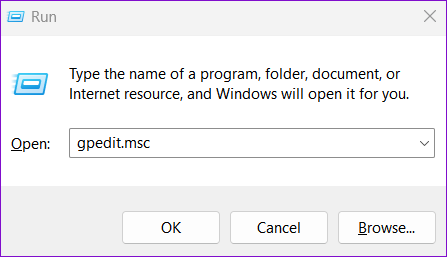
Step 1: Press the Windows + R keys to open the Run dialog box. Type gpedit.msc in the text box and hit OK.
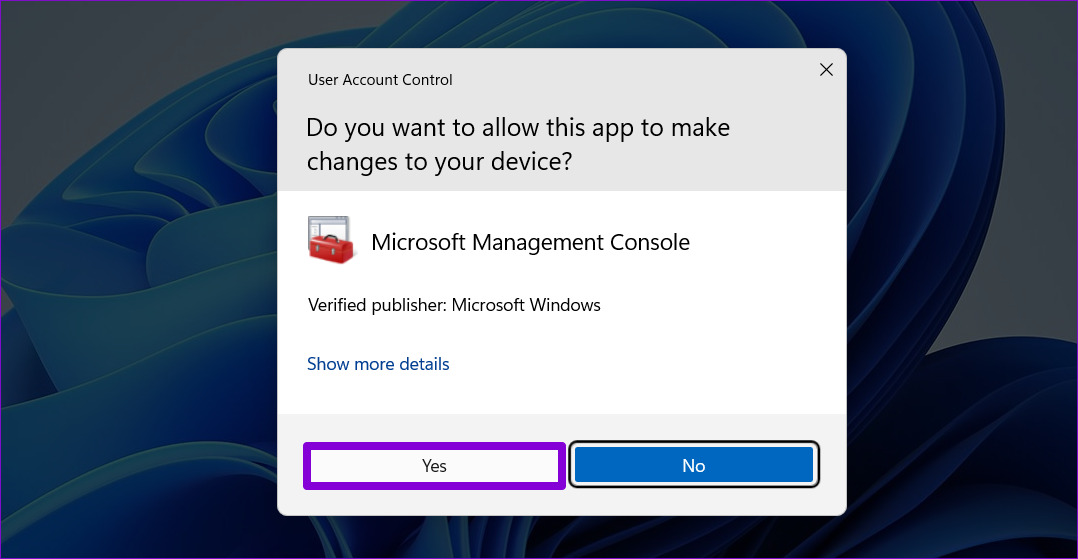
Step 2: When the User Account Control (UAC) prompt appears, select Yes to proceed.
Step 3: Use the left pane to navigate to the following folder:
Computer Configuration\Administrative Templates\Windows Components\Sync your settings
Step 4: Double-click the Do not sync policy from the right pane.

Step 5: Select the Enabled option if you want to stop Windows from syncing settings across devices. If you want to turn on sync settings, select Disabled or Not Configured instead.
Step 6: Click Apply followed by OK.

Was this helpful?
Last updated on 22 April, 2024
Read Next
 3 Ways to Disable or Enable Search Highlights in Windows 10 and Windows 11
Method 1: Disable or Enable Search Highlights From the Settings App The Settings app on Windows allows you to control most things on your PC.
3 Ways to Disable or Enable Search Highlights in Windows 10 and Windows 11
Method 1: Disable or Enable Search Highlights From the Settings App The Settings app on Windows allows you to control most things on your PC.
 4 Ways to Enable or Disable Num Lock at Windows Startup
Method 1: Disable Fast Startup Step 1: Click the search icon on the taskbar, type control panel, and press Enter.
4 Ways to Enable or Disable Num Lock at Windows Startup
Method 1: Disable Fast Startup Step 1: Click the search icon on the taskbar, type control panel, and press Enter.
 15 Ways to Fix OneDrive Sync Is Pending or Stuck Error in Windows 10
One of the most common issues with any cloud storage service is broken sync.
15 Ways to Fix OneDrive Sync Is Pending or Stuck Error in Windows 10
One of the most common issues with any cloud storage service is broken sync.
 7 Ways to Fix Time Sync Failed on Windows 11
Fix 1: Review Date and Time Settings You can start by verifying the date and time settings on Windows to ensure they’re set to be updated automatically.
7 Ways to Fix Time Sync Failed on Windows 11
Fix 1: Review Date and Time Settings You can start by verifying the date and time settings on Windows to ensure they’re set to be updated automatically.
 6 Ways to Fix iCloud Sync Not Working in Windows 11
Fix 1: Restart File Explorer and Photos App iCloud is integrated into File Explorer and the Photos App.
6 Ways to Fix iCloud Sync Not Working in Windows 11
Fix 1: Restart File Explorer and Photos App iCloud is integrated into File Explorer and the Photos App.
 How to Enable or Disable Battery Saver in Windows 11
How to Turn On or Off Battery Saver Manually Method 1.
How to Enable or Disable Battery Saver in Windows 11
How to Turn On or Off Battery Saver Manually Method 1.
 How to Enable or Disable Mouse Click Sound on Windows 11
Enable the Mouse Click Sound on Windows 11 If you're tired of your default mouse or trackpad click sound, setting a custom sound will enhance your navigation experience.
How to Enable or Disable Mouse Click Sound on Windows 11
Enable the Mouse Click Sound on Windows 11 If you're tired of your default mouse or trackpad click sound, setting a custom sound will enhance your navigation experience.
 How to Enable or Disable Smart App Control in Windows 11
Have you ever downloaded an app that was more trouble than it's worth?
How to Enable or Disable Smart App Control in Windows 11
Have you ever downloaded an app that was more trouble than it's worth?
The article above may contain affiliate links which help support Guiding Tech. The content remains unbiased and authentic and will never affect our editorial integrity.