Microsoft Teams has become integral to modern workplace communication, facilitating information sharing and collaboration. Despite MS Teams’ robust chat and collaboration features, you may need to export or download your chat conversations for various reasons. This article will explore the top methods to export Microsoft Teams chat history.

Before diving into the solutions, let’s understand the purpose of downloading or exporting Teams chat history. Saving Teams chat history can be useful for various reasons, including data retention, keeping communications records, knowledge transfer, meeting legal and compliance requirements, etc.
With this understanding, let’s proceed with the article to explore the best methods for achieving this task effectively.
1. Copy Messages and Save Them as Text Files
This is one of the easiest ways to save chat history in Microsoft Teams. All you need to do is click and drag your cursor to copy the text you want and paste it into a text file. Follow the below steps.
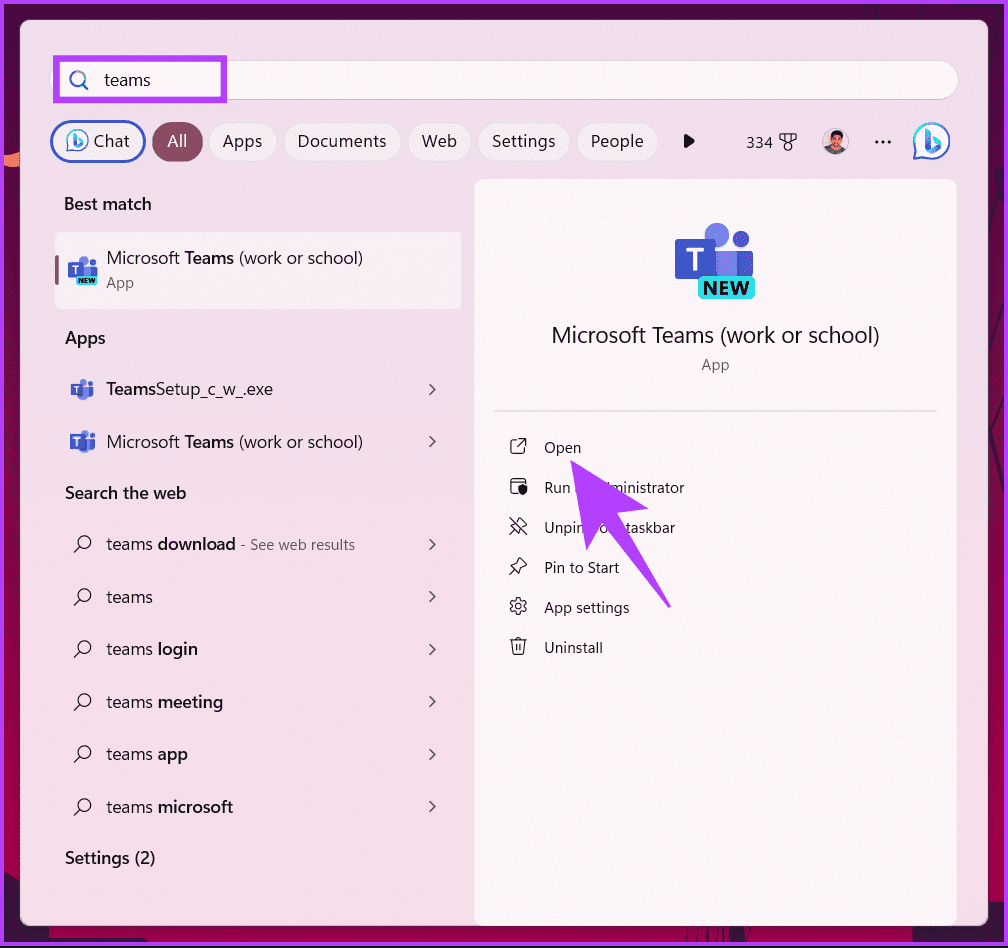
Step 1: Press the Windows key on your keyboard, type Microsoft Teams, and click Open.
Note: On Mac, press ‘Command+Space’ on your keyboard, type Teams, and hit the Return key.
Step 2: Once launched, go to the Chat or Teams section from the top left corner of the Teams window.
Step 3: Select and open the chat you would like to save. It can be a personal chat, a group chat, or a Teams chat.

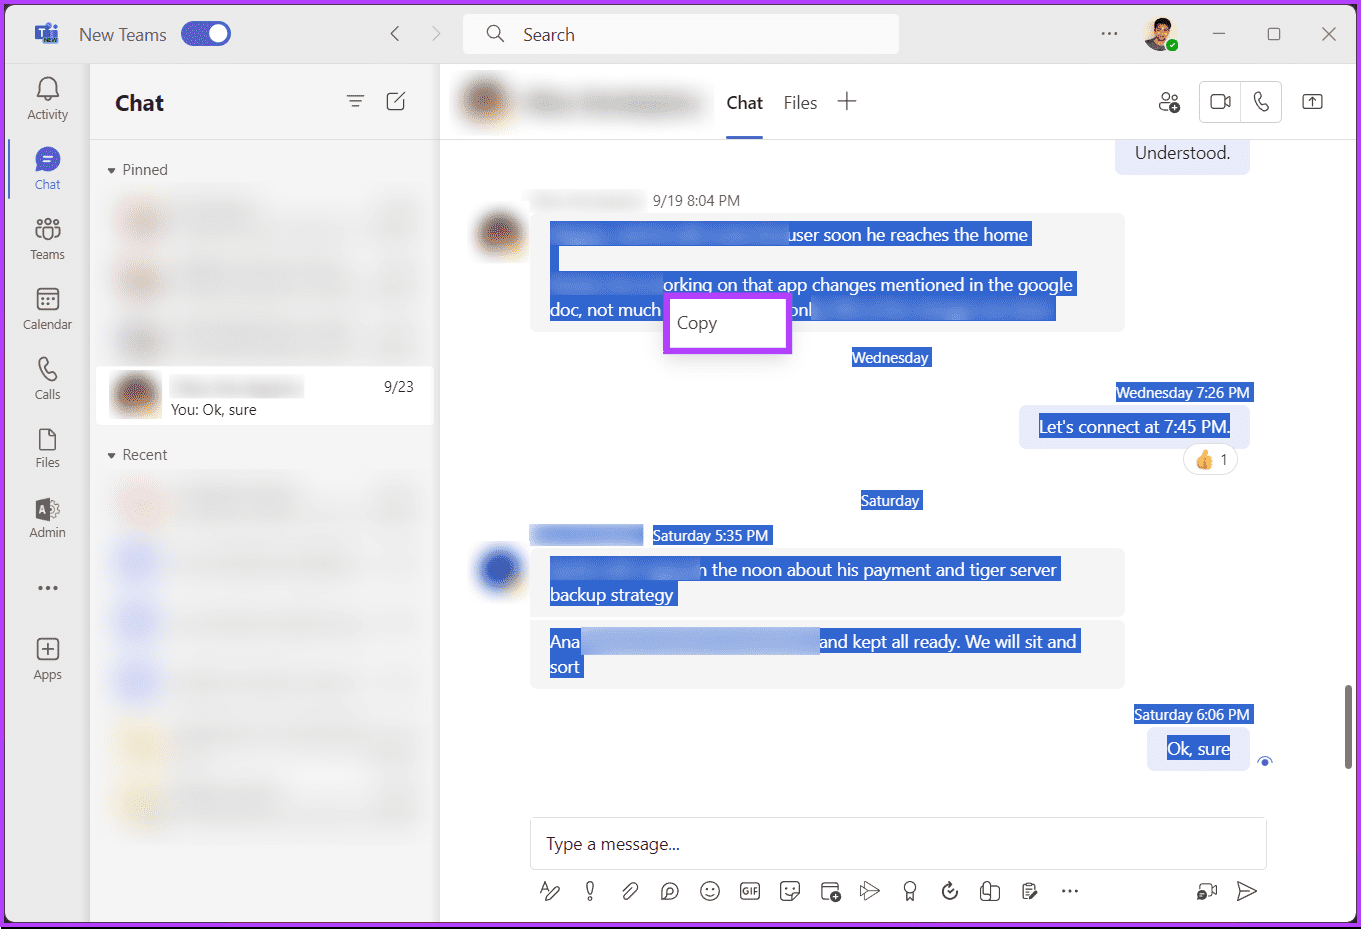
Step 4: Once the chat is opened, select the portion of the chat you want to save by dragging the mouse from the start of the chat to the end.
Step 5: Once selected, right-click and select Copy or press ‘Ctrl + C’ to copy the selected text to your clipboard.
Note: Press ‘Command + C’ on Mac to copy the selected text.
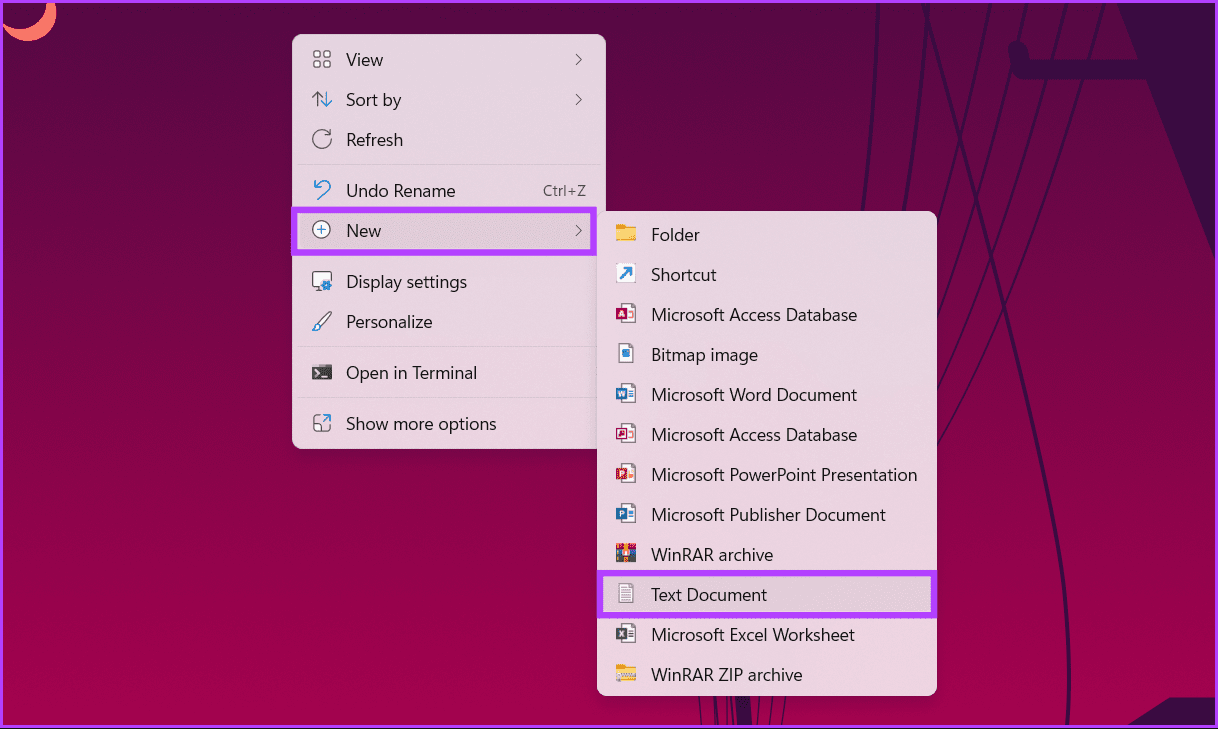
Step 6: Now, go to your desktop, right-click on any blank space, choose New, and select Text Document.
Note: If you are on Mac, type Text Editor from the Spotlight search by pressing ‘Command+Space’ on your keyboard.
Step 7: Click open the Text document.
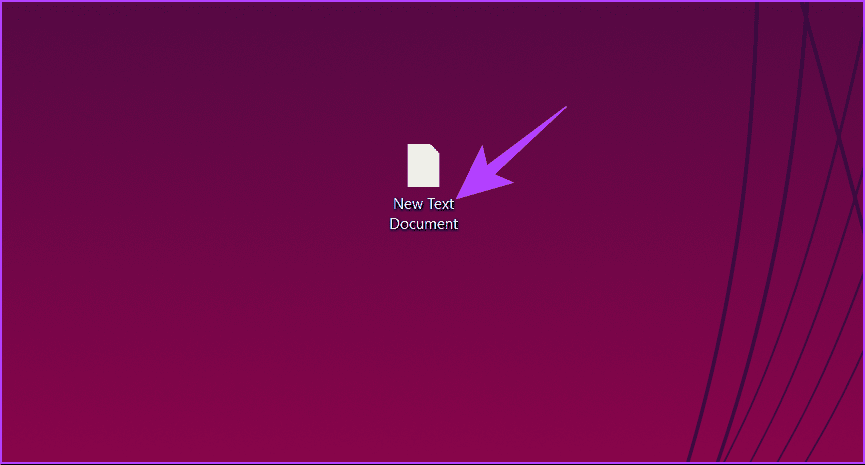
Step 8: Once in the text document, press’ Ctrl+V,’ and your chat text will be copied.
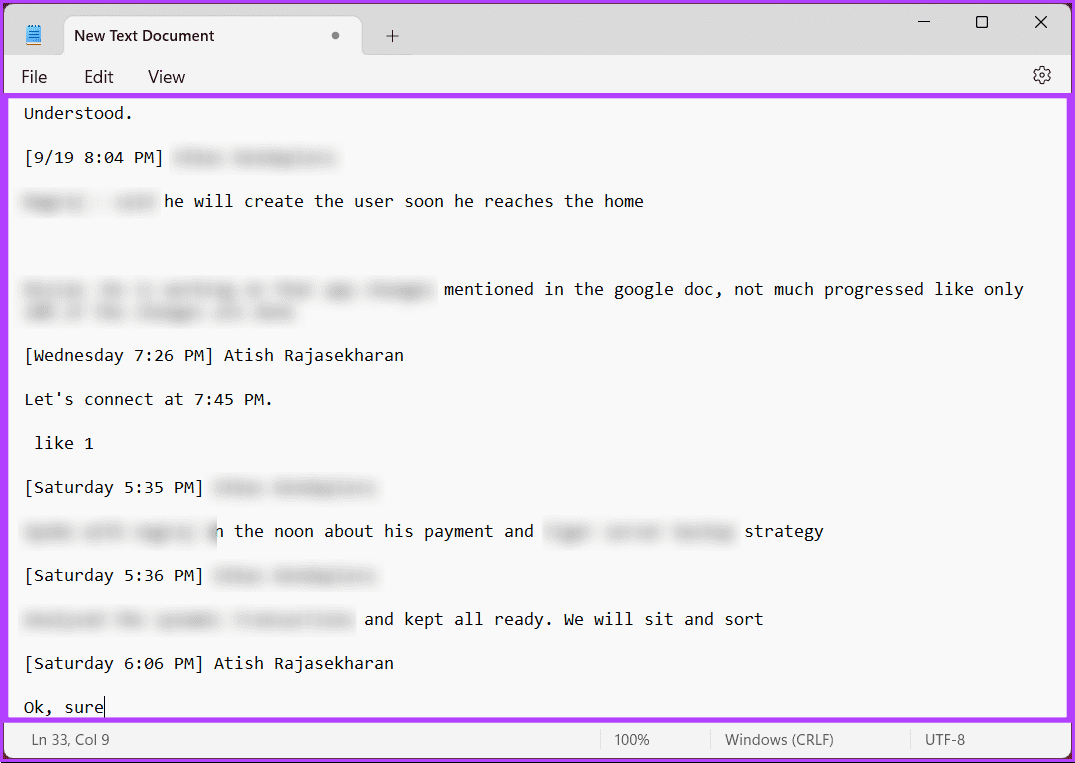
Step 9: Press Ctrl + S to save the document. And then, you can move the document anywhere you want or share it with someone via email or WhatsApp.
That’s it. You have saved the Teams chat as a document. If this method is too long for you to follow, move on to the next method.
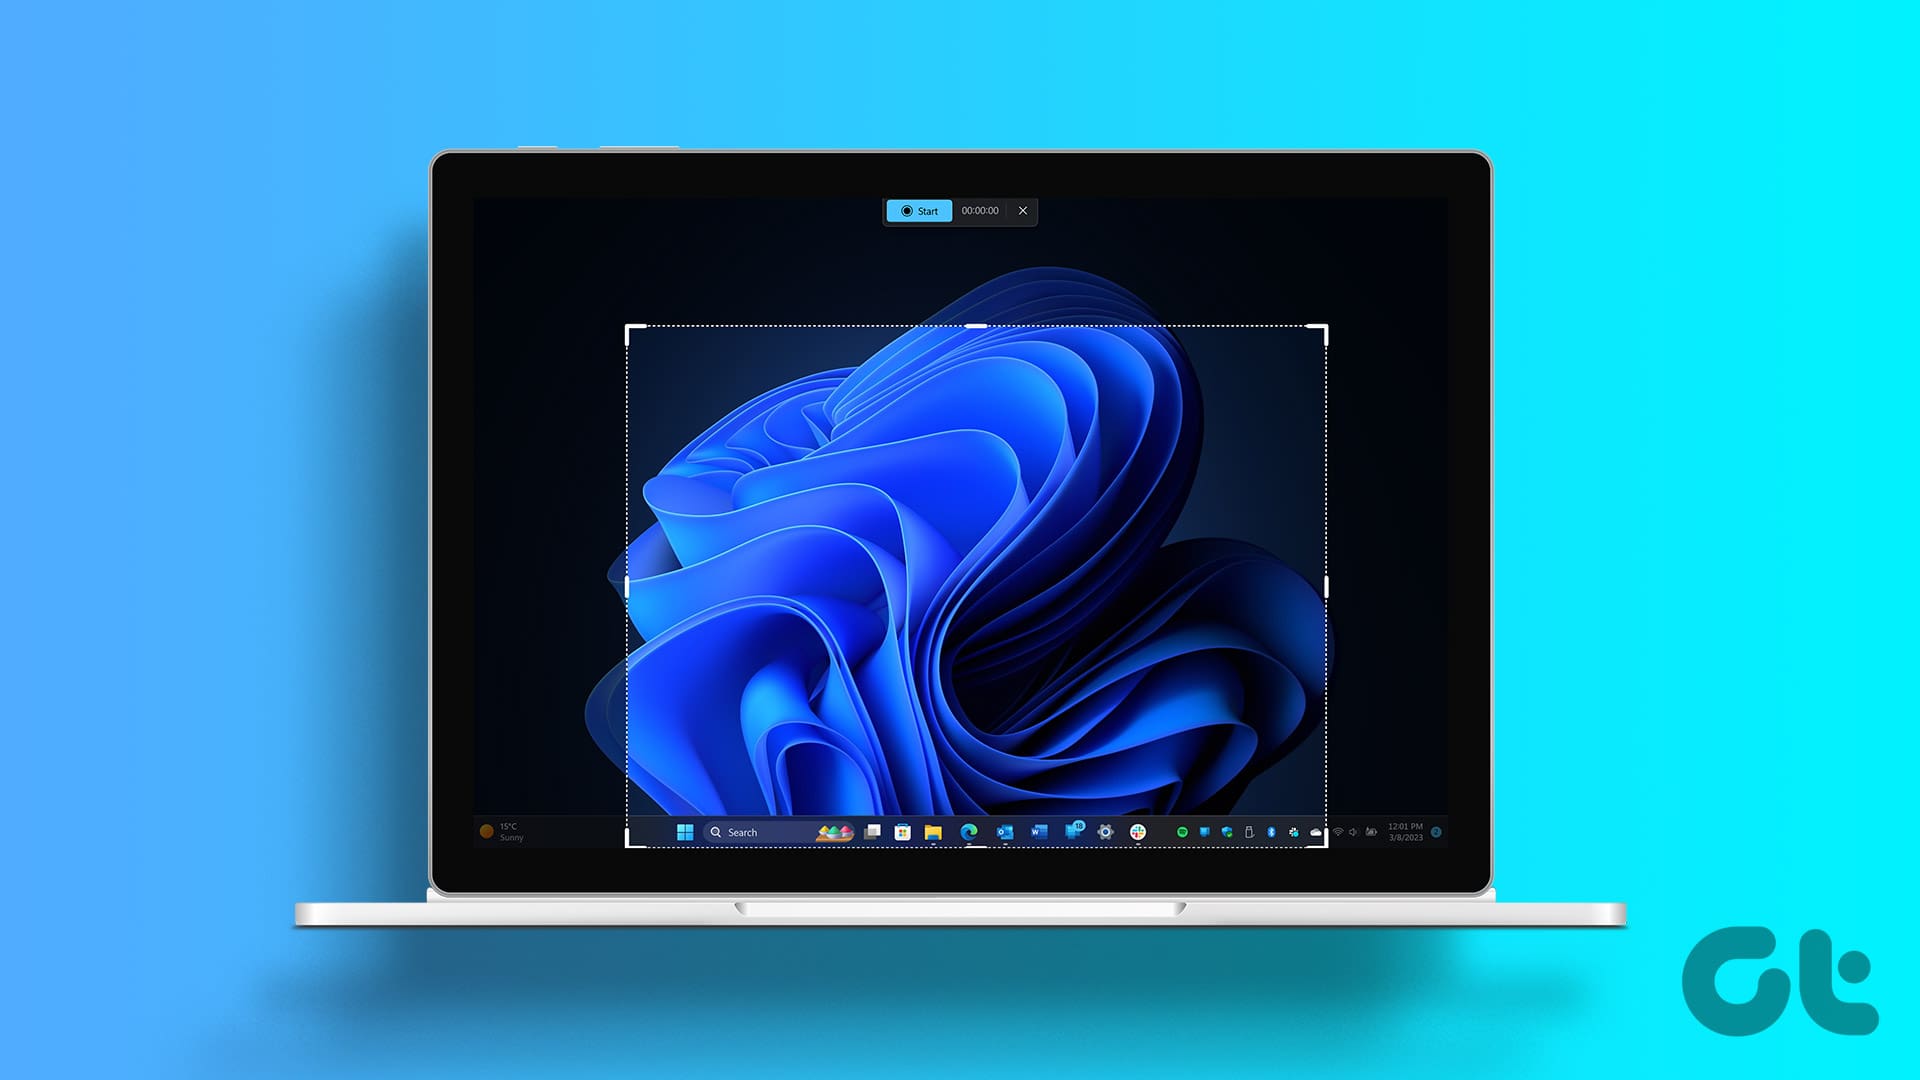
2. Take Screenshots
This is one of the easiest and most widely used methods, not specific to MS Teams but to any social or communication platform. We already have articles about taking screenshots on any platform; below are some of them.
- Easy ways to take a screenshot in Windows 11
- Where to find screenshots on Windows 11 and 10
- Best free screenshot tools for Windows and Mac
- Best ways to take a screenshot on Android
To go one step further, read the following articles, depending on your browser, on how to take full-page screenshots of your chat conversations. Check it out below;
- How to take a full-page screenshot on Microsoft Edge
- How to take a full-page screenshot on Google Chrome
If you don’t want to rely on screenshots but rather want them in document format, check out the next method.
3. Save as PDF Using the Print Option
This method requires you to use or access Microsoft Teams from a browser (Google Chrome, Microsoft Edge, or Firefox). Follow the instructions below to print Teams chat quickly and easily.
Step 1: Launch any browser on your Windows or Mac computer, go to the Microsoft Teams website, and log in with your account credentials.
Note: If asked, click the ‘Use the web app instead’ option to continue accessing Teams on the web browser.
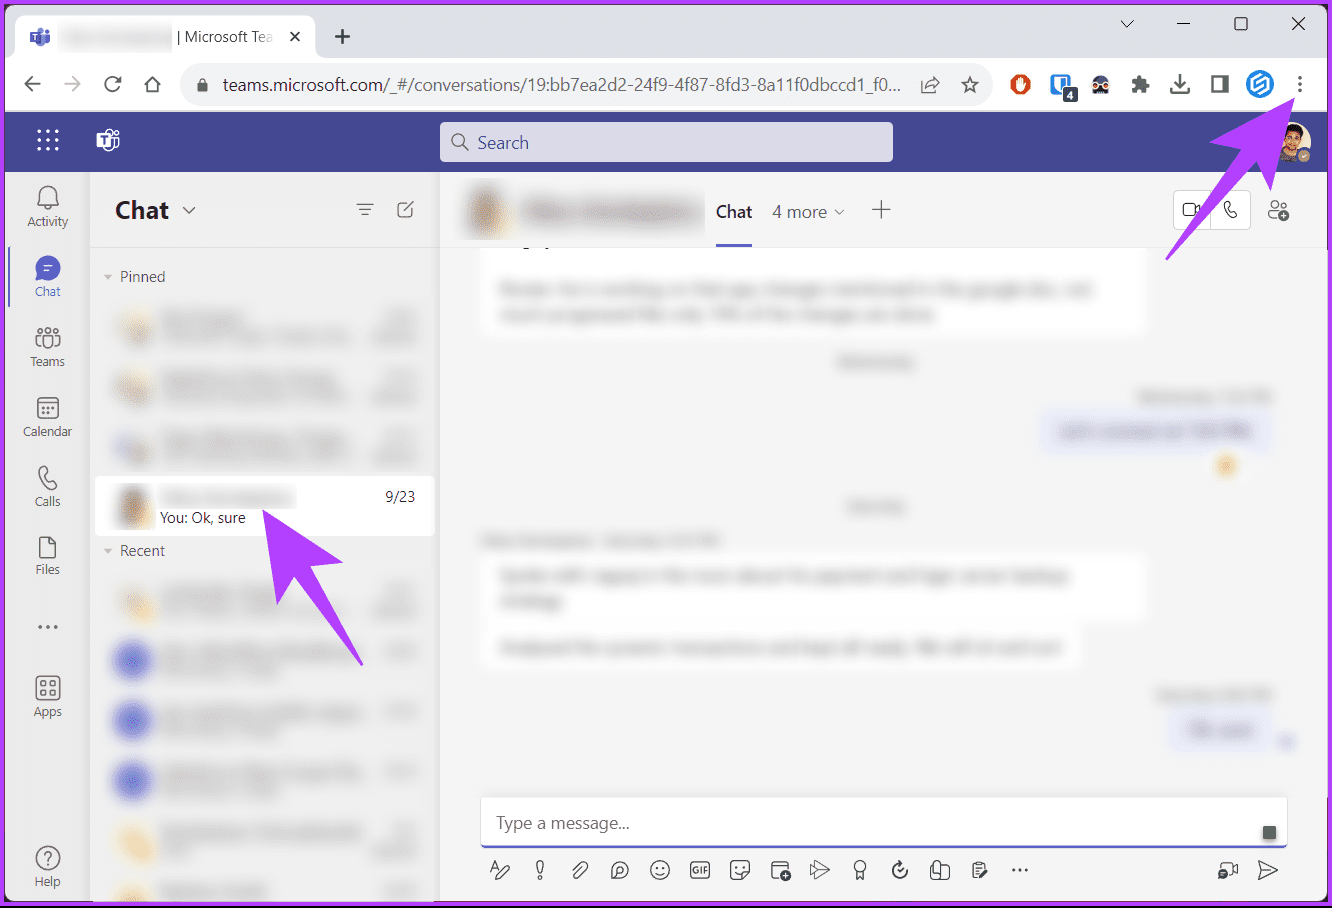
Step 2: Now, navigate to the Chat or Teams chat section from the top left corner of the Teams window. Click on the three vertical dots icon in the top right corner
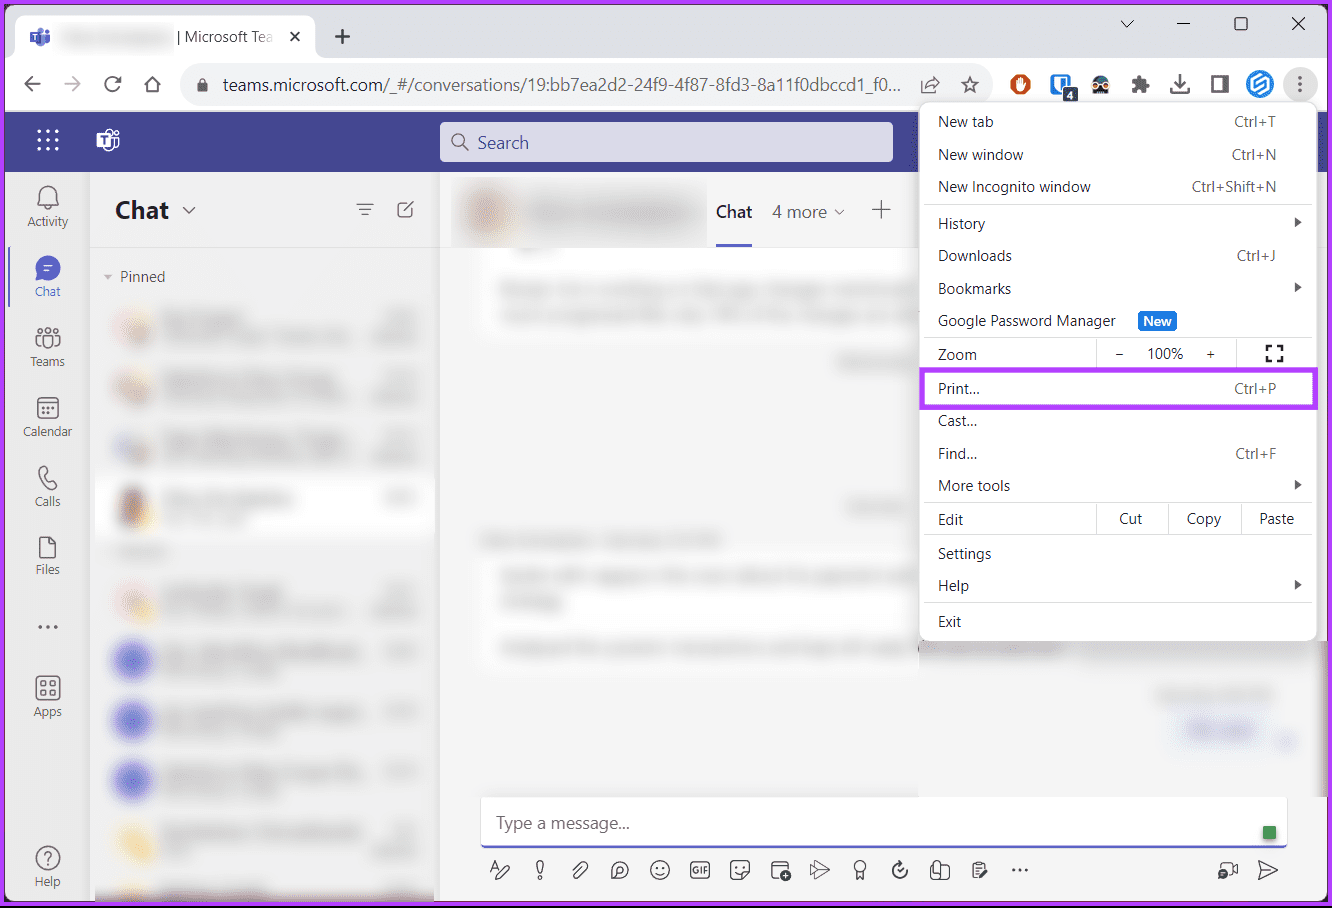
Step 3: From the drop-down menu, select Print.
Step 4: In the Print window, click on the destination drop-down, select ‘Save as PDF,’ and click Save.
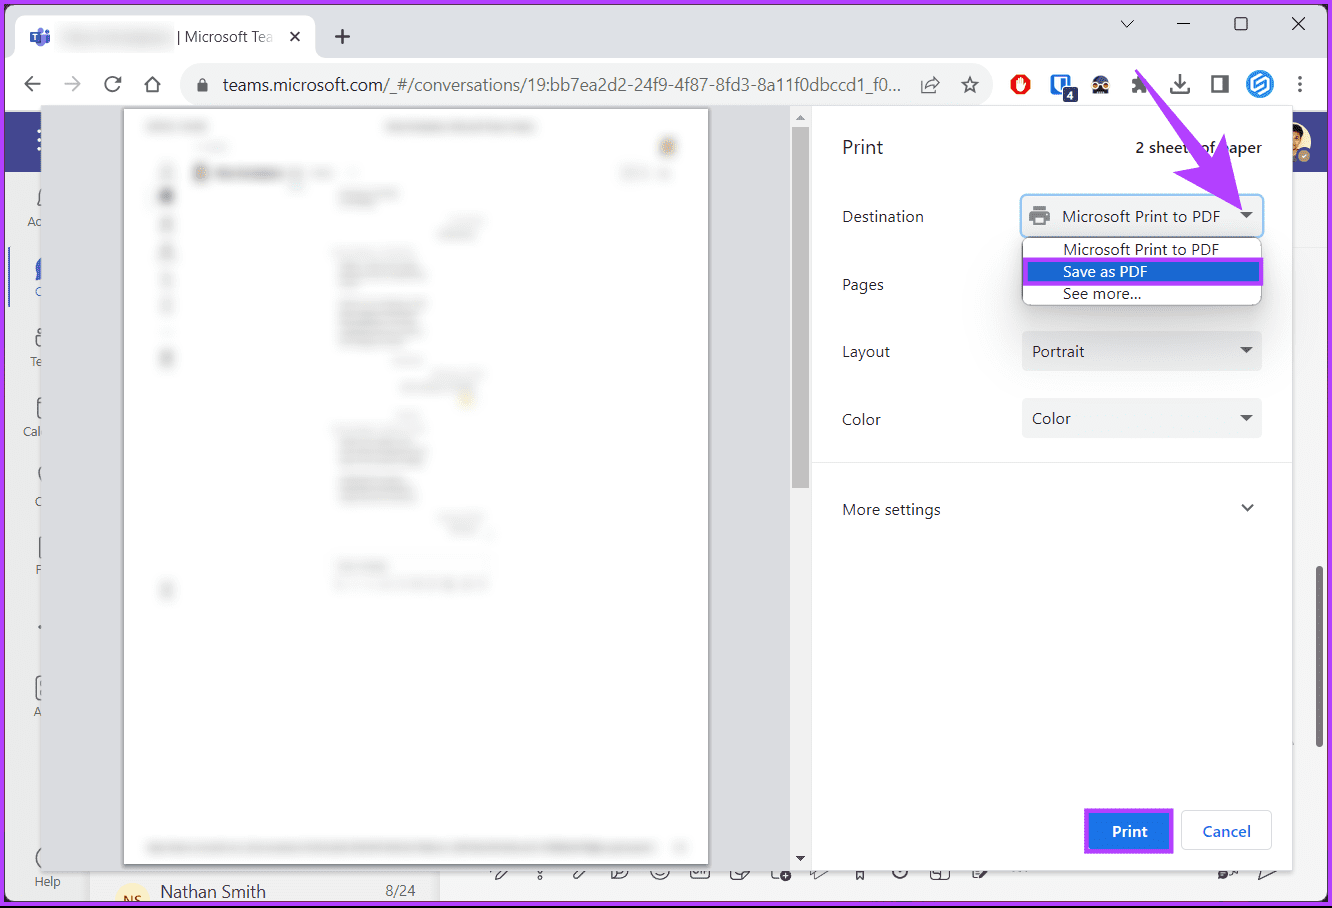
That’s it. The selected chat will be saved as a PDF file, which can be shared via email. If you don’t want to use the browser but rather want a quick-step process to share the chat with someone via email, check out the next method.
4. Share to Outlook
This method is the most convenient if you want to export Teams chat to email. However, it does have one major drawback, which is that you can only share one message at a time. If it is just one message you want to share, follow the instructions below.
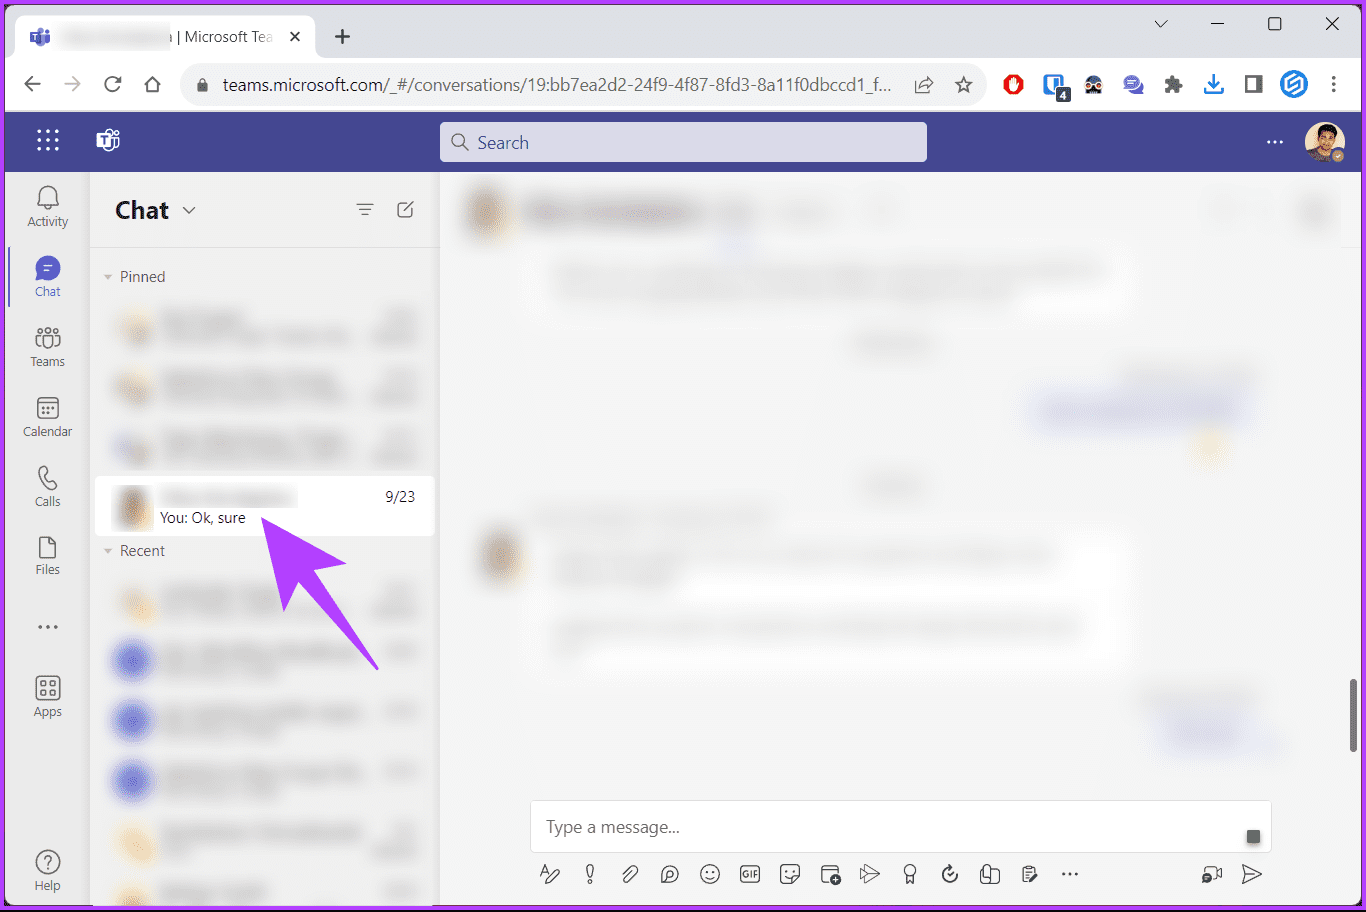
Step 1: Launch Microsoft Teams and navigate to the Chat or Teams section from the top left corner of the Teams window.
Step 2: Select the message you want to share, right-click, and select ‘Share to Outlook.’
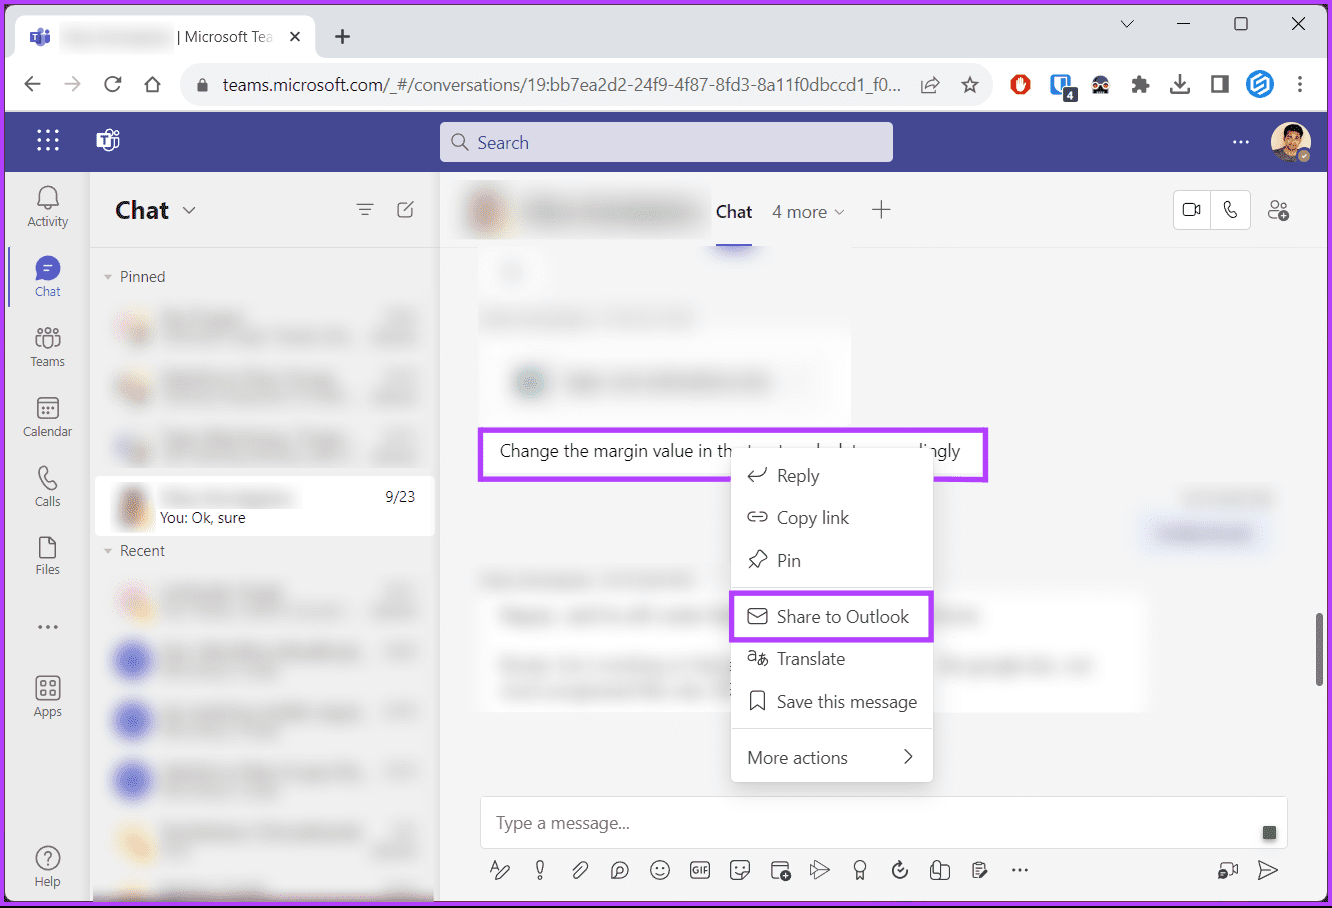
In the pop-up modal, the message gets populated, which you can easily share via Outlook. This method will not work if you have multiple messages to share. Check out the next method if you have multiple messages to be shared.
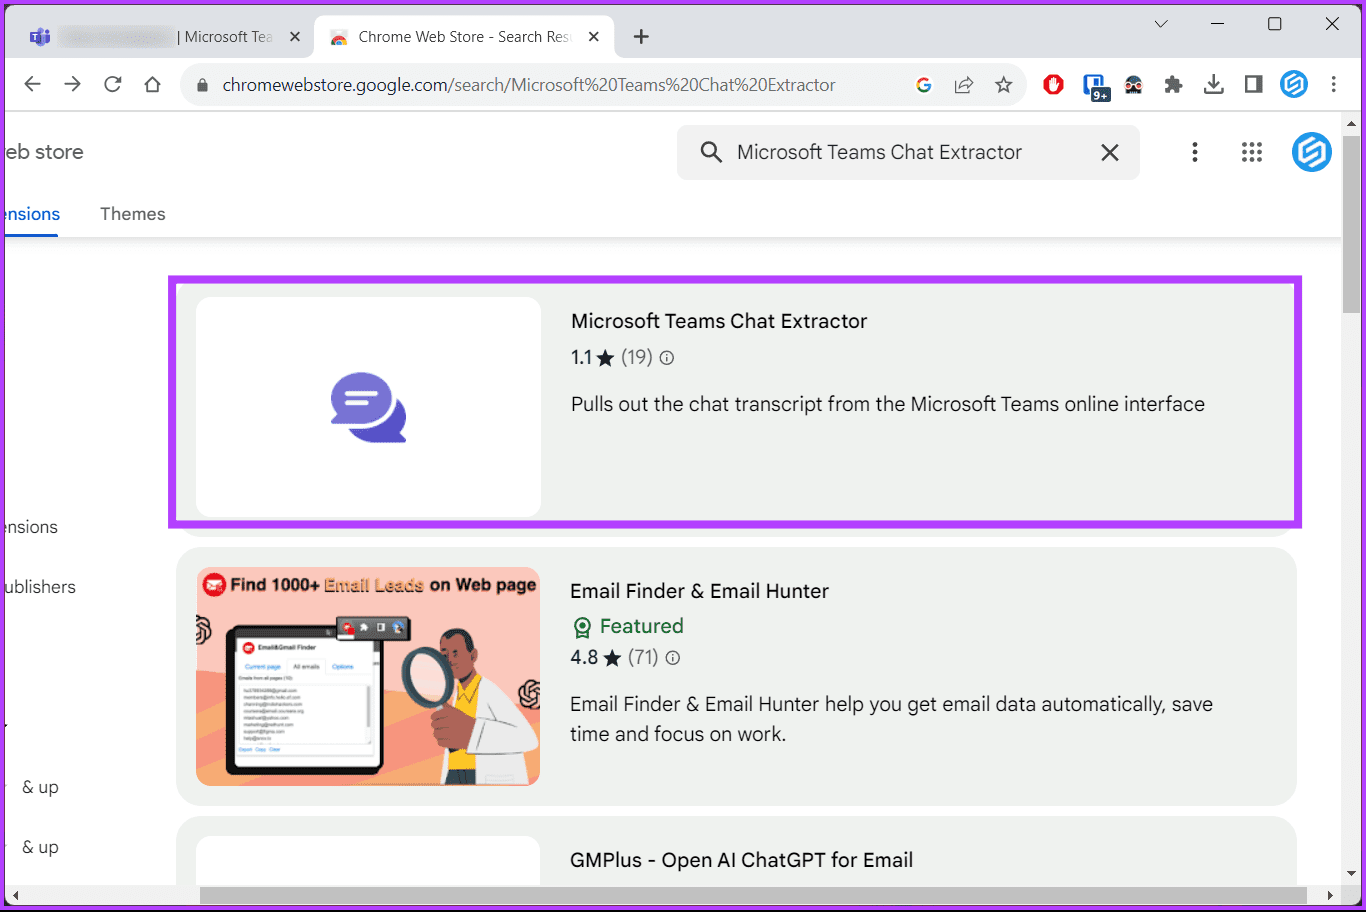
5. Use Teams Chat Extractor Extension
Unlike many operational-level extensions available on the Chrome Webstore, there are many extensions; in fact, there’s only one extension called ‘Microsoft Teams Chat Extractor’ available to extract chats or conversations from Microsoft Teams. However, during our testing, the extension didn’t work. If it does for you, below are the steps.
Below are some of the articles that you may need to check before moving forward with the steps below.
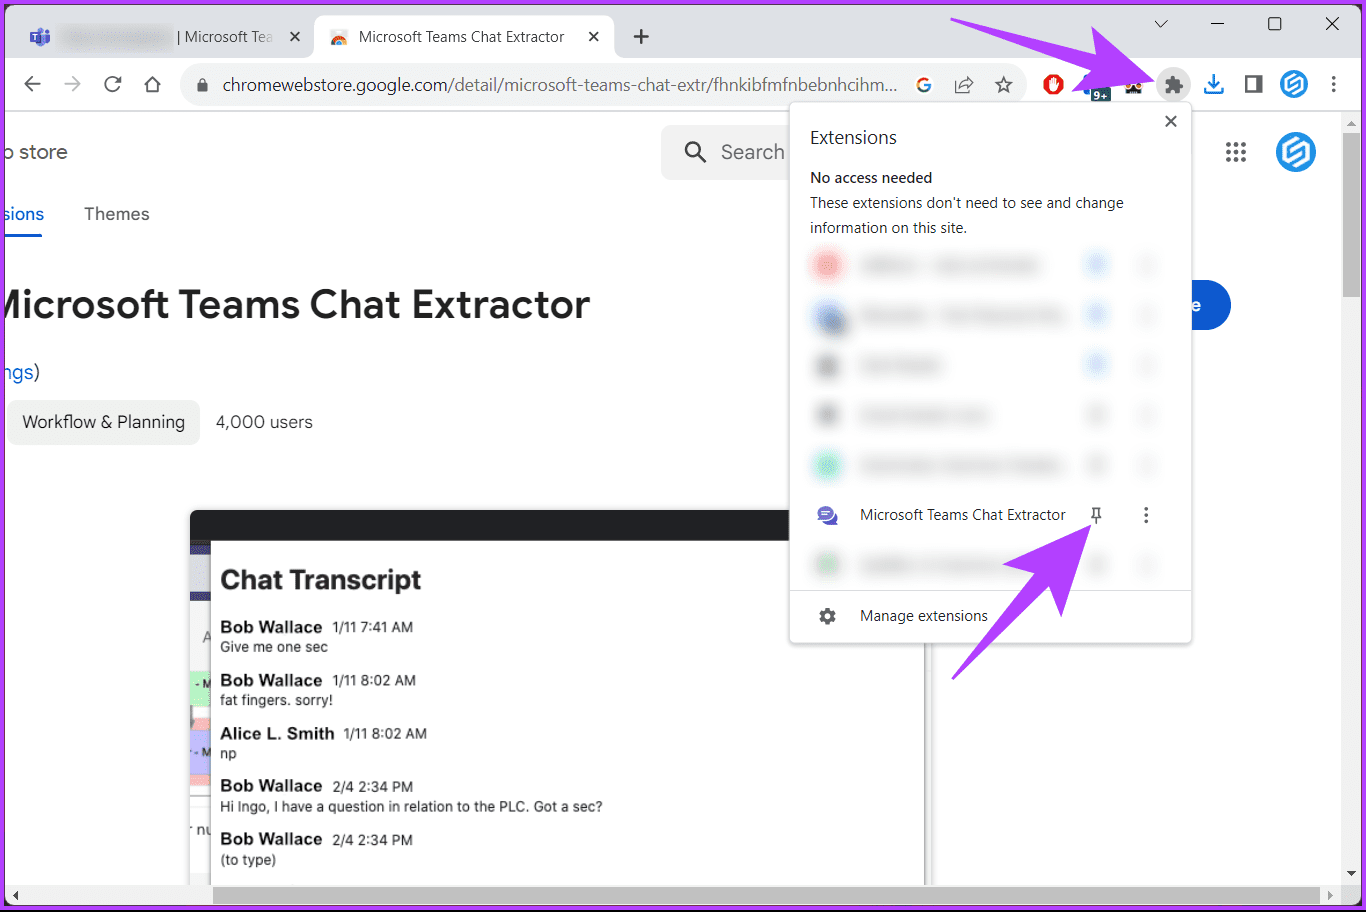
Step 1: Firstly, download and add the extension to your Chrome browser.
Step 2: Once downloaded, click on the Chrome extension icon and pin the Teams Chat Extractor extension for easy access.
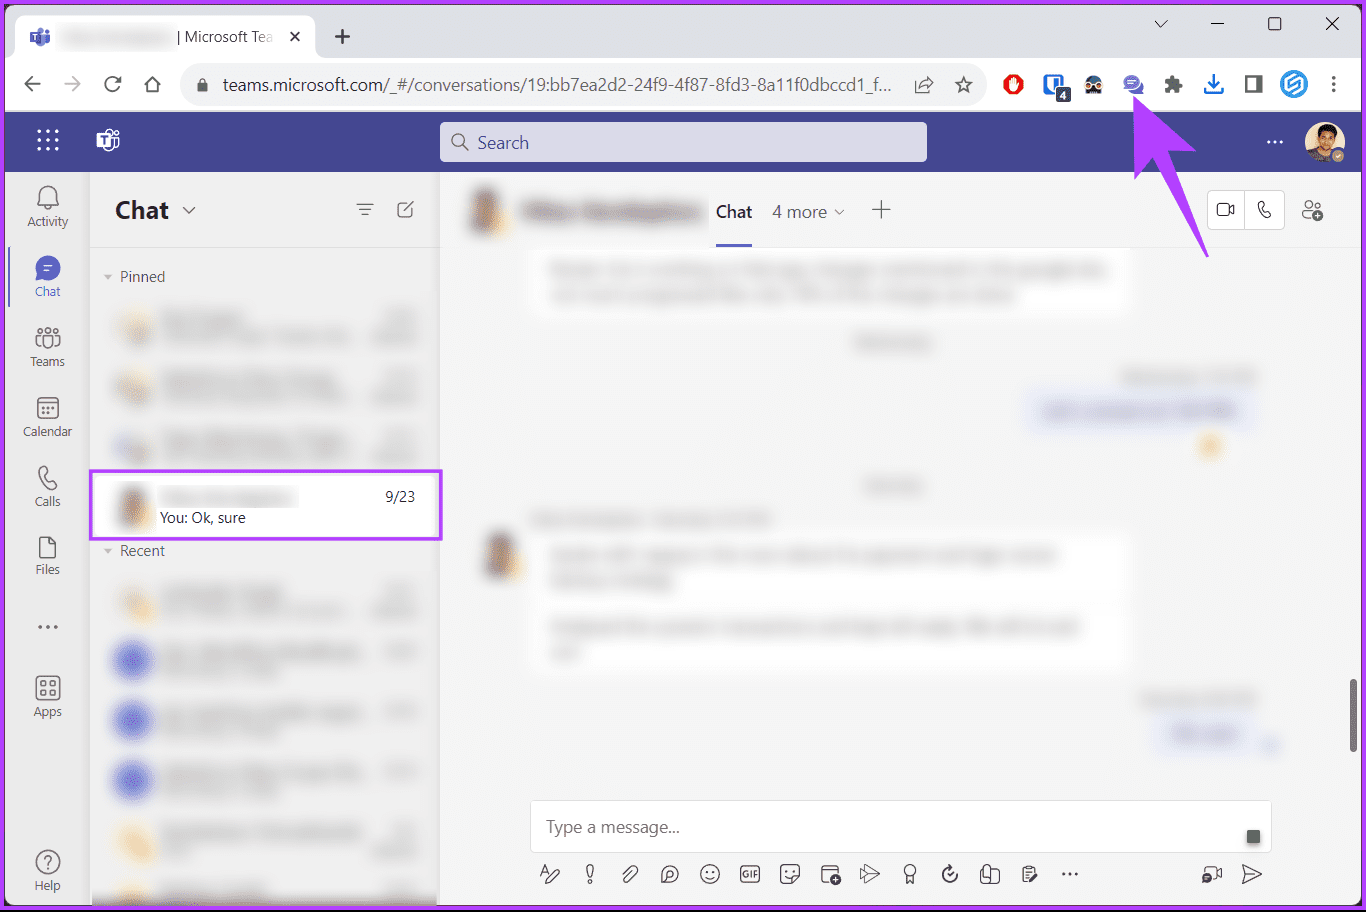
Step 3: Go to the Teams chat you want to export.
Step 4: Scroll up to the first message to load the entire conversation, and click on the Microsoft Teams Chat Extrator icon.
Step 4: Copy and paste the text on a Microsoft Word or Text document when it extracts all the chats with the date and time stamps.
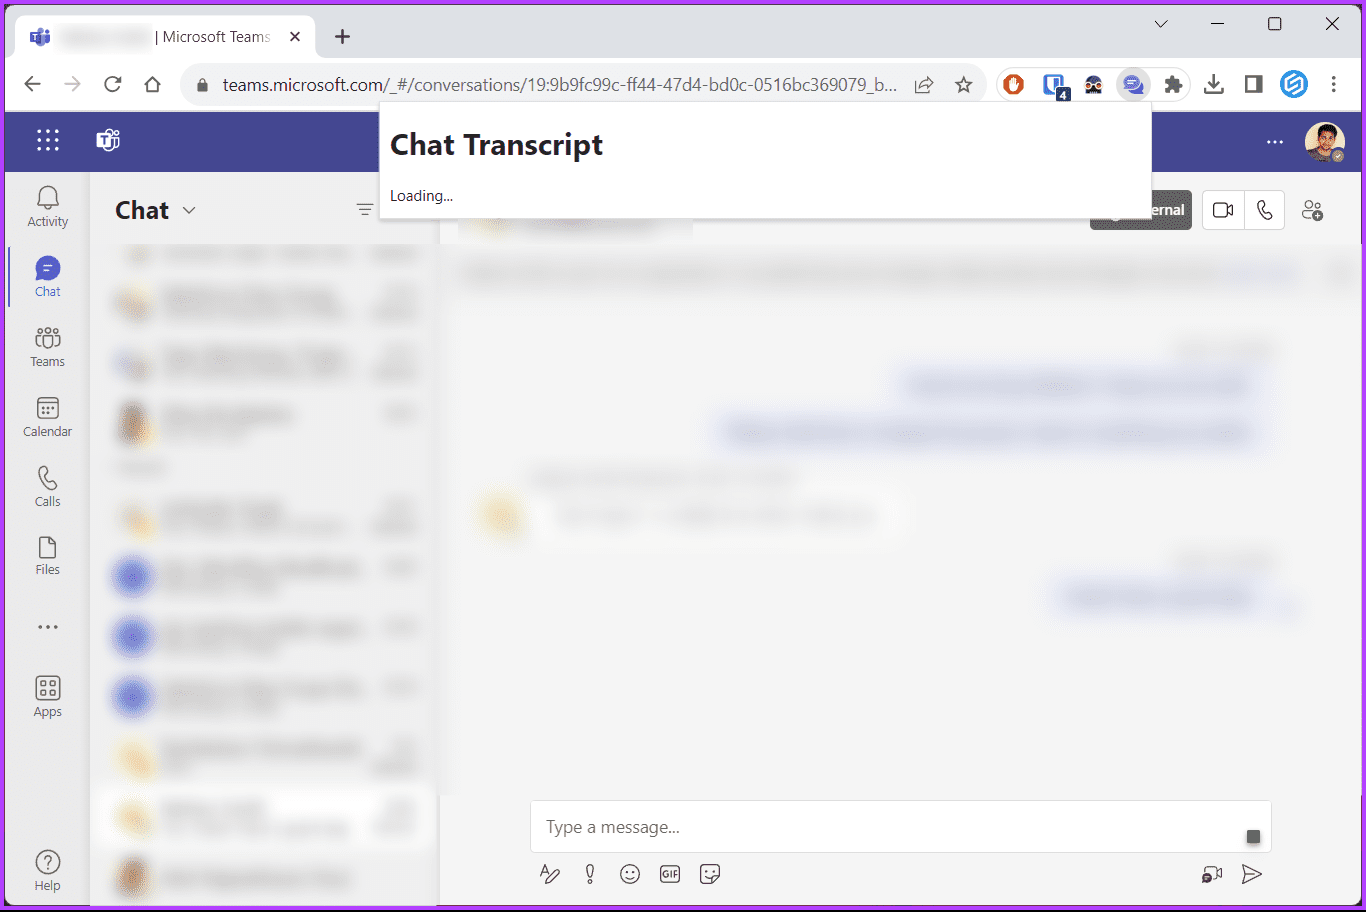
There you go. You have all the messages of a Microsoft Teams conversation extracted. However, you should know that images and gifs won’t be captured; only the text will be copied.
The next method and the last method are for those who do not wish to use extensions and want to export their chats officially.
6. Export the Chat
Of all the methods mentioned in the article, this is the official way to download chat conversations. So, without further ado, follow the below-mentioned steps.
Step 1: Go to the Teams data export page from your preferred browser on your Windows or Mac computer.
Note: You will need to log in to your Microsoft account.
Step 2: Check the box next to Chat history and Media. Select Submit request.

Step 3: In the pop-up, click Continue.
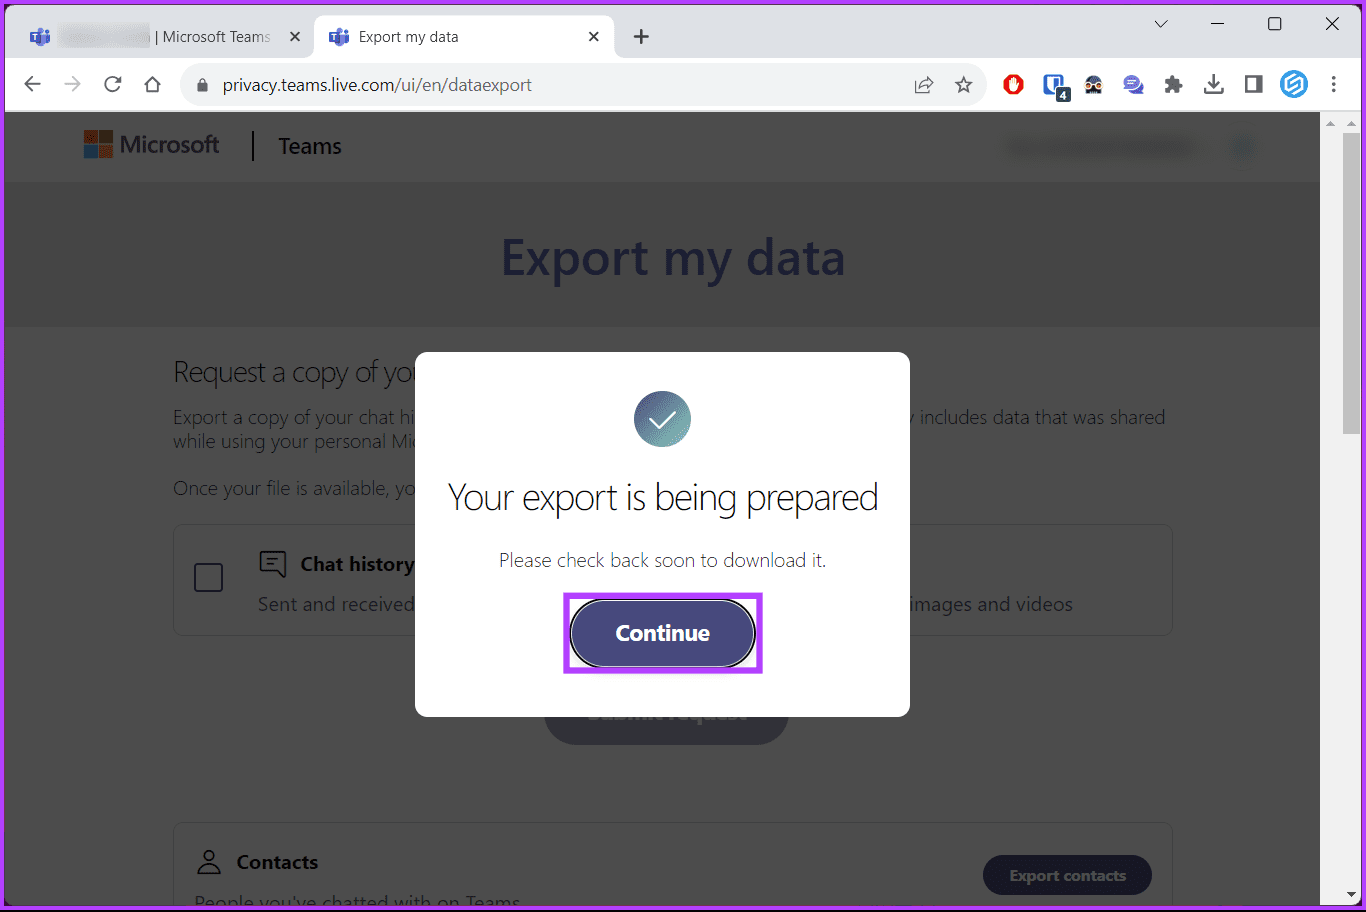
Microsoft will indicate your pending request.
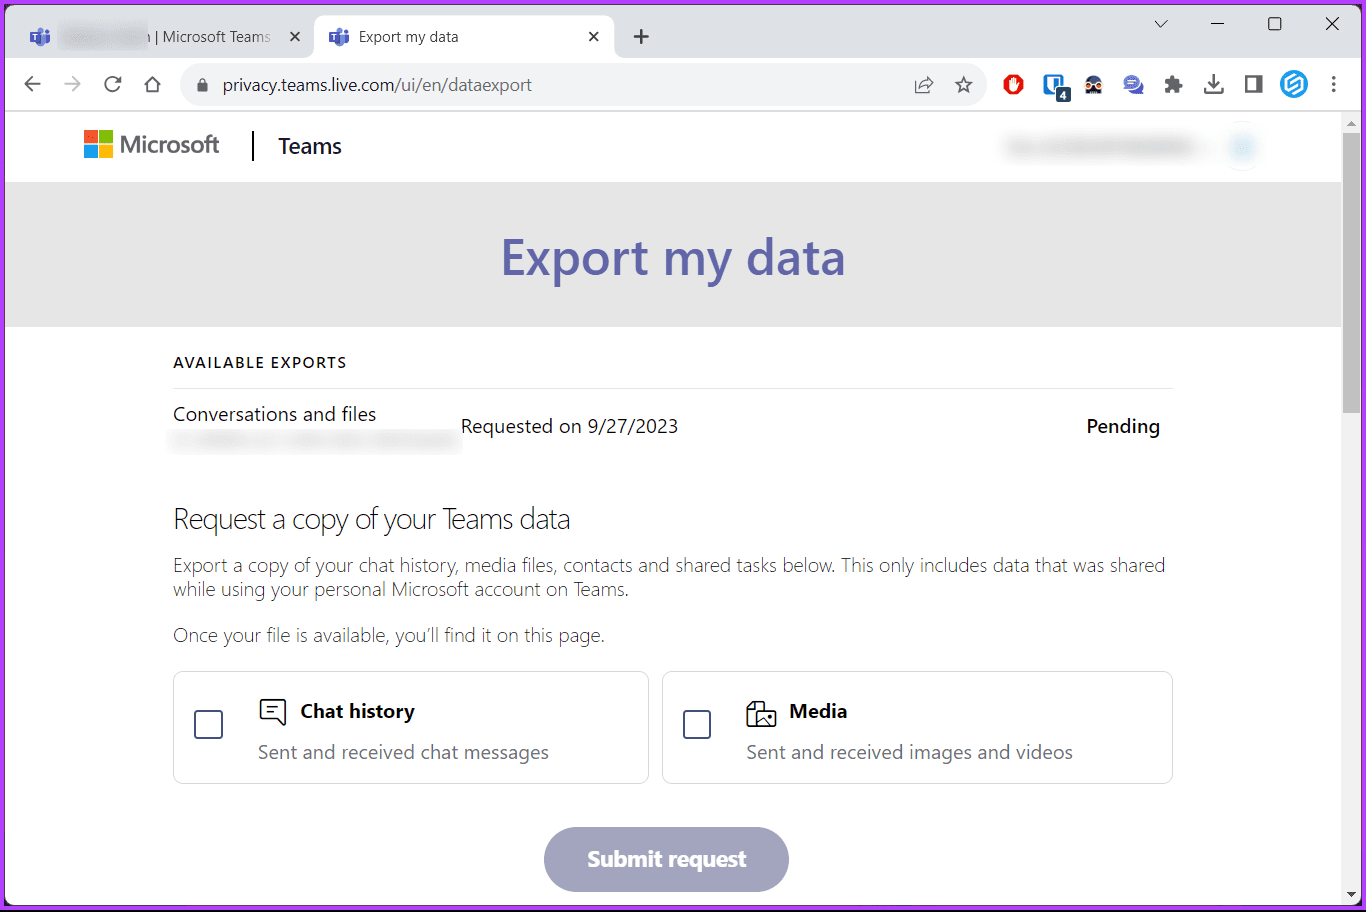
Give it some time, and check this page after a while. You should see an option to be able to export Teams chat data. That said, if you have any queries, check out the FAQ section below.
FAQs on Exporting Microsoft Teams Chat History
Yes, Microsoft Teams chat history is typically stored in the cloud and is backed up as part of Microsoft 365 data. However, individual users can also export and save their chat histories locally.
2. Is there a limit on how much chat history I can export?
Microsoft Teams may have some limitations on the amount of chat history that can be exported simultaneously. You may need to perform multiple exports if you have an extensive chat history.
No, exporting chat history does not remove it from Microsoft Teams. It merely creates a copy of the chat history in a downloadable format.
There may not be a set limit on how often you can export chat history, but it’s typically done as needed for backup, reference, or compliance purposes.
Keep a Copy of Teams Chat
We’ve explored why you might want to download or export your Microsoft Teams chat history and provided the best methods to accomplish this task efficiently. Your chat history is a valuable resource you can preserve and access with the right methods when necessary.
Was this helpful?
Last updated on 04 October, 2023
1 Comment
Leave a Reply
Read Next
 How to View, Export, and Delete Bing Chat History
How to Find Bing Chat History On PC Step 1: Open Bing Chat by clicking the Chat button from the Bing Home screen.
How to View, Export, and Delete Bing Chat History
How to Find Bing Chat History On PC Step 1: Open Bing Chat by clicking the Chat button from the Bing Home screen.
 How to Export WhatsApp Chat to PDF on Android or iOS
Are you looking for a way to preserve your WhatsApp conversations in a convenient and shareable format?
How to Export WhatsApp Chat to PDF on Android or iOS
Are you looking for a way to preserve your WhatsApp conversations in a convenient and shareable format?
 Teams: Disable All Chat Notifications During Meetings
Method 1: Enable Do Not Disturb for Your Account One of the quickest ways to disable chat notifications during meetings is to set your status to Do Not Disturb.
Teams: Disable All Chat Notifications During Meetings
Method 1: Enable Do Not Disturb for Your Account One of the quickest ways to disable chat notifications during meetings is to set your status to Do Not Disturb.
 How to Export Lucidchart Diagrams to Microsoft Word and Excel
Method 1: Importing Lucidchart Diagrams as Image Files Step 1: After completing your diagram, click File > Export and select one of the options - PNG, JPEG, or SVG.
How to Export Lucidchart Diagrams to Microsoft Word and Excel
Method 1: Importing Lucidchart Diagrams as Image Files Step 1: After completing your diagram, click File > Export and select one of the options - PNG, JPEG, or SVG.
 Top 4 Ways to Export Chrome Bookmarks and Passwords
1.
Top 4 Ways to Export Chrome Bookmarks and Passwords
1.
 3 Ways to Fix Microsoft Teams Not Loading or Opening
Basic Fixes Check for downtime: Servers can be down, as many people worldwide rely on Teams.
3 Ways to Fix Microsoft Teams Not Loading or Opening
Basic Fixes Check for downtime: Servers can be down, as many people worldwide rely on Teams.
 5 Ways to Fix Microsoft Teams Web Not Working
Basic Fixes Sign out and sign back in: Authentication issues with your Microsoft account can sometimes cause Teams to stop working.
5 Ways to Fix Microsoft Teams Web Not Working
Basic Fixes Sign out and sign back in: Authentication issues with your Microsoft account can sometimes cause Teams to stop working.
 5 Ways to Keep Microsoft Teams Status Green All the Time
https://youtu.be/xs1269oi98k Note: Microsoft Teams provides several status options to indicate your availability, such as Available, Busy, Away, and more.
5 Ways to Keep Microsoft Teams Status Green All the Time
https://youtu.be/xs1269oi98k Note: Microsoft Teams provides several status options to indicate your availability, such as Available, Busy, Away, and more.
The article above may contain affiliate links which help support Guiding Tech. The content remains unbiased and authentic and will never affect our editorial integrity.


The chrome extension doesn’t seem to work. It gets stuck on the loading pop-up forever. I’ve seen other reviewers post the same problem.
For users of the corporate/school version of teams, the inability to copy/paste or otherwise export large numbers of messages in a single chat is a big problem. None of the options you list will allow copying for than a couple messages (maybe 3 screens worth) at a time.