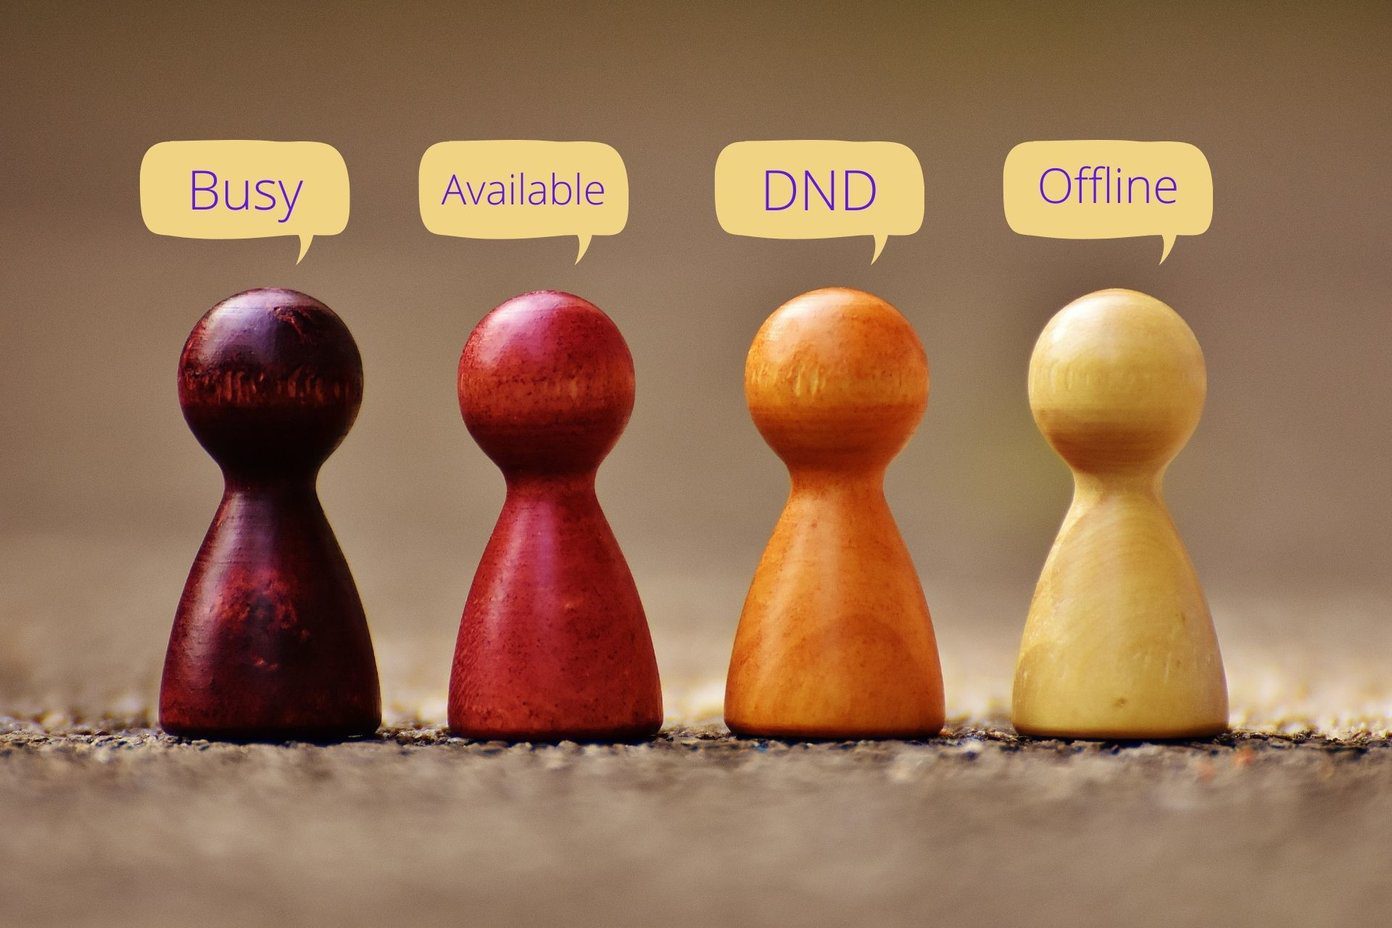
Note: Microsoft Teams provides several status options to indicate your availability, such as Available, Busy, Away, and more. However, it sets your status as Away if you’ve been inactive on the app for a certain period.
1. Prevent Your PC or Mac From Going to Sleep
On Windows
Step 1: Press the Windows key, type Settings, and click Open.
Step 2: Under System, go to Power & battery.
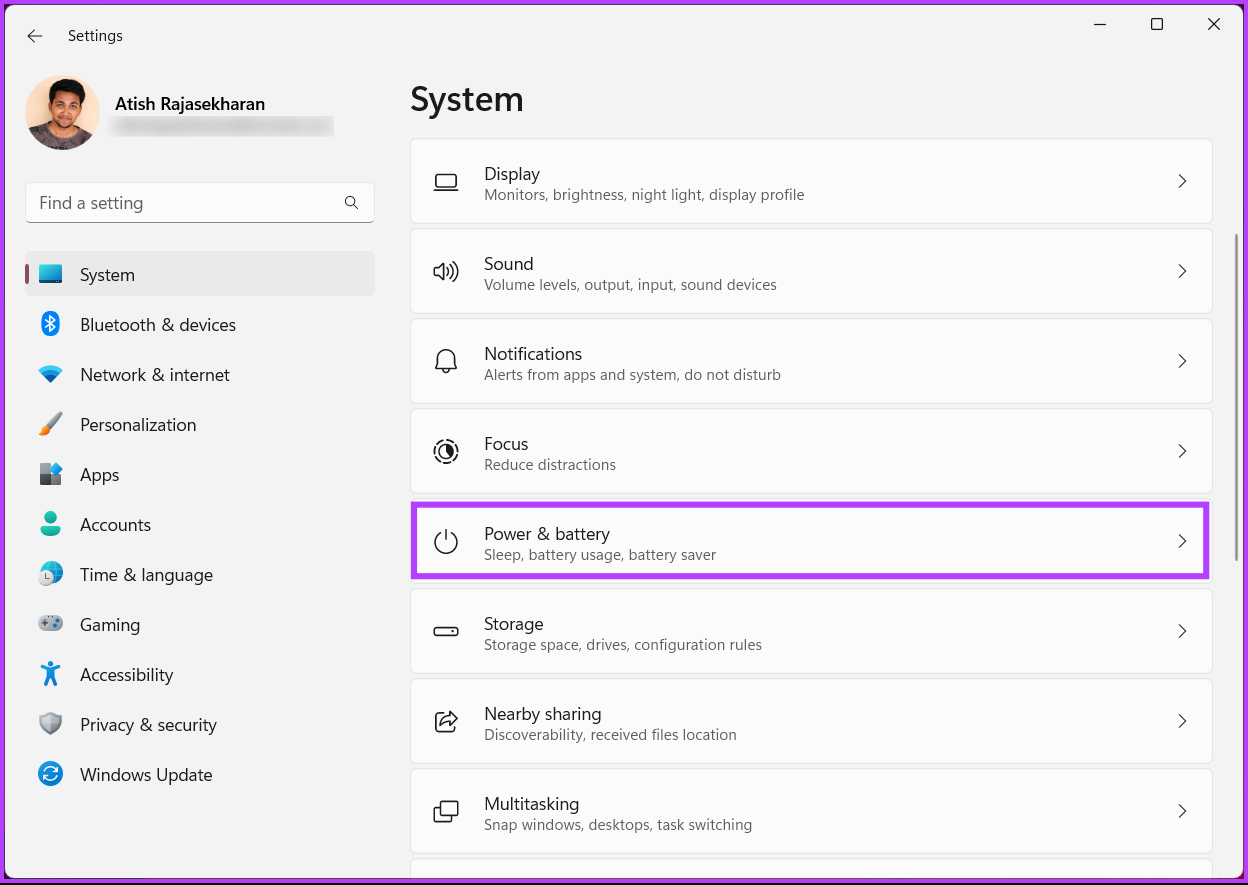
Step 3: Select Screen and sleep from the Power section.
Step 4: Adjust when you want your system to sleep when plugged in and on the battery.

That’s it. You changed the sleep settings on Windows, so your PC will not go to sleep, apparently keeping your Teams status active. If you are on a Mac, continue reading.
On Mac
Step 1: Press Command + Space, type System Settings, and press the return key.
This will open System Settings.
Step 2: On the left pane, select Lock Screen.
Step 3: Adjust when you want your system to sleep – when plugged in and on the battery.

With this, you keep your status active on Teams. That said, you can also use other methods mentioned in our article on quick ways to stop Mac from sleeping.
2. Manually Keep Your Status Active on Teams
On Windows or Mac
Step 1: Launch Microsoft Team depending on your operating system.
Note: For demonstration purposes, we are going with Mac.
Step 2: Once launched, click on your profile picture at the top right corner of your screen.
Step 3: Click on the Availability option.

Step 4: In the drop-down menu, select (green) Available.
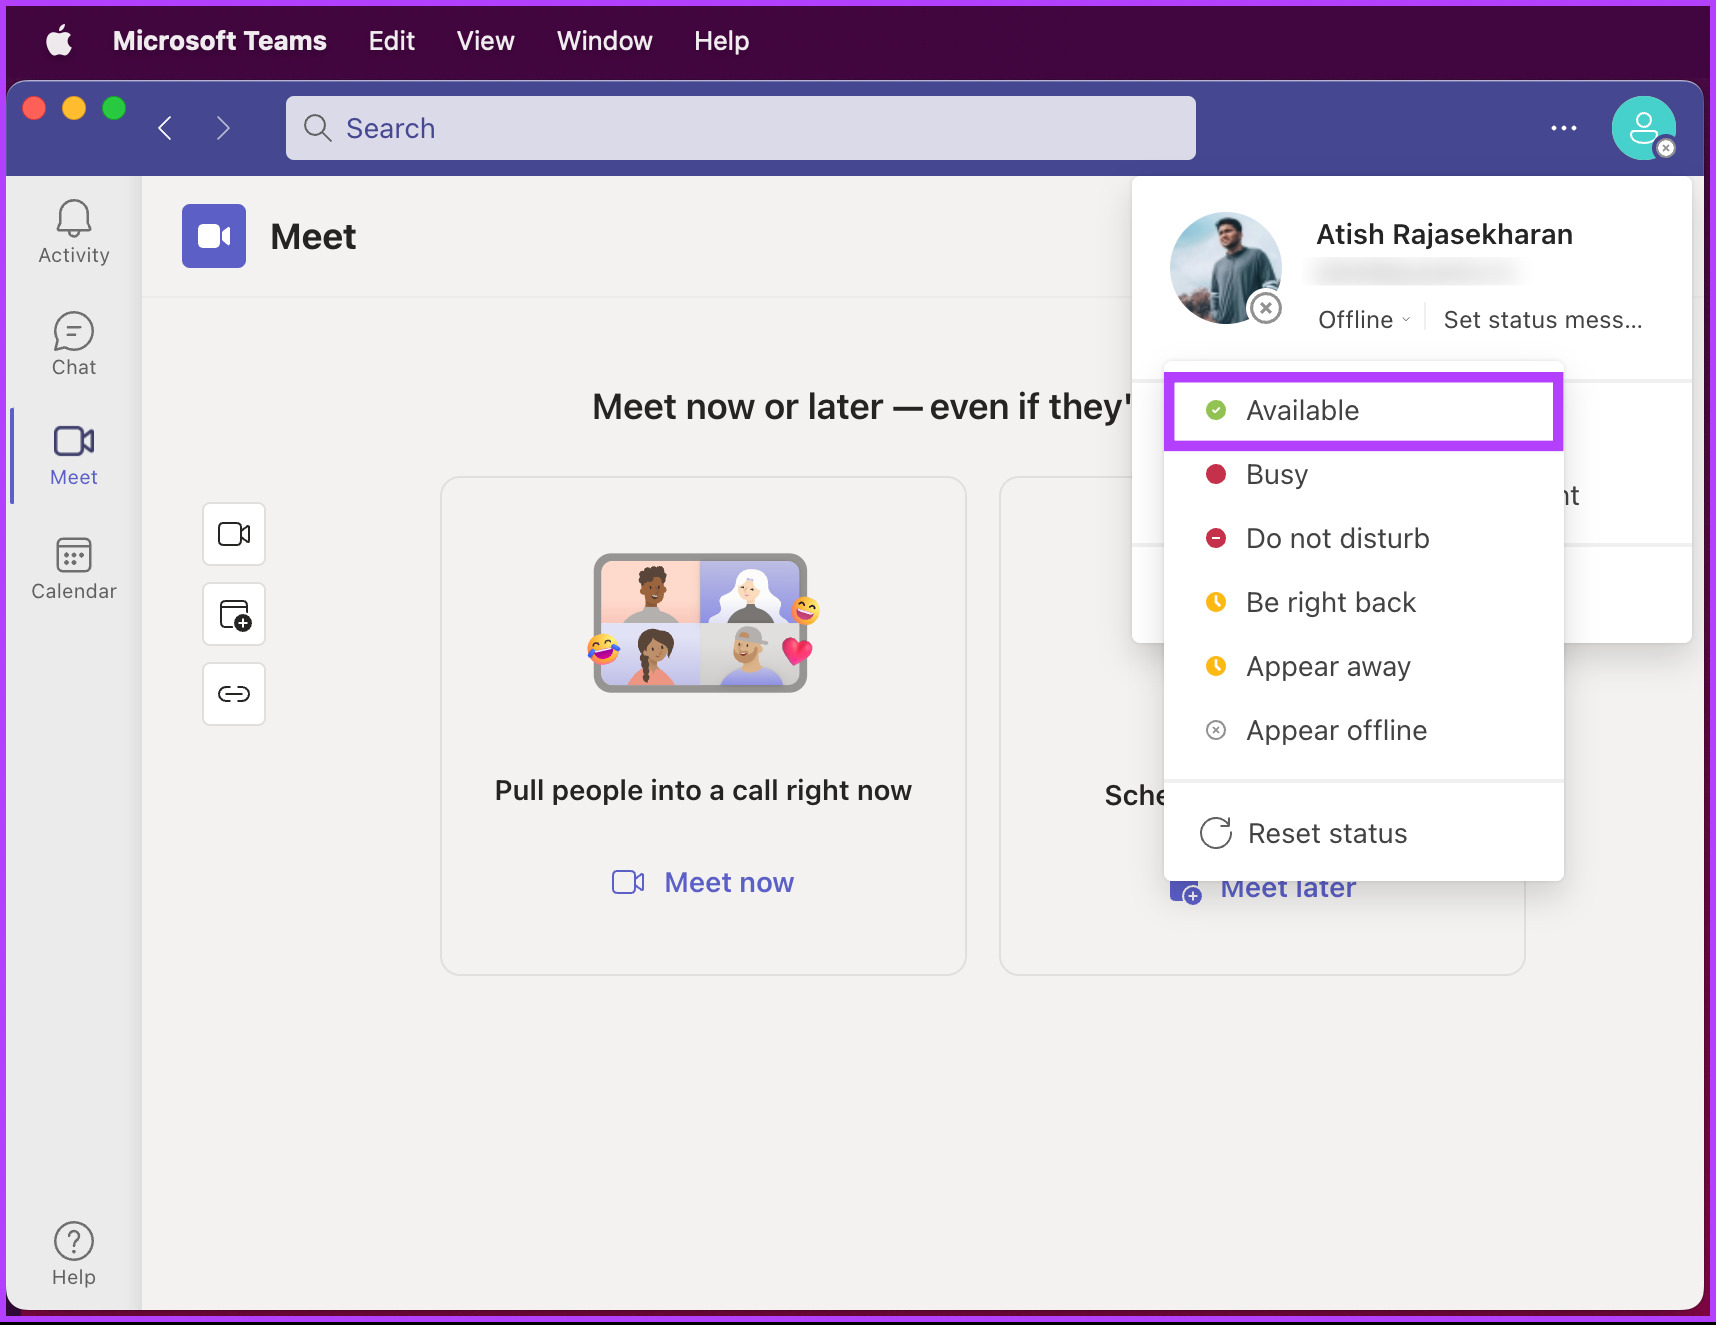
That’s it. You have set yourself available, allowing others to see you active even when you’re not working or are away from your computer.
On Android or iOS
The steps are the same for both Android and iOS. However, for the sake of demonstration, we will go with Android.
Step 1: Launch Teams, and tap on your profile in the top-left corner.
Step 2: In the sidebar, tap Offline. From the drop-down, select the Available option.
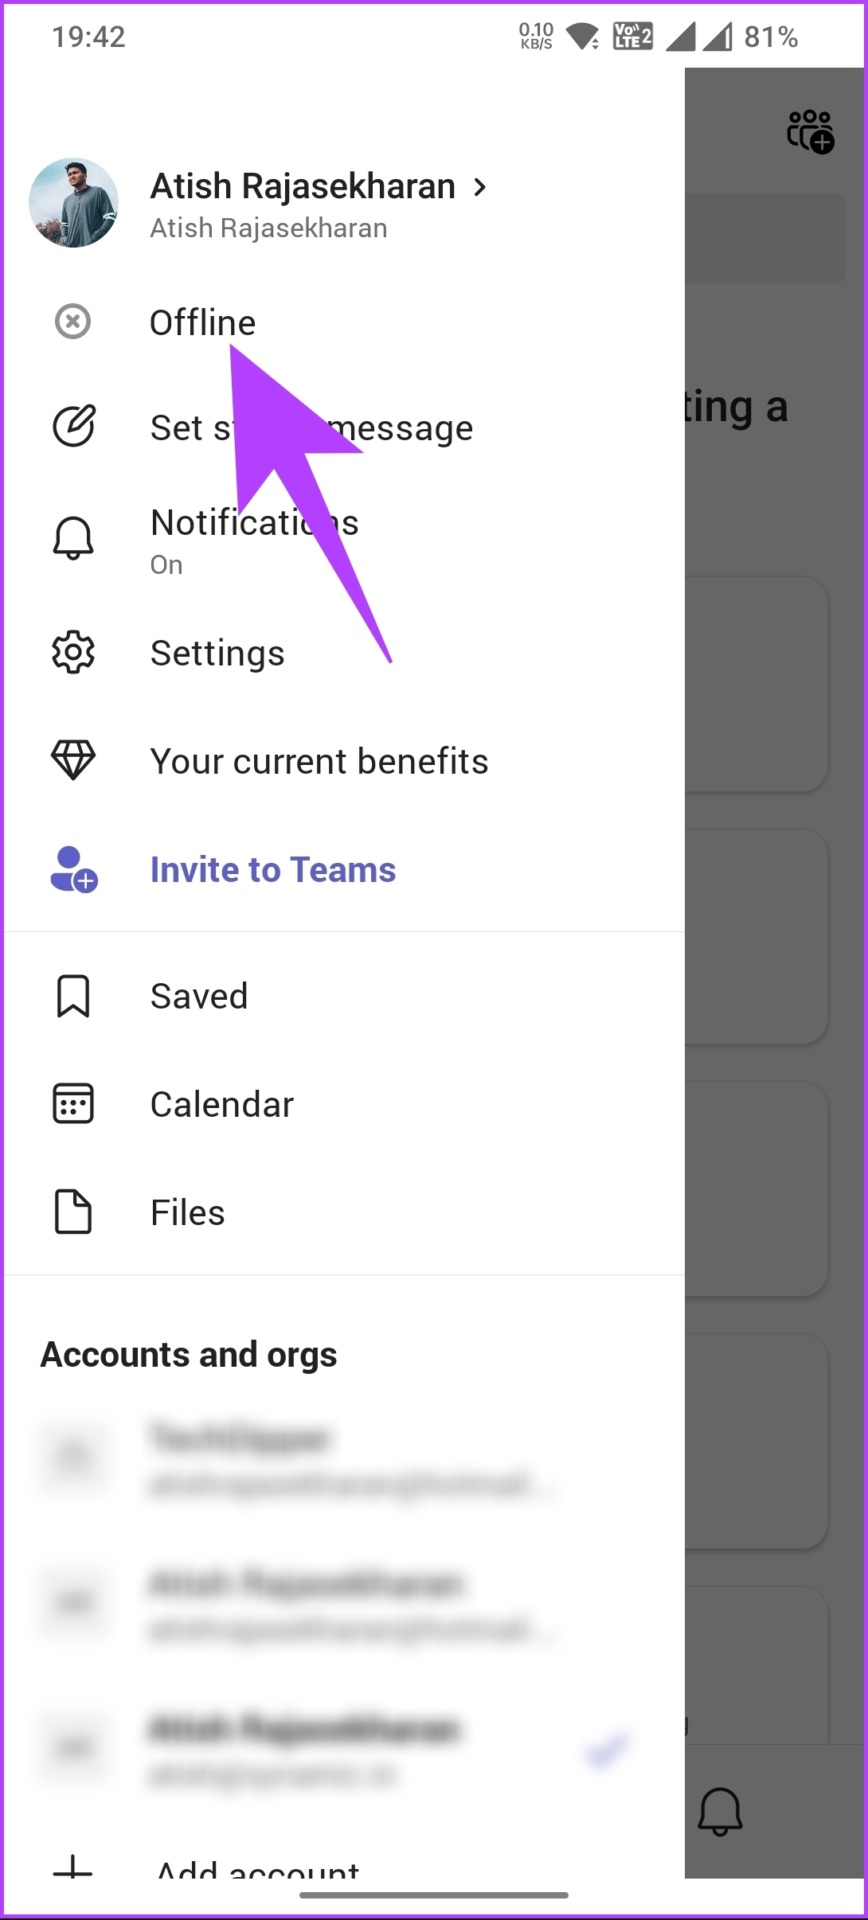

There you have it. You have successfully changed your availability setting, keeping Microsoft Teams’ status green even when you are not working.
If you don’t want to hang on to the availability thread, you can change the status message to make it more inclusive. Move to the next method.
3. Use a Status Message
Status messages on Teams appear next to users’ profile pictures. It is an excellent way for others to know what you are doing and to share information about your availability, status, or current activity.
Note: You only need to choose one way to set the status message, i.e., either on Windows, Mac, Android, or iOS devices. The settings or changes you made will get automatically synced across all the devices you are logged in with the same account.
On Windows or Mac
Step 1: Open Microsoft Teams on your Windows or Mac computer.
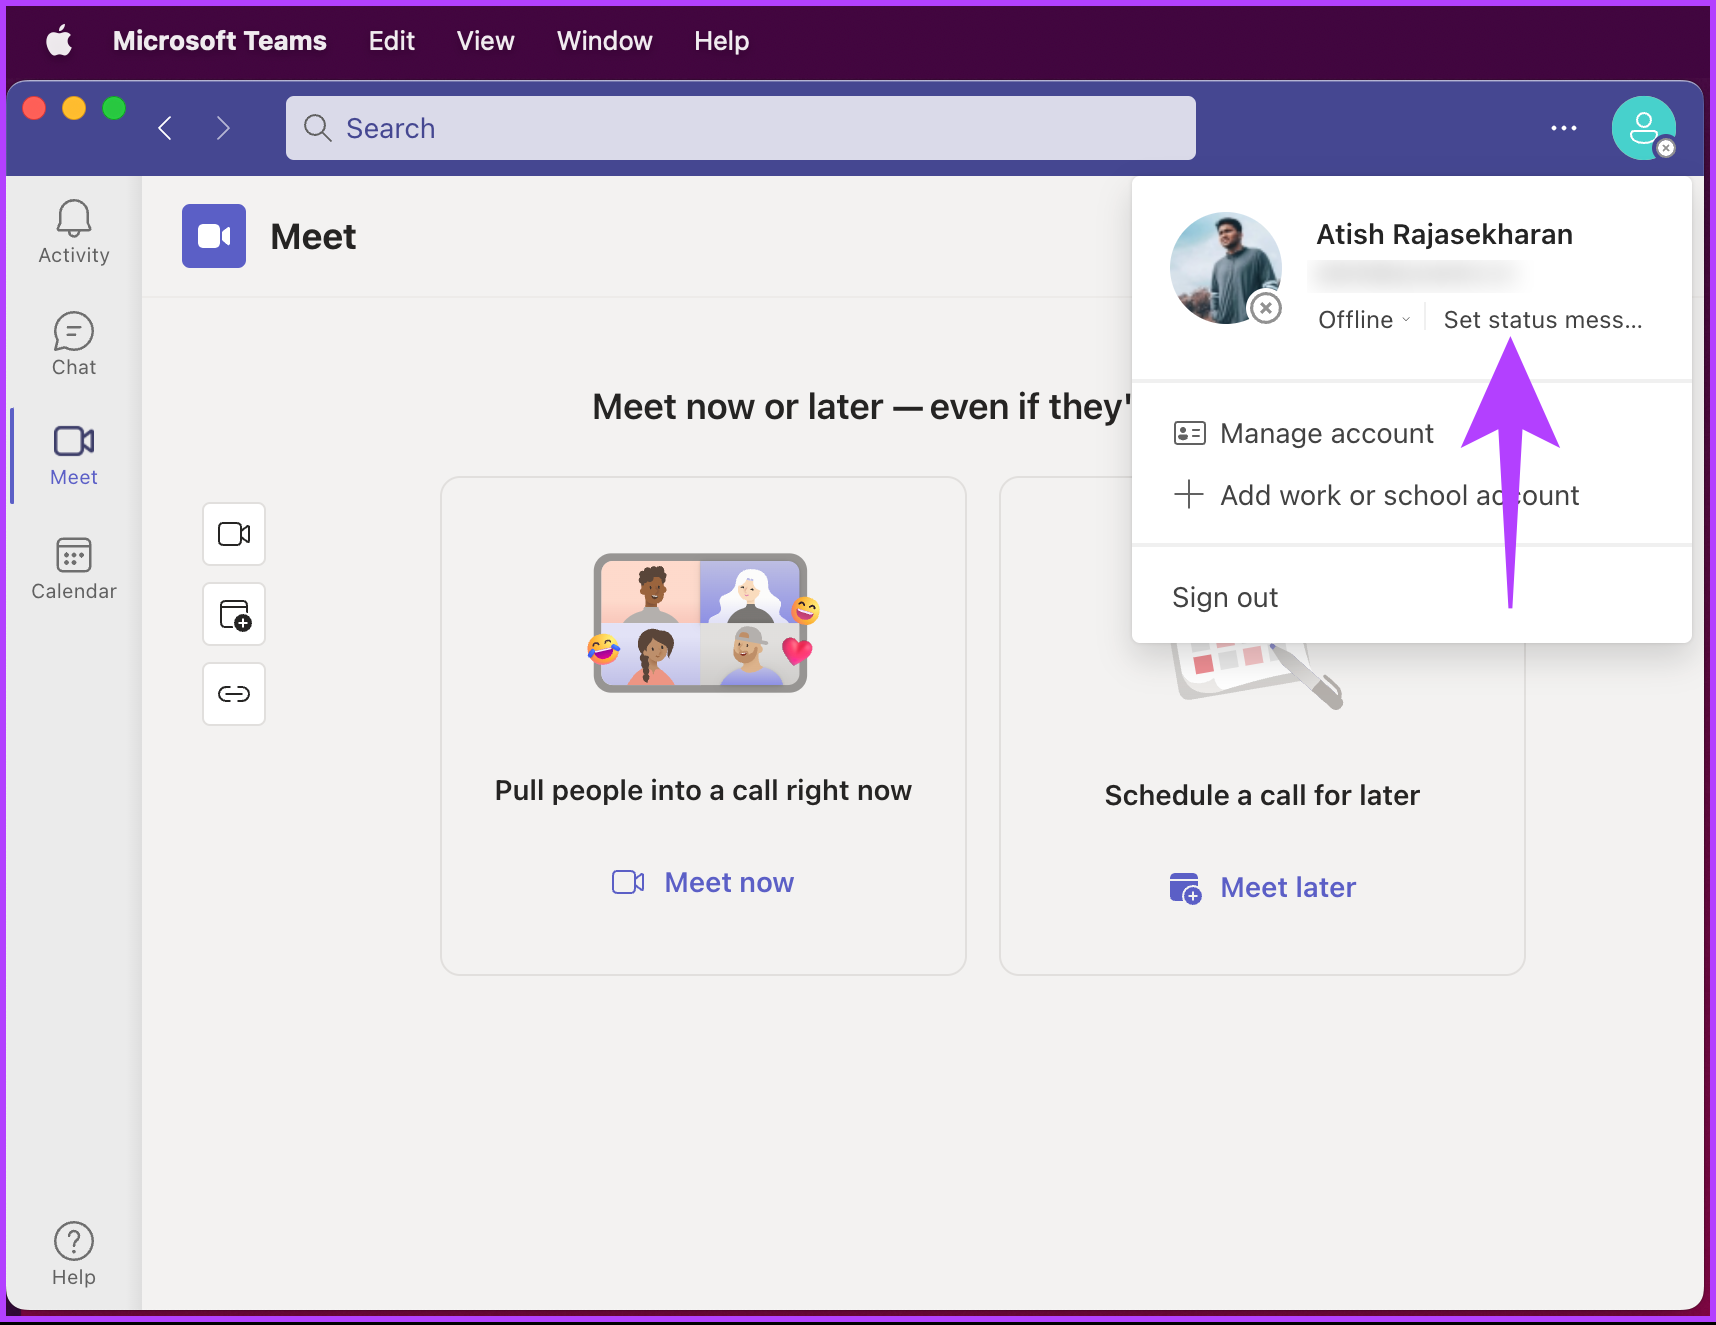
Step 2: Once launched, click on your profile picture at the top right corner.
Step 3: Click on the Set status message.
Step 4: Type the note, then tick the box Show when people message me.

Step 5: Under Clear status message after, set the message’s duration to appear.

Step 6: Finally, click Done.
There you have it. A status message will appear when a message is delivered to you, and the user can also see the message appear on your profile. You can set the same on your Teams mobile app; keep reading.
On Android or iOS
The steps are the same for both Android and iOS. However, for the sake of demonstration, we will go with Android.
Step 1: Launch Teams and tap on your profile picture in the top-left corner.
Step 2: Tap on the Set status message. Type and set your status message on the next screen under the text box.


Step 3: Toggle on the option Show when people message me.
Step 4: Next to the Clear after option, select a time after which you want the message to disappear.

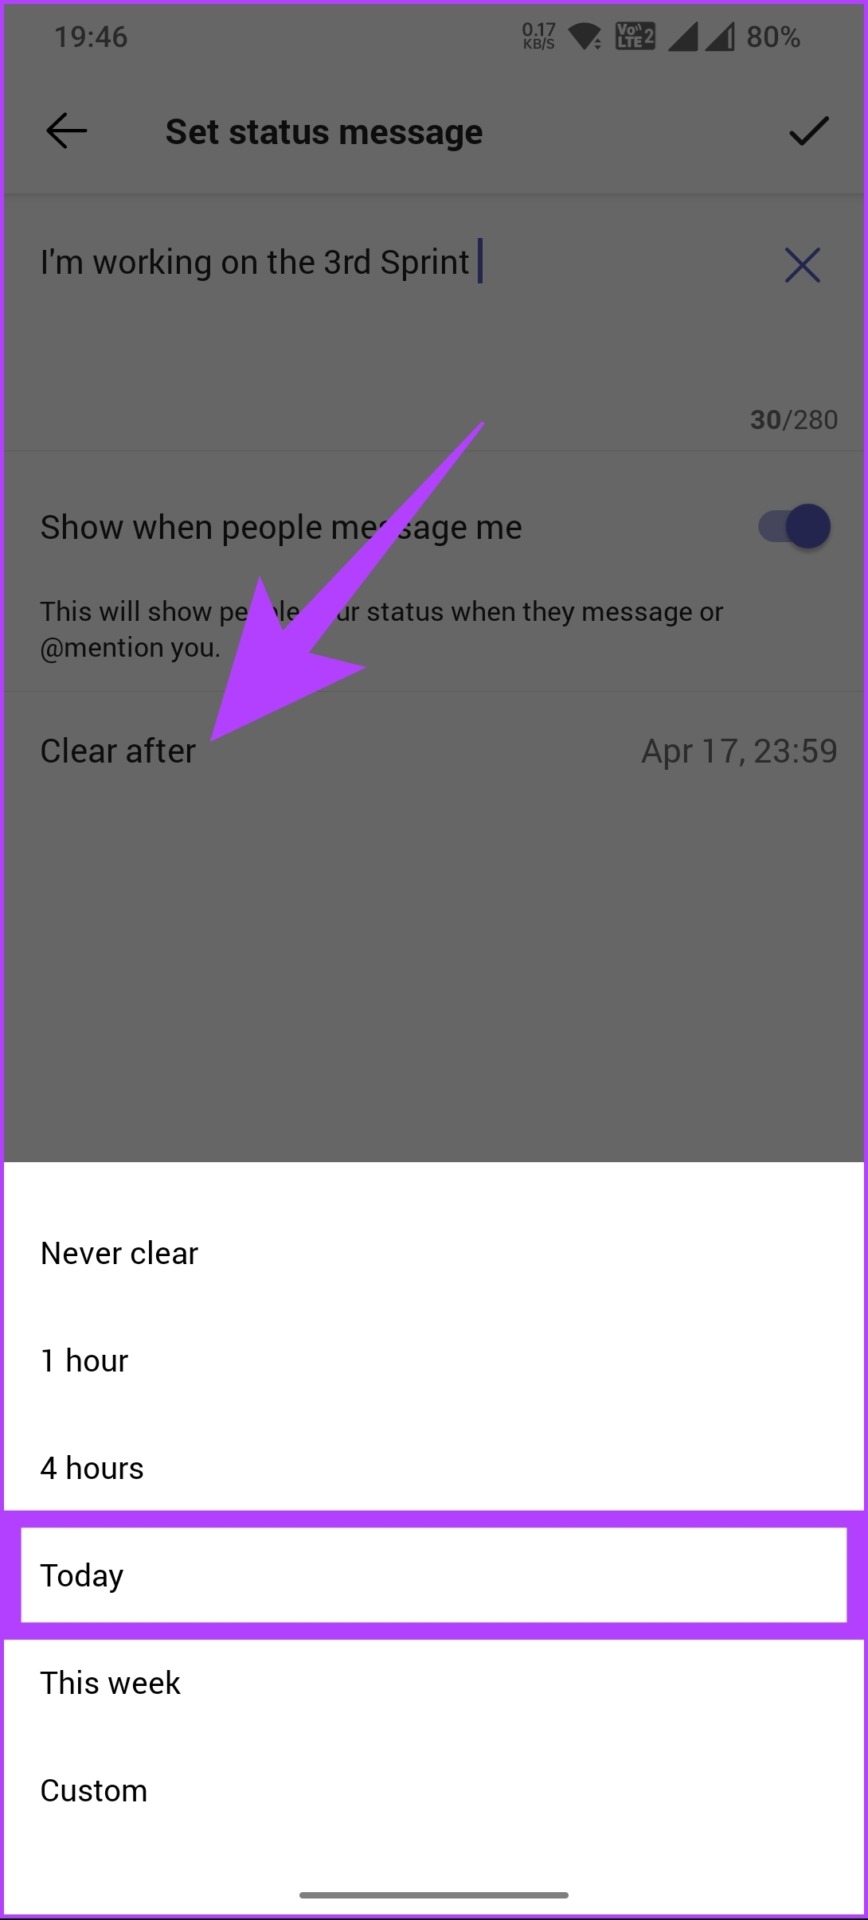
Step 4: Finally, tap the checkmark in the upper right corner.
There you go. You have set your status message on your Teams mobile app.
4. Host a Private Meeting
This is one of the most reliable options in the list of methods mentioned in this article and will allow you to keep your status active on Teams all the time.
On Windows/Mac
Step 1: Open the Microsoft Teams app on your Windows or Mac machine.
Note: For demonstration purposes, we are going with Mac.
Step 2: From the sidebar, go to Meet.
Step 3: Under Meet, click on Meet now or Meet later, depending on your absence.
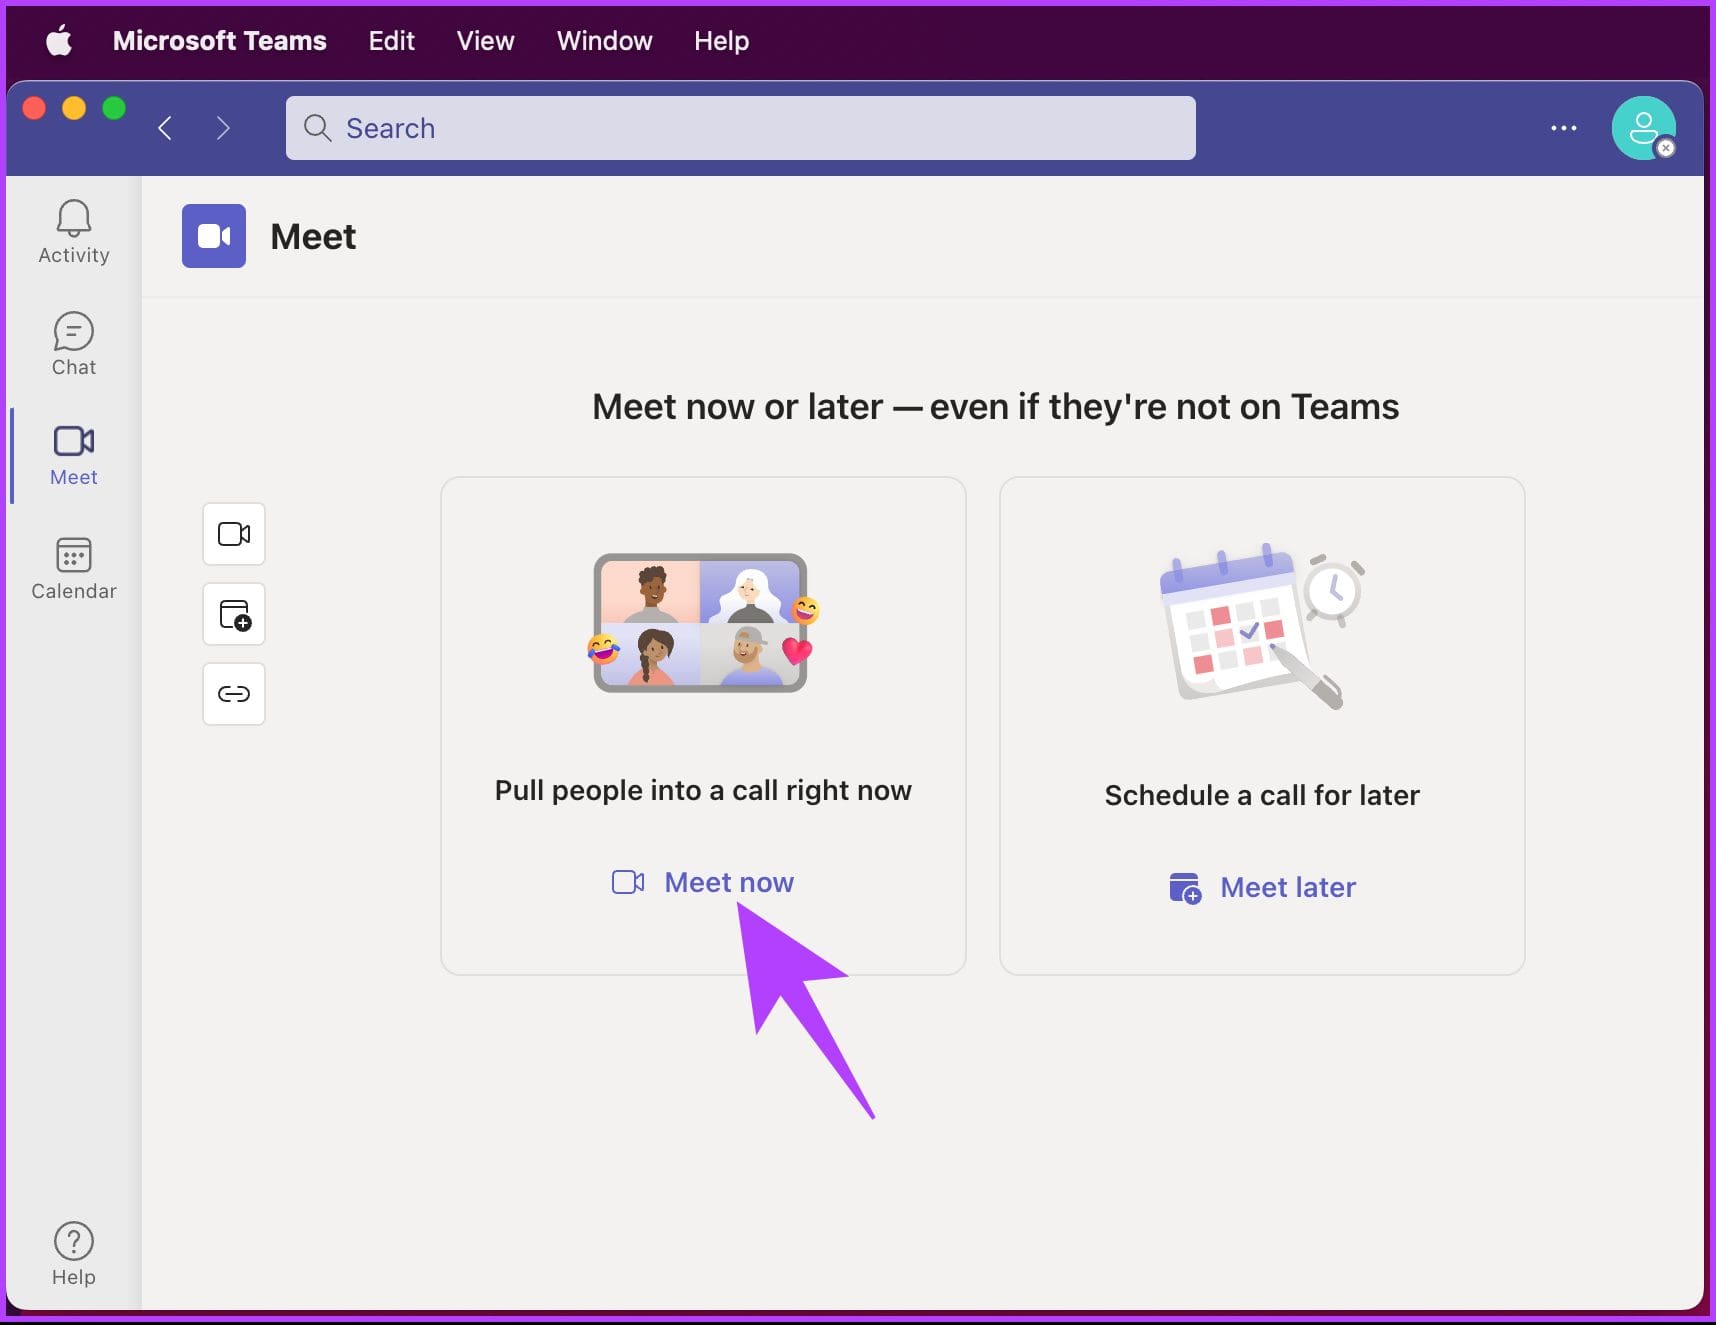
Once the meeting is set, join it, and don’t worry about staying active on Teams. This can also be done using a mobile device; continue reading.
On Android/iOS
Step 1: Launch Teams and tap on your profile picture in the top-left corner.
Step 2: Tap Calendar. In the Calendar screen, select Meet in the top right corner.

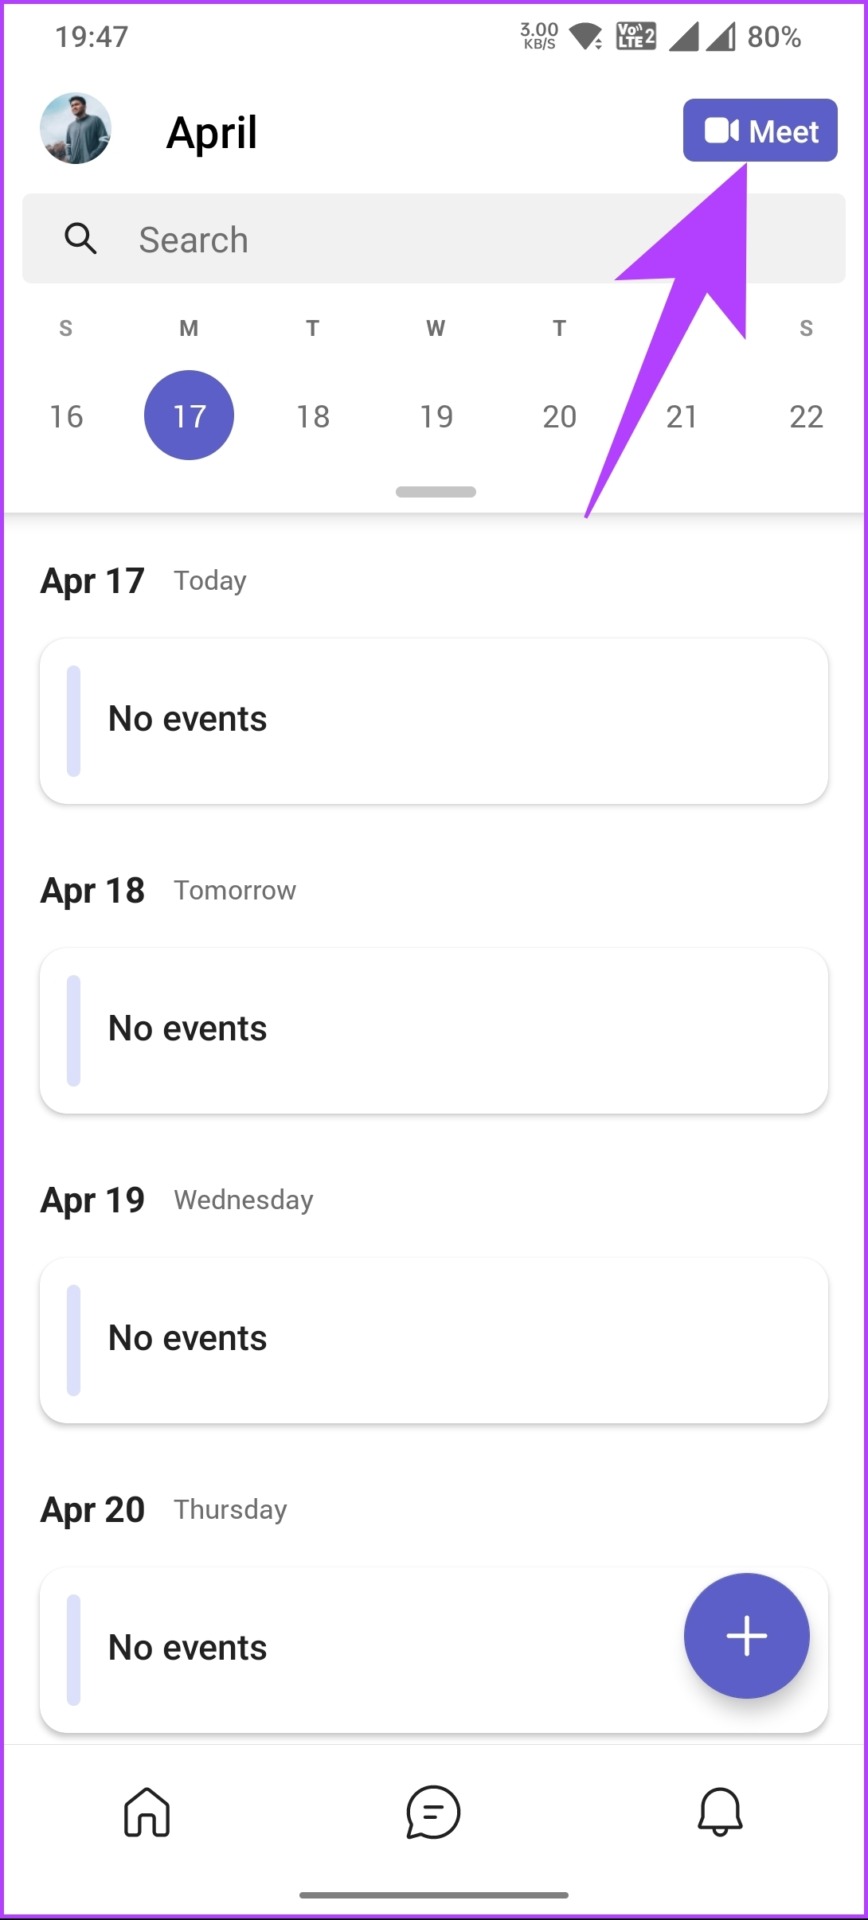
Step 3: Under the Instant meeting bottom sheet, tap Start meeting.
Note: Ensure to set the necessary parameters under Meeting options. Also, use the calendar to schedule the meeting at the time of your unavailability.
There you go. You have efficiently set your availability to stay green even in your absence. If this method is too much for you, the next method should do the job.
5. Use a Mouse Jiggler
Mouse jiggler applications automatically move your mouse cursor periodically to prevent your computer from falling asleep or locking due to inactivity. While many third-party programs are available, we recommend using Move Mouse for Windows and Jiggler for Mac. They help you stay active and ensure that your status is not set to inactive or away.
If we have missed addressing any queries above, check out the FAQ section below.
FAQs on Microsoft Teams Status
Teams status changes automatically to yellow after five minutes of inactivity on the computer or the Teams mobile application. However, you can set yellow manually. It will remain yellow until you change it manually or start interacting with the computer or Teams application.
Microsoft Teams allows some administrative tracking and reporting, such as meeting attendance and chat usage for analytics purposes. It’s important to note that any tracking or monitoring should be done in accordance with company policies and privacy laws.
Microsoft Teams’ status is generally accurate but sometimes inaccurate due to technical issues or delays in updating the status. Additionally, there may be delays in synchronizing the status across different devices or platforms.
Knowing how to keep Microsoft Teams status green all the time is essential to ensuring that you and your team are always in sync and working efficiently.
Was this helpful?
Last updated on 11 July, 2024
1 Comment
Leave a Reply
Read Next
 How to Fix Green Cell or Green Line Error in Google Sheets
Google Sheets users are facing an issue where they view a green line after some cells, or the cell carrying a green border.
How to Fix Green Cell or Green Line Error in Google Sheets
Google Sheets users are facing an issue where they view a green line after some cells, or the cell carrying a green border.
 5 Ways to Fix Microsoft Teams Not Showing Status on Windows 11/10
Basic Fixes Sign Back In: Many times, signing out and then signing back in can fix temporary issues, which could be because your account has been logged in for a long
5 Ways to Fix Microsoft Teams Not Showing Status on Windows 11/10
Basic Fixes Sign Back In: Many times, signing out and then signing back in can fix temporary issues, which could be because your account has been logged in for a long
 How to Keep Slack Status Active All the Time
Things to Know Before Setting Your Slack Status Your Slack status stays active as long as you keep using your device.
How to Keep Slack Status Active All the Time
Things to Know Before Setting Your Slack Status Your Slack status stays active as long as you keep using your device.
 What Does It Mean When Messages Turn Green on iPhone
Basic Fixes Add iMessage information for contact: The contact may not have registered with iMessage with their phone number.
What Does It Mean When Messages Turn Green on iPhone
Basic Fixes Add iMessage information for contact: The contact may not have registered with iMessage with their phone number.
 Why Is My iPhone and Android Phone Screen Turning Green and How to Fix It
Your iPhone or Android screen may sometimes turn green after installing a new OS version.
Why Is My iPhone and Android Phone Screen Turning Green and How to Fix It
Your iPhone or Android screen may sometimes turn green after installing a new OS version.
 3 Ways to Fix Microsoft Teams Not Loading or Opening
Basic Fixes Check for downtime: Servers can be down, as many people worldwide rely on Teams.
3 Ways to Fix Microsoft Teams Not Loading or Opening
Basic Fixes Check for downtime: Servers can be down, as many people worldwide rely on Teams.
 8 Ways to Fix Microsoft Teams Black Screen Issues
Work productivity applications are indispensable in the post-COVID era.
8 Ways to Fix Microsoft Teams Black Screen Issues
Work productivity applications are indispensable in the post-COVID era.
The article above may contain affiliate links which help support Guiding Tech. The content remains unbiased and authentic and will never affect our editorial integrity.

this is stupid, terrible post