How do you identify your Windows 10 computer for connecting to it over a network? By its name. The device name is how you can identify and connect to via Bluetooth or Wi-Fi. That’s why having an easy to identify computer name is very important. But, default names assigned by Windows sound odd and are hard to remember. So let’s figure out how to change your computer’s name in Windows 10.
There are a few ways to change your computer’s name and we will discuss all of them below.
For clarity, the computer name is the overall hardware system (desktop or laptop) name and it is not the same as your user account name. Some Windows 10 users get confused between the two.
On your Windows-based laptop, you can then create more than one user account on the same computer (one for each family member) and give it different names. Thus, one computer can have multiple user accounts. However, the name of your Windows computer will appear the same no matter which user account you access it from. That said, if you want to change computer name only, we shall tell you how. Read on.
Choosing Computer Name
There are certain naming convention rules prescribed by Microsoft that you need to keep in mind before giving your computer a new name. You are free to use alphabets (a-z) and numbers (0-9) but no special characters. The hyphen (-) is allowed though. The minimum character length is 1 and the maximum is 15. You should also note that Microsoft has reserved select words and you can’t use them.
Note: Changing the name of your computer will not change the pathway of your user profile folder if that’s the reason you are doing it. For example, C:\Users\old-name will still remain the same. That’s because that is a username and not the device or computer name.
1. Windows Settings
This is where you will find all the settings that you can use to change, configure, and customize for your Windows 10 computer.
Step 1: Press Windows key+I to open Settings and go to System > About. Click on Rename this PC button.

Step 2: A blue-screen pop-up will reveal itself where you will enter the new computer name. You will be notified of the current name too.

Step 3: Click on Next and enter the admin account password if asked for. You will have to reboot your computer once for the changes to take effect.
2. Windows System Properties
There’s another old-school style of way of changing your computer’s name.
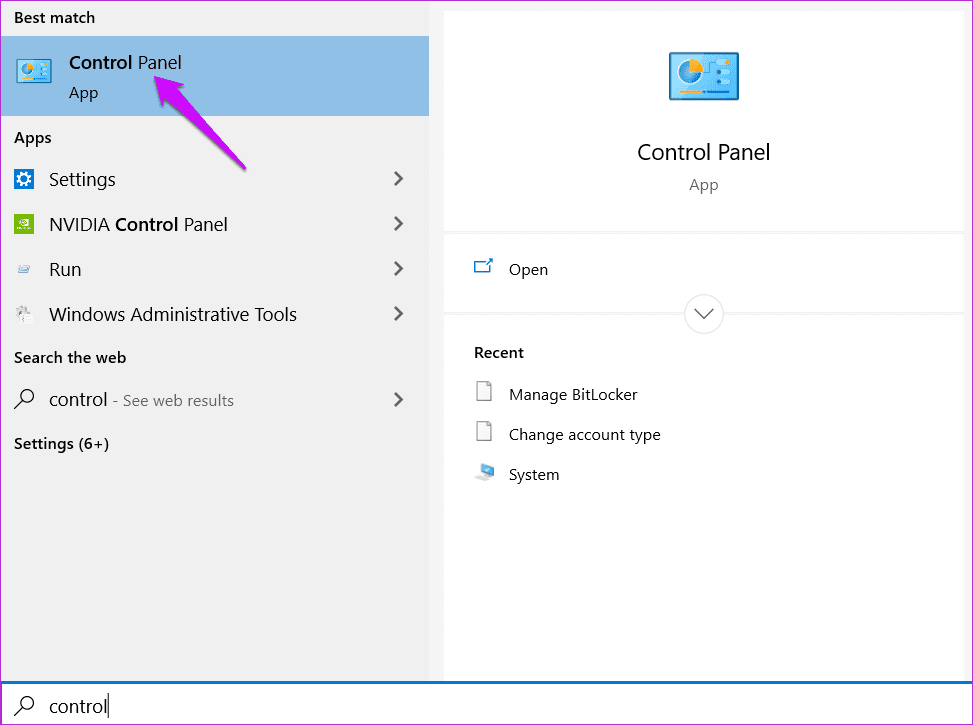
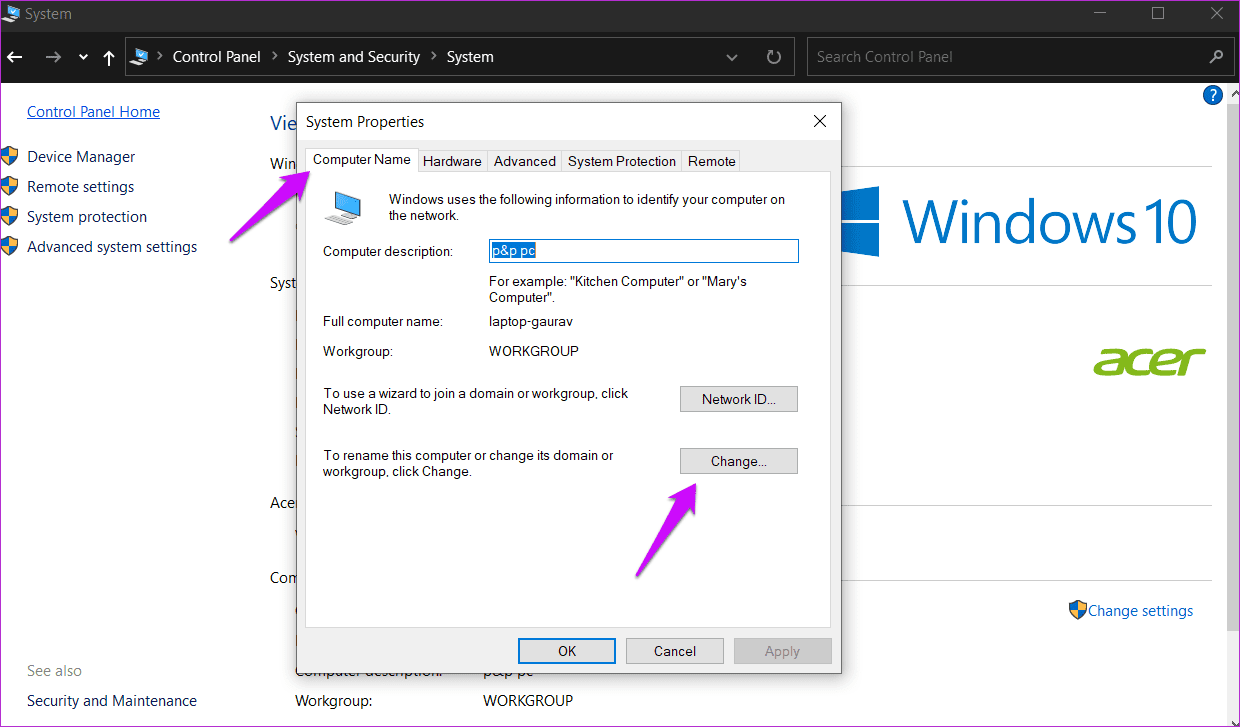
Step 1: Search for Control Panel in the Start menu and open it.
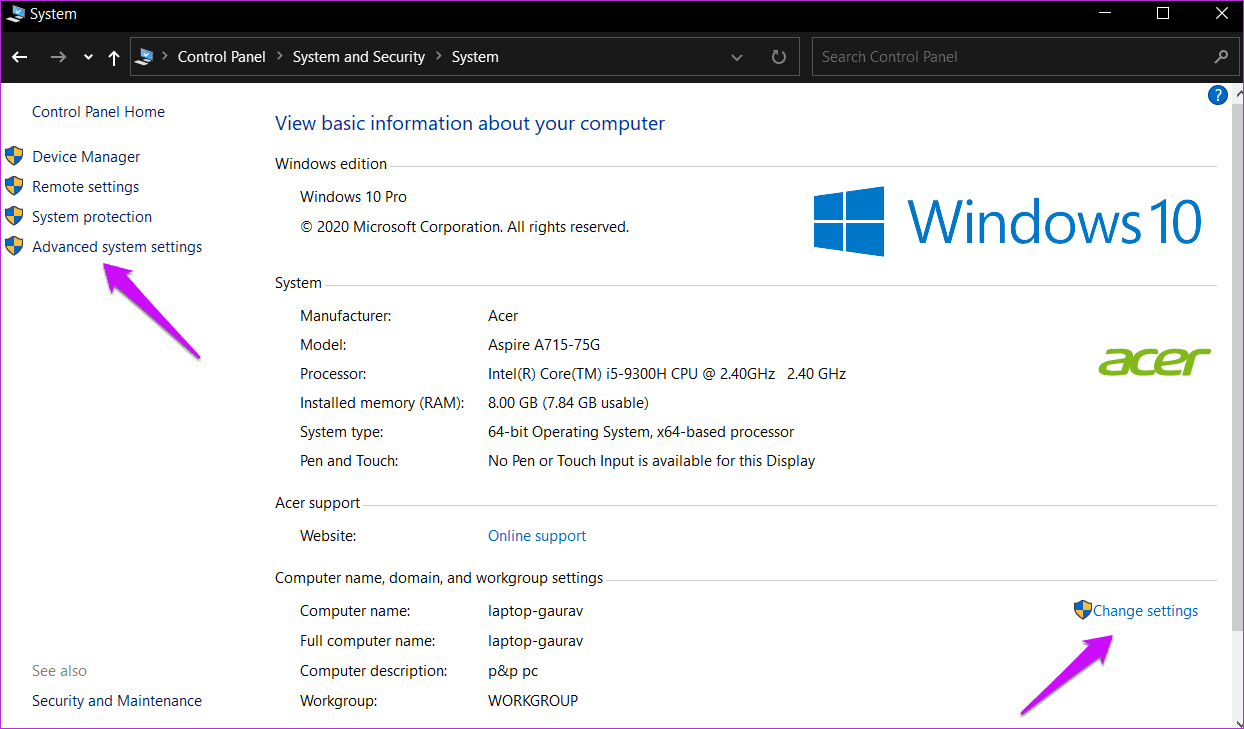
Step 2: Go to System and Security > System > Advanced system settings (left sidebar) and click on Change settings.
Step 3: Click on the Change button under the Computer Name tab in the pop-up that follows.
Step 4: You will enter your desired computer name in the provided box.
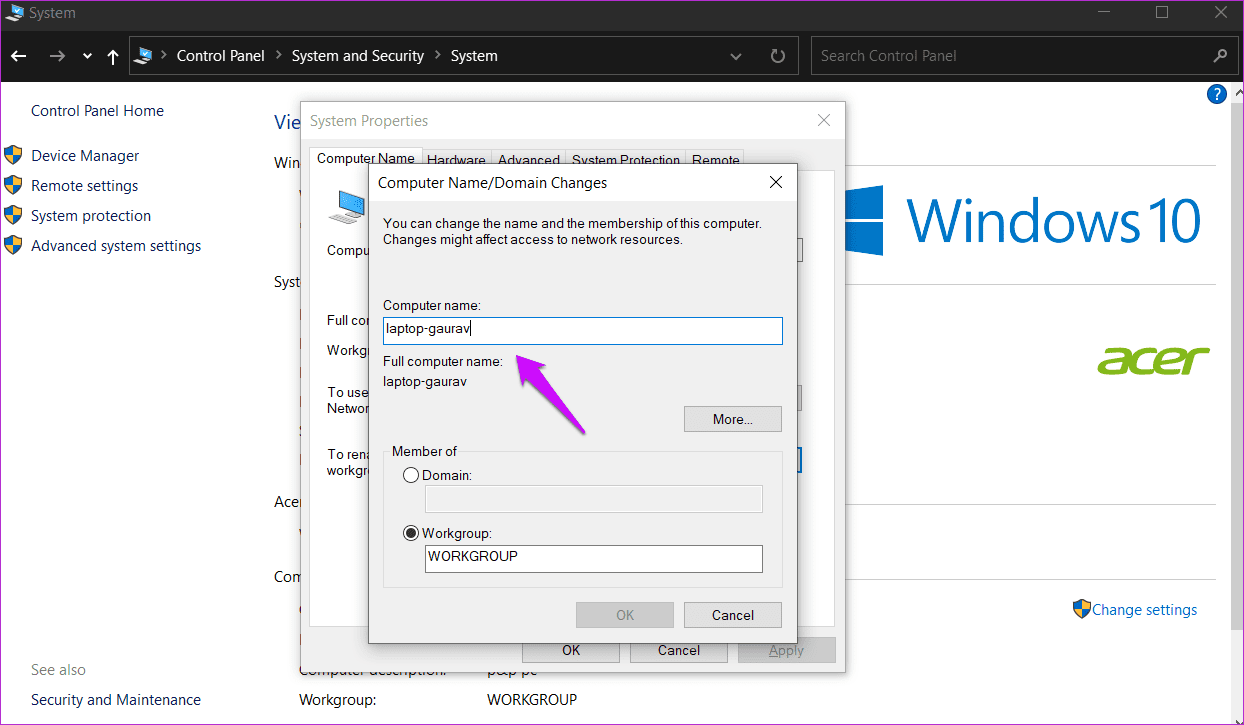
Save changes and reboot your computer.
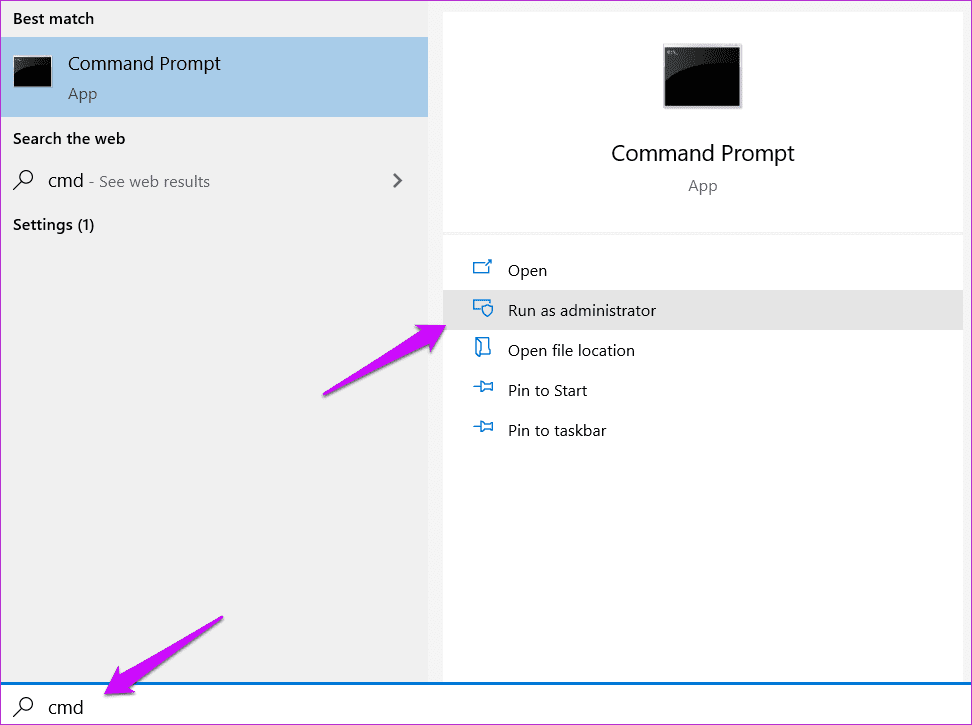
3. Command Prompt (CMD)
This method is purely for the power users who like using the Command Line Interface (CLI). If you aren’t comfortable using the command prompt, feel free to skip this trick.
Step 1: Search for CMD in the Start menu and click on Run as administrator to open it with admin rights.
Step 2: Give the command below and hit Enter to execute it. Don’t forget to replace the “Computer-Name” text with the name you want to give your computer.
wmic computersystem where name="%computername%" call rename name="Computer-Name"
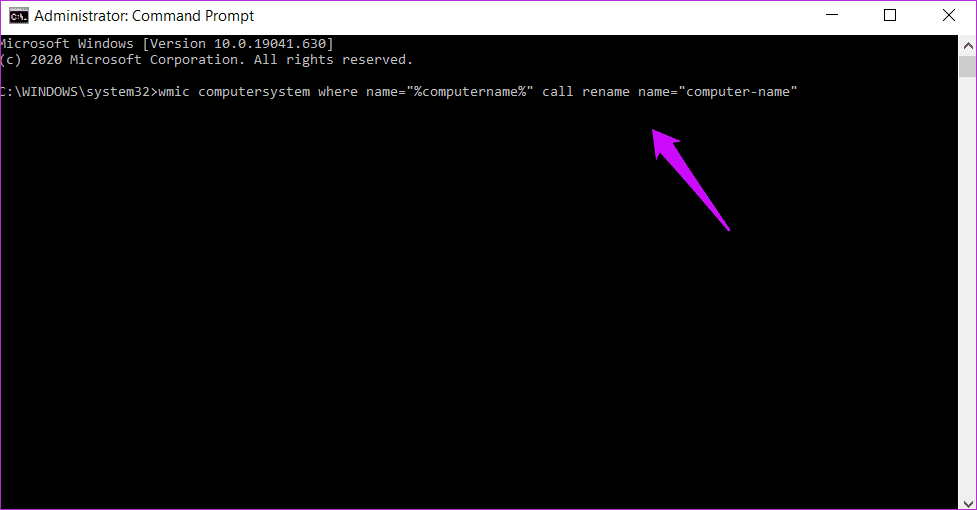
Wait for the command to run its course and then reboot your computer once to implement the changes.
4. PowerShell
PowerShell is the advanced version of the Command Prompt and is set to replace it sometime in the future. Better get used to it now.
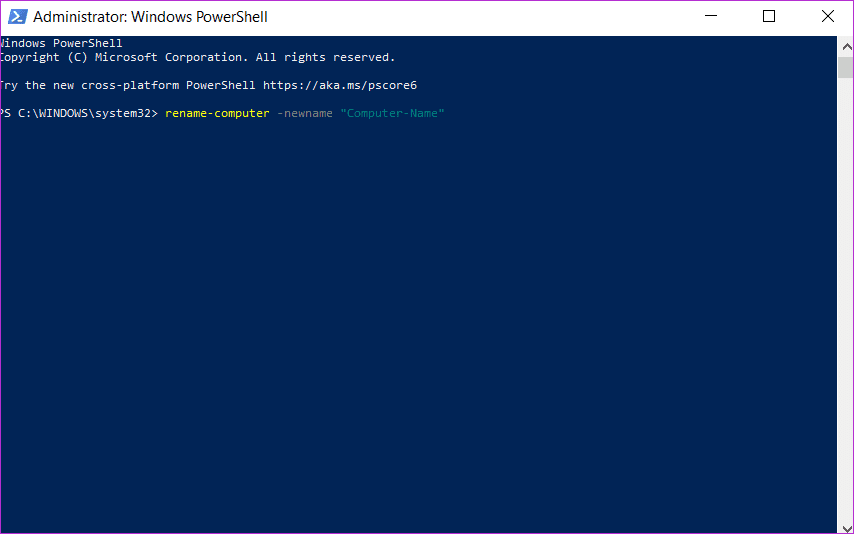
Step 1: Search for PowerShell in the Start menu and open with admin rights. You can also use the shortcut Windows key+X to open a hidden menu.
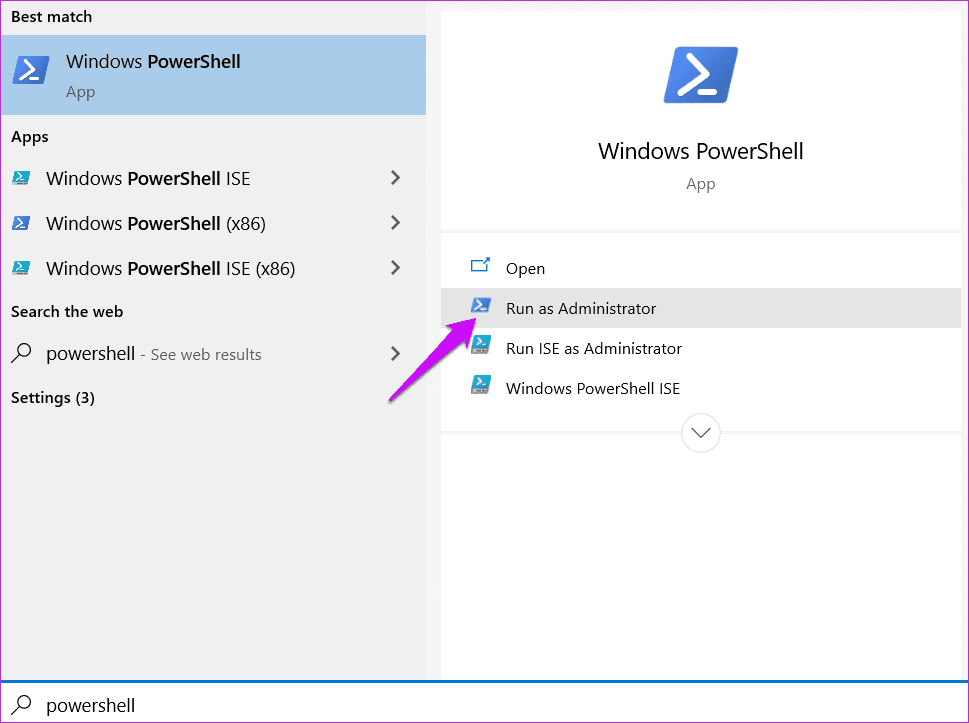
Step 2: Type the command below and press Enter. Replace the last part “Computer-Name” with the name you want to give your computer.
Rename-Computer -NewName "Computer-Name"
Restart your computer. That’s it.
Say My Name
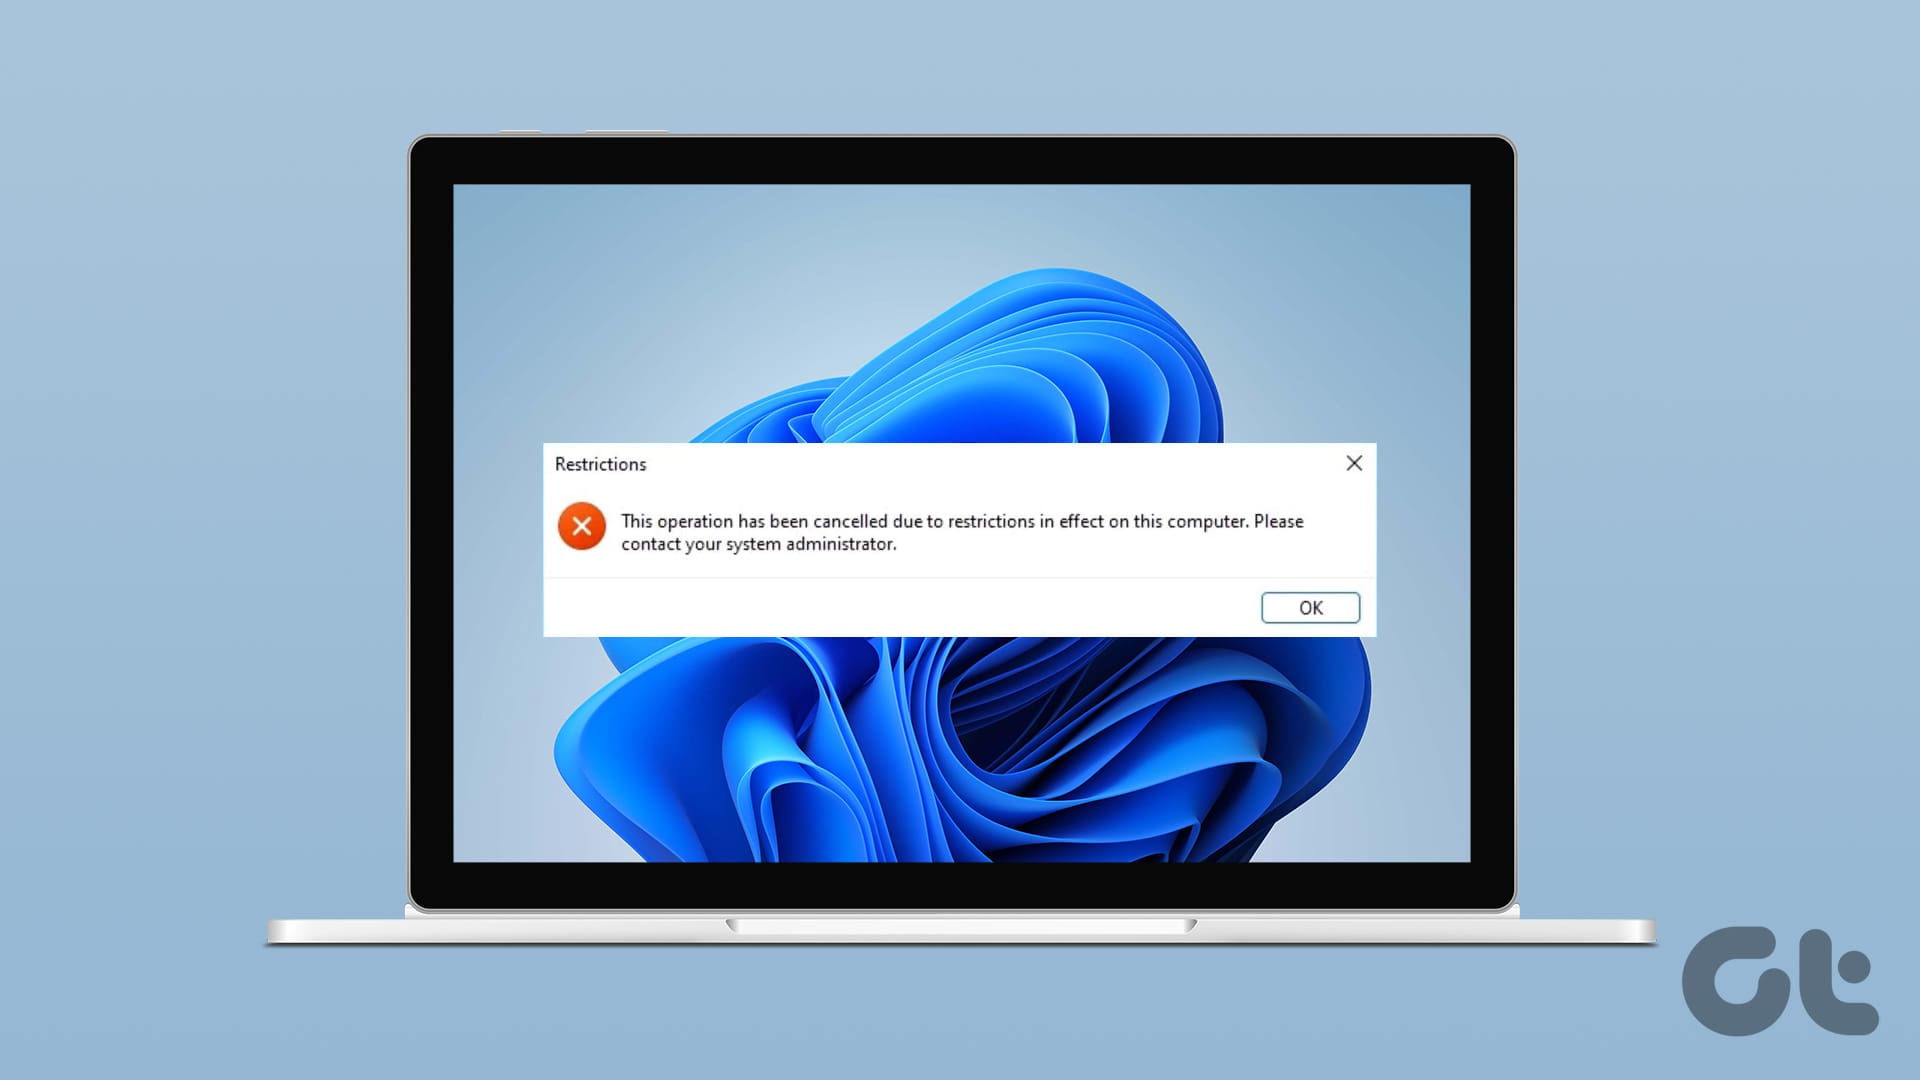
Now that you know different ways to name your Windows 10 computer, you should assign a name to it. I wouldn’t say the same for an enterprise computer because they are connected to a system and have multiple admin-level apps installed that rely on the name of the computer to function correctly. Even more importantly, the IT admin may have restricted you from making such changes. Best if you send him/her an email.
Earlier versions of Windows asked users to choose a name at the time of Windows OS installation, but that is no longer the case with Windows 10. Note that changing the computer name in Windows 10 may require you to reconnect Bluetooth devices like TWS and Wi-Fi, but that’s it. Not a big deal and should not take more than a few moments. You can do it as you use them along the way.
You can use any one of the tricks mentioned above, and if it doesn’t work for you, then there’s always another one on the list.
Next up: Still can’t change the computer name? Getting the ‘computer name is invalid’ error? Click on the link below to learn how to fix it.
Was this helpful?
Last updated on 13 July, 2021
Read Next
 5 Ways to Fix “Your Computer Is Low on Memory” Error on Windows 10 and Windows 11
Try Basic Fixes Close unwanted apps and programs: Start by closing any unwanted apps and programs on your computer, especially the ones consuming a major chunk of your PC’s memory.
5 Ways to Fix “Your Computer Is Low on Memory” Error on Windows 10 and Windows 11
Try Basic Fixes Close unwanted apps and programs: Start by closing any unwanted apps and programs on your computer, especially the ones consuming a major chunk of your PC’s memory.
 5 Ways to Fix Computer Turns on but No Display on Windows 11
Basic Fixes: Ensure the monitor is turned on: If you're using an external monitor or if your laptop's monitor has an external power switch, ensure it is turned on before
5 Ways to Fix Computer Turns on but No Display on Windows 11
Basic Fixes: Ensure the monitor is turned on: If you're using an external monitor or if your laptop's monitor has an external power switch, ensure it is turned on before
 Top 9 Ways to Fix Windows 11 Computer Not Recognizing Headphones
Connecting your favorite pair of headphones allows you to isolate yourself from the surrounding noise and lets you focus on the task at hand.
Top 9 Ways to Fix Windows 11 Computer Not Recognizing Headphones
Connecting your favorite pair of headphones allows you to isolate yourself from the surrounding noise and lets you focus on the task at hand.
 7 Ways to Fix Undoing Changes Made to Your Computer in Windows 11
Fix 1: Boot Your PC Into Safe Mode If Windows becomes stuck on the undoing changes screen, you will first have to boot your PC into Safe Mode to troubleshoot
7 Ways to Fix Undoing Changes Made to Your Computer in Windows 11
Fix 1: Boot Your PC Into Safe Mode If Windows becomes stuck on the undoing changes screen, you will first have to boot your PC into Safe Mode to troubleshoot
 2 Ways to Open Computer Management on Windows 11
Method 1: Open Computer Management From Control Panel You can easily access Computer Management through the Control Panel.
2 Ways to Open Computer Management on Windows 11
Method 1: Open Computer Management From Control Panel You can easily access Computer Management through the Control Panel.
 5 Ways to Fix Discord Keeps Crashing on Windows Computer
https://youtu.be/_uU0Ob5vTWM Try Basic Fixes End Discord processes using Task Manager: Press Ctrl + Shift + Esc keys to open Task Manager.
5 Ways to Fix Discord Keeps Crashing on Windows Computer
https://youtu.be/_uU0Ob5vTWM Try Basic Fixes End Discord processes using Task Manager: Press Ctrl + Shift + Esc keys to open Task Manager.
 6 Ways to Find the Name of Computer on Windows 11 and 10
Have you ever had to identify your Windows computer for networking or system management purposes?
6 Ways to Find the Name of Computer on Windows 11 and 10
Have you ever had to identify your Windows computer for networking or system management purposes?
 6 Ways to Fix Buzzing Sound From Computer or Laptop Speakers
Fix 1.
6 Ways to Fix Buzzing Sound From Computer or Laptop Speakers
Fix 1.
The article above may contain affiliate links which help support Guiding Tech. The content remains unbiased and authentic and will never affect our editorial integrity.