Fix 1: Boot Your PC Into Safe Mode
If Windows becomes stuck on the undoing changes screen, you will first have to boot your PC into Safe Mode to troubleshoot the issue. To do so, use these steps:
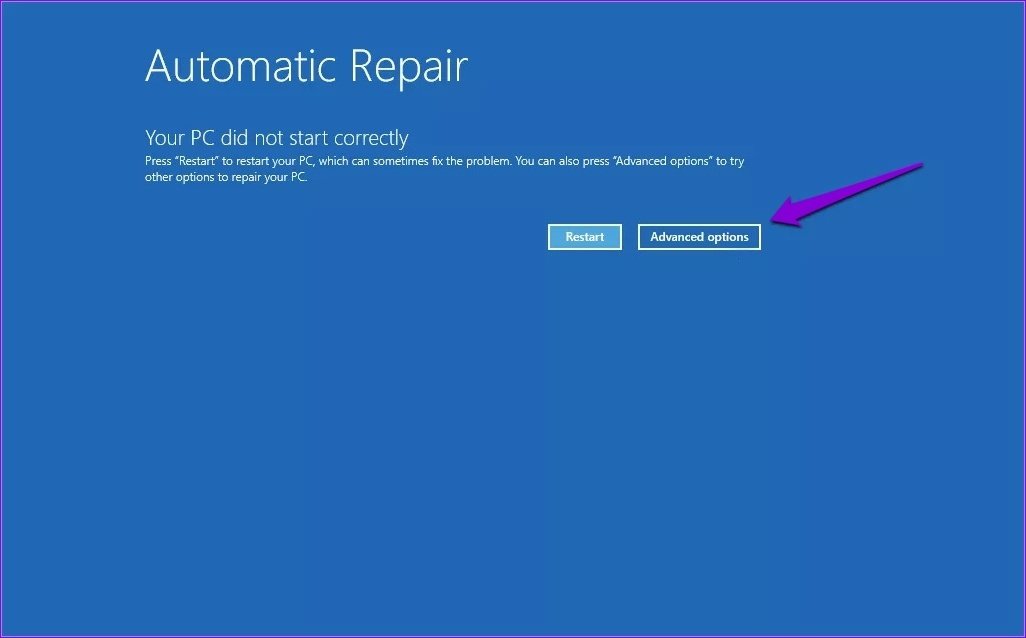
Step 1: While your PC is booting, press and hold the physical power button until it restarts. Repeat this to interrupt the boot process three consecutive times. On the fourth occasion, Windows will greet you with the “Automatic Repair” screen. Click on Advanced options to proceed.
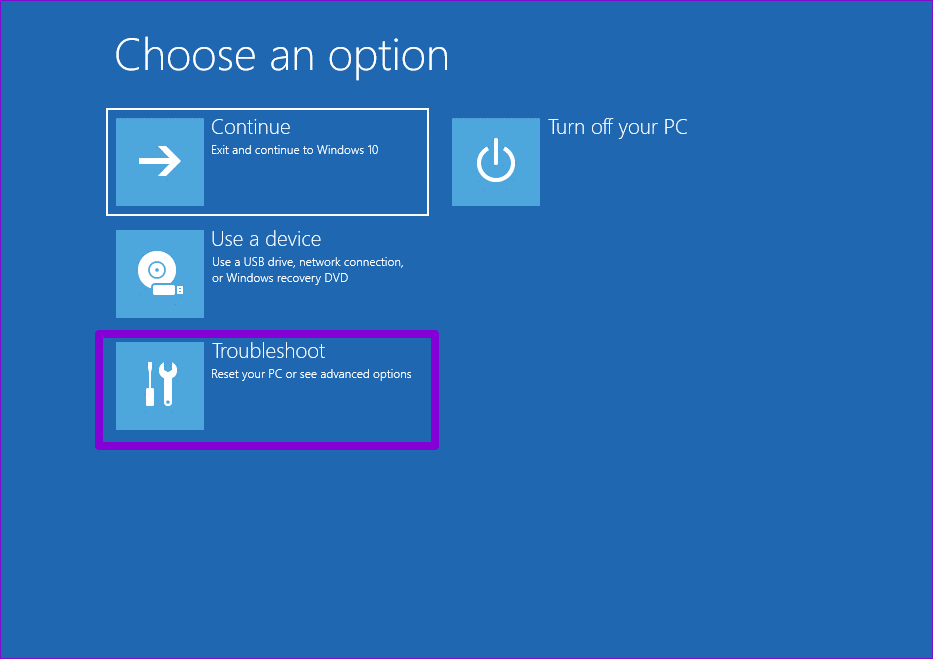
Step 2: Under Choose an option, select Troubleshoot.
Step 3: Go to Advanced options > Startup Settings.
Step 4: Click the Restart button to enter the Startup Settings menu.
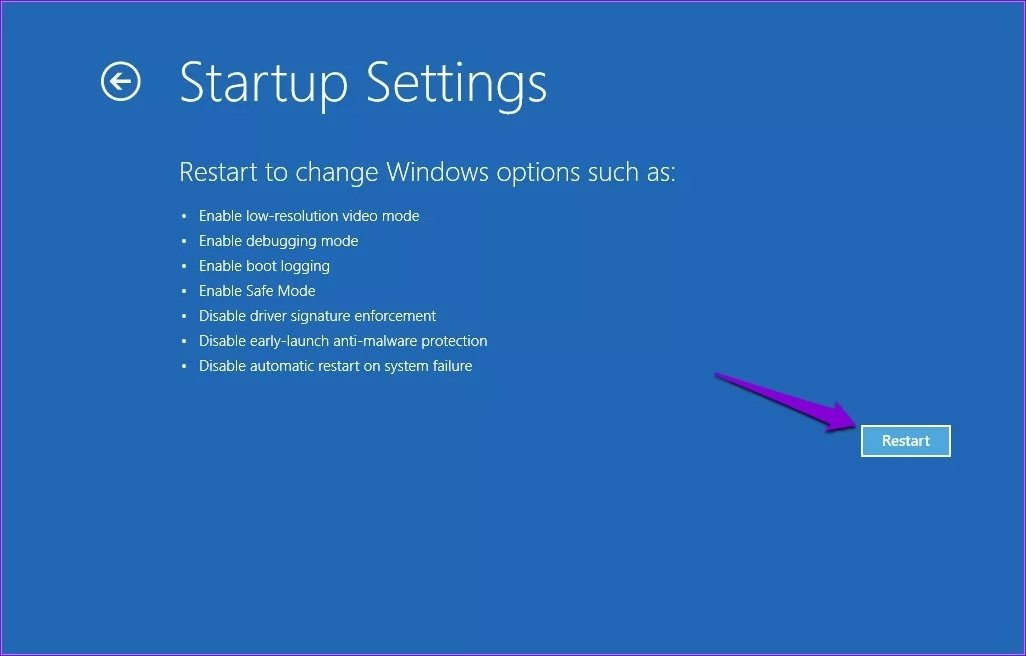
Step 5: Press 4 or F4 on your keyboard to restart your PC in Safe Mode.

Fix 2: Run Windows Update Troubleshooter
Since the “Undoing changes made to your computer” message appears during the installation of an update, you should consider running the Windows Update troubleshooter. Here’s how to do t.
Step 1: Click the search icon on the taskbar, type in troubleshooter settings, and press Enter.
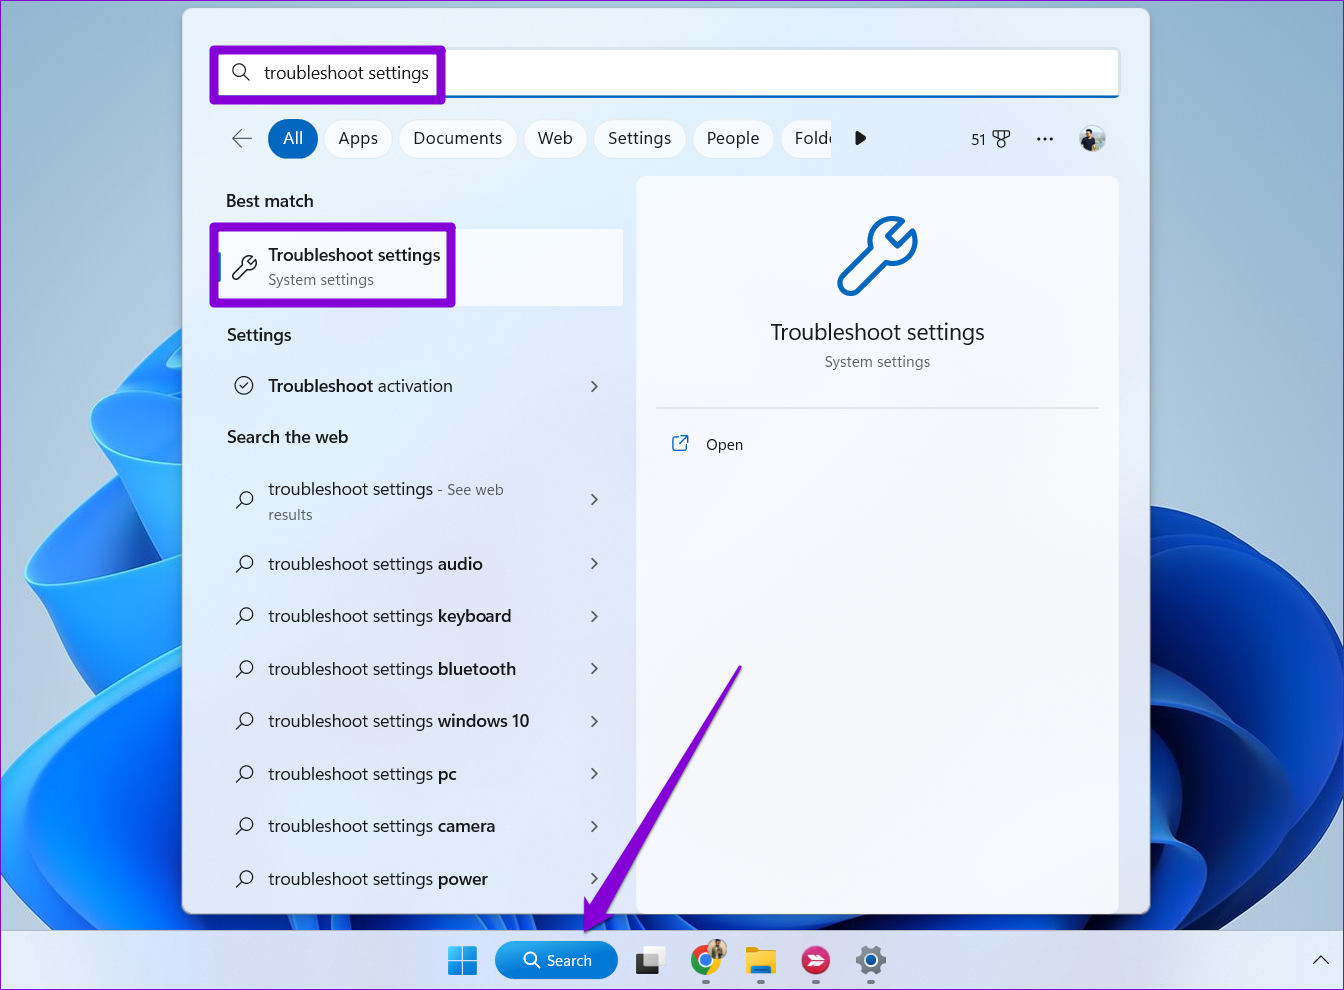
Step 2: Select Other troubleshooters.
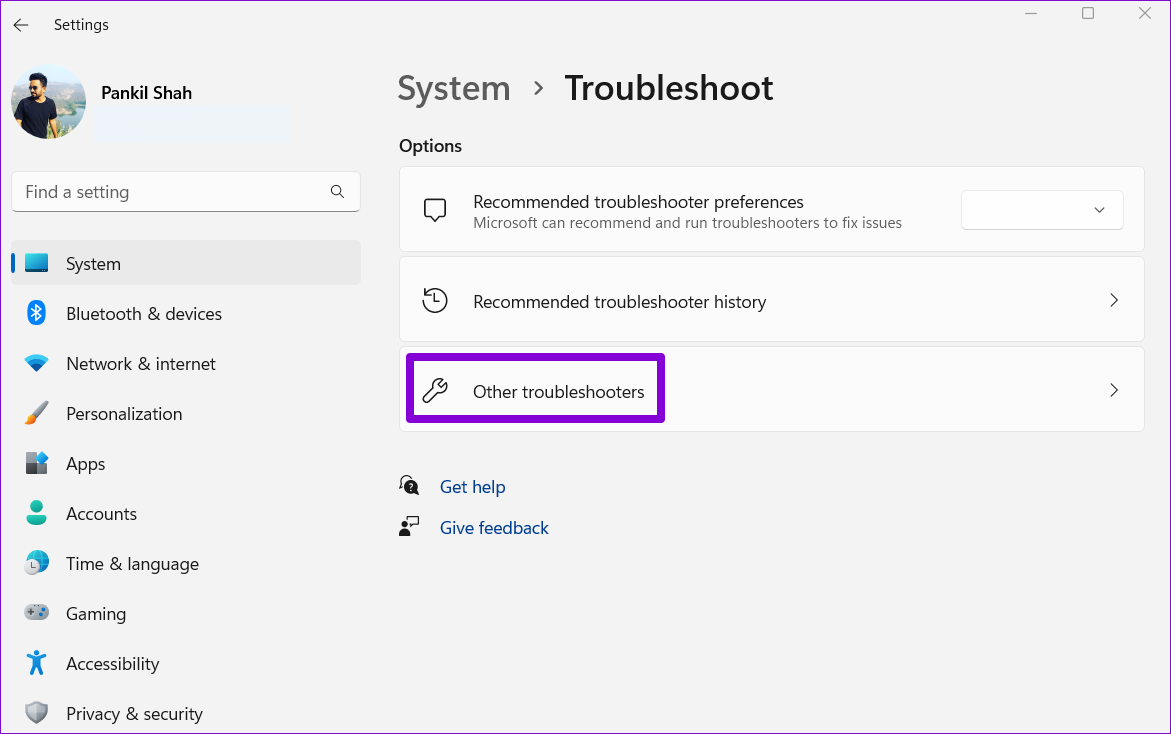
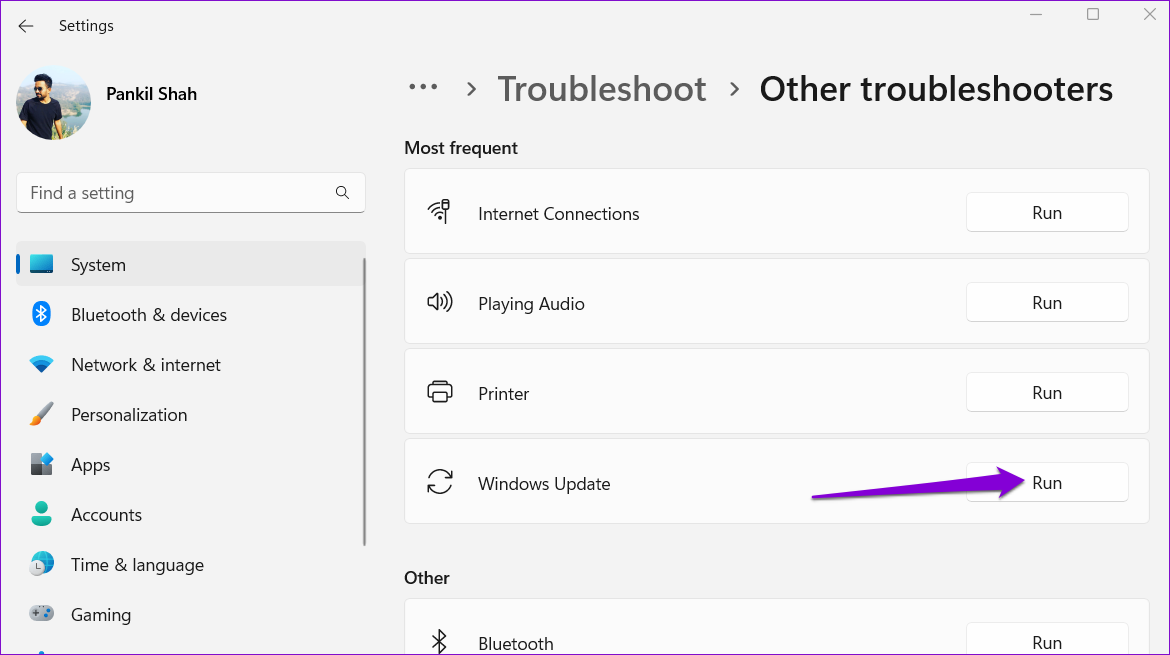
Step 3: Click the Run button next to Windows Update and follow the on-screen prompts to run the tool.
Fix 3: Uninstall Recent Updates
It’s possible that a recently installed Windows update is causing your PC to become stuck on the “Attempting to recover installation. Undoing changes made to your computer” screen. If that’s the case, uninstalling the problematic update should solve your problem.
Step 1: Press the Windows key + I to open the Settings app. Switch to the Windows Update tab and click on Update history.
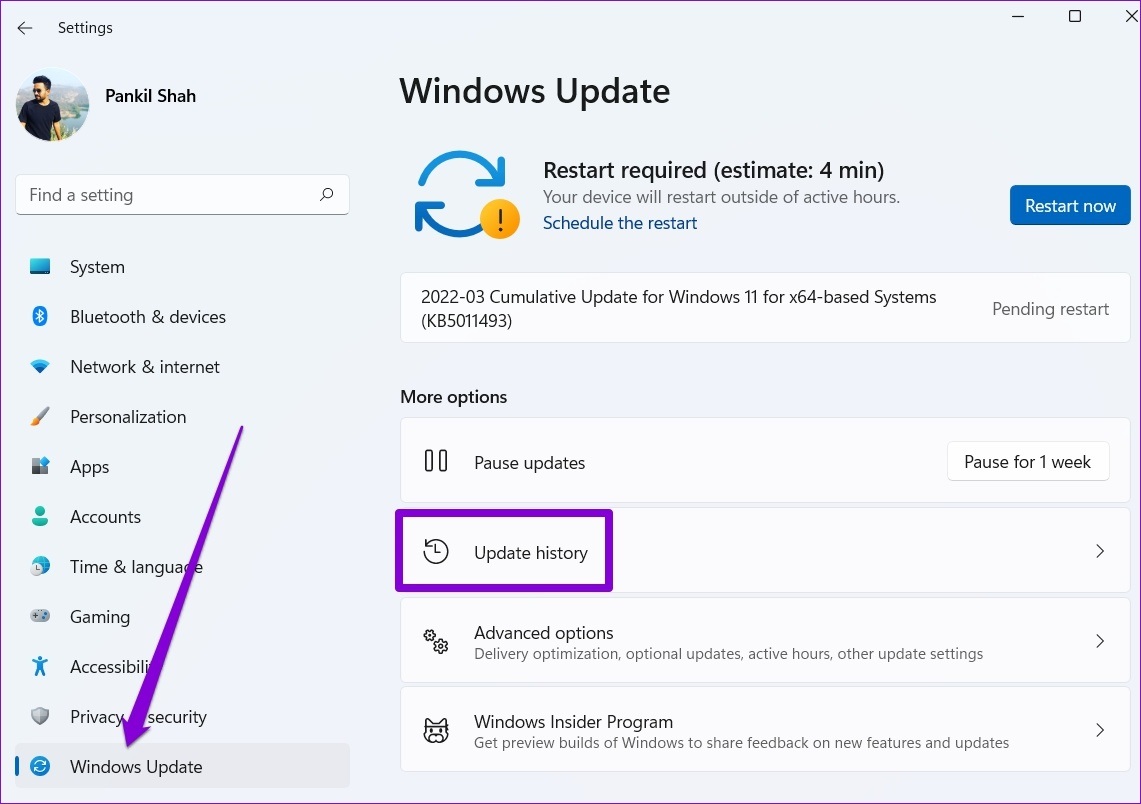
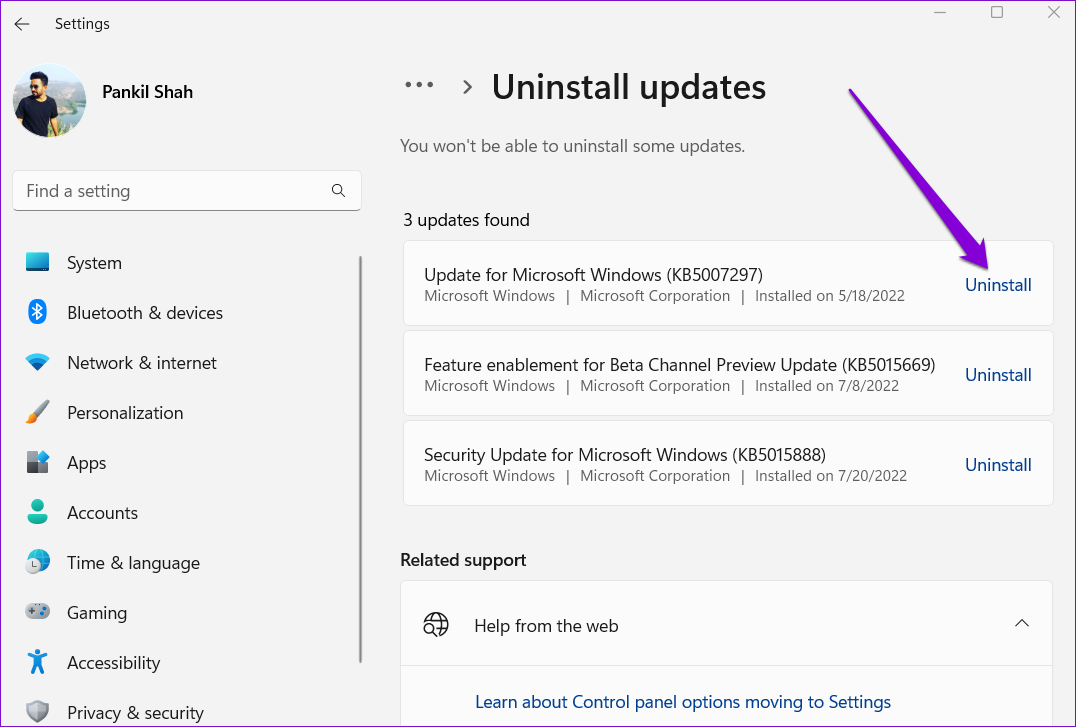
Step 2: Under Related settings, click on Uninstall updates.

Step 3: Click the Uninstall button next to an update to remove it.
Fix 4: Empty the SoftwareDistribution Folder
Windows stores all the update files in the “SoftwareDistribution” folder before installing them. If Windows can’t fetch these files for some reason, the update won’t go through, and you’ll be greeted with “We couldn’t complete the updates. Undoing changes” error message.
To fix this, you will need to empty the SoftwareDistribution folder and then download the update again.
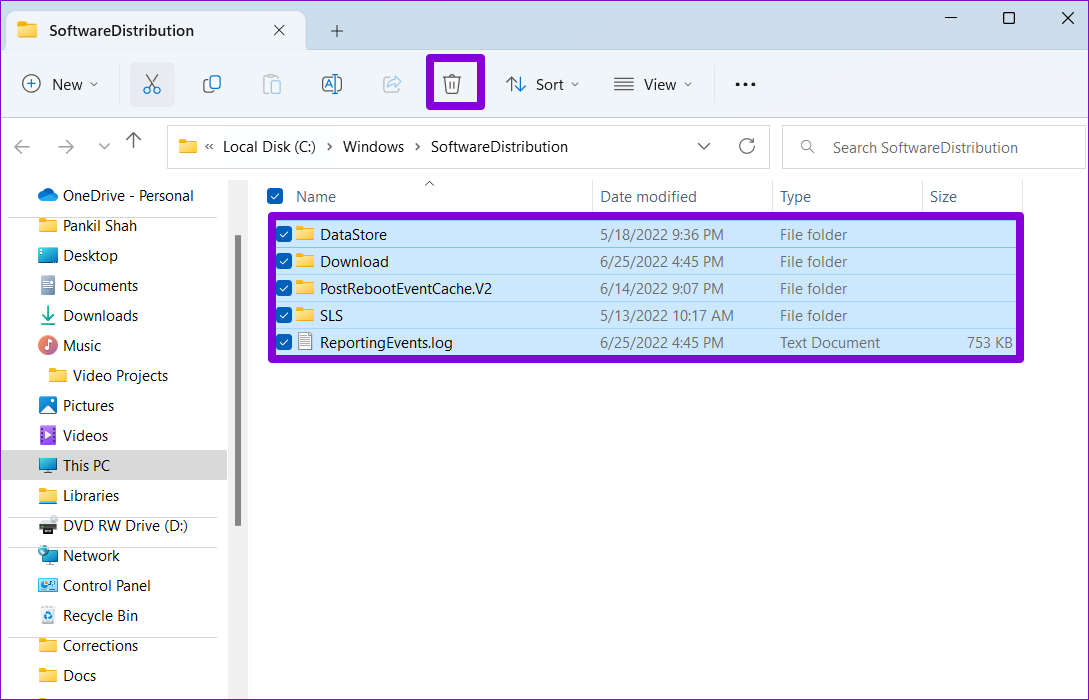
Step 1: Press the Windows + R keyboard shortcut to launch the Run dialog box. Type C:\Windows\SoftwareDistribution in the box and press Enter.
Step 2: Select all the files within the folder and click the trash icon at the top.
Step 3: Press the Windows key + I to open the Settings app. Switch to the Windows Update tab and click Check for updates to download and install pending updates.

Fix 5: Install the Update Manually
If Windows continues to show the “Undoing changes made to your computer” error while installing a specific update, you can try fixing the issue by downloading the update from the Microsoft Update Catalog and installing it manually. Here’s how:
Step 1: Press the Windows key + I to open the Settings app and head over to the Windows Update tab. Make a note of the knowledge base number of the update you want to download, such as KB5015814.

Step 2: Open the Microsoft Update Catalog website in your browser.
Step 3: Type the KB number in the search box and press Enter.

Step 4: Download the relevant update pack meant for your system.

Step 5: Double-click the downloaded MSU file and follow the on-screen prompts to complete the installation process.
Fix 6: Run an SFC and DISM Scan
Corrupted or missing system files can also lead to such errors during Windows updates. To fix them, you will have to run the SFC (or System File Checker) and DISM (Deployment Image Servicing and Management) scans using these steps:
Step 1: Right-click on the Start icon and select Terminal (Admin) from the list.

Step 2: Type the command mentioned below and hit Enter.
sfc /scannow

Step 3: Run the following commands one by one and press Enter after each one.
DISM /Online /Cleanup-Image /CheckHealth
DISM /Online /Cleanup-Image /ScanHealth
DISM /Online /Cleanup-Image /RestoreHealth

Fix 7: Perform a System Restore
System Restore is a handy feature that takes a backup of the entire system whenever it detects any major changes. You can use this feature to undo any recent changes made to your PC that may be triggering the “Undoing changes made to your computer” error.
Step 1: Click on the search icon on the taskbar, type in create a restore point and press Enter.

Step 2: Switch to the System Protection tab and click the System Restore button.

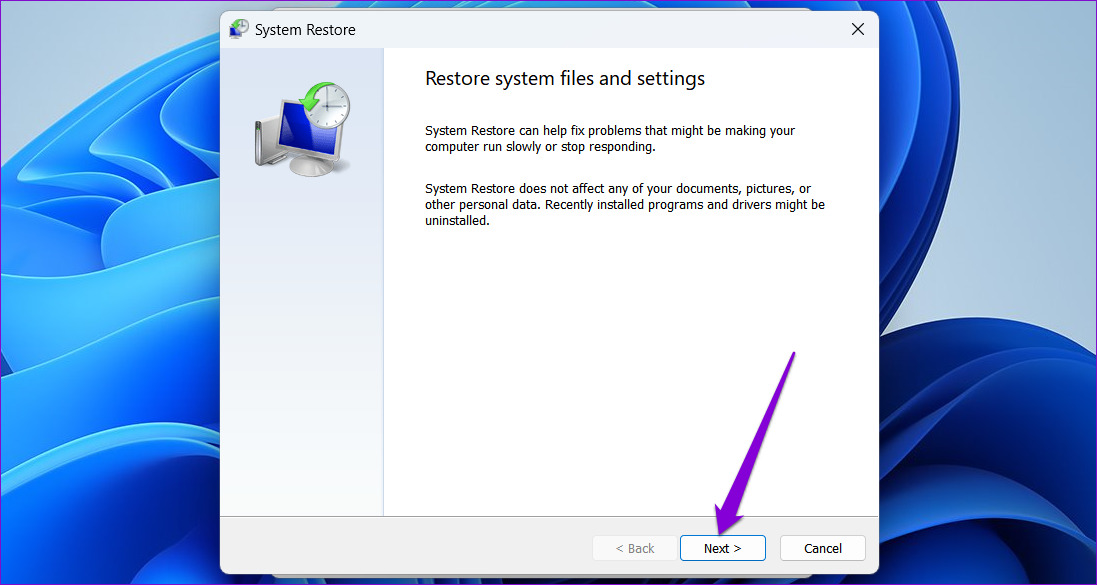
Step 3: Click Next to continue.
Step 4: Select the Recommended restore option and click Next.

Step 5: Click Finish to confirm.
Was this helpful?
Last updated on 22 July, 2024
Read Next
 8 Best Ways to Fix Mouse Sensitivity Changes Randomly on Windows 10
While mice and keyboards help while working with desktop or laptop, the mouse gets finicky sometimes.
8 Best Ways to Fix Mouse Sensitivity Changes Randomly on Windows 10
While mice and keyboards help while working with desktop or laptop, the mouse gets finicky sometimes.
 5 Ways to Fix Microsoft Excel Not Saving Changes on Windows
Fix 1: Repair Files From File Explorer Step 1: Open the Microsoft Excel app on your computer.
5 Ways to Fix Microsoft Excel Not Saving Changes on Windows
Fix 1: Repair Files From File Explorer Step 1: Open the Microsoft Excel app on your computer.
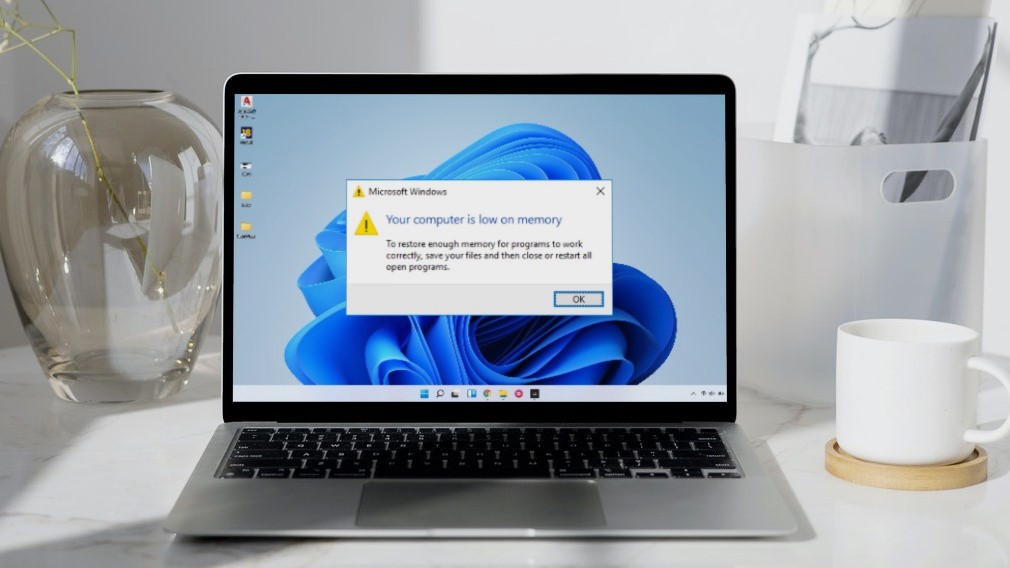 5 Ways to Fix “Your Computer Is Low on Memory” Error on Windows 10 and Windows 11
Try Basic Fixes Close unwanted apps and programs: Start by closing any unwanted apps and programs on your computer, especially the ones consuming a major chunk of your PC’s memory.
5 Ways to Fix “Your Computer Is Low on Memory” Error on Windows 10 and Windows 11
Try Basic Fixes Close unwanted apps and programs: Start by closing any unwanted apps and programs on your computer, especially the ones consuming a major chunk of your PC’s memory.
 5 Ways to Fix Computer Turns on but No Display on Windows 11
Basic Fixes: Ensure the monitor is turned on: If you're using an external monitor or if your laptop's monitor has an external power switch, ensure it is turned on before
5 Ways to Fix Computer Turns on but No Display on Windows 11
Basic Fixes: Ensure the monitor is turned on: If you're using an external monitor or if your laptop's monitor has an external power switch, ensure it is turned on before
 Top 9 Ways to Fix Windows 11 Computer Not Recognizing Headphones
Connecting your favorite pair of headphones allows you to isolate yourself from the surrounding noise and lets you focus on the task at hand.
Top 9 Ways to Fix Windows 11 Computer Not Recognizing Headphones
Connecting your favorite pair of headphones allows you to isolate yourself from the surrounding noise and lets you focus on the task at hand.
 5 Ways to Fix Discord Keeps Crashing on Windows Computer
https://youtu.be/_uU0Ob5vTWM Try Basic Fixes End Discord processes using Task Manager: Press Ctrl + Shift + Esc keys to open Task Manager.
5 Ways to Fix Discord Keeps Crashing on Windows Computer
https://youtu.be/_uU0Ob5vTWM Try Basic Fixes End Discord processes using Task Manager: Press Ctrl + Shift + Esc keys to open Task Manager.
 How to Fix Discord Profile Theme and Other Changes Not Saving
Basic Fixes Check your network connection: Ensure your device has a good internet connection.
How to Fix Discord Profile Theme and Other Changes Not Saving
Basic Fixes Check your network connection: Ensure your device has a good internet connection.
 2 Ways to Open Computer Management on Windows 11
Method 1: Open Computer Management From Control Panel You can easily access Computer Management through the Control Panel.
2 Ways to Open Computer Management on Windows 11
Method 1: Open Computer Management From Control Panel You can easily access Computer Management through the Control Panel.
The article above may contain affiliate links which help support Guiding Tech. The content remains unbiased and authentic and will never affect our editorial integrity.