Connecting your favorite pair of headphones allows you to isolate yourself from the surrounding noise and lets you focus on the task at hand. While your Windows 11 computer is generally efficient at detecting various accessories, there can be times when it fails to recognize your headphones for a variety of reasons.

There can be various reasons behind this issue, ranging from a dirty audio jack and misconfigured settings to a faulty update. In this post, we’ve outlined a few effective solutions that will help fix the headphone detection problem in Windows 11. So, let’s start.
1. Clean the Audio Jack
The headphone jack on your PC can easily gather dust and debris over time. If your Windows 11 computer is not recognizing your wired headphones, you can start by cleaning the headphone jack. Inspect the headphone jack for any visible dust particles and gently blow into the jack to remove them. You can also use a soft-bristled brush to clean the inside of the jack.

2. Disconnect and Reconnect Your Headphones
This may seem basic but don’t skip over this step. If you’re using wired headphones, unplug them, wait for a few seconds, and plug them back in. In the case of Bluetooth headphones, follow these steps to disconnect and reconnect your headphones.
Step 1: Press the Windows key + A to open the Quick Settings panel. Right-click on the Bluetooth icon and select Go to Settings.

Step 2: Click the three-dot menu icon next to your headphones and select Remove device.
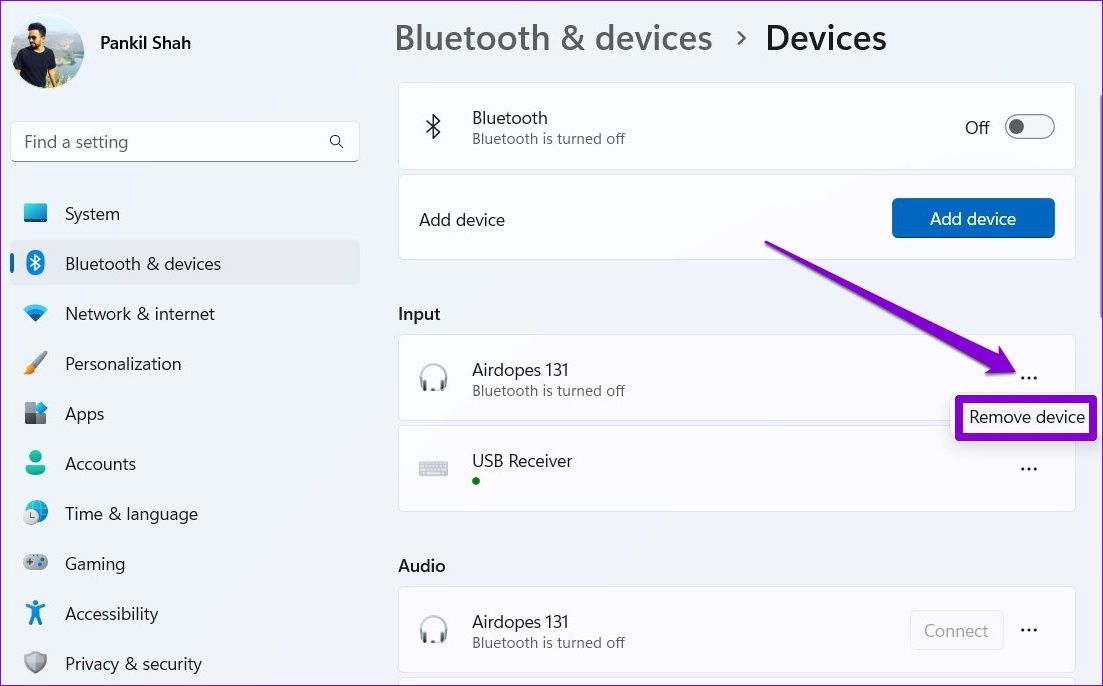
Step 3: Click the Add device button and follow the on-screen prompts to pair your headphones again and see if Windows can detect them.

3. Test Your Headphones With Another Device
If reconnecting your headphones does not help, you can test your headphones with another PC or phone. This should help you determine whether the problem is specific to your Windows 11 computer or if it lies with the headphones themselves. If your headphones work fine with another device, continue with the fixes below.
4. Enable Your Headphones From Sound Settings
Windows 11 may fail to recognize your headphones if you have previously disabled them on your PC. Here’s how you can enable them.
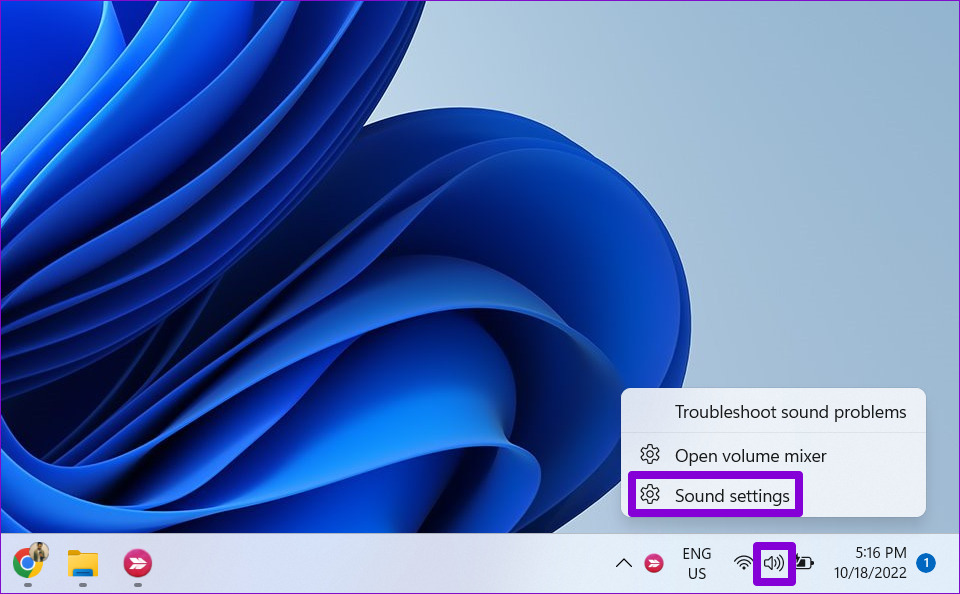
Step 1: Right-click the speaker icon on the taskbar and select Sound settings from the resulting menu.
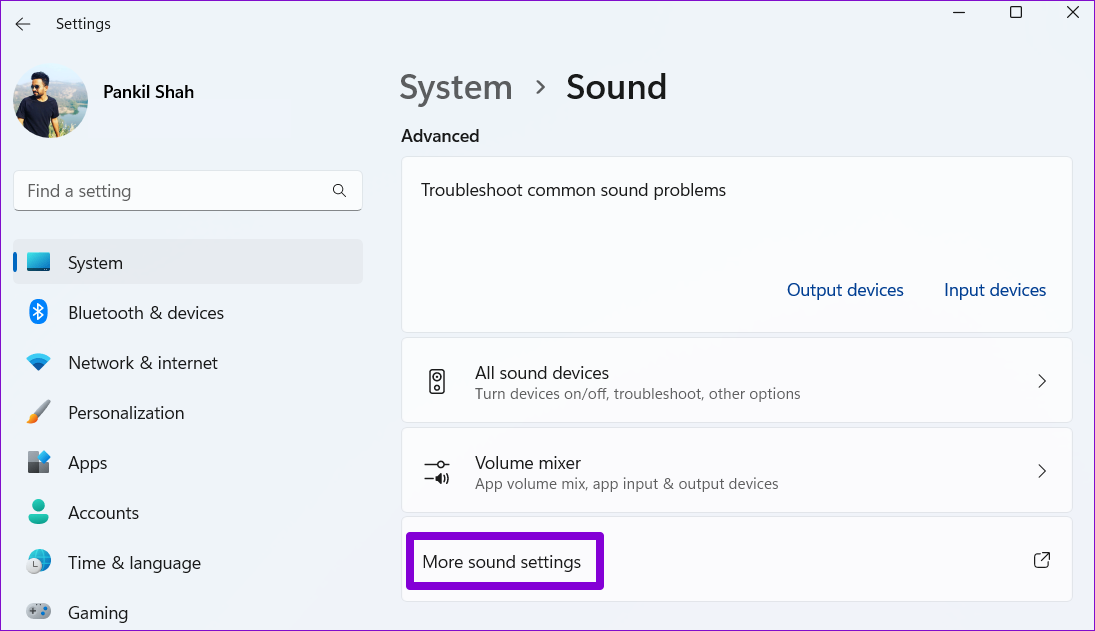
Step 2: Click on More sound settings.
Step 3: Under the Playback tab, right-click anywhere on an empty spot and select Show Disabled Devices.

Step 4: Right-click on your headphones and select Enable.

If there are multiple audio devices connected to your system, you will need to ensure that your headphones are set as the default audio device. To do so, right-click on your headphones and select ‘Set as Default Device’ from the list.

5. Check the In-App Audio Settings
Certain applications like Spotify, Microsoft Teams, VLC, and others have their own audio controls that operate independently of your computer’s settings. If your headphones are not working only in a specific app, you should check the in-app audio settings and ensure that your headphones are set as the default audio device.

6. Run the Audio Troubleshooter
Windows 11 ships with a handy audio troubleshooter that can inspect your PC for common audio-related issues and fix them. So, if Windows fails to detect your headphones even after you’ve connected them, use these steps to run the audio troubleshooter.
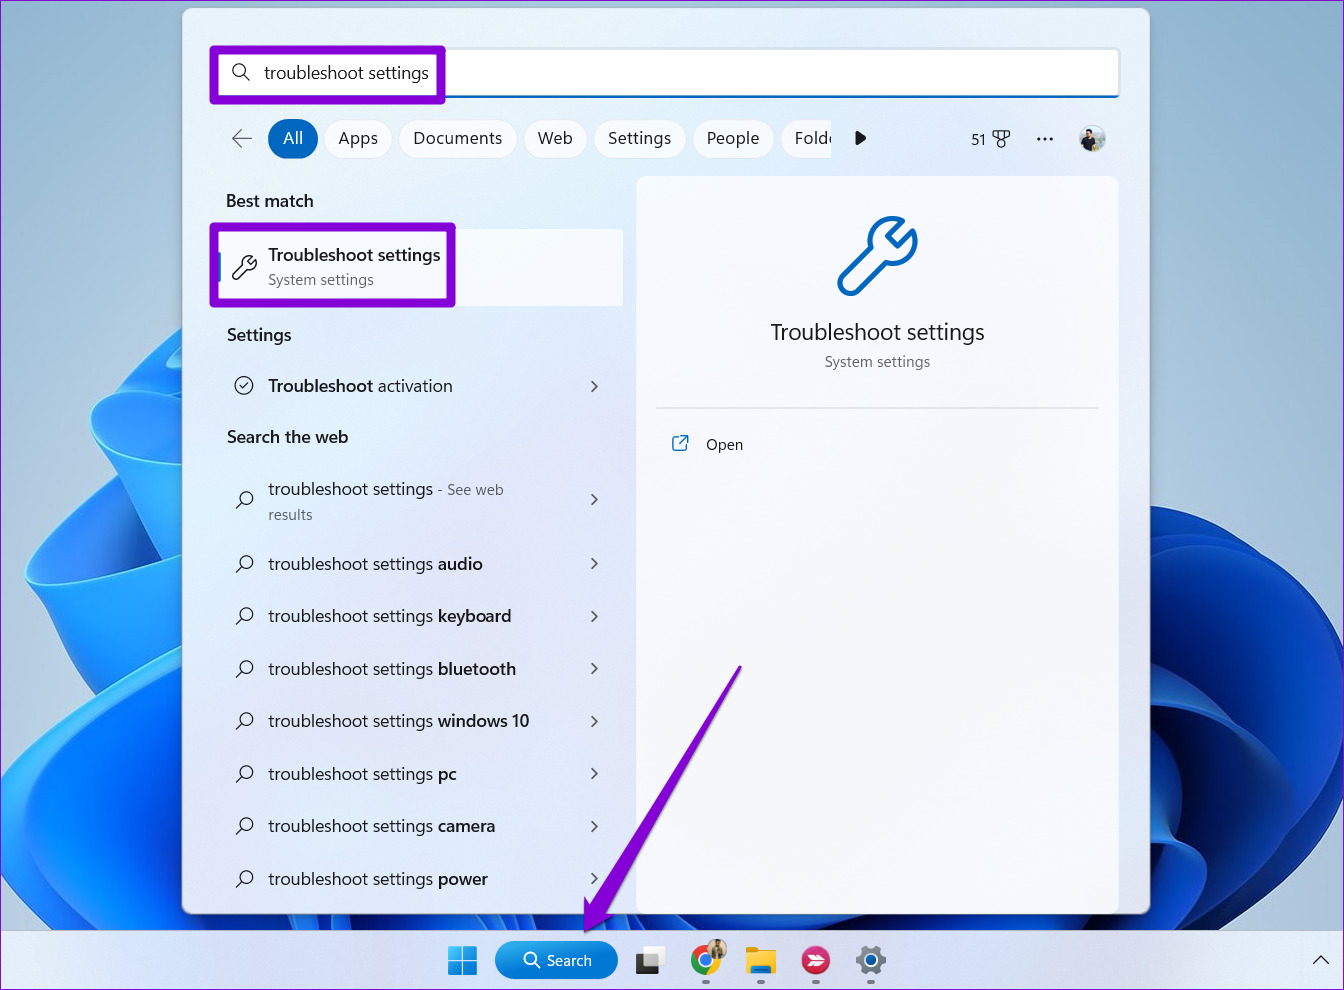
Step 1: Click the search icon on the taskbar, type in troubleshoot settings, and select the first result that appears.
Step 2: Go to Other troubleshooters.
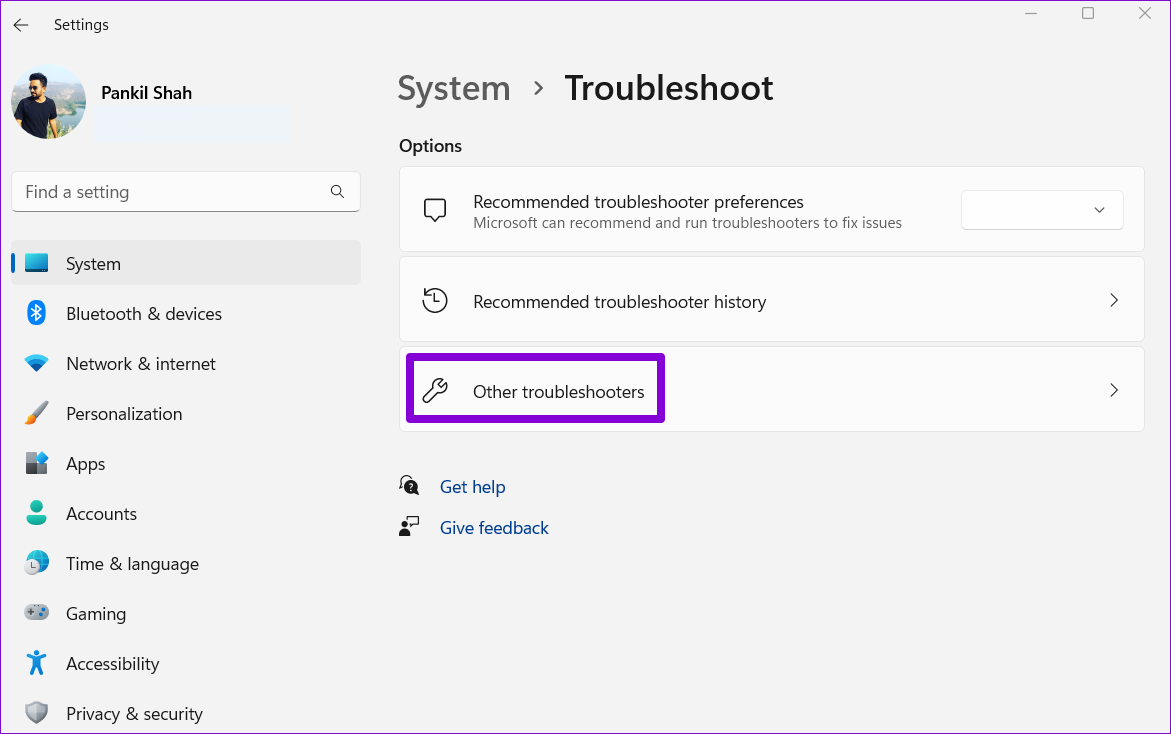
Step 3: Click the Run button next to Playing Audio and follow the on-screen instructions to finish the troubleshooting process.

7. Update the Audio Driver
The audio driver on your PC helps Windows identify and interact with connected audio devices. Naturally, if there’s an issue with the installed audio drivers, Windows 11 might fail to detect your headphones. You can try updating the audio drivers manually to remedy that.
Step 1: Press the Windows key + S to access the search menu, type in device manager, and select the first result that appears.

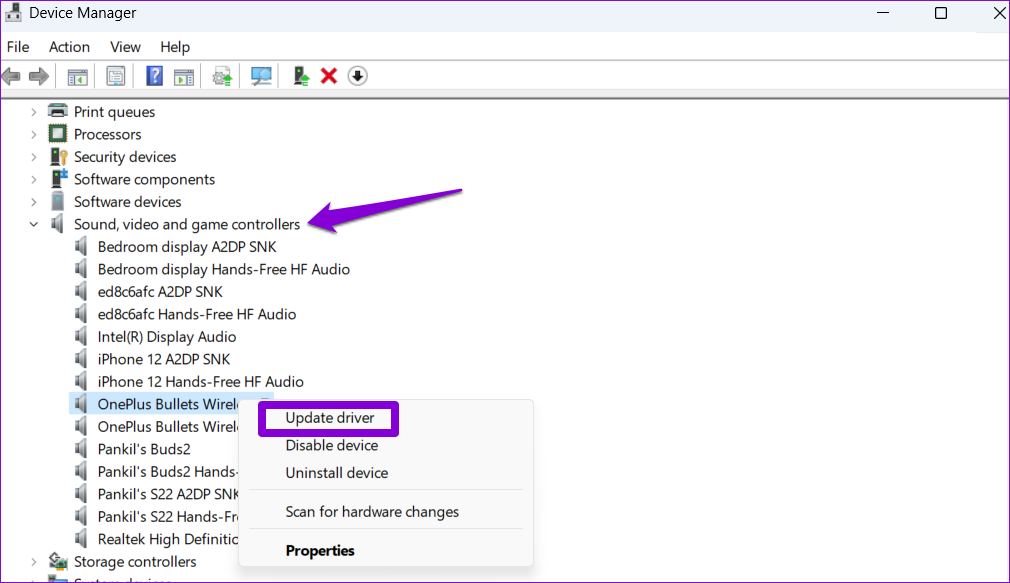
Step 2: Expand ‘Sound, video and game controllers’, right-click on your device, and select Update driver from the list.
From there, follow the on-screen instructions to finish updating the driver.
8. Check for Bluetooth Issues
If you’re facing this particular issue only while connecting your wireless headphones, the issue could be with the Bluetooth functionality on Windows 11. In that case, you can try restarting the Bluetooth service or updating the Bluetooth drivers. If that doesn’t work, you can go through this dedicated guide on fixing Bluetooth issues on Windows 11.
9. Install Windows Updates
Regular software updates are essential for any device and your Windows 11 PC is no exception to this rule. If the issue is caused by a bug within Windows, updating to a newer build should help.
Press the Windows key + I to open Settings to check for updates. Use the left pane to visit the Windows Update tab and click the Check for updates button.

Download and install any pending updates from here and see if that helps with the headphone detection issue on Windows 11.
FAQs on Windows 11 Computer Not Recognizing Headphones
If your headphones are plugged in but not functioning, it is possible that there is a loose connection or you have selected the wrong default audio device.
To play sound through your headphones instead of speakers, you will need to switch the audio output device on Windows.
Revive Your Headphones
Such connection issues between your headphones and PC can be frustrating, to say the least. Hopefully, the above-mentioned solutions have helped you resolve the headphone detection issues on Windows 11 for good, and you’re at peace.
Was this helpful?
Last updated on 23 November, 2023
Read Next
 Top 7 Ways to Fix Steam Not Recognizing Controller on Windows 11
Select games on your PC are more fun with a controller rather than the keyboard and mouse combo.
Top 7 Ways to Fix Steam Not Recognizing Controller on Windows 11
Select games on your PC are more fun with a controller rather than the keyboard and mouse combo.
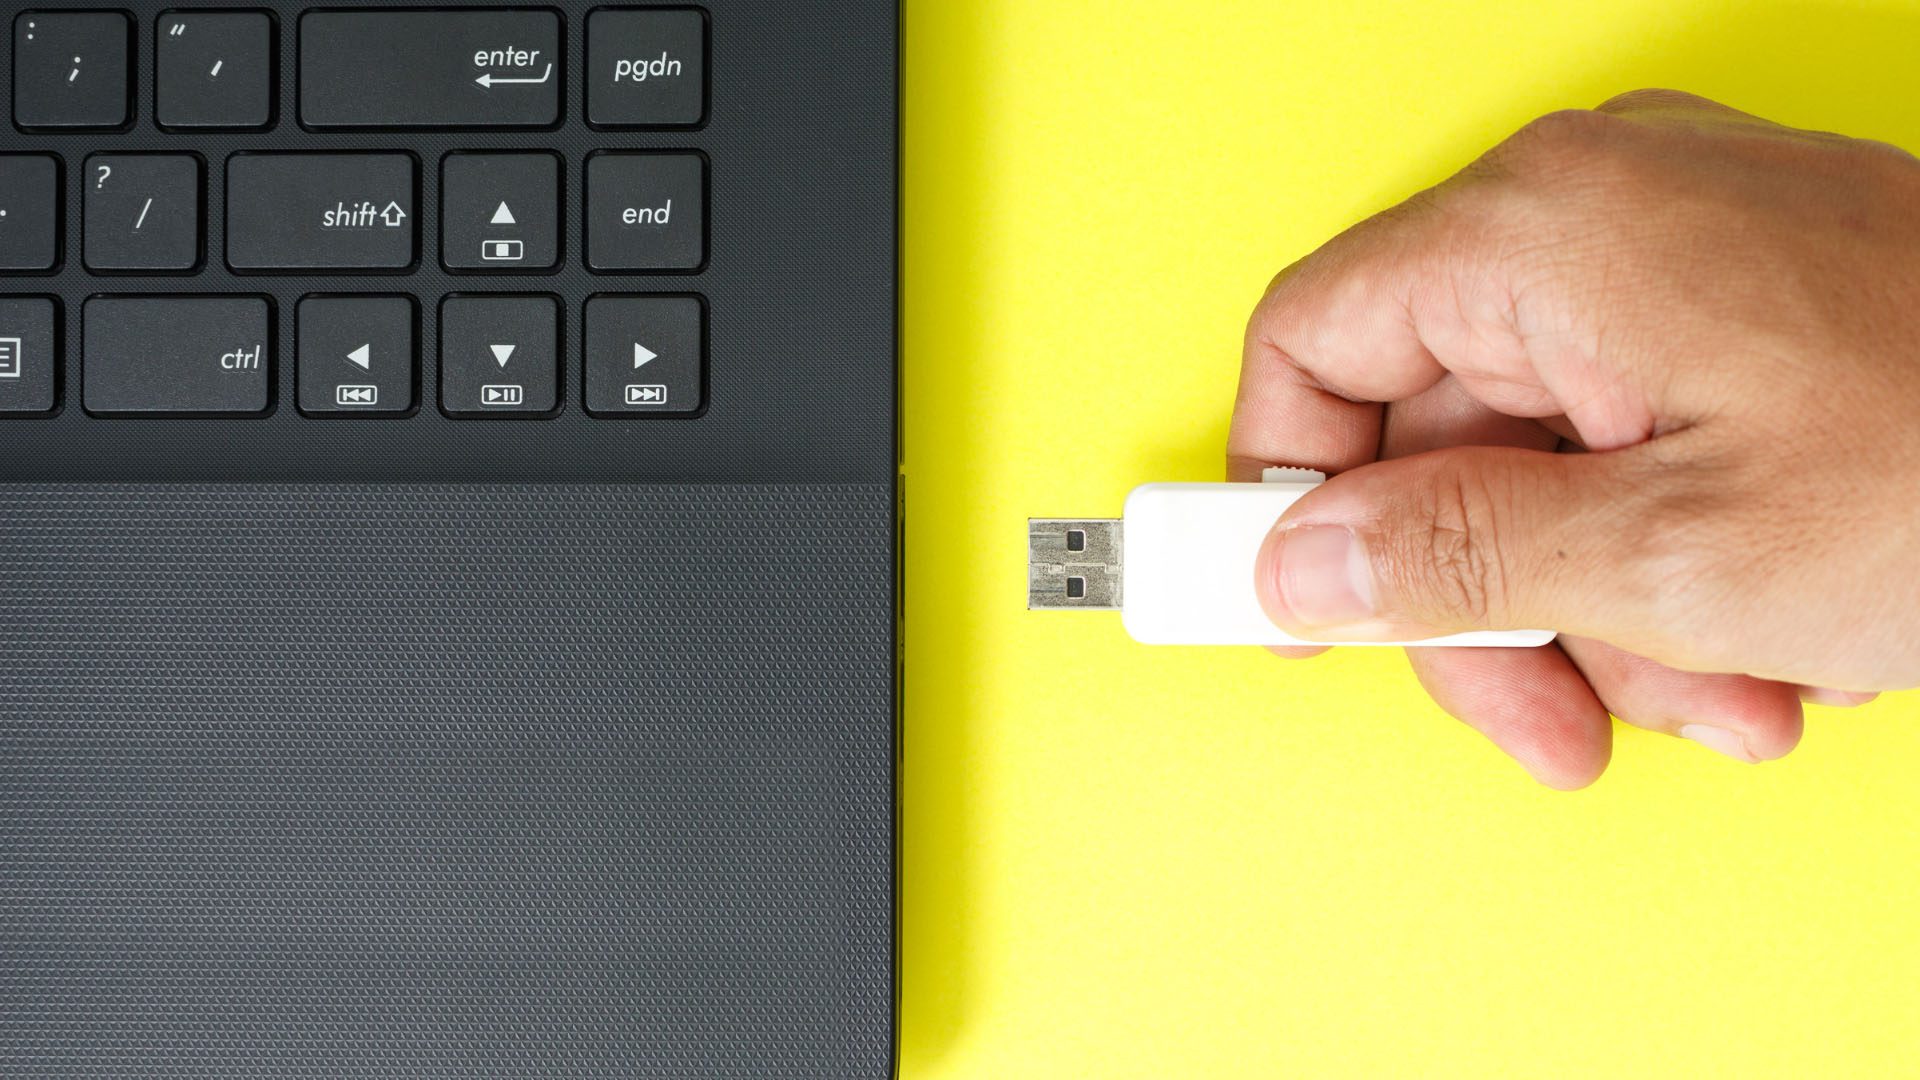 6 Fixes if Windows 11 Is Not Recognizing USB Devices
Fix 1: Unlock and Trust the Device Some devices, like iPhones or Androids, have an added layer of authentication to verify user identity.
6 Fixes if Windows 11 Is Not Recognizing USB Devices
Fix 1: Unlock and Trust the Device Some devices, like iPhones or Androids, have an added layer of authentication to verify user identity.
 5 Fixes for Apple Photos Not Recognizing Faces on iPhone
Fix 1: Disable and Re-Enable iCloud Photos Sync A common reason why the Apple Photos app may fail to recognize and organize photos by face is due to sync issues
5 Fixes for Apple Photos Not Recognizing Faces on iPhone
Fix 1: Disable and Re-Enable iCloud Photos Sync A common reason why the Apple Photos app may fail to recognize and organize photos by face is due to sync issues
 4 Fixes for PS5 Not Recognizing External Hard Drive
Try Basic Fixes Make sure the hard drive is compatible: Your PS5 supports nearly all external hard drives ranging from 250GB to 8TB in storage capacity, connected via the SuperSpeed
4 Fixes for PS5 Not Recognizing External Hard Drive
Try Basic Fixes Make sure the hard drive is compatible: Your PS5 supports nearly all external hard drives ranging from 250GB to 8TB in storage capacity, connected via the SuperSpeed
 3 Fixes for Amazon Fire TV Stick 4K Not Recognizing USB Drive
Basic Fixes Avoid using largely sized USB drives: You need to avoid using USB drives that are larger than 128GB in size.
3 Fixes for Amazon Fire TV Stick 4K Not Recognizing USB Drive
Basic Fixes Avoid using largely sized USB drives: You need to avoid using USB drives that are larger than 128GB in size.
 Top 5 Ways to Fix Bluetooth Headphones Connected but No Sound on Windows 10
On a usual day, you'd hook your wireless Bluetooth headphones to your PC to listen to a song.
Top 5 Ways to Fix Bluetooth Headphones Connected but No Sound on Windows 10
On a usual day, you'd hook your wireless Bluetooth headphones to your PC to listen to a song.
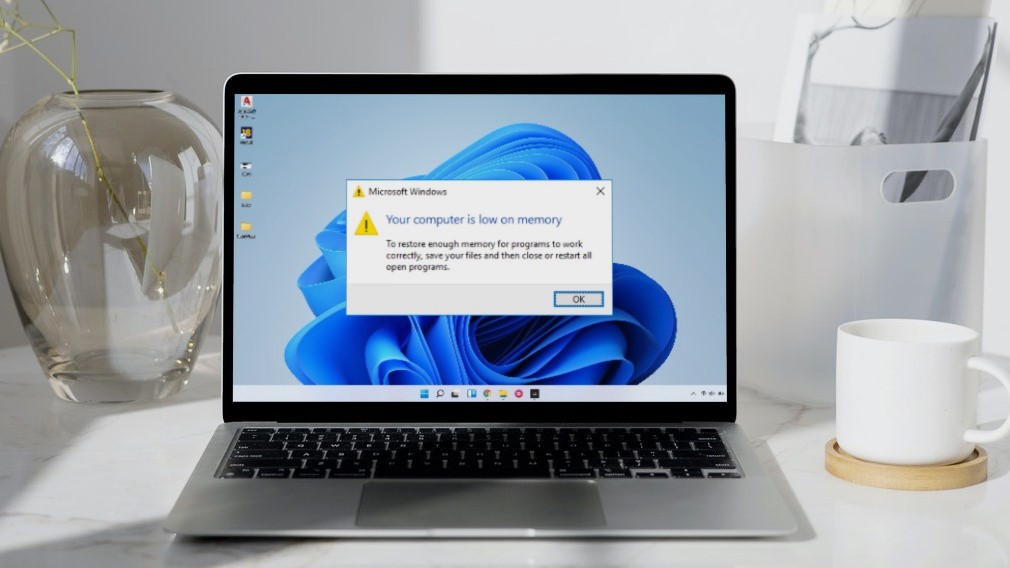 5 Ways to Fix “Your Computer Is Low on Memory” Error on Windows 10 and Windows 11
Try Basic Fixes Close unwanted apps and programs: Start by closing any unwanted apps and programs on your computer, especially the ones consuming a major chunk of your PC’s memory.
5 Ways to Fix “Your Computer Is Low on Memory” Error on Windows 10 and Windows 11
Try Basic Fixes Close unwanted apps and programs: Start by closing any unwanted apps and programs on your computer, especially the ones consuming a major chunk of your PC’s memory.
 7 Ways to Fix Google Chrome Sound Not Working on Headphones
Basic Fixes Restart Chrome: Restart Chrome, reload the tab, and restart your PC to eliminate temporary bugs and glitches.
7 Ways to Fix Google Chrome Sound Not Working on Headphones
Basic Fixes Restart Chrome: Restart Chrome, reload the tab, and restart your PC to eliminate temporary bugs and glitches.
The article above may contain affiliate links which help support Guiding Tech. The content remains unbiased and authentic and will never affect our editorial integrity.