Have you ever had to identify your Windows computer for networking or system management purposes? It’s a common task, and in this guide, we’ll show you how to find the name of your computer on Windows. It can come in handy in many situations, regardless of whether you are tech-savvy or getting started with computers.
To begin with, knowing your computer’s name is crucial for connecting it to a network, sharing files and printers, and troubleshooting network-related issues. In addition, providing your computer’s name when you request support or configure remote access can ensure a smoother experience and save you time.
So, let’s dive into the steps for discovering your computer’s identity.
Note: The method works on Windows 10 and Windows 11. However, we will use Windows 11 to demonstrate the methods.
1. Using the Search Box
This is one of the most common and easiest ways to find your computer name in Windows 11 and 10. Follow the steps below.
Step 1: Click on the Windows icon in the taskbar or press the Windows key on your keyboard.

Step 2: Now, type PC Name.
Step 3: In the search results, click ‘View your PC name.’

You will be taken to Windows Settings. Next to the device name, you will find your Windows PC name on the right pane.
Also Read: How to fix it if Windows Settings reset to default upon reboot
2. Using the Settings App
Unlike the method above, you can directly open Windows Settings and find your Windows PC name. Follow the instructions.
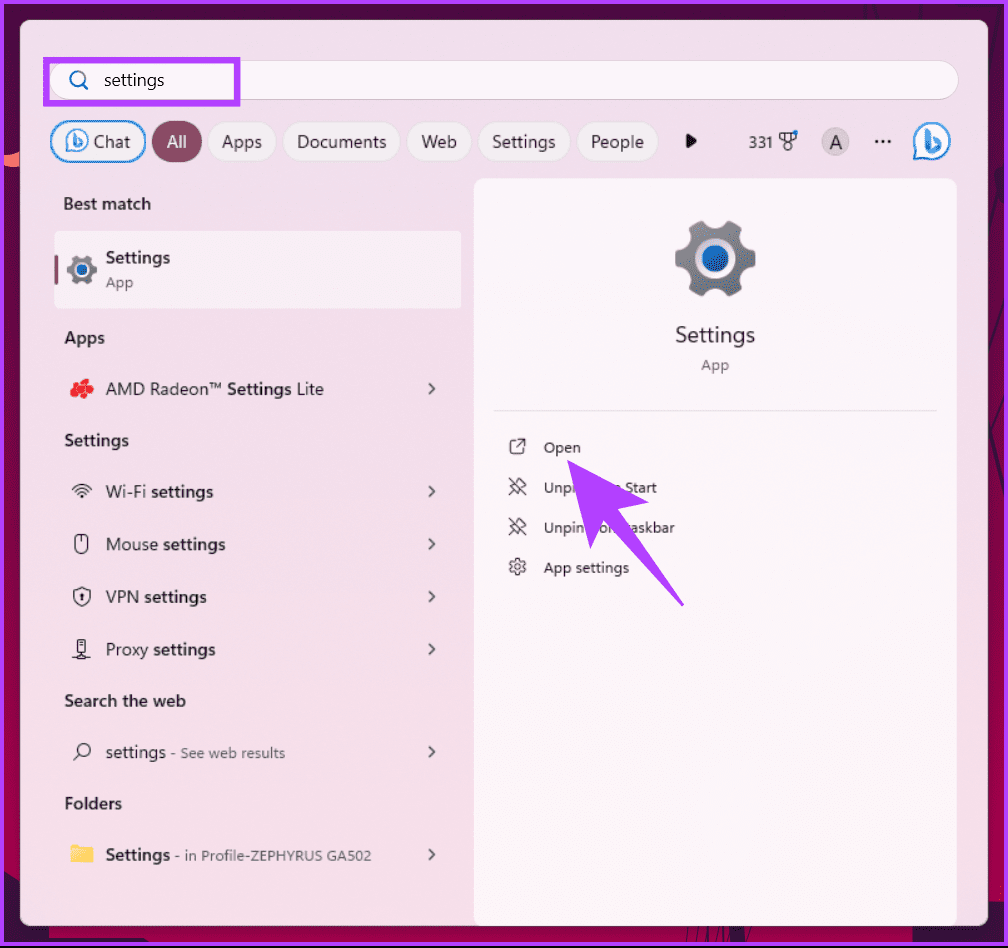
Step 1: Press the Windows key on your keyboard, type Settings, and click Open.
Note: Alternatively, press ‘Windows key + i’ to open Settings directly.
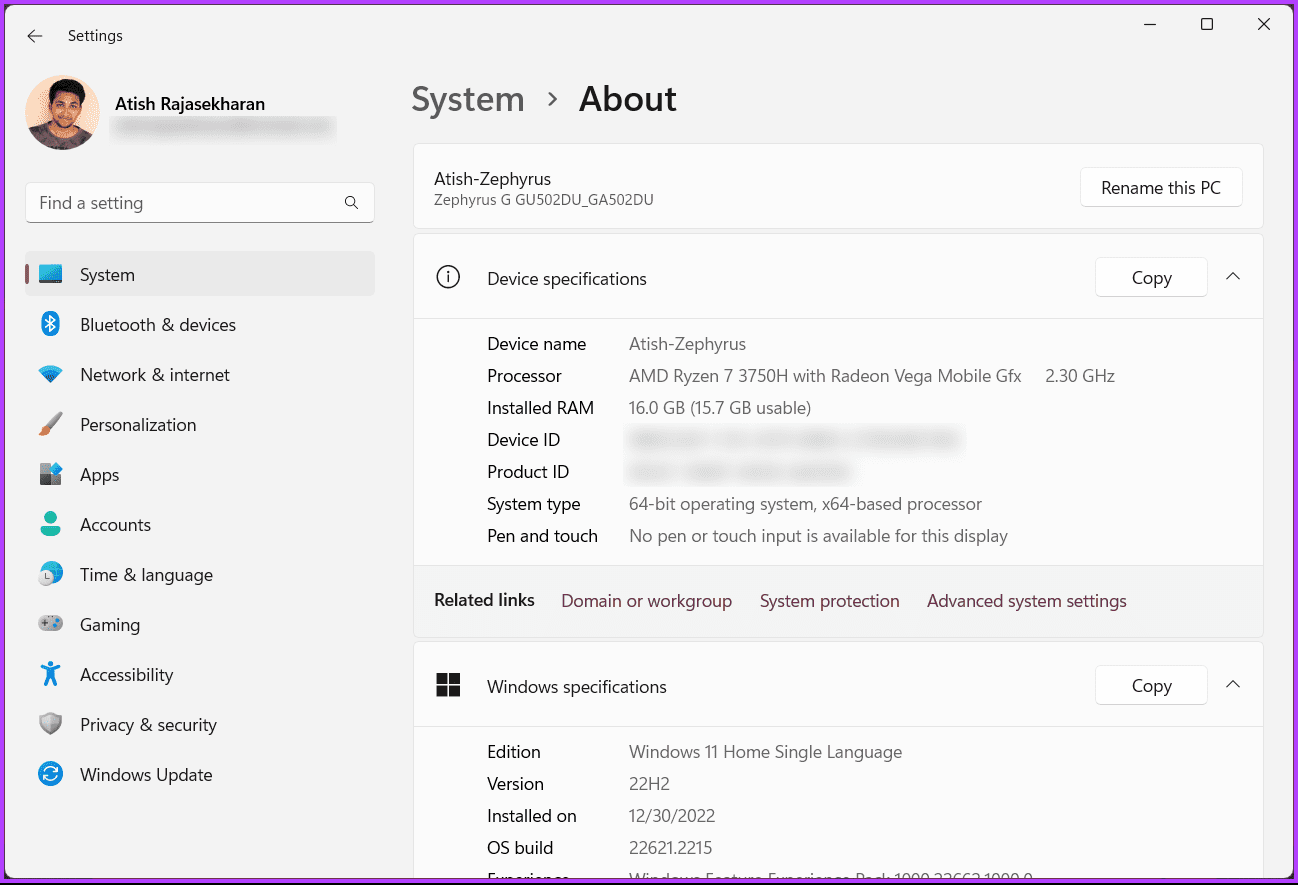
Step 2: Under System, scroll down to the About section in the right pane and click on it.
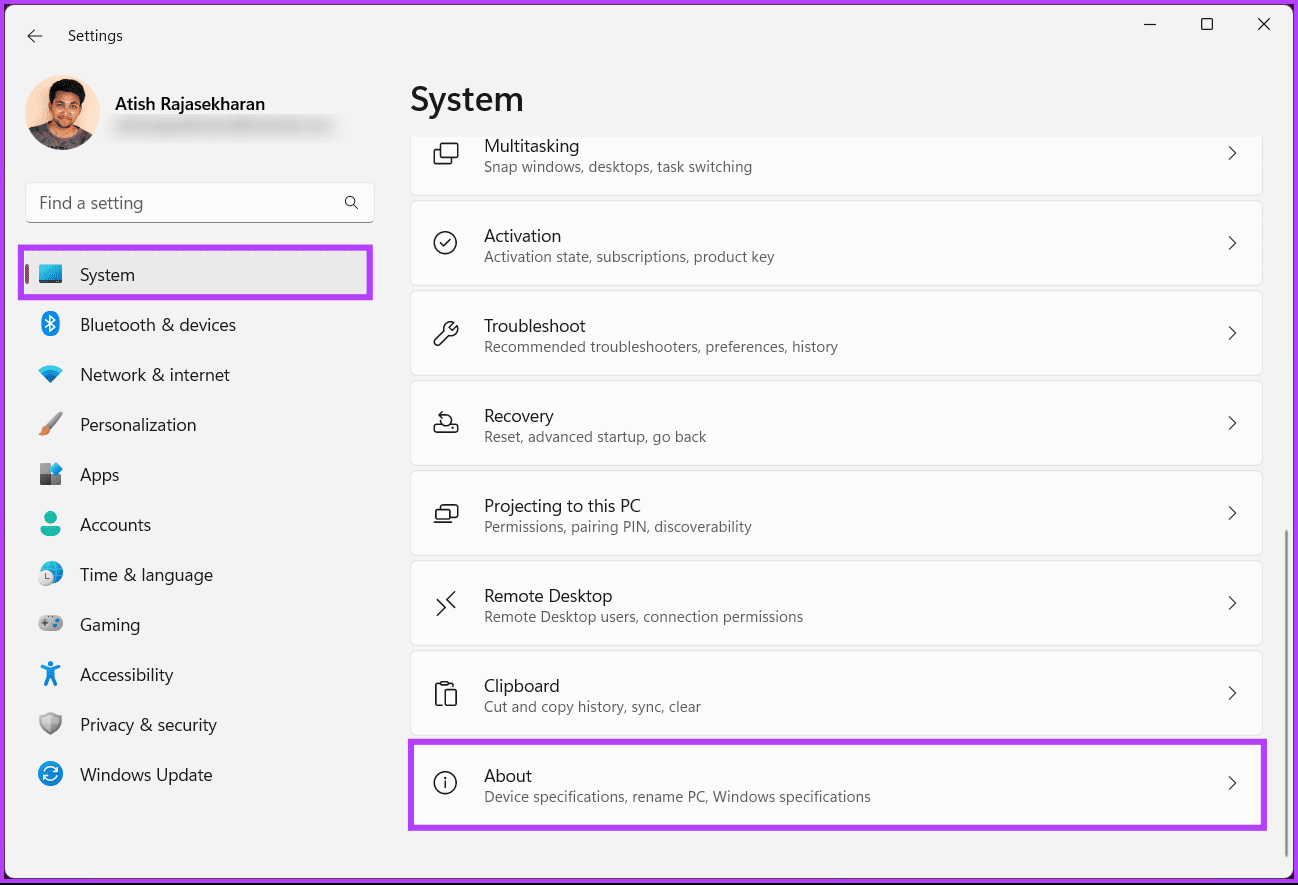
Your PC name will appear next to the device name.
Moreover, you can rename your PC from here by pressing the ‘Rename this PC’ button. That said, move on to the following method if you want to do the same from File Explorer.
3. Using File Explorer
Finding your Windows PC name using File Explorer may sound tricky, but it is not. Here’s how to find the Windows PC name.
Step 1: Press the Windows key on your keyboard, type File Explorer, and click Open.
Note: Alternatively, press ‘Windows key + E’ on your keyboard to open File Explorer.

Step 2: Find and right-click on This PC in the left pane.
Step 3: From the context menu, choose Properties.

There you have it. You will be taken to the About section in the Settings, where you can find the Windows PC name next to the Device name.
4. Using the Power User Menu
Step 1: Press’ Windows + X’ on your keyboard. Alternatively, right-click on the Windows icon on your taskbar.
Step 2: In the context menu, choose System.

During this process, you will be taken to Windows Settings. On the right pane, you will find the name of your Windows PC located next to the device name.
Check out the next method if you don’t want to follow the steps but want a quick keyboard shortcut.
Also Read: How to run programs or games as administrator in Windows 11
5. Using a Keyboard Shortcut
This method is by far the most straightforward method to find your computer name in Windows 11 and 10. All you need to do is press ‘Windows key + Pause/Break’ on your keyboard.

You will be taken to the Windows Settings, where you will find the name of the Windows PC beside the device’s name under Device specifications. The only downside to this method is that not all laptops have the Pause/Break key, which is why the next method will help you.
6. Using Command Prompt
This method may suit you if you prefer commands rather than GUIs. There are two ways to find your computer name with CMD. Both use commands. Let’s proceed.
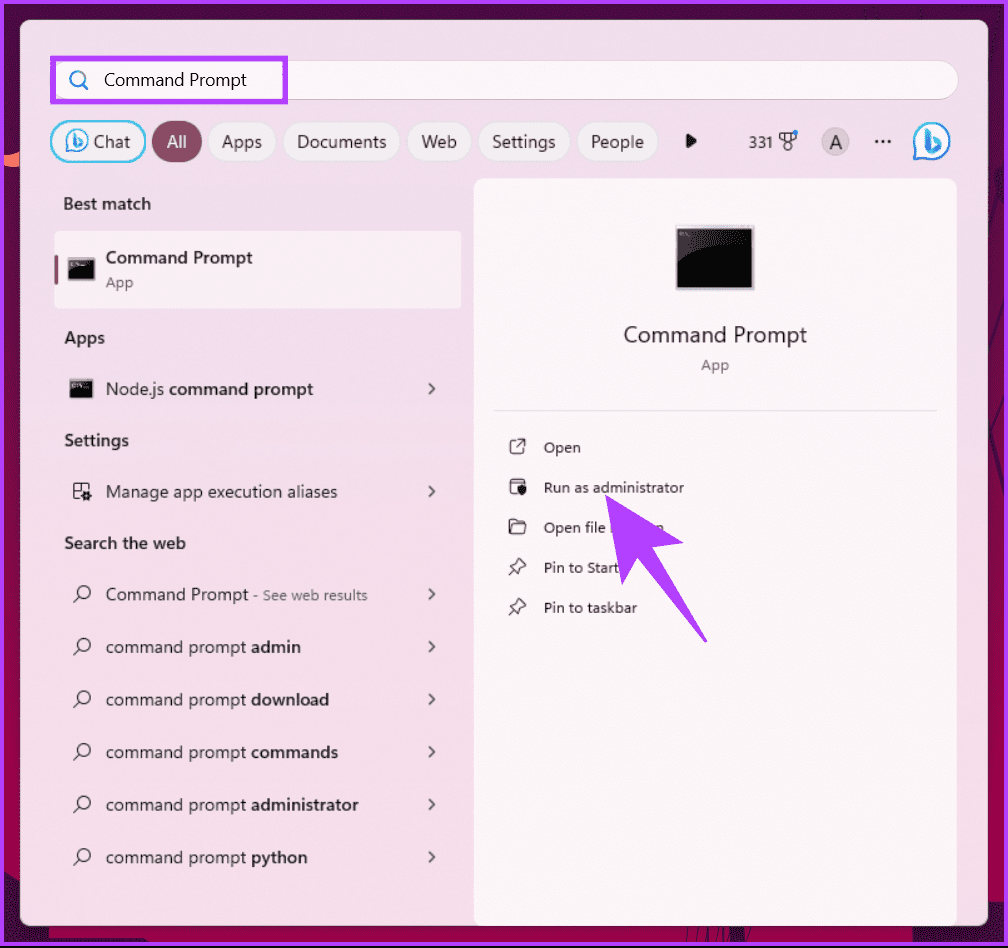
Step 1: Press the Windows key on your keyboard, type Command Prompt, and click ‘Run as administrator.’
Step 2: Once opened, type the below command and hit Enter.
hostname

This command displays your Windows PC name. You can use another command to get more information about your Windows PC; continue with the below steps.
Step 3: Type the below command and press Enter.
ipconfig /all
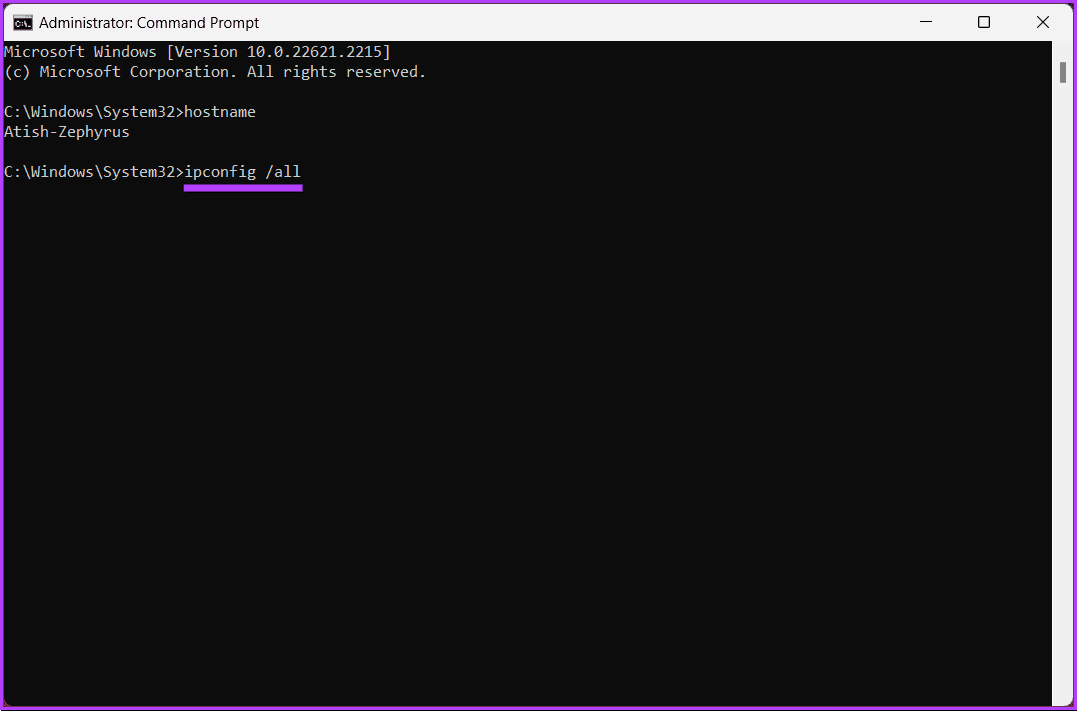
There you go. Here, you can see all the details about your Windows PC, from the name to the network adapter. Check out some answers to common questions in the FAQ section below.
FAQs on Find Your Computer Name in Windows
Yes, when changing your computer name, there are some naming conventions and restrictions to follow. For example, it should not contain any special characters or spaces.
Changing your computer name should not affect your files or software. However, it’s a good practice to restart your computer after changing the name to ensure that all changes take effect.
Know Your Windows Machine Better
By following the methods mentioned in this article, you now know how to find the name of your computer on Windows. You may also want to read the best ways to check RAM type on PC running Windows 10 or Windows 11.
Was this helpful?
Last updated on 18 September, 2023
Read Next
 5 Ways to Fix “Your Computer Is Low on Memory” Error on Windows 10 and Windows 11
Try Basic Fixes Close unwanted apps and programs: Start by closing any unwanted apps and programs on your computer, especially the ones consuming a major chunk of your PC’s memory.
5 Ways to Fix “Your Computer Is Low on Memory” Error on Windows 10 and Windows 11
Try Basic Fixes Close unwanted apps and programs: Start by closing any unwanted apps and programs on your computer, especially the ones consuming a major chunk of your PC’s memory.
 4 Best Ways to Change Computer Name in Windows 10
How do you identify your Windows 10 computer for connecting to it over a network?
4 Best Ways to Change Computer Name in Windows 10
How do you identify your Windows 10 computer for connecting to it over a network?
 5 Ways to Fix Computer Turns on but No Display on Windows 11
Basic Fixes: Ensure the monitor is turned on: If you're using an external monitor or if your laptop's monitor has an external power switch, ensure it is turned on before
5 Ways to Fix Computer Turns on but No Display on Windows 11
Basic Fixes: Ensure the monitor is turned on: If you're using an external monitor or if your laptop's monitor has an external power switch, ensure it is turned on before
 Top 9 Ways to Fix Windows 11 Computer Not Recognizing Headphones
Connecting your favorite pair of headphones allows you to isolate yourself from the surrounding noise and lets you focus on the task at hand.
Top 9 Ways to Fix Windows 11 Computer Not Recognizing Headphones
Connecting your favorite pair of headphones allows you to isolate yourself from the surrounding noise and lets you focus on the task at hand.
 7 Ways to Fix Undoing Changes Made to Your Computer in Windows 11
Fix 1: Boot Your PC Into Safe Mode If Windows becomes stuck on the undoing changes screen, you will first have to boot your PC into Safe Mode to troubleshoot
7 Ways to Fix Undoing Changes Made to Your Computer in Windows 11
Fix 1: Boot Your PC Into Safe Mode If Windows becomes stuck on the undoing changes screen, you will first have to boot your PC into Safe Mode to troubleshoot
 2 Ways to Open Computer Management on Windows 11
Method 1: Open Computer Management From Control Panel You can easily access Computer Management through the Control Panel.
2 Ways to Open Computer Management on Windows 11
Method 1: Open Computer Management From Control Panel You can easily access Computer Management through the Control Panel.
 5 Ways to Fix Discord Keeps Crashing on Windows Computer
https://youtu.be/_uU0Ob5vTWM Try Basic Fixes End Discord processes using Task Manager: Press Ctrl + Shift + Esc keys to open Task Manager.
5 Ways to Fix Discord Keeps Crashing on Windows Computer
https://youtu.be/_uU0Ob5vTWM Try Basic Fixes End Discord processes using Task Manager: Press Ctrl + Shift + Esc keys to open Task Manager.
 6 Ways to Fix Buzzing Sound From Computer or Laptop Speakers
Fix 1.
6 Ways to Fix Buzzing Sound From Computer or Laptop Speakers
Fix 1.
The article above may contain affiliate links which help support Guiding Tech. The content remains unbiased and authentic and will never affect our editorial integrity.