The DISM error 0x800f0915 usually displays text like “The repair content could not be found anywhere” while running commands. It means the utility couldn’t fetch exact filenames needed, which prevents Windows from replacing the corrupted ones with them. While the command also provides tips on how to fix the 0x800f0915 DISM error, here’s what to do exactly.
Fix 1 – Check Your Internet Connection
By default, DISM downloads files via Windows Update and relies on an internet connection. It won’t work when offline and some settings, antiviruses, or VPNs can block Windows Update from accessing the network.
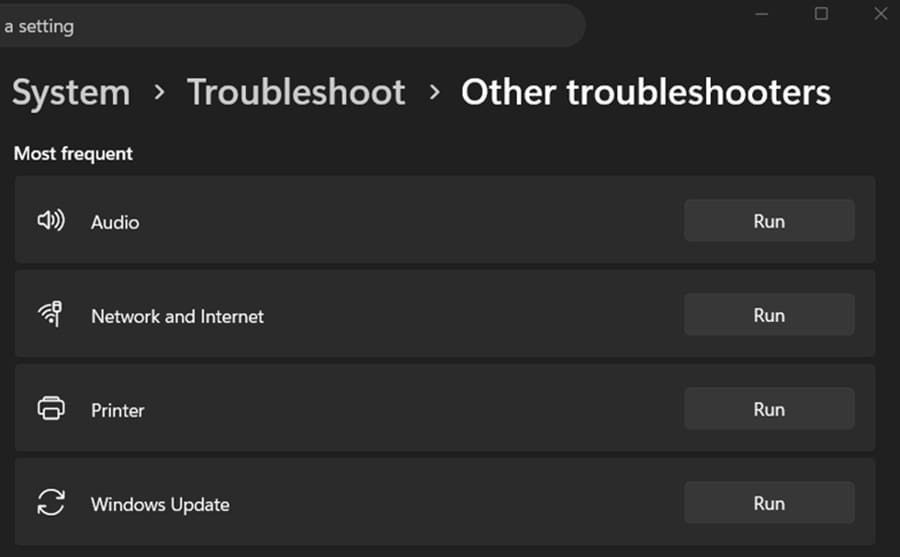
Step 1. Run the built-in Network and Internet troubleshooter. It’s usually located in “Troubleshoot” settings under “Other troubleshooters.” You can also use “Diagnose network problems” when right-clicking on the internet icon in the taskbar.
Step 2. Temporarily disable any third-party firewall, antivirus, or VPN software you have. This will depend on the exact software. The stock Windows Defender can be accessed via Settings.
Step 3. Re-run the DISM command.
Fix 2 – Fix DISM Error 0x800f0915 With the Correct ISO File
If DISM can’t find files via Windows Update, you’ll need to download an offline repair source (or ISO file). This has to match your installed Windows version exactly.
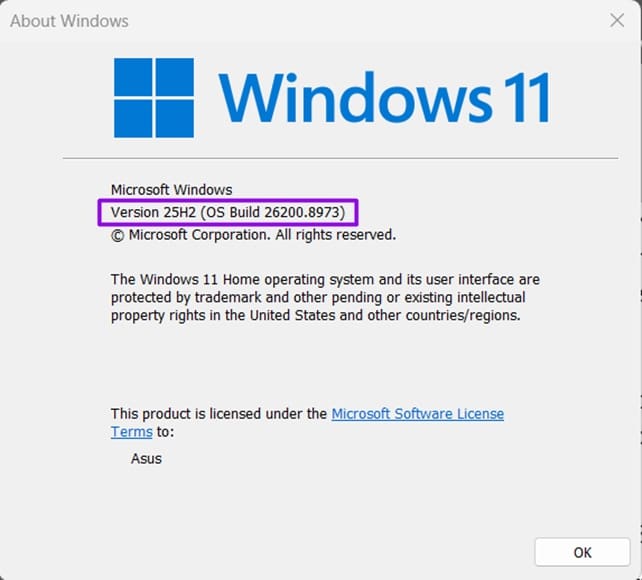
Step 1. Hit “Win + R,” then type in “winver” and hit “Enter.” Note your exact Windows version and build number.
Step 2. Go to Microsoft’s website and download an ISO file that matches that version, then double-click it to mount it as a drive.
Step 3. Check whether the filelist contains an install.wim or install.esd under the sources folder and remember what the mounted drive letter was.
Step 4. Run the following command
DISM /Get-WimInfo /WimFile: X:\sources\install.wim
Replace “install.wim” with “install.esd” based on Step 3, and replace the “X” with the mounted letter drive.
Step 5. You’ll get a response with a listing of various versions of Windows loaded in the ISO file. Find the “index” number of your installed edition (such as Home, Pro, Single Language, etc.).
Step 6. Run the DISM command by specifying the ISO and index
DISM /Online /Cleanup-Image /RestoreHealth /Source:WIM:X:\sources\install.wim:INDEX /LimitAccess
Change “NUM” with whichever index matched your edition in Step 5.
Fix 3 – Run Component Cleanup
DISM has its own component library that might get cluttered after large updates and needs to be cleaned up.
Step 1. In the Command Prompt, run “DISM.exe /Online /Cleanup-Image /StartComponentCleanup” and let the command finish.
Step 2. Restart the PC and rerun the original DISM repair command. You may need to retry the index-specific command from Fix 2.
Fix 4 – Use an In-Place Repair Upgrade
You can reset the Windows version to the “basic” update, which also automatically replaces system files with the factory defaults and then lets Windows Update modify them as needed later. This shouldn’t affect your data, but back it up just in case.
Step 1. Download the latest Windows installation media from Microsoft and mount the ISO.
Step 2. Run Setup.exe from the mounted drive.
Step 3. When prompted, choose to keep your personal files and apps.
Step 4. Let the process finish and restart the PC.
This should bypass the need for running future DISM commands for a while.
Was this helpful?
Last updated on 28 August, 2026
Read Next
 5 Fixes for “Word Experienced an Error Trying to Open the File” Error in Windows
Fix 1: Unblock Your Word File Microsoft Word may fail to open a document if it has been altered by third-party software.
5 Fixes for “Word Experienced an Error Trying to Open the File” Error in Windows
Fix 1: Unblock Your Word File Microsoft Word may fail to open a document if it has been altered by third-party software.
 Top 6 Ways to Fix Cannot Expand Folder Error in Outlook
Microsoft Outlook users have been facing a particular error for the past decade.
Top 6 Ways to Fix Cannot Expand Folder Error in Outlook
Microsoft Outlook users have been facing a particular error for the past decade.
 5 Ways to Fix Computer Boots to Blinking Cursor Error
What happens when you boot your computer?
5 Ways to Fix Computer Boots to Blinking Cursor Error
What happens when you boot your computer?
 11 Best Ways to Fix Dropbox Not Connecting or Syncing on Windows 10 Error
Dropbox is a popular cloud storage solution that, for the most part, works right out of the box.
11 Best Ways to Fix Dropbox Not Connecting or Syncing on Windows 10 Error
Dropbox is a popular cloud storage solution that, for the most part, works right out of the box.
 Top 3 Ways to Fix OneDrive Connectivity Error Code 0x8004de40 in Windows 10
OneDrive is arguably one of the best cloud storage and backup solutions for Windows computers.
Top 3 Ways to Fix OneDrive Connectivity Error Code 0x8004de40 in Windows 10
OneDrive is arguably one of the best cloud storage and backup solutions for Windows computers.
 3 Ways to Fix Microsoft Excel Document Not Saved Error in Windows 11
Try Basic Fixes Try saving the document with a different name: Press F12 on your keyboard to bring up the Save As dialog in Excel.
3 Ways to Fix Microsoft Excel Document Not Saved Error in Windows 11
Try Basic Fixes Try saving the document with a different name: Press F12 on your keyboard to bring up the Save As dialog in Excel.
 5 Ways to Fix Some Update Files are Missing or Have Problems Error on Windows 11
Fix 1: Run the Windows Update Troubleshooter Windows 11 includes a dedicated troubleshooter to automatically identify and resolve any common issues with the Windows Update process.
5 Ways to Fix Some Update Files are Missing or Have Problems Error on Windows 11
Fix 1: Run the Windows Update Troubleshooter Windows 11 includes a dedicated troubleshooter to automatically identify and resolve any common issues with the Windows Update process.
 How to Fix Printer Not Activated (Error Code 30) on Windows 11
Basic Fixes Reconnect printer: If you're using a wired printer, its loose USB connection to your PC may result in 'Printer not activated (Error Code 30)'.
How to Fix Printer Not Activated (Error Code 30) on Windows 11
Basic Fixes Reconnect printer: If you're using a wired printer, its loose USB connection to your PC may result in 'Printer not activated (Error Code 30)'.
The article above may contain affiliate links which help support Guiding Tech. The content remains unbiased and authentic and will never affect our editorial integrity.