Method 1: Change Page Size
Microsoft Word uses the document size and layout as A4 by default. However, you can change it to Letter, Tabloid, A3, A5, B4, B5, Executive, Legal, and Statement, entirely depending on the type of document you use often.
Step 1: Select Layout on the menu bar. Expand the Size menu.

Step 2: Select one of the default sizes from the list.

Set a Specific Size as Default on Microsoft Word.
Step 1: Expand the Size menu in Layout.
Step 2: Select More Paper Sizes.

Step 3: Expand the Paper Size menu, set height and width, check live preview, and select whether to apply the change to the entire document or go forward from this point.
Step 4: Select Set As Default and hit OK.

After this, Microsoft Word will remember your choice and use the specified page layout for future documents.
Method 2: Change Document Orientation
You can also change the default layout to landscape from portrait or vice versa.
Click Layout at the top, expand Orientation, and select Landscape.

Method 3: Change Document Margins
You can select one of the preset margins or set custom margins for a Word document. Let’s check both options.
Use Preset Margins
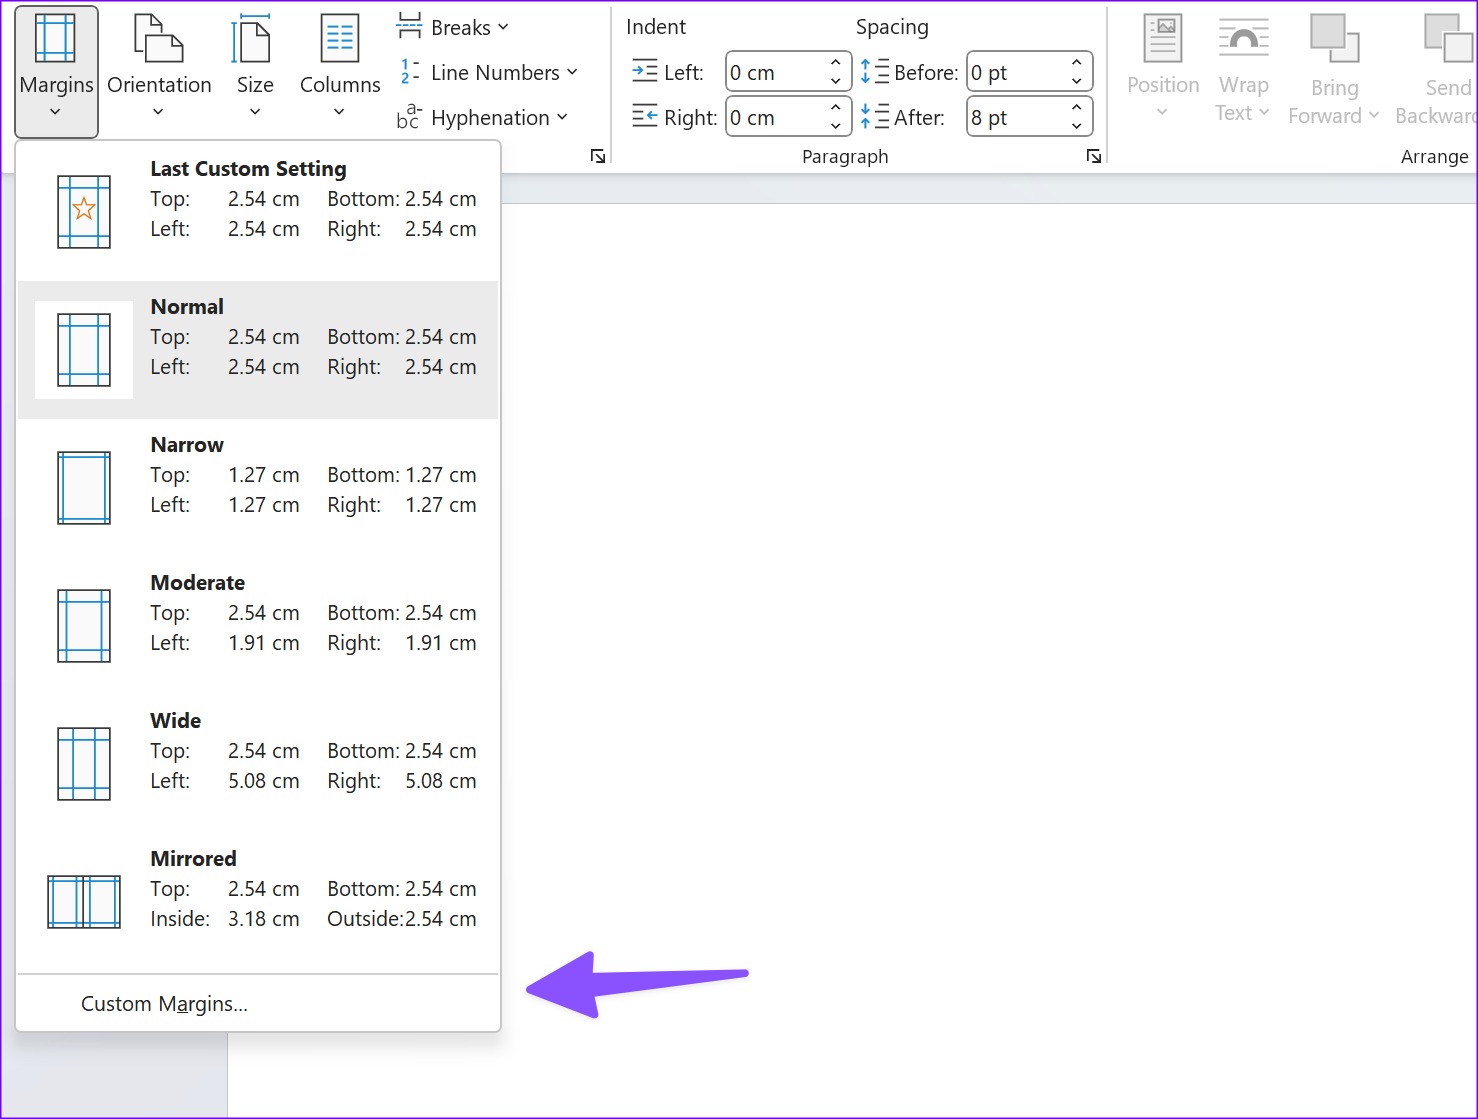
Open the Layout menu and expand the Margins menu. You have five options to pick from.
- Normal
- Narrow
- Moderate
- Wide
- Mirrored
You can check each option’s top, bottom, right, and left margins and the live preview.

Use Custom Margins
Step 1: Open the Layout menu and expand the Margins menu. Click Custom Margins.
Step 2: Set top, bottom, left, and right margins. Click the Gutter position to include additional space inside the margins you’ve set. Check the live preview and hit OK.
Note: If you intend to use the same margins and orientation for all your documents, hit the’ Set As Default’ button.

Method 4: Change Layout in Page Setup
Your ideal Word page setup is complete with layout customization. Let’s check all available options to customize it.
Step 1: Open the Layout menu and expand the Margins menu. Click Custom Margins.
Step 2: Go to the Layout menu.
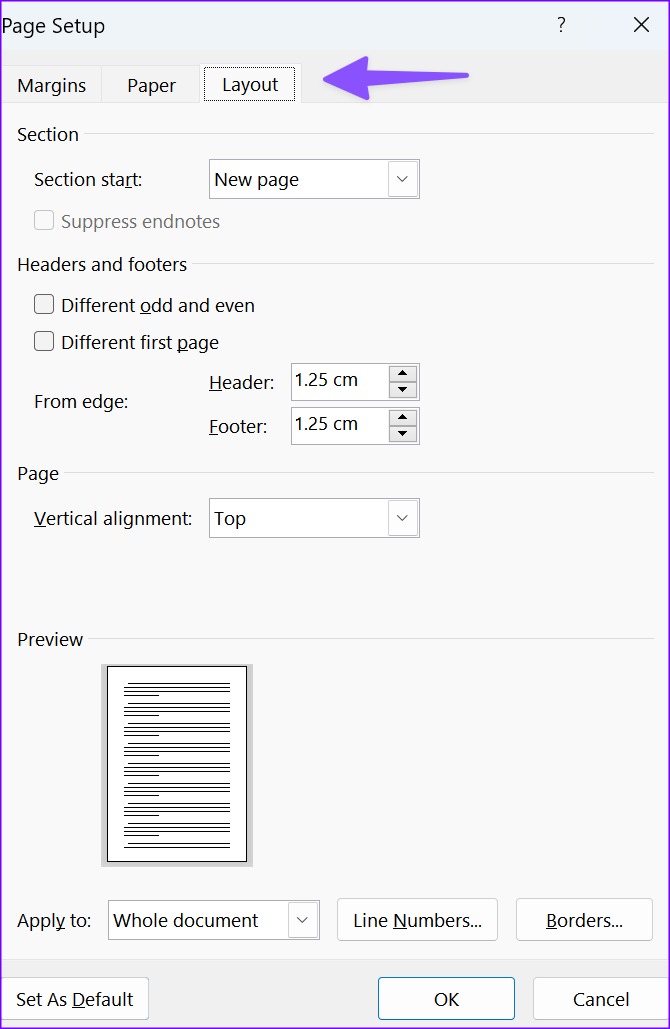
Step 3: Tweak margins for header and footer from the edge, check vertical alignment, add line numbers and borders, and click OK.
Ensure to check the live preview before setting your Word document as default.
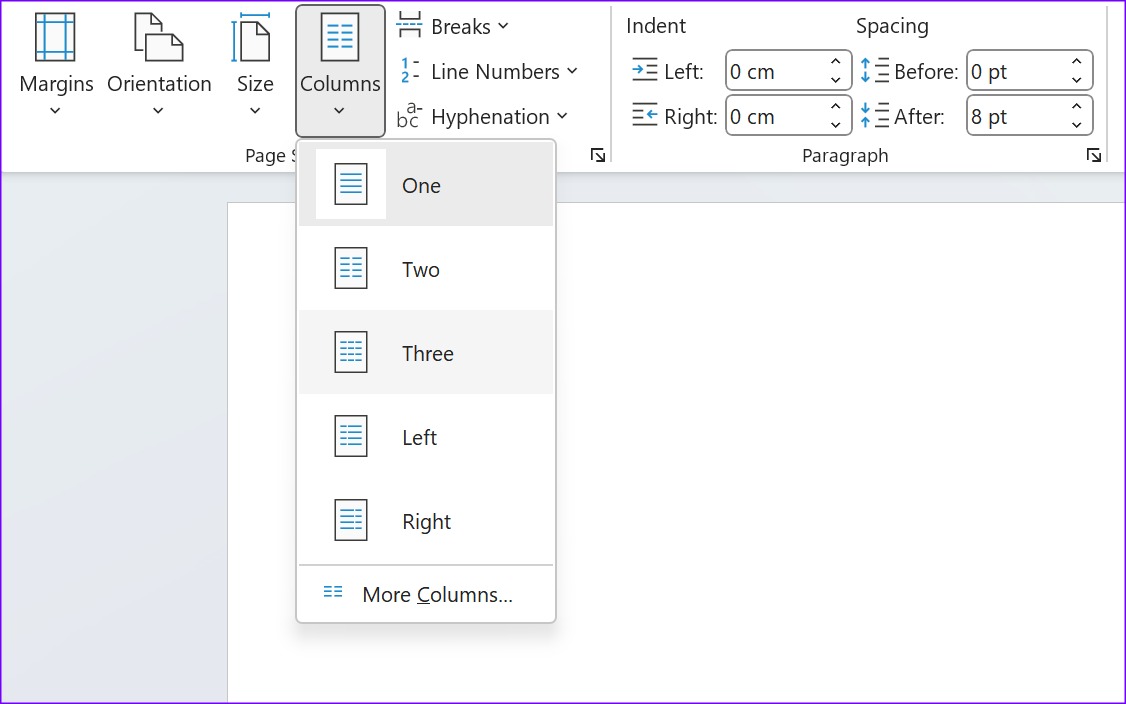
Method 5: Use Column Layout
Are you writing a Word document for a magazine or newspaper? Try the column layout for better readability to end users. Here’s what you need to do.
Step 1: Head to the Layout menu in Microsoft Word. Expand the Columns menu.
Step 2: Select one of the default column styles or make custom changes from the More columns menu.
Bonus: Save a Page Layout as a Template
After making the relevant changes to your page layout, you can save it as a template with a specific name and reason.
Step 1: Open a blank document and make all the changes to the page layout. Hit File at the top left corner, select Save As, and click Browse.
Step 2: Expand the Save As Type dialog box and select Word Template.

Step 3: Name it and hit the Save button.
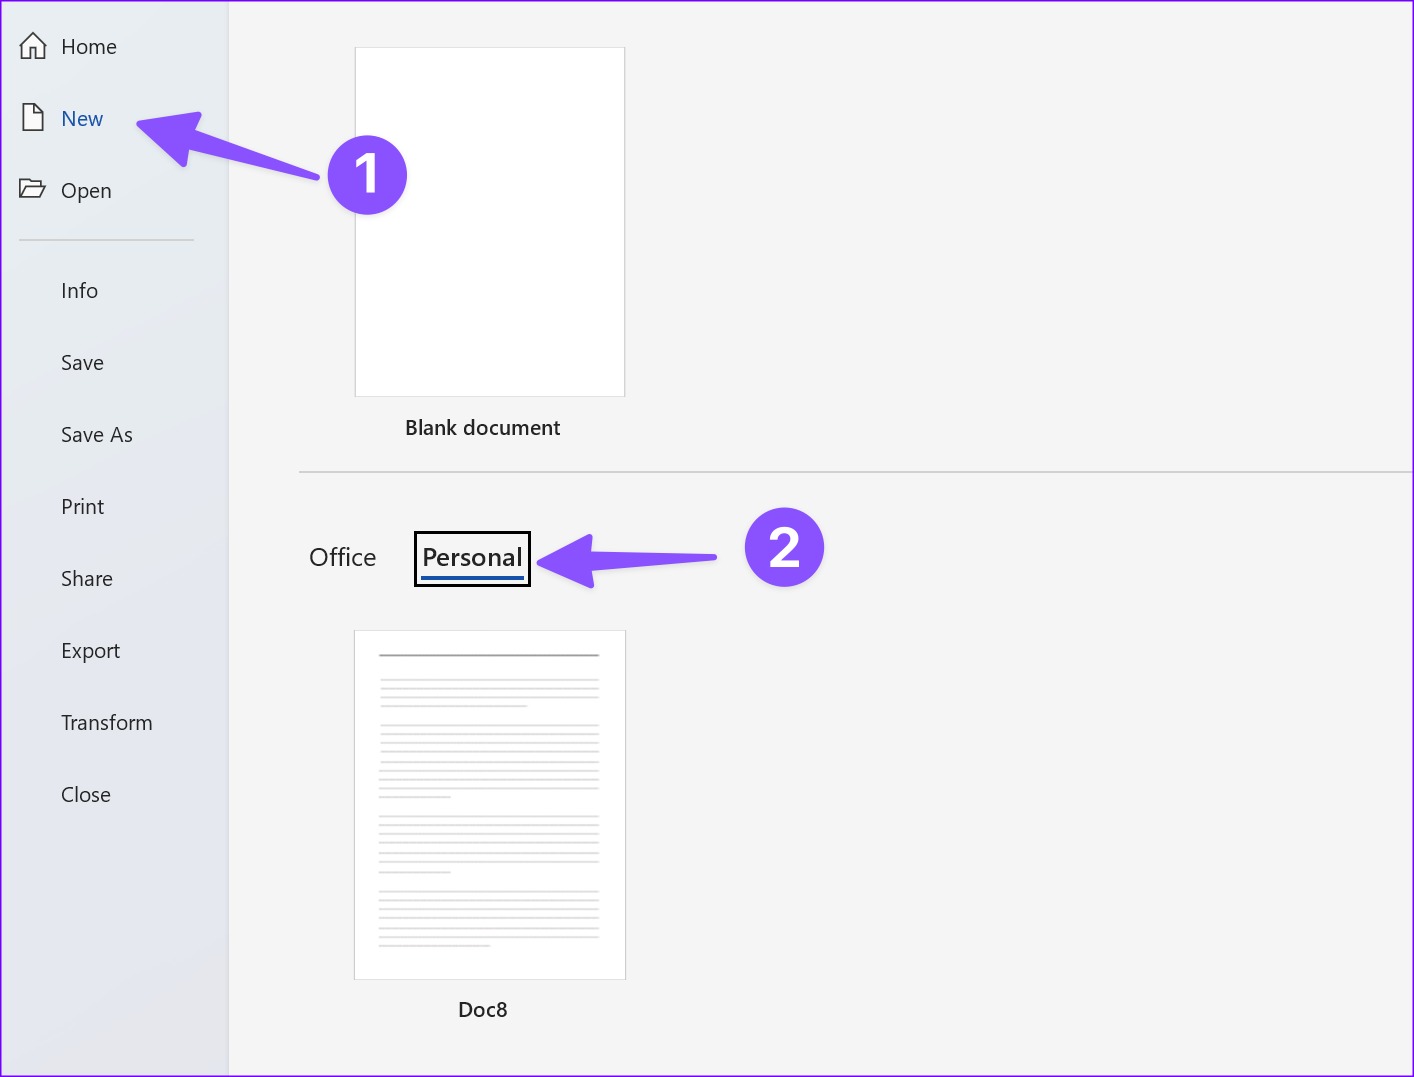
You can find your Word template from the New menu and click on the Personal menu while creating a new document.
Also Read: How to insert and edit a page border in Microsoft Word
Was this helpful?
Last updated on 18 April, 2024
Read Next
 How to Reset iPhone Home Screen Layout to Default
What Is Reset Home Screen Layout on iPhone?
How to Reset iPhone Home Screen Layout to Default
What Is Reset Home Screen Layout on iPhone?
 How to Add Page Numbers in Microsoft Word
Add Page Numbers in Word Mobile App If you are on the go and want to add page numbers at the last minute, you can use the Microsoft Office app
How to Add Page Numbers in Microsoft Word
Add Page Numbers in Word Mobile App If you are on the go and want to add page numbers at the last minute, you can use the Microsoft Office app
 3 Ways to Adjust the Page Margin in Microsoft Word
Method 1: Adjust the Page Margin of a Word Document Using the Ruler Step 1: Open the Word document to adjust the page margin.
3 Ways to Adjust the Page Margin in Microsoft Word
Method 1: Adjust the Page Margin of a Word Document Using the Ruler Step 1: Open the Word document to adjust the page margin.
 2 Ways to Access the Page Setup Dialog Box in Microsoft Word
Method 1: Using the Microsoft Word Ruler The Microsoft Word ruler has several uses, including quickly accessing the Page Setup dialog box. Here's how: Step 1: Click the Start button
2 Ways to Access the Page Setup Dialog Box in Microsoft Word
Method 1: Using the Microsoft Word Ruler The Microsoft Word ruler has several uses, including quickly accessing the Page Setup dialog box. Here's how: Step 1: Click the Start button
 How to Fit Full Page to Window By Default in Adobe Acrobat DC and Reader DC
Adobe Acrobat DC and Acrobat Reader DC prefer fitting pages by width.
How to Fit Full Page to Window By Default in Adobe Acrobat DC and Reader DC
Adobe Acrobat DC and Acrobat Reader DC prefer fitting pages by width.
 How to Make a Cover Page in Microsoft Word Online
One of the primary advantages of Microsoft Word Online is its accessibility.
How to Make a Cover Page in Microsoft Word Online
One of the primary advantages of Microsoft Word Online is its accessibility.
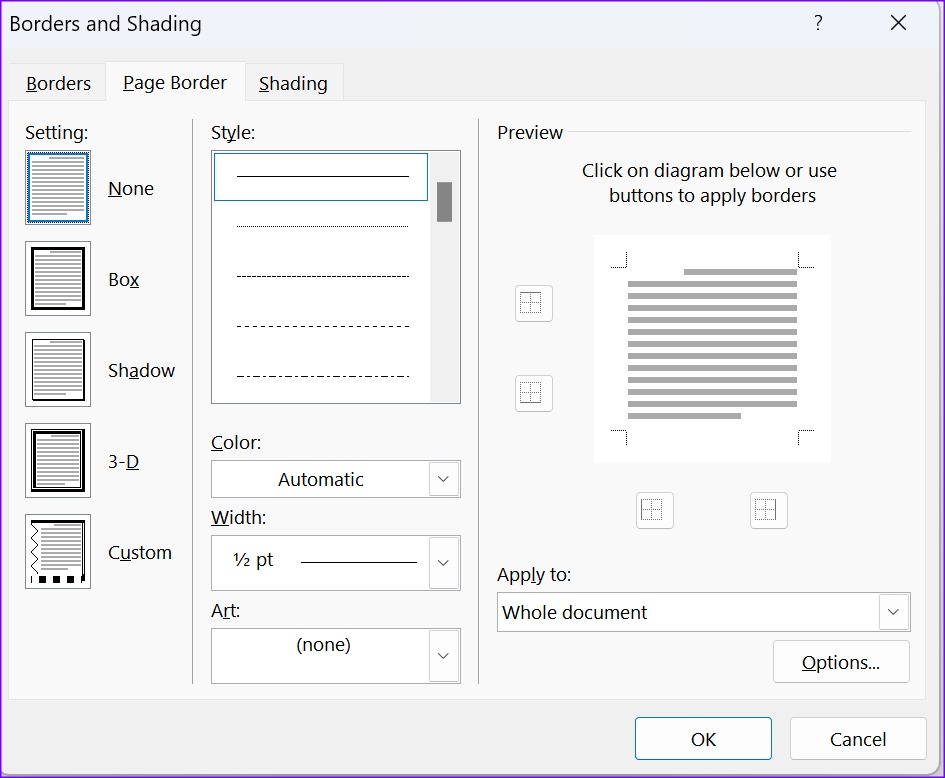
 How to Insert and Edit a Page Border in Microsoft Word
How to Insert a Page Border in Microsoft Word There are different border settings and styles in Microsoft Word.
How to Insert and Edit a Page Border in Microsoft Word
How to Insert a Page Border in Microsoft Word There are different border settings and styles in Microsoft Word.
 15 Best Home Screen Layout Ideas on iPhone
Apple's iOS is often criticized for the lack of customization options.
15 Best Home Screen Layout Ideas on iPhone
Apple's iOS is often criticized for the lack of customization options.
The article above may contain affiliate links which help support Guiding Tech. The content remains unbiased and authentic and will never affect our editorial integrity.