Method 1: Adjust the Page Margin of a Word Document Using the Ruler
Step 1: Open the Word document to adjust the page margin.
Step 2: Click the View tab, and in the Show group, tick the box for Ruler to launch the Microsoft Word ruler. Then, select all the text in the document.

Step 3: Depending on the margin you want to adjust, place your mouse pointer between the boundary, i.e., between the grey and white space at the top or left of the Word page. This will convert the mouse pointer to a double-sided arrow.

Step 4: Slide the double-sided arrow left, right, down, or up to adjust the page margin.

Method 2: Adjust the Page Margin of a Word Document Using the Layout Tab
Adjust the Page Margin Using Preset Margin Options
Step 1: Open the Word document and go to the Layout tab.
Step 2: From the Layout tab, click on Margins.

Step 3: From the Margins drop-down, select a suitable preset margin option. Once done, the Margins drop-down will close while your selection takes effect immediately.

Adjust the Page Margin Using Custom Margins
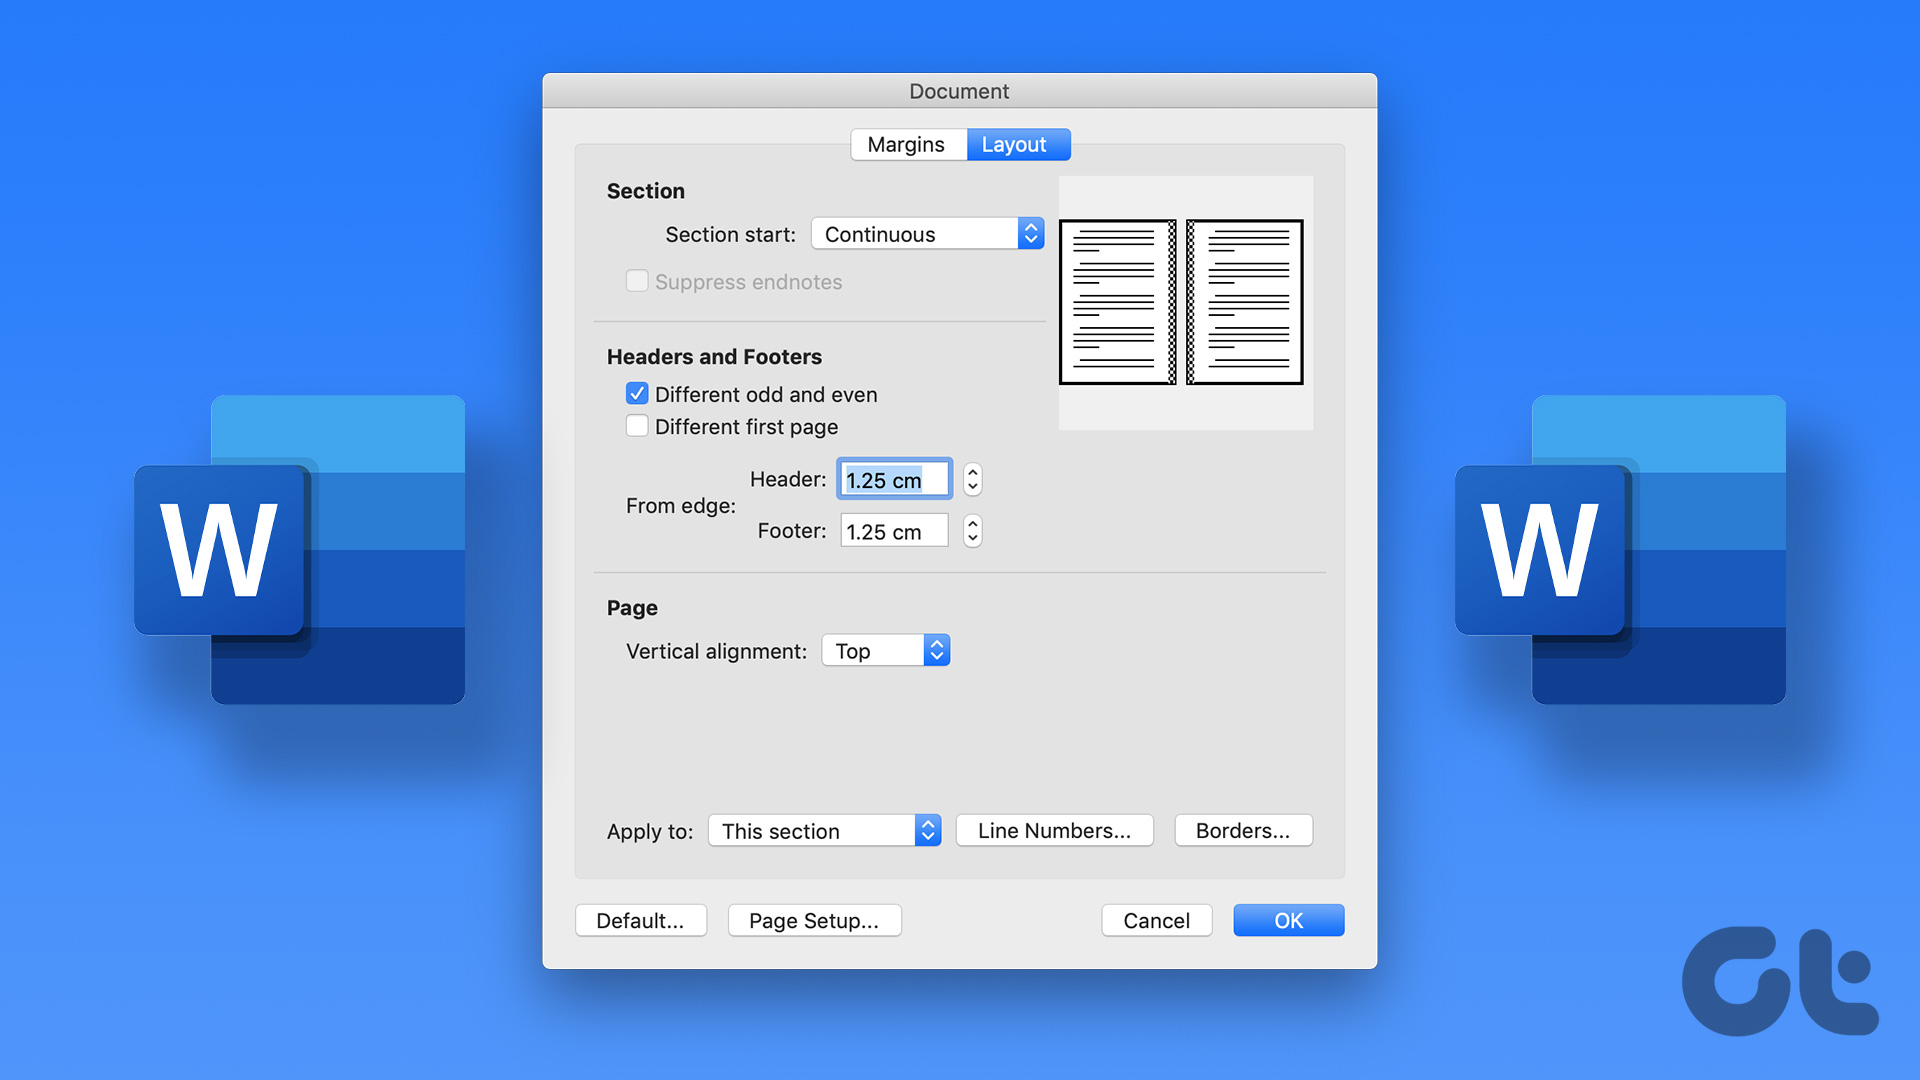
Step 1: From the Margins drop-down, click the Custom Margins button to launch the Page Setup dialog box.

Step 2: Switch to the Margins tab.

Step 3: Place your cursor within the text boxes beneath the Margins section in the Margins tab and type your preferred page margins. You can input page margins for your document’s Top, Bottom, Left, and Right.

Step 4: Click on the drop-down beside Apply to and select where you would like your new margin settings applied to the Whole document or from This point forward. Once done, click OK to close the dialog box.

Was this helpful?
Last updated on 23 August, 2024
Read Next
 How to Adjust AutoCorrect Settings in Microsoft Word
How to Enable or Disable AutoCorrect on Microsoft Word By default, the AutoCorrect feature relies on the library of the words from the language you've chosen to use in the
How to Adjust AutoCorrect Settings in Microsoft Word
How to Enable or Disable AutoCorrect on Microsoft Word By default, the AutoCorrect feature relies on the library of the words from the language you've chosen to use in the
 2 Ways to Access the Page Setup Dialog Box in Microsoft Word
Method 1: Using the Microsoft Word Ruler The Microsoft Word ruler has several uses, including quickly accessing the Page Setup dialog box. Here's how: Step 1: Click the Start button
2 Ways to Access the Page Setup Dialog Box in Microsoft Word
Method 1: Using the Microsoft Word Ruler The Microsoft Word ruler has several uses, including quickly accessing the Page Setup dialog box. Here's how: Step 1: Click the Start button
 How to Make a Cover Page in Microsoft Word Online
One of the primary advantages of Microsoft Word Online is its accessibility.
How to Make a Cover Page in Microsoft Word Online
One of the primary advantages of Microsoft Word Online is its accessibility.
 How to Insert and Edit a Page Border in Microsoft Word
How to Insert a Page Border in Microsoft Word There are different border settings and styles in Microsoft Word.
How to Insert and Edit a Page Border in Microsoft Word
How to Insert a Page Border in Microsoft Word There are different border settings and styles in Microsoft Word.
 5 Ways to Change the Default Page Layout in Microsoft Word
Method 1: Change Page Size Microsoft Word uses the document size and layout as A4 by default.
5 Ways to Change the Default Page Layout in Microsoft Word
Method 1: Change Page Size Microsoft Word uses the document size and layout as A4 by default.
 How to Add Page Numbers in Microsoft Word
Add Page Numbers in Word Mobile App If you are on the go and want to add page numbers at the last minute, you can use the Microsoft Office app
How to Add Page Numbers in Microsoft Word
Add Page Numbers in Word Mobile App If you are on the go and want to add page numbers at the last minute, you can use the Microsoft Office app
 Google Docs vs. Microsoft Word Online: Which Word Processor Is Better
Google Docs vs.
Google Docs vs. Microsoft Word Online: Which Word Processor Is Better
Google Docs vs.
 Apple Pages vs Microsoft Word: Which Word Processing Software Is Better
Every major tech company out there is offering their version of the productivity suite.
Apple Pages vs Microsoft Word: Which Word Processing Software Is Better
Every major tech company out there is offering their version of the productivity suite.
The article above may contain affiliate links which help support Guiding Tech. The content remains unbiased and authentic and will never affect our editorial integrity.