How to Insert a Page Border in Microsoft Word
There are different border settings and styles in Microsoft Word. Select your preferred border feature before adding a page border to your document. Note that a border is different from the page margin.
Step 1: Launch the Microsoft Word app.
Step 2: On the Ribbon at the top, click the Design tab.
Step 3: Click the Page Borders option in the Page Background group.

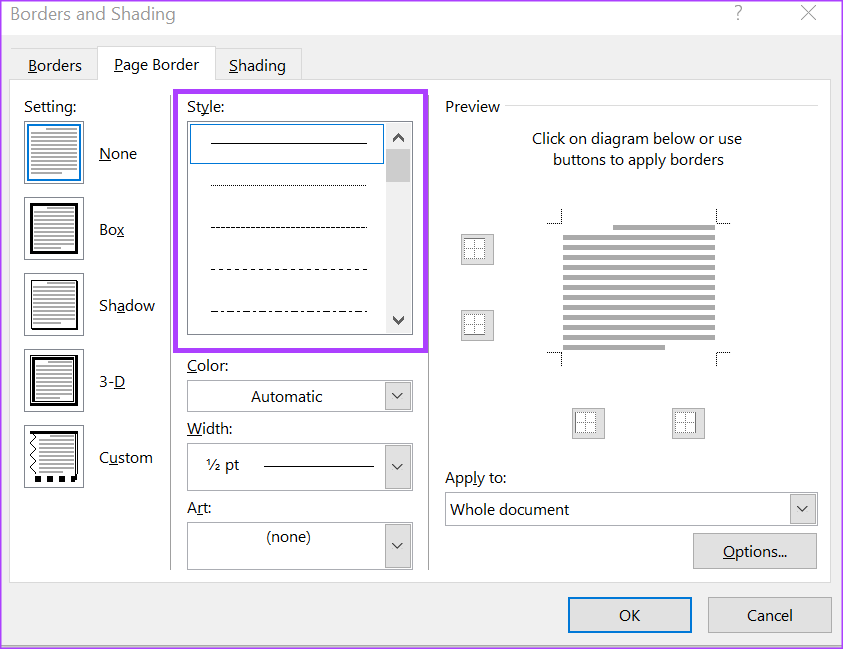
Step 4: In the Borders and Shading dialog box, click the Page Border tab.

Step 5: Next, in the Setting section, select your preferred option. The Border Setting section determines the vividness of your border.

Step 6: In the Style section, scroll through the section and select the thickness of the border lines.
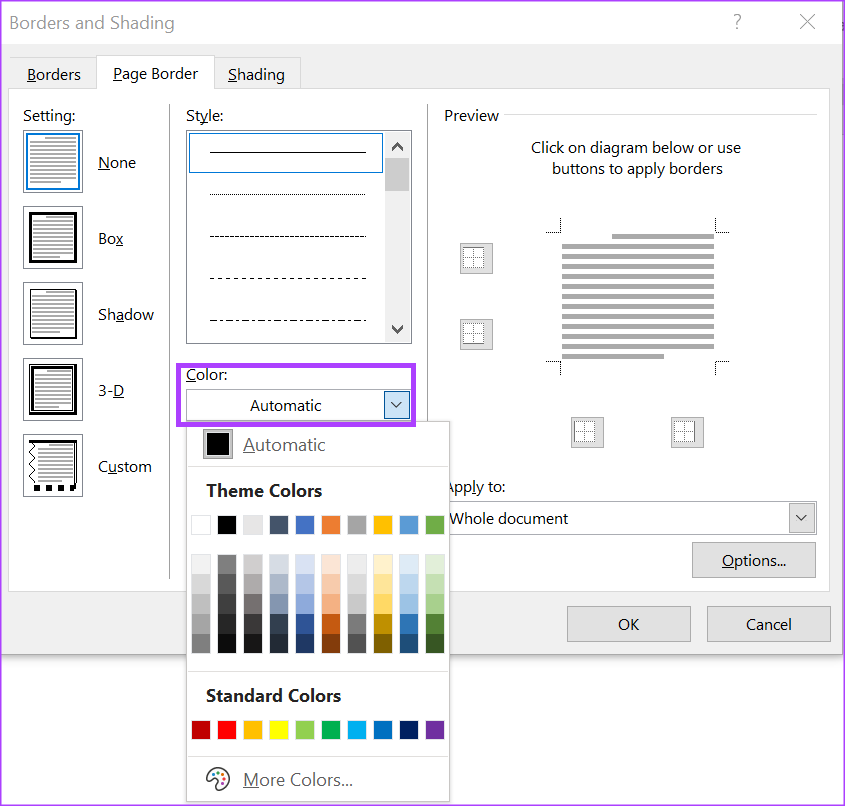
Step 7: In the Color section, click the drop-down menu and select the preferred color for your border. If you do not select a border color, the default color will be black.
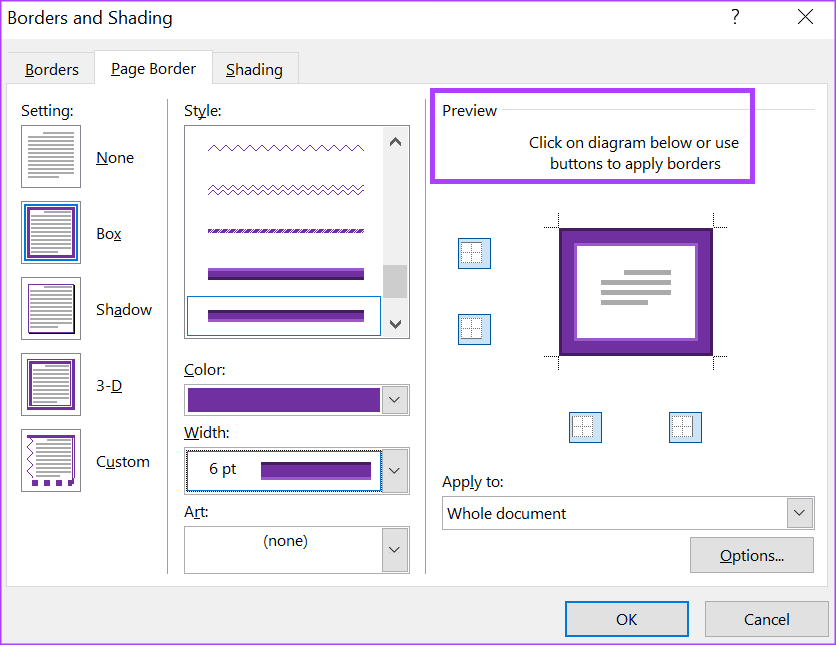
Step 8: In the Width section, click the drop-down > select the preferred width for the border lines.
Note: The initial thickness of the border width is connected to your border style.

Step 9: In the Art section, click the drop-down and select the preferred graphic for the border. Note that this is optional; if you choose an art feature, the style and color options will no longer be available.

Step 10: After selecting your preferred design elements for the page border, check its final look in the Preview section.
Step 11: Select or deselect the boxes in the Preview section to determine the page margins with borders.
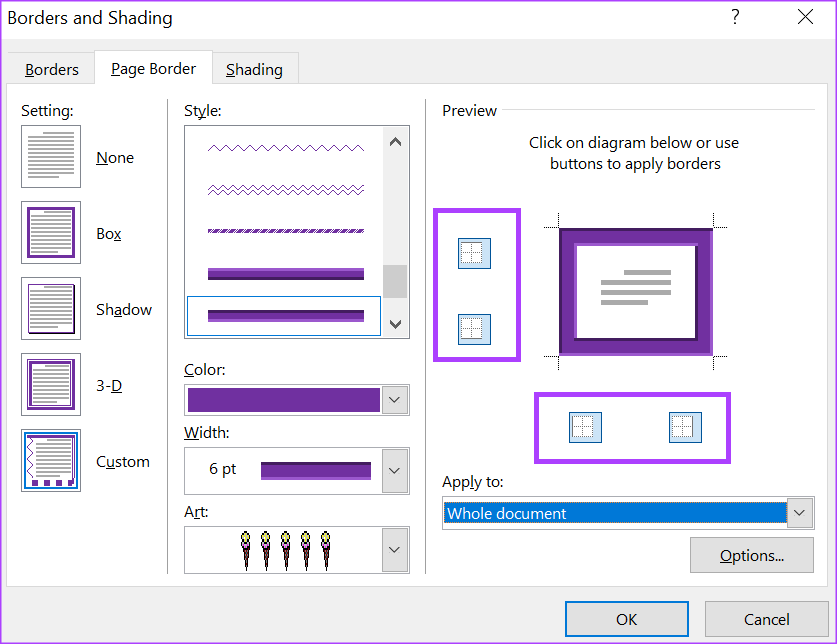
Step 12: In the Apply to section, select where you would like the border to feature from the following options:
- Whole document
- This section
- This section – First page only
- This section – All except first page

Step 13: Finally, click OK to save your changes.

How to Edit a Page Border in Microsoft Word
If you would like to change certain things related to the appearance of a page border, follow the same steps to add a page border. However, if you would like to adjust the distance between the page border and the page margin, here’s what you need to do:
Step 1: On the Word Ribbon, click the Design tab.
Step 2: Click the Page Borders option in the Page Background group, then wait for the Borders and Shading dialog box to open.
Step 3: In the Borders and Shading dialog box, click the Page Border tab.
Step 4: Click Options at the bottom-right > wait for the Border and Shading Options dialog box to launch.

Step 5: In the Margin section, click the toggles beside Top, Bottom, Left, and Right to determine your margin.

Step 6: In the Measure from section, click the drop-down > choose where you want your border to start from.

Step 7: Preview your selections in the Preview section.

Step 8: Finally, click OK to save your changes.

How to Remove a Page Border in Microsoft Word
Step 1: On the Word Ribbon, click the Design tab.

Step 2: Click the Page Borders option in the Page Background group, then wait for the Borders and Shading dialog box to launch.
Step 3: In the Borders and Shading dialog box, click the Page Border tab.
Step 4: In the Setting section, click on None.

Step 5: Lastly, click OK at the bottom of the dialog box, and the border should be removed.
Was this helpful?
Last updated on 05 August, 2024
Read Next
 How to Insert Videos in a Microsoft Word Document
How to Insert an Online Video in Microsoft Word Microsoft Word for desktop allows you to insert videos from Vimeo, YouTube, and SlideShare.
How to Insert Videos in a Microsoft Word Document
How to Insert an Online Video in Microsoft Word Microsoft Word for desktop allows you to insert videos from Vimeo, YouTube, and SlideShare.
 How to Make a Cover Page in Microsoft Word Online
One of the primary advantages of Microsoft Word Online is its accessibility.
How to Make a Cover Page in Microsoft Word Online
One of the primary advantages of Microsoft Word Online is its accessibility.
 3 Ways to Adjust the Page Margin in Microsoft Word
Method 1: Adjust the Page Margin of a Word Document Using the Ruler Step 1: Open the Word document to adjust the page margin.
3 Ways to Adjust the Page Margin in Microsoft Word
Method 1: Adjust the Page Margin of a Word Document Using the Ruler Step 1: Open the Word document to adjust the page margin.
 2 Ways to Access the Page Setup Dialog Box in Microsoft Word
Method 1: Using the Microsoft Word Ruler The Microsoft Word ruler has several uses, including quickly accessing the Page Setup dialog box. Here's how: Step 1: Click the Start button
2 Ways to Access the Page Setup Dialog Box in Microsoft Word
Method 1: Using the Microsoft Word Ruler The Microsoft Word ruler has several uses, including quickly accessing the Page Setup dialog box. Here's how: Step 1: Click the Start button
 How to Insert a Table of Contents in Microsoft Word
 (Windows and Mac) As a part of the Office redesign, Microsoft revamped the Word app on the desktop.
How to Insert a Table of Contents in Microsoft Word
How to Insert a Table of Contents in Microsoft Word (Windows and Mac) As a part of the Office redesign, Microsoft revamped the Word app on the desktop.
 How to Create and Insert a Signature in Microsoft Word
Microsoft Word is so versatile that you can use it for official documentation and creating invoices.
How to Create and Insert a Signature in Microsoft Word
Microsoft Word is so versatile that you can use it for official documentation and creating invoices.
 How to Insert Audio Files into Microsoft Word
Method 1: Using a Simple Drag and Drop The easiest way to insert audio in Microsoft Word is to use a simple drag-and-drop method.
How to Insert Audio Files into Microsoft Word
Method 1: Using a Simple Drag and Drop The easiest way to insert audio in Microsoft Word is to use a simple drag-and-drop method.
 How to Insert and Edit Pictures in Google Docs on Mobile and PC
How to Insert a Picture in Google Docs on PC Drag and drop: Open the Google Docs document and place your cursor where you want to insert the image.
How to Insert and Edit Pictures in Google Docs on Mobile and PC
How to Insert a Picture in Google Docs on PC Drag and drop: Open the Google Docs document and place your cursor where you want to insert the image.
The article above may contain affiliate links which help support Guiding Tech. The content remains unbiased and authentic and will never affect our editorial integrity.