Why Does Your Android Phone Say “Emergency Calls Only”?
Before we get started on fixing this issue, let us have a brief look at why this error might be occurring on your Android phone.
- The area you’re currently in has poor network connectivity.
- Your network provider is currently facing a temporary outage, causing issues when placing calls.
- Your mobile plan might have expired or become inactive.
- A temporary device or software glitch might be causing your phone to show “Emergency calls only”.
- The currently selected network provider is incorrect, causing your phone to not connect to your network.
- Insufficient network speeds are causing your phone to not connect to active 5G networks.
- Issues with the SIM Toolkit app is causing your Android phone to go into the “Emergency calls only” mode.
Basic Fixes:
- Ensure your mobile plan is active: If your mobile service provider has suspended calling and messaging services for your phone, you might not be able to receive or make calls from your Android phone. So, check and ensure your mobile plan is active.
- Enable and disable Airplane Mode: Airplane Mode helps disable all radio communications on your phone, effectively rebooting all the network connections. To do this, enable Airplane Mode and wait a while. Disable it and, once the network bars are visible, try making a call to check.
- Re-insert the SIM: Use a SIM ejector tool to remove the SIM card from the phone. Wait for a few seconds and restart your phone. Reinsert the SIM in its place. After a minute or two, your phone should latch on to an appropriate network, and you can start making calls.
- Check for software updates: If the “Emergency calls only” error is due to a network bug, installing the latest software updates might help fix it. You can open the Settings app and check if your phone is up-to-date.
Fix 1: Force Stop and Clear Cache SIM Toolkit
SIM Toolkit is a system app that handles your phone SIM. If it’s acting up, your phone may get stuck on an emergency calls only error. It’s time to force stop it and clear the cache from the Settings menu. Here’s what you need to do.
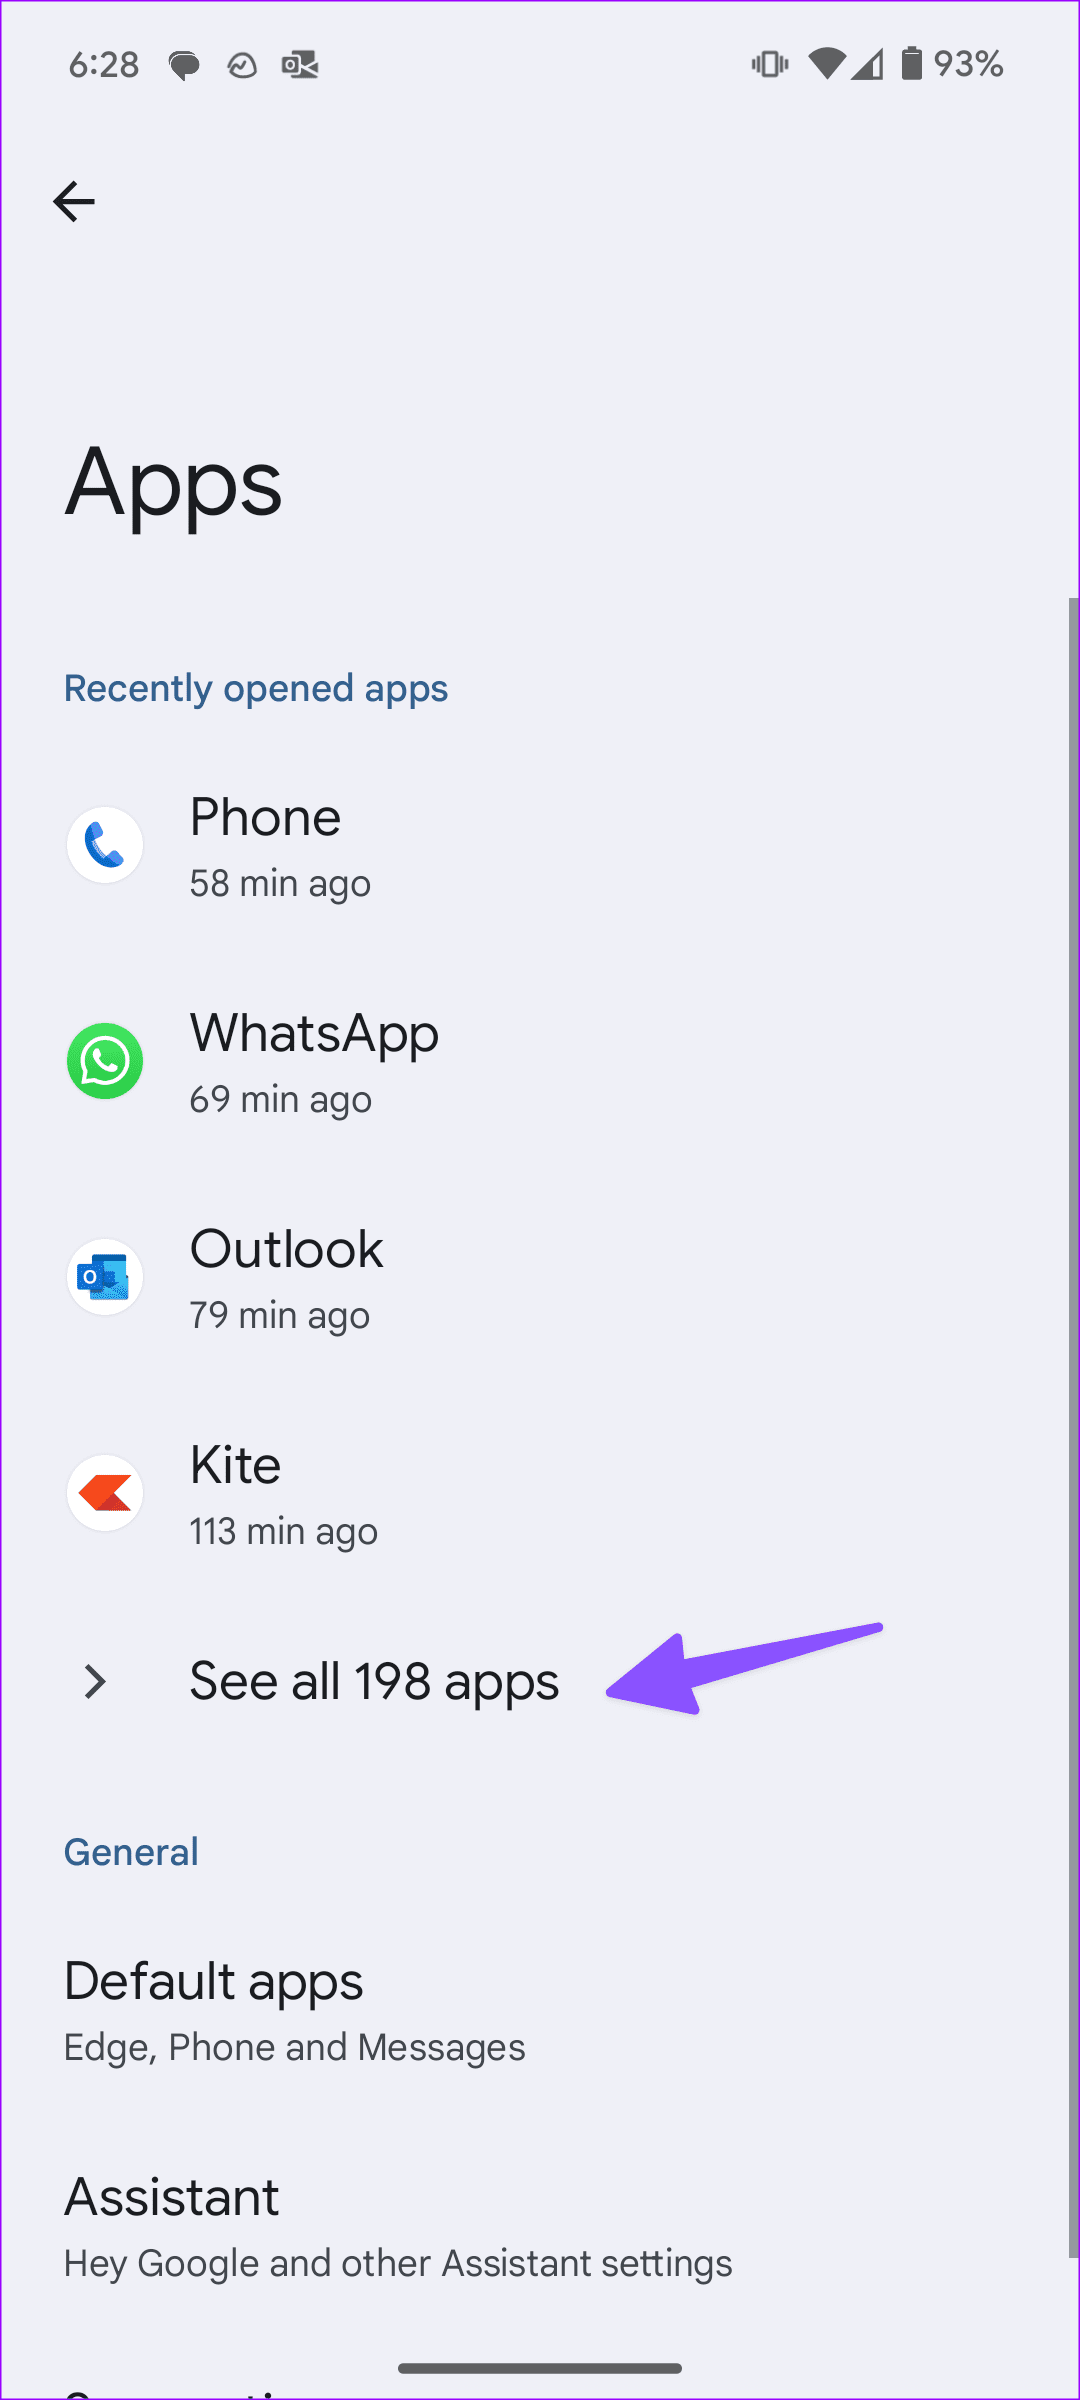
Step 1: Open Settings and tap on Apps. Tap on See all apps.

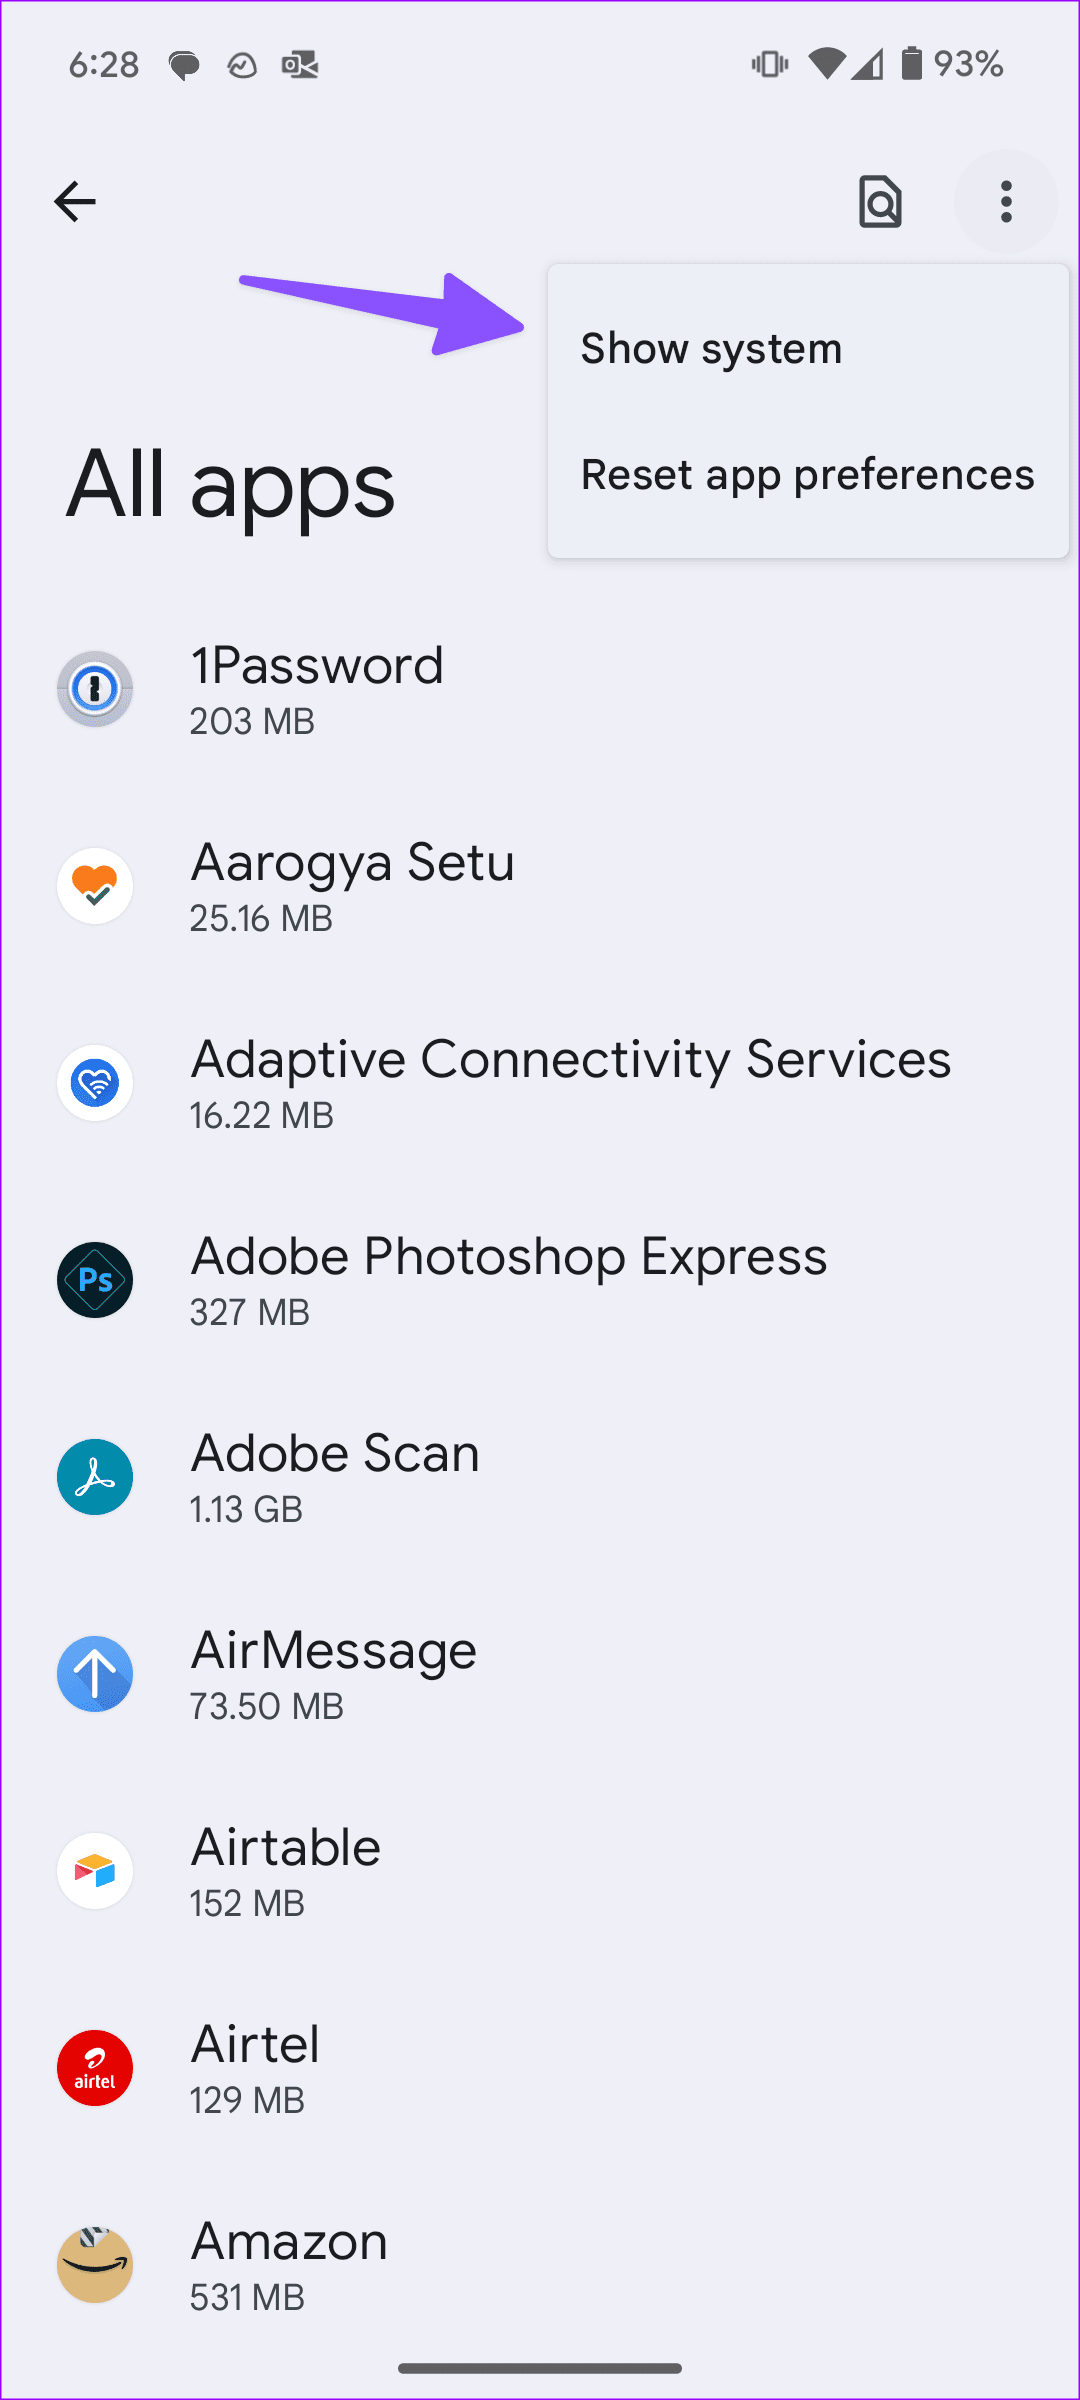
Step 2: Tap the three-dot menu icon and select Show system. Tap on SIM Toolkit.

Step 3: Tap on Force stop. Then, tap Storage and cache and select Clear cache.


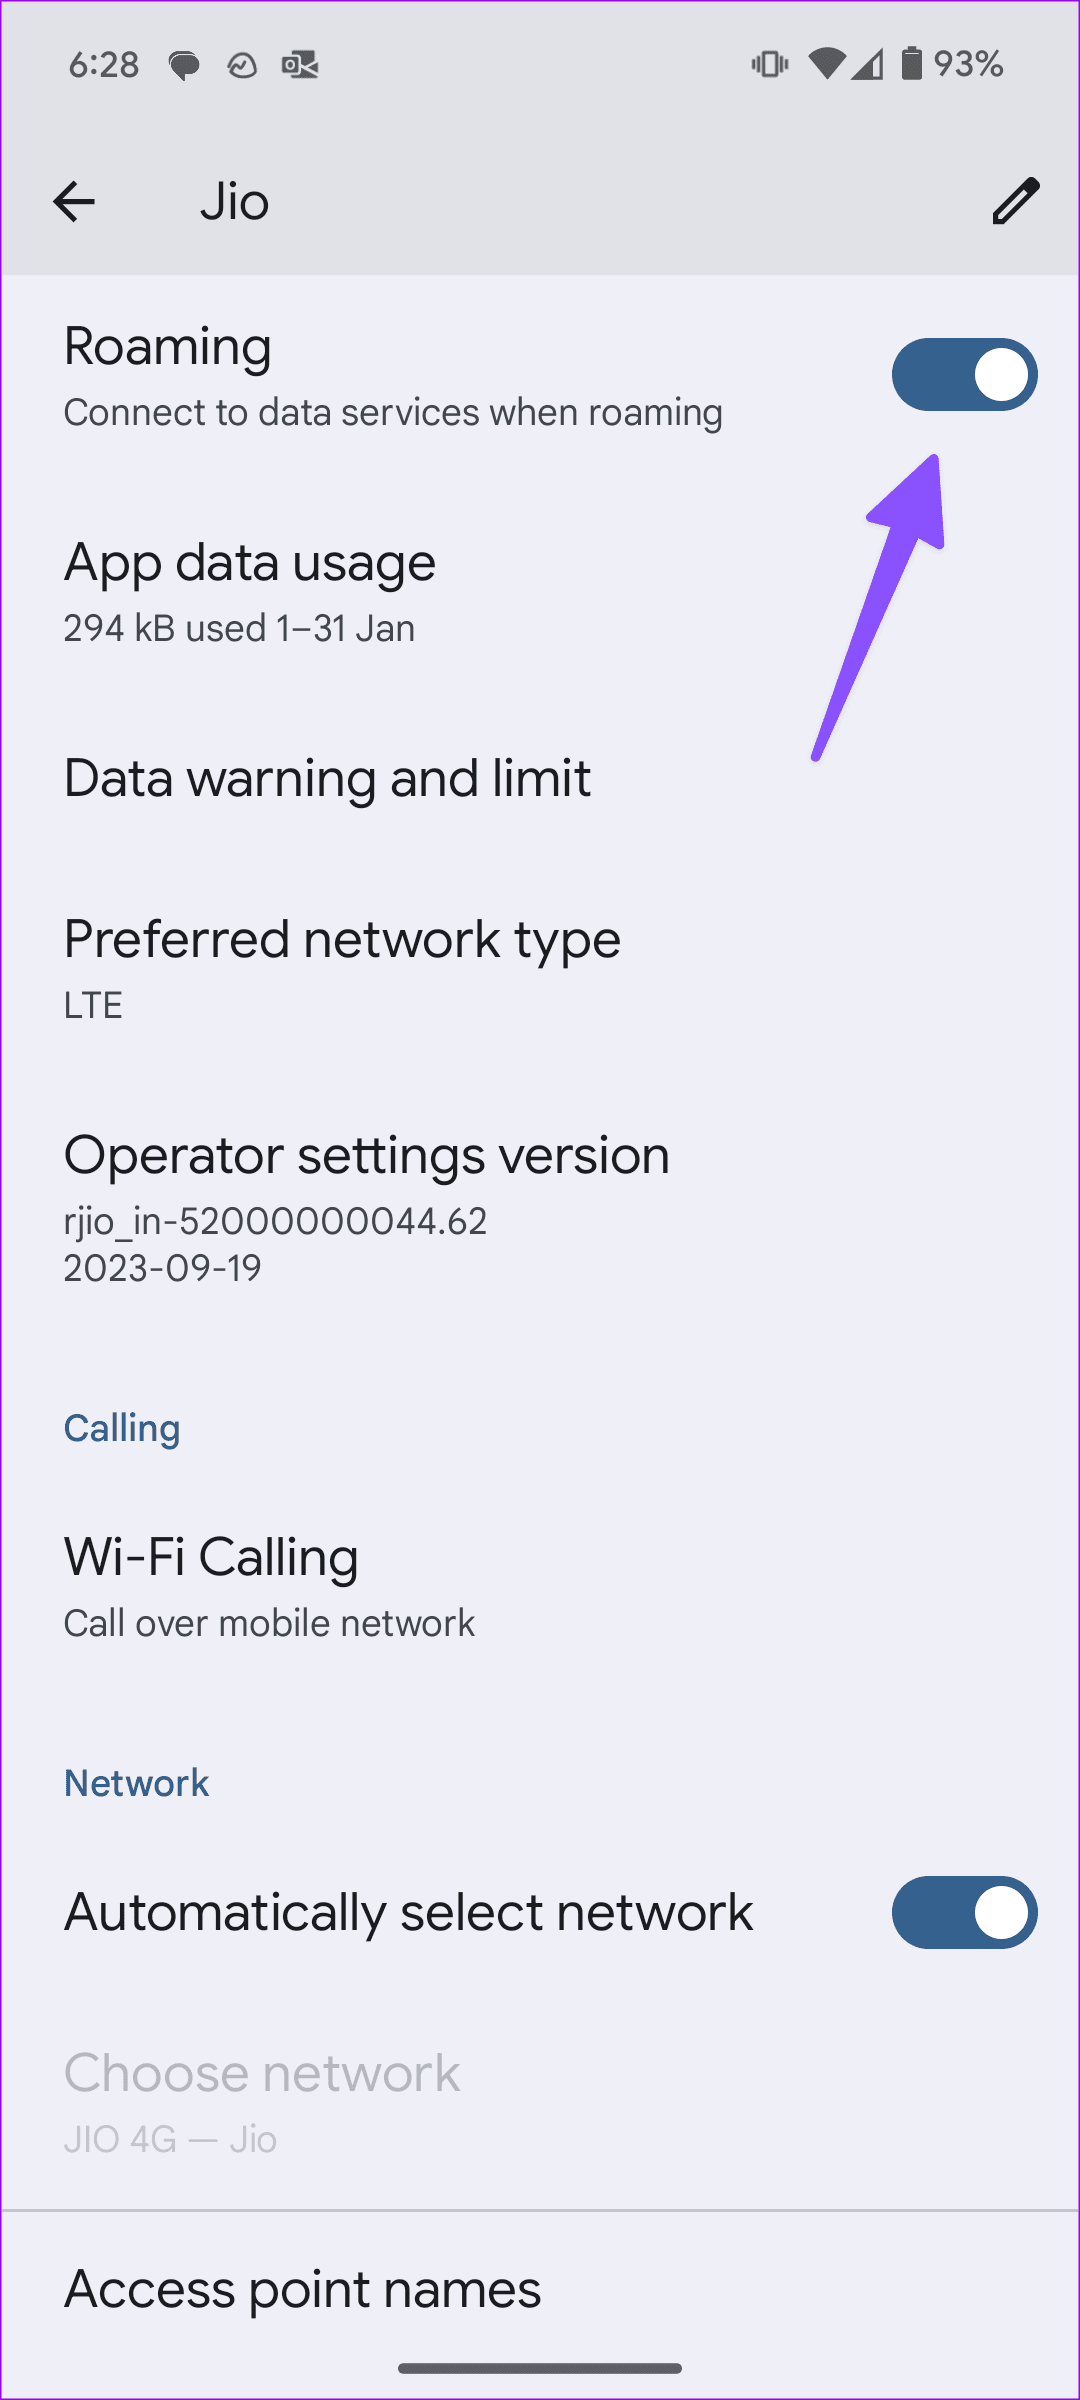
Fix 2: Enable Data Roaming
You can enable data roaming and enjoy flawless calling functionality on your Android phone. This can help ensure your calls don’t get restricted when you’re traveling. Here’s how to do it.
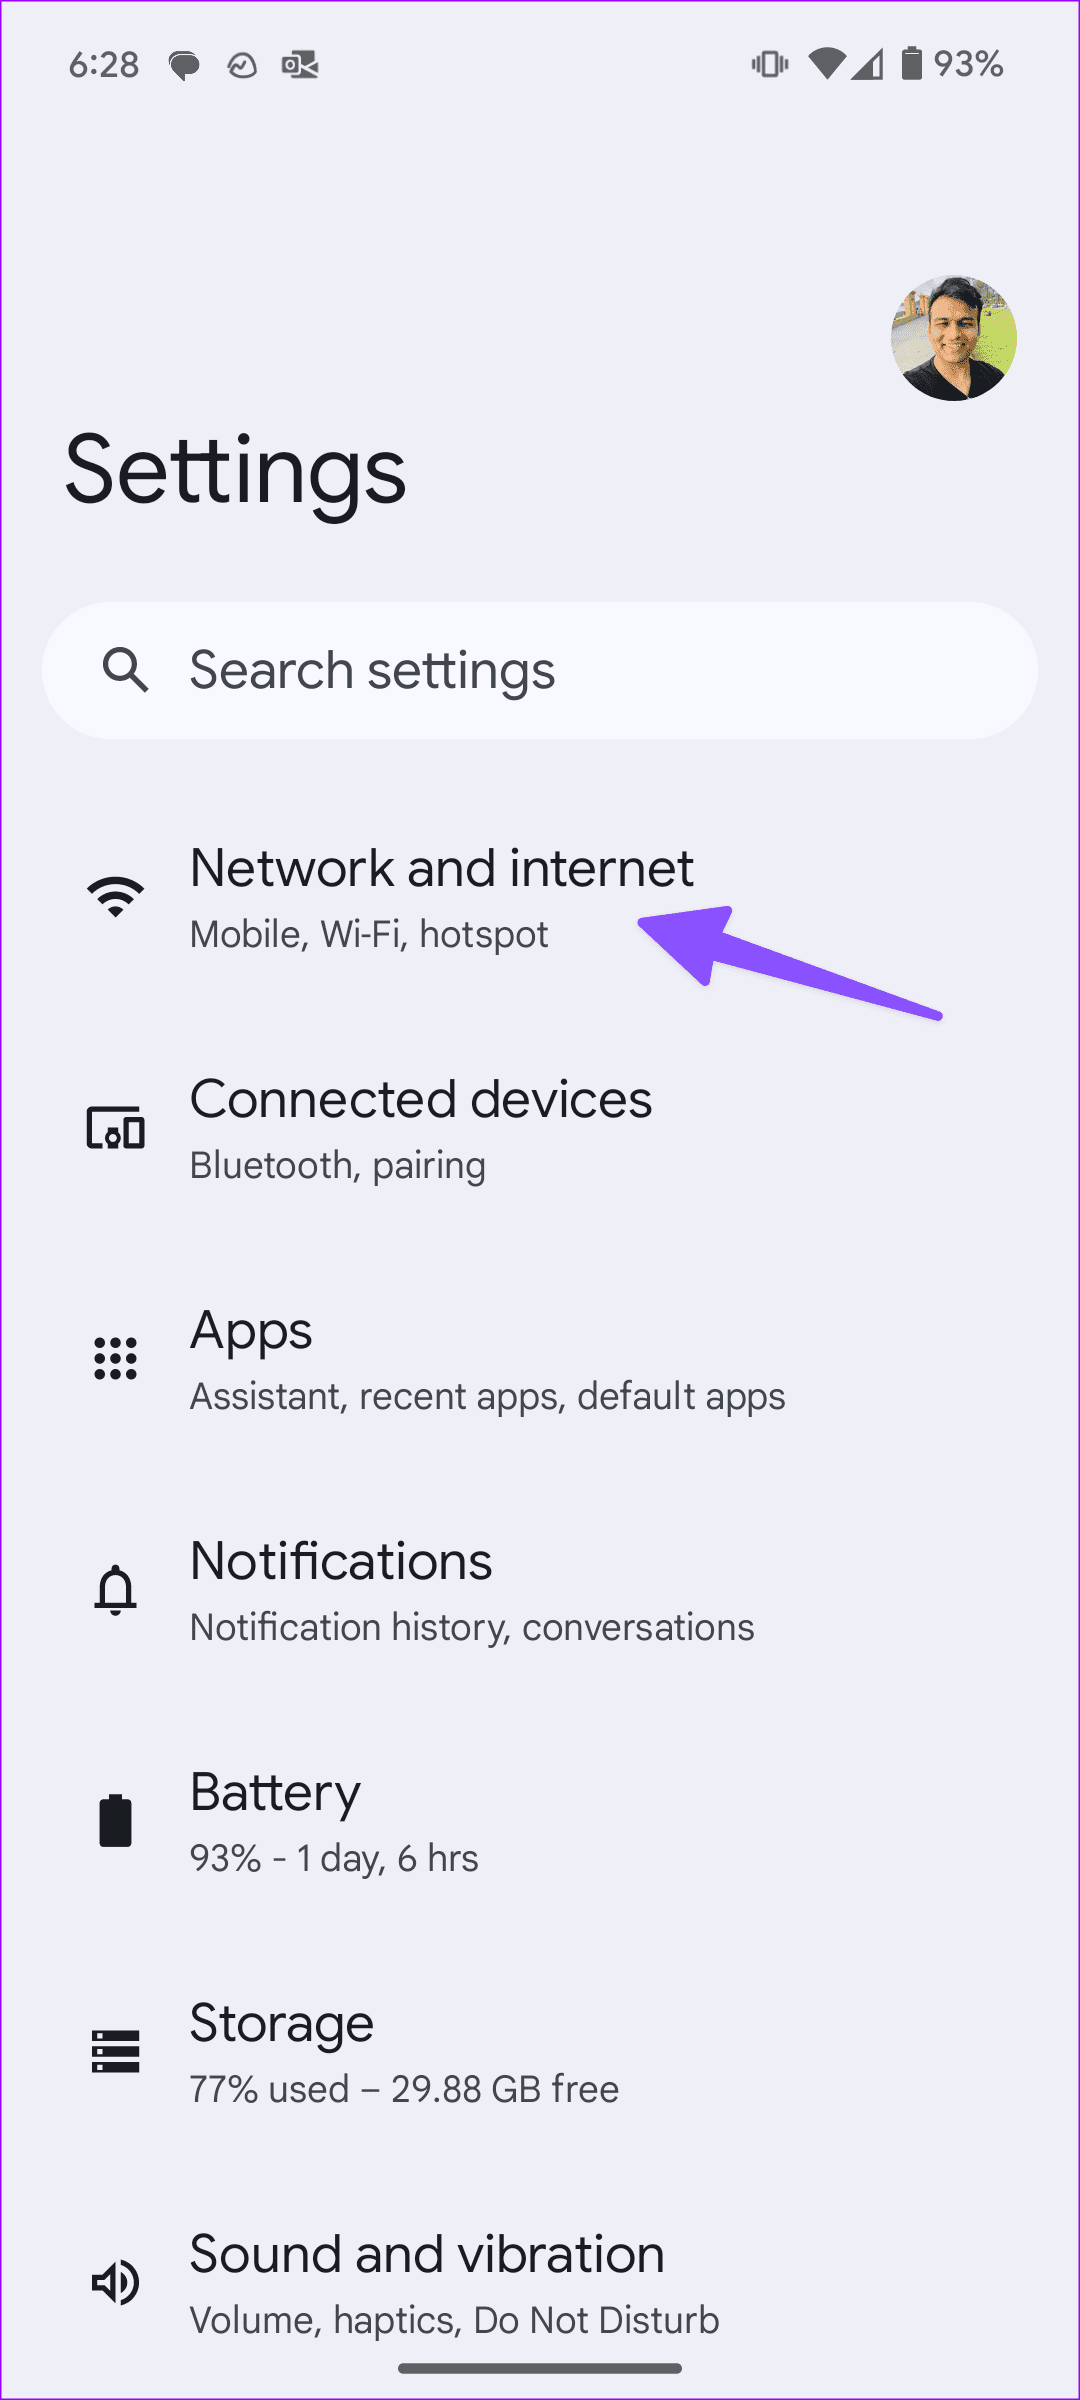
Step 1: Open Settings and select Network and internet. Tap Internet.

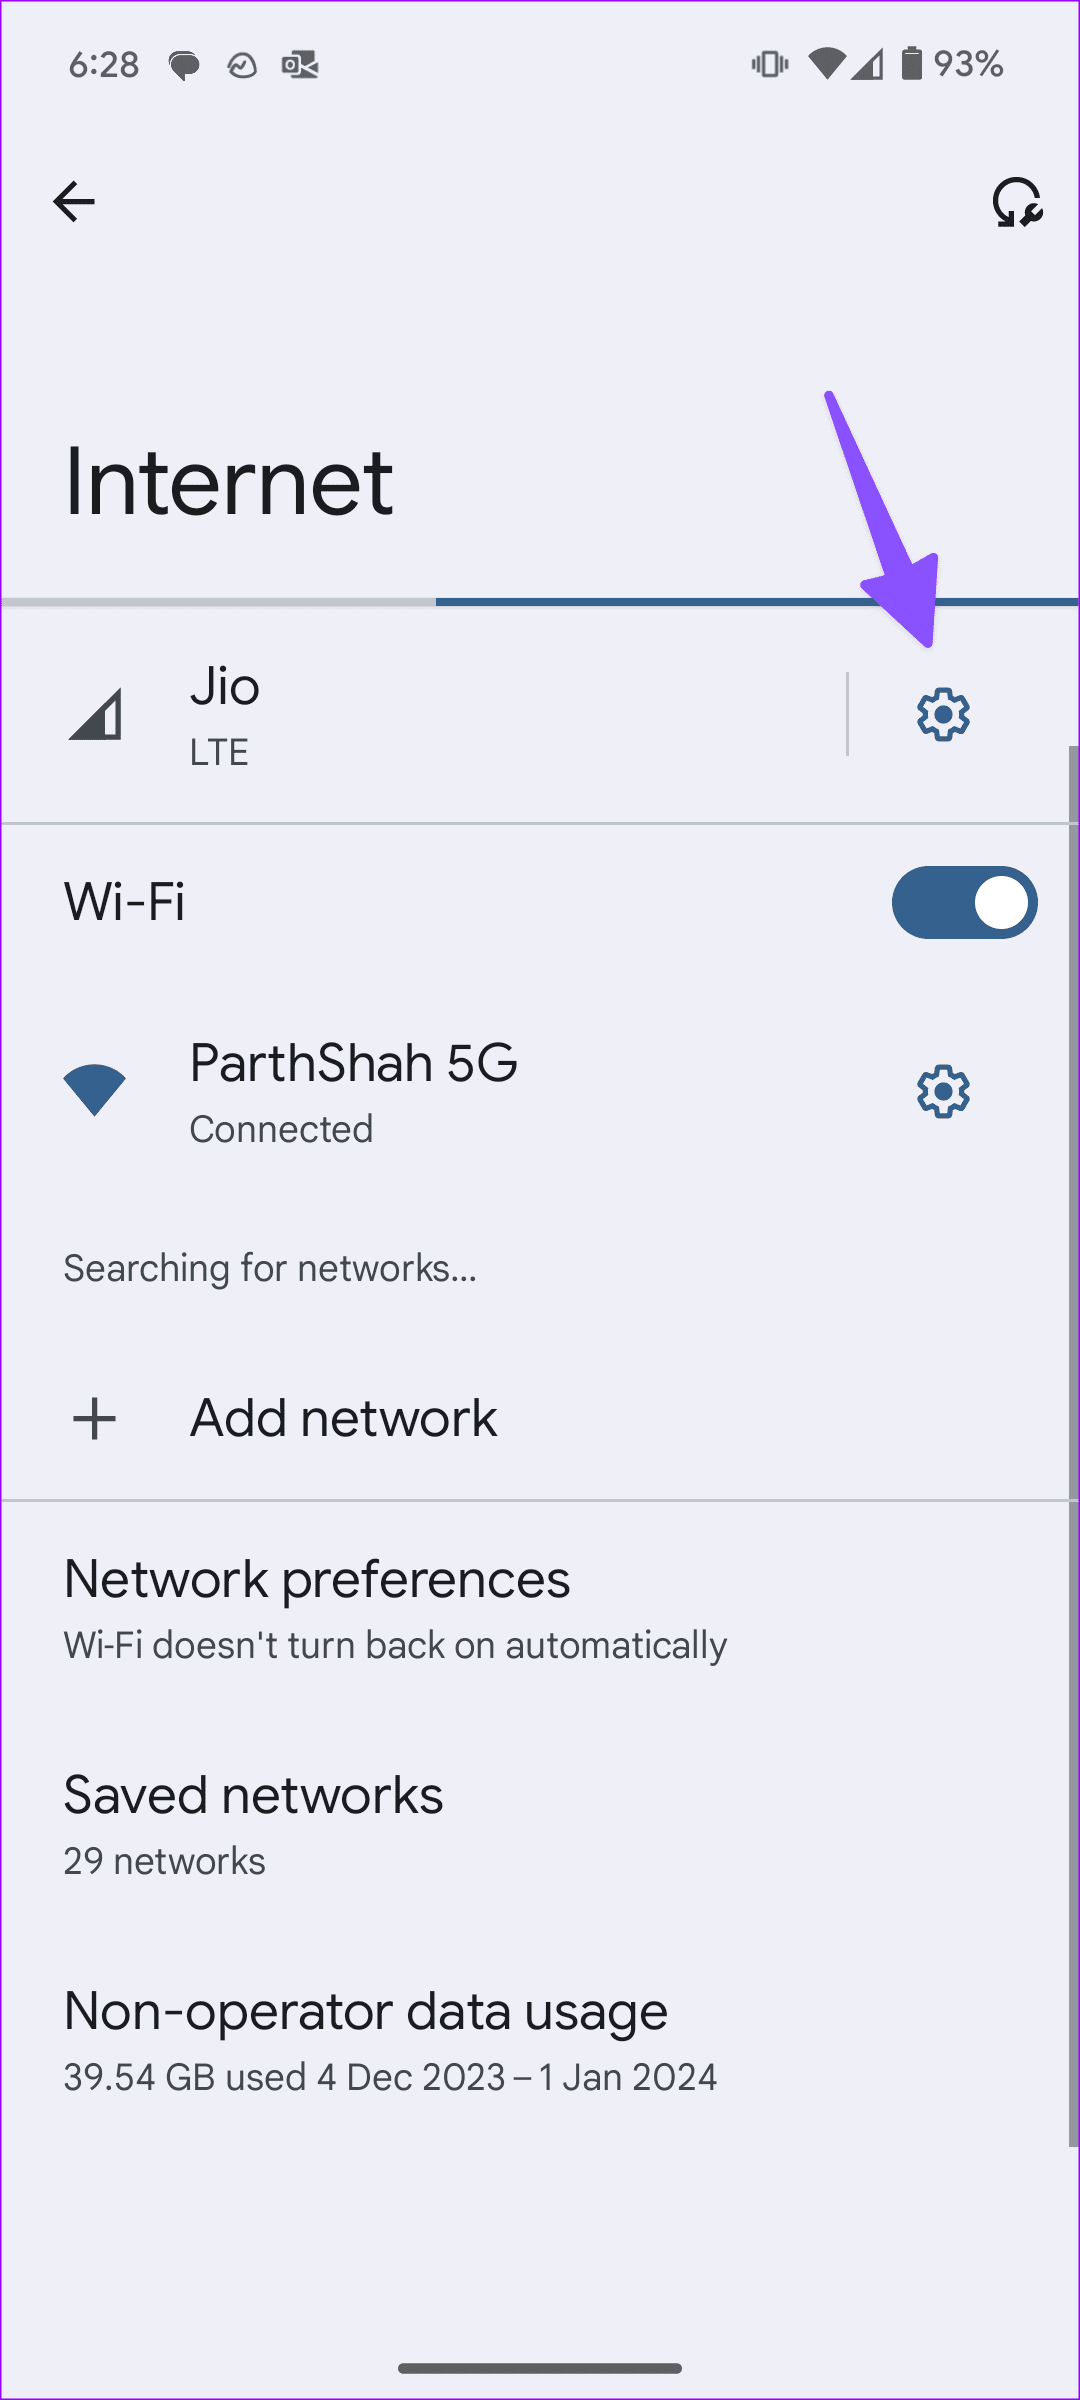
Step 2: Select mobile network settings and enable the Roaming toggle.
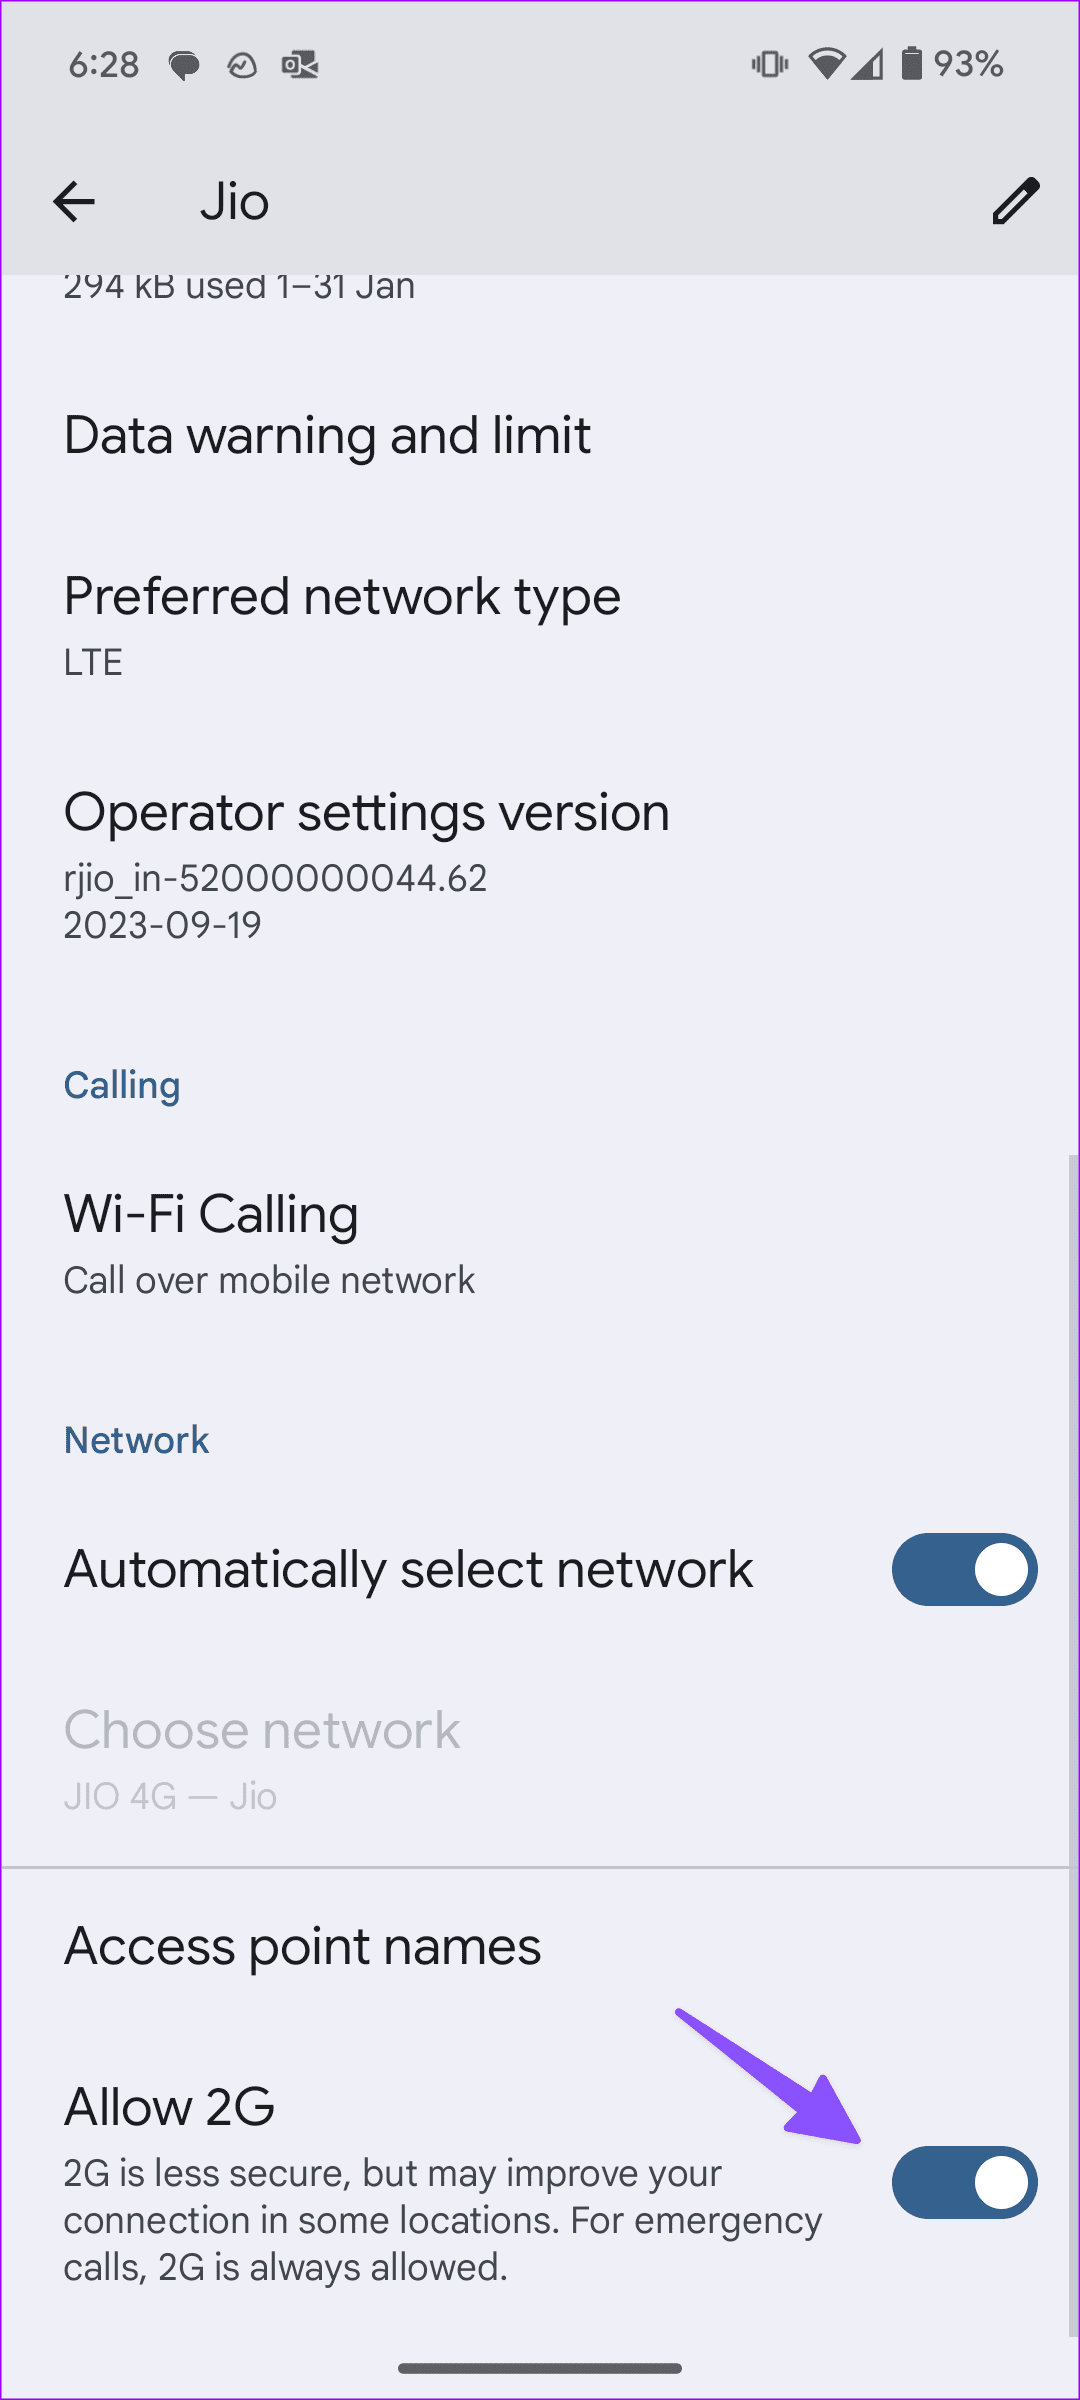
Fix 3: Allow 2G
While 2G is less secure, it may improve your connection in some locations. Here’s how to enable the option on your Android phone.
Step 1: Open Settings and select Network and internet. Tap Internet.
Step 2: Select mobile network settings and enable the Allow 2G toggle.
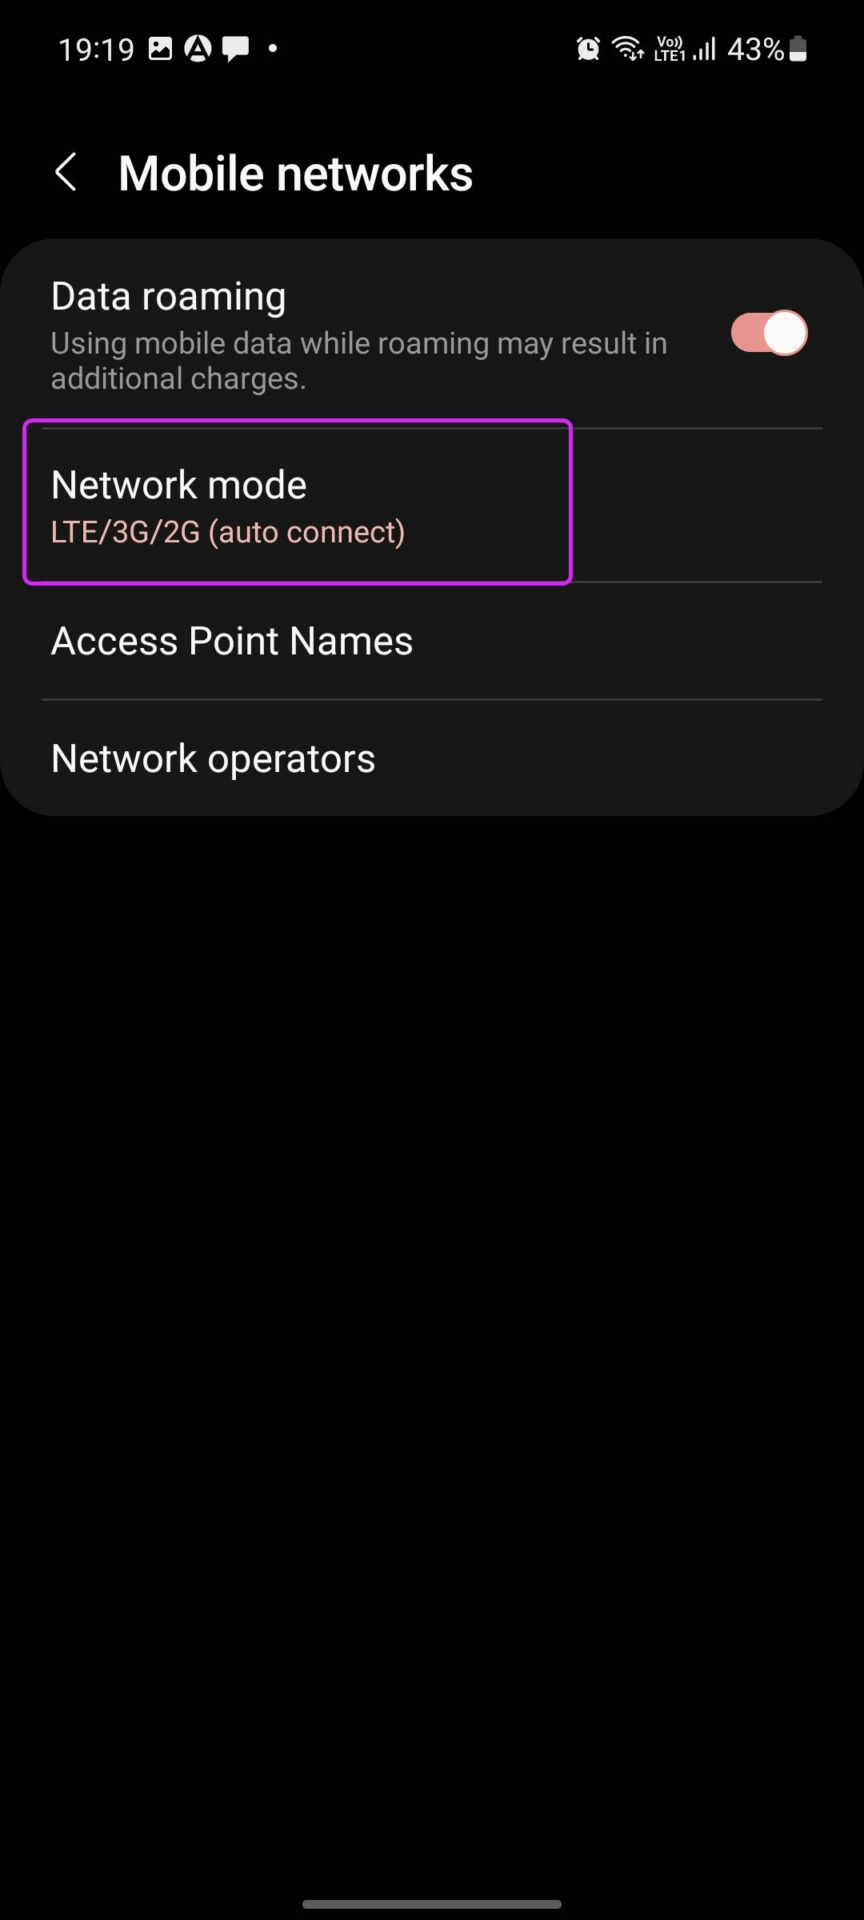
Fix 4: Change the Network Mode
While the 5G mobile network sounds exciting with blazing-fast speeds, it’s often unreliable. You have the option to change the network mode on your Android phone. Here’s how to do it.
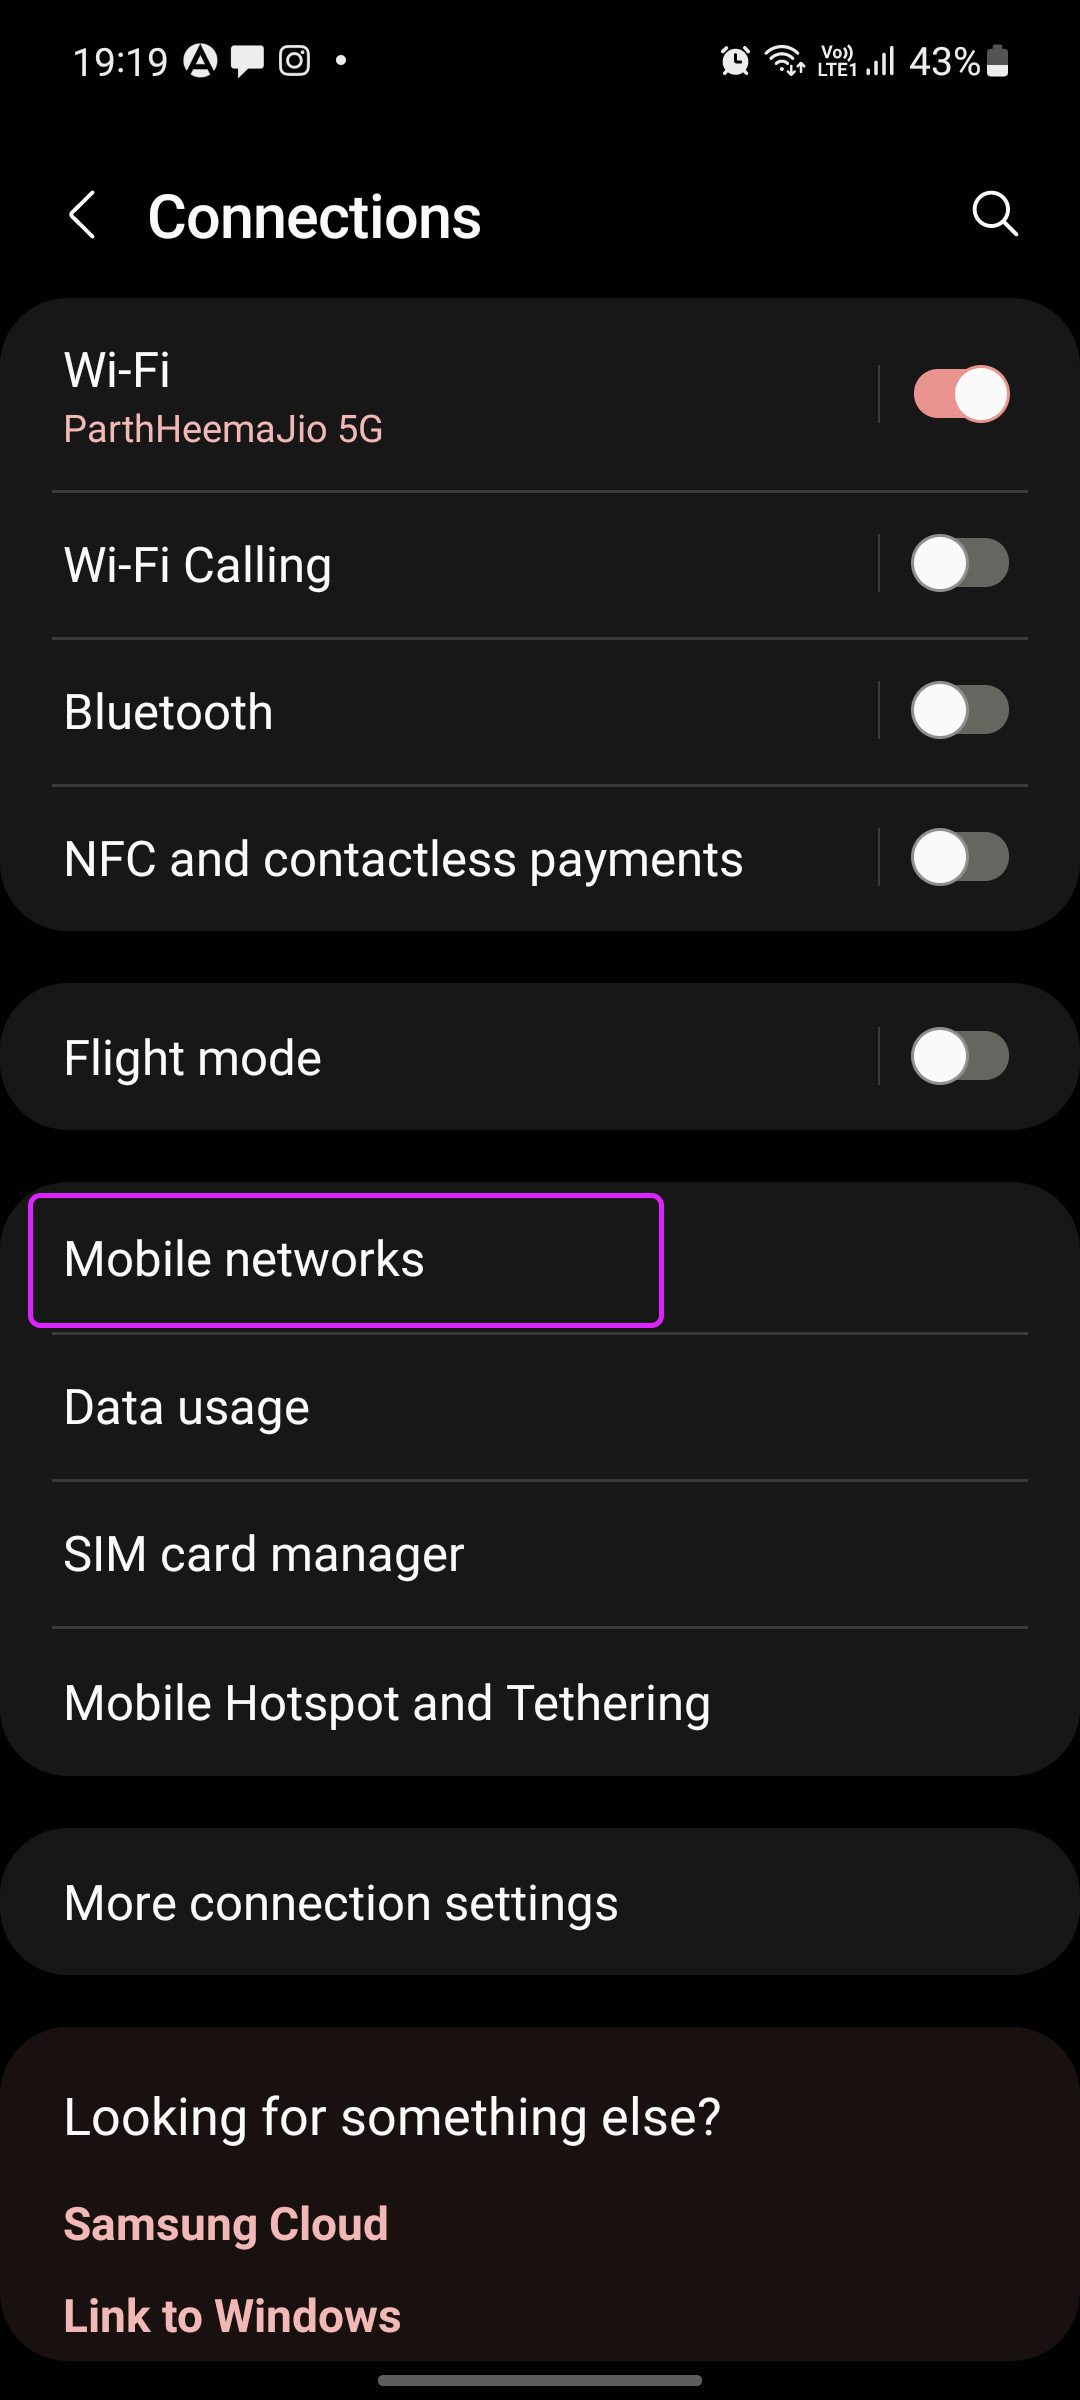
Step 1: Open Settings and go to Connections. Select Mobile networks.
Step 2: Tap on Network mode and select 2G only or 3G only.
Also Read: How to fix “Cellular network not available for voice calls” error on your phone
Fix 5: Manually Select the Network Operator
If your phone is unable to connect to the right network operator, it might cause your calls to not go through. To fix this, manually select the relevant network operator from the settings menu using the below steps.
Step 1: Go to Settings and tap on Connections. Tap on Mobile networks.

Step 2: Tap on Network operators and turn off the toggle for Select automatically.

Once the list of network operators is available, select the relevant one. Wait for the network bars to stabilize and try placing a call to check.
Fix 6: Reset Network Settings
Some Android-based phone makers offer an option to reset network settings. Samsung is one example that allows users to reset network settings on Galaxy phones. Resetting network settings doesn’t delete personal data and only clears the network settings. Use the steps below to do it.
Step 1: Open Settings and search for Reset network settings.
Step 2: Tap on the search suggestion and tap on Reset network settings.


Follow the on-screen instructions to finish the process. Once done, restart your Android phone and wait for the network bars to appear. Then, try placing a call to check if the issue has been resolved.
Was this helpful?
Last updated on 04 September, 2024
2 Comments
Leave a Reply
Read Next
 How to Turn on Emergency Bypass on iPhone to Allow Specific Notifications in DND
What is Emergency Bypass on iPhone?
How to Turn on Emergency Bypass on iPhone to Allow Specific Notifications in DND
What is Emergency Bypass on iPhone?
 5 Best Rechargeable Light Bulbs for Emergency You Can Buy
A dependable light source is indispensable during a power outage.
5 Best Rechargeable Light Bulbs for Emergency You Can Buy
A dependable light source is indispensable during a power outage.
 4 Ways to Fix Android Phone Stuck on Boot Screen
https://youtu.be/JaOC_-u7kdM Try Basic Fixes Perform a force reboot: In most cases, performing a force reboot should resolve any temporary glitches with your OnePlus, Samsung, Motorola, or any other phone, allowing
4 Ways to Fix Android Phone Stuck on Boot Screen
https://youtu.be/JaOC_-u7kdM Try Basic Fixes Perform a force reboot: In most cases, performing a force reboot should resolve any temporary glitches with your OnePlus, Samsung, Motorola, or any other phone, allowing
 5 Ways to Fix Android Phone Not Making Calls But Can Text
Basic Fixes Eject and re-insert SIM: Eject the SIM card from your phone, and insert it again - doing this can refresh the network connection.
5 Ways to Fix Android Phone Not Making Calls But Can Text
Basic Fixes Eject and re-insert SIM: Eject the SIM card from your phone, and insert it again - doing this can refresh the network connection.
 4 Ways to Fix Android Phone Keeps Cutting Out During Calls
Basic Fixes Eject and re-insert SIM: Eject the SIM card from your phone, and insert it again.
4 Ways to Fix Android Phone Keeps Cutting Out During Calls
Basic Fixes Eject and re-insert SIM: Eject the SIM card from your phone, and insert it again.
 5 Fixes for Android Phone Stuck in Safe Mode
Try Basic Fixes Restart your phone: Restarting your Android is the most straightforward method for disabling Safe Mode.
5 Fixes for Android Phone Stuck in Safe Mode
Try Basic Fixes Restart your phone: Restarting your Android is the most straightforward method for disabling Safe Mode.
 10 Ways to Fix Windows Update Stuck at 100% Issue
Keeping your Windows device up-to-date ensures you get access to the latest features and bug fixes.
10 Ways to Fix Windows Update Stuck at 100% Issue
Keeping your Windows device up-to-date ensures you get access to the latest features and bug fixes.
 3 Ways to Fix Fire TV Stick Stuck on Updating Issue
Basic Fixes: Wait for the update to finish: If you're updating to a newer OS version or haven't updated your device in a while, your device might need time to
3 Ways to Fix Fire TV Stick Stuck on Updating Issue
Basic Fixes: Wait for the update to finish: If you're updating to a newer OS version or haven't updated your device in a while, your device might need time to
The article above may contain affiliate links which help support Guiding Tech. The content remains unbiased and authentic and will never affect our editorial integrity.

My idea sim is showing emergency calls only and there cant be any call done from the phone. How to resolve it
please help i cannot open my samsung S22 ultra phone