Where Is the Hosts File Located in Windows
The host files are stored locally on your computer within the C drive. To locate the path, follow the steps below.
Step 1: Press the Windows + S key on your keyboard. Type This PC and click Open.

Step 2: Double-click on Local Disk C.

Step 3: Navigate to the Windows folder.

Step 4: Scroll down and open the System32 folder.

Step 5: Search for the drivers folder and open it.

Step 6: Double-click on the etc folder.

Step 7: Now, you can see your hosts files.

Alternatively, you can also open This PC and paste the following in the address bar:
C:\Windows\System32\drivers\etc\hosts
Note that you may have to make hidden folders visible to see the hosts file.
How to Edit Hosts File in Windows
Editing the hosts file in Windows is a straightforward process. To get started, you’ll need a text editor, and Windows conveniently includes Notepad as the default option. To modify the hosts file, follow these steps:
Step 1: Click the Windows icon and select the search box. Enter Notepad, right-click the app, and click Run as administrator. Select Yes when prompted.

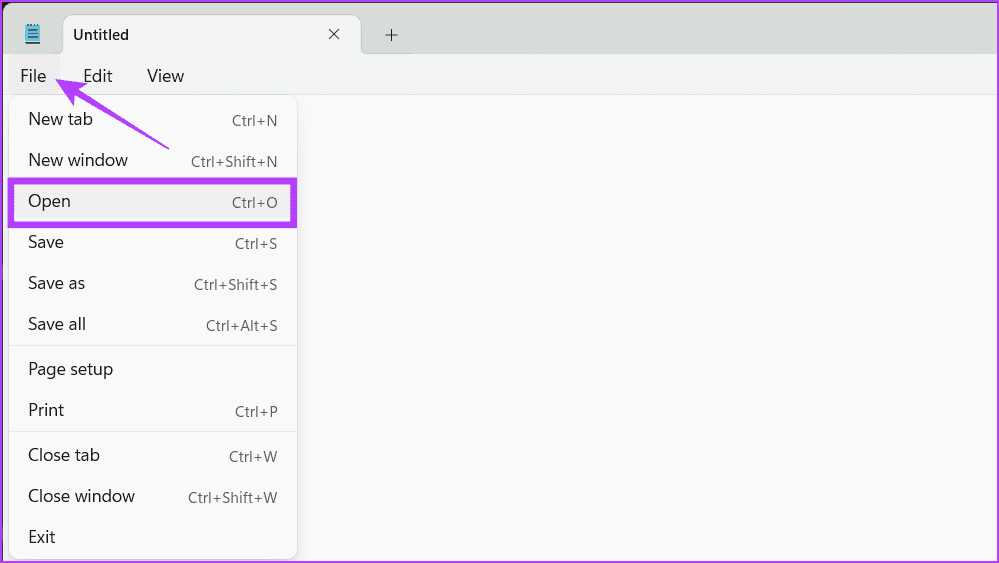
Step 2: Click File and choose Open from the drop-down menu.
Tip: You can also press Ctrl + O to launch the Open menu directly.
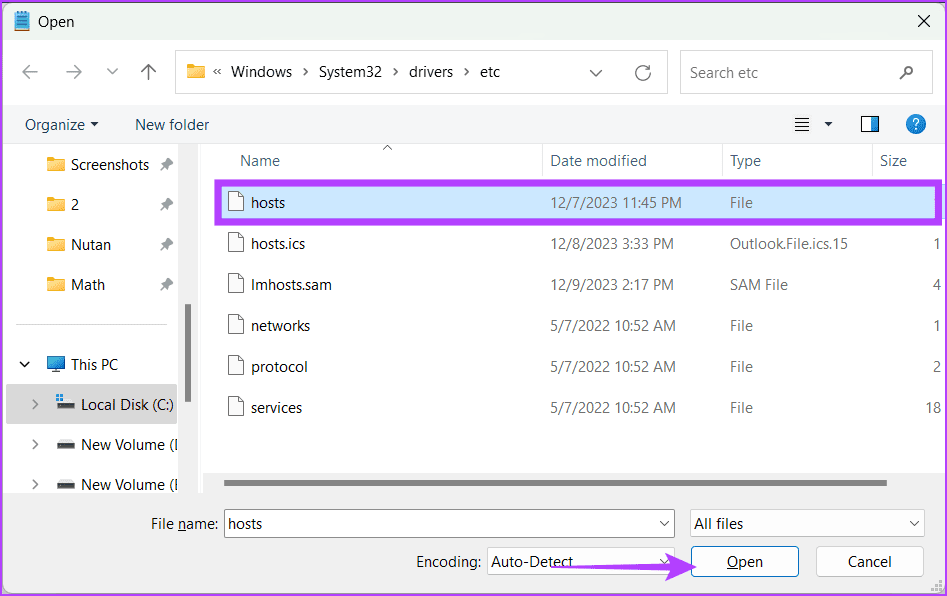
Step 3: Paste the following in the address bar.
C:\Windows\System32\drivers\etc
Note: Switch the file type to All files instead of .txt, the default file type.

Step 4: Select the hosts file and click Open.
Step 5: Now, you can edit the host file. Once edited, click File and choose Save.

Also Read: How to fix Notepad not opening
Was this helpful?
Last updated on 10 July, 2024
Read Next
 5 Fixes When the Hosts File Is Not Working on Windows
Basic Fixes: Name the Hosts file correctly: Naming is essential.
5 Fixes When the Hosts File Is Not Working on Windows
Basic Fixes: Name the Hosts file correctly: Naming is essential.
 How to Fix “Unable to Locate Java Runtime” Error
Basic Fixes: Uninstall conflicting Java versions: If conflicts are causing the problem, you can resolve them by completely removing older Java versions and leaving only the most recent one.
How to Fix “Unable to Locate Java Runtime” Error
Basic Fixes: Uninstall conflicting Java versions: If conflicts are causing the problem, you can resolve them by completely removing older Java versions and leaving only the most recent one.
 How to Find and Edit Zoom Recordings on Mac and PC
Zoom is undoubtedly one of the most popular video communication tools in recent times (and we've published the ULTIMATE guide on it).
How to Find and Edit Zoom Recordings on Mac and PC
Zoom is undoubtedly one of the most popular video communication tools in recent times (and we've published the ULTIMATE guide on it).
 How to Use Paint 3D to Edit Photos
When we want to edit an image on our Windows 10 PC, we think of downloading third-party software.
How to Use Paint 3D to Edit Photos
When we want to edit an image on our Windows 10 PC, we think of downloading third-party software.
 How to Edit the Author Name in Microsoft Word
https://youtu.be/szJtvGVtXgA How to Add, Change, and Delete the Author Name in a New Word Document If you are creating a new document, you can change the author’s name before working
How to Edit the Author Name in Microsoft Word
https://youtu.be/szJtvGVtXgA How to Add, Change, and Delete the Author Name in a New Word Document If you are creating a new document, you can change the author’s name before working
 How to Add and Edit Outlook Calendar Reminders
Add Reminders to Outlook Calendar on Mobile The Outlook app on your iPhone and Android lets you quickly add reminders to your Outlook calendar on the go.
How to Add and Edit Outlook Calendar Reminders
Add Reminders to Outlook Calendar on Mobile The Outlook app on your iPhone and Android lets you quickly add reminders to your Outlook calendar on the go.
 2 Ways to Reduce PDF File Size on Windows 11
Method 1: Using Adobe Acrobat Pro Adobe Acrobat is part of the Adobe Creative Suite.
2 Ways to Reduce PDF File Size on Windows 11
Method 1: Using Adobe Acrobat Pro Adobe Acrobat is part of the Adobe Creative Suite.
The article above may contain affiliate links which help support Guiding Tech. The content remains unbiased and authentic and will never affect our editorial integrity.