How to Add Custom Properties to a Word Document
You can assign numeric, text, or time values to custom properties. You can also define your custom properties or choose from Word’s list. Here’s how to create custom properties for your Word file.
Step 1: Launch Microsoft Word.
Step 2: On the Microsoft Word Ribbon, click on the File tab.

Step 3: Click the Info tab to view the document properties.

Step 4: Click the drop-down beside Properties at the top and click Advanced Properties to launch your Document’s Properties dialog box.

Step 5: On the dialog box, click the Custom tab. Name your custom property or choose from the default Word list shown in the Name field.
Step 6: From the Type list, select the data type for the custom property you want to add.
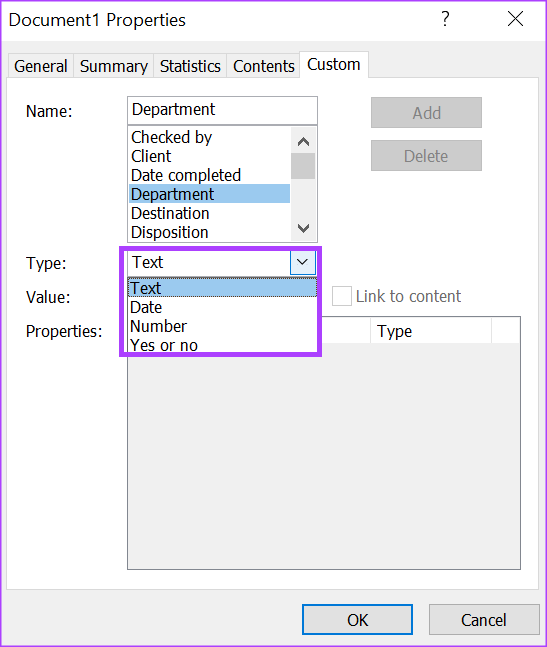
Step 7: In the Value box, choose or type a value for the property. The value entry depends on your selected Type.
For example: If you select Yes or No in the Type list, the value box will only have Yes or No as options.

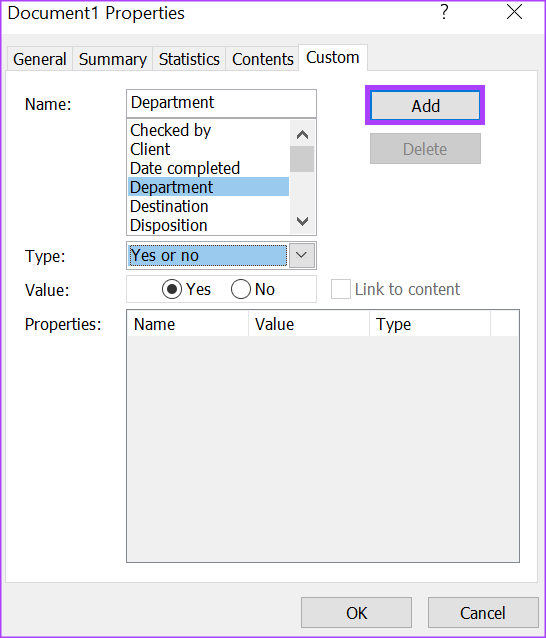
Step 8: Click the Add button to include the new custom property in your Properties menu.
Step 9: Click OK to save your new changes.
How to Edit the Standard Document Properties in Word
Standard properties are author, title, and subject. For these standard properties, Microsoft Word expects you to specify your text values for them to make it easy to organize and identify the document. If you want to edit the standard properties for a Word document, here’s what to do:
Step 1: Launch the Microsoft Word app.
Step 2: On the Microsoft Word Ribbon, click on the File tab.
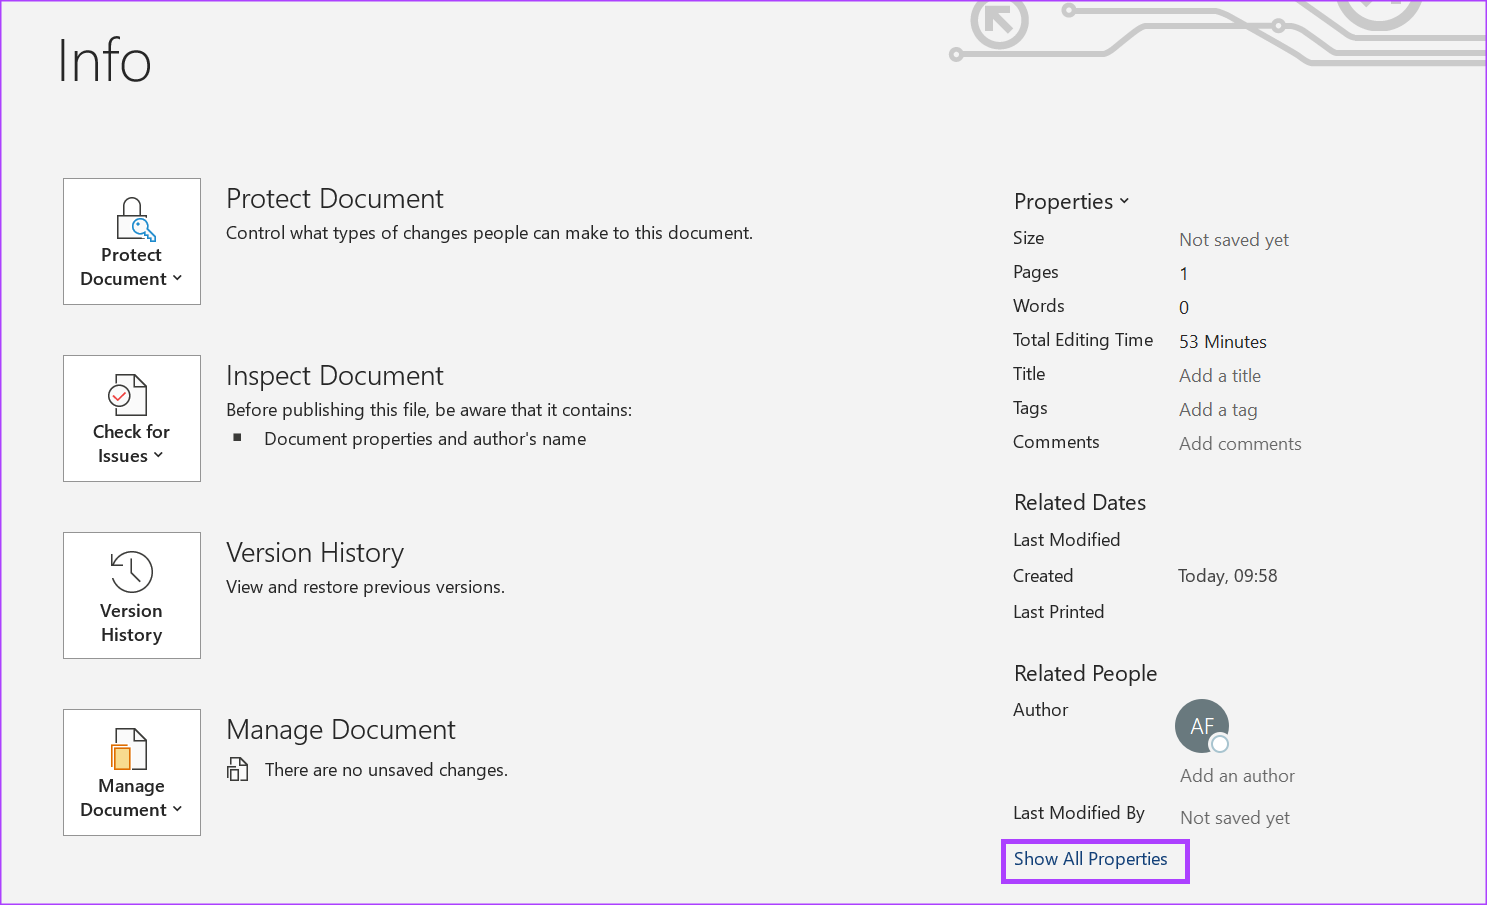
Step 3: Click the Info tab to view the document properties.
Step 4: Click Show All Properties at the bottom right to view all options.
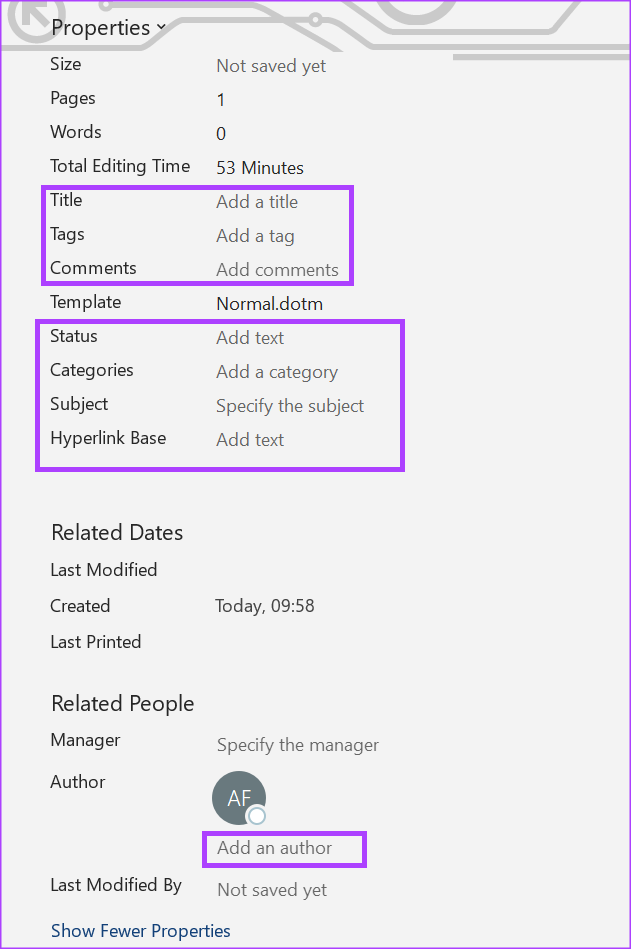
Step 5: Place your cursor in the text box of the following properties fields to enter your preferred text value.
- Title
- Tag
- Comments
- Status
- Categories
- Subject
- Hyperlink Base
- Author
Step 7: After entering the details into the Properties field, return to the main Word page. Any changes made to the properties will be saved automatically.
Now, you may add tags and use these properties in Word.
Was this helpful?
Last updated on 26 August, 2024
Read Next
 How to Insert Videos in a Microsoft Word Document
How to Insert an Online Video in Microsoft Word Microsoft Word for desktop allows you to insert videos from Vimeo, YouTube, and SlideShare.
How to Insert Videos in a Microsoft Word Document
How to Insert an Online Video in Microsoft Word Microsoft Word for desktop allows you to insert videos from Vimeo, YouTube, and SlideShare.
 How to Draw, Add and Edit Shapes in Microsoft Word
How to Add a Shape in Microsoft Word To insert a shape in Word, you can choose between two options.
How to Draw, Add and Edit Shapes in Microsoft Word
How to Add a Shape in Microsoft Word To insert a shape in Word, you can choose between two options.
 How to Lock Parts of a Microsoft Word Document
Method 1: Using Restrict Editing Feature As the name suggests, this feature lets you set up editing restrictions for your Word document.
How to Lock Parts of a Microsoft Word Document
Method 1: Using Restrict Editing Feature As the name suggests, this feature lets you set up editing restrictions for your Word document.
 How to Convert WordPad Document to Microsoft Word
Method 1: Using WordPad Step 1: Open the WordPad document you want to convert to Docx.
How to Convert WordPad Document to Microsoft Word
Method 1: Using WordPad Step 1: Open the WordPad document you want to convert to Docx.
 How to Import Styles from Another Word Document
Import Styles from Another Word Document You can import styles via the Developer tab in Microsoft Word.
How to Import Styles from Another Word Document
Import Styles from Another Word Document You can import styles via the Developer tab in Microsoft Word.
 How to Save a Word Document as a PDF on Windows and Mac
While Microsoft Word is a powerful word processing tool, it is ideal to convert the document to a PDF before sharing it with anyone.
How to Save a Word Document as a PDF on Windows and Mac
While Microsoft Word is a powerful word processing tool, it is ideal to convert the document to a PDF before sharing it with anyone.
 3 Ways to Insert an Excel Spreadsheet into a Word Document
Method 1: Using the Insert Table Option The Insert tab on the Word Ribbon has different options, including an Insert Table button, which can be used to insert an Excel
3 Ways to Insert an Excel Spreadsheet into a Word Document
Method 1: Using the Insert Table Option The Insert tab on the Word Ribbon has different options, including an Insert Table button, which can be used to insert an Excel
 How to Save a Word Document as an Image
Method 1: Use Paste Special Option in Word Using the Paste Special in Microsoft Word option is one of the most straightforward ways to convert text in your document into
How to Save a Word Document as an Image
Method 1: Use Paste Special Option in Word Using the Paste Special in Microsoft Word option is one of the most straightforward ways to convert text in your document into
The article above may contain affiliate links which help support Guiding Tech. The content remains unbiased and authentic and will never affect our editorial integrity.

