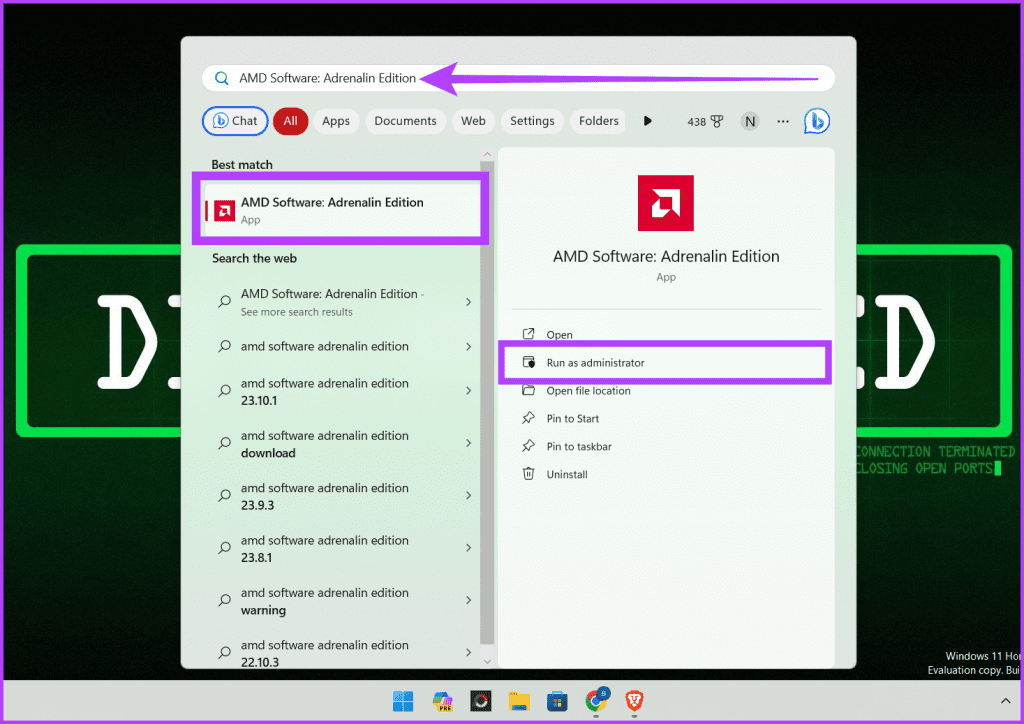
Fix 1: Run AMD Radeon Software With Admin Privileges
If your AMD Adrenalin software is not working or opening, one of the initial fixes to perform is to run it as an administrator to ensure there is no restriction.
Step 1: Press Win + S and type AMD Software: Adrenalin Edition.
Step 2: Once it appears on the list, click Run as administrator. In the UAC prompt, choose Yes.
If you open the software often, create a shortcut to launch it with admin permission or create a task to launch after the PC starts with the required permission.
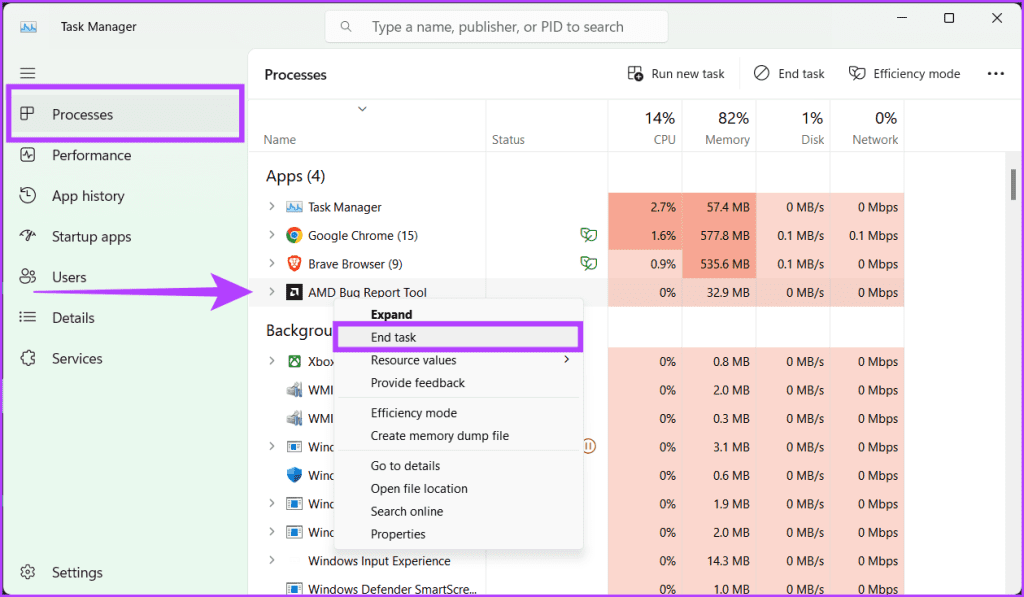
Fix 2: Terminate Radeon Software Processes
If the AMD Radeon Software is running in the background but not responding, opening the app will make it look as if it is not opening. It’s best to terminate the app and relaunch it.
Step 1: Launch the Task Manager by pressing Ctrl + Shift + Esc and switch to the Processes tab.
Step 2: Locate the AMD software in the Apps section; right-click on it and choose End Task to stop it.
Step 3: Check the Background processes section for any AMD-related processes and close them by right-clicking and choosing End Task.
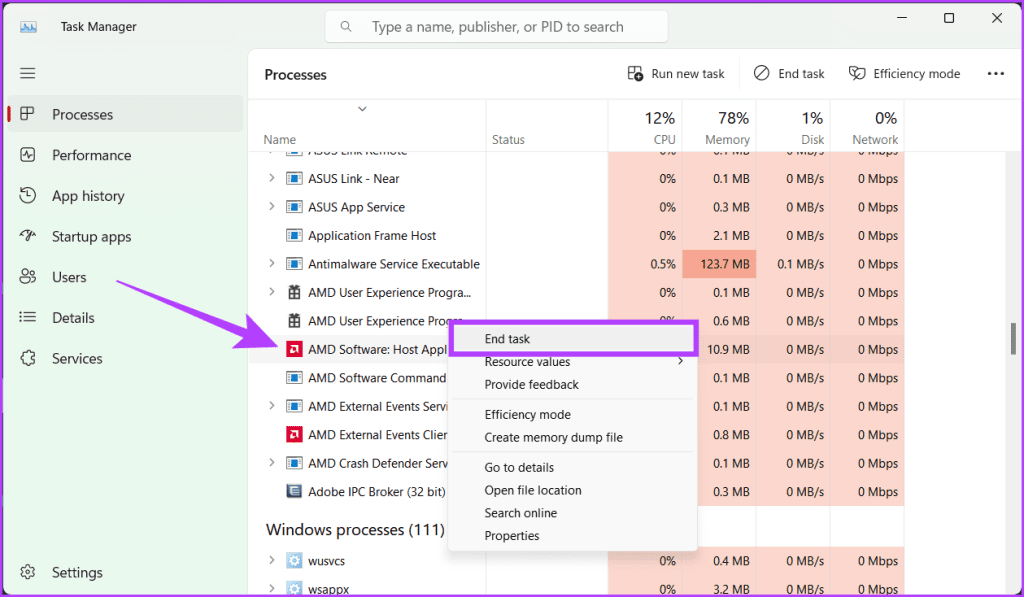
Step 4: Relaunch the AMD Radeon Software, which should start fresh without glitches.
Fix 3: Update or Reinstall the Graphics Driver
The driver may be outdated, so the first check is to update it by downloading it from the AMD driver page and then running the installer.
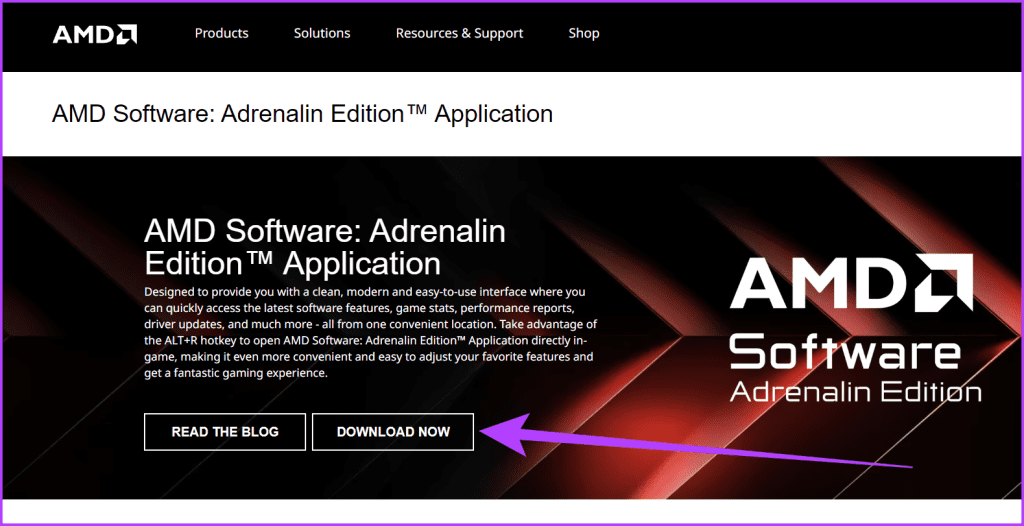
If this doesn’t solve the problem, uninstall the driver and reinstall everything.
Fix 4: Modify CN Registry Key
Modifying the CN Registry Key is a quick and effective fix for the AMD Radeon software not working on Windows error. This method involves editing a specific registry entry to synchronize the software’s version with the installed drivers.
This mismatch often causes the software to malfunction, preventing you from accessing its features.
Step 1: Press Windows + X on your keyboard and select Device Manager. If prompted, select yes to launch the app and make modifications.
Alternatively, you can right-click the Windows icon and choose Device Manager.
Step 2: Expand the Display adapters listing and double-click on AMD Radeon.

Step 3: Go to the Driver tab. Copy the number next to the Driver version and close the properties window and the Device Manager tool.

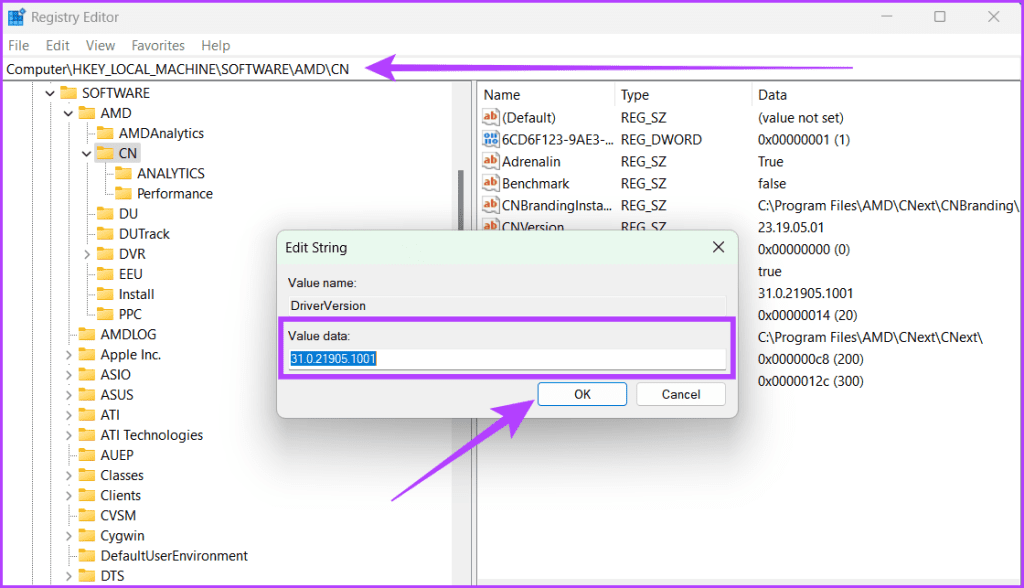
Step 4: Open Registry Editor using the Start menu and navigate to the below-mentioned path:
HKEY_LOCAL_MACHINE\SOFTWARE\AMD\CN
Step 5: Double-click the DriverVersion string on the pane’s right side. Hit backspace on your keyboard to clear the existing data.
Step 6: Paste the driver version number in that box and click OK to save changes.
Fix 5: Delete CN Folder
The CN folder contains the configuration files and settings for the Radeon Software, and if it gets corrupted or misconfigured, the software will malfunction. However, deleting this folder can reset the Radeon software’s default settings, eliminating any glitches or conflicts causing the issue.
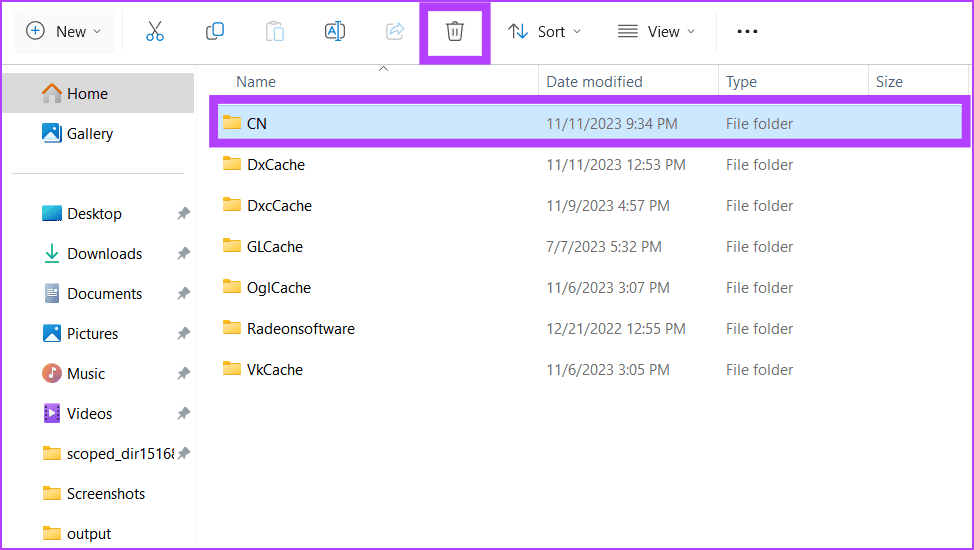
Step 1: Open the Run box by pressing the Windows + R key on your keyboard.
Step 2: Type %localappdata% and click OK.
Step 3: Head to the AMD folder, select the CN folder, and click the Delete button (trash icon).
Restart your PC and relaunch the AMD Radeon software, and it will rebuild the CN folder.
Fix 6: Rebuild Radeon Profiles
AMD Radeon profiles in Windows are predefined settings that can be applied to your AMD Radeon graphics card to optimize its performance for specific tasks or applications.
However, if you’re facing issues with your software and don’t want to delete the entire CN folder from your computer, rebuilding the Radeon profile from scratch is a good option.
Step 1: Open the Run prompt, type %localappdata%/AMD/CN, and click OK.
Step 2: Select gmdb.blb and delete the file.

Fix 7: Rename Epic Games Launcher Log Files
Many forum users have reported that renaming the log file in the Epic Games launcher can fix the issue.
Step 1: Close all instances of Epic Games Launcher.
Step 2: Go to the following folder location in File Explorer:
explorer%localappdata%\EpicGamesLauncher\SavedStep 3: Rename the Logs folder to anything else like Logsbk, and open the Radeon Software.
It should work if the reason for you was AMD Radeon Graphics software interfering with the Epic Games launcher.
Was this helpful?
Last updated on 20 April, 2024
Read Next
 How to Overclock a Monitor: NVIDIA, AMD, and Intel GPUs
When gaming, having a high-performance monitor can make a significant difference in your overall experience.
How to Overclock a Monitor: NVIDIA, AMD, and Intel GPUs
When gaming, having a high-performance monitor can make a significant difference in your overall experience.
 How to Use AMD FSR3 on NVIDIA RTX GPUs
If you already own an NVIDIA GPU, one of the best features available is DLSS technology.
How to Use AMD FSR3 on NVIDIA RTX GPUs
If you already own an NVIDIA GPU, one of the best features available is DLSS technology.
 5 Fixes for Adobe Acrobat Reader Not Opening in Windows 11/10
Before starting the fixes, please note that Adobe Acrobat Reader DC and Adobe Acrobat Reader are the same now.
5 Fixes for Adobe Acrobat Reader Not Opening in Windows 11/10
Before starting the fixes, please note that Adobe Acrobat Reader DC and Adobe Acrobat Reader are the same now.
 Top 8 Fixes for Microsoft Edge Not Opening PDF Files in Windows
The other day I was trying to open a PDF file in Microsoft Edge to edit it.
Top 8 Fixes for Microsoft Edge Not Opening PDF Files in Windows
The other day I was trying to open a PDF file in Microsoft Edge to edit it.
 Top 8 Fixes for Chrome Not Opening on Windows 10
What if your favorite browser stops working on the computer and you are unable to open it?
Top 8 Fixes for Chrome Not Opening on Windows 10
What if your favorite browser stops working on the computer and you are unable to open it?
 3 Fixes When Microsoft Store Is Not Opening or Loading
Basic Fixes: Check your Internet connection: Microsoft Store requires a high-speed Internet connection to work correctly.
3 Fixes When Microsoft Store Is Not Opening or Loading
Basic Fixes: Check your Internet connection: Microsoft Store requires a high-speed Internet connection to work correctly.
 6 Fixes for “Class Not Registered” Error When Opening Photos on Windows 11
Fix 1: Restart Windows Explorer The error message can appear due to a temporary glitch within the system, so restart Windows Explorer.
6 Fixes for “Class Not Registered” Error When Opening Photos on Windows 11
Fix 1: Restart Windows Explorer The error message can appear due to a temporary glitch within the system, so restart Windows Explorer.
 4 Fixes for Taskbar Calendar Not Opening on Windows 11
Try Basic Fixes Restart the Windows Explorer process: If the Windows Explorer process is malfunctioning on your system, the taskbar may not load correctly, and you may have trouble opening
4 Fixes for Taskbar Calendar Not Opening on Windows 11
Try Basic Fixes Restart the Windows Explorer process: If the Windows Explorer process is malfunctioning on your system, the taskbar may not load correctly, and you may have trouble opening
The article above may contain affiliate links which help support Guiding Tech. The content remains unbiased and authentic and will never affect our editorial integrity.