Fix 1: Restart Windows Explorer
The error message can appear due to a temporary glitch within the system, so restart Windows Explorer.
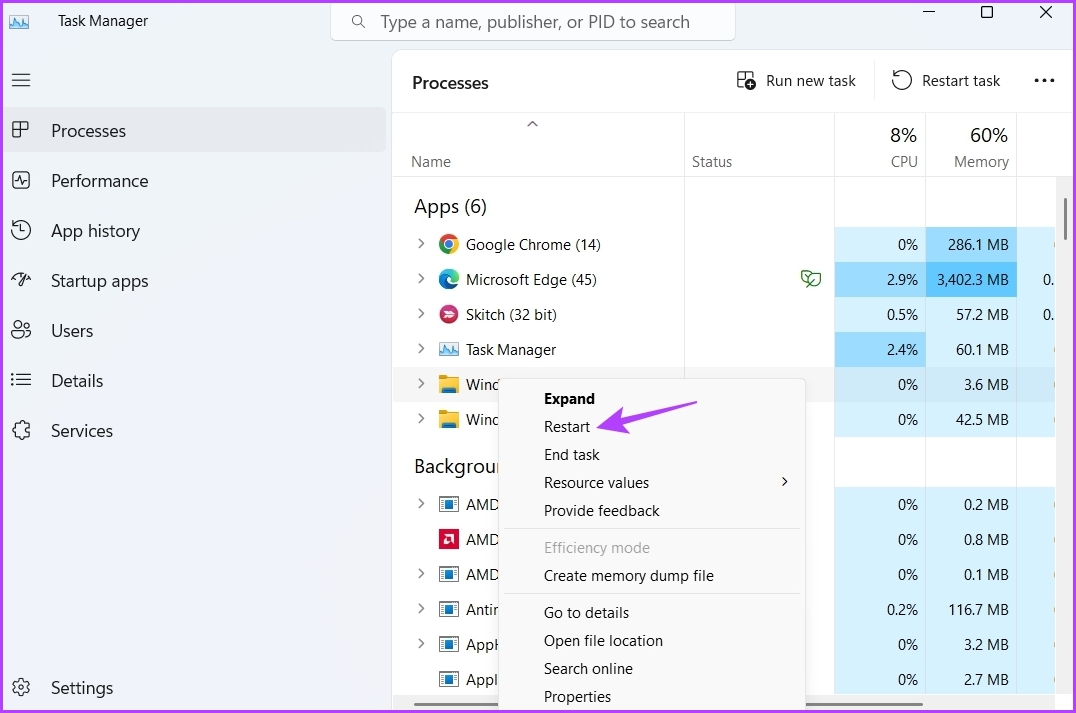
Step 1: Press the Windows + X keys to open the Power User Menu and choose Task Manager from the list.
Step 2: Right-click on Windows Explorer and choose Restart.
Fix 2: Choose Photos as the Default Image Viewer
The error message will likely crop up if the Photos app is not set as the default image-viewing application.
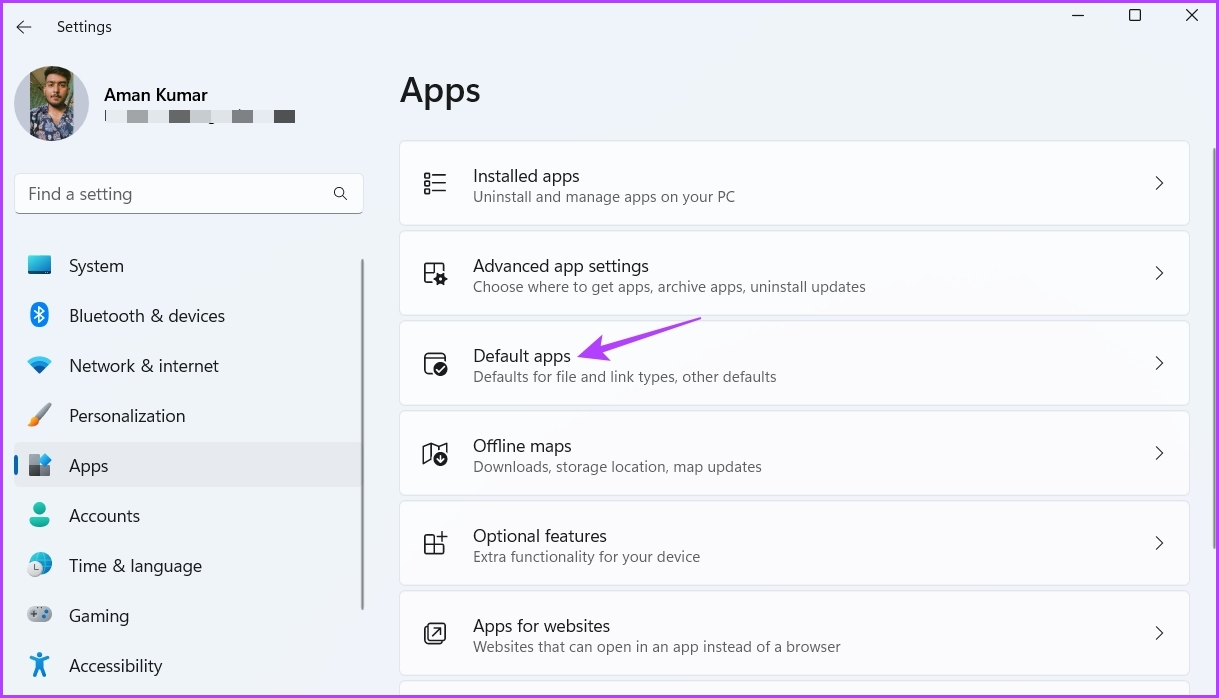
Step 1: Open the Settings app, select Apps in the side menu, and go to Default Apps.
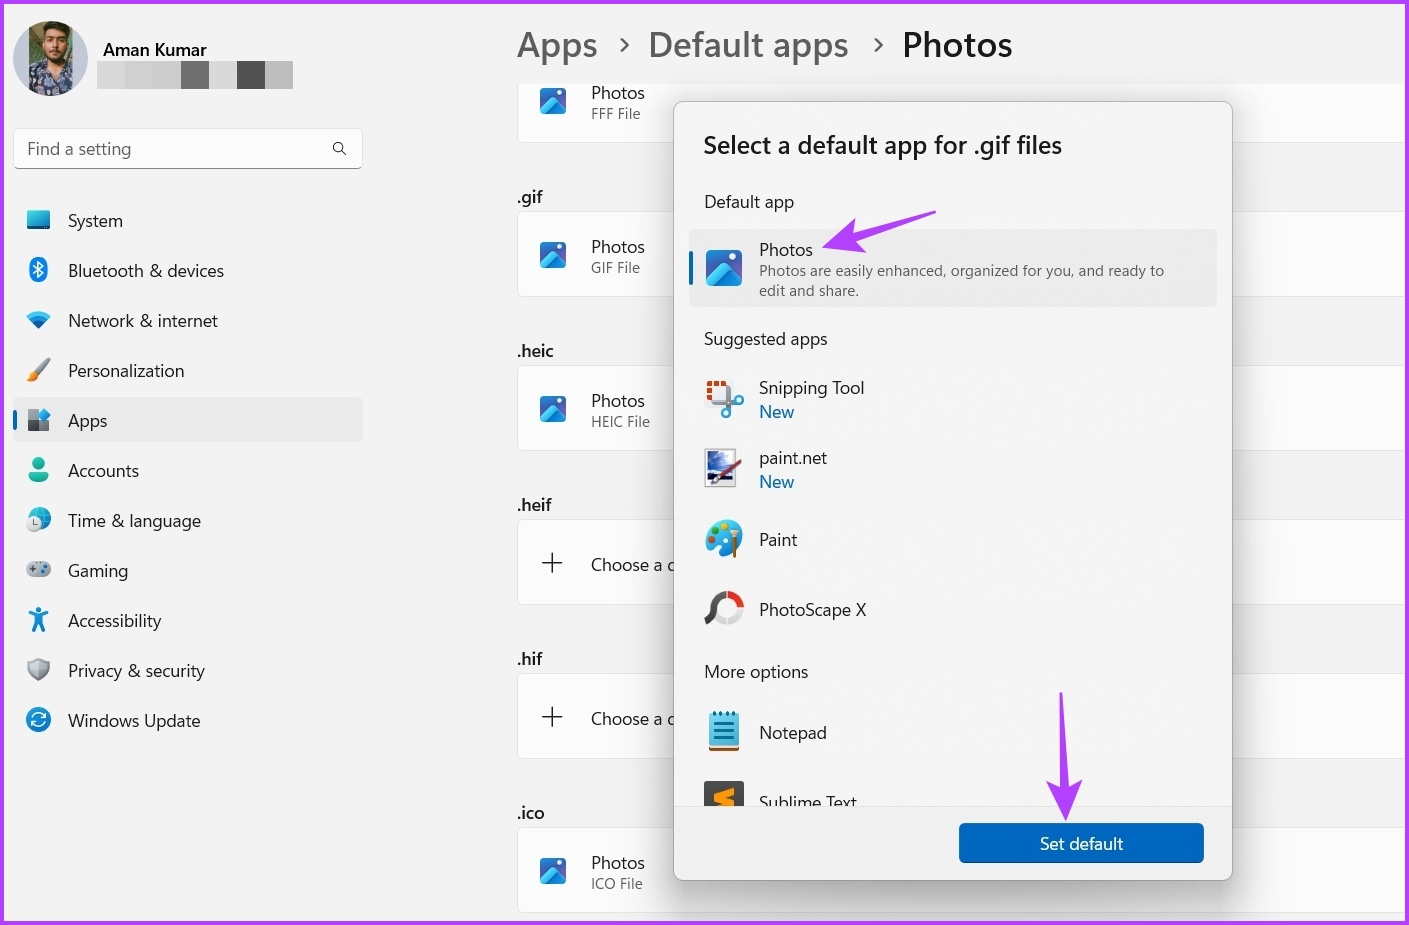
Step 2: Locate and select the Photos app.

Step 3: Click on all the commonly used image extensions like JPG, JPEG, PNG, and GIF, choose Photos from the menu, and click on Set default.
Fix 3: Reset the Photos App
If configuring the Photos app as the default image viewing application wasn’t helpful, reset the app to its default settings.
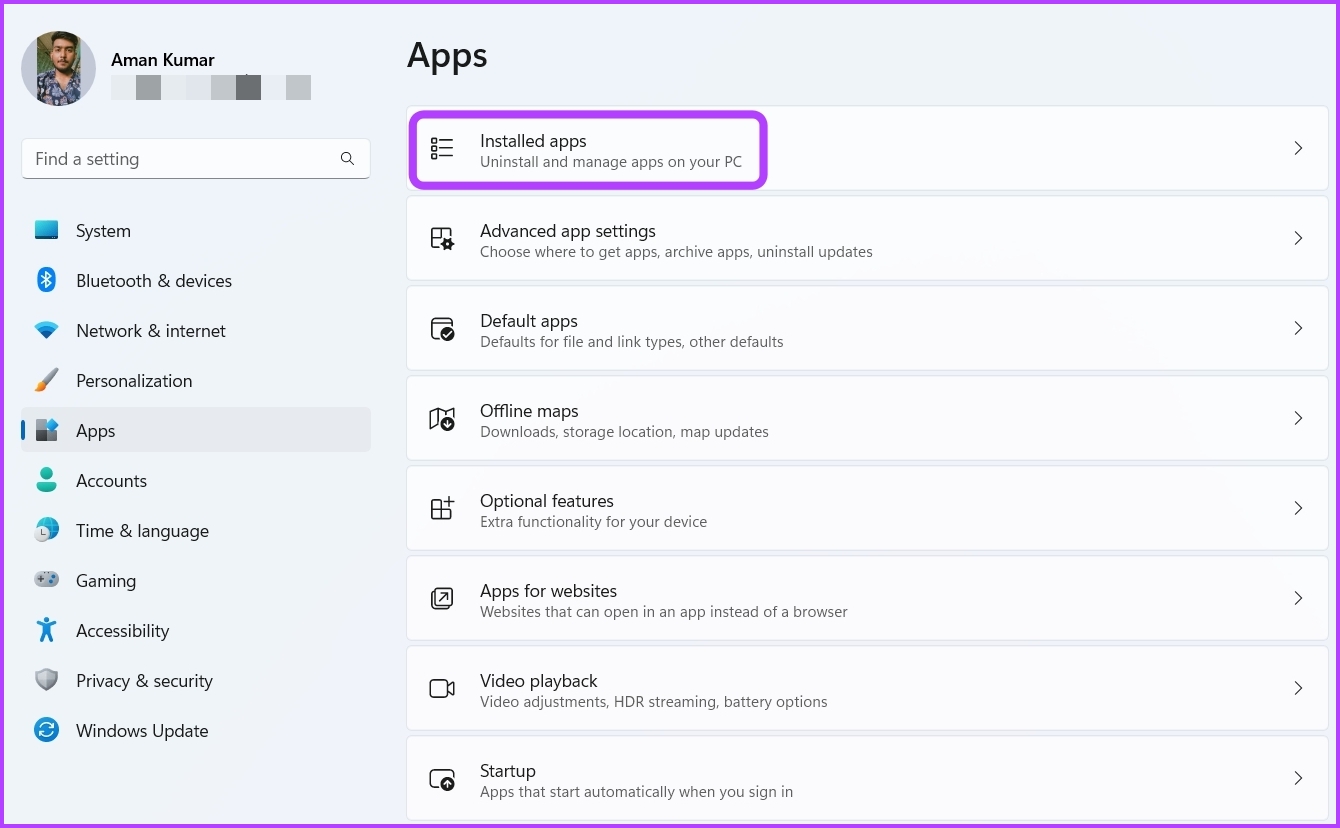
Step 1: Open Settings, choose Apps from the left panel, and select Installed apps.
Step 2: Locate and click on three dots next to Microsoft Photos and choose Advanced options.
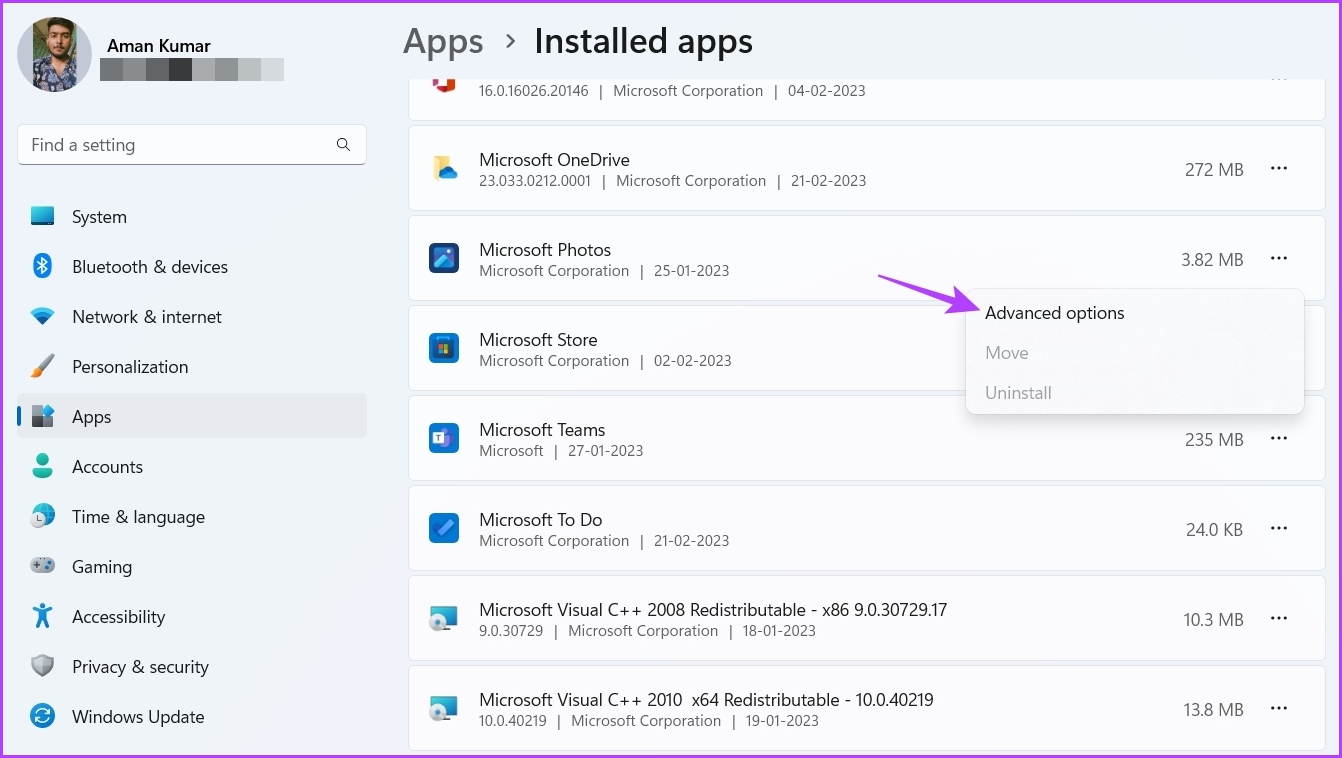
Step 3: Click on Reset. Don’t worry, this will not delete your photos.

Fix 4: Re-Register Windows DLL Files
DLL (Dynamic Link Library) files contain codes and data that other programs use to perform certain tasks. If an important DLL file goes missing or corrupted, the app won’t function properly.
One of the ways to solve that is to re-register the DLL files using Command Prompt.
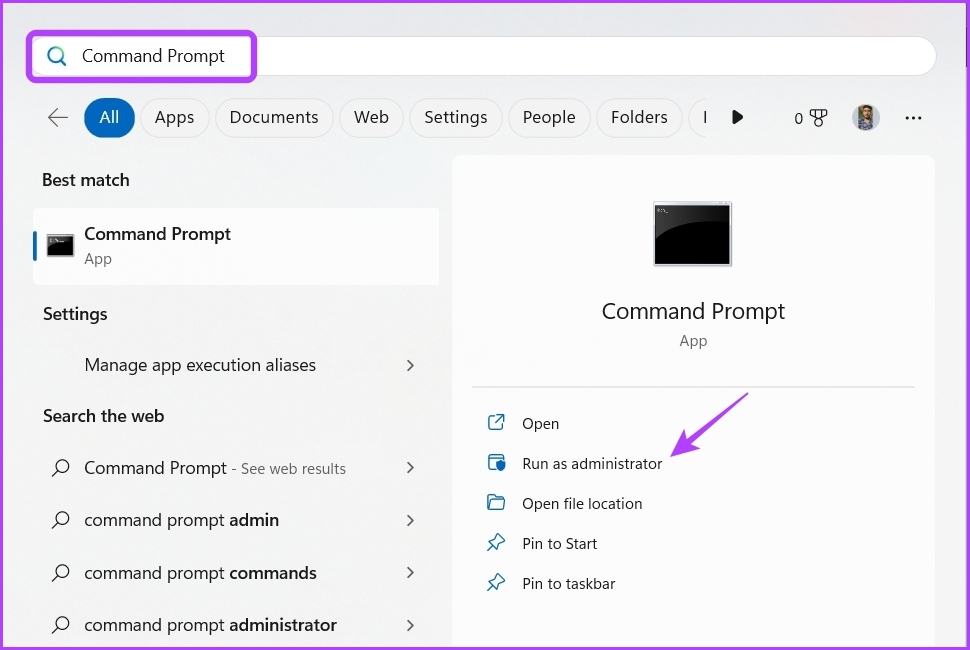
Step 1: Type Command Prompt in the Windows Search bar and choose Run as administrator from the right pane.
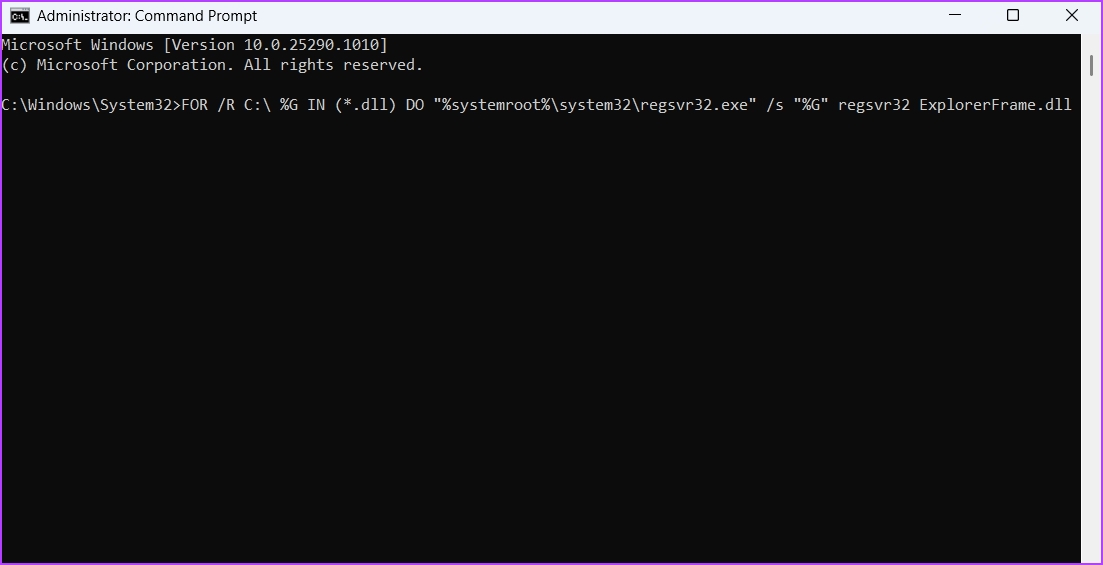
Step 2: In the elevated Command Prompt window, type the following command and press Enter:
FOR /R C:\ %G IN (*.dll) DO "%systemroot%\system32\regsvr32.exe" /s "%G" regsvr32 ExplorerFrame.dll
Fix 5: Repair Microsoft Visual C++ Programs
The Microsoft Visual C++ library is an important component of the Windows operating system. It ensures that all the applications run properly on your computer.
When the package gets corrupt due to sudden system shutdown, virus attack, or any other reason, you become prone to errors like Class not registered. Fortunately, you can use the built-in repair option to eliminate the error. To do that, follow the below instructions:
Step 1: Open the Start Menu, type Control Panel, and press Enter.

Step 2: Choose Uninstall a program.

Step 3: Right-click on the latest Microsoft Visual C++ package installed on the device and choose Change.

Step 4: Choose Repair from the prompt.
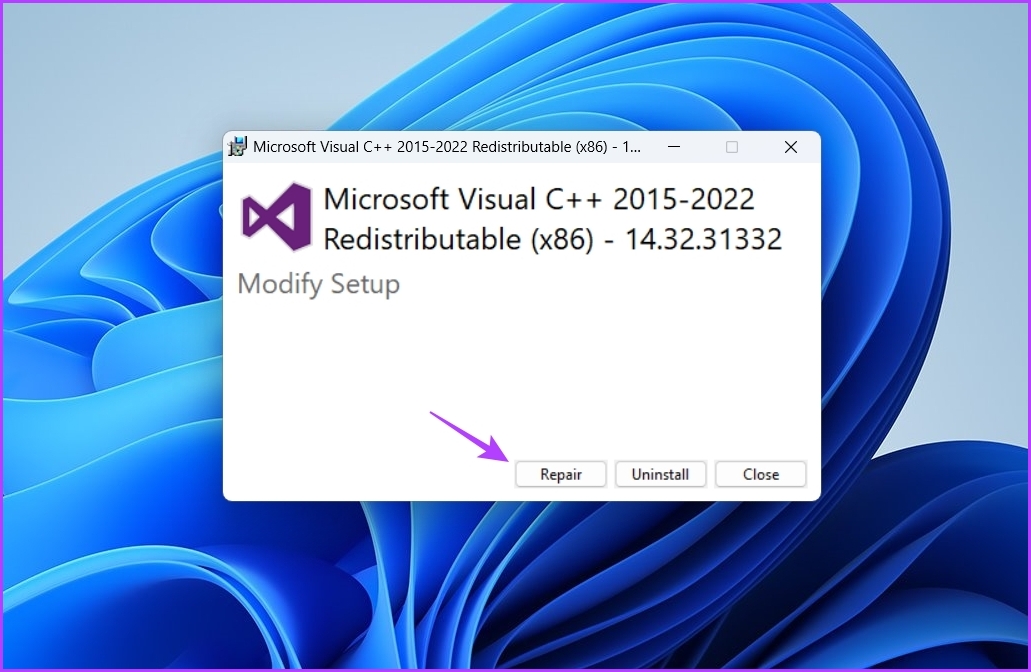
After the repair is complete, you must restart your computer to apply the changes.
Fix 6: Reinstall Microsoft Store
Another prime reason behind the error message is corruption in the Microsoft Store. You can quickly remove the corruption by reinstalling the Microsoft Store. To do that, open Command Prompt as an administrator, type the following commands, and press Enter.
Get-AppXPackage | Foreach {Add-AppxPackage -DisableDevelopmentMode -Register "$($_.InstallLocation)\AppXManifest.xml"}

If none of the above methods work, run the SFC scan to detect, and repair any corrupted system files.
Was this helpful?
Last updated on 05 July, 2024
1 Comment
Leave a Reply
Read Next
 4 Ways to Fix “Not Registered on Network” Error on Samsung Galaxy Phones
Basic Fixes Remove and reinsert the SIM: An improperly inserted SIM can result in such network errors.
4 Ways to Fix “Not Registered on Network” Error on Samsung Galaxy Phones
Basic Fixes Remove and reinsert the SIM: An improperly inserted SIM can result in such network errors.
 How to Archive or Delete a Class in Google Classroom
How to Archive a Class in Google Classroom Archiving a class in Google Classroom can help you remove the class from your Classes dashboard while still having access to all
How to Archive or Delete a Class in Google Classroom
How to Archive a Class in Google Classroom Archiving a class in Google Classroom can help you remove the class from your Classes dashboard while still having access to all
 How to Remove Registered Devices From Amazon Prime Video
Method 1: Deregister Device Using Mobile The Prime Video App on iPhone or Android will let you enjoy your favorite content on the move or from the porch.
How to Remove Registered Devices From Amazon Prime Video
Method 1: Deregister Device Using Mobile The Prime Video App on iPhone or Android will let you enjoy your favorite content on the move or from the porch.
 5 Fixes for Adobe Acrobat Reader Not Opening in Windows 11/10
Before starting the fixes, please note that Adobe Acrobat Reader DC and Adobe Acrobat Reader are the same now.
5 Fixes for Adobe Acrobat Reader Not Opening in Windows 11/10
Before starting the fixes, please note that Adobe Acrobat Reader DC and Adobe Acrobat Reader are the same now.
 Top 8 Fixes for Microsoft Edge Not Opening PDF Files in Windows
The other day I was trying to open a PDF file in Microsoft Edge to edit it.
Top 8 Fixes for Microsoft Edge Not Opening PDF Files in Windows
The other day I was trying to open a PDF file in Microsoft Edge to edit it.
 Top 8 Fixes for Chrome Not Opening on Windows 10
What if your favorite browser stops working on the computer and you are unable to open it?
Top 8 Fixes for Chrome Not Opening on Windows 10
What if your favorite browser stops working on the computer and you are unable to open it?
 4 Fixes for Google Chrome Not Opening New Tabs on Windows
Common Fixes Before you delve into complex troubleshooting methods, try these basic fixes and see if they help restore normalcy to Google Chrome: Restart Google Chrome - Restarting the browser
4 Fixes for Google Chrome Not Opening New Tabs on Windows
Common Fixes Before you delve into complex troubleshooting methods, try these basic fixes and see if they help restore normalcy to Google Chrome: Restart Google Chrome - Restarting the browser
 4 Fixes for Taskbar Calendar Not Opening on Windows 11
Try Basic Fixes Restart the Windows Explorer process: If the Windows Explorer process is malfunctioning on your system, the taskbar may not load correctly, and you may have trouble opening
4 Fixes for Taskbar Calendar Not Opening on Windows 11
Try Basic Fixes Restart the Windows Explorer process: If the Windows Explorer process is malfunctioning on your system, the taskbar may not load correctly, and you may have trouble opening
The article above may contain affiliate links which help support Guiding Tech. The content remains unbiased and authentic and will never affect our editorial integrity.


Thank you so much for such a detailed solution