How to Setup OBS Studio to Recording Game Play
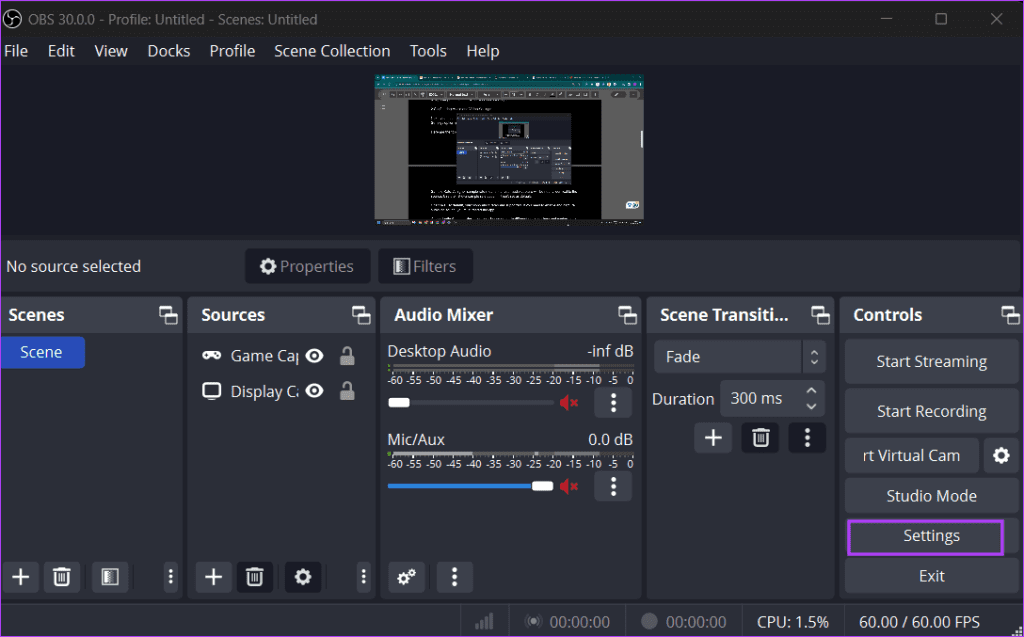
Before recording your gameplay, you must set up OBS Studio. Unlike basic screen recording software like Snipping Tool, which only focuses on the video aspect of your gameplay, OBS Studio lets you control and tweak other settings, too. You can pick the display source, adjust audio, video, and output settings, and map hotkeys as shown below.
Select Source
Selecting Source in OBS Studio means picking the display area you want to capture. You can capture the entire screen (all open windows) or select a single window (a game in this case). We recommend using the Game Capture mode because of its built-in anti-cheat hook feature. Follow the steps below.
Step 1: Click on the plus button in the Sources section. Select the Game Capture option.

Step 2: Type a name and click on the OK button.

Step 3: Select the Use anti-cheat compatibility hook option and click OK.

Once done, your game capture window will be ready.
Configure Audio and Video Settings
Next, you must configure the audio and video capture settings in OBS Studio. Click on the Settings option at the bottom right. Then, click on the Audio option.
Audio Settings in OBS Studio
Here are the following settings you must check:
Sample Rate: A higher sample rate means your audio capture will be nearly identical to the source. If the 48 kHz sample rate option isn’t set as the default, use it.
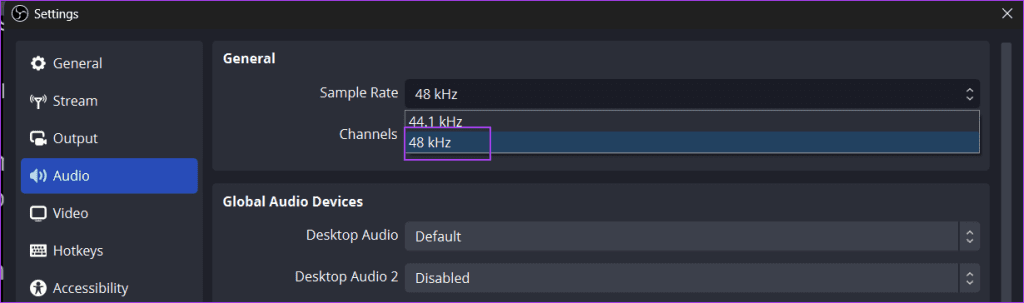
Channels: By default, only Mono and Stereo are supported. To enable and capture surround sound, you must restart the app.

Global Audio Settings: Here, you can choose up to six different audio devices and capture their audio. However, the desktop and microphone audio should suffice for most users.
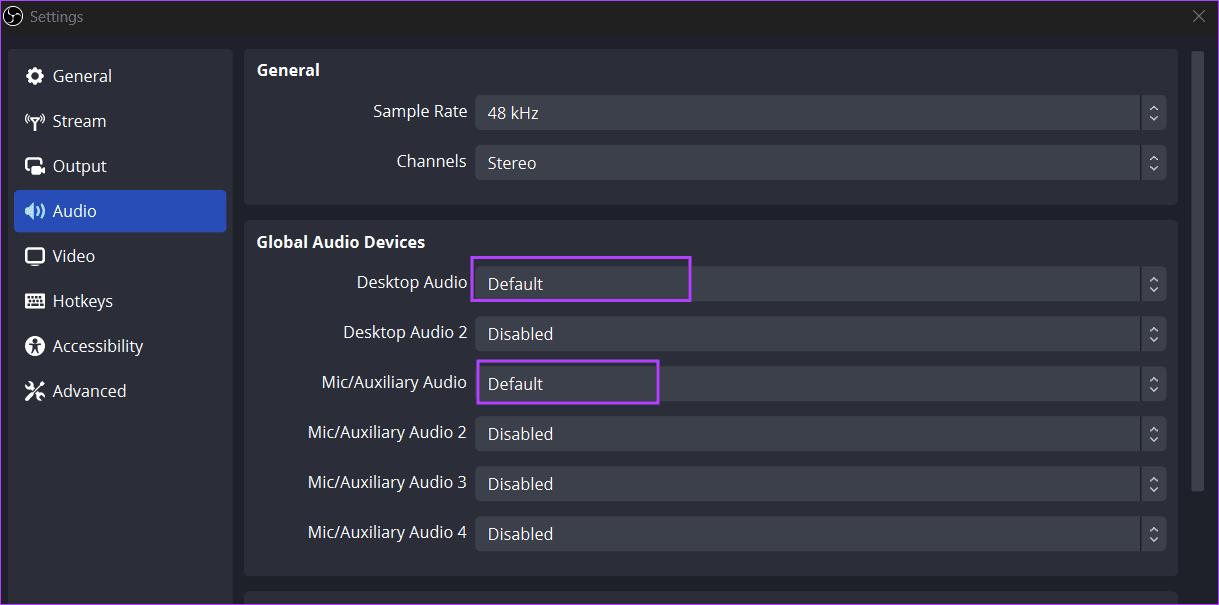
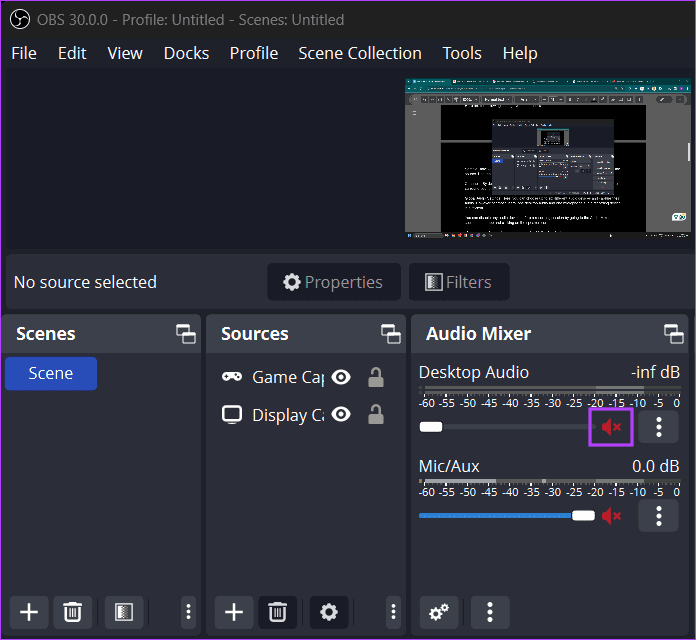
Notably, you can also disable any audio device before a recording session. To do so, go to the Audio Mixer section in the app and click on the speaker icon to disable any audio source.
For now, these presets should help you get up and running quickly.
Video Settings in OBS Studio
Moving on to the Video settings in OBS. Click on the Video option in the settings to switch to it. Here are a few settings with their meanings:
Base (Canvas) Resolution: It is the resolution in which you want to record the gameplay. While you can pick 1080p and 720p as a base resolution, we suggest you pick the one that matches your monitor’s resolution.

Output (Scaled) Resolution: This refers to the resolution in which you want the final output video. Keep it the same as the Base resolution unless you want to downscale the output.

Downscale Filter: Only applicable if you set the output resolution lower than the base resolution. We recommend using it with default settings.
Common FPS Value: By default, OBS Studio captures video at 60 FPS, which is enough for uploading and streaming.
That being said, if you want to capture gameplay in 120 FPS, repeat the following steps:
Step 1: Click on the arrow icon and select the Integer FPS Value option.

Step 2: Type 120 in the box and click the Apply button.
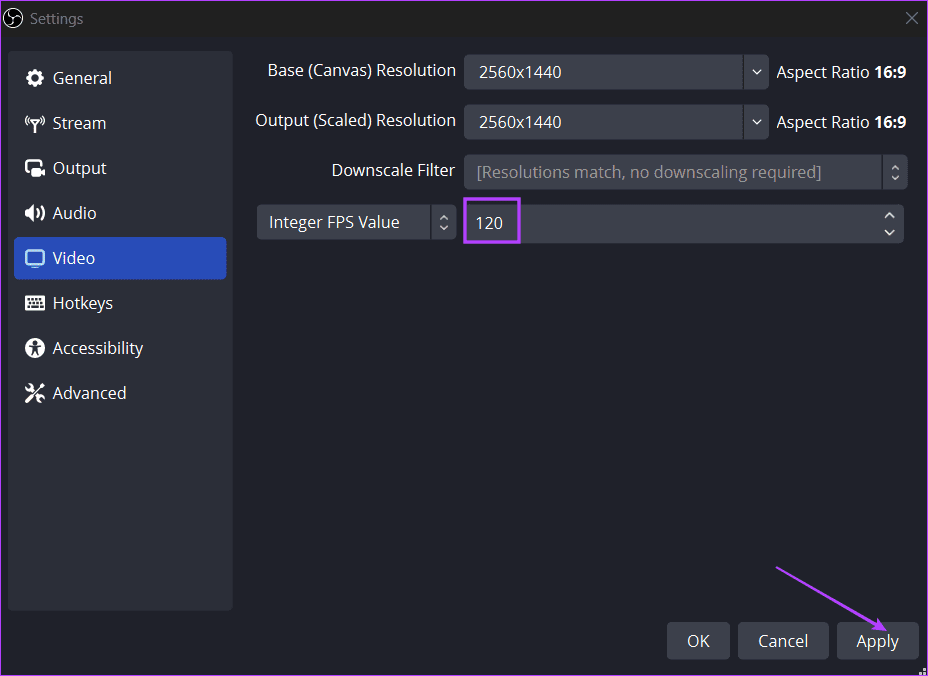
Remember that recording at 120 FPS will load your PC extensively. Use an FPS checker to determine the maximum FPS you are getting with the current game settings.
Configure Output Settings
Next are the output settings, which control the location, formats, and encoders used for the gameplay recording. Switch to the Output tab in the OBS Studio and go to the Recording section.
Recording Path: This is the location where OBS will save the recorded clip. By default, it is the Video folder in Windows File Explorer.
Recording Quality: This indicates the final quality and clarity of the output video. By default, it is set to the High-Quality option, which produces a moderate-sized video clip of decent quality. You can choose the Indistinguishable Quality option, but be prepared for bigger files that eat into a sizeable portion of your storage.

Recording Format: This refers to the video clip’s file format. OBS uses MKV as the default format, but you can also use MP4, MOV, or FLV.

Click on Apply to save the changes. Don’t change the Audio Encoder, Video Encoder, and Audio Track settings.
Map Hotkeys for Recording
Switching to the OBS window every time you want to record a clip is cumbersome. Instead, you can map hotkeys for basic actions such as starting, pausing, or ending a recording. Repeat the following steps:
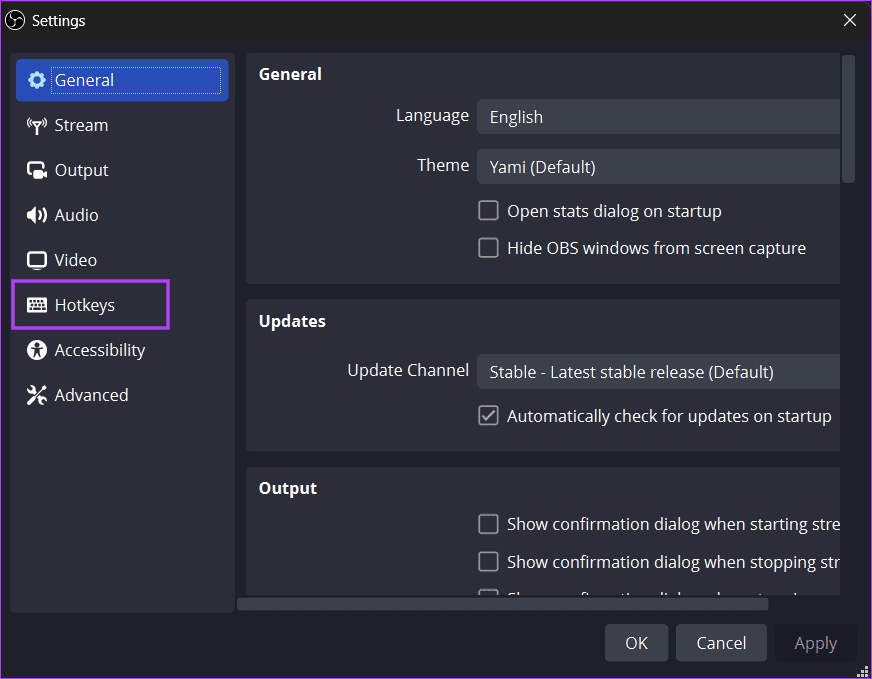
Step 1: Click on the Hotkeys tab in the OBS Studio settings.
Step 2: Then click on the Start Recording option and press the desired key combination, e.g., Shift + R.
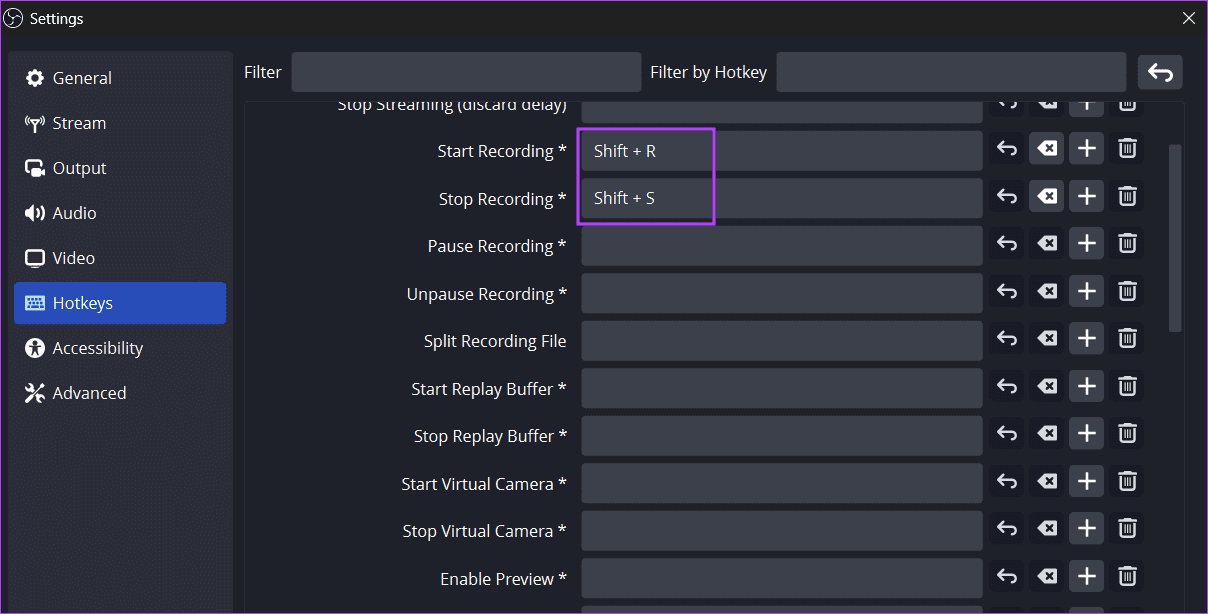
Step 3: Similarly, map the hotkeys for other basic actions and click the Apply button.
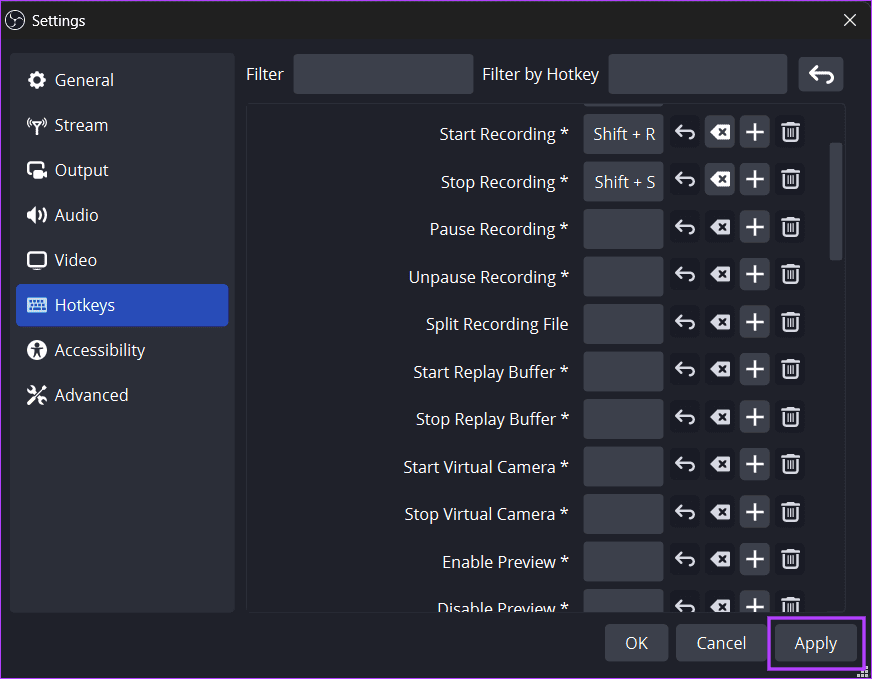
Step 4: Click on the OK button.
Now, OBS can record gameplay without issues.
Was this helpful?
Last updated on 17 July, 2024
Read Next
 How to Send High Quality Videos on WhatsApp (iPhone and Android)
Method 1.
How to Send High Quality Videos on WhatsApp (iPhone and Android)
Method 1.
 How to Extract a High-Quality Image From Video on Android
Method 1: Use the Gallery App Some Android devices have an inbuilt feature to extract still images from video.
How to Extract a High-Quality Image From Video on Android
Method 1: Use the Gallery App Some Android devices have an inbuilt feature to extract still images from video.
 How to Turn on High Quality Uploads in Instagram
https://youtu.be/4ciQ4fT42Sc Step 1: Open your Profile on Instagram, and tap on the three-bar menu icon at the top right corner.
How to Turn on High Quality Uploads in Instagram
https://youtu.be/4ciQ4fT42Sc Step 1: Open your Profile on Instagram, and tap on the three-bar menu icon at the top right corner.
 How to Send High Quality Photos and Video on Telegram
Send High-Quality Photos and Videos on Telegram on Mobile Let us show you the steps to send photos and videos without losing quality on your iPhone and Android using Telegram.
How to Send High Quality Photos and Video on Telegram
Send High-Quality Photos and Videos on Telegram on Mobile Let us show you the steps to send photos and videos without losing quality on your iPhone and Android using Telegram.
 Download 7 High-Quality Nothing Phone (2a) Wallpapers in 4K
Since its inception, Nothing has been the talk of the town, with fans buzzing about its innovative design and customizable lights.
Download 7 High-Quality Nothing Phone (2a) Wallpapers in 4K
Since its inception, Nothing has been the talk of the town, with fans buzzing about its innovative design and customizable lights.
 5 Best Microphones for a Smartphone to Record Videos
Content creation is at an all-time high, thanks to platforms like YouTube and TikTok giving people the opportunity to showcase their talents.
5 Best Microphones for a Smartphone to Record Videos
Content creation is at an all-time high, thanks to platforms like YouTube and TikTok giving people the opportunity to showcase their talents.
 How to Take Pictures or Record Videos Using Your Mac’s Camera
Webcams are generally used for video conferencing.
How to Take Pictures or Record Videos Using Your Mac’s Camera
Webcams are generally used for video conferencing.
 How to Set Up OBS Virtual Camera on Windows and Mac
What Is an OBS Virtual Camera OBS virtual camera is a tool that helps add components and customize your video feed in a meeting.
How to Set Up OBS Virtual Camera on Windows and Mac
What Is an OBS Virtual Camera OBS virtual camera is a tool that helps add components and customize your video feed in a meeting.
The article above may contain affiliate links which help support Guiding Tech. The content remains unbiased and authentic and will never affect our editorial integrity.