Method 1. Snipping Tool
The Snipping Tool is the native Windows 11 tool that lets you capture screens and record video.
Note: This feature is currently limited to Windows 11.
Step 1: In the taskbar, click the Start icon. Search for the Snipping Tool and select Open.
Step 2: Click the video recording icon and press the New button.
Alternatively, press the Windows + Shift + R key to head directly to the Snipping Tool video recording tool.
Step 3: Use your mouse to select the area you want to record. Click the microphone icon in the tool to enable it and press Start to initiate recording.
Tip: If the mic icon is grayed out, head to Settings > Privacy & security > Microphone. Enable the microphone and ensure the button next to the Snipping Tool is toggled on.
You’ll see a 3-second countdown, and the screen recording will start.
Step 4: Once the recording is complete, press the Stop icon.
Step 5: Finally, you’ll see the video. You can check and save it to your preferred location by clicking the Save button (Floppy icon).

Method 2. Xbox Game Bar
Note: You can’t record your desktop or File Explorer with the Xbox Game Bar.
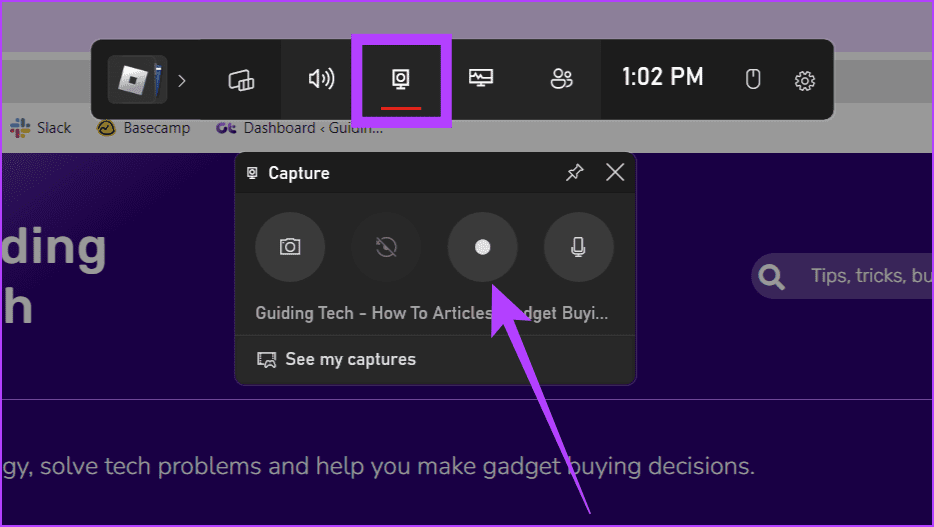
Step 1: Launch the app you want to record the screen for and open the Xbox Game Bar by pressing the Windows + G keys on your keyboard.
Step 2: Click the Capture button (the monitor with a circle in it) and press the Start recording button (the white circle icon).
Tip: Start recording your screen directly by pressing Windows + Alt + R.
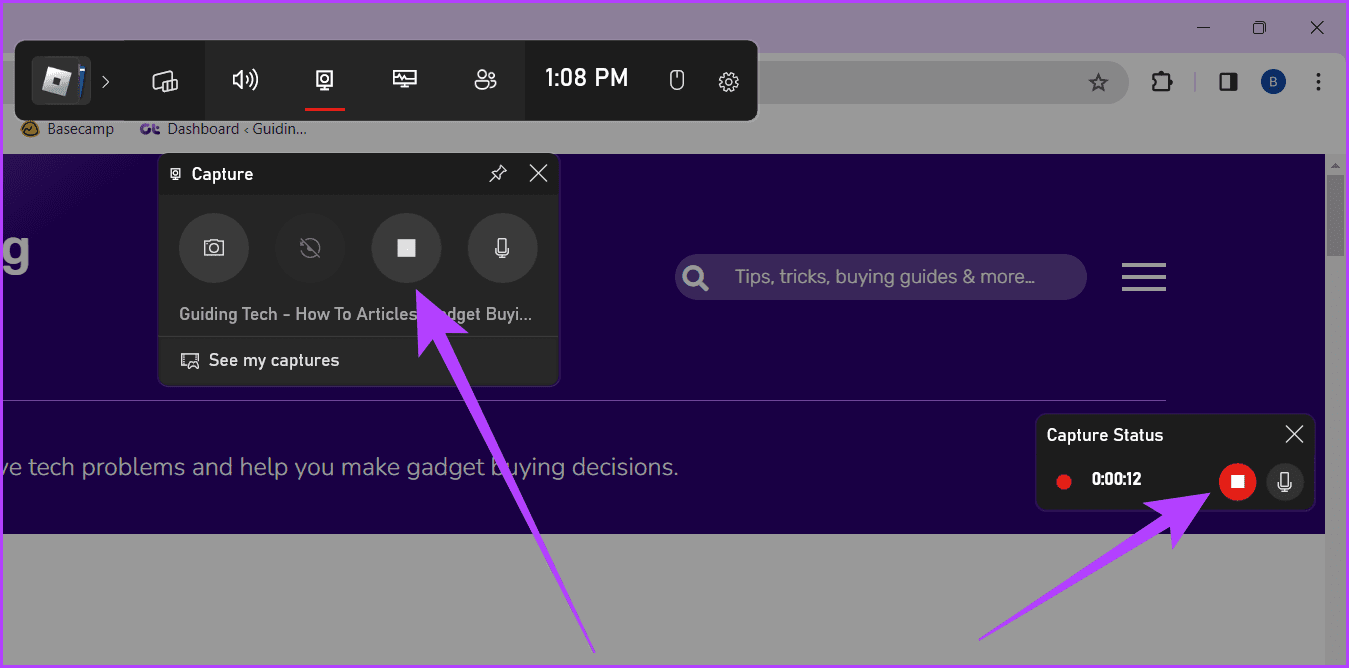
Step 4: Record your screen, and once done, click the Stop recording button (square icon) to end the recording.
Check our explainer to record your screen without relying on the Xbox Game Bar.
Method 3. Utilizing Third-Party Screen Recording Software
Third-party screen recording software provides the flexibility and quality you want. While there are many tools, we’ll use OBS Studios for demonstration. Follow along:
Step 1: Download and install OBS Studio from the official site.
Step 2: Press Windows + S, type OBS Studio, and launch it.
Step 3: If you are installing OBS Studio for the first time, follow the steps below. If you have installed it before, skip them.
a. Under Usage information, select Optimize just for recording, I will not be streaming and click Next.

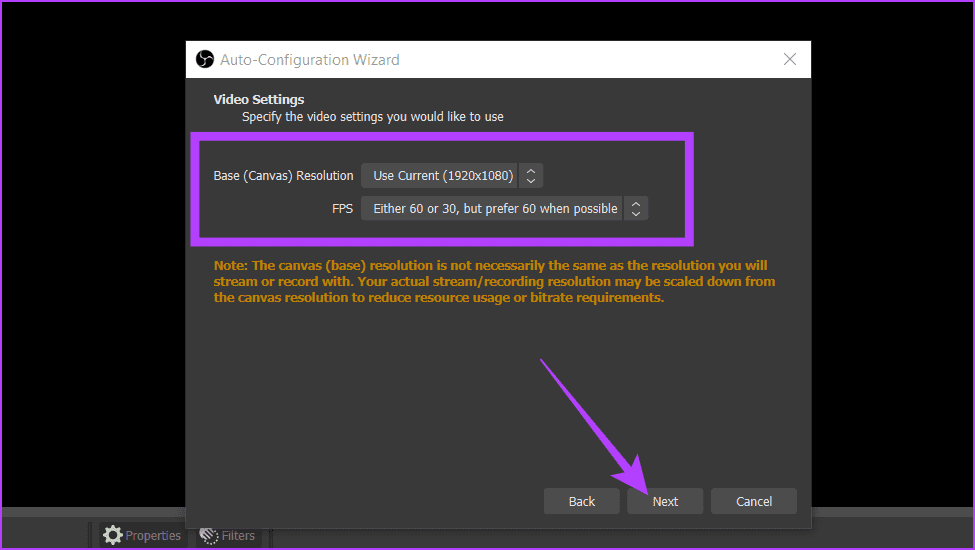
b. For Video Settings, adjust the Base (Canvas) Resolution and FPS and press Next.
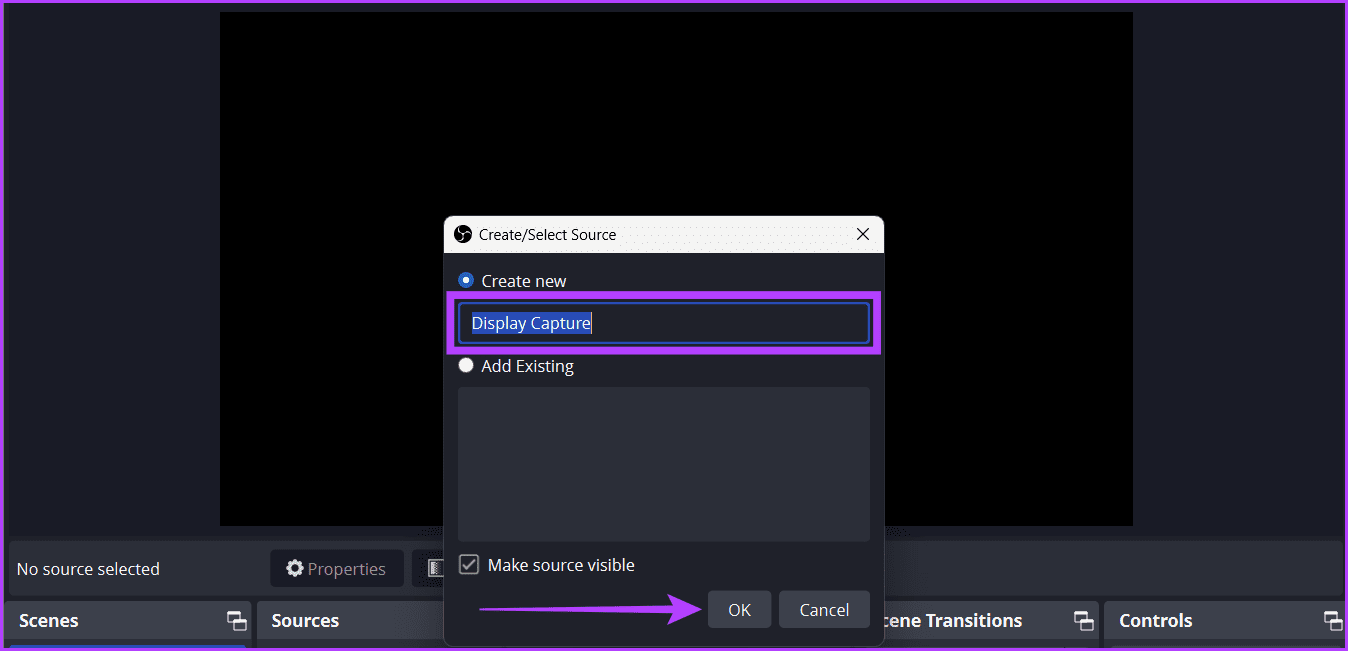
Step 4: Click the + icon under the Sources box and choose Display Capture.
Step 5: Rename the Capture and press OK.
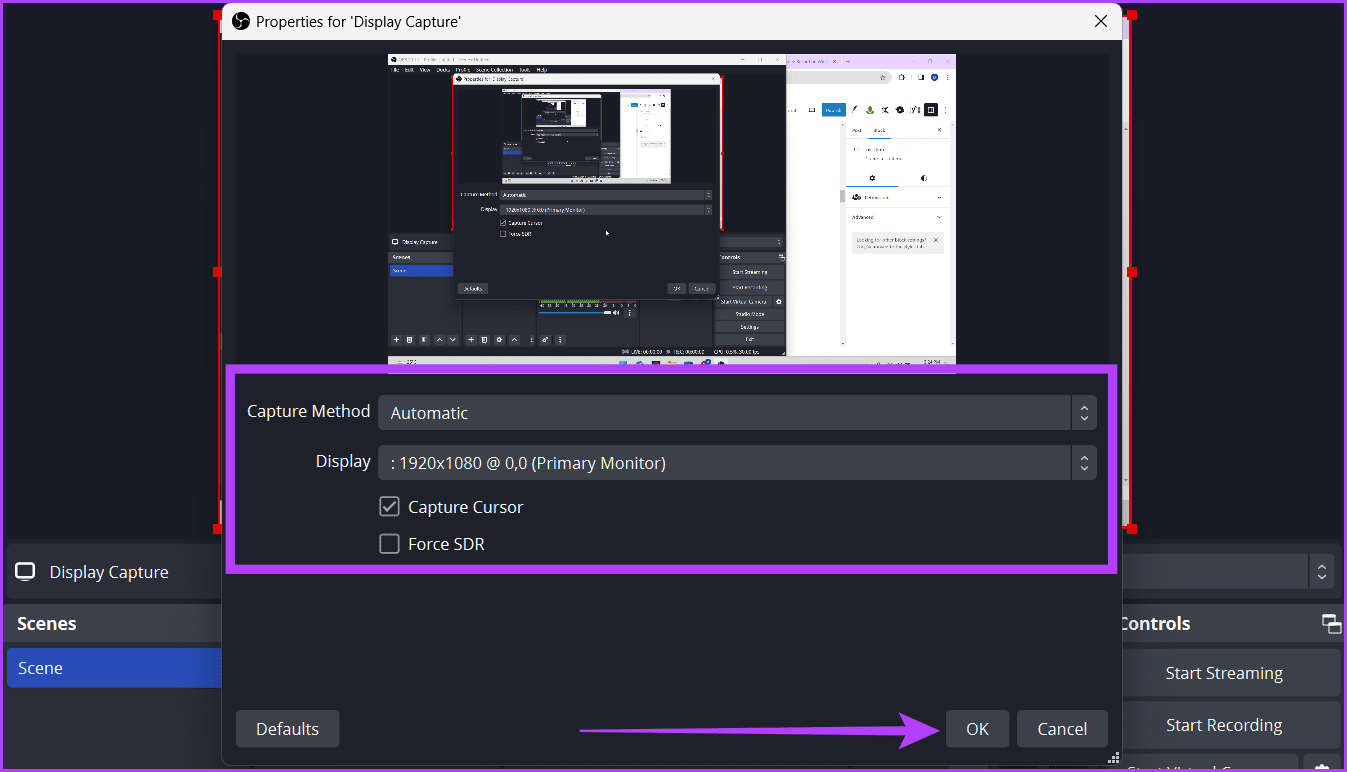
Step 6: Adjust the below-mentioned settings and click OK.
- Capture Method: Choose how OBS captures the contents of your screen.
- Display: If you work with multiple monitors, choose the monitor from which you want to record the screen.
- Capture Cursor: Enabling this ensures your cursor movements are recorded in the screen recording.
- Force SDR: Enabling this feature ensures that regardless of their original color space, OBS Studio forcefully converts all video sources to SDR.
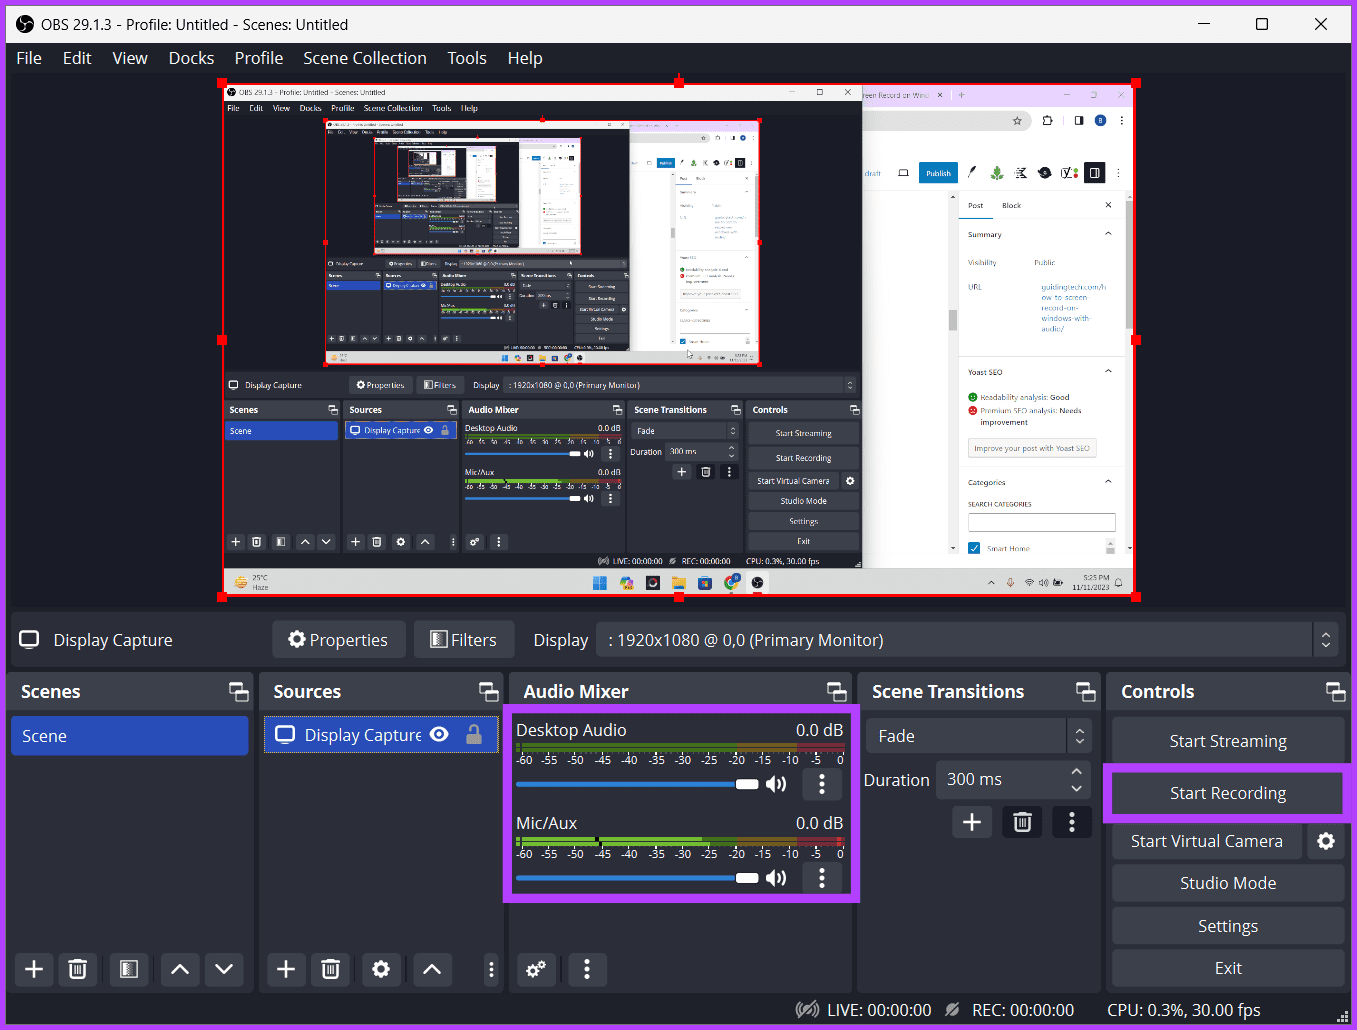
Step 7: Adjust the Desktop Audio and Mic/AUX sliders. Finally, click Start Recording and minimize the OBS Studio window.
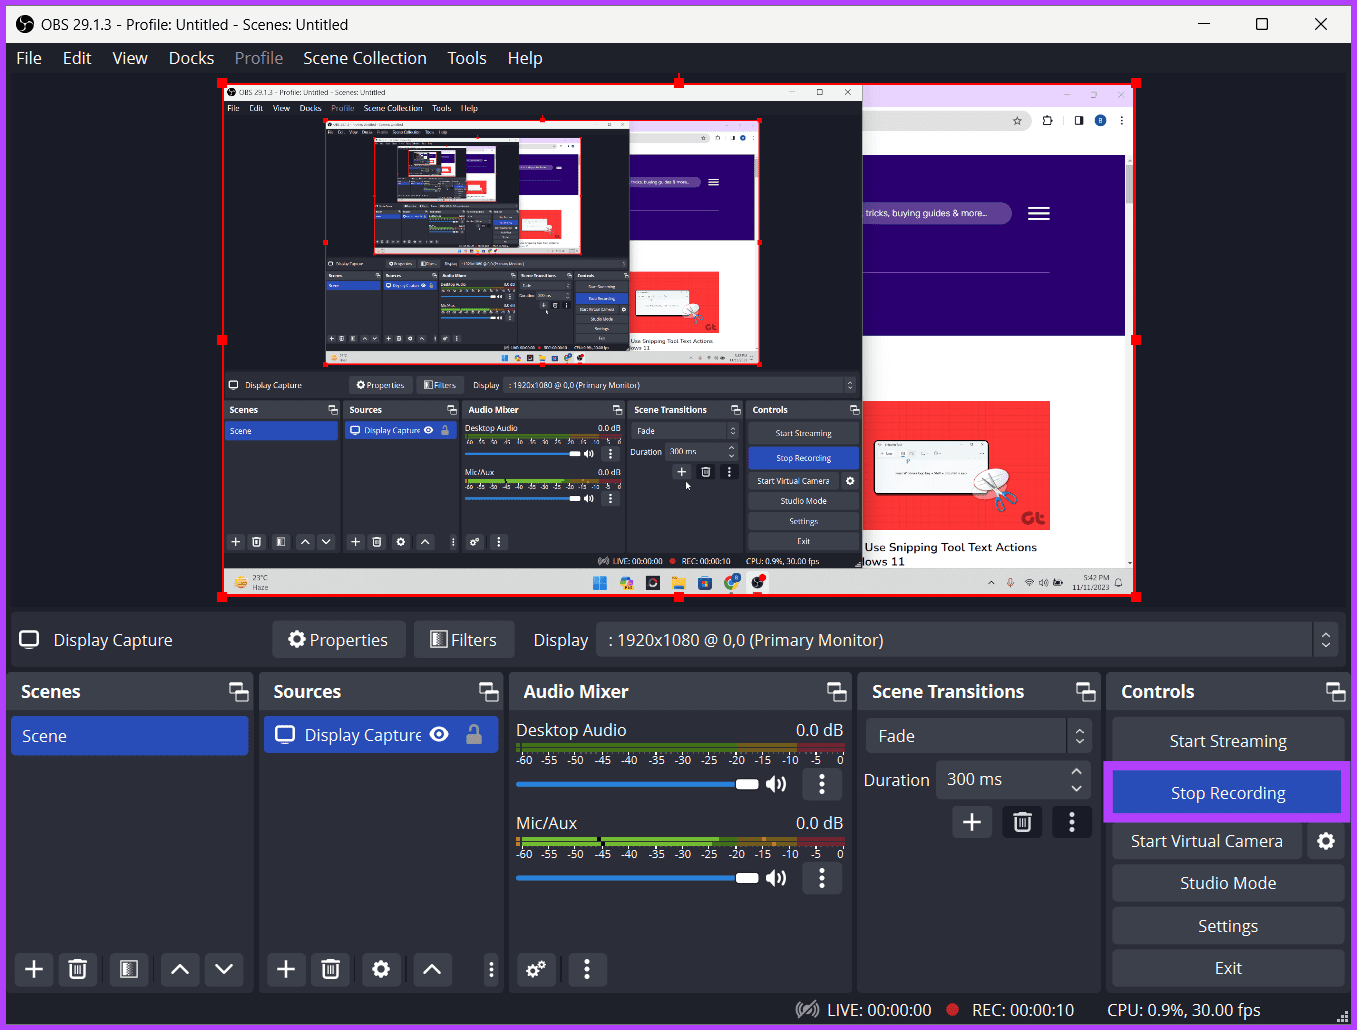
Step 8: Once recorded, maximize OBS Studio and click on Stop Recording.
Was this helpful?
Last updated on 16 April, 2024
Read Next
 2 Ways to Record Audio on Windows 11
Method 1: Using the Native Windows Sound Recorder App Microsoft consistently updates Windows to optimize its performance.
2 Ways to Record Audio on Windows 11
Method 1: Using the Native Windows Sound Recorder App Microsoft consistently updates Windows to optimize its performance.
 How to Record Audio on Mac
Method 1: Record Audio Using Voice Memos The Voice Memos app comes pre-installed on your Mac, and it can record good-quality audio files and even share them.
How to Record Audio on Mac
Method 1: Record Audio Using Voice Memos The Voice Memos app comes pre-installed on your Mac, and it can record good-quality audio files and even share them.
 4 Best Ways to Record Screen Without Xbox Game Bar on Windows 11
The Xbox Game Bar on your Windows 11 computer is a good built-in tool for screen recording.
4 Best Ways to Record Screen Without Xbox Game Bar on Windows 11
The Xbox Game Bar on your Windows 11 computer is a good built-in tool for screen recording.
 How to Record Your Screen with Zoom on Windows and macOS
How to Record Your Screen with Zoom on Windows Here's how to record your computer screen on Windows and Mac using the Zoom desktop app.
How to Record Your Screen with Zoom on Windows and macOS
How to Record Your Screen with Zoom on Windows Here's how to record your computer screen on Windows and Mac using the Zoom desktop app.
 3 Ways to Fix Can’t Record Meeting in Microsoft Teams
Preliminary Fixes Ensure you have a Microsoft 365 license: It is crucial to have the appropriate Microsoft 365 license.
3 Ways to Fix Can’t Record Meeting in Microsoft Teams
Preliminary Fixes Ensure you have a Microsoft 365 license: It is crucial to have the appropriate Microsoft 365 license.
 How to Record High-Quality Gameplay Videos Using OBS Studio
How to Setup OBS Studio to Recording Game Play Before recording your gameplay, you must set up OBS Studio.
How to Record High-Quality Gameplay Videos Using OBS Studio
How to Setup OBS Studio to Recording Game Play Before recording your gameplay, you must set up OBS Studio.
 How to Fix Call Recording Not Working on Samsung Galaxy Phones
Basic Fixes: Restart Samsung Galaxy phone: Rebooting your Samsung Galaxy phone is one of the effective ways to troubleshoot common problems.
How to Fix Call Recording Not Working on Samsung Galaxy Phones
Basic Fixes: Restart Samsung Galaxy phone: Rebooting your Samsung Galaxy phone is one of the effective ways to troubleshoot common problems.
The article above may contain affiliate links which help support Guiding Tech. The content remains unbiased and authentic and will never affect our editorial integrity.