How to Record Audio in Microsoft Word
You can save time and energy by dictating your thoughts using Microsoft Word. It captures the words you speak and converts them to text. Here’s how to record audio in Microsoft Word. You will need the Microsoft Web online app for this.
Step 1: Visit Microsoft Word online.
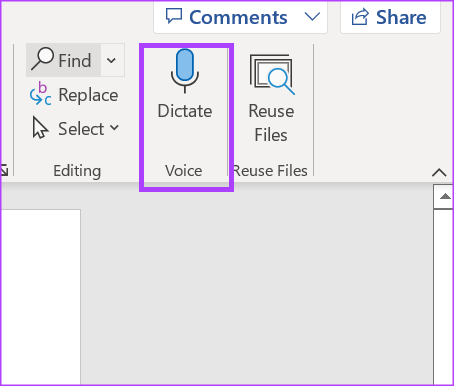
Step 2: On the Microsoft Office Ribbon, click on the Home tab.

Step 3: Look out for the Voice group and click the Dictate icon.
Step 4: Click the Start Dictation microphone to begin recording.

Step 5: Ensure the microphone icon is pulsing blue once you start speaking. You should see the words you speak recorded in grey text on the Word canvas.

If you do not have Microsoft 365, you can get it for free.
How to Transcribe Audio in Microsoft Word
Also, the transcribe feature only works on Word for Web for those with a Microsoft 365 subscription. This feature is for you if you want to pay more attention in a meeting or lecture. By recording directly in Microsoft Word, you can give more energy to active participation in your meetings.
Step 1: Open your preferred browser and sign in to your Microsoft 365 account.
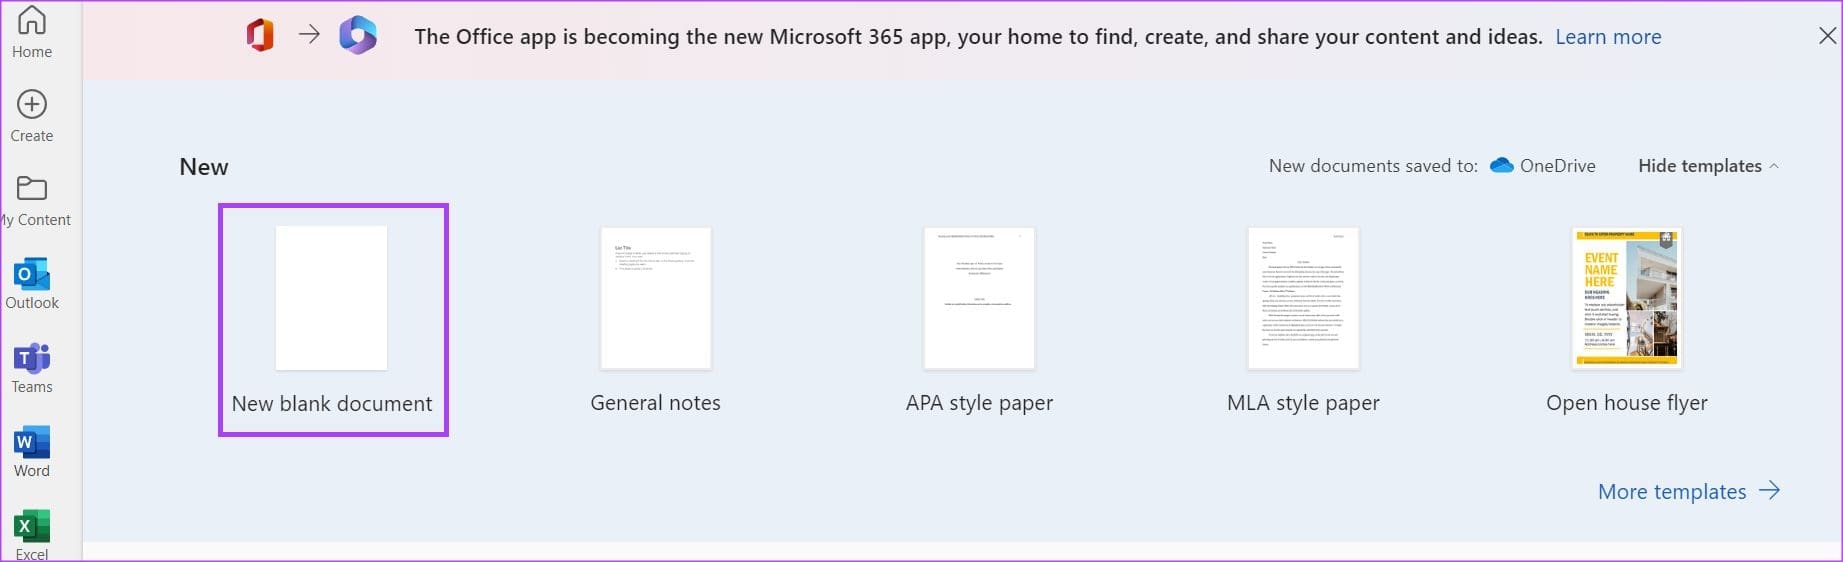
Step 2: Click the Microsoft Word icon to launch the program from the sidebar.

Step 3: Select a New blank document or an existing document to open it.
Step 4: On your Word document, click the Home tab on the Ribbon.

Step 5: Look for a microphone icon on the Ribbon, which represents Dictate, and click on it to launch a drop-down.
Step 6: From the drop-down, select Transcribe.

Step 7: If you have audio from another source, click Upload audio. If you want to record directly on Word and have the app transcribe for you instead, select Start recording.
Note: Ensure you give your browser permission to start recording audio in Word.

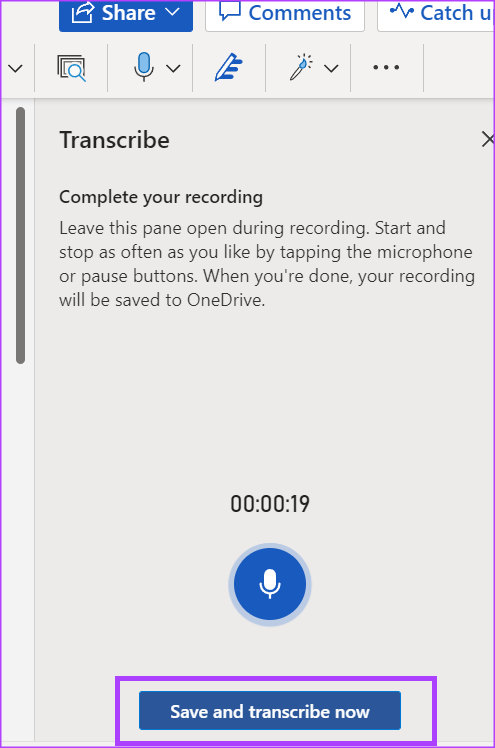
Step 8: After uploading your audio or recording directly on Word, select Save and Transcribe Now or Transcribe, respectively, to commence transcription. Ensure you leave the Transcription pane open throughout the process.
Note: Your recordings will be saved on OneDrive in a Transcribed Files folder.
Step 9: After saving the transcription, you should see timestamps and texts in the Transcription pane, which are the contents of your recording.

Edit Your Transcription in Microsoft Word
After Word transcribes your audio file, you can make further edits. Here’s how to do so:
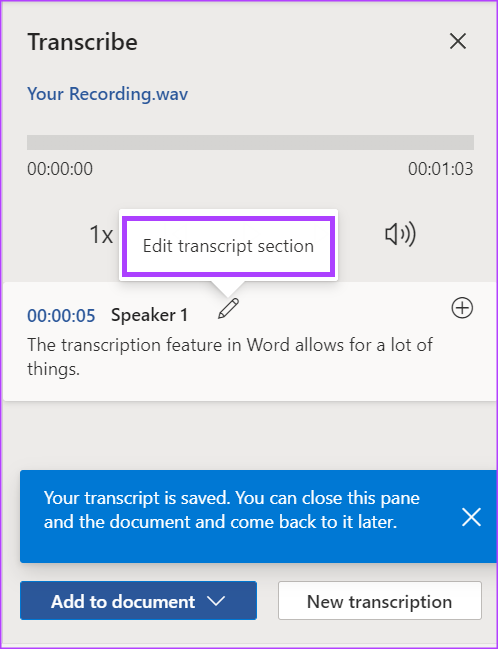
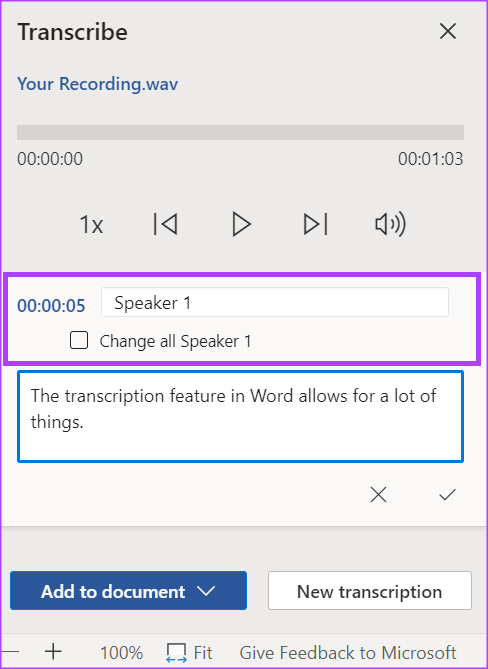
Step 1: On the transcription pane, hover your cursor on the section you want to edit.
Step 2: Click the Edit transcript section button.
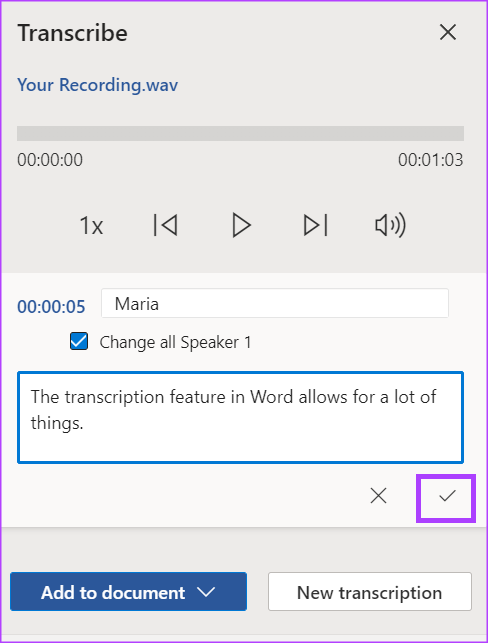
Step 3: Click the Speaker label to change the name used. If you want your new name to be reflected in all further references for the speaker’s name, tick the box with Change all speaker.
Step 4: If the transcribed text is missing something or you want to reword it, click the text box and make your changes directly.
Step 5: Click the Confirm icon to save your changes.
Was this helpful?
Last updated on 08 August, 2024
Read Next
 5 Ways to Transcribe Voice Memos on iPhone
Method 1: Use Live Captions to Transcribe Voice Memos on iPhone Why you should try this: There is no need for the internet or a third-party app.
5 Ways to Transcribe Voice Memos on iPhone
Method 1: Use Live Captions to Transcribe Voice Memos on iPhone Why you should try this: There is no need for the internet or a third-party app.
 3 Easy Ways to Screen Record on Windows With Audio
Method 1.
3 Easy Ways to Screen Record on Windows With Audio
Method 1.
 2 Ways to Record Audio on Windows 11
Method 1: Using the Native Windows Sound Recorder App Microsoft consistently updates Windows to optimize its performance.
2 Ways to Record Audio on Windows 11
Method 1: Using the Native Windows Sound Recorder App Microsoft consistently updates Windows to optimize its performance.
 How to Record Audio on Mac
Method 1: Record Audio Using Voice Memos The Voice Memos app comes pre-installed on your Mac, and it can record good-quality audio files and even share them.
How to Record Audio on Mac
Method 1: Record Audio Using Voice Memos The Voice Memos app comes pre-installed on your Mac, and it can record good-quality audio files and even share them.
 Google Docs vs. Microsoft Word Online: Which Word Processor Is Better
Google Docs vs.
Google Docs vs. Microsoft Word Online: Which Word Processor Is Better
Google Docs vs.
 How to Insert Audio Files into Microsoft Word
Method 1: Using a Simple Drag and Drop The easiest way to insert audio in Microsoft Word is to use a simple drag-and-drop method.
How to Insert Audio Files into Microsoft Word
Method 1: Using a Simple Drag and Drop The easiest way to insert audio in Microsoft Word is to use a simple drag-and-drop method.
 Apple Pages vs Microsoft Word: Which Word Processing Software Is Better
Every major tech company out there is offering their version of the productivity suite.
Apple Pages vs Microsoft Word: Which Word Processing Software Is Better
Every major tech company out there is offering their version of the productivity suite.
 3 Ways to Fix Can’t Record Meeting in Microsoft Teams
Preliminary Fixes Ensure you have a Microsoft 365 license: It is crucial to have the appropriate Microsoft 365 license.
3 Ways to Fix Can’t Record Meeting in Microsoft Teams
Preliminary Fixes Ensure you have a Microsoft 365 license: It is crucial to have the appropriate Microsoft 365 license.
The article above may contain affiliate links which help support Guiding Tech. The content remains unbiased and authentic and will never affect our editorial integrity.