Fix 1: Enable Connect to Wi-Fi Automatically
Windows 11 may not connect to a known network automatically if you haven’t configured it to do so. Hence, it’s the first thing you should check.
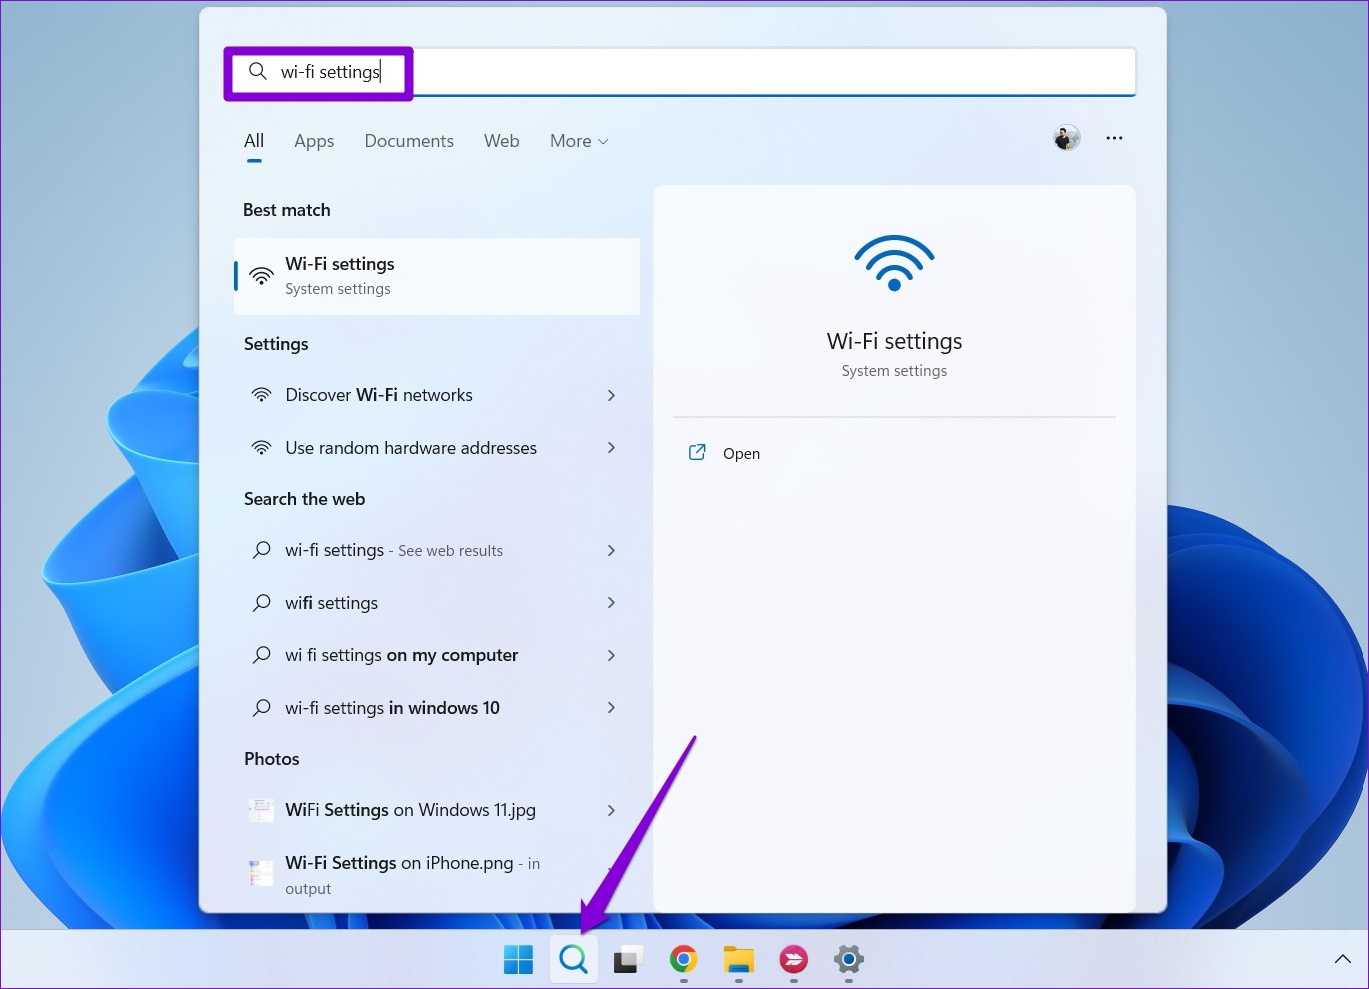
Step 1: Click on the search icon on the taskbar, type Wi-Fi settings, and press Enter.
Step 2: Click on Manage known networks.

Step 3: Select the network to which you want your Windows PC to connect automatically.

Step 4: Check the box for Connect automatically when in range.

Fix 2: Use the Updated Wi-Fi Password
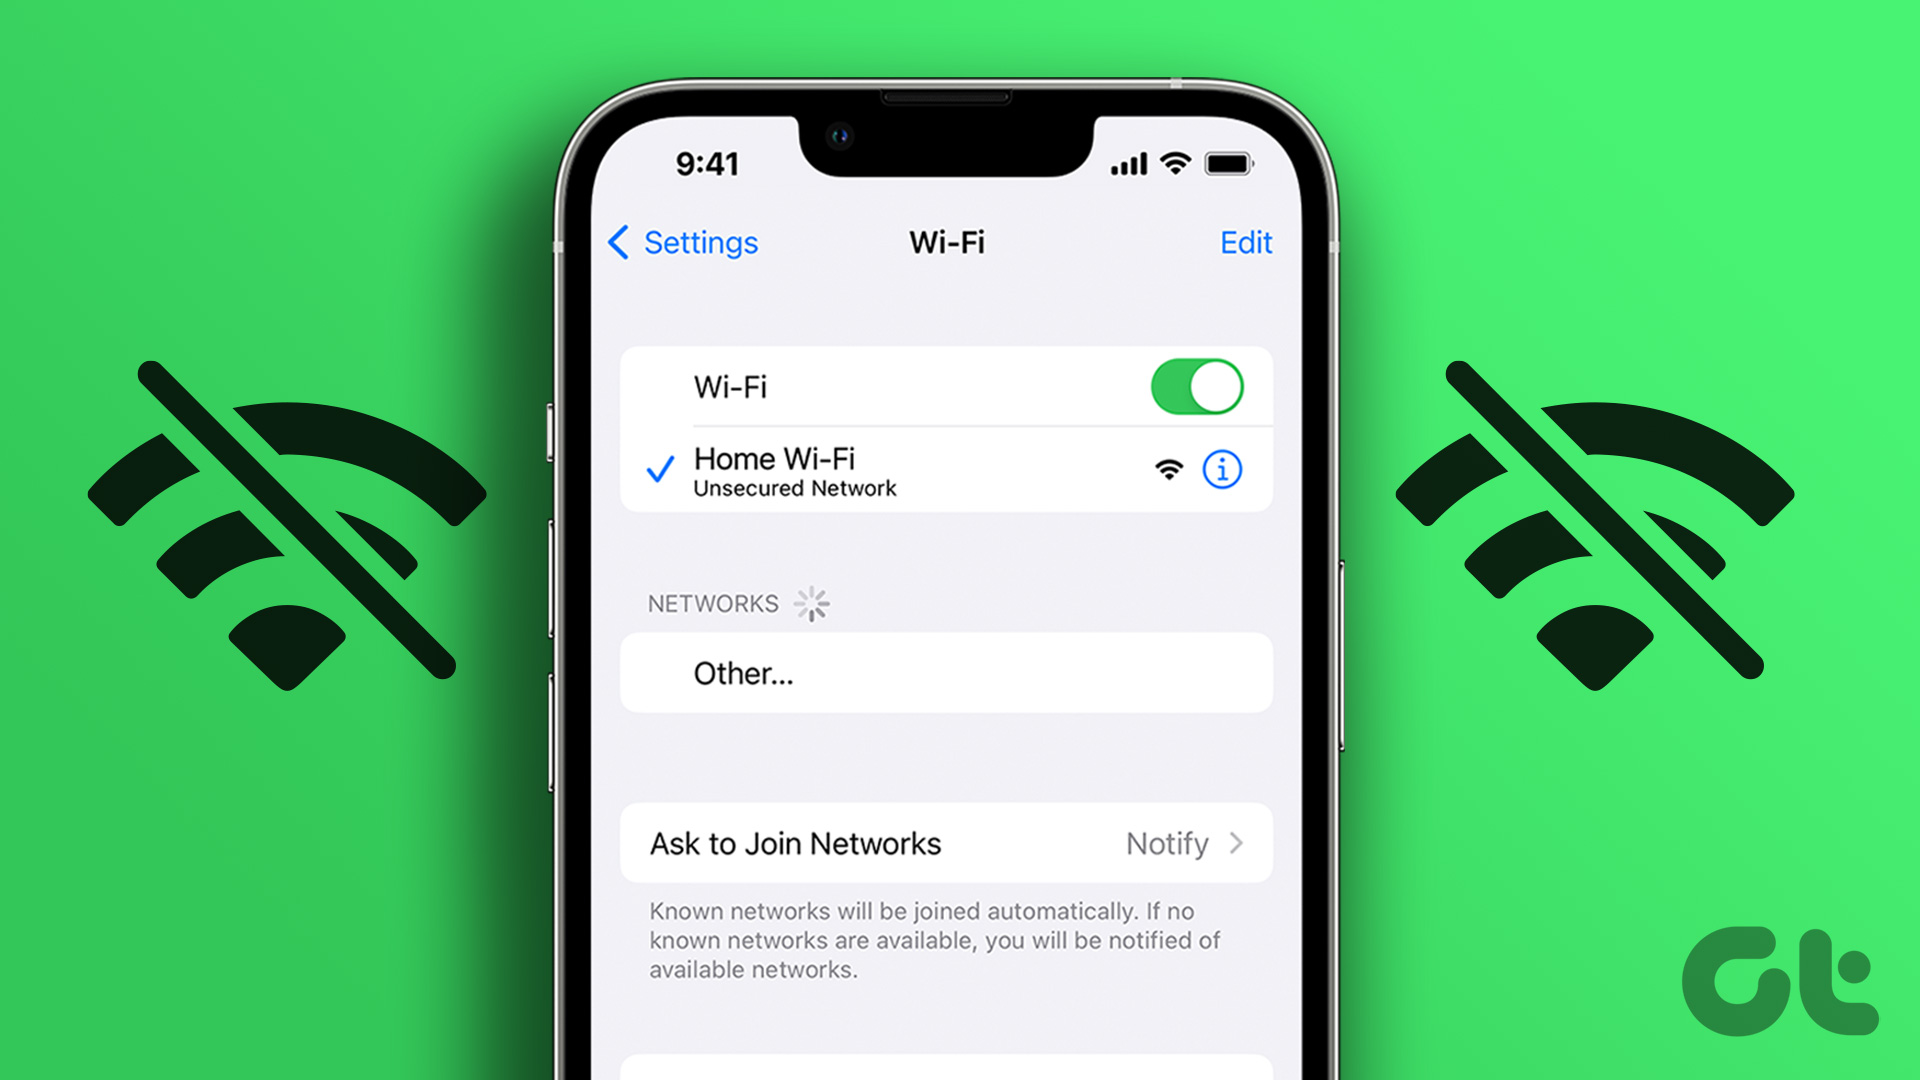
Windows may fail to connect to a Wi-Fi network automatically if the password is incorrect. It’s possible that the Wi-Fi password for your office or cafe’s network has changed and you haven’t updated it yet. To fix this, disconnect from that particular network and connect to it again.
Step 1: Open the Wi-Fi settings menu and go to Manage known networks.
Step 2: Click the Forget button next to the Wi-Fi’s name to remove it.

Step 3: Head back to Wi-Fi settings and click on Show available networks to expand it. Select your Wi-Fi network, check the box for Connect automatically, and click Connect.
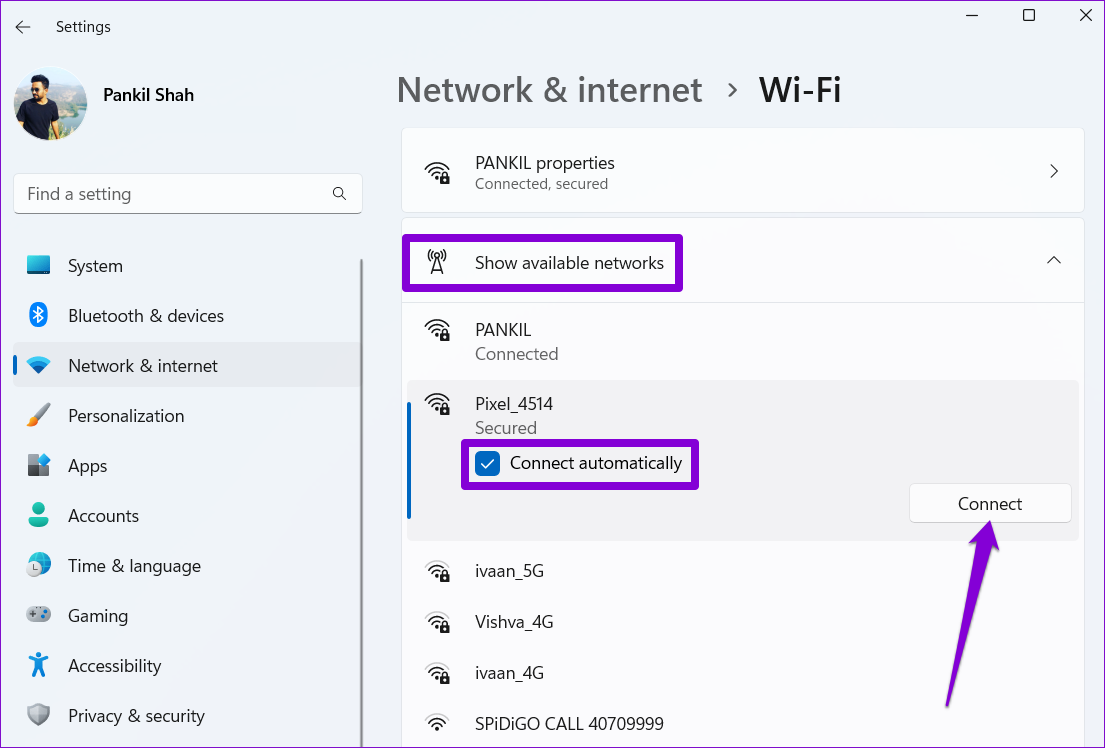
Type the updated password to connect to the network. Windows will connect your computer to that network automatically whenever it is in range.
Fix 3: Run the Network and Internet Troubleshooter
Another thing you can do is run the Network and internet troubleshooter. It will look for any network-related issues that may prevent Windows from connecting to the network automatically and try to fix them.
Step 1: Click the search icon on the taskbar, type troubleshoot settings, and hit Enter.

Step 2: Go to Other troubleshooters.

Step 3: Click the Run button next to the Network and Internet.

Follow the on-screen prompts to allow the troubleshooter to detect and fix any network connection issues.
Fix 4: Modify Network Adapter Properties
Selecting a stricter power usage profile can sometimes prevent Windows from connecting to a Wi-Fi network automatically after waking up from sleep or hibernation. Here’s how to fix it.
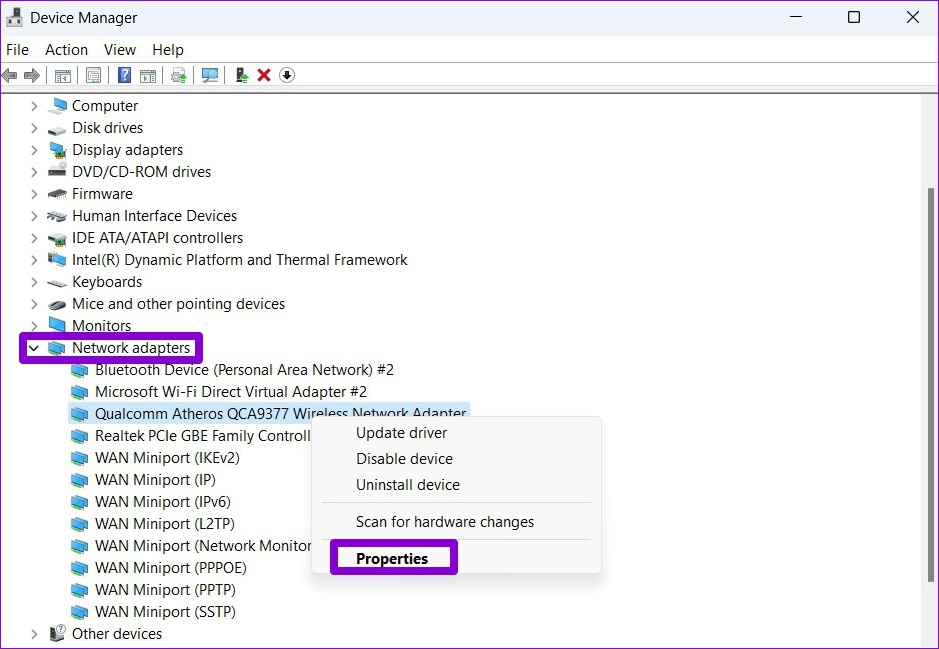
Step 1: Right-click on the Start icon and select Device Manager from the list.

Step 2: Double-click on Network adapters to expand it. Right-click on your Wireless Network Adapter and select Properties.
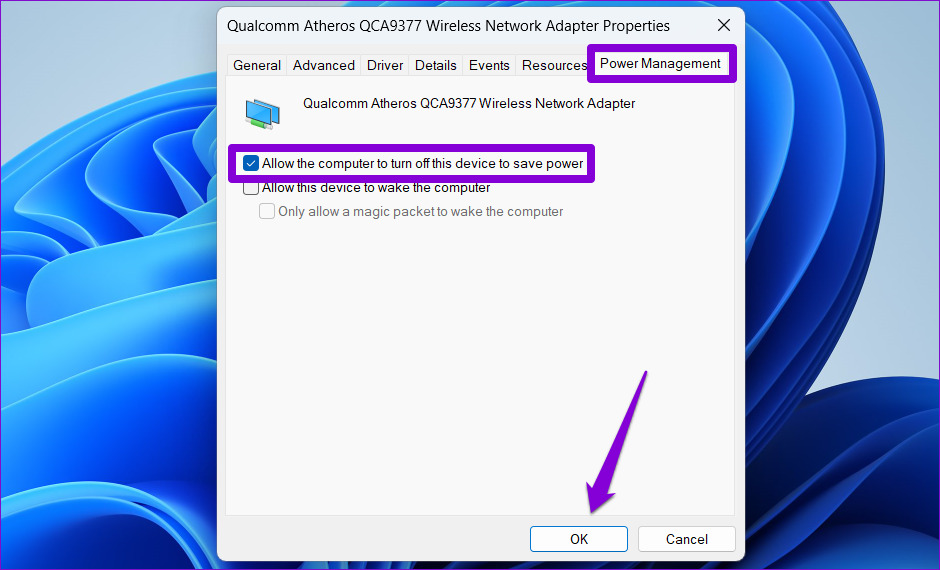
Step 3: Navigate to the Power Management tab and uncheck Allow the computer to turn off this device to save power. Then, click OK.
Fix 5: Update Wi-Fi Network Adapter Drivers
You’ll likely face such Wi-Fi problems on Windows with outdated network adapter drivers. To fix them, you must update the Wi-Fi drivers on your PC by following the steps below.
Step 1: Open Device Manager on your PC.
Step 2: Expand Network adapters, right-click on the relevant Wireless Network Adapter from the list, and select Update driver.

From there, follow the on-screen instructions to update the wireless network driver and see if Windows 11 can connect to Wi-Fi networks automatically.
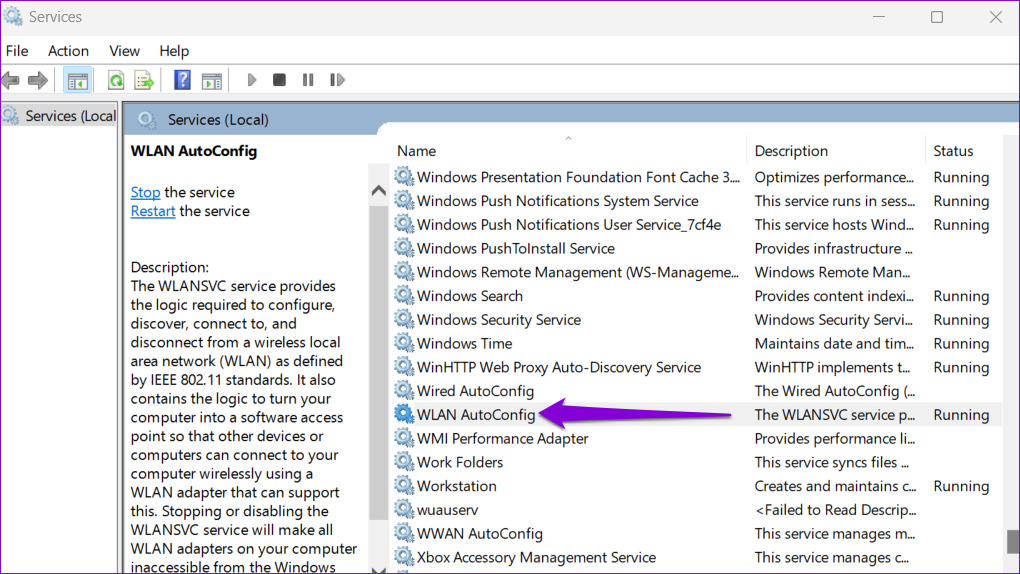
Fix 6: Configure Windows Services
Windows 11 relies on certain system services to connect to nearby Wi-Fi networks automatically. If these services are not running on your PC, Windows 11 may not connect to Wi-Fi networks automatically. Here’s how to fix that.
Step 1: Press the Windows key + R to open the Run dialog. Type services.msc in the box and press Enter.
Step 2: Locate and double-click the WLAN AutoConfig service to open its properties.
Step 3: Use the drop-down menu to change the Startup type to Automatic and hit Apply, followed by OK.
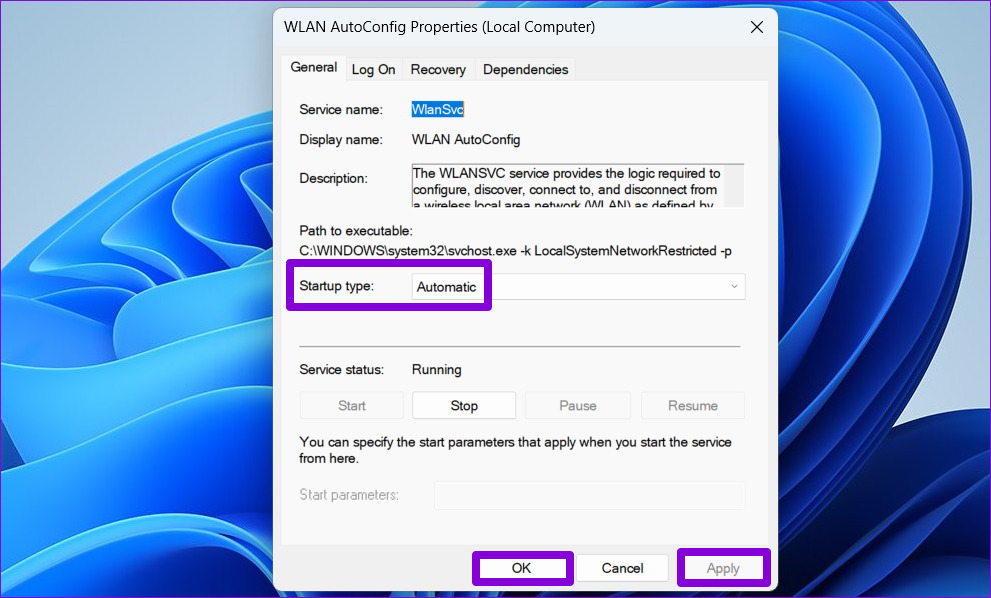
Similarly, configure the WWAN Auto Config service to start automatically on your PC. After that, check if the issue is resolved.
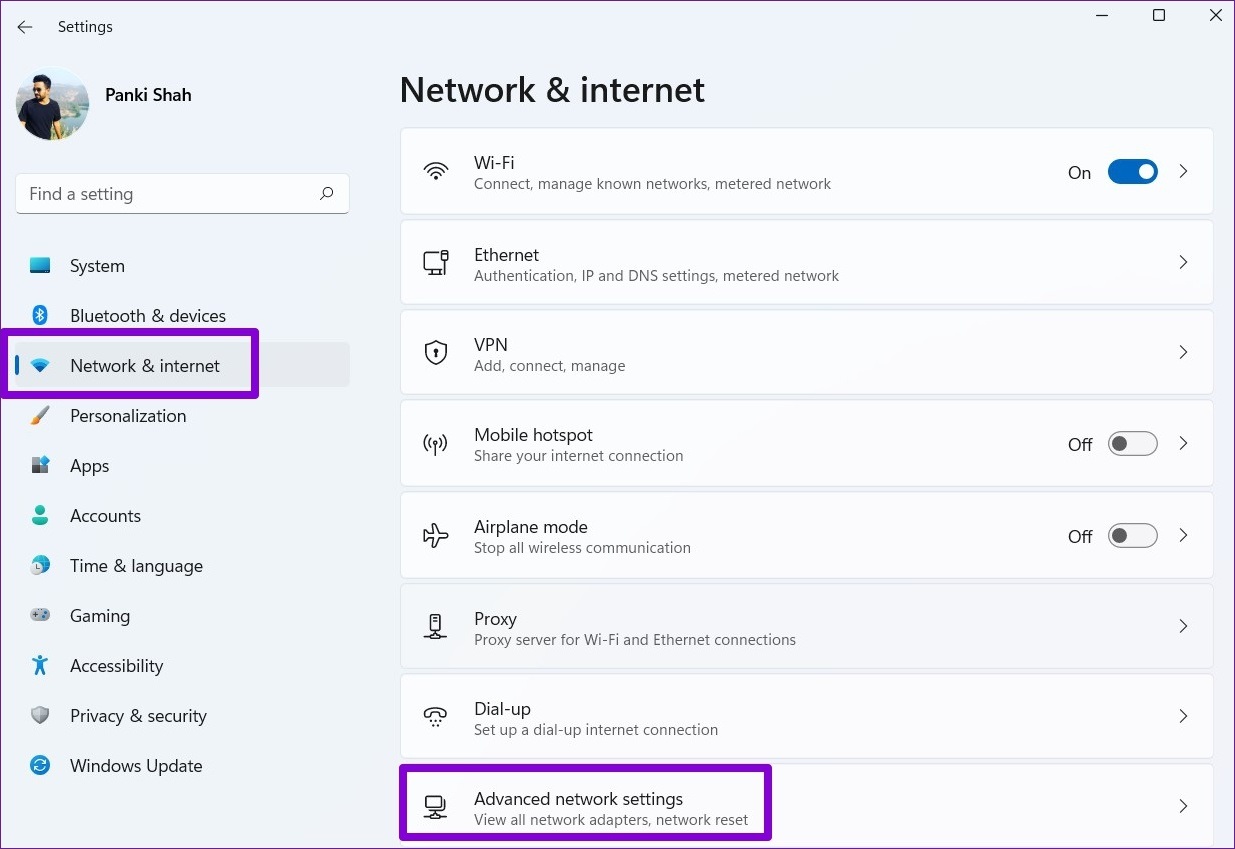
Fix 7: Reset Network Settings
If nothing works, resetting network settings on your Windows PC may be your last option. Here’s how to go about it.
Step 1: Press the Windows key + I to launch the Settings app. In the Network & internet tab, click on Advanced network settings.
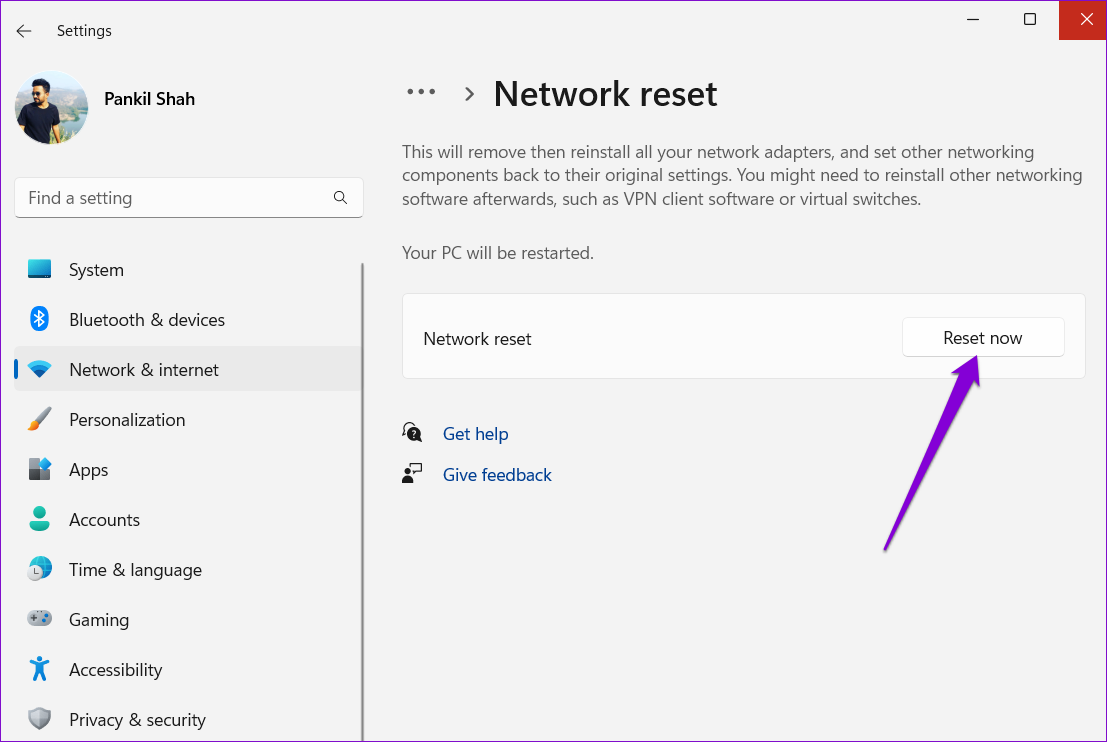
Step 2: Click Network reset.

Step 3: Click on Reset now next to Network reset.
Was this helpful?
Last updated on 03 July, 2024
1 Comment
Leave a Reply
Read Next
 3 Ways to Fix iPhone Not Automatically Connecting to Wi-Fi
Before you begin, ensure that there isn't any problem with your network connectivity and the Wi-Fi router.
3 Ways to Fix iPhone Not Automatically Connecting to Wi-Fi
Before you begin, ensure that there isn't any problem with your network connectivity and the Wi-Fi router.
 3 Ways to Fix Android Not Connecting to Wi-Fi Automatically
Try Basic Fixes Use the updated Wi-Fi password: If the password is incorrect, your Android may fail to connect to a Wi-Fi network automatically.
3 Ways to Fix Android Not Connecting to Wi-Fi Automatically
Try Basic Fixes Use the updated Wi-Fi password: If the password is incorrect, your Android may fail to connect to a Wi-Fi network automatically.
 5 Ways to Fix Wireless Android Auto Not Connecting Automatically
Fix 1: Disable Mobile Hotspot I have personally noticed that keeping the mobile hotspot enabled prevented my phone from connecting to Android Auto, or it keeps disconnecting when turned on.
5 Ways to Fix Wireless Android Auto Not Connecting Automatically
Fix 1: Disable Mobile Hotspot I have personally noticed that keeping the mobile hotspot enabled prevented my phone from connecting to Android Auto, or it keeps disconnecting when turned on.
 2 Fixes for Bluetooth Device Not Connecting Automatically on iPhone
Basic Fixes Reconnect device: Open the Settings app, go to Bluetooth, select your device, and tap on Forget.
2 Fixes for Bluetooth Device Not Connecting Automatically on iPhone
Basic Fixes Reconnect device: Open the Settings app, go to Bluetooth, select your device, and tap on Forget.
 11 Best Ways to Fix Dropbox Not Connecting or Syncing on Windows 10 Error
Dropbox is a popular cloud storage solution that, for the most part, works right out of the box.
11 Best Ways to Fix Dropbox Not Connecting or Syncing on Windows 10 Error
Dropbox is a popular cloud storage solution that, for the most part, works right out of the box.
 4 Ways to Fix Windows Laptop Not Connecting to Mobile Hotspot on Android
Try Basic Fixes Switch to Airplane Mode or Restart Devices: It will ensure the removal of temporary blocks that show up if the device is turned on for a long
4 Ways to Fix Windows Laptop Not Connecting to Mobile Hotspot on Android
Try Basic Fixes Switch to Airplane Mode or Restart Devices: It will ensure the removal of temporary blocks that show up if the device is turned on for a long
 Top 12 Ways to Fix Steam Not Connecting to the Internet on Windows
Steam is one of the popular gaming apps on Windows.
Top 12 Ways to Fix Steam Not Connecting to the Internet on Windows
Steam is one of the popular gaming apps on Windows.
 10 Ways to Fix Discord “RTC Connecting” and “No Route” Errors on Windows
Discord has evolved into one of the best chat platforms.
10 Ways to Fix Discord “RTC Connecting” and “No Route” Errors on Windows
Discord has evolved into one of the best chat platforms.
The article above may contain affiliate links which help support Guiding Tech. The content remains unbiased and authentic and will never affect our editorial integrity.

My simple solution after trying all of the above was a matter of Authentication Mode. Setting the adapter (although capable) to WPA3 allows it to connect, but not automatically after a Restart, Sleep, or Hibernate, and requires manual intervention. My router is set to both WPA2 and WPA3 security. After switching the wireless adapter to WPA2 Personal, the WiFi connects automatically again.
Check your authentication mode to see if the adapter is compatible with your router.