Basic Fixes
- Reconnect the external microphone: Plug out the external connected microphone, wait a few seconds, and reconnect it.
- Update Windows 11: Press the Windows + I keys to open Settings, select Windows Update in the left sidebar, and install available system updates.
Fix 1: Enable Microphone Permissions for the Xbox Game Bar
The Xbox Game Bar will fail to capture the input audio if it lacks the necessary microphone permission. Head to Windows Settings to enable it.
Step 1: Press the Windows + I keys to open Settings > select Privacy & security in the left sidebar > click Microphone under App permissions.

Step 2: Enable Microphone access for the Game Bar by turning on its toggle.

Fix 2: Check Default Input Device on Windows 11 and Xbox Game Bar
Selecting an incorrect audio input in the system and Xbox Game Bar settings also leads to microphone issues on Windows 11. Check individual settings to correct it.
Step 1: Open Windows Settings > select System in the left sidebar > click Sound.

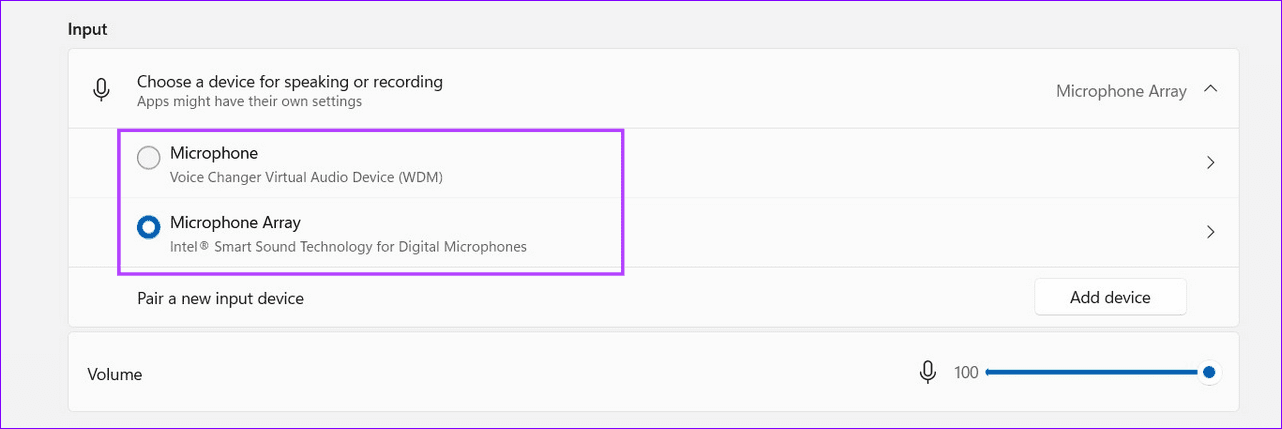
Step 2: Select the correct Microphone under Input to use it.
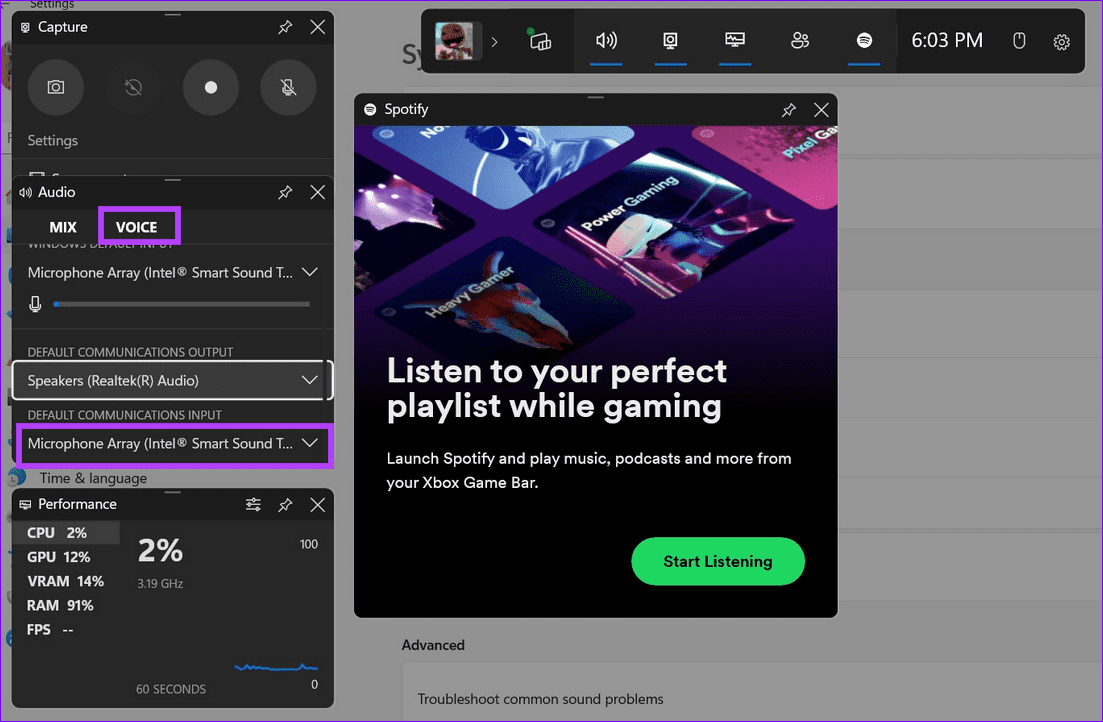
Step 3: Next, press the Windows key + G to launch the Xbox Game Bar overlay > select the Voice tab under Audio.
Step 4: Select Default Communications Input and pick your connected microphone.
Fix 3: Reinstall the Microphone Driver
If you’re experiencing poor microphone quality or it isn’t working, reinstalling the microphone driver should resolve the issue.
Step 1: Press the Windows key, search Device Manager, and click to open it.

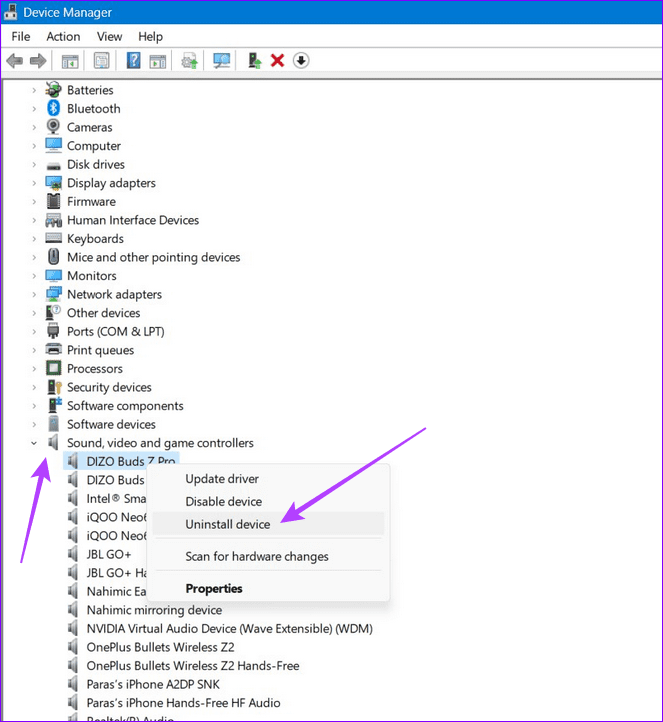
Step 2: Expand Sound, video and game controllers, right-click your microphone, and select Uninstall device.
Step 3: Restart your PC to let Windows automatically install the new drivers. Alternatively, you can download and install the microphone drivers from the online product page.
Fix 4: Restart the Windows Audio Service
Windows Audio is responsible for managing audio on your computer. When this service malfunctions, you may encounter microphone issues in the Xbox Game Bar. Restart the service to fix it.
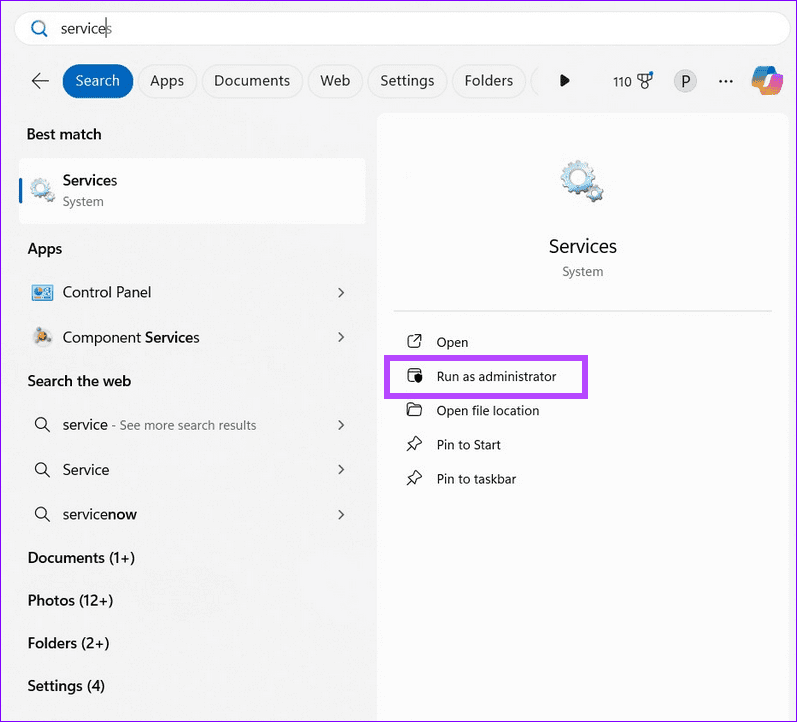
Step 1: Press the Windows key, search Services, and click Run as administrator.
Step 2: Locate Windows Audio in the list, right-click it, and select Restart.

Fix 5: Run the Audio Troubleshooter
Windows 11 comes with an in-built troubleshooter to fix all audio-related issues. Launch it from Windows Settings to fix the microphone not working in the Xbox Game Bar.
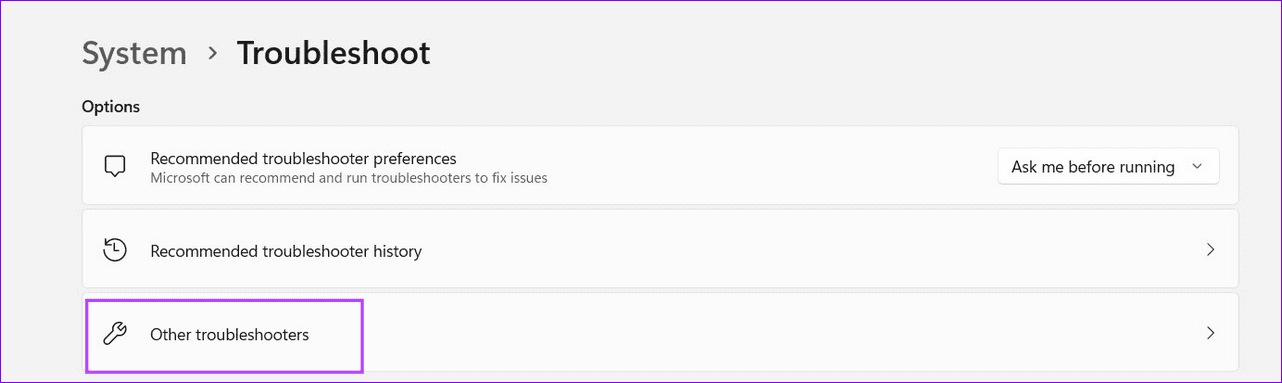
Step 1: Open Windows Settings > select System in the left sidebar > click Troubleshoot.

Step 2: Select Other troubleshooters.
Step 3: Click Run beside Audio to launch its troubleshooter, and wait a few seconds for Windows to resolve the issue.

Fix 6: Edit the Local Group Policy Editor
If running the audio troubleshooter didn’t work, you can manually edit the Windows Game Recording policy using the Group Policy Editor tool to fix microphone issues in the Xbox Game Bar.
Note: If you’re using a Windows 11 Home Edition, enable the Group Policy Editor manually.
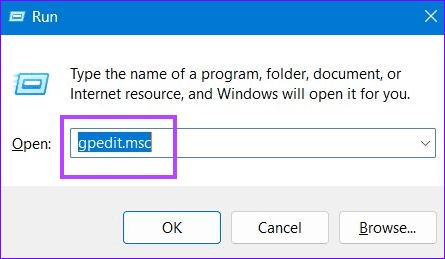
Step 1: Press the Windows + R keys simultaneously to open the Run dialog, type gpedit.msc, and hit Enter.
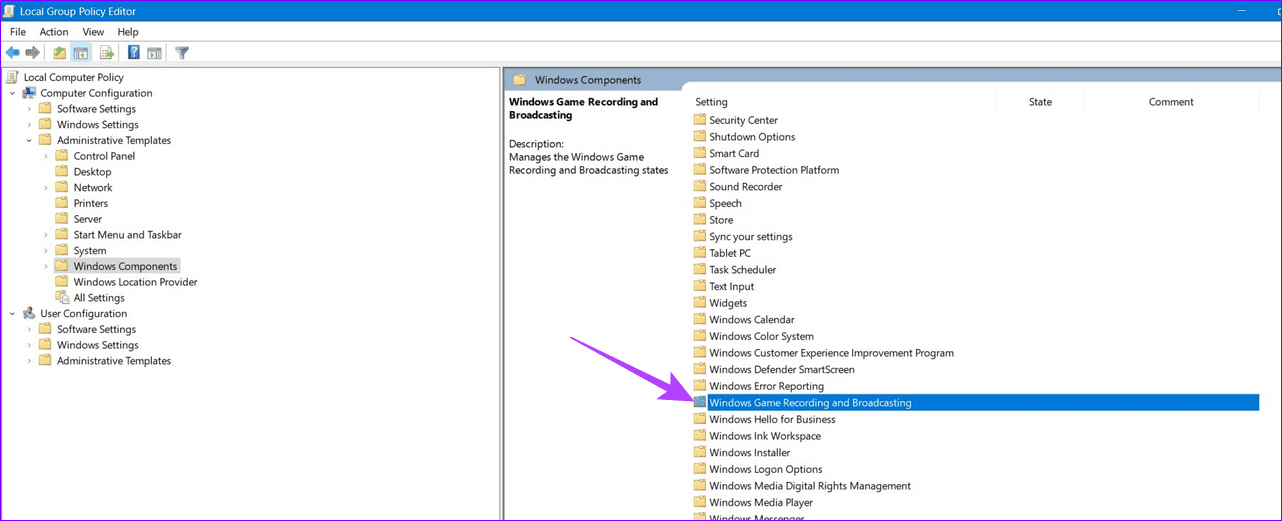
Step 2: Navigate to Computer Configuration > Administrative Templates > Windows Components and open the Windows Game Recording and Broadcasting policy.
Step 3: Double-click Enables or disables Windows Game Recording and Broadcasting, set its value to Enabled, and click Apply.

Fix 7: Re-Register the Xbox Game Bar
If the Xbox Game Bar installation files are corrupt, you can’t record the in-game audio. Register the Xbox Game Bar again to fix the error.
Step 1: Press the Windows key, search Windows PowerShell, and click Run as administrator.

Step 2: Copy-paste the below command, hit Enter, and reboot your PC.
Get-AppxPackage -allusers Microsoft.XboxApp | Foreach {Add-AppxPackage -DisableDevelopmentMode -Register “$($_.InstallLocation)\AppXManifest.xml”}
Fix 8: Repair or Reset the Xbox Game Bar
Lastly, you can utilize the built-in Windows 11 features to repair or reset the Xbox Game Bar, fixing existing microphone issues.
Note: Resetting the Xbox Game Bar will delete all its data.
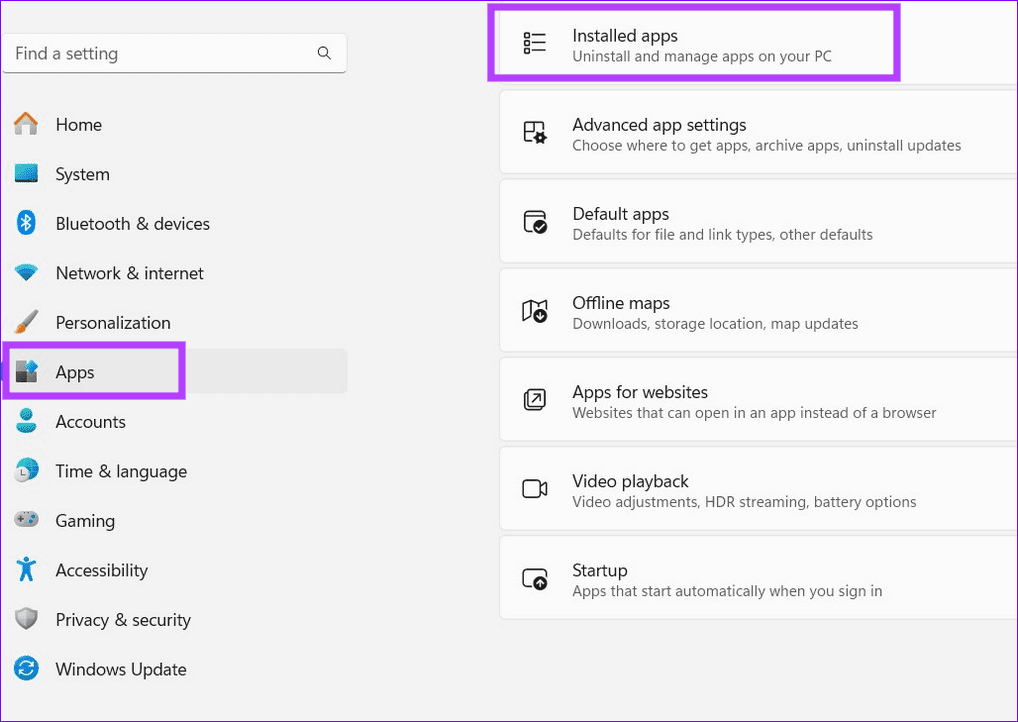
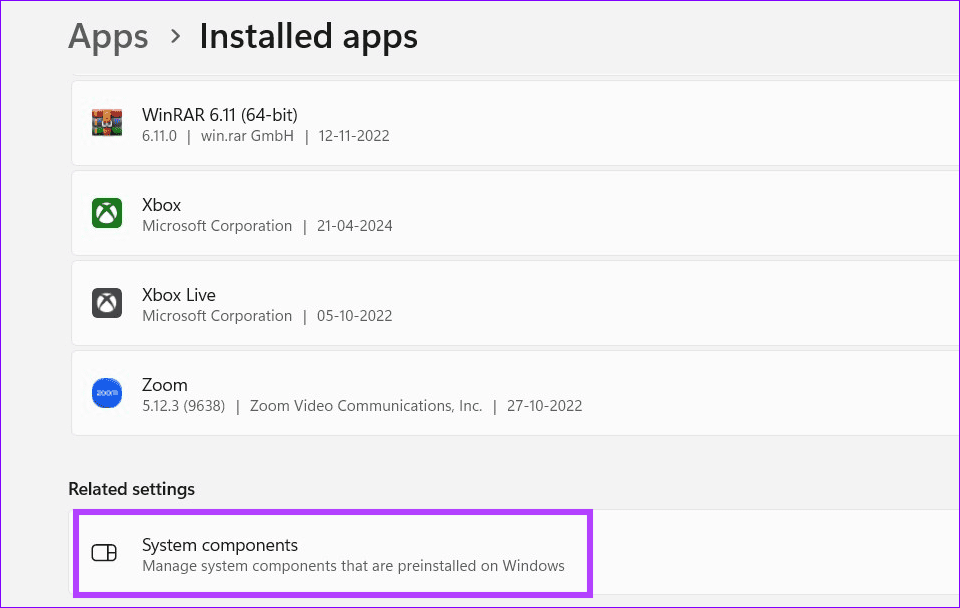
Step 1: Press the Windows + I keys to open Settings > select Apps in the sidebar > click Installed apps.
Step 2: Scroll to the bottom and select System components.
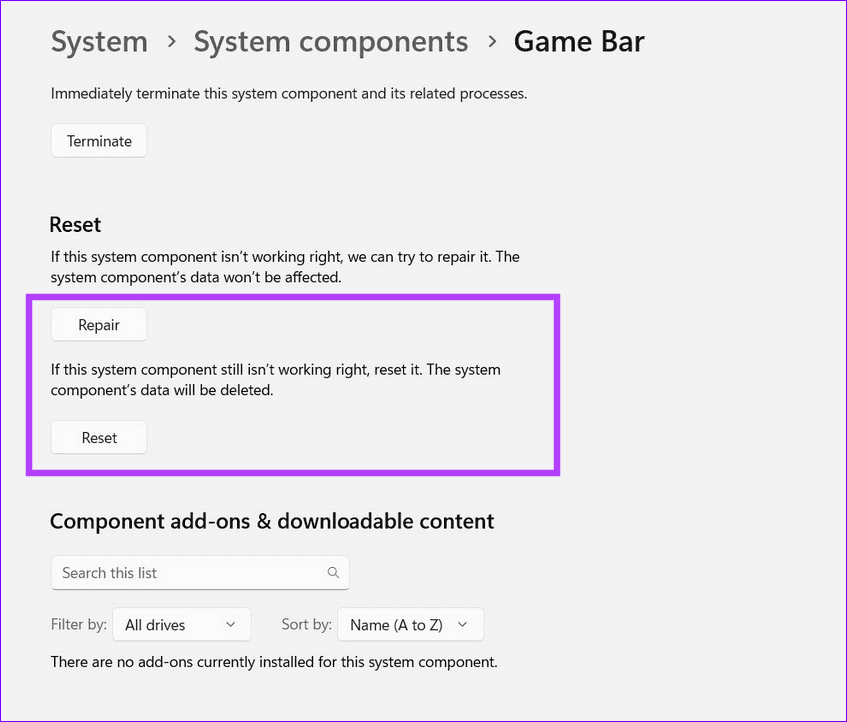
Step 3: Click three horizontal dots beside the Game Bar and select Advanced options.

Step 4: Click Repair to allow Windows to repair the Xbox Game Bar components. If the issue persists, use Reset to reset the Xbox Game Bar.
Was this helpful?
Last updated on 22 May, 2024
Read Next
 5 Ways to Fix Xbox Game Bar Not Working on Windows 11
Fix 1: Enable Xbox Game Bar in Windows Settings If you can't launch the Xbox Game Bar from your connected game controller on Windows 11, head to Windows Settings to
5 Ways to Fix Xbox Game Bar Not Working on Windows 11
Fix 1: Enable Xbox Game Bar in Windows Settings If you can't launch the Xbox Game Bar from your connected game controller on Windows 11, head to Windows Settings to
 4 Best Ways to Record Screen Without Xbox Game Bar on Windows 11
The Xbox Game Bar on your Windows 11 computer is a good built-in tool for screen recording.
4 Best Ways to Record Screen Without Xbox Game Bar on Windows 11
The Xbox Game Bar on your Windows 11 computer is a good built-in tool for screen recording.
 3 Ways to Disable Xbox Game Bar on Windows 11
Method 1: Using PowerShell Step 1: Press the Windows key, type PowerShell, and click Run as Administrator.
3 Ways to Disable Xbox Game Bar on Windows 11
Method 1: Using PowerShell Step 1: Press the Windows key, type PowerShell, and click Run as Administrator.
 How to Solve Windows 10 Game Bar Not Working and Other Common Issues
With the recent Windows 10 version 1809 update, Microsoft pushed a bunch of improvements to the Xbox Game Bar.
How to Solve Windows 10 Game Bar Not Working and Other Common Issues
With the recent Windows 10 version 1809 update, Microsoft pushed a bunch of improvements to the Xbox Game Bar.
 5 Fixes for Cloud Gaming Not Working in Xbox App for Windows
Fix 1.
5 Fixes for Cloud Gaming Not Working in Xbox App for Windows
Fix 1.
 5 Best Fixes for Microsoft Teams Microphone Not Working on Windows 10
More businesses and organizations now use Microsoft Teams to manage their teams working from office or remotely.
5 Best Fixes for Microsoft Teams Microphone Not Working on Windows 10
More businesses and organizations now use Microsoft Teams to manage their teams working from office or remotely.
 6 Fixes for Zoom Microphone Not Working on Windows 11/10
Basic Fixes You Should Try Restart the Zoom app and Windows PC.
6 Fixes for Zoom Microphone Not Working on Windows 11/10
Basic Fixes You Should Try Restart the Zoom app and Windows PC.
 4 Fixes for Microphone Not Working in WhatsApp on Windows 11
Basic Fixes Check if WhatsApp is down: Go to DownDetector and check the status of WhatsApp servers.
4 Fixes for Microphone Not Working in WhatsApp on Windows 11
Basic Fixes Check if WhatsApp is down: Go to DownDetector and check the status of WhatsApp servers.
The article above may contain affiliate links which help support Guiding Tech. The content remains unbiased and authentic and will never affect our editorial integrity.